
There's more than one way to crack a nut! Or in this case, to measure one. Roboflow provides tools to easily identify objects and then take actions such as counting or measuring. I used the measuring block in a Workflow recently and made some interesting discoveries, as well as had some fun taking it a step further.
Today I'm going to show you how I measured object sizes with computer vision. I'll share how measurement works, as well as the models and workflows that make it possible. And I'll show you how I handled tricky edge cases such as rotated objects or irregular shapes.
Measuring Objects in Images with Computer Vision
The Size Measurement block in workflows uses the reliable method of finding the minimum area rectangle around an object, then returning the longest side of that rectangle as object length and the adjacent side as width.
This works quite well for most objects and for most measurement tasks. But I stumbled on a scenario with oblong objects (nuts) that added a twist. You may find industries where similar cases occur such as identifying bolts by true length or finding the longest potatoes to get the biggest french fries.
Now I'll walk you through what was needed in both situations and compare the results.
How to Build a Workflow and Measure Things
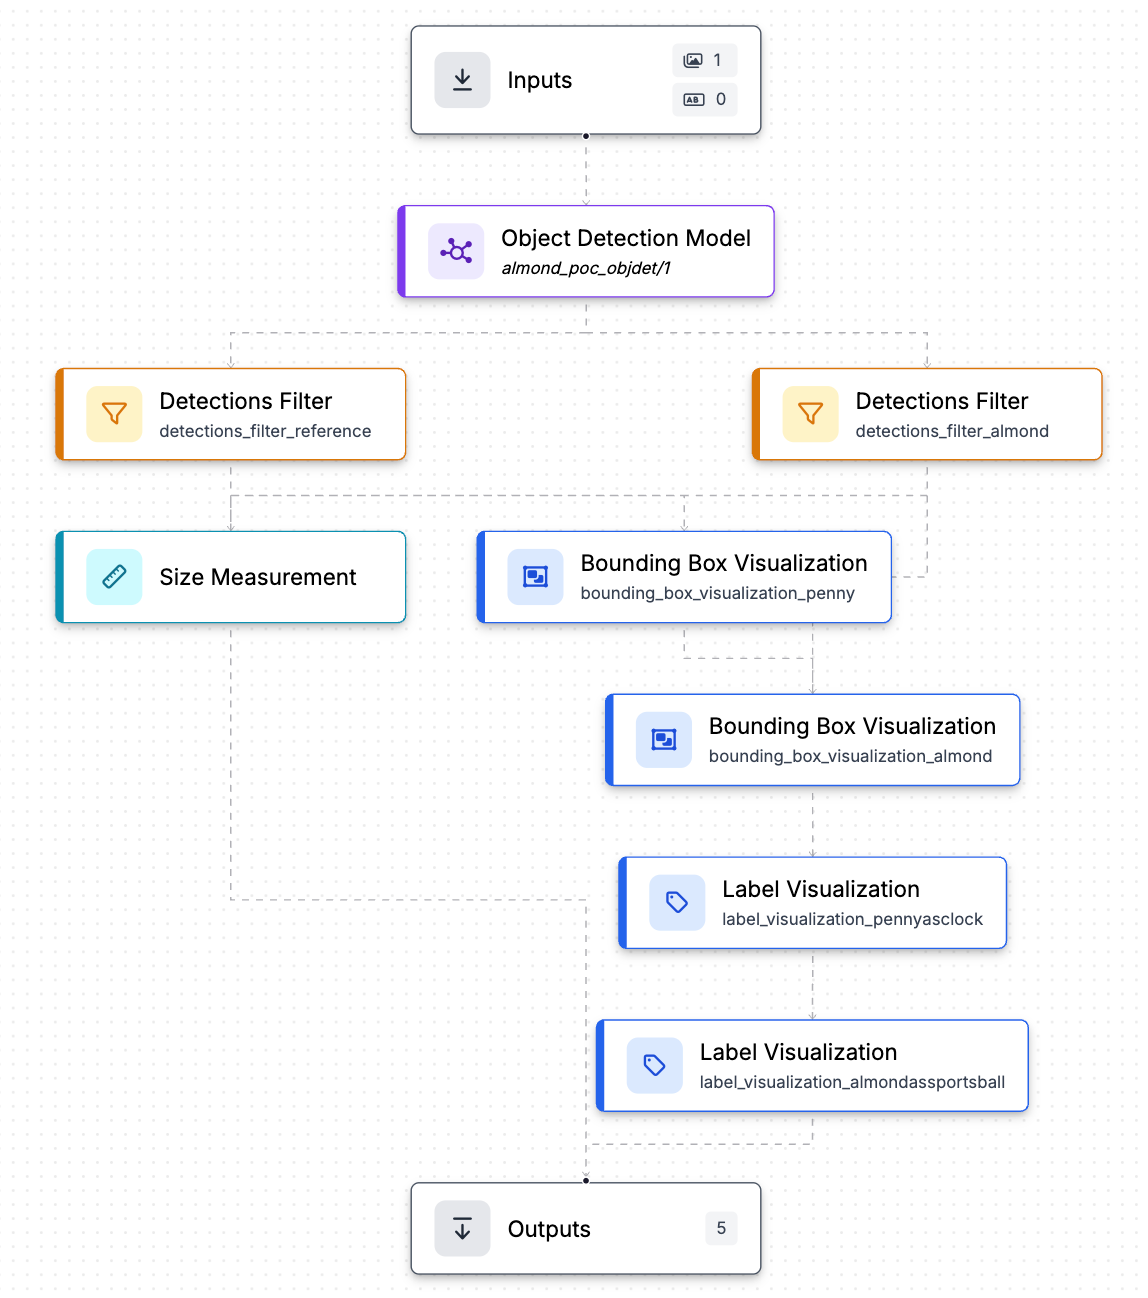
First up is the most common method - using an object detection model to find your item, and then measure the bounding box that goes around it. Roboflow streamlines the entire process from models to measuring. I've used their plug-and-play workflow system, and created my setup as shown below. Let's walk through it.
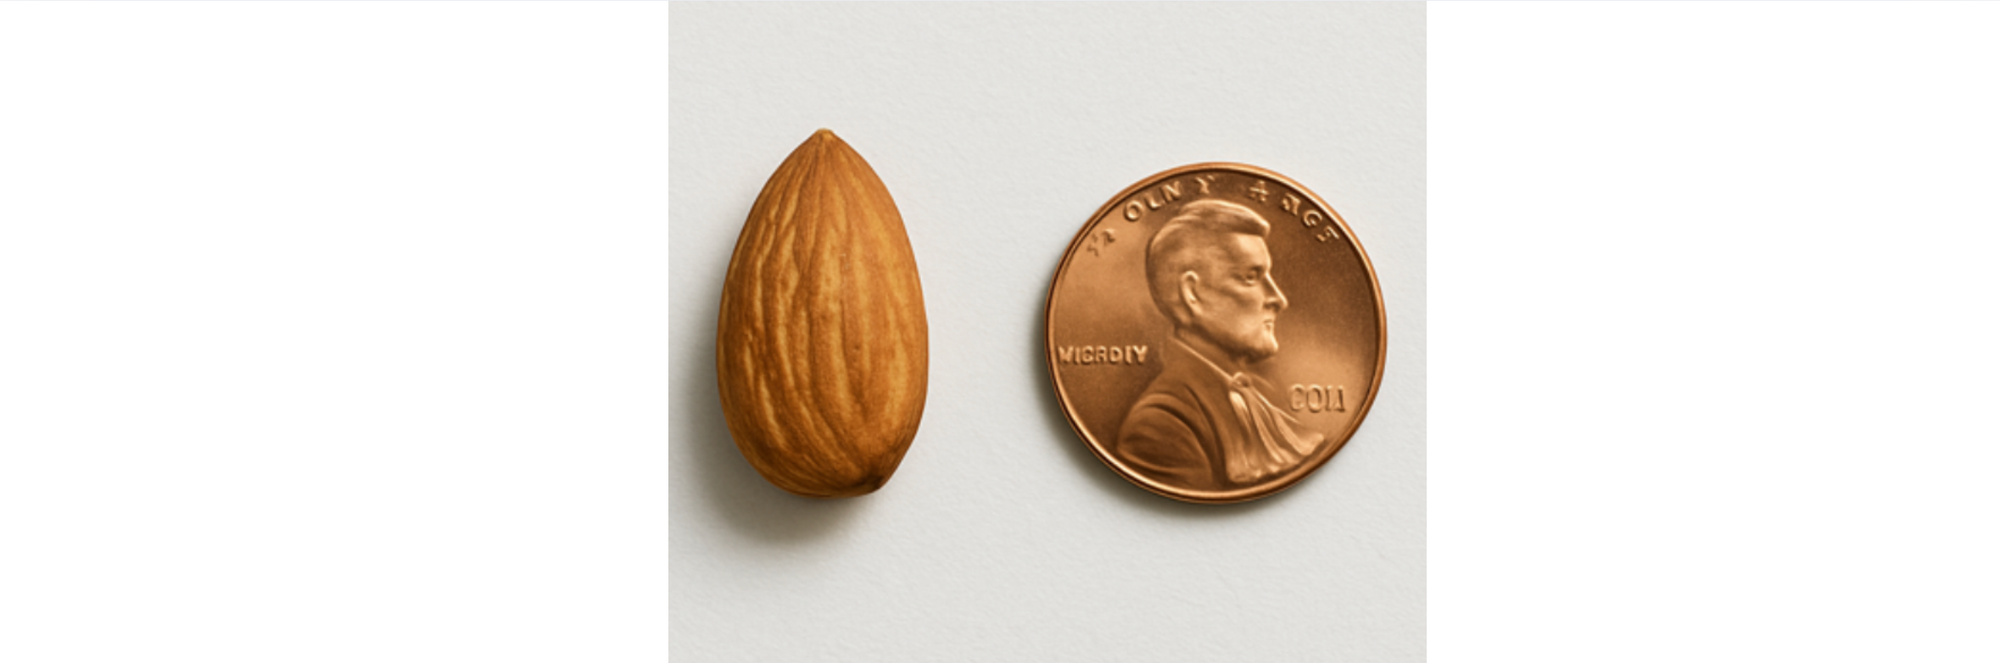
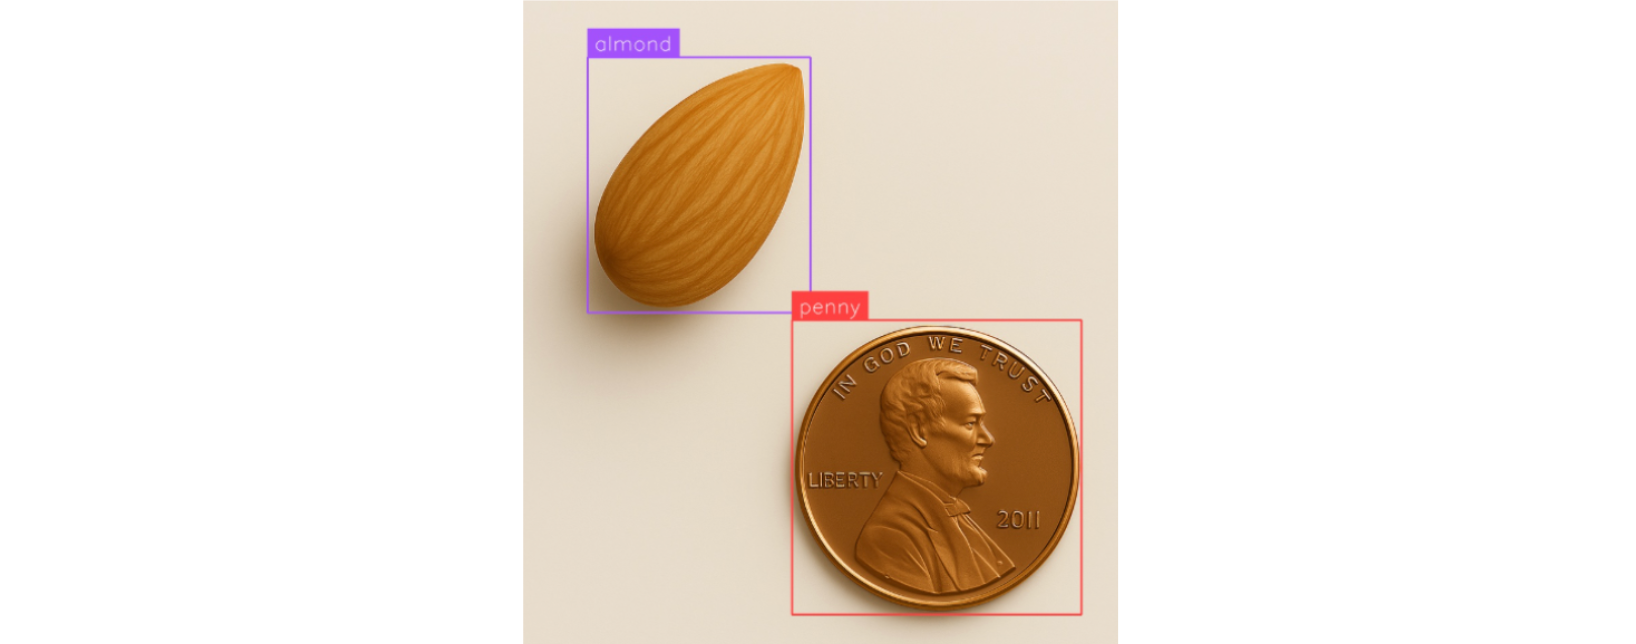
The input block in this project just needs an image so I drop in my first scenario. This has both an almond and a penny. I'm looking to find the length of the almond from end-to-end, and the penny is a handy tool used as a reference for measuring other items in the image. (You could easily replace the penny with a ruler or any other reference item for which you had precise dimensions.)
Next up is the Object Detection Model. Training a model to detect specific classes has been covered exhaustively in Roboflow documentation, including how to fine-tune the SOTA model RF-DETR that Roboflow released recently. I used a few images, plus augmentation in Roboflow, to fine-tune a YOLO model for identifying these two items.
Example of Object Measurement in Computer Vision: How to Measure an Almond with a Penny
The next part is a little tricky - first you need to consider the Size Measurement block. It requires two main inputs:
- what objects you want to detect, and
- what to use as a reference measurement item.
The detections are all bunched up after the model runs and that is where the Detection Filter blocks come in. You’ll want to insert one filter that isolates the almonds, and another filter to isolate the penny. Both of these come before the Size Measurement block.
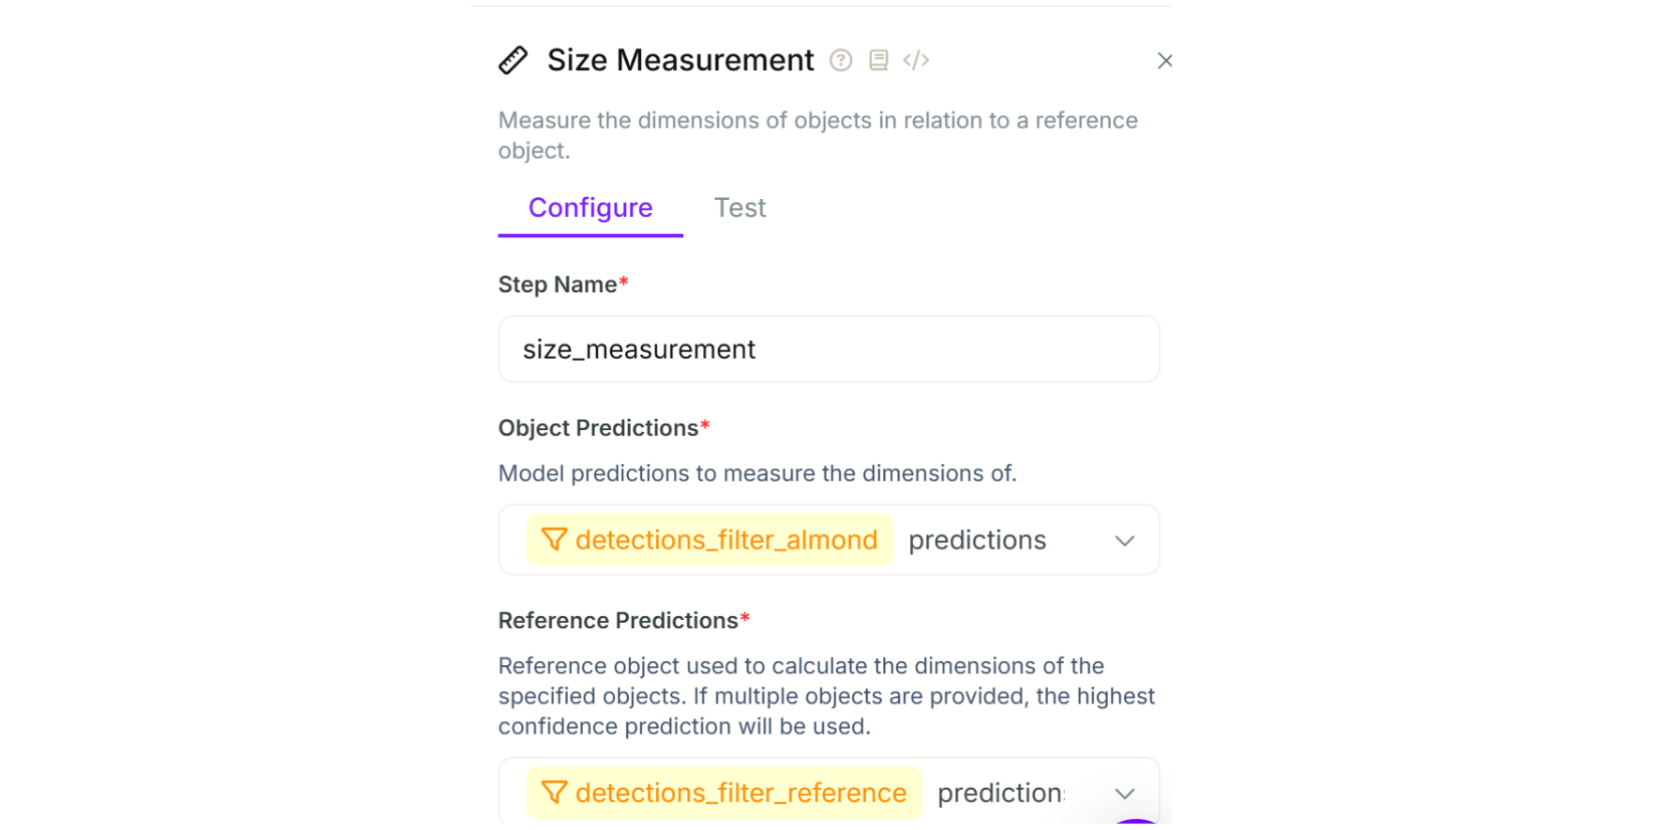
Now that you have those isolated, you can select them in their respective Object Predictions and Reference Predictions drop downs in the Size Measurement block as shown below.
You will also now enter the dimensions of the Reference item - the penny. As you can see, you do not need to tell the system if you are measuring in inches, millimeters, yards, or parsecs. Just say the length and width of the reference item - in this case 19.05 by 19.05. Then when you get your object measurements back they’ll be in the same units. So when I see the size of the almonds here, it will be in millimeters like I used for the penny.

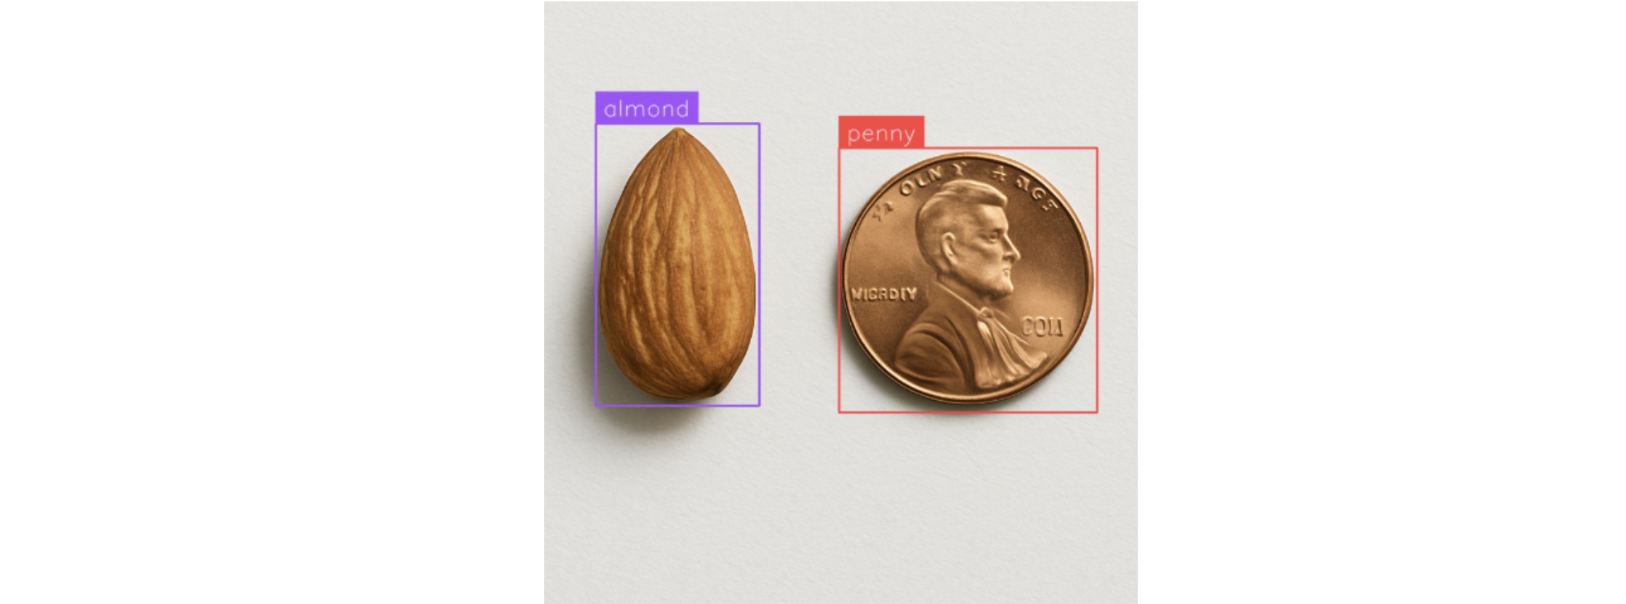
After this I just throw on a bounding box visualization and label visualization to help me see what I found. Click “Test Workflow” to get immediate results on the test image. We have detections!
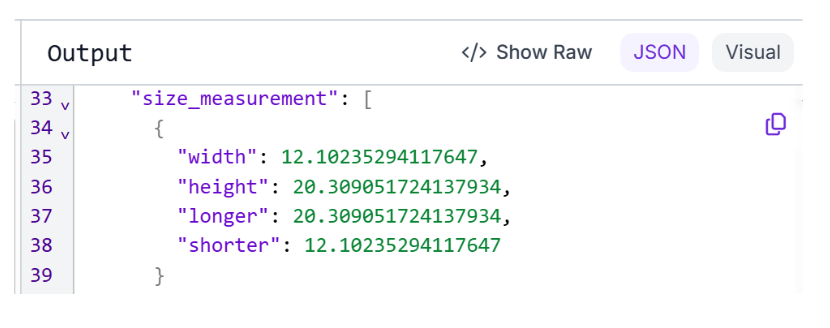
But the real star of the show is in the JSON Output display (it will be in the right-side panel of your screen). You can see that it has provided a size measurement for the almond with a width of 12.10 and a height of 20.30. Recalling that the penny was 19.05, we can intuitively see that the close heights reflects a successful test run!
Note: Using only a couple images but seeing results as I did here is a good reminder on how easy it is to get a proof of concept off the ground using Roboflow. Now that I know I can get a measurement I need, I would be able to go back and invest the time in training a more robust model or employ active learning to build on what I have.
But I said earlier there might be scenarios where this does not meet all our needs. Let’s look at an example where the long axis of the almond is not situated parallel to the vertical axis of the image.
Uh Oh, It’s Crooked!
Here is an example where the almond’s longest axis is not parallel to the vertical orientation of the image. Let’s run our same Workflow with the new image dropped in (so easy to iterate in Workflows!) and see what happens.
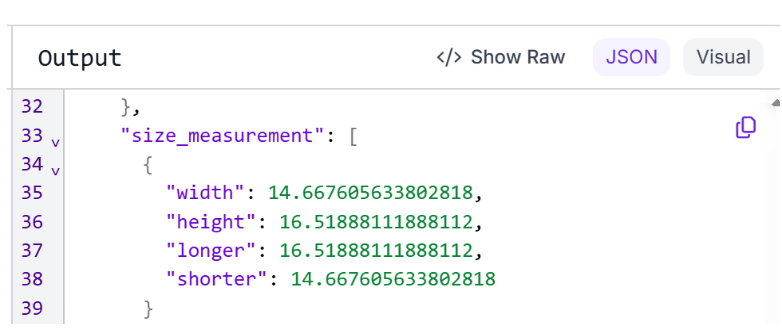
This time with the object detection model, when we examine the JSON output we see that the minimum area rectangle used by the Size Measurement block is not giving us the expected results. Now the “height” is only 16.51. This may be fine if you are able to work with the object in any orientation. But in my case I needed to get the longest axis regardless of orientation.
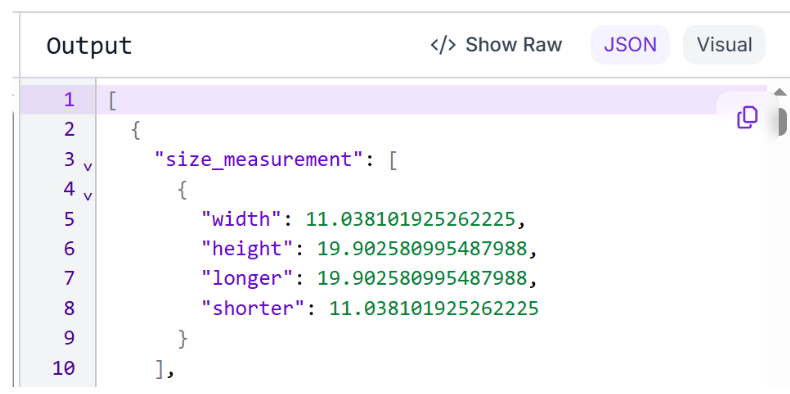
So what’s the secret? To get an “actual length” I needed to train an instance segmentation model instead of object detection. Putting that new model in my workflow in place of the previous model, objects are detected with an array of points around them and a best fit rotated minimum area rectangle is calculated from the Size Measurement block. Now the height is back to a healthy 19.90 mm. This approach gives us a better length estimate for the almond regardless of orientation.
One Last Thing
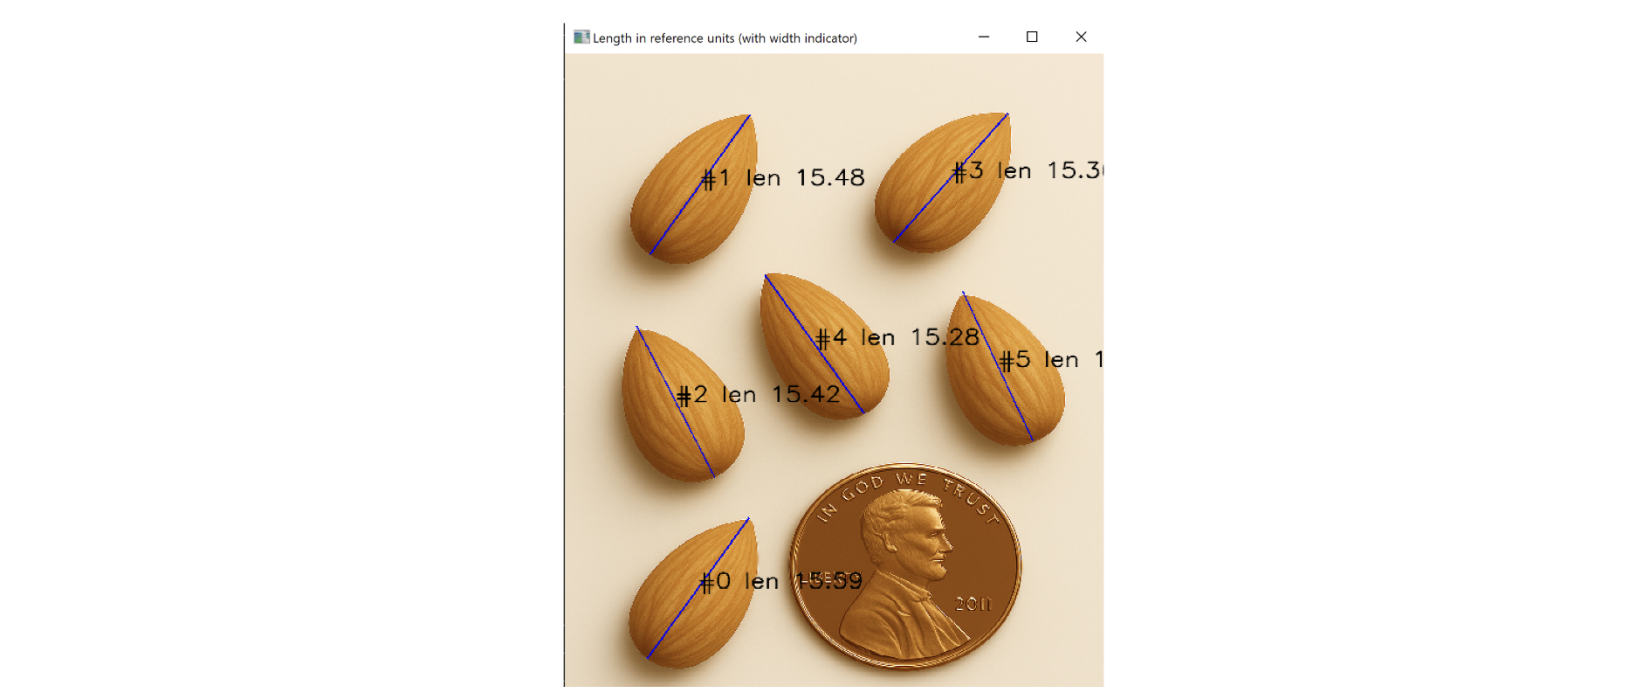
For fun, I did something similar to the rotated bounding box where I wrote a Python script that compares the distance between all pairs of points in an instance segmentation and then isolates the greatest distance (which would be the longest axis.) It yielded results similar to the rotated minimum area rectangle method used above. It also loops through each detection, numbering the objects of interest and labels them with a length and axis in case you end up with multiple items in an image and need to see which one is which length.
Object Measurement with Computer Vision
And those are some of the ways you, too, can crack this computer vision nut. With the right models, a reference object, and Roboflow’s Workflow tools, you can quickly build a system that returns reliable measurements. Whether you're sizing almonds, bolts, or something mission-critical in your manufacturing facility, the key is choosing the right detection method, and iterating as you go.
Written by Zachary Crane
You might also enjoy this live session, exploring how to train a custom AI model to measure the dimensions of physical items - such as your kids' LEGO pieces or products moving down an assembly line. Discover common mistakes to avoid, like choosing the wrong model, and dive into techniques for calibrating the input and boosting your measurement accuracy.
Cite this Post
Use the following entry to cite this post in your research:
Contributing Writer. (May 21, 2025). How to Measure Object Size with Computer Vision. Roboflow Blog: https://blog.roboflow.com/object-measurement-computer-vision/