
Basler cameras, ubiquitous in manufacturing, can be used for computer vision tasks such as object detection and image segmentation. You can use a Basler camera with an NVIDIA Jetson to run computer vision models.
In this guide, we are going to walk through how to set up a Basler camera in an NVIDIA Jetson. The steps below assume you have a new or newly-flashed NVIDIA Jetson.
Without further ado, let’s get started!
Set Up a Basler Camera on a Jetson
Step #1: Connect Peripheral Devices
If you haven't already, please connect a monitor, mouse, and keyboard to your Jetson. This will be needed for the following instructions.
Step #2: Install Required Dependencies
PyPylon is the official Python SDK for using Basler cameras. While it's strongly recommended by Basler to install the Pylon SDK before installing PyPylon, for some users, installing the Pylon SDK is not required.
If you're in a pinch, you can try running pip3 install pypylon and test the example script provided in the official documentation to see if that works. If that doesn't work though, please refer to the instructions below.
First, on your Jetson, go to the Pylon download page for Linux.
Once on this page, click on the ARM installer link. This will take you to a downloads page like this:
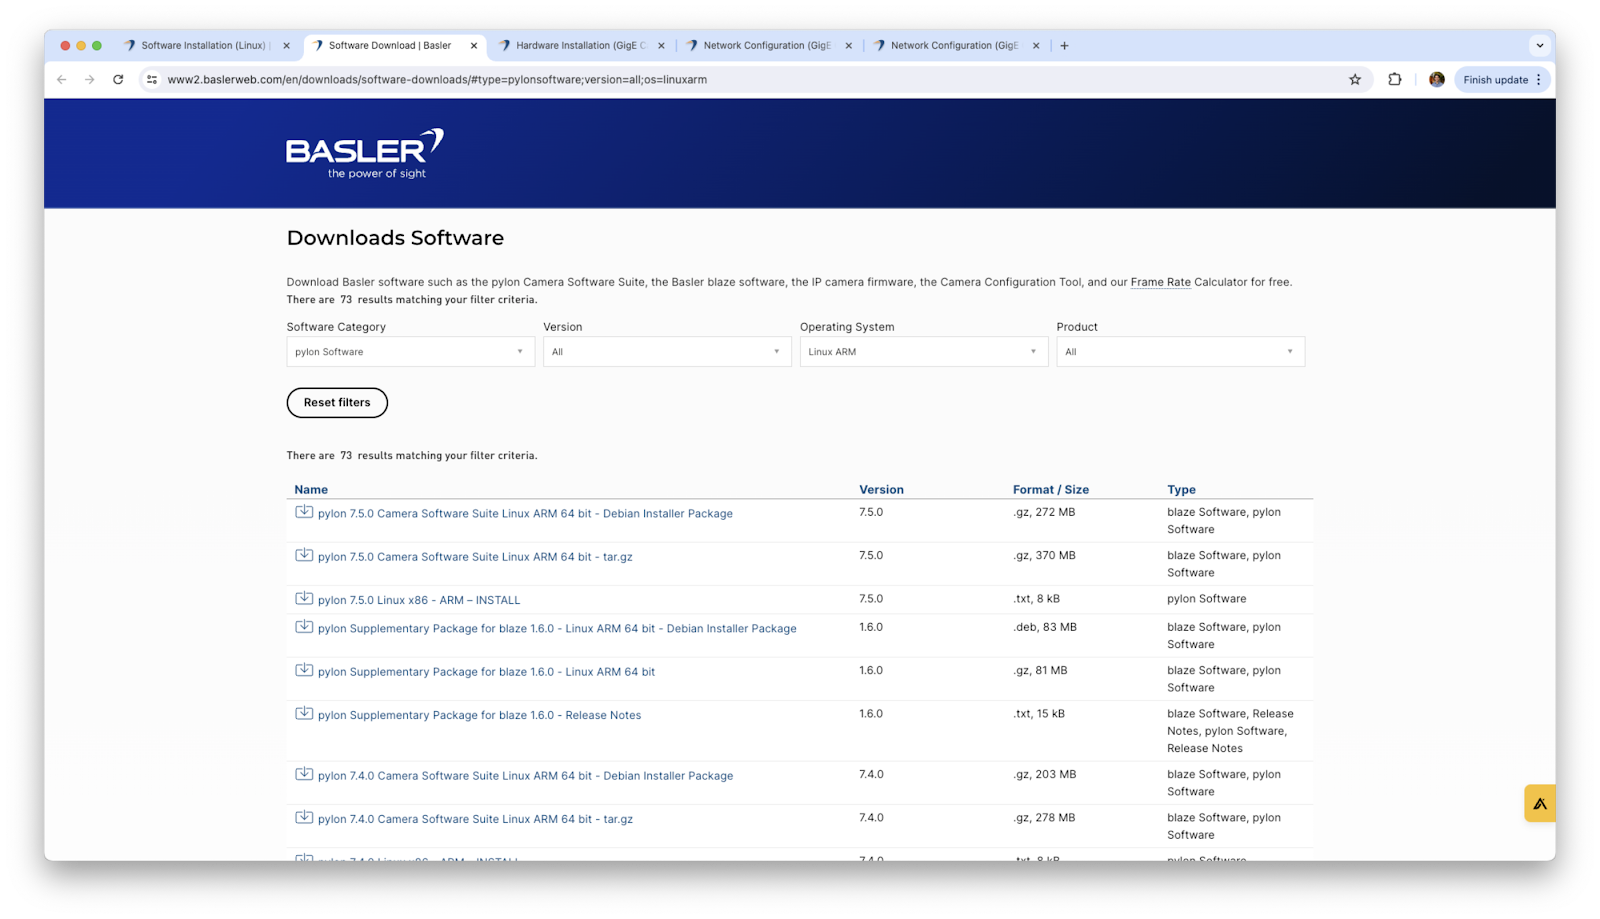
Once here, choose the Pylon download that you would like. It is recommended that you choose the Debian installer for the latest Pylon version. In the case of the above image, that would be "pylon 7.5.0 Camera Software Suite Linux ARM 64 bit - Debian Installer Package".
Next, input your information under the "Download now for free" form to get the download link for Pylon. Download this file, and then extract the contents of the file to your Documents folder in a new folder called "Pylon".
Next, open a terminal and navigate to the Pylon folder you just created. For example:
cd /home/roboflow/Documents/PylonNow run the command:
sudo apt-get install ./pylon_*.deb ./codemeter*.debIf this command doesn't work, check for the command in the "INSTALL" file in your "Pylon" folder.
After running this command, Pylon should have been installed on your computer.
Next, run the command:
./opt/pylon/binThis will take you to the folder containing all of the Pylon files.
To run the Pylon Viewer, run ./pylonviewer. You may be required to download an additional dependency for Qt. If so, please run the command sudo apt update && sudo apt install —reinstall libxcb-xinerama0 libxcb-cursor0. This will install the XCB dependency for Qt. Once XCB has been installed, you can try running ./pylonviewer again.
Step #3: Camera Configuration
When you open Pylon Viewer for the first time, you may not see your Basler camera. This is expected. If you do not see your camera, follow the instructions below to configure your device.
To configure your Basler camera, click on the "Tools" tab up top and select "pylon GigE Configurator". Next, with "Optimize complete system" selected (This should be the default setting) click "Configure".
Go to the "Tools" tab again and select "pylon IP Configurator". You should see a camera icon with a warning icon to the right of it within the row. Click on the camera icon, and in the bottom window, select "Static IP".
Todetermine what to use for the static IP, we need to get the information for the eth0 interface. To do this, open up a new terminal and run nmcli device show eth0.
For the IP address of the Basler camera, choose an IP address within the same subnet as the network adapter. For example, eth0 for me was 192.168.3.1 and I chose a static IP of 192.168.3.123. Now for the subnet mask and gateway of the Basler camera, match eth0. For me, that was 255.255.255.0 and 0.0.0.0.
Finally, click "Save" and you're set.
Close out of that window and click on the refresh button on the Devices window. You should now see your Basler camera as an option. Click on the camera and then flip the toggle in the top-left for "Open Device" (reference). Then, click the video icon that says "Continuous Shot" and you should see a video stream from the Basler camera. If the video is black, move around the camera to confirm that it's not a lighting problem.
Step #4: Test and Use the Camera
The Basler is connected and ready to go. To test the camera using PyPylon, we recommend referring to the official documentation for PyPylon. First, run pip3 install pypylon, then run the sample script in the documentation.
Supporting Resources
Below are resources that may be useful as you work with Basler cameras and your Jetson.
- Pylon Software Installation on Linux: https://docs.baslerweb.com/software-installation-(linux)
- Connected a GigE Basler Camera: https://docs.baslerweb.com/hardware-installation-(gige-cameras)
- Configuring a GigE Basler Camera on the Network: https://docs.baslerweb.com/network-configuration-(gige-cameras)
- Pylon Viewer Overview: https://docs.baslerweb.com/overview-of-the-pylon-viewer
- Troubleshooting the Basler Camera (FML): https://www.youtube.com/watch?v=wEsqjqJWXa4
- PyPylon Installation and Test Code: https://pypi.org/project/pypylon/