
This tutorial builds a Python accessibility app that combines two models from Roboflow Universe, MIT Indoor Scene Recognition for identifying the room type and an object detection model called all_finalize for common household items, with a text-to-speech library to verbally describe what a photo contains. The result is a working script that speaks the room category and each detected object, with clear extension points for ordering by position or filtering by spatial zone.
Computer vision has many applications in building accessibility technologies. With the ability to identify objects in an image or video – and their position in a captured frame – you can build tools that help people navigate around an environment. In such applications, speech text to speech algorithms that narrate a given word or sentence are useful. You can have a model recognize objects in a room, then a speech synthesizer read out what is found.
In this guide, we’re going to walk through how to narrate the contents of a room with computer vision. We’ll use two pre-made models to get us started and build the logic to narrate predictions from the model. Let’s begin!
Step 1: Choose Models to Use
We are going to build an application that:
- Identifies the type of room someone is in and;
- Narrates the objects in that room.
To build this application, we’ll need to use two models. One model can identify the type of room in which a photo was taken, and another can identify specific objects in the room.
Luckily for us, there are already models that can help with both of these tasks. For this tutorial, we’re going to use MIT Indoor Scene Recognition, an image classification model that lets you identify the type of room in a photo. We’ll also use a model called “all_finalize” which identifies a few common household objects such as a cupboard and a refrigerator.
Versions of both of these models are hosted on Roboflow Universe, a repository of open models and datasets. To use these models, you will need a free Roboflow account.
The “all_finalize” model is a good starting point for identifying indoor objects, but you may want to build on the model to improve its ability to detect different objects, or to add new classes. You can do this by downloading the dataset associated with the model and adding your own annotated images.
Now that we have chosen models to use, we can start writing the logic for our code!
Step 2: Set Up the Application Script
First, we need to create our application script and write some code to configure our use of the Roboflow API and the text-to-speech library that we’re going to use in this project: pyttsx3.
Create a file called “app.py” and paste in the following code:
import time
import os
import pyttsx3
import roboflow

rf = roboflow.Roboflow(api_key=os.environ["ROBOFLOW_API_KEY"])

workspace = rf.workspace()

engine = pyttsx3.init()
engine.setProperty("rate", 150)
This code imports the libraries we’ll need for this project, creates a “workspace” object through which we will be able to query our Roboflow models, and configures the pyttsx3 library. The 150 value refers to the rate of speech used by the model. You can tweak this value as necessary.
You’ll need to keep a value in your environment called “ROBOFLOW_API_KEY” that stores your Roboflow API key. You can retrieve this value by following our API key guide.
Now that we have set up our script, we can begin writing the core logic for our application.
Step 3: Narrate the Room Type
Let’s write code that narrates the type of room in which a photo was taken. First, we’re going to write a wrapper function that both narrates a string and prints that string to the console:
def say(text: str) -> None:
   """
   Speak out text and print that text to the console.
   """
   engine.say(text)
   print(text)


   engine.runAndWait()
Next, we are going to write a function that uses the MIT Indoor Scene Recognition model on Roboflow to identify the type of room in which a photo was taken. This function will accept one parameter: the name of an image file on which to run inference. We’ll return a dictionary that contains all of the predictions returned by our model.
def get_room_type(image_file: str) -> dict:
   """
   Get the type of room a photo was taken in (i.e. kitchen).
   """
   indoor_scene_recognition = workspace.project("mit-indoor-scene-recognition")

   model = indoor_scene_recognition.version(5).model

   prediction = model.predict(image_file)

   room = prediction.json()

   return room
To test our function, we can call it and pass in the name of a file. In this case, we’re going to pass in a file called “kitchen1.jpeg”. The file looks like this:
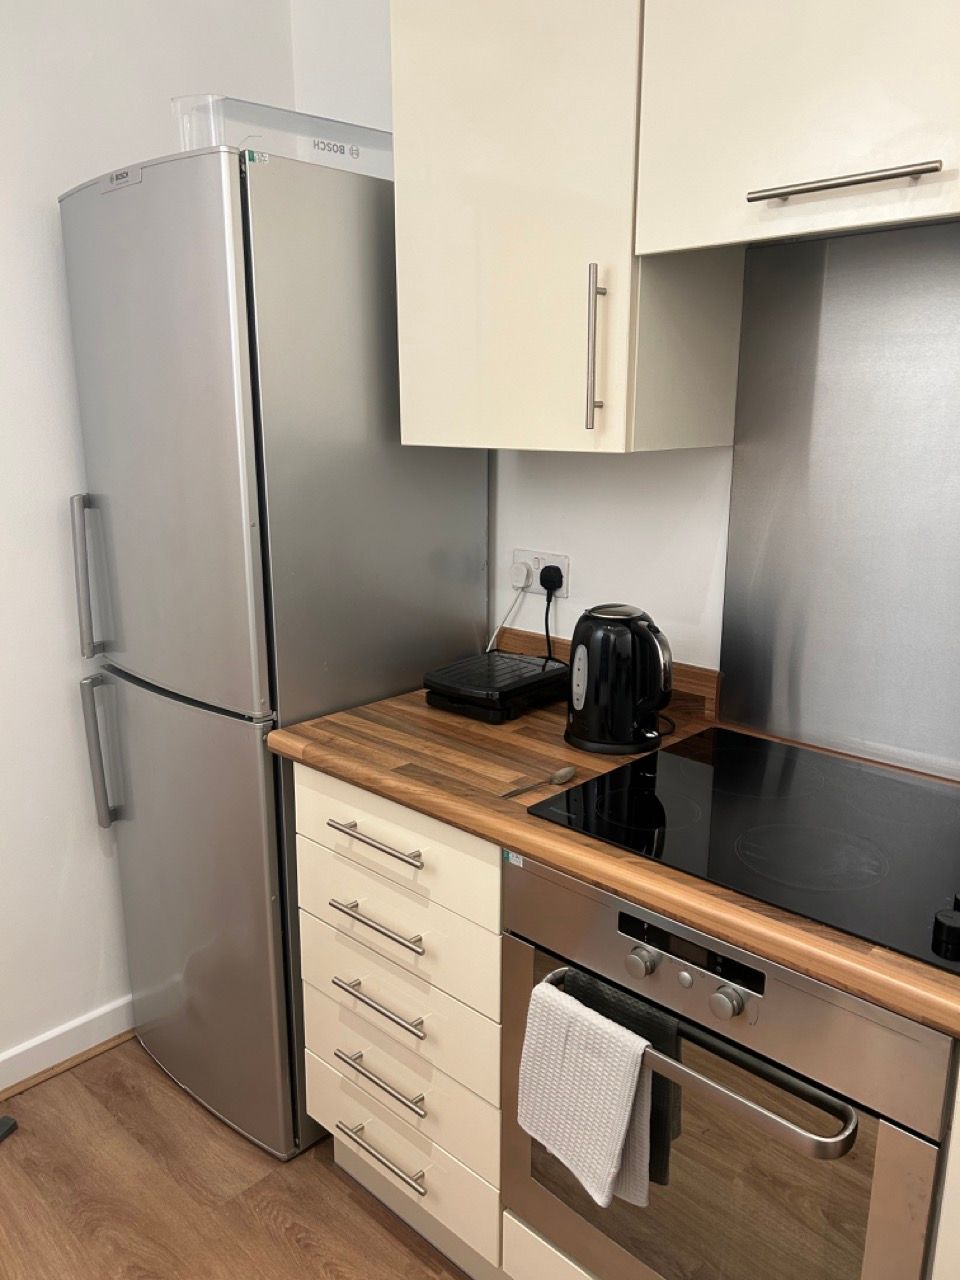
Add this code to the bottom of your script:
image = "images/kitchen1.jpeg"

room = get_room_type(image)

room_type = room["predictions"][0]["top"]

say(room)
This code will read out the type of room in which a photo was taken. The image above was taken in a kitchen. When our script runs, the word “kitchen” is narrated.
Now that we know the type of room that a photo was taken in, we can proceed on to narrate specific objects in the room.
Step 4: Narrate Specific Objects in a Room
We’re going to use the “all_finalize” model to identify specific objects in a room. Let’s write a function that uses this model on Roboflow Universe and creates a list with all of the items found in a room. We’ll also save the result of our prediction using the prediction.save() function in the Roboflow Python package so that we can visualize the result of our code:
def get_items_in_room(image: str) -> list:
   """
   Find items in a room.
   """
   project = workspace.project('all_finalize')

   model = project.version(3).model

   prediction = model.predict(image, confidence=10)

   predictions = prediction.json()

   labels = [p["class"] for p in predictions["predictions"]]

   prediction.save("out.png")

   return labels
Let’s test if this function works by writing a line of code that calls the function and prints all of the identified labels to the console:
print(get_items_in_room(image))This code returns the following list:
[]We can open the “out.png” file to see the results of our model:
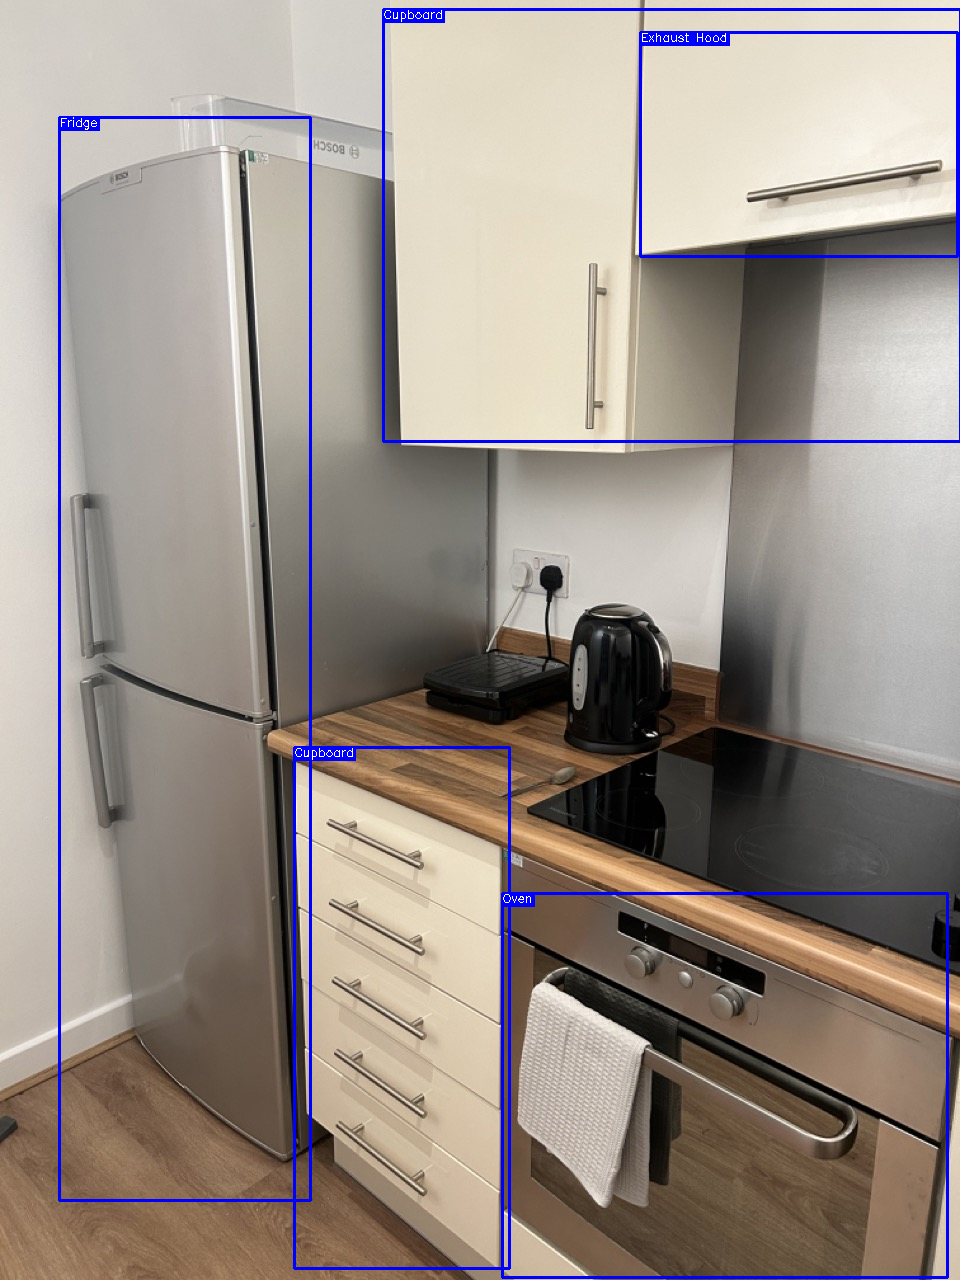
The all_finalize model has successfully identified a few objects in the room. We can now write a function that narrates the identified objects:
def narrate_room(room_type: str, labels: list) -> None:
   """
   Speak out the type of room a photo was taken in and the objects in the room.
   """
   say(f"You are in a {room_type}")

   time.sleep(1)

   if len(labels) > 0:
       say("I see")
       time.sleep(0.5)

   for label in labels:
       label = label.lower()
       say("A " + label)

       time.sleep(0.5)
This function:
- Says “You are in a {room}”, where {room} is equal to the name of the room type passed into the function.
- Waits a second.
- Says “I see” if an object was found in a room.
- Speaks out the name of each object found in the room. The phrase “A “ is appended to the beginning of each word, so as to make the tool sound more conversational.
Let’s call this function and pass in the results from the code we wrote that identifies the room type and objects in a room:
labels = get_items_in_room(image)

narrate_room(room_type, labels)
Now, let’s run our code! When we run our program in full, we get the following results in our console:
loading Roboflow workspace...
loading Roboflow project...
loading Roboflow project...
You are in a kitchen
I see
A cupboard
A cupboard
A exhaust hood
A fridge
A oven
Our program speaks out:
You are in a kitchen
I see
A cupboard
A cupboard
A exhaust hood
A fridge
A oven
Our project works as expected! The program successfully narrates the names of the objects that our model has detected. Note that the objects are not spoken out in any particular order. Indeed, should you want to read the names of the objects found in a room from, say, left-to-write, you will need to write additional logic to support this.
Conclusion
In this guide, we have written a Python script that uses two computer vision models to narrate the type of room in which a photo was taken and objects found in the room.
There are many things you can do to expand upon the code above. You could:
- Improve upon the “all_finalize” model to identify new objects in a room.
- Build logic to read the objects in a room from left-to-right.
- Add logic that only narrates an object if it is in the center, left, or right of a photo (which would be useful were this application to be used to guide people around a room, for example).
- And more!
Now you have the tools you need to narrate predictions returned by a computer vision model. Happy building!
Cite this Post
Use the following entry to cite this post in your research:
James Gallagher. (Jan 25, 2023). Narrate the Contents of a Room with Computer Vision. Roboflow Blog: https://blog.roboflow.com/narrate-the-contents-of-a-room-with-computer-vision/