
When real-world images for a specific visual scenario are scarce, Stable Diffusion can generate representative synthetic images from a text prompt, giving a computer vision model training data it would otherwise be impossible or impractical to collect. This tutorial walks through setting up Stable Diffusion in an AWS SageMaker Studio Lab notebook, sending prompts to generate batches of images, and uploading the results to Roboflow for annotation. A follow-up post in the series covers using an existing Roboflow Universe model to auto-label those generated images and complete the pipeline.
In the world of machine learning, it never hurts to have more representative data for your use case. The key to that statement is representative. You may have a use case where you want to identify a specific tree species from an aerial view. Getting image data that is an aerial view of a variety of trees may be easy to source. Getting representative data of that specific species of tree can be a challenge.
One recent breakthrough in machine learning is synthetic image generation, where a trained model creates images for you based on a prompt. This prompt, such as “a forklift in front of a truck”, tells the model to create a scene matching that description. From there, a computer vision model can use the data.
In this post, we’re going to talk about:
- What synthetic data is
- How it is useful in training computer vision models
- How to use Stable Diffusion to generate images that match a description
- How to upload your generated images to Roboflow
This post is part of a series. In the next post, we’ll walk through how to use the images you uploaded to Roboflow to start making real-world inferences on your dataset.
Let’s begin!
What are AI generated images?
AI images are synthetic (computer-generated) pictures generated through artificial intelligence. Artificial intelligence is increasingly being used to generate images in a variety of ways. Nowadays, AI is being used to create more realistic or even abstract images.
For example, AI can be used to generate images of objects that do not exist in the real world. This can be used for the creation of realistic images for movies or video games. Additionally, AI can be used to generate images that are not intended to be realistic, but instead are meant to be abstract or artistic over realism.
One of the more popular algorithms to use at present is DALL·E 2. DALL·E 2 is an AI system from Open AI, that can create realistic images and art from a description or text representation in natural language.
Another big player in the AI image generation space is the newly created Stable Diffusion model. Released in August 2022, Stable Diffusion is a deep learning, text-to-image model. It is primarily used to generate detailed images conditioned on text descriptions, though it can also be applied to other tasks such as inpainting (filling in pieces of an image), outpainting (expanding an image outside of its current bounds to create a bigger scene), and generating image-to-image translations guided by a text prompt.
What is synthetic image data in computer vision?
Synthetic image data is information generated by computers that represents a visual scene, in contrast to regular images which capture a scene in a physical space. While synthetic images do not represent a moment in time in the real world, they are based on and retain the semantic roots of a real-world concept. Synthetic images useful in computer vision represent specific concepts that a model needs to know about, such as a car, a table, or a house.
You can use AI generated images as synthetic data for training computer vision models.
How can synthetic image data be used?
You may be wondering: if synthetic data is generated by a computer, how can it be used in computer vision applications to identify real-world objects? That’s a great question. There are plenty of applications of synthetic data in modern computer vision pipelines.
Defect identification
Consider this example: you are manufacturing mouthpieces for musical instruments. You are building a computer vision model to help you identify defects at an early stage of production so that defective goods don’t cause issues further in the flow. But, defects happen only once in a while, so you struggle to connect enough data representative of defects.
Enter synthetic data. In this situation, we can use synthetic data to create variations on the mouthpiece we want to identify during the production or assembly processes. These variations could have holes in some places, protrusions in other places, splits in the middle. We can then label the mouthpieces in the data as defective so the model can learn to identify more issues that may happen in production.
This way, we don’t have to wait until defects happen. We can proactively start to identify defects without a lot of real-world examples.
Improving existing datasets with new data
Consider a scenario where you have deployed a model to keep track of whether there is a digger present at a particular area in a construction site. Diggers can be moved around, so there is no guarantee one will be where it is needed. The model sends an alert to a manager if a digger is not in place.
Now imagine being asked to train a model that also identifies cement mixers. You could go and gather data on hundreds of cement mixer positions. Or, you could generate some cement mixers based on a prompt to get your model started. Then, you can collect more real-world data to add to your dataset. This process lets you start identifying cement mixers without having to wait until you have collected lots of real-world data.
Generating images for computer vision
If you're looking to generate representative images for your computer vision use case, Stable Diffusion is a great option. In this blog we will go through generating 1000 images to further enrich your computer vision use case, then upload those images into your Roboflow project. Let's get started!
Create a notebook in SageMaker Studio Lab
For this demo, we will use SageMaker Studio Lab (although you can run this code anywhere, preferably with a GPU for faster image generation), Hugging Face and Roboflow. You will need accounts for all 3 services. Also, you can download the repository on GitHub with the full notebook that we’ll be walking through in this tutorial, if you would like a full copy to use as you work through our guide.
SageMaker Studio Lab is a completely free version of Amazon SageMaker. It is essentially a hosted JupyterLab environment that comes with persistent storage and free CPU or GPU compute. It allows you to quickly create data analysis, scientific computing, and machine learning projects with notebooks in your browser. If you don’t already have an account, request one. Approvals take about a day.

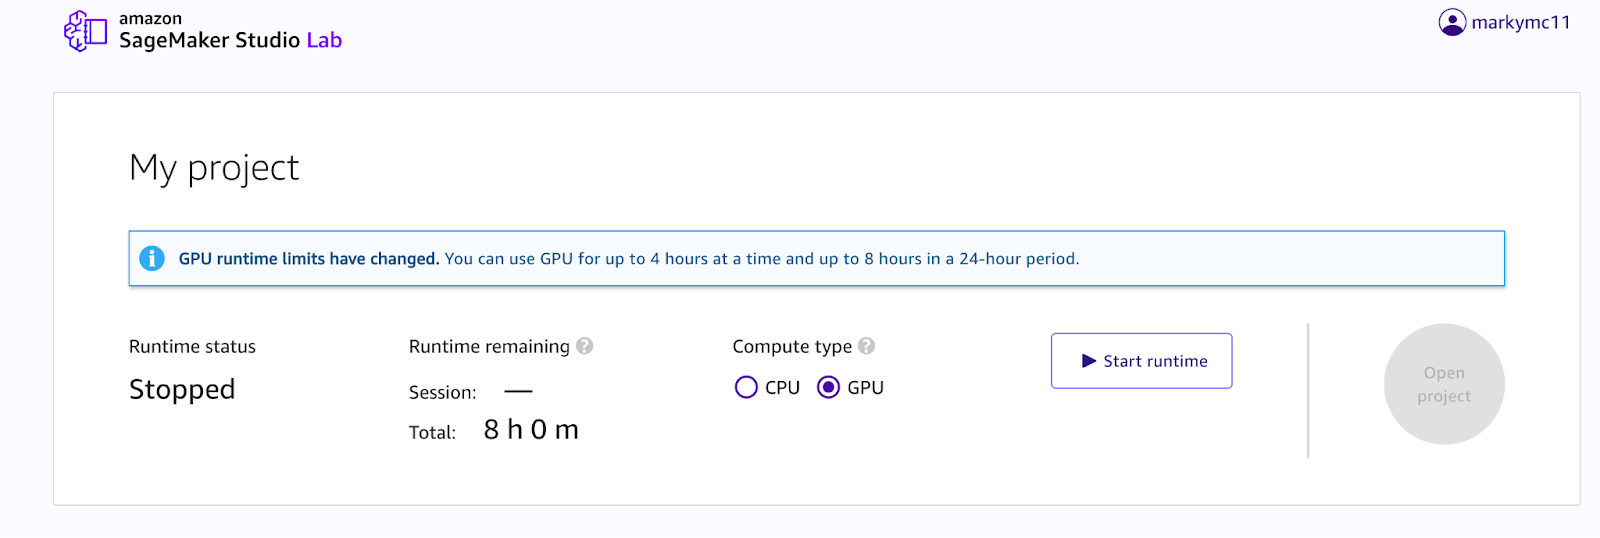
Once you have access and are signed into your SageMaker Studio Lab account, select your compute type and start runtime and open project. For this demo you should use a GPU runtime, as illustrated in the image below:
Next, open a “default” Python notebook. We will write all of the code for our project in this notebook.
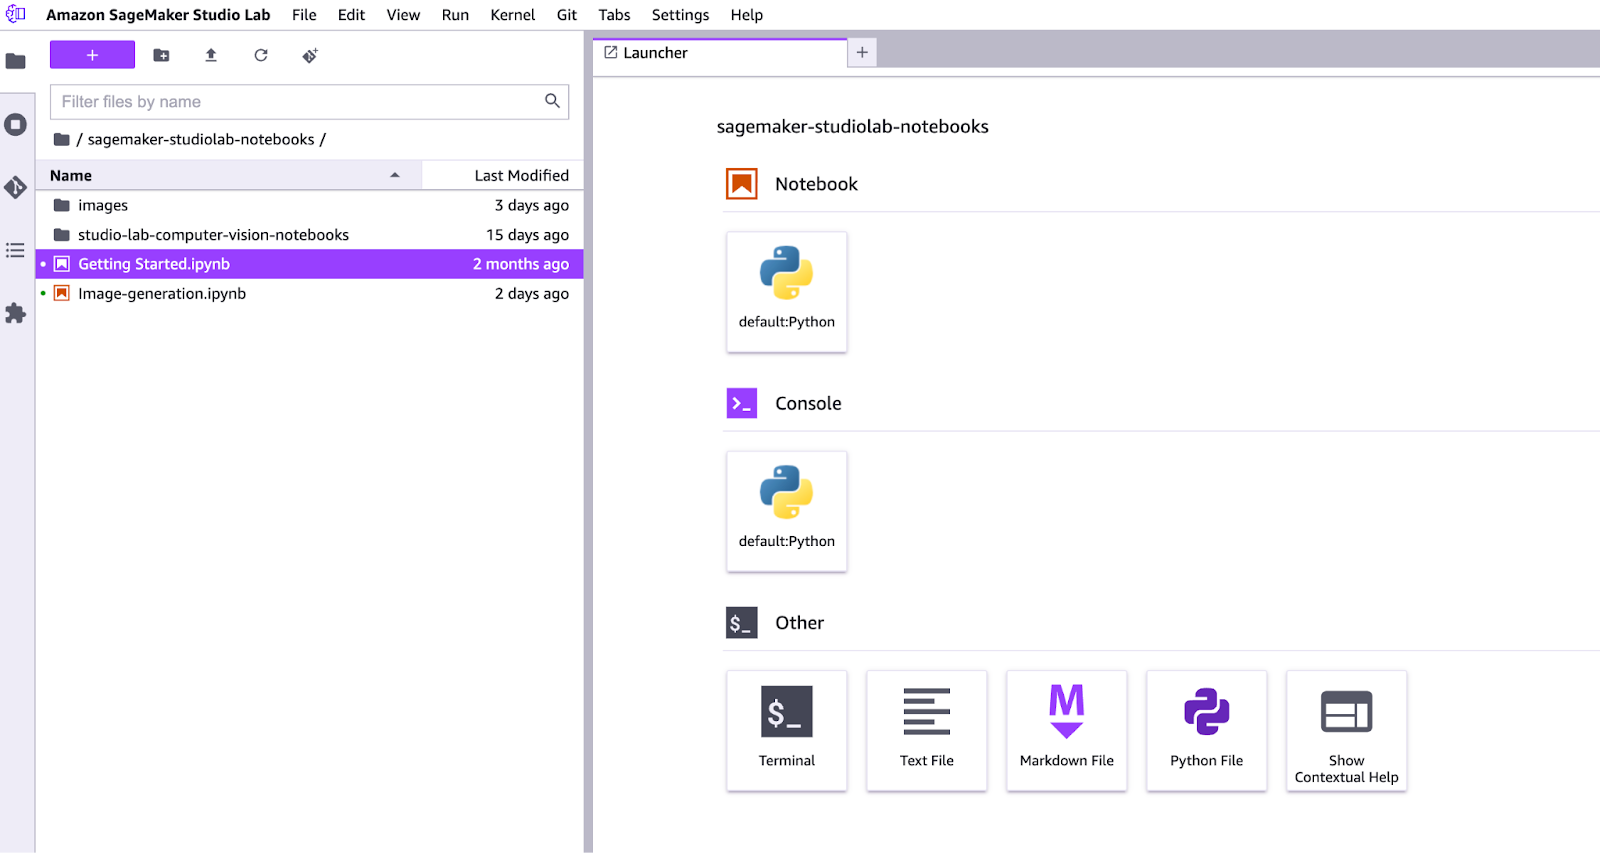
Now that we have SageMaker Studio Lab set up, we can get to work on the code we’ll need to generate images with Stable Diffusion. All of your project code in this section should be added to the notebook you just created.
First, we need to install the dependencies for our project:
Prepare to Generate Images with Stable Diffusion
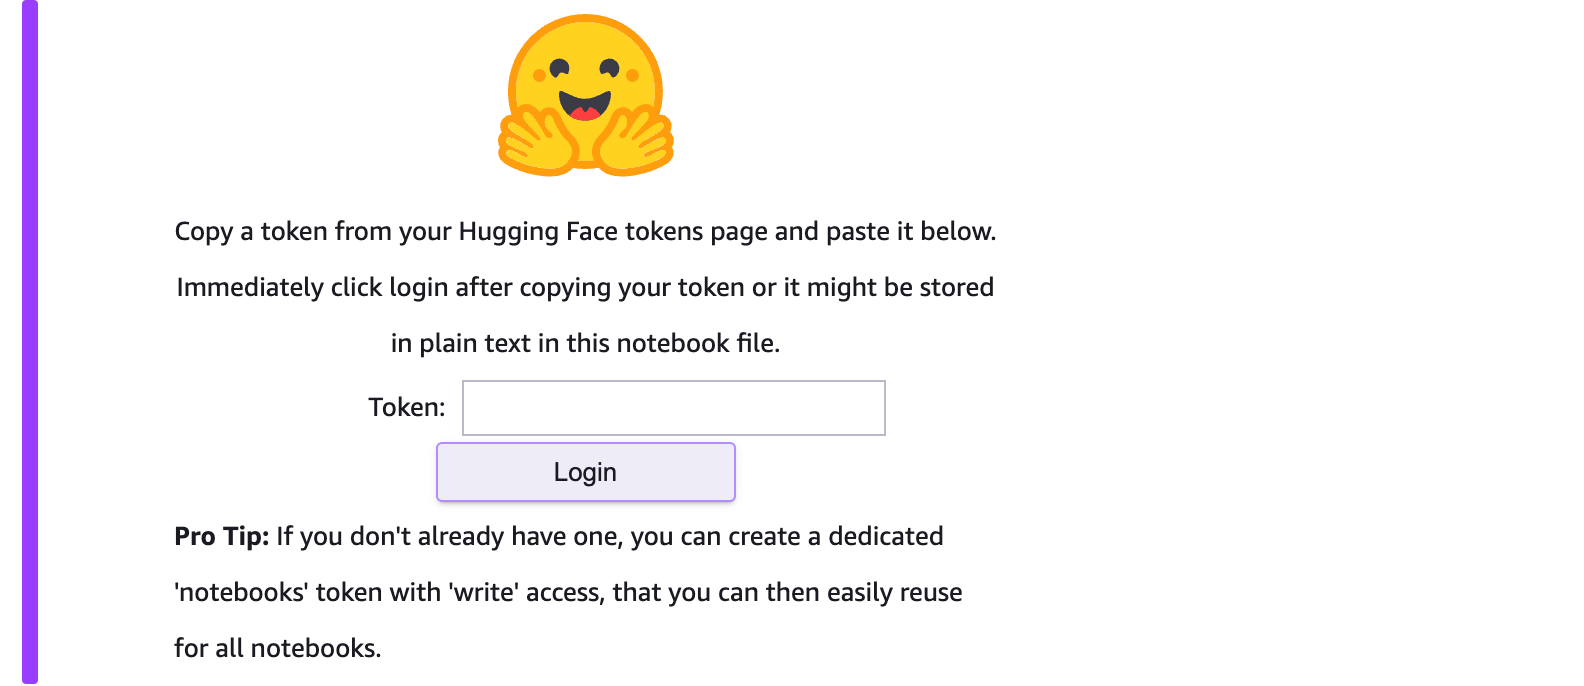
Next, we need to authenticate with Hugging Face to access the Stable Diffusion model:
You will then be prompted to enter your Hugging Face access token. You can access your token on the Hugging Face dashboard:
Next we will:
- Import “torch” and the Hugging Face StableDiffusionPipeline class from the diffusers library;
- Define the stable-diffusion-v1-5 model to pull in and;
- Specify fp16 for speed and ensure we are using a GPU.
Before we load this model from the Hugging Face Hub, we have to make sure that we accept the license of the runwayml/stable-diffusion-v1-5 project. You can accept the license by clicking on the Agree and access repository button on the model page.
Once you have accepted the license, paste in the code below and run it in your notebook:
This code will set up a pipeline that uses our GPU. Pipelines, a feature in Hugging Face, make it easy for you to complete various model preparation and inference tasks without writing too much code. You can learn more about Hugging Face pipelines on their website.
Now, we will create our function which defines our parameters when we generate our images:
In this code, we are calling the pipeline and then defining four images to generate per prompt. We then save the generated images to the images output dir and set a guidance scale of 8.
The guidance scale is defining the level of freedom to give the model when generating images. The lower the number, the more freedom your model has when generating an image.
We will iterate through the pipeline based on the total number of images and the images to generate per batch.
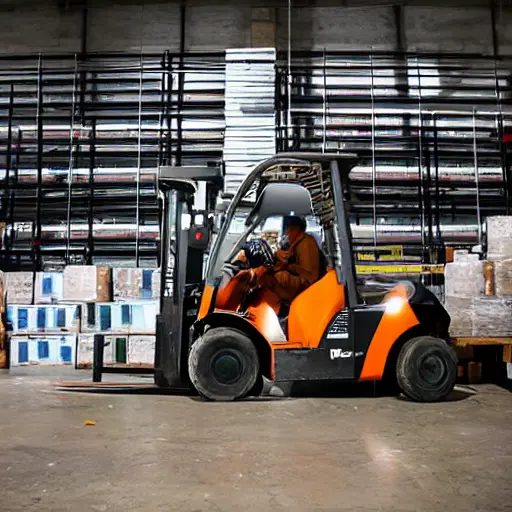
There are many examples of using Stable Diffusion being used to create “play” images as some call them. A dog flying over the moon wearing a cape, or a raccoon wearing sunglasses on the moon are examples of a play image. But, for this demo we want to showcase the true power of Stable Diffusion for real life business use cases.
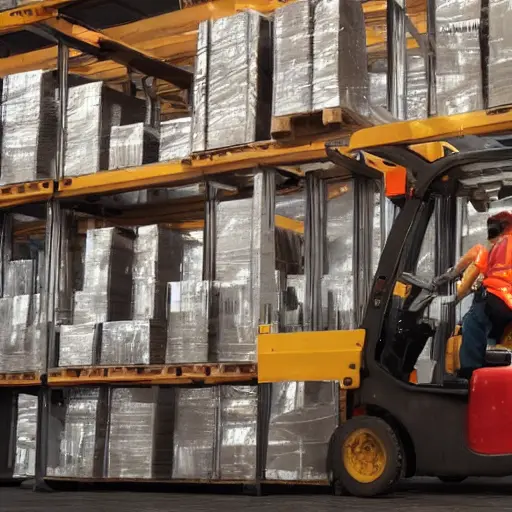
Imagine running a factory or warehouse and needing to know where the occupied forklifts are at all times for safety purposes. Pretty simple object detection use and a very common need for safety purposes. But gathering images of forklifts - or better yet - humans on a forklift - can be a challenge. Here we will simply define the prompt as “human on a forklift”, and call to generate 1000 images. This should give us plenty of representative data to train a great safety model.
Send a Prompt to the Stable Diffusion Model
In this code, we are calling the pipeline and then defining four images to generate per prompt. We then save the generated images to the images output dir and set a guidance scale of 8. The guidance scale is defining the level of freedom to give the model when generating images. The lower the number, the more freedom your model has when generating an image.
We will iterate through the pipeline based on the total number of images and the images to generate per batch.
There are many examples of using Stable Diffusion being used to create “play” images as I call them. A dog flying over the moon wearing a cape, or a racoon wearing sunglasses on the moon are examples of a play image. But, for this demo I wanted to showcase the true power of Stable Diffusion for real life business use cases.
Imagine running a factory or warehouse and needing to know where the manned forklifts are at all times for safety purposes. Pretty simple object detection use and a very common need for safety purposes. But gathering images of forklifts - or better yet - humans on a forklift - can be a challenge. Here we will simply define the prompt as “human on a forklift”, and call to generate 1000 images. This should give us plenty of representative data to train a great safety model.
Send a prompt to the Stable Diffusion model
To get images of a human on a forklift, call the generate_images function and specify a prompt of “human on a forklift”. Before you run this code, double-check your code to make sure you are ready. Image generation will take approximately 2+ hours on SageMaker Studio Lab to generate 1000 images. You don’t want to have to stop the operation due to a minor code issue.
Now we are ready to start creating images! (Note: I have adjusted the guidance scale in-line here to allow the model more freedom)
Upload Images to Roboflow
Once your images are generated, call the Roboflow Upload API so we can push our images into a Roboflow project:
In the code above, you should substitute your API key and project name with a project and API that you create in Roboflow. If you don’t already have an account, you will need to create one before we continue. Then, click “Start a project”. This will give you a blank project where you can upload your images for your model. To get your API key, you can follow our tutorial on retrieving an API key from the Roboflow dashboard.
Once all of your images have been successfully uploaded, you can go into your project and the Annotate tab. You will see them in the unassigned tab, ready for annotating:
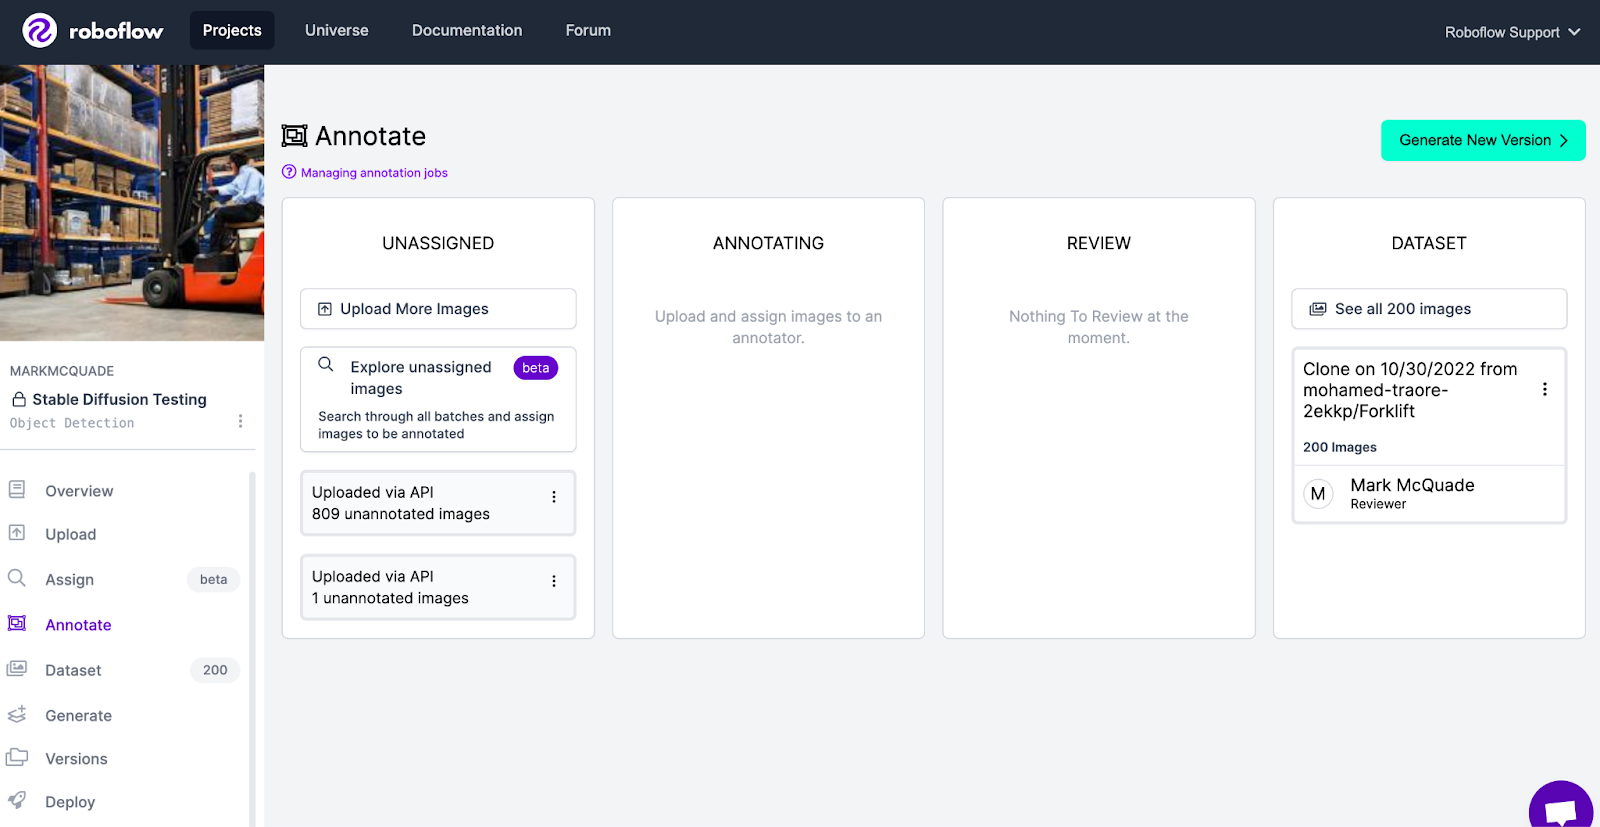
Just like that I have 1000 new, AI generated, representative images that I can use to train my computer vision model.
Stay tuned for part two
Stay tuned for further enhancements to this simple notebook in part two of this series. In the next part, we will use a publicly available Roboflow Universe model to getpredictions and bounding box coordinates for the items in the dataset we generated earlier.
We can then take all predictions with a confidence of over 50% and use the output of the prediction to auto label my images and get annotations. We will then upload all images and corresponding annotations into my Roboflow project via the API. This workflow will greatly reduce the manual efforts of annotating your generated images.
I wanted to give a shout out to my old friend Julien Simon for the inspiration to write this blog, based on his recent post.
Cite this Post
Use the following entry to cite this post in your research:
Mark McQuade. (Nov 4, 2022). Synthetic Data Generation with Stable Diffusion: A Guide. Roboflow Blog: https://blog.roboflow.com/synthetic-data-with-stable-diffusion-a-guide/