
This project builds a real-time letter-tracking system for the Wheel of Fortune TV show using two Roboflow-trained models: one to detect letters on the puzzle board and one to recognize called letters. A USB HDMI capture device feeds live frames to a local inference server, which identifies which letters have been guessed and updates a web interface so you can follow all correct and incorrect guesses as the episode plays.
This post was contributed to the Roboflow blog by Warren Wiens, a marketing strategist with 20+ years experience in technology who is learning about AI in their spare time.
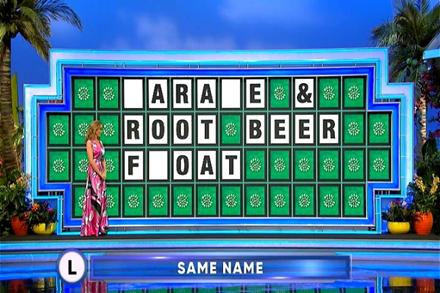
As a regular fan of Wheel of Fortune, I often find myself wishing that I could see all the letters that have been guessed for a puzzle. The correct ones are visible of course, but there is no way to see the guesses that were incorrect. Computer vision to the rescue! After a few weeks of training and coding, I am excited to share a project that does exactly that.
This project uses a USB HDMI capture device connected to a Roku express to capture images from the show while it is being aired. This serves two purposes. This approach allowed me to capture images from the show to use for training and grab images to send for inference to detect letters.
Preparing the Dataset
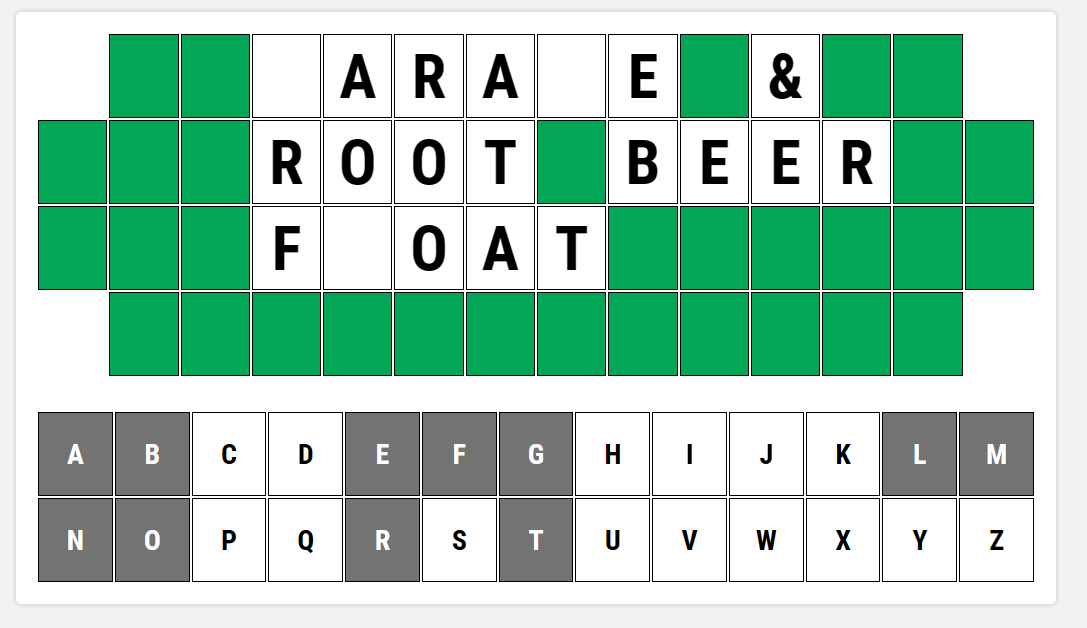
The first step was to collect enough images to be able to train a model to detect letters. Getting enough screenshots for good training was going to take some time and there was a challenge in getting enough of the rare letters, like Q or Z, to effectively train the model. Fortunately, the letters we need to detect are consistent. Furthermore, the letters are in the same place, which makes it easier to parse images of the game board.
I decided to create my own dataset for my use case. I created some Python scripts to extract letters from images and used those to create my own puzzle boards. I created a list of 5,000 phrases, many of which were actual Wheel of Fortune puzzles. I checked letter counts across the selection of words to ensure enough presence of the rare letters.
Since my code was placing the letters on top of a blank puzzle board, I also knew the exact position and size. This lets me also create bounding box data for each image. This saved a lot of time that would have been required for annotating each image. I have included the scripts I used to generate the images on the project Github repository with the rest of the code.
Project Approach
Before we start, I want to explain the approach I took as it will affect how we create the dataset. To get to my goal of real-time letter updates, I knew I would need the ability to accurately detect every letter that appeared. I also needed to have a good idea of the location of those letters so I could build my own version of the puzzle board.
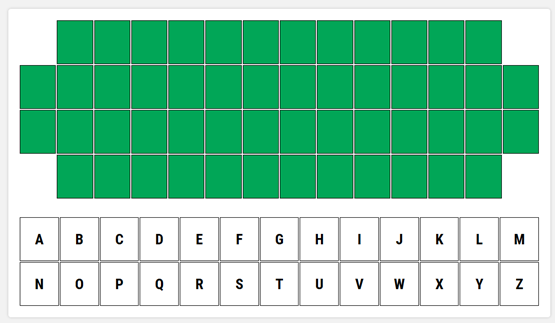
This would have been easy if I just needed to worry about the letters on the board, but I also needed to capture the letters that were called. These letters appear on the bottom left corner of the screen when a player makes a guess. Add the fact that a lot of similar letters appear on the screen at times that are not part of the puzzle and I needed to do some extra work to make sure everything worked as expected.
After testing a lot of different approaches, I decided to create two different models: one that could focus on the puzzle board letters and another to focus on the smaller call letters. For the puzzle board, I capture the screen at 720x480 pixels. For the call letters, I used a 250x250 pixel image size, cropped from the full-sized screen.
I am making two calls to the inference server for each frame, but it still runs quickly. Importantly, I was able to get very accurate results. My approach required a little extra Python coding because I am working with two models, but we will get into that later. As a result, we will be creating two Roboflow projects and training two models. Let’s get started!
Upload Images and Annotations
Roboflow makes this super easy. If you haven’t created an account, do so now and create a new project. All the images I collected and models I trained as part of my project are available on Roboflow Universe.
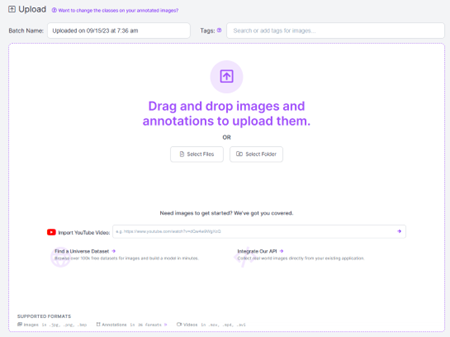
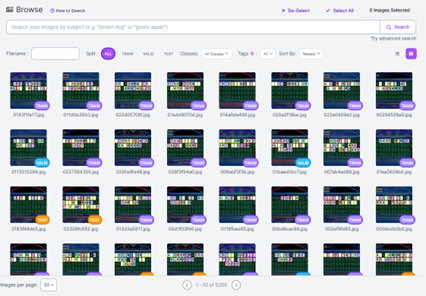
The first project is going to be for the large puzzle board. This is the main board that we all see as the players try to guess the puzzle. For this, I gathered 5,000 puzzle board images. The dataset has a good balance of letters to ensure good training. If you have downloaded my images or have created your own, you can upload these to Roboflow. Just drag and drop all the images and annotation files to the upload page.
You can look at a few of the images to make sure the annotations are correct. If you are using your own images and don’t have annotations, you can use Roboflow Annotate to make your images.
When you upload your images, accept the default split for Training, Validation and Test data. With our images and annotations uploaded, we can now create a dataset for use in training a model.
Create a Dataset
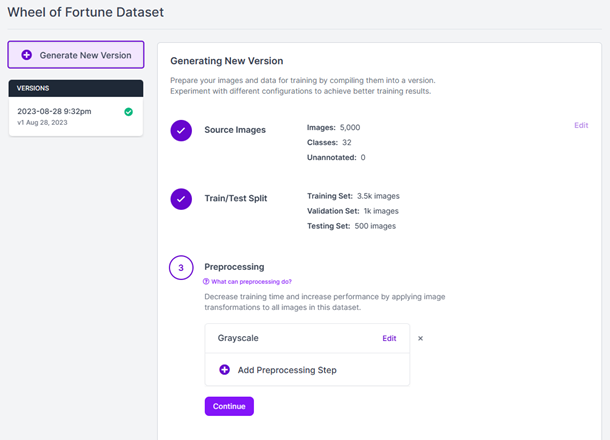
Click the “Generate” option to get started. In the Preprocessing step, remove the Auto-Orient option. This is one you usually want to keep, but we know our letters are always going to be perfectly vertical so we don’t need to account for different orientations. We can add a grayscale option. This will save some time as we don’t really need color for the detection we are doing.
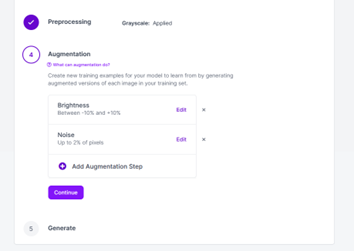
For the Augmentation step, I added both Brightness and Noise. While the images from the show should be consistent, it might be useful to account for some varying brightness and a little bit of noise. For brightness, I used values of -15% to +15%. For noise, I used a value of 2%. With those settings configured, hit Generate to create the dataset.
Train a Model
Training with Roboflow is incredibly simple! From the Versions page. Just select “Train a Model” and click the “Start Training” button. If you’re a community user, you probably won’t have options to change these settings anyway. Go grab a cup of coffee or walk the dog. My images took a couple of hours to train.
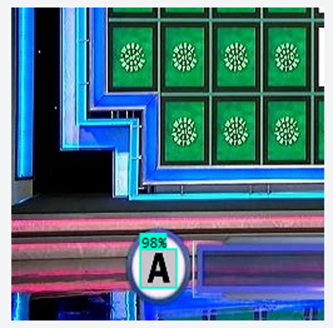
When training is complete, you can test it by uploading an image. The model should detect all the letters and spaces on the puzzle board, and generally you should see confidence levels in the 90% range.
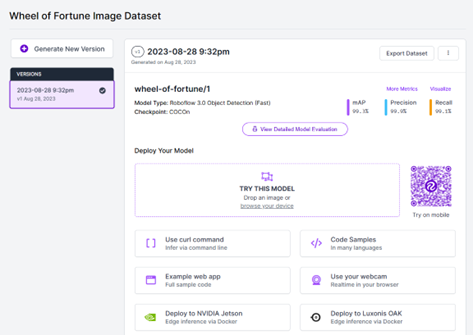
Deploy the Model
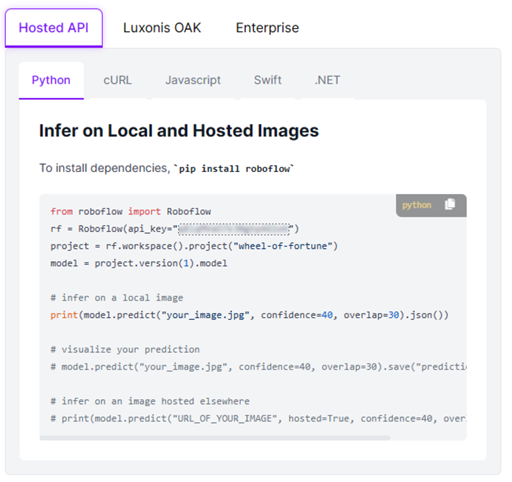
Now go to the Deploy section in your Roboflow project. I am going to cover deployment in detail but want to point out a key section here. In the instructions for deployment section, you will see example code snippets. Remember this for later, we will need some of the information from here. Copy the Python example and save it for use later.
Train a Call Letters Model
As I stated above, I created two models for this project. The first was for the main puzzle board. The second is for the letters called by a player (“call letters”).
If you’re like me, you may have never even noticed the call letters. Every time a player guesses a letter, that letter appears in a small circle at the bottom left corner of the screen. If the letter was incorrect, a red line runs through it. By training a model to look at only this section of the screen, we can make it more accurate and faster.
The call letter images that I created are 250x250. Repeat the same steps above for the batch of these images with a new project. I used all the same settings so repeating the process should be straightforward.
Setting Up the Inference Server
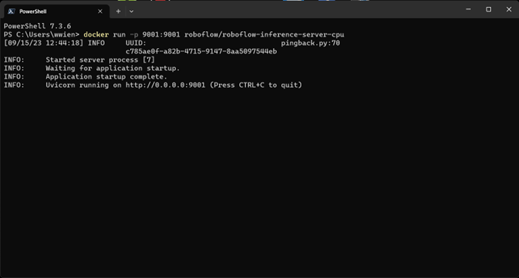
Because we are detecting letters from live video, I set up a local Roboflow inference server. This prevents us from sending a constant stream of frames to Roboflow’s servers. Like all their other tools, Roboflow makes this super easy. They have built a Docker image that you can download and run on your local machine.
Installing Docker is beyond the scope of this article, but there are plenty of good tutorials on YouTube that will help you get Docker running on your system. You can also reference the official Docker documentation for more information. I use Windows, so will provide some instructions here on how to obtain and run the Roboflow inference image. The first step is to retrieve the Docker image that we need. From a command line run:
docker pull roboflow/roboflow-inference-server-cpuThis will download the latest Docker image for the inference server. Once it has been downloaded, you can run it with this command:
docker run --net=host roboflow/roboflow-inference-server-cpuThis will start the instance, which can now be called via API at http://localhost:9001. That’s all there is to it. Now you can handle inference requests locally rather than hitting their servers.
The Game Interface
Now that we have trained models, we need an interface for all of this. This will take the form of a simple web page that displays a simulated version of the Wheel of Fortune puzzle board, and a list of letters that can show what has already been called.

This page is developed in Python using Flask and SocketIO to bring real-time updates to a web page. The code pulls an image from the video stream and sends that image to the inference server to see if it can detect any letters. This is done twice – once to identify letters on the puzzle board and a second time to find and identify call letters.
The data returned from the inference call needs to be translated to the puzzle board. Most of the code is dedicated to this task. The key to this is not just recognizing a letter, but determining where on the board it appears. The code uses the bounding box information that is sent back to figure this out. For details, see the code itself. It is well commented so you can get a sense of how it works.
Running the Project
Ok, let’s get this project running. If you have not already downloaded the code from the project Github repository, do that now and extract it into a folder of your choosing.
Make sure you have all the required Python libraries installed. These are all listed at the top of the server.py file. Then connect your USB HDMI capture device and make sure it is capturing video. If you are using something like a Roku, you can view past versions of Wheel of Fortune to test this out.
Before you go any further you will need to add your Roboflow API key and project information. This is where the information from the deploy step will be used. This is at the top of the server.py file, at around line 20.
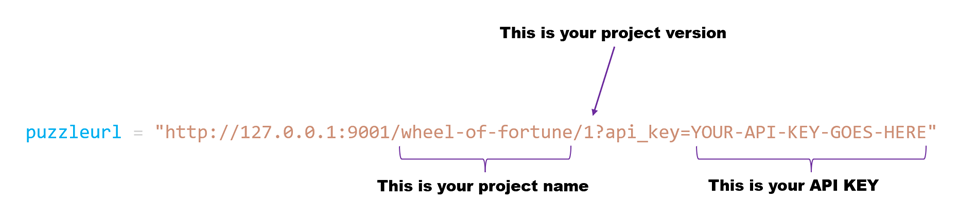
Open up `server.py` in your favorite text editor and add your Roboflow API key and project information:

Make sure you update both projects. There is one for the main puzzle board and one for the call letters.
Now, open a terminal window and navigate to the folder where you saved the code and run python server.py. This will start the project and give you a URL to navigate to. Open that URL in your browser and you should see the puzzle board and call letter list.
Now start up the show and watch the letters appear! Note that the code is still a work-in-progress and I will continue to refine it and update the project Github repository.
Cite this Post
Use the following entry to cite this post in your research:
Contributing Writer. (Sep 25, 2023). How I Built a Wheel of Fortune Game with Roboflow. Roboflow Blog: https://blog.roboflow.com/wheel-of-fortune-game/