
Computer vision helps factories do things like count parts or find defects. But sending that data to a screen on the factory floor can be hard. Usually, it takes complex coding to make it work.
This guide shows you a simple way to connect Roboflow to FactoryTalk Optix. We will use a block called OPC UA Writer Sink. In just a few steps, you can show live data, like a count of objects, right on your screen.
By the end, you will have:
- A Roboflow workflow that sees objects.
- A connection sending results to FactoryTalk Optix.
- A screen that updates the count in real time.
It works because Optix has a built in server for this data. Roboflow writes directly to it, and your screen updates instantly.
What You Need
Before we start, make sure you have:
- FactoryTalk Optix installed
- A Roboflow account with Enterprise access.
- The Roboflow Inference Server running.
- A network connection between your server and the machine running Optix.
Connect Roboflow to FactoryTalk Optix
Step 1: Make a Variable in Optix
First, we need a spot for the data to go. In Optix, we create a "Variable."
- Open your project.
- Right-click on Model.
- Choose New, then Variable.
- Name it ObjectCount.
- Set the type to Int32.
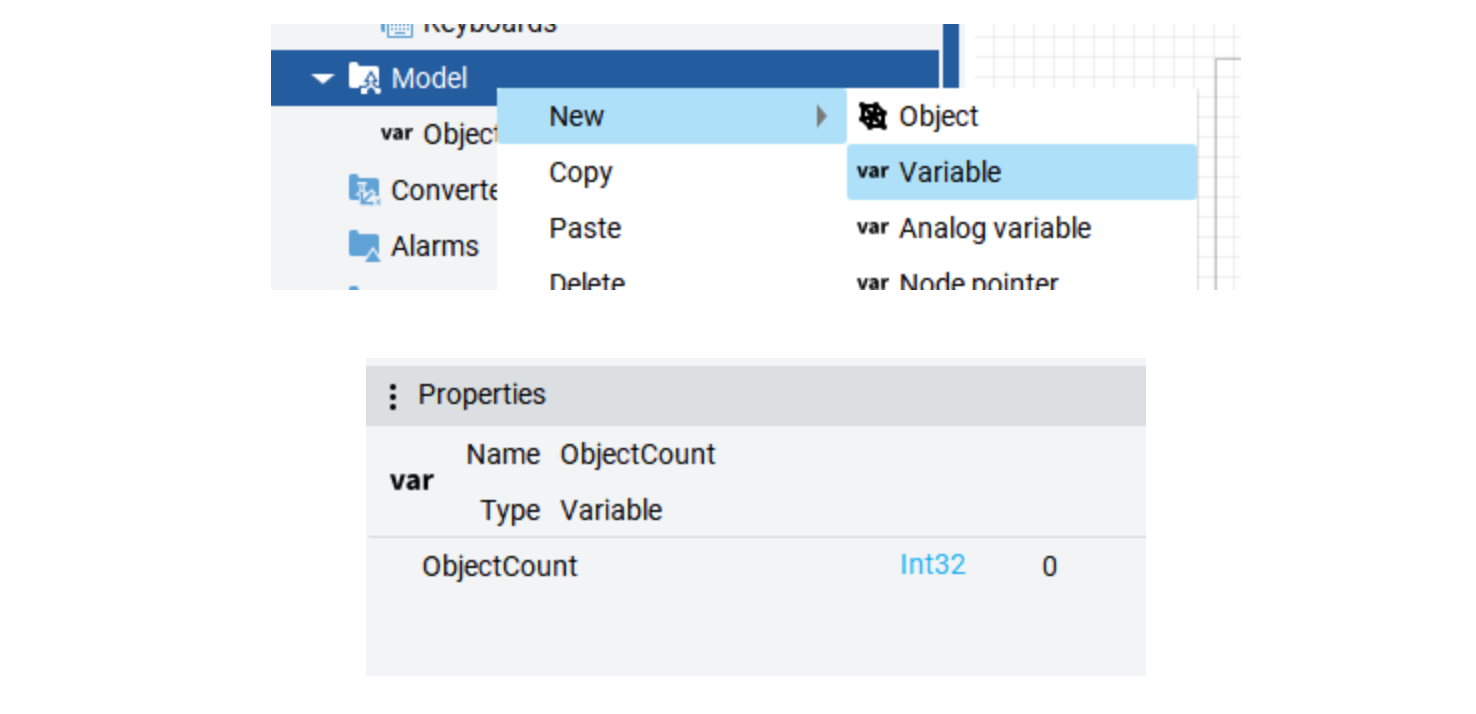
Now you have a variable named ObjectCount. This is where Roboflow will send the number of objects it sees.
Step 2: Show the Data on Your Screen
Now, let’s put that number on a screen so you can see it.
- Open your main window in the editor.
- Drag a TextBox onto the window.
- Click the TextBox and find Text in the properties panel.
- Click the link icon next to it.
- Select Model, then ObjectCount via dynamic link.
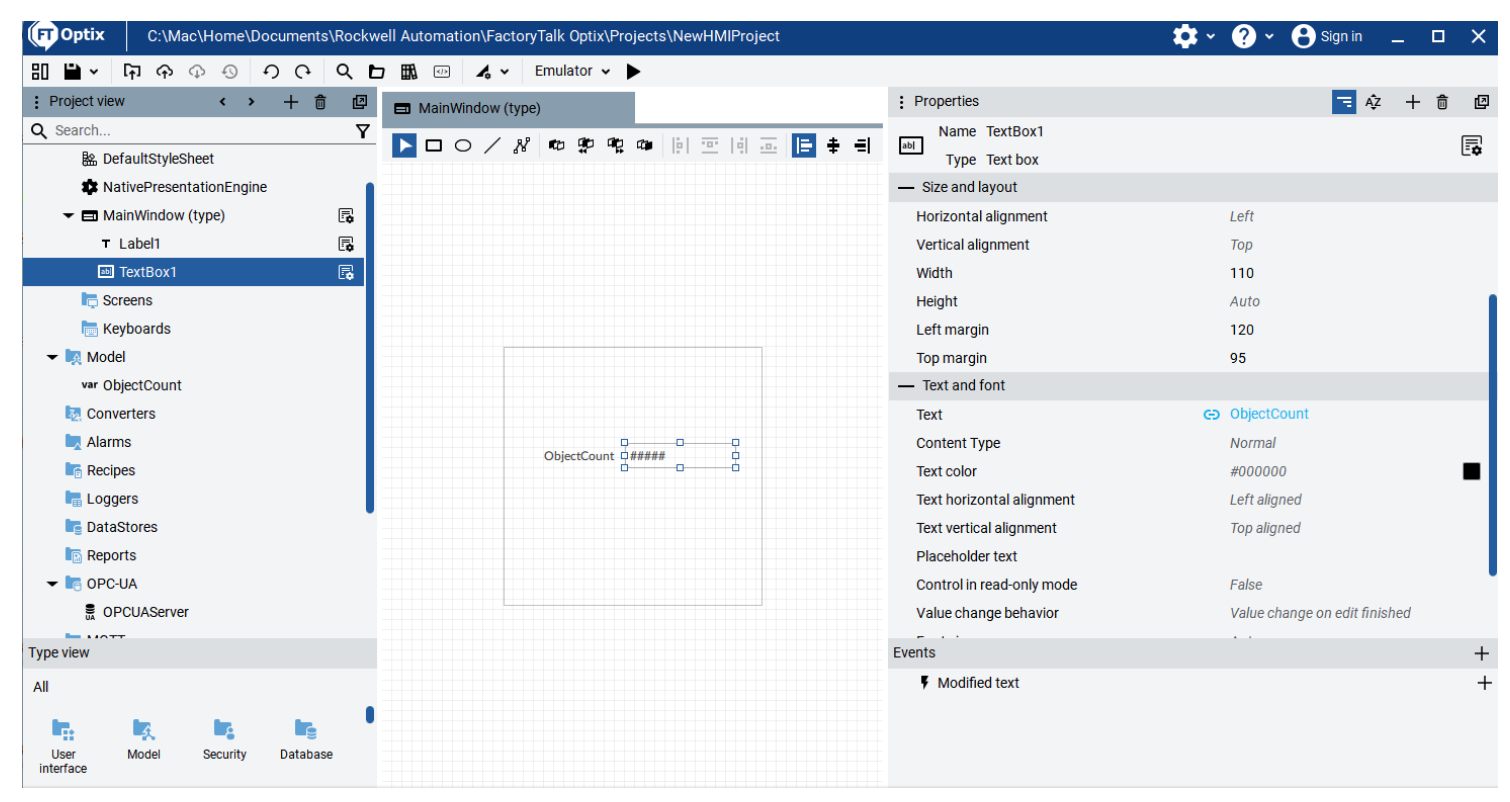
Your TextBox is now linked. When the count changes, the number in the box will change too.
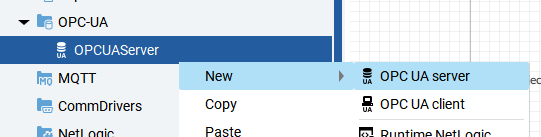
Step 3: Create and Configure the Server
We need to make sure Optix is ready to listen for data. By default, the server might not be there, so we have to add it.
- Find OPC-UA in your project tree.
- Right-click on it.
- Select New, then OPC UA Server.
Now that the server is created, you need to find the details to put into Roboflow:
- The URL: Click your new server and look at the properties. It usually looks like opc.tcp://localhost:59100.
- The Namespace: This is just your project name. For example, NewHMIProject.
Note: If Roboflow is on a different computer, swap "localhost" for the IP address of the computer
Step 4: Set Up Roboflow
Now we tell Roboflow where to send the data. We will add a step to your workflow called "OPC UA Writer Sink."
Here is how you configure it:
- url: The URL you found in Step 3.
- namespace: Your project name.
- object_name: The path to your folder. Use NewHMIProject/Model.
- variable_name: ObjectCount.
- value_type: Int32.
- value: The output from your counting step.
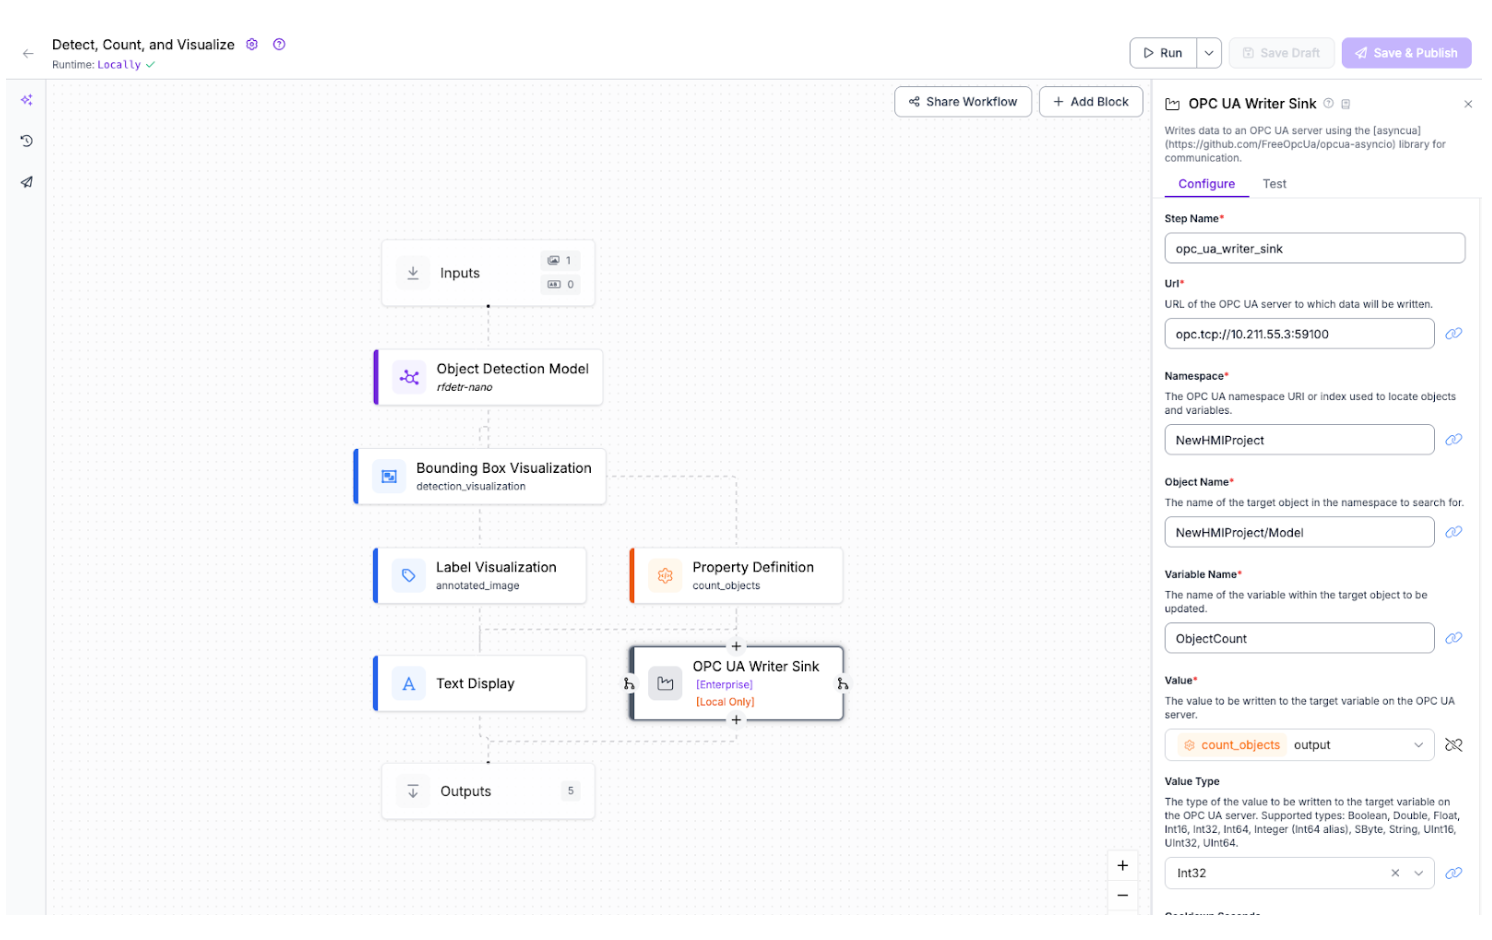
Make sure you use / to separate folders in the path. Here is a link to my workflow that you can reference.
Step 5: Test It
Before you finish, test it out. Run your workflow with an image.
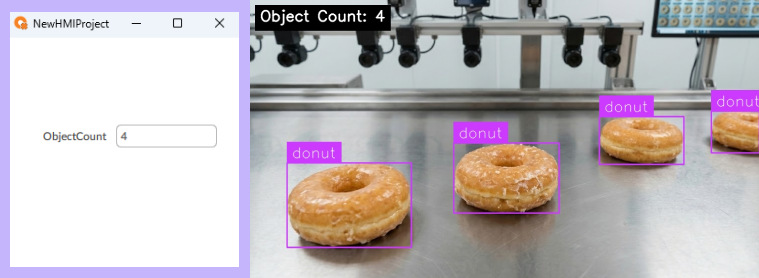
- Check that the workflow finishes without errors.
- Look at your Optix screen. Did the number change?
If it works, you are done! If you see an error like "node not found," check that your path matches your project folders exactly.
Troubleshooting Tips
- "Node not found": Check your spelling. The Project Name and Variable Name must be exact.
- Timeouts: Check your IP address. Make sure your firewall allows port 59100.
- Value not updating: Make sure you linked the TextBox correctly in Step 2.
Next Steps
Now that you can send counts, you can do even more. You could add more variables for different objects, or track trends over time. This method makes it easy to get data to the people who need it.
Cite this Post
Use the following entry to cite this post in your research:
Joe Bastulli. (Jan 15, 2026). How to Connect Roboflow to FactoryTalk Optix. Roboflow Blog: https://blog.roboflow.com/connect-to-factorytalk-optix/