
That hairline crack in the wall; the tiny chip in the countertop; the subtle water stain on the ceiling: Whether you're a property manager processing dozens of move-out inspections, an insurance adjuster documenting claims, or just a renter trying to protect your security deposit, these small defects matter.
I recently built a defect detection model for home inspections using RF-DETR-Seg, and the journey taught me a lot about what it takes to reliably spot small, subtle damage. In this guide, I'll walk you through the techniques that actually work so you can apply them to your own projects.
Why Small Defects Are Hard to Detect
Before diving into solutions, it's worth understanding why this problem is difficult in the first place. Object detection and segmentation models work by analyzing feature maps at different scales. When a defect occupies only a tiny fraction of the image (i.e. a 15-pixel scratch in a 4000×3000 photo) the model has very little visual information to work with. By the time the image passes through the network's downsampling layers, that small defect may have effectively disappeared.
There's also the annotation challenge. If people struggle to spot a defect when labeling training data, the model will struggle too. Small defects require careful, zoomed-in annotation. The good news: you don't need to modify model architectures or dive into research papers to solve this. A combination of smart data practices and inference-time techniques can dramatically improve detection rates.
How do I detect very small or subtle defects that are hard to see?
1. Collect Data for Subtle Defect Detection
First, we need to collect data relevant to our use case. Gathering data representative of your specific environment is key to achieving high model performance. There are a few approaches you can take:
- Capture your own images. For home defect detection, this is often the best approach. Use your smartphone camera at full resolution to photograph walls, countertops, floors, ceilings, and tiles. Capture both defective and defect-free examples. You don't need thousands of images, quality matters more than quantity.
- Search Roboflow Universe. You can browse Roboflow Universe, a community with over 1 million computer vision datasets, to find existing defect detection datasets. Search for terms like "crack detection," "surface defect," or "damage detection" to find datasets you can use as a starting point or combine with your own data.
For this guide, we'll use a home defects dataset I created by photographing surfaces around different houses. In our case, there is only one defect class that includes: cracks, scratches, stains and holes. The dataset can be found in Home Defect Inspection on Roboflow Universe.
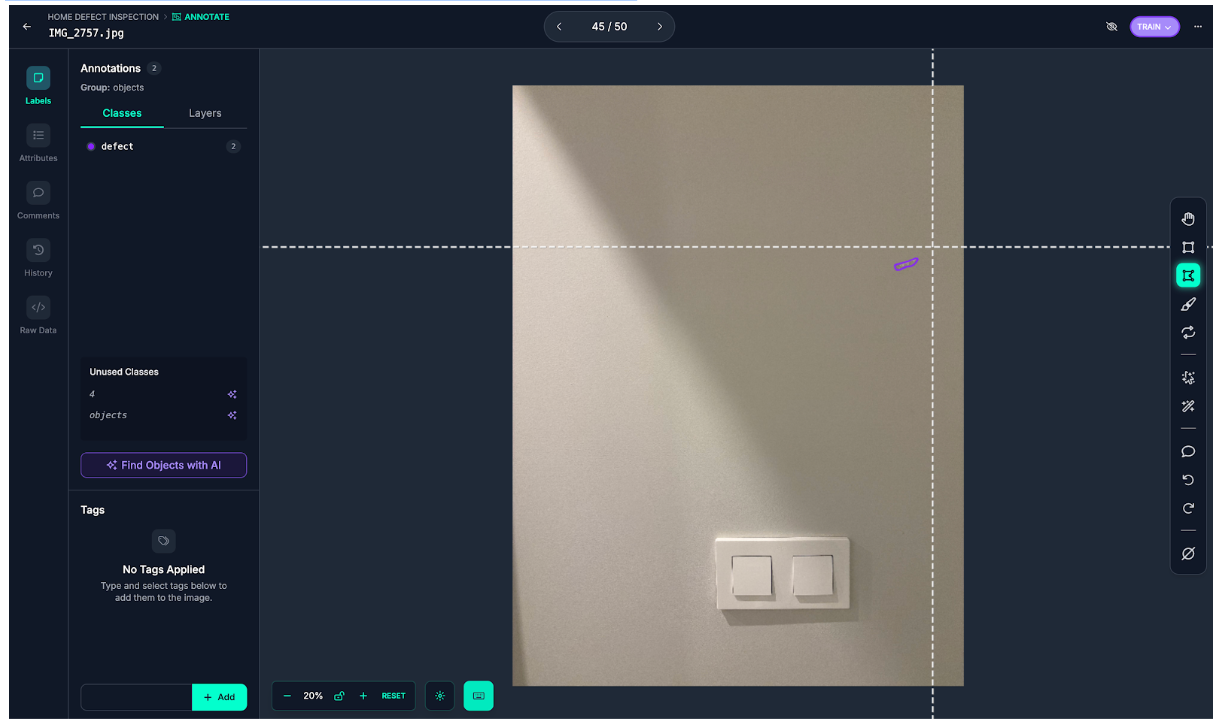
2. Annotate Small Defects with SAM3
Once you have images, you need to annotate them. For segmentation tasks (more specifically instance segmentation), this typically means drawing precise polygon masks around each defect, which can be incredibly tedious for small, irregular shapes like cracks and scratches. This is where SAM3 makes a huge difference. Roboflow integrates SAM3 directly into the annotation interface, turning a time-consuming task into a few clicks.
The workflow is simple: click on a defect, and SAM3 generates a precise segmentation mask instantly. For hairline cracks that would take minutes to trace manually, SAM3 produces accurate boundaries in seconds. I annotated my entire dataset in a fraction of the time it would have taken with traditional polygon tools.
If you're building a segmentation dataset, I strongly recommend leveraging SAM3. The time savings alone make it worthwhile, but the consistency of the masks is arguably even more valuable for model training.
Now let's walk through the steps that turn this small dataset into a high-performing model.
Step 1: Quality Raw Data
You don't need thousands of images to build a working defect detector. What you need is quality images with consistent capture conditions. For our home defects dataset, I used a smartphone camera (most modern phones capture 12MP+ images, which is plenty). There are some key principles:
- Resolution matters more than quantity. A single 4000×3000 image contains far more information than ten blurry 640×480 shots. High resolution gives you room to tile and crop without losing detail.
- Capture both classes. You need defect-free examples too. A model trained only on damaged surfaces won't learn what "normal" looks like, leading to false positives everywhere.
- Annotate carefully. Take your time when annotating, the quality of annotations directly determines model quality.
Baseline Results
Training RF-DETR-Seg on just the raw images (no augmentation, no preprocessing) establishes our baseline:

The model detects obvious defects but misses most of the subtle ones. Let 's fix that.
Step 2: Augmentation and Synthetic Data
With a small dataset of real images, you need to squeeze every bit of value from what you have. This step combines traditional augmentation with AI-generated synthetic images to maximize your training data.
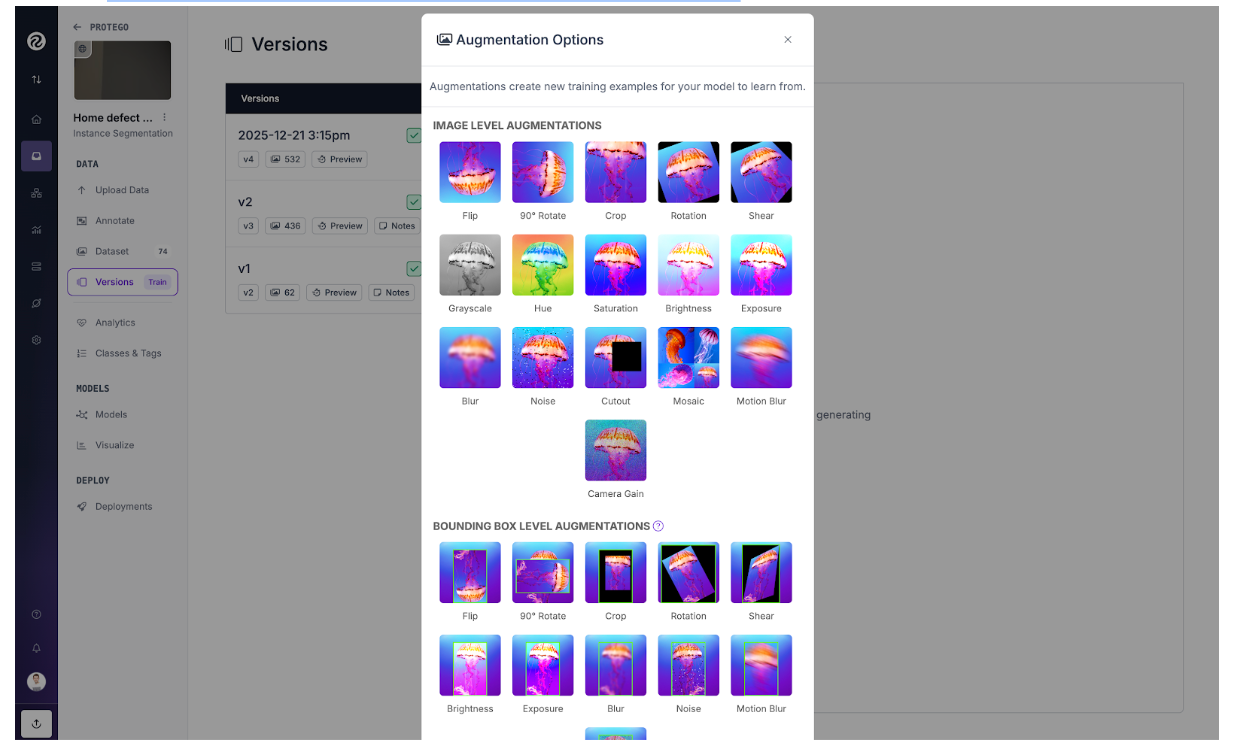
Augmentation in Roboflow
In Roboflow's preprocessing and augmentation settings, these are particularly effective for small defect detection:
- Tiling: is the most impactful technique. It slices your high-resolution images into smaller tiles, effectively "zooming in" on regions of the image. A 4000×3000 image tiled into 640×640 chunks means small defects now occupy a much larger percentage of each tile. This is critical, it transforms a 15-pixel defect into something the model can actually learn from.
- Flip and rotation: augmentations help the model recognize defects regardless of orientation. A crack is a crack whether it runs horizontally, vertically, or diagonally.
- Brightness and contrast variations: simulate different lighting conditions. That subtle water stain visible under bright light might be nearly invisible in shadow.
- Blur and noise: augmentations build robustness to image quality variations. Real-world photos aren't always perfectly sharp.
One important note: if you use tiling during training, you'll want to use a similar approach during inference. We'll cover that in the SAHI section.
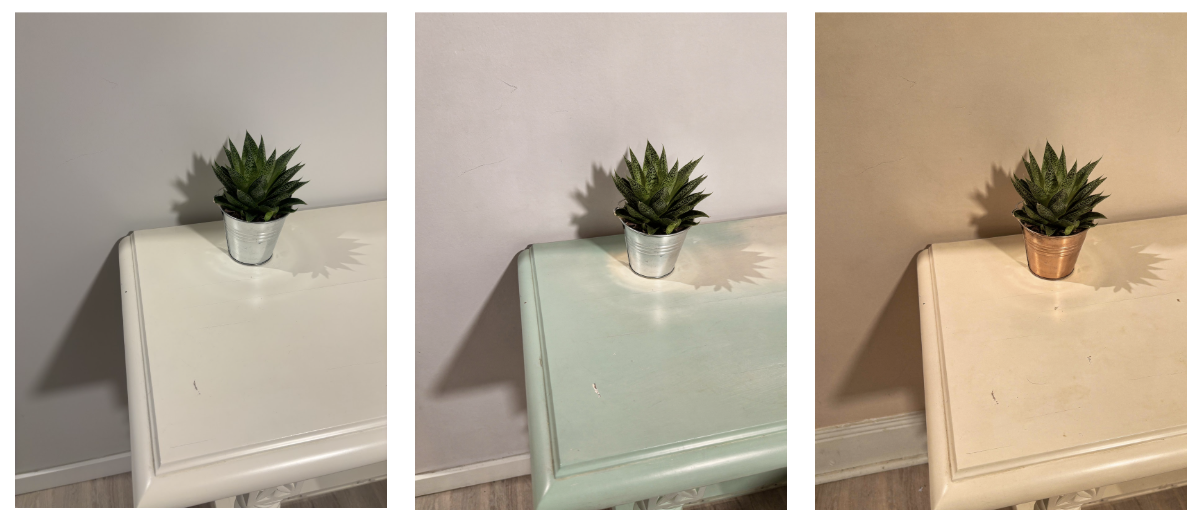
AI-Generated Synthetic Images
When your real dataset is small, synthetic data can help fill the gaps. I experimented with generating additional defect images using AI image generation tools, and it made a noticeable difference in model generalization.
For this project, I used ComfyUI to generate synthetic defect images. ComfyUI provides an open source, flexible, node-based interface for building image generation workflows, making it easy to create variations of defects on different surfaces and lighting conditions.
The idea is simple: generate variations of defects that you couldn't easily photograph. Different wall textures, different lighting conditions, different defect severities. This expands the diversity of your training data without requiring more manual photography. A few considerations:
- Balance is key. As a rule of thumb, a ratio of roughly 70-80% of real images and 20-30% of synthetic images work well. Too much synthetic data can cause the model to learn artifacts of the generation process rather than real defect characteristics.
- Quality over quantity. Not all generated images are useful. Review them and discard any that look obviously fake or contain unrealistic defects.
- Match your domain. If you're detecting defects on walls, generate images of walls, not random surfaces. The synthetic data should look like it belongs in your dataset.
This technique is especially valuable for rare defect types where you might only have a handful of real examples.
Results with Augmentation and Synthetic Data
After implementing these techniques, the results speak for themselves:

Adding tiling, augmentation and AI-generated images to our training pipeline shows significant improvements, especially on small objects, but we can push further with inference-time optimizations.
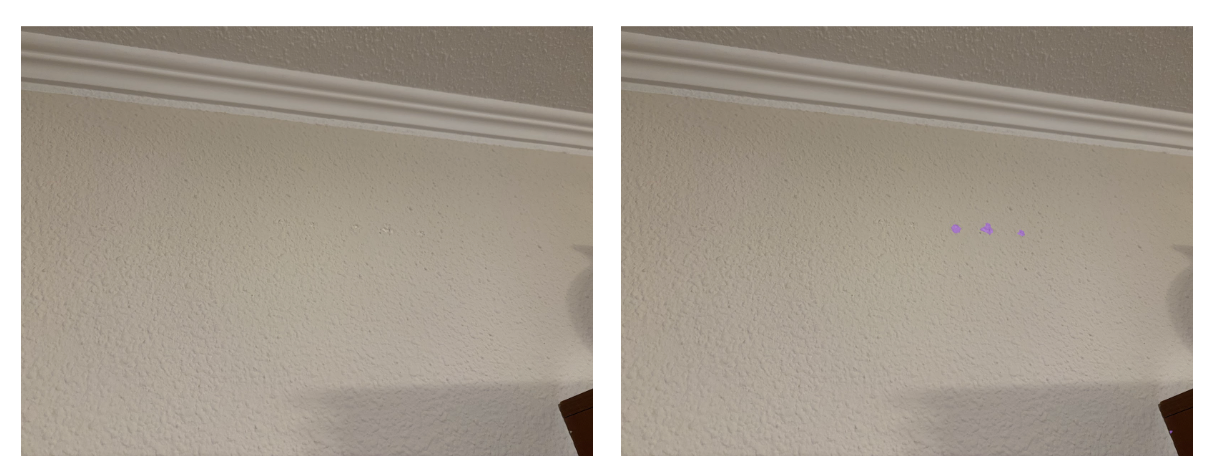
Step 3: SAHI for Inference
Even with a well-trained model, small defects in large images remain challenging at inference time. This is where SAHI (Slicing Adaptive Inference) becomes essential. SAHI works by slicing your input image into overlapping tiles, running inference on each tile, and then merging the results. It's like giving your model a magnifying glass where suddenly those tiny defects are large enough to detect reliably.
The beauty of SAHI is that it works with any trained model. You don't need to retrain anything, you just change how you run inference. Here's how to use it with our already trained RF-DETR-Seg model from Roboflow: see GitHub.
The slice_wh parameter controls the size of each tile. Smaller slices mean more "zoom" but slower inference. The overlap_ratio_wh ensures defects that fall on tile boundaries are still detected. Comparing the results below, it's clear that SAHI's slicing approach is essential for detecting subtle defects in high-resolution images.
One thing to keep in mind is that small defects tend to produce lower confidence scores than larger, more obvious damage. This is expected as the model has less visual information to work with. If you're missing detections, try lowering your confidence threshold. A value that works well for large defects might filter out the subtle cracks and scratches you're trying to catch.
Limitations and Considerations
Although we have trained and evaluated successfully a model, there are few things to keep in mind:
- Speed tradeoff. SAHI is slower than standard inference because you're running the model multiple times per image. For real-time applications, you may need to optimize slice size or accept lower accuracy.
- Some defects need different approaches. Very subtle defects (like slight discoloration or texture changes) might be better suited for anomaly detection rather than object detection or segmentation tasks. If your defects don't have clear boundaries, consider exploring unsupervised methods.
- Image quality matters. Poor lighting, motion blur, or insufficient resolution will limit your results. When possible, control your capture conditions.
How to Detect Subtle Defects with Computer Vision Conclusion
Detecting small defects doesn't require exotic architectures or massive datasets. With just a few images, smart annotation using SAM3, strategic augmentation, synthetic data, and SAHI at inference time, you can build a model that reliably catches subtle damage.
The techniques here apply well beyond home inspection, such as manufacturing, electronics inspection, agricultural monitoring and anywhere else small defects matter. The principles remain the same: maximize the visual information available to your model, both during training and inference. Try these techniques on your own dataset and see how they perform.
Written by David Redó Nieto
Cite this Post
Use the following entry to cite this post in your research:
Contributing Writer. (Dec 31, 2025). Small Defect Detection with Computer Vision. Roboflow Blog: https://blog.roboflow.com/detect-subtle-defects/