
This tutorial builds a wood-mining bot for Minecraft by training a computer vision model to detect tree wood blocks and the in-game crosshair, then wiring the detections into a Roboflow Workflow. A Python script uses PyAutoGUI to read the relative positions of detected objects and moves the mouse to align the crosshair with a wood block before triggering the mine action, automating a task that would otherwise require constant manual input.
In the world of gaming, Minecraft stands out as one of the most iconic and beloved games, offering endless opportunities for creativity and exploration.
One of Minecraft's most repetitive tasks is gathering materials, which can be tedious and take a long time. One fun technical solution is to use computer vision to build a video game controller.
In recent years, computer vision has exponentially improved, offering a wide range of capabilities in many fields. Therefore, with computer vision, we are able to create a simple wood mining script for Minecraft.
In this tutorial we will learn how to create a computer vision model and use workflows, a free no-code tool for computer vision. We will also learn how to implement directional logic in order to be able build a simple script in Minecraft.
By the end of the guide, you will learn how to build a simple wood mining script for Minecraft.
Before we dive in, here are the steps we’ll cover to build this project successfully.
- Train a model to identify wood blocks
- Build a Workflow to run our model and process results from the model
- Create a new Python script to control the keyboard to move around, find tree blocks, and mine them.
Step #1: Train a model to identify wood blocks
First, sign up for Roboflow and create an account.
Next, go to workspaces and create a project. Customize the project name and annotation group to your choice. Make sure to create an object detection project.

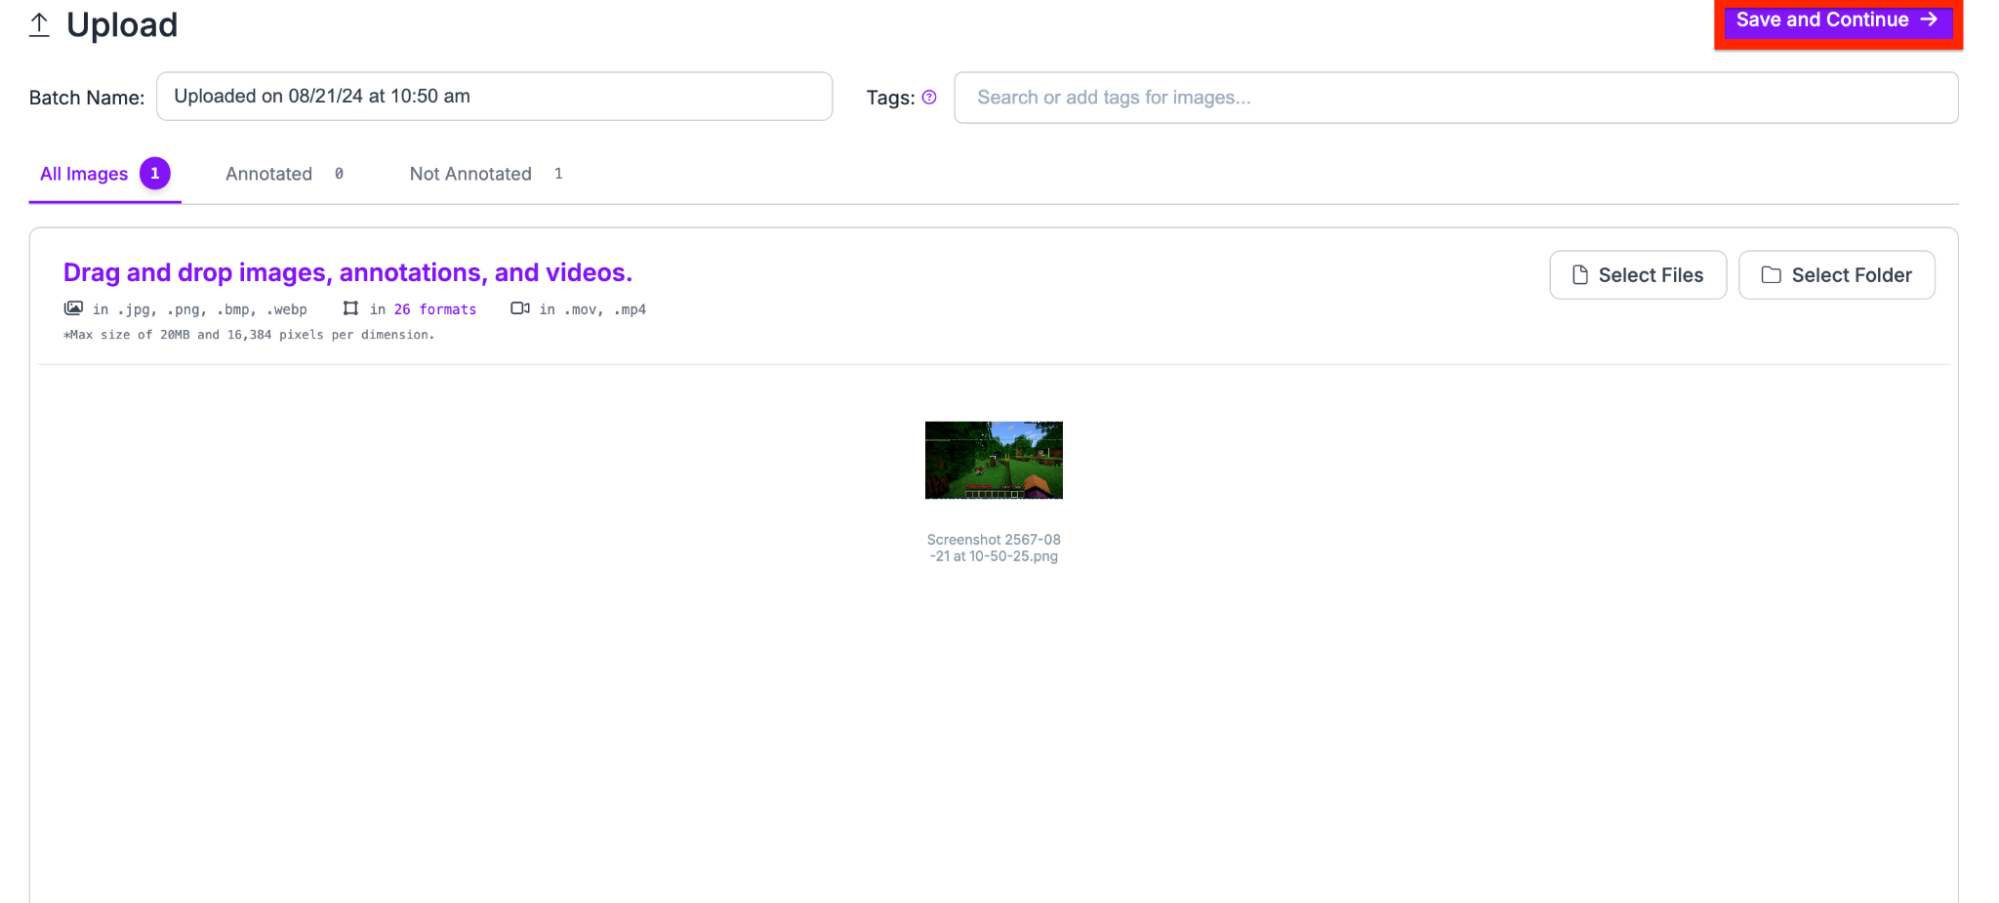
Next, add your images. In order to create a minecraft script, add your images of the game.
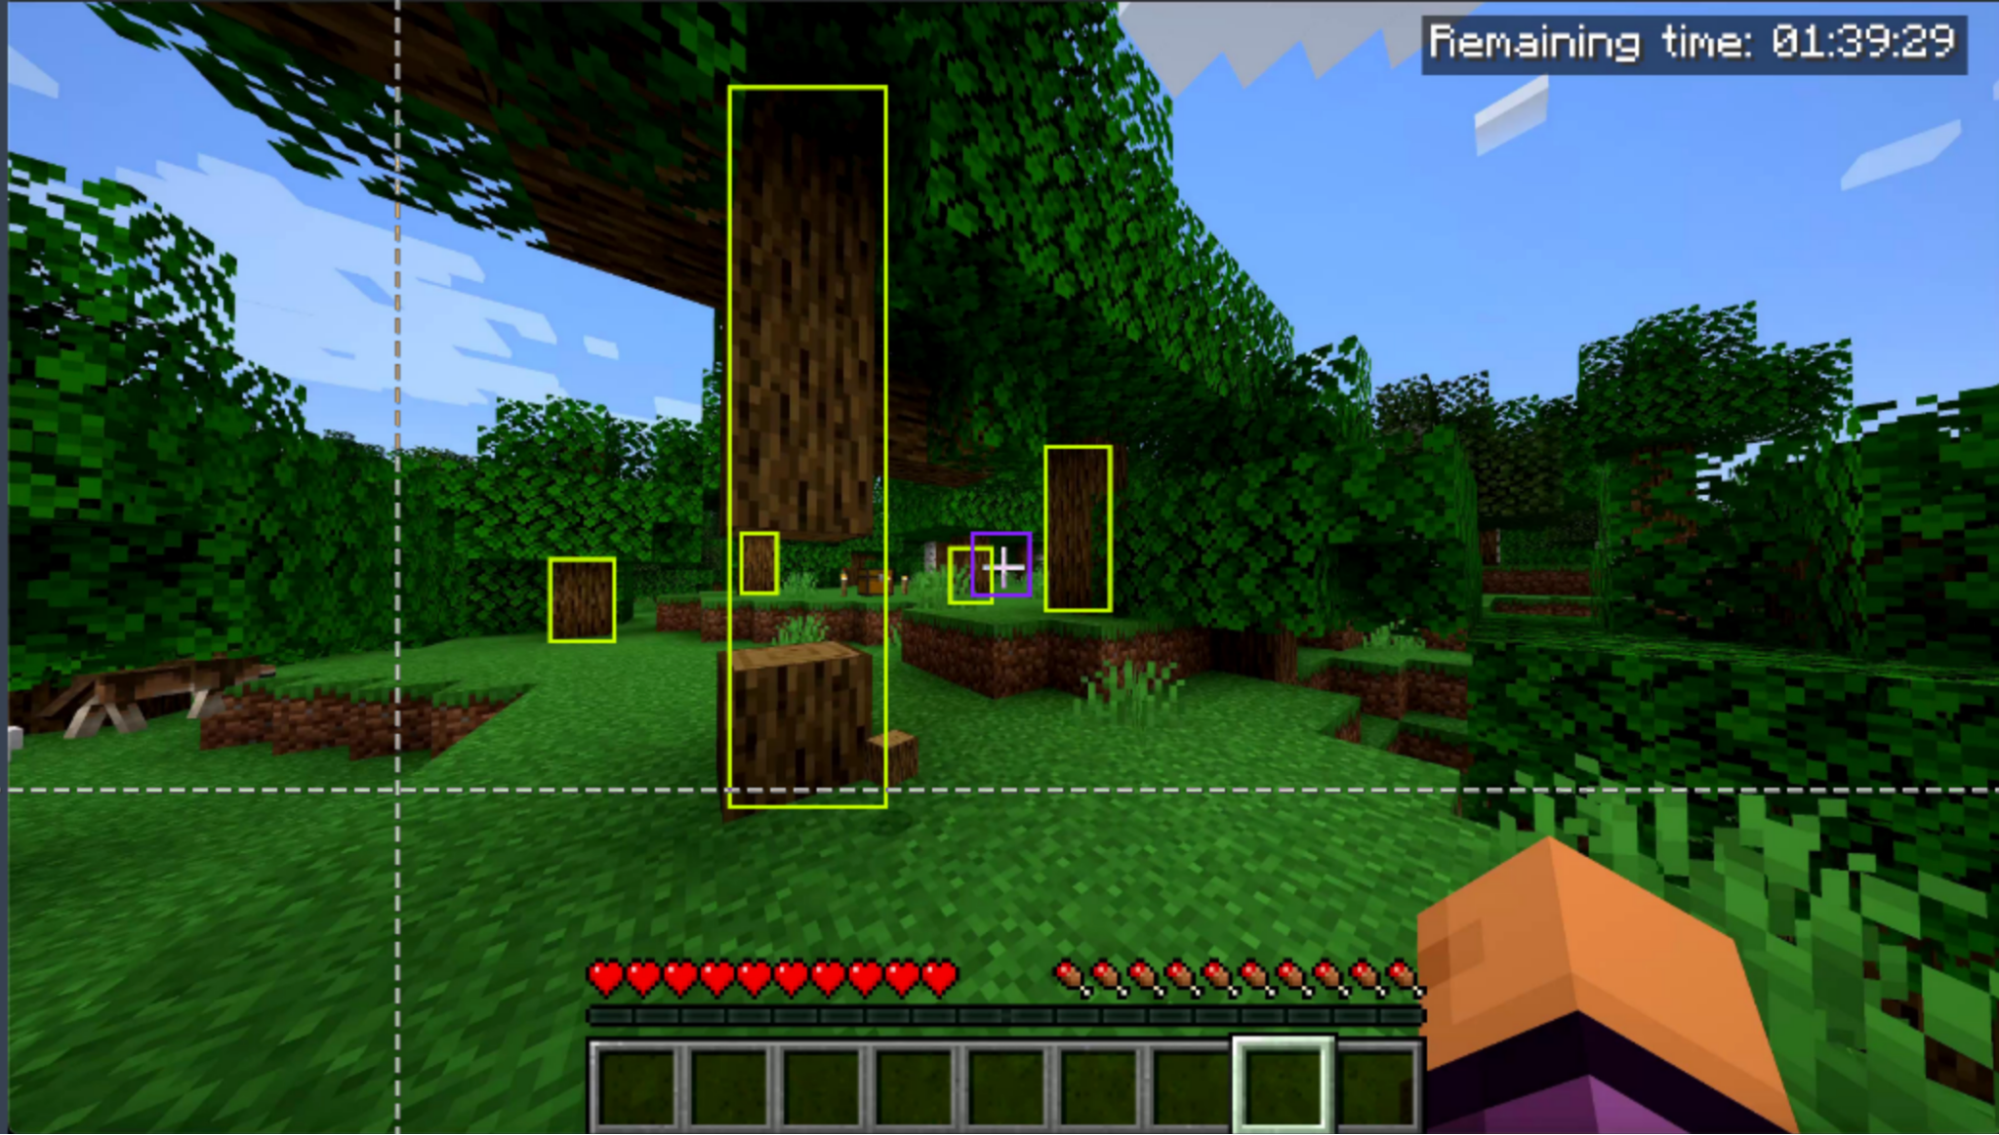
Then, add the classes you want your model to detect. In our case, we need to detect the crosshair and the trees.

Next, annotate the dataset and draw your bounding boxes around the necessary objects.
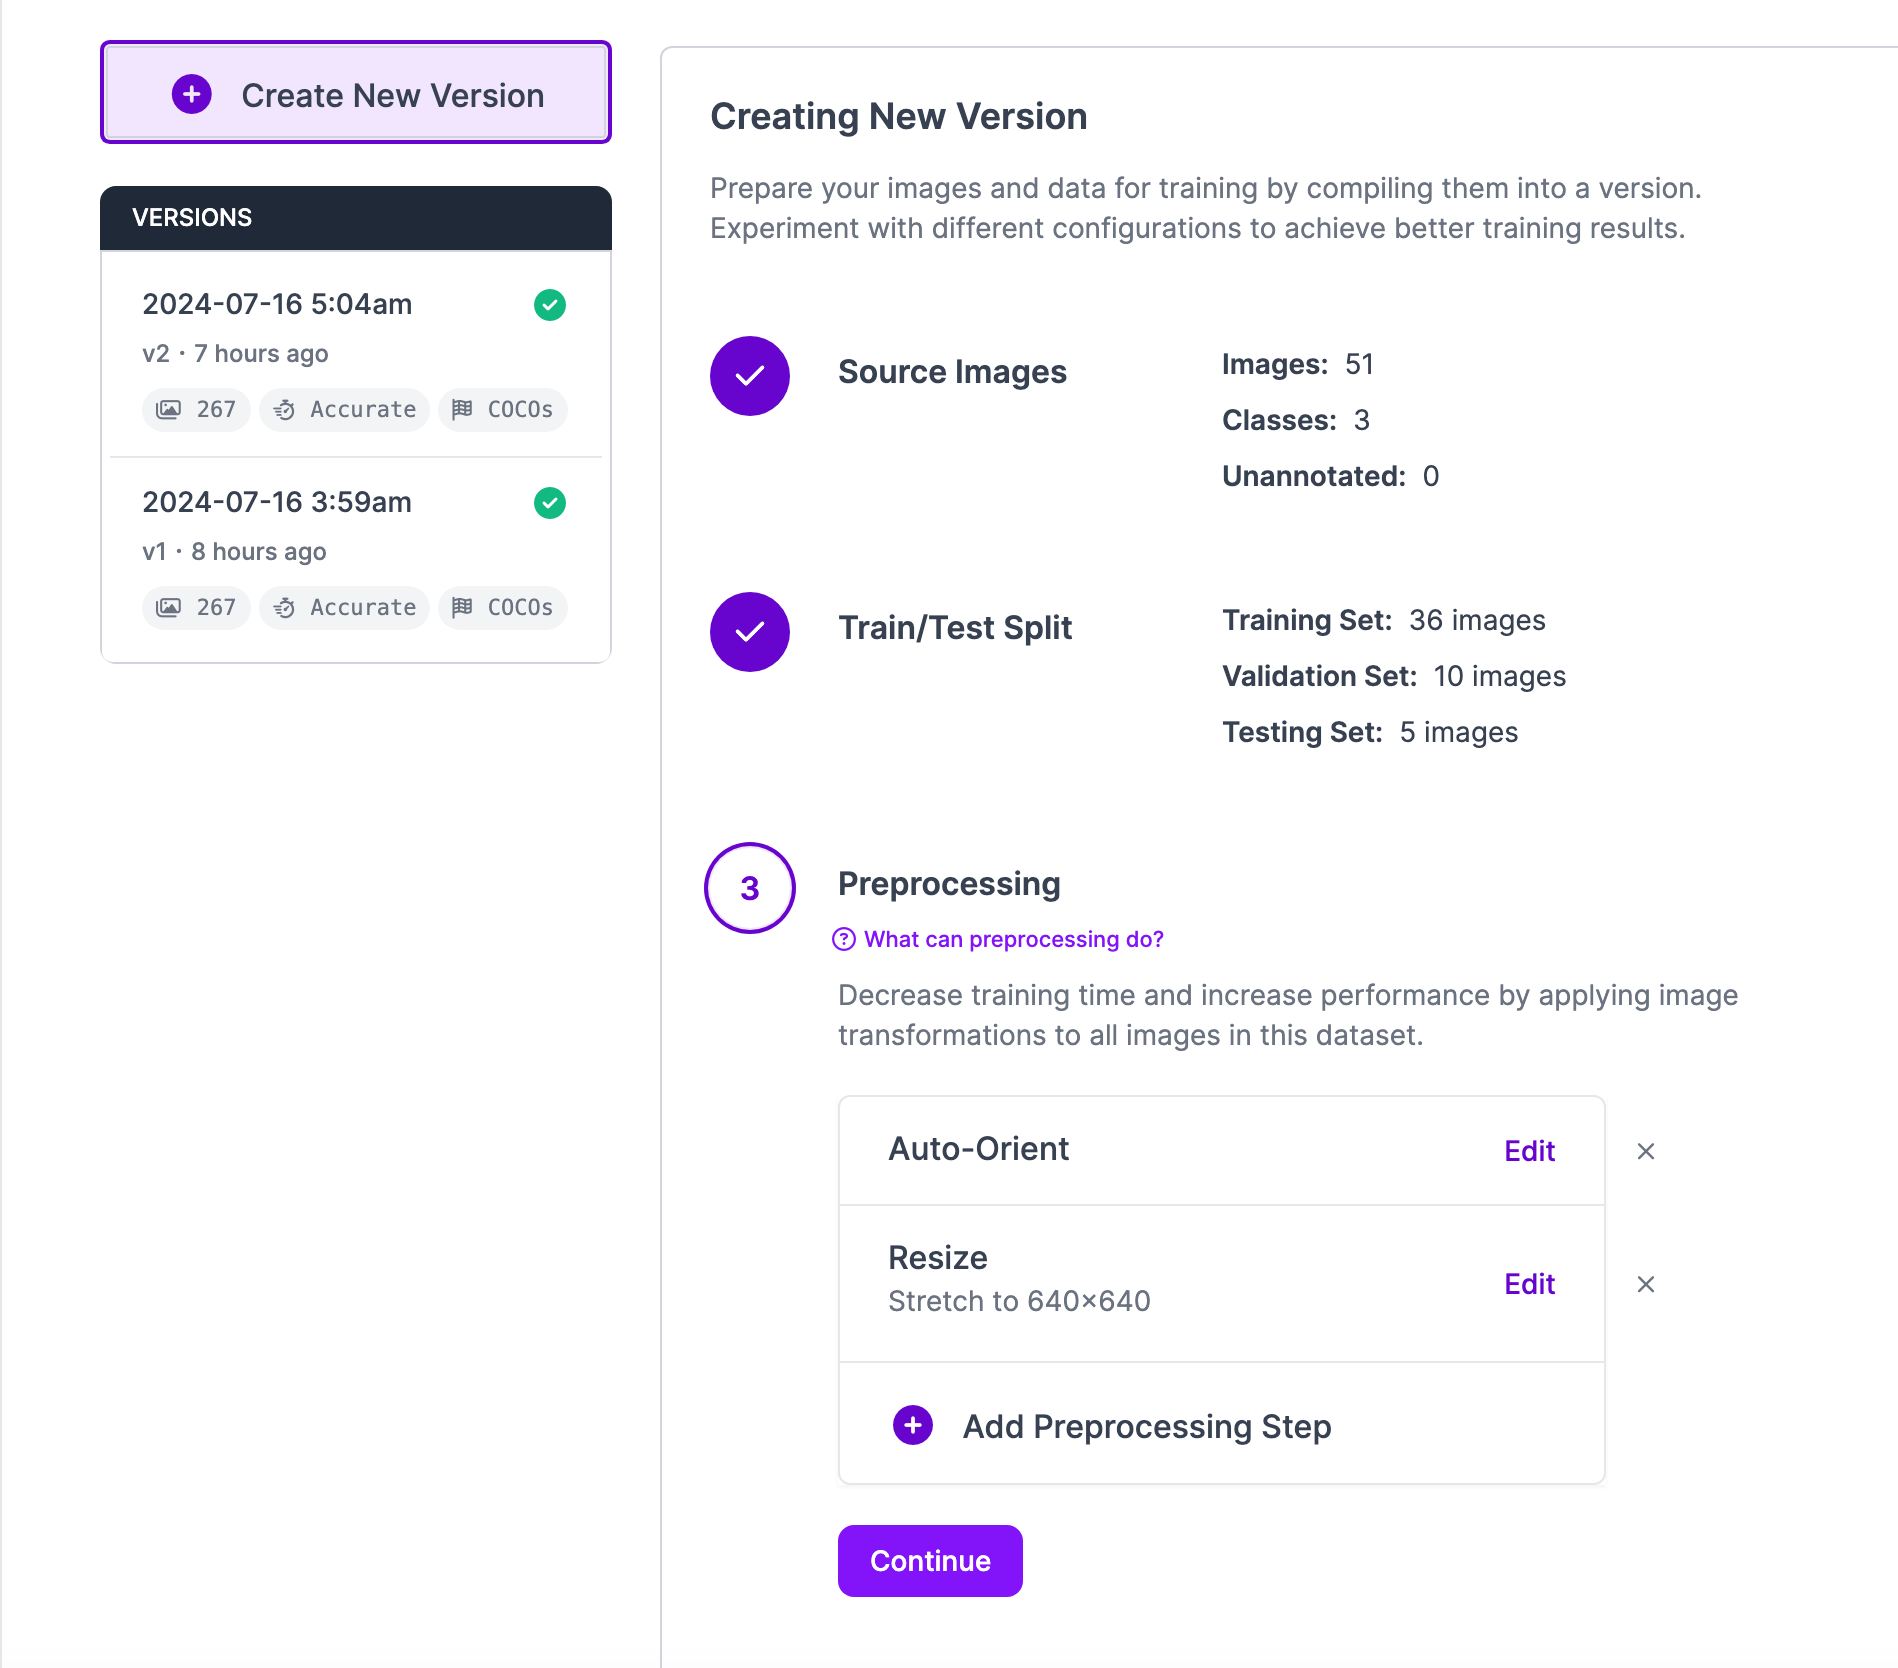
Now that we have our annotations and images, we can generate a dataset version of your labeled images. Each version is unique and associated with a trained model so you can iterate on augmentation and data experiments.
Step 2: Create a Workflow
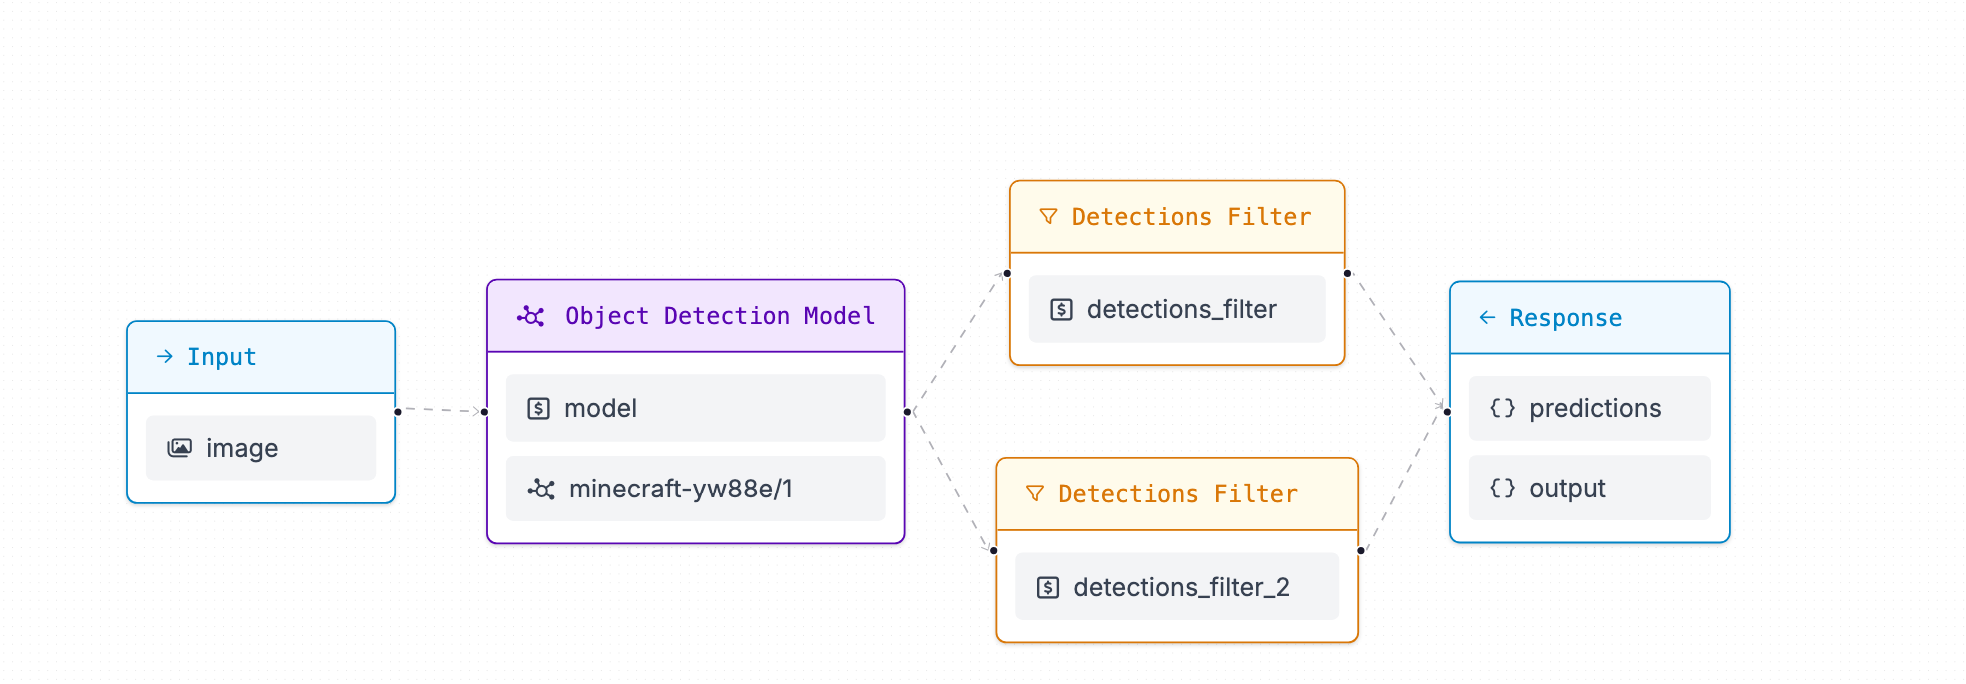
Workflows is a web-based, interactive computer vision application builder. You can use Workflows to define multi-stage computer vision applications that can be run in the cloud or on your own hardware.
At the end of this step, our workflow will be able to:
- Detect the trees
- Detect the crosshair
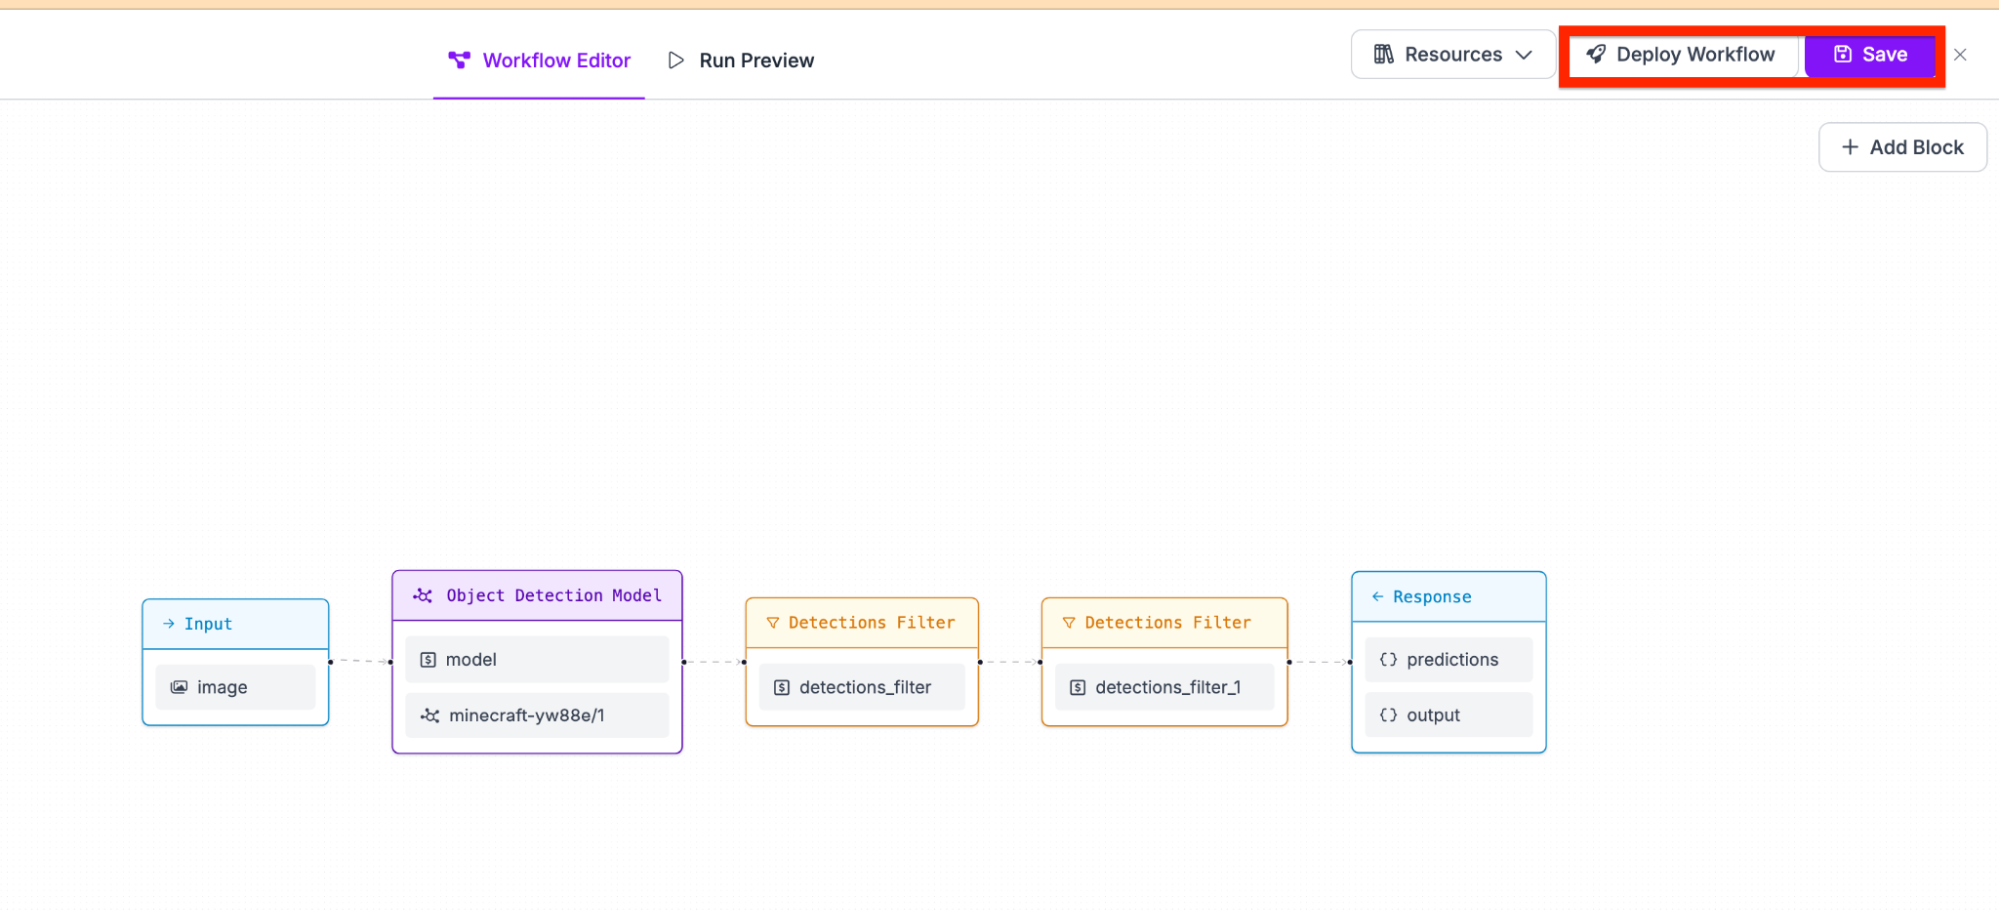
The overall Workflow will look similar to this:
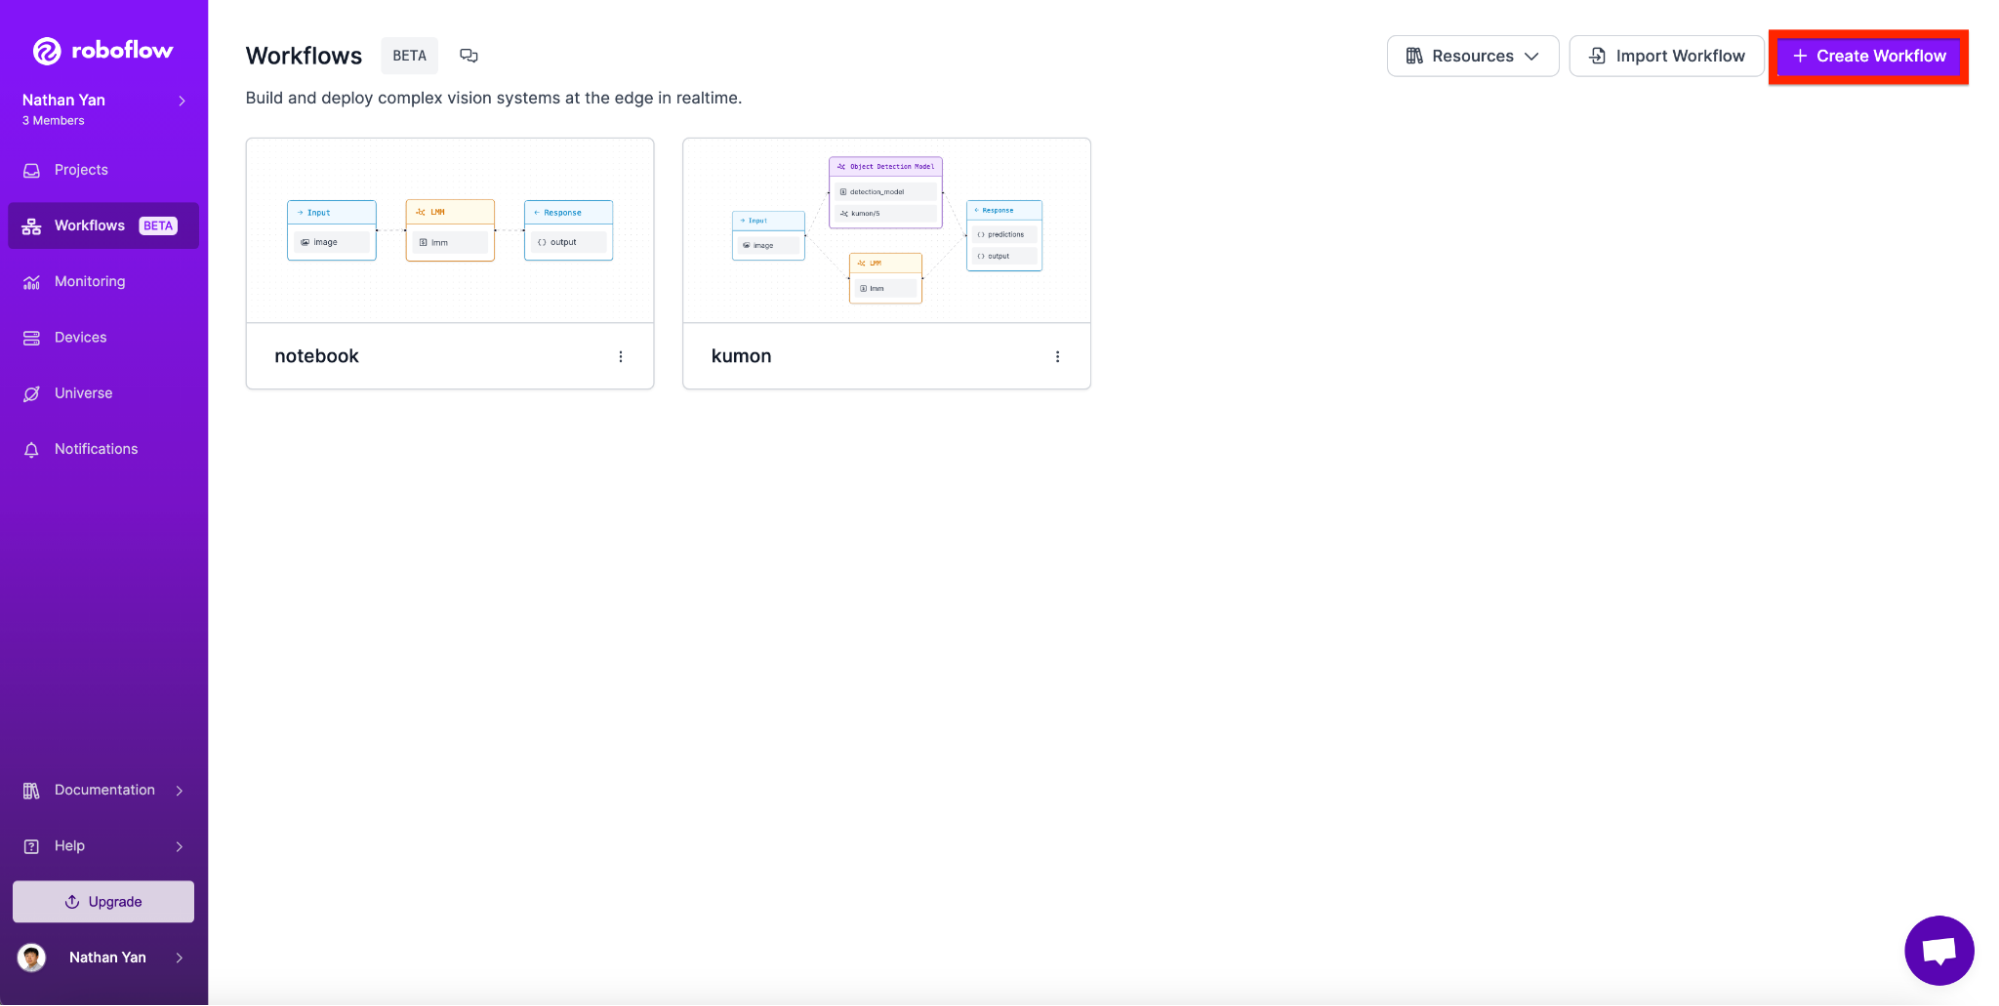
To get started, go to Workflows in the Roboflow application:

Then, click on “Create Workflow”.
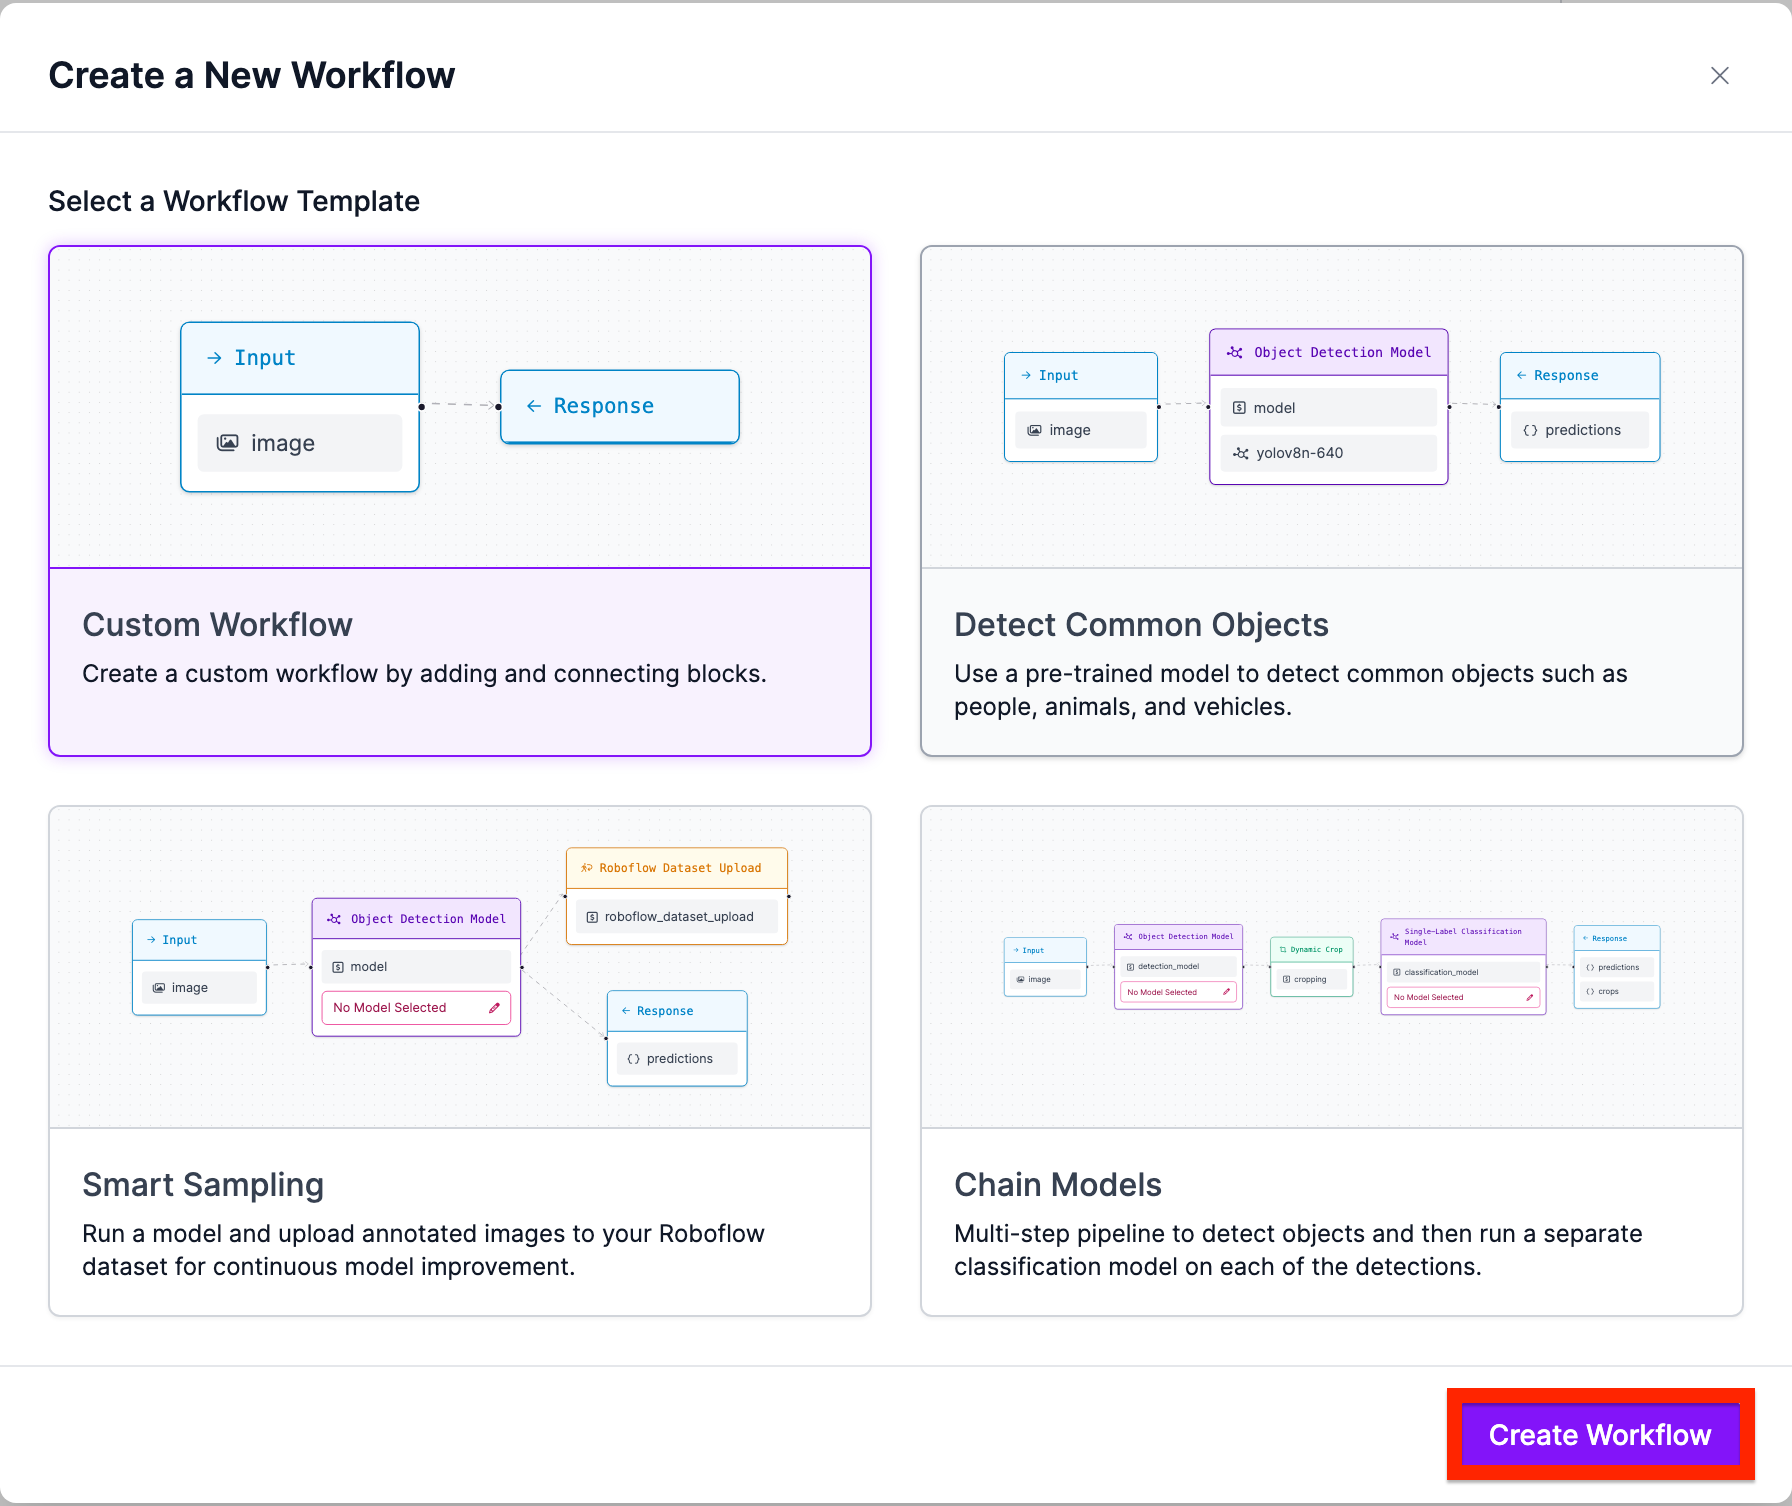
Next, click “Custom Workflow” and click “Create”:
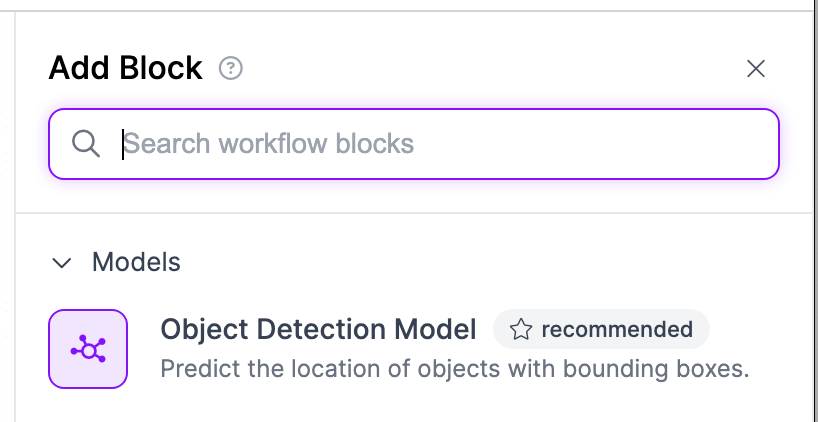
Next, navigate to add block and search for “Object Detection”:
Add the Object detection block.
Now we have to pick which specific object detection model we want to use. To do this, click on the Model button.
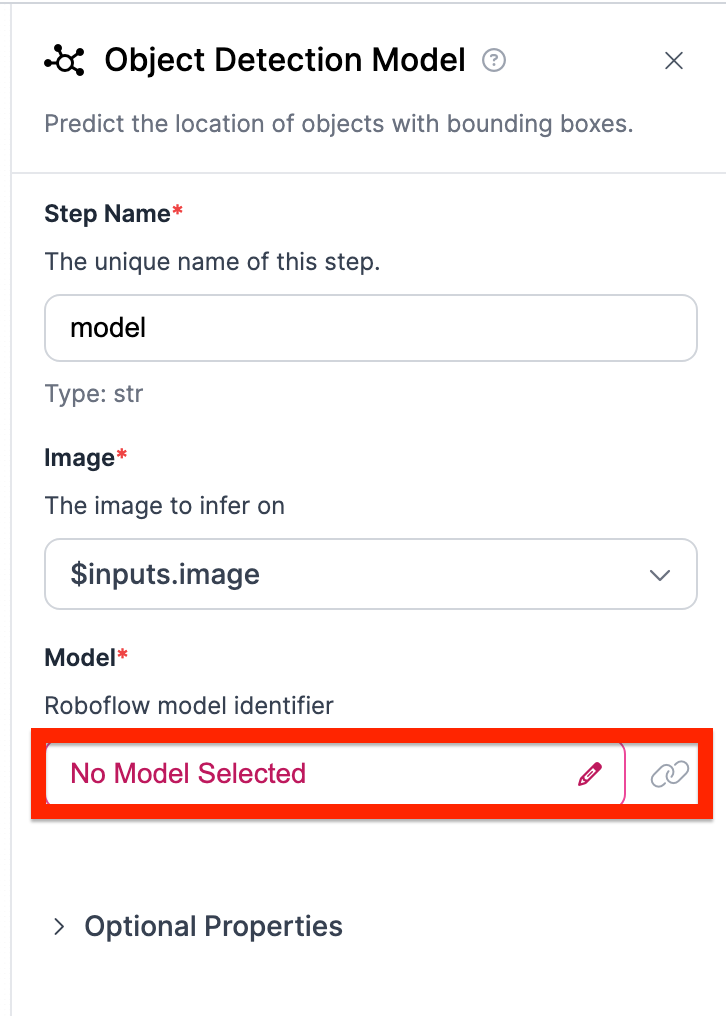
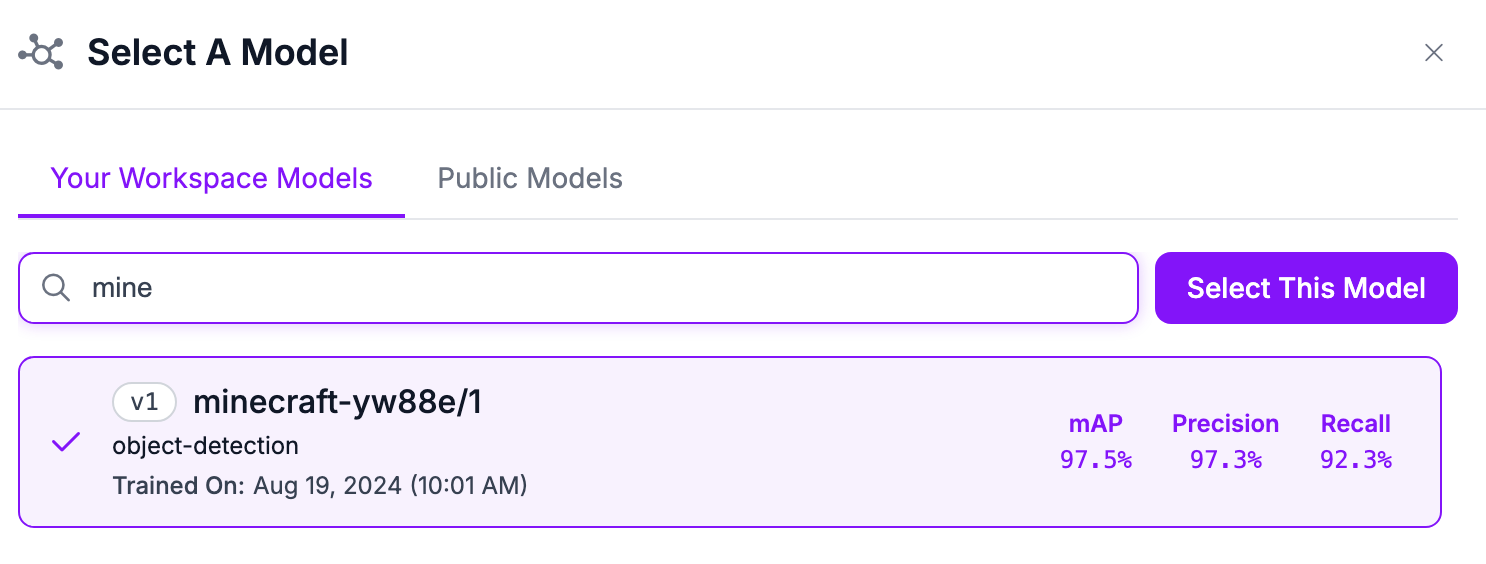
Select the specific object detection model as the one you just trained.
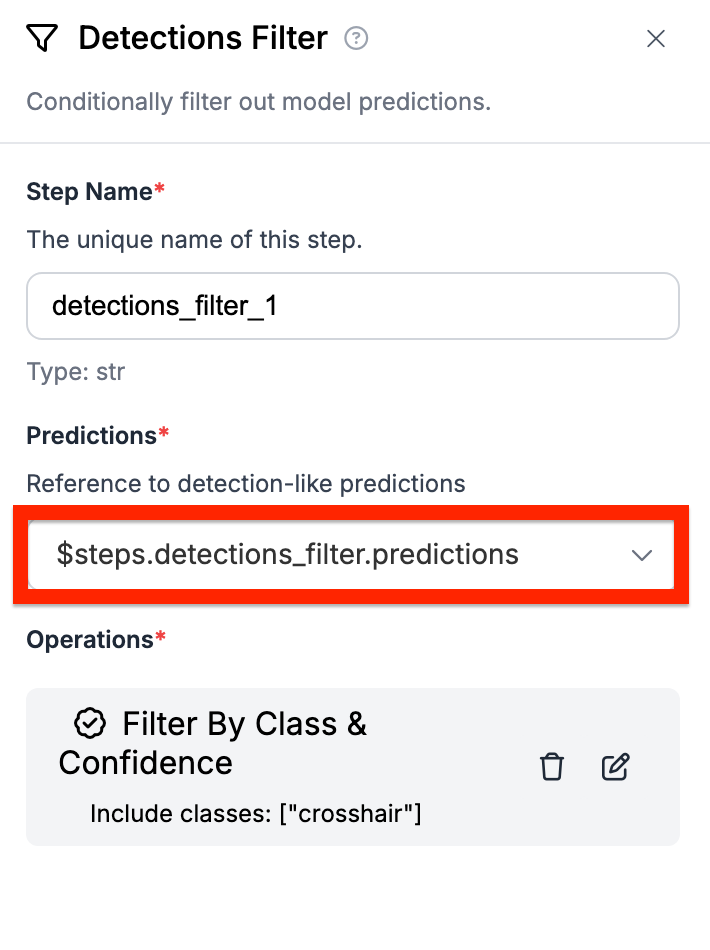
Next, we need to filter out the specific predictions. We can do this by using the filter predictions block.
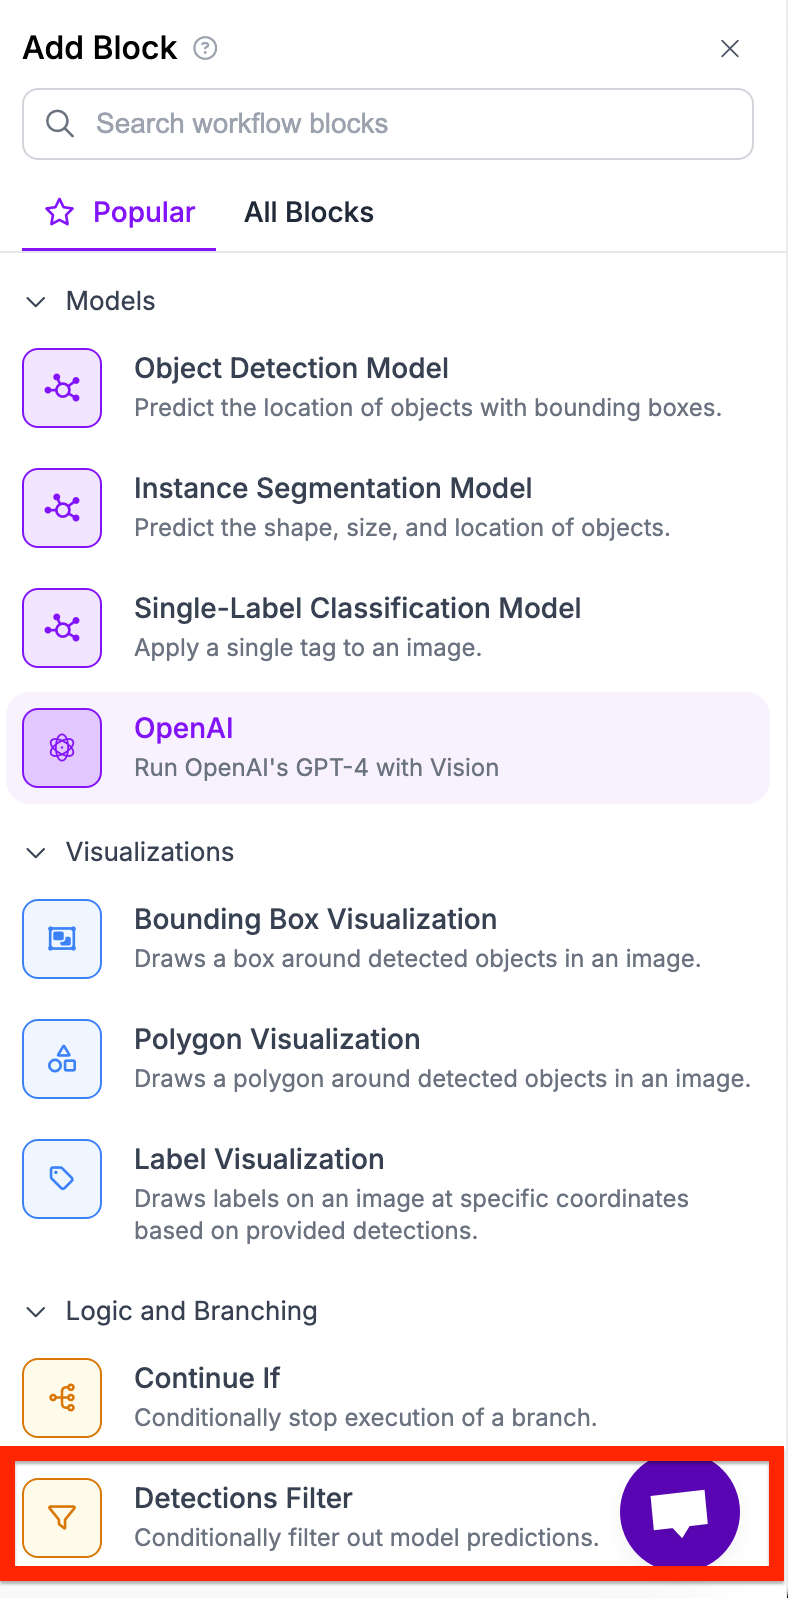
Using the block, we want to separate out tree predictions from our crosshair ones. We can achieve this using the class filter.
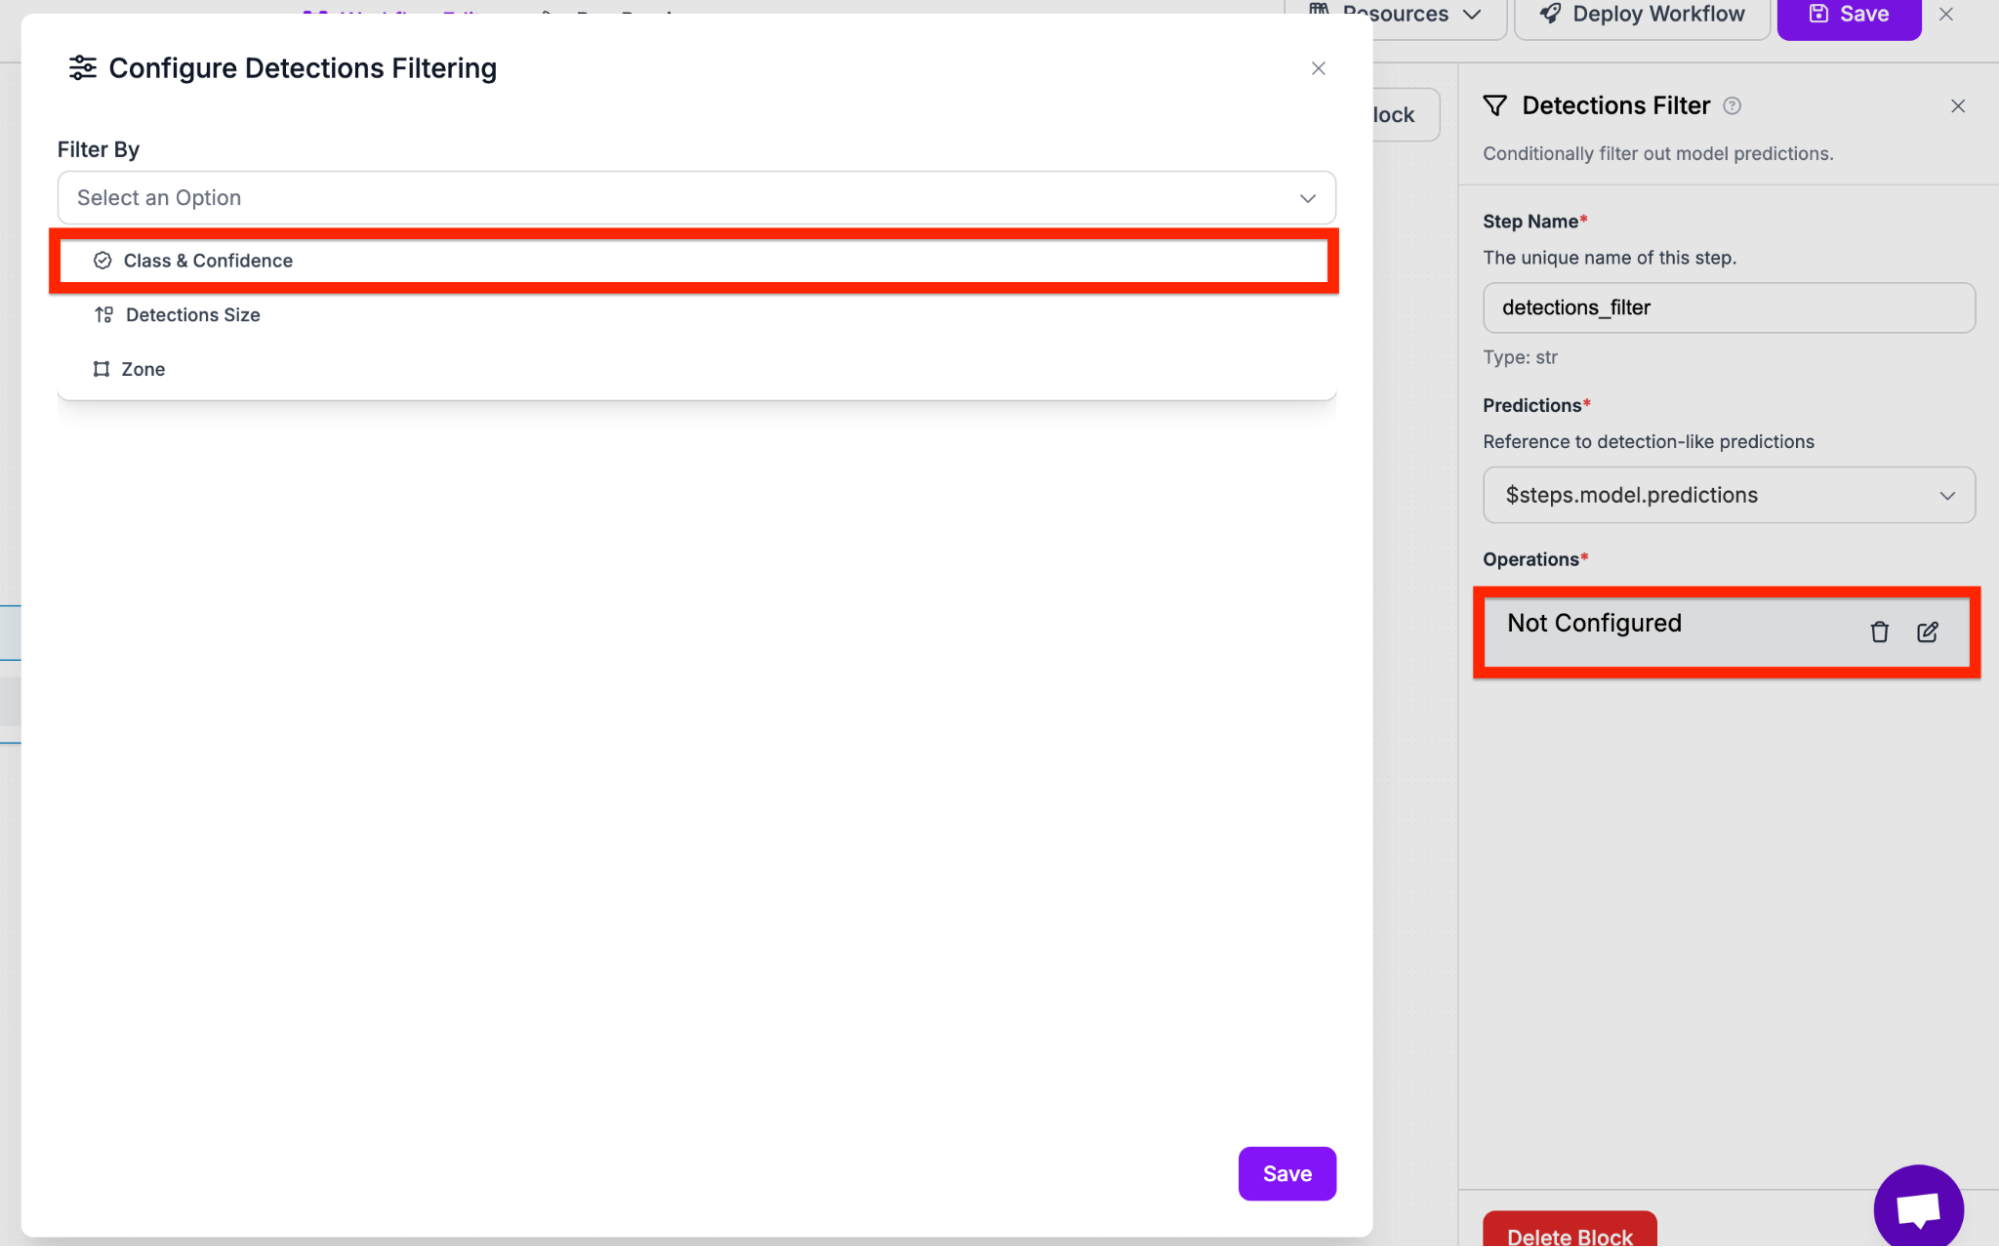
Inside the class menu, insert the specific class you want to filter for. Using the model’s classes, we will first filter for ‘crosshair’ and then repeat the step for trees.
Now your workflow should look similar to this:
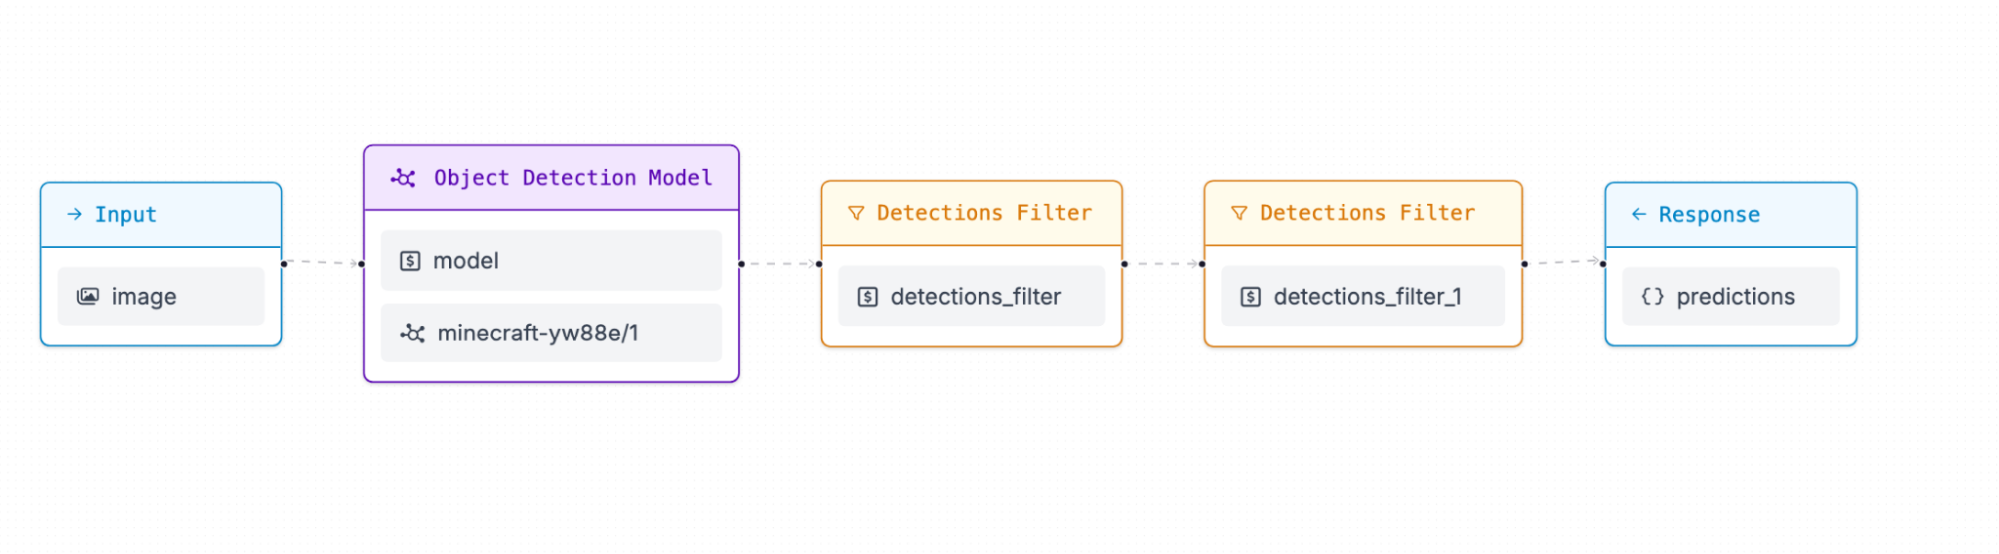
However, this is not what we want. We need to have the two detections filters connect on the object detection model and have both be an output. In order to change this, click into the second detections filter and change the reference input to be the model instead.
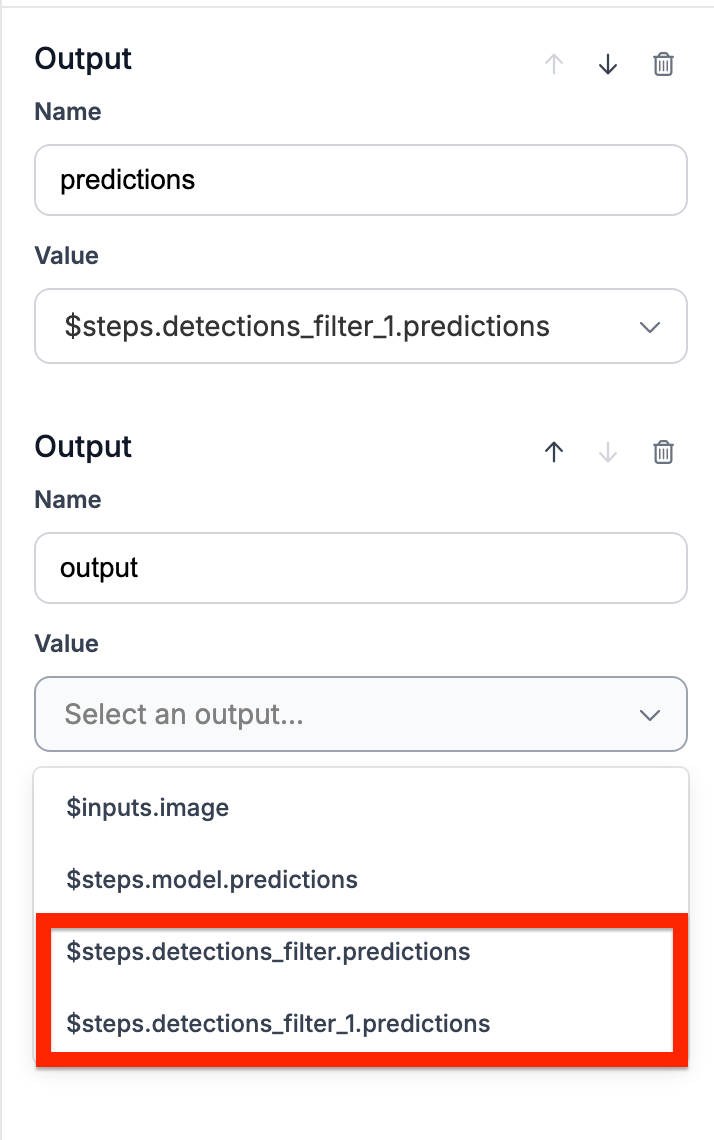
Finally, add the two as separate outputs in the response block.
Now we can save and deploy the model. Make sure to save the deploy code somewhere as we will be using it later in the tutorial.
Step 3: Download and import libraries
In this step, we will begin to download the needed libraries in order to start programming.
First download the necessary libraries:
pip install supervision inference numpy pyautoguiNext, import the libraries to a new script your preferred code editor:
import cv2
import numpy as np
import pyautogui
import supervision as sv
from inference_sdk import InferenceHTTPClient
import time
Step 4: Create the detection and mining functions
In order to see our detections, we need to use the Supervision library. Supervision offers a comprehensive list of resources for all your computer vision needs. This library will help us easily implement the visuals of the detected trees and crosshairs.
We can create a function to show predictions by using Supervision Cheatsheet’s quick start code.
def show_detections(input):
    detections = sv.Detections.from_inference(input)

    frame = sv.BoxAnnotator().annotate(
        scene=frame, detections=detections
    )
    frame = sv.LabelAnnotator().annotate(
        scene=frame , detections=detections
    )
Next, we will create a function to mine a block in Minecraft. To accomplish this, we are using pyautogui’s library in order to run a script.
Here, we use the library to left click a block, wait for four seconds for the block to break, and go forward (the w key) in order to pick up the block.
def mine_block():
    pyautogui.mouseDown(button='left')
    time.sleep(4)
    pyautogui.mouseUp(button='left')
    pyautogui.keyDown('w')
    time.sleep(1)
    pyautogui.keyUp('w')
Step #5: Create main application logic
In this function, we will predict where the closest tree is relative to your crosshair, and then mine the tree.
First, get your deployment code and use the hosted api option.
Also make sure to make a loop that takes a screenshot of the screen and sends it into your Workflow.
client = InferenceHTTPClient(
    api_url="https://detect.roboflow.com",
    api_key="API"
)

while True:
    img = pyautogui.screenshot(region = (1055, 0, 855, 510))
    frame = np.array(img)
    frame= cv2.cvtColor(frame, cv2.COLOR_RGB2BGR)

    results = client.run_workflow(
        workspace_name="",
        workflow_id="",
        images={
            "image": frame
        }
    )
Next, grab the tree and crosshair values from the workflow's output. Using these outputs, we can show the detections by using a previously defined function in step 4.
    trees = results[0]['predictions']
    crosshair = results[0]['output']

    if trees:
        show_detections(trees)

    if crosshair:
        show_detections(crosshair)

    cv2.imshow("annoated_frame", frame)
Afterwards, we have to calculate the closest tree relative to the crosshair. We can do this by using the x axis of each item. The following code loops through an array and finds the closest tree using the absolute value of the tree's x x-axis position subtracted by the crosshair’s x-axis position
    prev_abs = 2000
    num = 0
    if crosshair['predictions'] and trees['predictions']:
        for i, tree in enumerate(trees['predictions']):
            if np.abs(tree['x']-crosshair['predictions'][0]['x']) < prev_abs:
                prev_abs = tree['x']
                num = i
Using the closest tree, we need to move our cursor to a specific area on the tree in order to mine it.
To accomplish this, we first need to see if the tree is on the right of our crosshair or on the left of our crosshair.
After we find the crosshair’s position relative to the tree, we can get the cursor's movement by subtracting the x-axis distance of the crosshair by the tree distance (or the other way around for the left direction).
If the distance between the crosshair and the tree is less than 30 pixels (a random variable set), then we will call the mine_block function which will hold down our mouse and move to collect the block.
      if (crosshair['predictions'][0]['x']) > trees['predictions'][num]['x']:
            print("detected move right")
            move_amount = int(crosshair['predictions'][0]['x'] - trees['predictions'][num]['x'])
            time.sleep(0.5)
            pyautogui.moveRel(move_amount, 0)
            if ((crosshair['predictions'][0]['x']) - trees['predictions'][num]['x']) < 30:
                mine_block()

        elif (crosshair['predictions'][0]['x']) < trees['predictions'][num]['x']:
            print("detected move left")
            move_amount = int(trees['predictions'][num]['x']- crosshair['predictions'][0]['x'])
            time.sleep(0.5)
            pyautogui.moveRel(-move_amount, 0)
            if (trees['predictions'][num]['x']- crosshair['predictions'][0]['x']) < 30:
                mine_block()
Lastly, we need to set a stop key to stop our program:
    if cv2.waitKey(1) == ord('q'):
        break

cv2.destroyAllWindows()
Conclusion
By following this guide, you have successfully created your own wood mining script for Minecraft using computer vision.
Throughout this tutorial, you’ve learned how to build a functional Roboflow model, set up a Workflow, and implement directional logic to automate tasks in Minecraft. For more tutorials and resources, feel free to explore our Blog page.
Cite this Post
Use the following entry to cite this post in your research:
Nathan Y.. (Aug 23, 2024). Find Minecraft Trees with Computer Vision. Roboflow Blog: https://blog.roboflow.com/find-minecraft-trees-with-computer-vision/