
Imagine controlling your computer with a simple wave of your hand–no mouse, no keyboard, just intuitive gestures. Well, with Roboflow’s computer vision and object detection capabilities, it's now easier than ever to build a tool to effectively control your OS with nothing but your hands. In this guide, I will walk you through on how to create a project like this, along with how you can potentially improve or scale this project to meet your needs and impress your friends.
Here’s a video demo of the project we are going to build: magicOS Demo.
Let’s get started!
Create a Gesture Recognition Model
First, head on over to Roboflow, and either create an account if you’re a first time user or login if you already have one.
Next, choose or create a personal workspace that will house your model and select your plan. For this project, I'm going to be using a public plan.
Once you're in your workspace, navigate to the projects section on the left bar and create a new project.
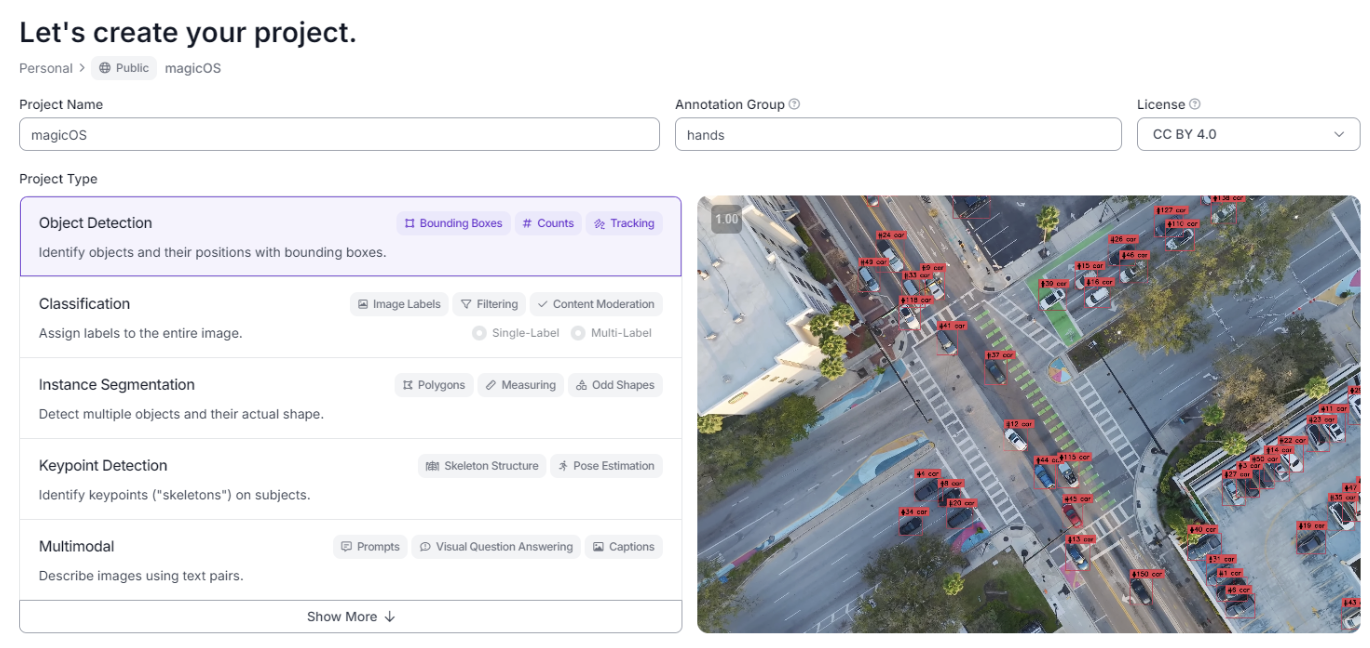
You can name the project whatever you’d like, but be sure to select the project type as object detection. This is, after all, what we are trying to achieve with this model. Additionally, set the annotation group (the data we’re labeling) as “hands”, because throughout we will be labeling different gestures–on our hands.
Now that we’ve set up our project on Roboflow, it's time to feed it some actual data. Many datasets can be found on Roboflow Universe, but for this project I suggest using a personal video of your setup for more accurate models and less raw data. This is because training the model on frames in the same camera angle and orientation will allow it to predict other gestures based on live footage of your hands–also taken in the same angle and orientation. On a side note, recording footage in greyscale may help the model recognize gestures faster and with more scalability, as the model will learn to associate the shape of the hand with a gesture rather than colors, which is not what we want.
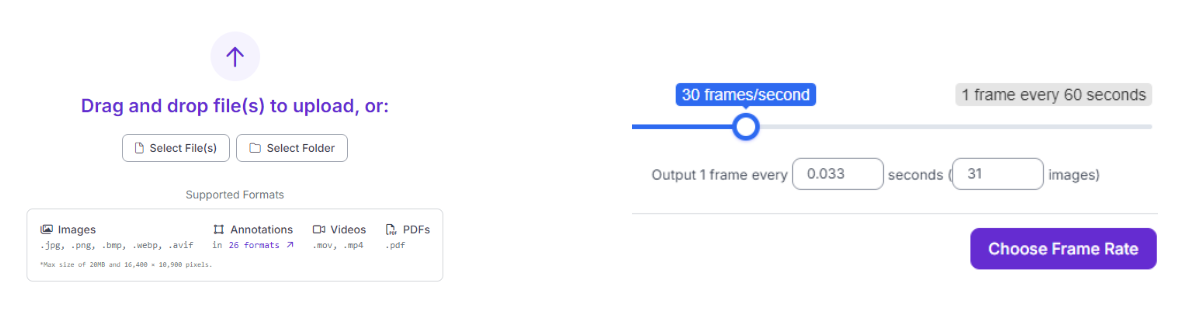
Once you’ve recorded a good amount of data (for me it was a 15 second greyscale video extracted at 30 fps with me performing only two gestures–swipe and snap), click on the upload data tab of your project on Robloflow and upload the clip. I suggest choosing a framerate between 30-60 fps to make sure you can capture all the frames of each gesture. You can always upload more data in the future if you need to train the model more.
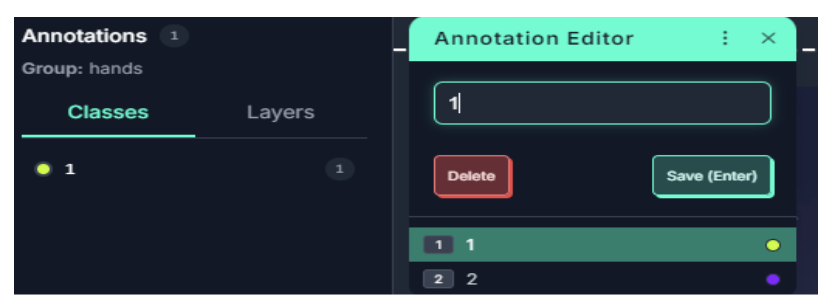
Once the images are uploaded, click on the classes and tags tab of your project. We will now create classes to help us label our different frames, which will allow the model to learn what it should look for when identifying a gesture. Click the add button, and then create a numbered list with the number of gestures you plan for the model to recognize. I chose to do this for easy labeling of images, but in reality each item in the list should be a potential object you plan to recognize. So for my case, think of “1” associated with a swipe and “2” associated with a snap.

Now, head on over to the annotation tab of the project and click on “start annotating” on the data you uploaded. Annotating our frames will consist of highlighting our hand (performing the gesture), along with labeling it with the right class (numbers symbolic to the different gestures).
When you’re in the annotation editor, be sure to have the bounding box tool selected.
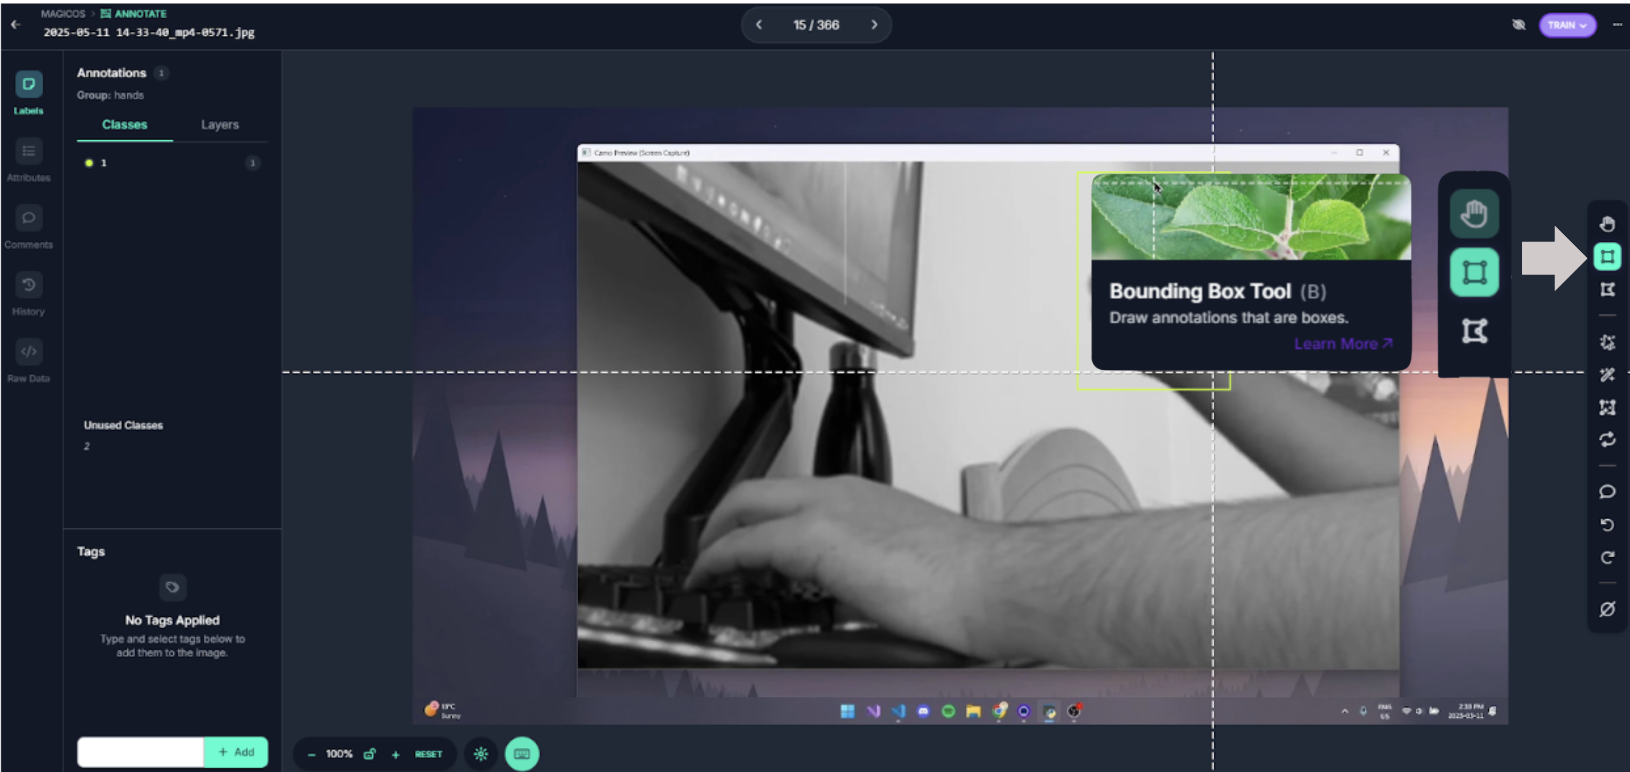
Once selected, draw a box around the hand doing the gesture. If there is no gesture being performed in a frame, you don’t need to add any annotations. In the image above, a swipe frame was being performed, so I created a tight-fitting box around the hand.
Finally, label the annotation with the number of the gesture. Earlier in the classes section, I mentally defined the class of “1” as a swipe, so here I would choose 1 in the annotation editor. This may vary depending on what sort of gestures you intend to include.
Once you’ve annotated enough images (in my case it was around 500 for an accurate model with only 2 gestures), exit the annotation editor and add the annotated images to the dataset. The model is ready to be trained.
Train the Model
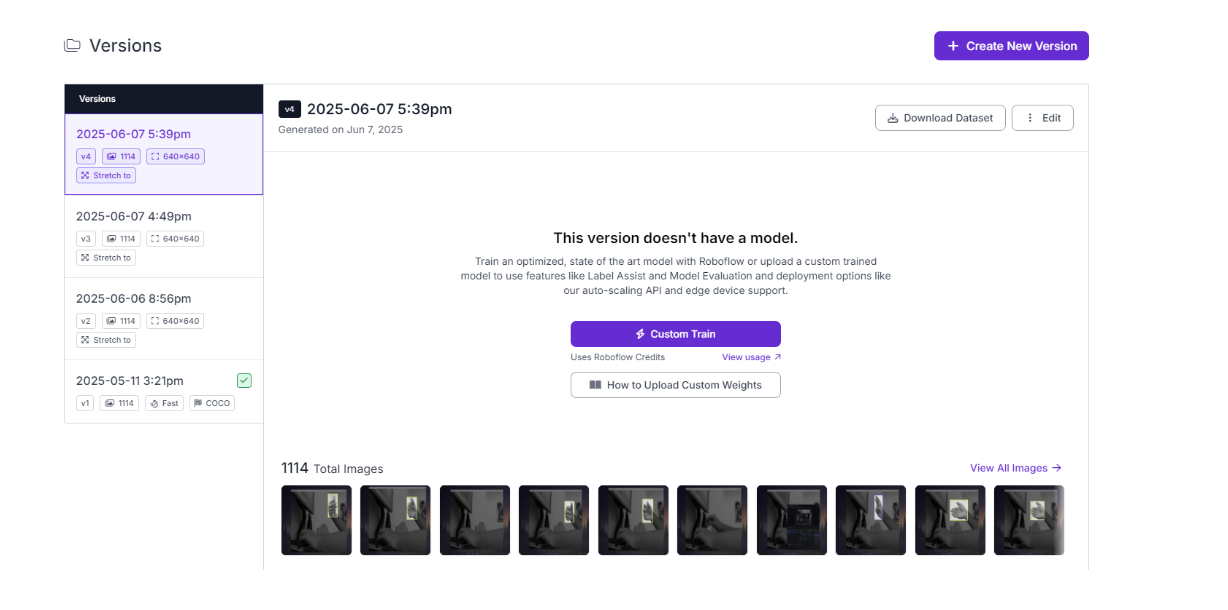
Head over to the versions tab of your project and continue with the default setting for the preprocessing and augmentation steps. Hit 'Create' to create a new version of the project.
On your version, click on “custom train” and select Roboflow 3.0 (YOLOv8) as the model architecture.
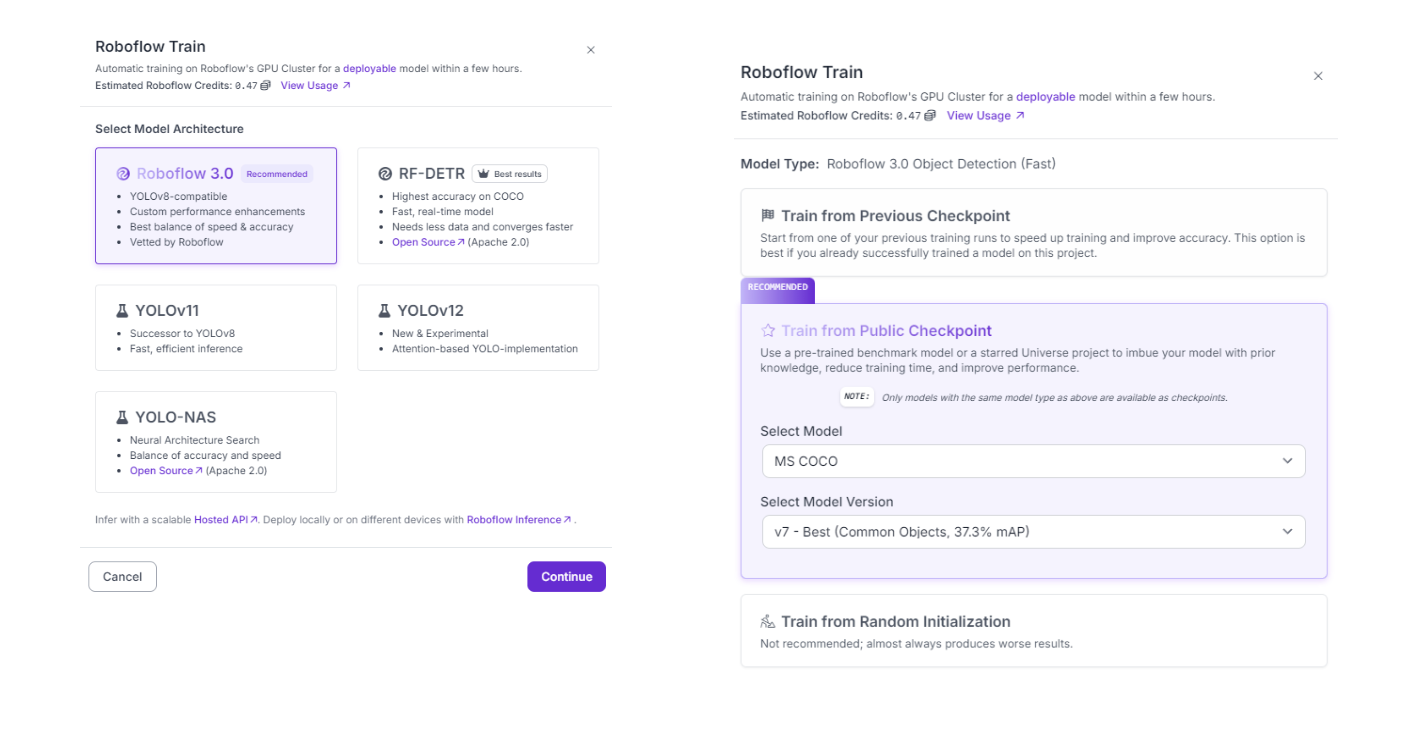
Also make sure to train from a public checkpoint, as this will make training faster and improve performance.
Let the model finish training. In the meantime, we can get started with coding the program.
Get Live Footage of Hands
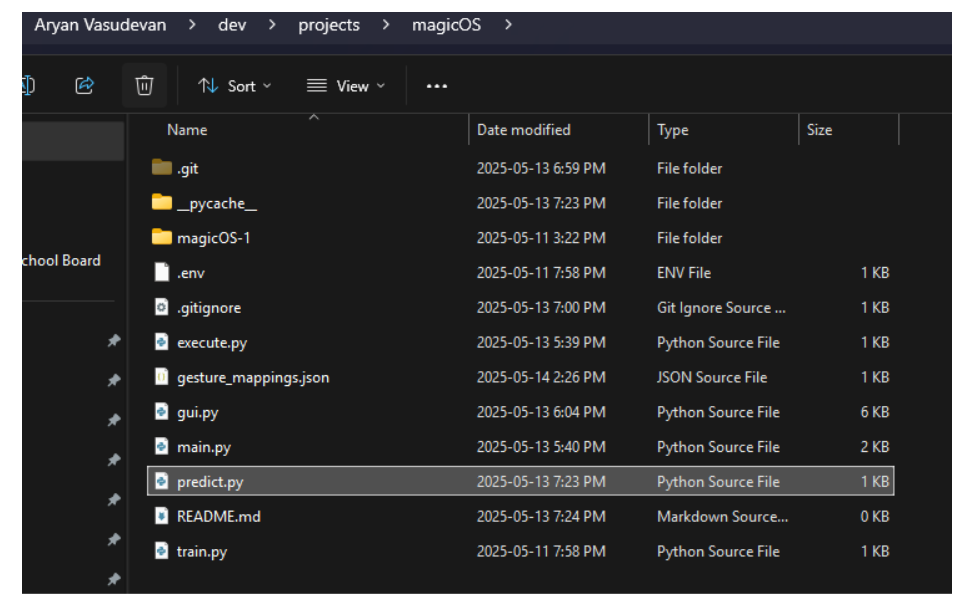
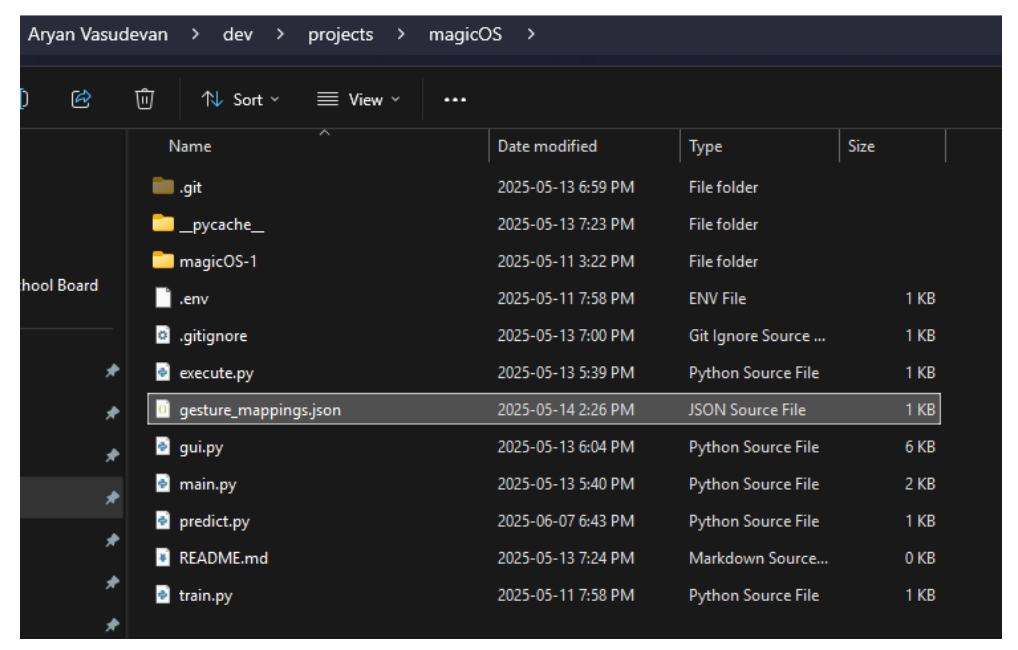
Create a new folder/workspace for your project on your desktop. Inside the folder, create a file called main.py. Open it with a code editor of your choice.

Keep in mind that you will need Python for this project, so if you don’t have it set up or installed, follow this guide first: Microsoft Python Guide.
Our file, main.py, will be the center of the program–gathering footage, calling the model predictions, and also calling the actions we intend to execute.
There are many ways to get live footage with Python, however because I used my phone as a camera, I chose to use Camo Studio (Camo Studio Downloads) along with the phone app to get footage.
Open a terminal and run the following commands:
pip install numpy pygetwindow mss opencv-python roboflowThen, in main.py, add the following code:
import cv2

# Get the Camo Studio Window
window = gw.getWindowsWithTitle("Camo Studio")[0]
window.moveTo(-2780, -248)
window.resizeTo(500, 600)
With camo studio open and live footage being recorded, this code moves the window to a specific location to consistently grab the right area for footage during future executions of the program.
Hence, to get the frames, update main.py:
import pygetwindow as gw
import cv2
import mss

# Get the Camo Studio Window
window = gw.getWindowsWithTitle("Camo Studio")[0]
window.moveTo(-2780, -248)
window.resizeTo(500, 600)

with mss.mss() as sct:
    monitor = sct.monitors[0]

    # Section being recorded
    region = {
        "top": monitor["top"] + 300,
        "left": monitor["left"] + 200,
        "width": 1500,
        "height": 800
    }

    while True:
        # Get the current frame
        screenshot = sct.grab(region)
        frame = np.array(screenshot)
        frame = cv2.cvtColor(frame, cv2.COLOR_BGRA2RGB)
The mss library is used here to take a screenshot of the camo studio window we resized and moved in the previous bit of code. The region you chose can change depending on your screen and where you chose to place the window, as it is grabbing the top left corner, width, and height of the window. During the loop, we use the mss library to grab a screenshot, turn the frame into an array with numpy, and then change it to rgb with open-cv, a better format for Roboflow.
Now that we have the frames, we can start making predictions for them.
Make Hand Gesture Predictions
In the same folder as your main.py, create another file called predict.py. This file will hold our prediction function, and we will be passing in the frame everytime the loop in main.py executes.
Head back over to your Roboflow project and check to see if your model is done training. If it is, you can add the following code to predict.py:
from roboflow import Roboflow
import os
from dotenv import load_dotenv
load_dotenv()
# Roboflow model
rf = Roboflow(api_key=os.getenv("API_KEY"))
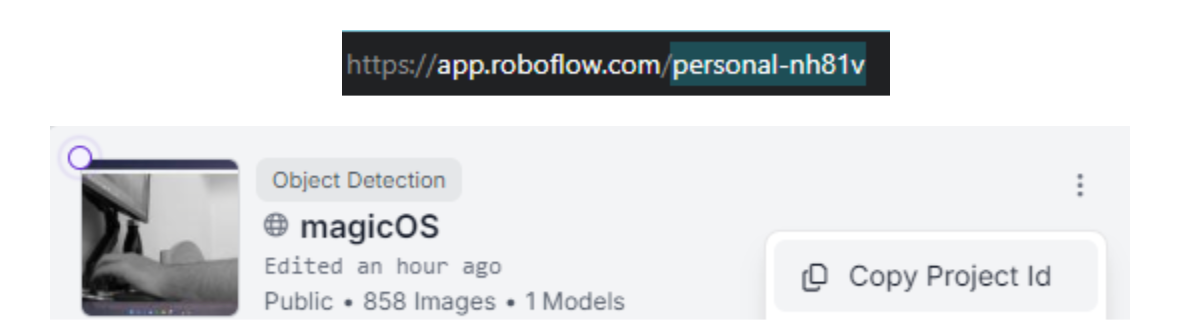
project = rf.workspace("personal-nh81v").project("magicos")
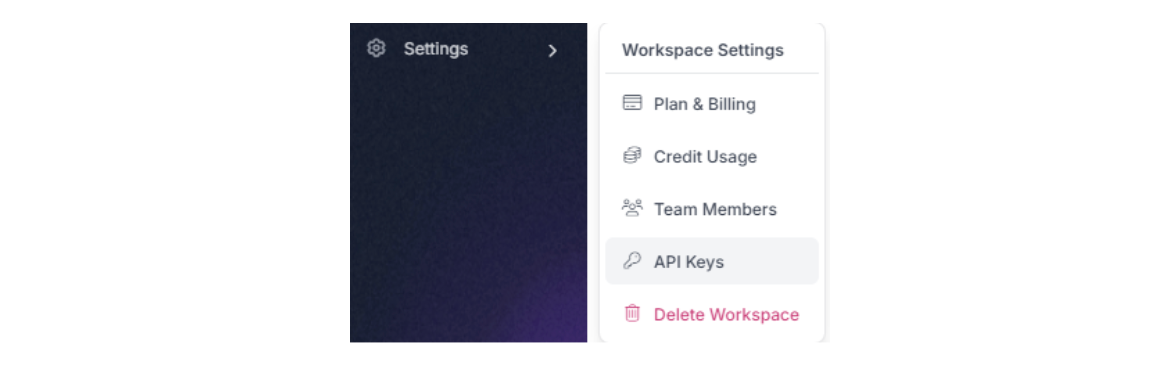
model = project.version(1).modelI used the dotenv and os libraries to hide my Roboflow API key. To do the same, follow this guide: Environment Variables in Python. If you don’t plan to publish the code or show it to anyone, you can remove the import os, import dotenv, and load_dotenv() functions and replace the Roboflow function parameter with your actual API key. You can find it in the workspace setting of your project.
Additionally, replace the workspace name and project id in the rf.workspace() command with your own workspace name and your own project id. You can find them in the url and project highlight respectively.
If this is not the first version of the model you trained, change the number in the project.version() to match whatever version you’re using.
Once you’ve loaded the model, define a prediction function that takes in a frame (we will later pass in from main.py):
from roboflow import Roboflow
import os
from dotenv import load_dotenv

load_dotenv()

# Roboflow model
rf = Roboflow(api_key=os.getenv("API_KEY"))
project = rf.workspace("personal-nh81v").project("magicos")
model = project.version(1).model

def predict(frame):
    # Make prediction of the frame
        predictions = model.predict(frame, confidence=40, overlap=30).json()

        # Process predictions through rf model
        for prediction in predictions['predictions']:
            gesture = prediction['class']
            confidence = prediction['confidence']

            # Depending on what the model predicts
            if gesture == "1" and confidence >= 0.8:
                return "swipe"
            elif gesture == "2" and confidence >= 0.8:
                return "snap"
        return "neutral"
This function will return the type of gesture you’re doing depending on the frame. Keep in mind, there is a confidence threshold so it will only return a prediction if it truly believes that a gesture has been done. This may be adjusted along with the number of gestures you return. Earlier, I only trained it on snap and swipe gestures, and associated them with predictions of “1” and “2” respectively. Change the conditions for your own gestures.
Next, we shall store the action we assign to each gesture.
Store Gesture Data in a JSON
In the parent folder, create a file called gesture_mappings.json.
This file will hold the type of action we plan to do once we perform a gesture. For my case, I planned to be able to do two different actions from a gesture–opening an application, and running a command. Along with that, I trained the model to only recognize a snap gesture and swipe gesture, so my gesture_mappings.json looks something like this:
{
    "swipe": {
        "type": "keybind",
        "value": "alt+tab"
    },
    "snap": {
        "type": "app",
        "value": "C:\\Program Files\\Google\\Chrome\\Application\\chrome.exe"
    }
Here, each gesture has a type property and a value property, used to indicate the type of action we wish to perform and the data necessary for it respectively.
Depending on your different gestures and what sort of actions to perform, you will have a different mapping. However, the JSON format makes it really easy to manage all your gestures and the type of action you want them to do. It's as simple as changing the type and value properties to any added gestures. On a side note, we will later create a tkinter GUI to remap gestures on the fly, making it a lot easier than having to manually change this JSON.
Now let’s do some cool stuff with this.
Do Cool Stuff with the Predictions
Go back to main.py and import the prediction function we just made. Additionally, we can now call the predict function for every frame we receive.
import pygetwindow as gw
import cv2
import mss
from predict import predict

# Get the Camo Studio Window
window = gw.getWindowsWithTitle("Camo Studio")[0]
window.moveTo(-2780, -248)
window.resizeTo(500, 600)

with mss.mss() as sct:
    monitor = sct.monitors[0]

    # Section being recorded
    region = {
        "top": monitor["top"] + 300,
        "left": monitor["left"] + 200,
        "width": 1500,
        "height": 800
    }

    while True:
        # Get the current frame
        screenshot = sct.grab(region)
        frame = np.array(screenshot)
        frame = cv2.cvtColor(frame, cv2.COLOR_BGRA2RGB)

        # Make a prediction with the predict function
        gesture = predict(frame)
With the gesture prediction, we can read the JSON file to find what the executed action should be:
import pygetwindow as gw
import cv2
import mss
import json
from predict import predict

# Get the Camo Studio Window
window = gw.getWindowsWithTitle("Camo Studio")[0]
window.moveTo(-2780, -248)
window.resizeTo(500, 600)

with mss.mss() as sct:
    monitor = sct.monitors[0]

    # Section being recorded
    region = {
        "top": monitor["top"] + 300,
        "left": monitor["left"] + 200,
        "width": 1500,
        "height": 800
    }

    while True:
        # Get the current frame
        screenshot = sct.grab(region)
        frame = np.array(screenshot)
        frame = cv2.cvtColor(frame, cv2.COLOR_BGRA2RGB)

        # Make a prediction with the predict function
        gesture = predict(frame)

        # Read the JSON file to find the action
        with open(MAPPINGS_FILE, "r") as f:
            mappings = json.load(f)
            action = mappings.get(gesture)
Make sure to import the json library. You may also be wondering why we are re-reading the file every time the loop executes. This is done because of potential changes to the JSON file while the program is run, so that it does not require another execution.
In the parent folder, create another file called execute.py. This file will hold our execution function, which will actually do something on our OS. My two chosen actions, opening an app or running a command, require the subprocess library and keyboard library. The subprocess library is already included in Python, so make sure to install the keyboard library by running the following command in the terminal:
pip install keyboardThen add the following to execute.py:
import subprocess
import keyboard

def execute(action):
    if action["type"] == "keybind":
        keys = action.get("value", "")
        if keys:
            keyboard.send(keys)

    elif action["type"] == "app":
        app_path = action.get("value", "")
        if app_path:
            try:
                subprocess.Popen(app_path)
            except Exception as e:
                print(f"Failed to launch application: {e}")
This code takes in the action we determined in main.py and actually uses the libraries to do the action on the OS. The action object is a dictionary, so in the function we can reference both the type and value. This overall workflow with the JSON and execute function makes changing and adding gestures super easy, so you can always make it more powerful later on. However, keep in mind that the process of how it performs the action may vary depending on what the action requires.
Now that the main features work, we must add a cooldown between gestures so as to not make actions overlap. To do this, update main.py:
import numpy as np
import mss
import pygetwindow as gw
import cv2
import time
import json
from predict import predict
from execute import execute

MAPPINGS_FILE = "gesture_mappings.json"

# Get the Camo Studio Window
window = gw.getWindowsWithTitle("Camo Studio")[0]
window.moveTo(-2780, -248)
window.resizeTo(500, 600)

# Cooldown
COOLDOWN_PERIOD = 2.0
last_action_time = 0
cooldown_active = False

with mss.mss() as sct:
    monitor = sct.monitors[0]

    # Section being recorded
    region = {
        "top": monitor["top"] + 300,
        "left": monitor["left"] + 200,
        "width": 1500,
        "height": 800
    }

    while True:
        # Get the current frame
        screenshot = sct.grab(region)
        frame = np.array(screenshot)
        frame = cv2.cvtColor(frame, cv2.COLOR_BGRA2RGB)

        gesture = predict(frame)

        # Time for cooldown
        current_time = time.time()

        # If a gesture is made outside of cooldown
        if not cooldown_active and gesture != "neutral":
            print(f"Gesture detected: {gesture}")

            # Execute necessary action
            with open(MAPPINGS_FILE, "r") as f:
                mappings = json.load(f)
            action = mappings.get(gesture)
            execute(action)

            # Reset cooldown
            cooldown_active = True
            last_action_time = current_time

        elif cooldown_active:
            if current_time - last_action_time >= COOLDOWN_PERIOD:
                cooldown_active = False
This code uses the time library and makes sure that the cooldown is not active before making a gesture.
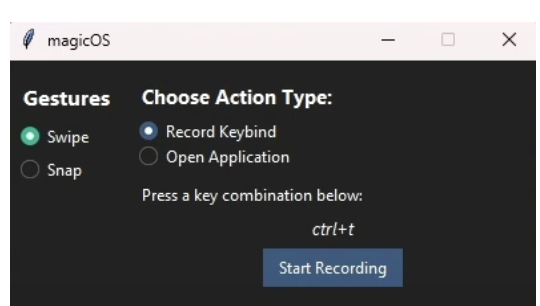
Create a tkinter GUI to Manage The Mappings
With that, the project is now working. However, anytime someone wishes to change the mappings for a specific gesture, they must look through and edit a JSON file, which is not very user-friendly. We can fix this by creating a tkinter GUI to manage and edit the JSON file, and have it run along with main.py.
In the parent folder, create a file called gui.py. Additionally, open the terminal and run the following command:
pip install ttkbootstrap winappsThese libraries will help style the GUI and improve the way we select certain apps when choosing to run.
In gui.py, add the following:
import tkinter as tk
from tkinter import ttk, messagebox
from ttkbootstrap import Style
import winapps
import json
import threading
import keyboard
import os

MAPPINGS_FILE = "gesture_mappings.json"

class magicOSApp:
    def __init__(self, root):
        self.root = root
        self.root.title("magicOS")
        self.style = Style("darkly")
        self.selected_gesture = tk.StringVar()
        self.action_type = tk.StringVar(value="keybind")
        self.selected_app = tk.StringVar()
        self.keybind = tk.StringVar()
        self.app_list = self.get_installed_apps()

        self.create_layout()

    def create_layout(self):
        sidebar = ttk.Frame(self.root, width=200)
        sidebar.pack(side="left", fill="y", padx=10, pady=10)

        main_panel = ttk.Frame(self.root)
        main_panel.pack(side="right", fill="both", expand=True, padx=10, pady=10)

        ttk.Label(sidebar, text="Gestures", font=("Segoe UI", 12, "bold")).pack(pady=5)
        gestures = ["swipe", "snap"]
        for g in gestures:
            ttk.Radiobutton(
                sidebar,
                text=g.capitalize(),
                variable=self.selected_gesture,
                value=g,
                command=self.on_gesture_select,
                style="success"
            ).pack(fill="x", pady=5)

        ttk.Label(main_panel, text="Choose Action Type:", font=("Segoe UI", 11, "bold")).pack(anchor="w", pady=5)
        ttk.Radiobutton(main_panel, text="Record Keybind", variable=self.action_type, value="keybind",
                        command=self.update_action_panel).pack(anchor="w", pady=2)
        ttk.Radiobutton(main_panel, text="Open Application", variable=self.action_type, value="app",
                        command=self.update_action_panel).pack(anchor="w", pady=2)

        self.action_container = ttk.Frame(main_panel)
        self.action_container.pack(fill="x", pady=10)

        self.save_btn = ttk.Button(main_panel, text="Save Mapping", command=self.save_mapping)
        self.save_btn.pack(pady=10)

        self.update_action_panel()

    def on_gesture_select(self):
        print(f"Selected gesture: {self.selected_gesture.get()}")

    def record_keybind(self):
        self.keybind_display.config(text="Listening... Press your combo")

        def listen():
            combo = keyboard.read_hotkey(suppress=True)
            self.keybind.set(combo)
            self.keybind_display.config(text=combo)

        threading.Thread(target=listen, daemon=True).start()

    def update_action_panel(self):
        for widget in self.action_container.winfo_children():
            widget.destroy()

        if self.action_type.get() == "keybind":
            ttk.Label(self.action_container, text="Press a key combination below:").pack(anchor="w")
            self.keybind_display = ttk.Label(self.action_container, text="Not recorded", font=("Segoe UI", 10, "italic"))
            self.keybind_display.pack(pady=5)
            ttk.Button(self.action_container, text="Start Recording", command=self.record_keybind).pack()
        else:
            ttk.Label(self.action_container, text="Select an App to Launch:").pack(anchor="w")
            self.app_dropdown = ttk.Combobox(self.action_container, textvariable=self.selected_app)
            self.app_dropdown['values'] = [name for name, _ in self.app_list]
            self.app_dropdown.pack(fill="x", pady=5)

    def save_mapping(self):
        gesture = self.selected_gesture.get()
        if not gesture:
            messagebox.showwarning("No gesture", "Please select a gesture to map.")
            return

        if self.action_type.get() == "keybind":
            value = self.keybind.get().strip()
            if not value:
                messagebox.showwarning("Empty Keybind", "Please enter a keybind.")
                return
        else:
            app_name = self.selected_app.get()
            if not app_name:
                messagebox.showwarning("No App", "Please select an application.")
                return

            # Find the corresponding winapps object
            app_obj = next((app for name, app in self.app_list if name == app_name), None)
            if not app_obj:
                messagebox.showerror("Error", f"Application '{app_name}' not found.")
                return

            value = self.resolve_app_path(app_obj)
            if not value:
                messagebox.showerror("Error", f"Could not find executable for '{app_name}'.")
                return

        # Load existing mappings
        try:
            with open(MAPPINGS_FILE, "r") as f:
                mappings = json.load(f)
        except FileNotFoundError:
            mappings = {}

        mappings[gesture] = {
            "type": self.action_type.get(),
            "value": value
        }

        with open(MAPPINGS_FILE, "w") as f:
            json.dump(mappings, f, indent=4)

        messagebox.showinfo("Success", f"Mapped '{gesture}' to {self.action_type.get()}:\n{value}")

    def get_installed_apps(self):
        apps = list(winapps.list_installed())
        return sorted([(app.name, app) for app in apps], key=lambda x: x[0]) or [("No apps found", None)]

    def resolve_app_path(self, app):
        if app.install_location and os.path.isdir(app.install_location):
            for file in os.listdir(app.install_location):
                if file.lower().endswith(".exe"):
                    return os.path.join(app.install_location, file)
        return None

root = tk.Tk()
root.geometry("400x250")
root.resizable(False, False)
app = magicOSApp(root)
root.mainloop()
This will create a user-friendly UI that will help manage our gestures.
As I didn’t cover the usage of the tkinter library, it’s definitely worth checking out this tutorial if you plan to design Python GUI in the future.
Gesture Recognition Applications with Computer Vision
And with that, our project is complete! However, there is always room to expand on this project, with the only real limitation being how much data you plan to record.
If you’re looking to clone the repository, you can view it on my github–magicOS Repo.
For any individual questions, you can email vasudevan.aryan@gmail.com.
Best of luck!
Cite this Post
Use the following entry to cite this post in your research:
Contributing Writer. (Jun 10, 2025). Gesture Recognition Applications with Vision AI. Roboflow Blog: https://blog.roboflow.com/gesture-recognition/