
Selecting the right lens for your machine vision camera is crucial for the success of any imaging application. Whether you're involved in industrial automation, quality control, robotics, or any field that relies on precise image capture, the lens you choose directly impacts the usefulness of your images.
But with an overwhelming amount of options available, how do you choose the right lens for your machine vision system? This guide aims to simplify the process by breaking down the key factors you need to consider. We'll explore everything from lens mount types and sensor compatibility to focal lengths and environmental considerations.
Read on to discover how the right lens can enhance image quality, reduce errors, and ultimately improve the efficiency of your machine vision applications.
Why Lens Selection Matters in Machine Vision
In machine vision applications, every pixel counts. The lens serves as the eye of the camera, determining how the sensor perceives the world. An poorly selected lens can lead to issues like:
- Blurry or distorted images
- Insufficient field of view
- Inaccurate measurements due to optical aberrations
Understanding Lens Mount Types
First, it is essential that the lens physically fits your camera. This compatibility is determined by the lens mount type. Understanding the different types of mounts and their implications is key to a successful setup.
Common Lens Mount Types in Machine Vision
There are four common types of mounts that you will encounter in a machine vision environment:
- C-Mount: The most widely used mount in machine vision. It has a flange focal distance of 17.526 mm and a thread size of 1" diameter with 32 threads per inch. C-mount lenses are compatible with a wide range of cameras and are suitable for sensors up to 1" in size.
- CS-Mount: Similar to C-mount but with a flange focal distance of 12.526 mm, which is 5 mm shorter. CS-mount lenses are typically used with cameras that have smaller sensors (1/2" or smaller).
- F-Mount: Developed by Nikon, F-mount lenses are used for larger format sensors. They have a bayonet-style mount and are suitable for applications requiring high-resolution imaging.
- M12 Mount (S-Mount): Also known as board lenses, M12 mounts are small and lightweight, making them ideal for compact cameras and applications where space is limited.
Using a lens with the wrong mount type means it won't physically attach to the camera, or it may not position the lens at the correct distance from the sensor, resulting in unfocused images.
In addition, even with adapters, mismatched mounts can introduce issues like light leaks or misalignment, affecting image quality.
To choose the right mount, we recommend:
- Check Camera Specifications: Always start by reviewing your camera's technical datasheet to determine the mount type it supports.
- Consider Adapter Use Carefully: While adapters can provide flexibility, they may introduce unwanted variables into your system. Use them only when necessary.
- Standardization: If possible, standardize on a mount type across your systems to simplify lens selection and inventory management.
Matching Lens to Camera Sensor Size
The size of your camera's sensor is a critical factor in lens selection. Sensor size affects the lens's ability to properly project an image onto the sensor without causing vignetting or distortion.
In machine vision, typical sensor sizes include 1/3", 1/2", 2/3", 1", and larger formats like APS-C or full-frame sensors.
Sensor sizes are often denoted in inches, but this measurement doesn't correspond directly to physical dimensions.
Camera sensors produce an image circle. This is a circular area of the projected image that the lens produces. It must be large enough to cover the sensor entirely.
If the image circle is smaller than the sensor, you'll experience vignetting, where the corners of the image appear dark or black because they are outside the image circle.

Always choose a lens designed for the same or larger sensor size than your camera's sensor.
Using a lens rated for a larger sensor than yours can improve image quality by utilizing the lens's "sweet spot," where optical performance is best.
Here are is a real-world example scenario considering a camera with a 1/2" sensor:
- Camera with 1/2" Sensor: Requires a lens that supports at least a 1/2" sensor format.
- Using a 1/3" Lens: Will result in vignetting because the lens's image circle won't cover the entire 1/2" sensor.
Considering Working Distance and Field of View
When selecting a lens for your machine vision camera, two interrelated factors are crucial: the working distance (the distance between the camera and the target object) and the field of view (the area of the scene captured by the camera). Understanding how these elements interact will help you choose a lens that meets your application's specific needs.
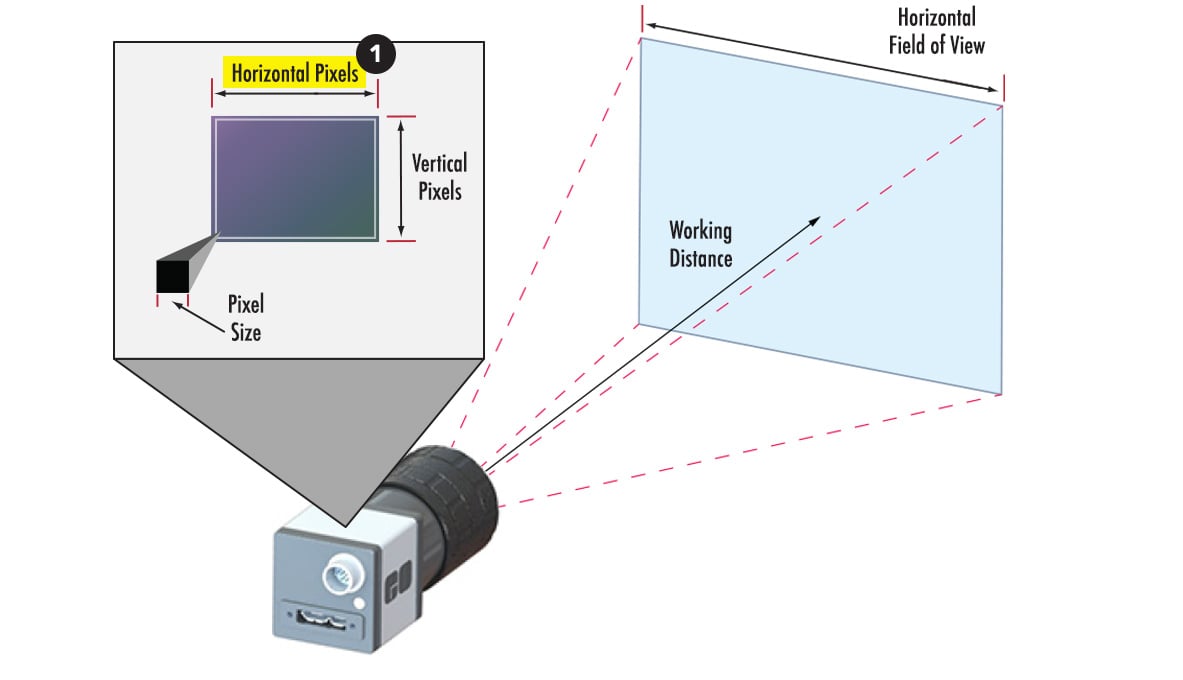
Working Distance
The physical distance from the front of the lens to the object you're imaging.
Why It Matters: Your available space may limit how close or far the camera can be positioned from the object. This distance influences the lens's focal length choice.
Field of View (FOV)
The extent of the observable area captured by the camera, typically measured horizontally.
Why It Matters: Determines how much of the scene or object fits into the image. A wider field of view captures more of the scene, while a narrower field focuses on a smaller area in greater detail.
How Working Distance and Field of View Interact
The lens's focal length bridges the gap between working distance and field of view.
Shorter focal lengths provide a wider field of view. They are ideal for capturing larger scenes or when the camera is close to the object.
Longer focal lengths offer a narrower field of view with increased magnification. They are suitable for focusing on distant objects or specific details without moving the camera closer.
There are a few practical considerations of which to be aware:
- Space Constraints: Assess your environment to determine how close the camera can be to the object.
- Object Size: Larger objects may require a wider field of view to capture them entirely.
- Detail Requirements: If you need to see fine details, a longer focal length might be necessary.
- Application Needs: For surveillance or monitoring large areas, a lens with a shorter focal length is beneficial. For inspection tasks requiring detail, a longer focal length is preferable.
Aperture and Depth of Field Considerations
The aperture of a lens, indicated by the f-number (e.g., f/1.8, f/2.8), is crucial in controlling both the amount of light entering the camera and the depth of field—the range within the scene that appears acceptably sharp.
- Larger Apertures (Smaller f-number):
- More Light: Allow more light into the camera, beneficial for low-light conditions.
- Shallow Depth of Field: Only a small portion of the scene is in sharp focus, which can be useful for isolating specific features but may be problematic if multiple depths need clarity.
- Application Tip: Ideal when you need to highlight a particular area or when the background details are not critical.
- Smaller Apertures (Larger f-number):
- Less Light: Reduce the amount of light entering the camera, potentially requiring additional lighting.
- Greater Depth of Field: More of the scene, from foreground to background, is in focus.
- Application Tip: Essential for applications where objects at varying distances must be clearly captured, such as inspection of items with different heights.
Practical Implications in Machine Vision
- Consistent Focus Across Depths: A greater depth of field ensures that objects moving towards or away from the camera remain in focus, which is vital in assembly lines or robotic applications.
- Lighting Considerations: Smaller apertures may necessitate brighter illumination or longer exposure times to compensate for reduced light, impacting system design and power consumption.
- Image Sharpness: While smaller apertures increase depth of field, they can introduce diffraction, slightly reducing image sharpness. Balancing aperture size is key to maintaining optimal image quality.
Adjustable Aperture Lenses
- Manual Iris Lenses: Allow you to adjust the aperture to suit different lighting conditions and depth of field requirements, offering flexibility in various environments.
- Fixed Aperture Lenses: Have a set aperture size, providing consistent performance but less adaptability. Suitable for controlled environments with stable lighting.
Balancing Aperture with Application Needs
- Low-Light Environments: Opt for lenses with larger maximum apertures to capture sufficient detail without excessive noise.
- High-Precision Tasks: Use smaller apertures to ensure all critical parts of the image are in focus, which is crucial for accurate measurements and defect detection.
By carefully considering aperture settings, you can optimize both the exposure and focus of your images, enhancing the reliability and effectiveness of your machine vision system.
Choosing a Lens with a Lens Selection Tool
To simplify the process of selecting the right lens based on working distance and field of view, consider using the online tools:
- Edmund Optics Imaging Lens Wizard
We like this one from Edmund Optics. It allows you to select the exact camera you intend to use (so it auto populates the sensor information) and once you enter the working distance and horizontal FOV it gives you compatible lens opti - Basler Lens Selector
Assists in finding compatible lenses for your camera model and application requirements, specific to Basler cameras.
Special Lens Types for Specific Applications
Depending on your needs, specialized lenses might offer significant advantages. The most common types of specialized lenses are:
- Telecentric Lenses: Maintain consistent magnification, eliminating perspective errors. Ideal for precise measurement tasks.
- Macro Lenses: Designed for close-up imaging, perfect for capturing small details.
- Zoom Lenses: Offer variable focal lengths, providing flexibility in applications where the working distance or field of view changes.
- Fixed Focal Length Lenses: Provide superior optical quality over zoom lenses in fixed setups.
In short, once you know the camera sensor size, mount type, working distance (distance to target), and desired horizontal field of view you are equipped with the minimum amount of information to select a lens. Let's walk through a few scenarios:
Scenario 1: Counting Cans on an Assembly Line
Use Case: We're tasked with counting the number of cans of different SKUs produced on an assembly line. The goal is to monitor the entire width of the conveyor belt to ensure accurate counting and tracking.
Requirements:
- Working Distance: The camera can only be mounted approximately 1,524 mm (5 feet) away from the conveyor belt.
- Conveyor Belt Width: The belt is 1,219 mm (4 feet) wide, and we need to capture its entire width.
- Field of View: Must encompass the full width of the conveyor belt.
- Lighting Conditions: Factory floor with consistent lighting.
Camera Specifications:
- Camera: Basler ace2 a2A1920-160ucBAS
- Sensor Size: 1/2.3"
- Mount Type: C-Mount
Lens Selection Process:
Using the Edmund Optics Imaging Lens Wizard, we input the following parameters:
- Sensor Size: 1/2.3"
- Working Distance: 1,524 mm
- Desired Field of View: 1,219 mm (to capture the full width of the conveyor belt)
The tool suggests that a lens with a focal length of approximately 8 mm would meet these requirements.
Selected Lens:
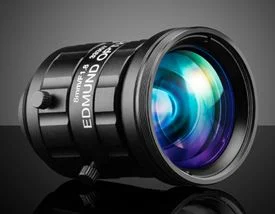
- Lens: 8 mm UC Series Fixed Focal Length Lens
- Working Distance: 50 mm to ∞
- Angular Field of View: 44.70°
- Maximum Sensor Format: 1/2"
- Aperture (f/#): f/1.8 - f/11
- Mount: C-Mount
Reasons for Selection:
- Compatibility: The lens supports up to a 1/2" sensor format, which is slightly larger than our camera's 1/2.3" sensor. This ensures full sensor coverage without vignetting.
- Field of View: With an angular field of view of 44.70°, the lens can capture the entire width of the conveyor belt from our mounting distance.
- Aperture: The large maximum aperture of f/1.8 allows ample light into the camera, beneficial for indoor factory conditions and providing flexibility in exposure settings.
- Mount Type: C-Mount compatibility ensures the lens fits the camera without the need for adapters.
- Compact Design: The Ultra Compact (UC) series is ideal for space-limited industrial environments.
Additional Considerations:
- Depth of Field: The adjustable aperture from f/1.8 to f/11 allows control over depth of field, ensuring all cans on the conveyor belt are in focus.
- Image Quality: The lens provides good optical performance suitable for the camera's resolution, aiding in accurate counting.
- Durability: Designed for industrial use, the lens can withstand typical factory conditions.
Conclusion:
By selecting the 8 mm UC Series Fixed Focal Length Lens, we effectively meet our application's requirements. The lens allows us to capture the entire width of the conveyor belt from the available mounting position, ensuring accurate monitoring and counting of cans on the assembly line.
Scenario 2: Monitoring Trucks in a Shipping Yard
Use Case: We need to monitor trucks entering and exiting a shipping yard. The goal is to read and identify the characters printed on the sides of the trucks using OCR (Optical Character Recognition). Since the application is outdoors and operates in various lighting conditions, including low light, the lens must perform well under these circumstances.
Requirements:
- High Resolution: To capture detailed images that allow for cropping and accurate OCR of the characters.
- Low-Light Performance: The lens must have a suitable aperture to perform adequately in low-light conditions.
- Working Distance: The camera will be mounted approximately 9,000 mm (9 meters) away from the trucks.
- Field of View: Focused on the side of the trucks where the characters are printed.
Camera Specifications:
- Camera: Lucid TRI120S (12 MP)
- Sensor Size: 1.1"
- Mount Type: C-Mount
Lens Selection Process:
Using the Edmund Optics Imaging Lens Wizard, we input the following parameters:
- Sensor Size: 1.1"
- Working Distance: 9,000 mm
- Desired Field of View: Sufficient to capture the characters on the side of the truck.
The tool suggests that a lens with a focal length of around 50 mm would meet these requirements.
Selected Lens:
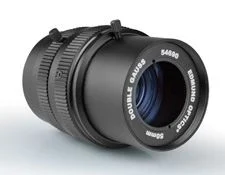
- Lens: 50 mm DG Series Fixed Focal Length Lens
- Working Distance: 240 mm to ∞
- Angular Field of View: 15.90°
- Maximum Sensor Format: 4/3"
- Aperture (f/#): f/4 - f/18
- Mount: C-Mount
Reasons for Selection:
- Compatibility: Supports up to a 4/3" sensor format, exceeding our camera's 1.1" sensor size, ensuring full sensor coverage without vignetting.
- Field of View: The 50 mm focal length provides an angular field of view of 15.90°, suitable for capturing detailed images of the truck sides from 9 meters away.
- Optical Performance: High-quality optics essential for high-resolution imaging and accurate OCR.
- Adjustable Aperture: The f/4 - f/18 range allows for flexibility in controlling depth of field and exposure, which is beneficial in varying outdoor lighting conditions.
- Mount Type: C-Mount compatibility ensures the lens fits the camera without the need for adapters.
Additional Considerations:
- Low-Light Performance: While the maximum aperture is f/4, which is moderate, you may need to enhance lighting conditions or adjust camera settings (e.g., increase ISO sensitivity) during low-light periods.
- Environmental Protection: Given the outdoor setting, it's advisable to use a weatherproof enclosure to protect the camera and lens from dust, moisture, and temperature variations.
- Focus Adjustment: Ensure the lens is precisely focused at the 9,000 mm working distance to capture sharp images necessary for OCR.
By selecting the 50 mm DG Series Fixed Focal Length Lens, we can effectively capture high-resolution images of the trucks, ensuring that the characters are clear and suitable for OCR processing, even under challenging lighting conditions.
Cite this Post
Use the following entry to cite this post in your research:
Reed Johnson. (Oct 14, 2024). How to Choose a Lens for Machine Vision. Roboflow Blog: https://blog.roboflow.com/how-to-choose-a-lens-for-machine-vision/