
The Hugging Face Vision Transformer (ViT) adapts the BERT transformer architecture to image classification by splitting images into fixed patches, linearly embedding them with positional encodings, and passing them through a standard transformer encoder, achieving accuracy competitive with convolutional networks. This tutorial covers training ViT on a custom dataset using a public rock-paper-scissors classification dataset sourced and preprocessed through Roboflow, then applying the ViT feature extractor to train the model and test it on held-out images via a Colab notebook.
HuggingFace has recently published a Vision Transformer model. In this post, we will walk through how you can train a Vision Transformer to recognize classification data for your custom use case.
Learn more about Transformers in Computer Vision on our YouTube channel.
We use a public rock, paper, scissors classification dataset for the purpose of this tutorial. However, you can import your own data into Roboflow and export it to train a vision transformer to fit your own needs. The Vision Transformer notebook used for this tutorial can be downloaded here.
Thanks to Hugging Face for publishing the base notebook that formed the foundation of our notebook.
To train our vision transformer, we take the following steps:
- Download the base Vision Transformer model
- Download and preprocess custom Vision Transformer image classification data using Roboflow
- Define the Vision Transformer model
- Use the Vision Transformer feature extractor to train the model
- Apply the Vision Transformer on a test image
Innovations With the Vision Transformer
The Vision Transformer leverages powerful natural language processing embeddings (BERT) and applies them to images. When providing images to the model, each image is split into patches which are linearly embedded after which position embeddings are added and this is sequentially fed to the transformer encoder. Finally, to classify the image, a [CLS] token is inserted at the beginning of the image sequence.
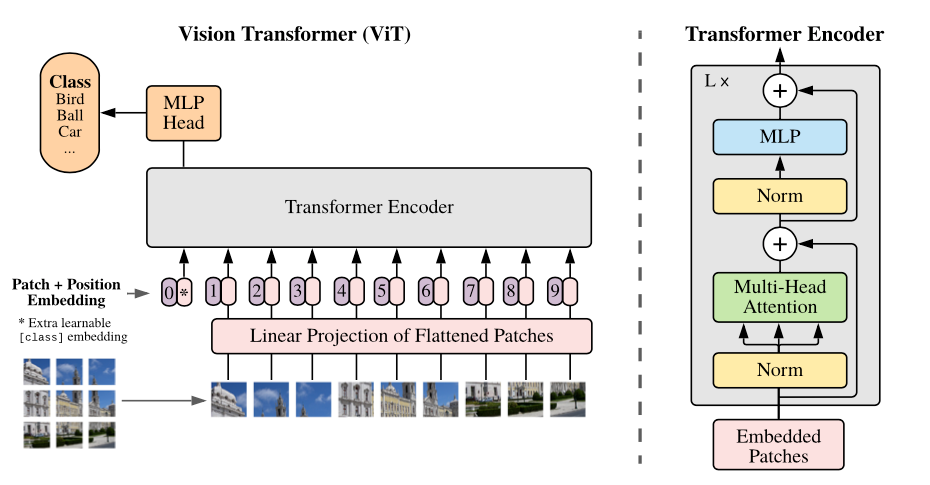
Ultimately, applying transformers to image classification tasks achieves state-of-the-art performance, rivaling traditional convolutional neural networks.
Preparing the Vision Transformer Environment
To start off with the Vision Transformer we first install the HuggingFace's transformers repository. All remaining dependencies come pre-installed within the Google Colab environment 🎉
!pip install -q git+https://github.com/huggingface/transformers
Downloading and Preparing Custom Data Using Roboflow
As aforementioned, we will be using this rock, paper, scissors dataset but you are welcome to use any dataset. Before we can start using the data, we will need to apply some preprocessing steps to ensure that the data will work with the vision transformer. To get started, create a Roboflow account if you haven't already and fork the dataset:
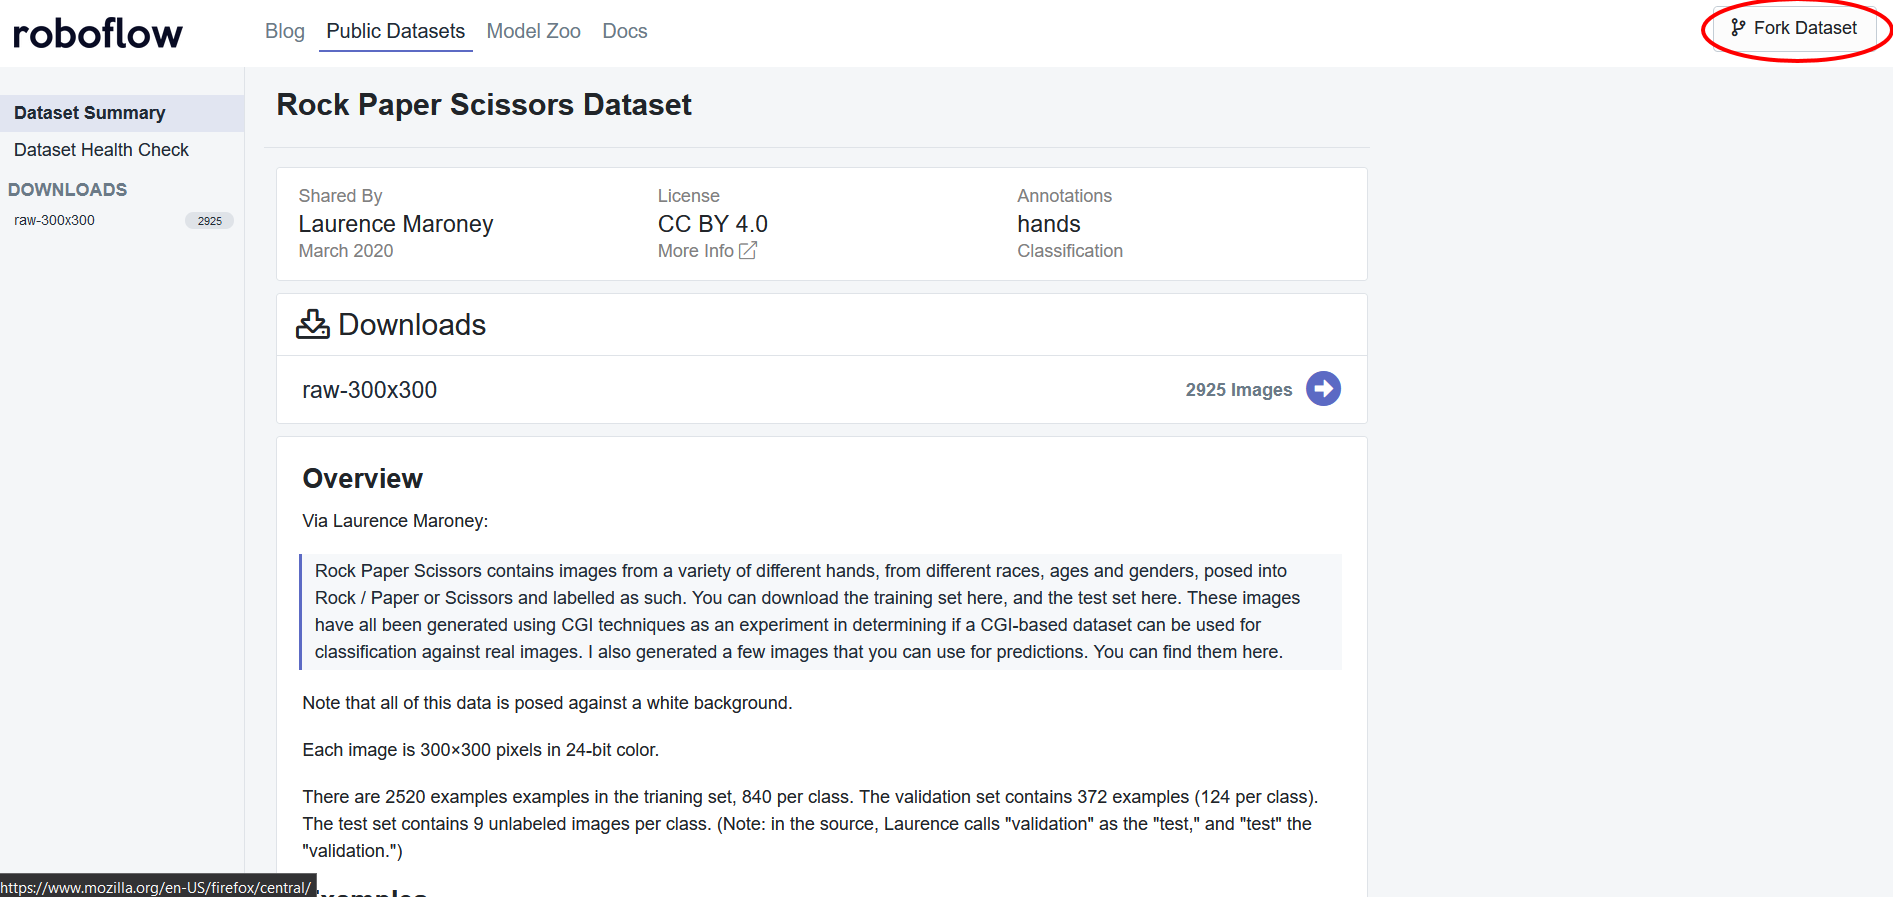
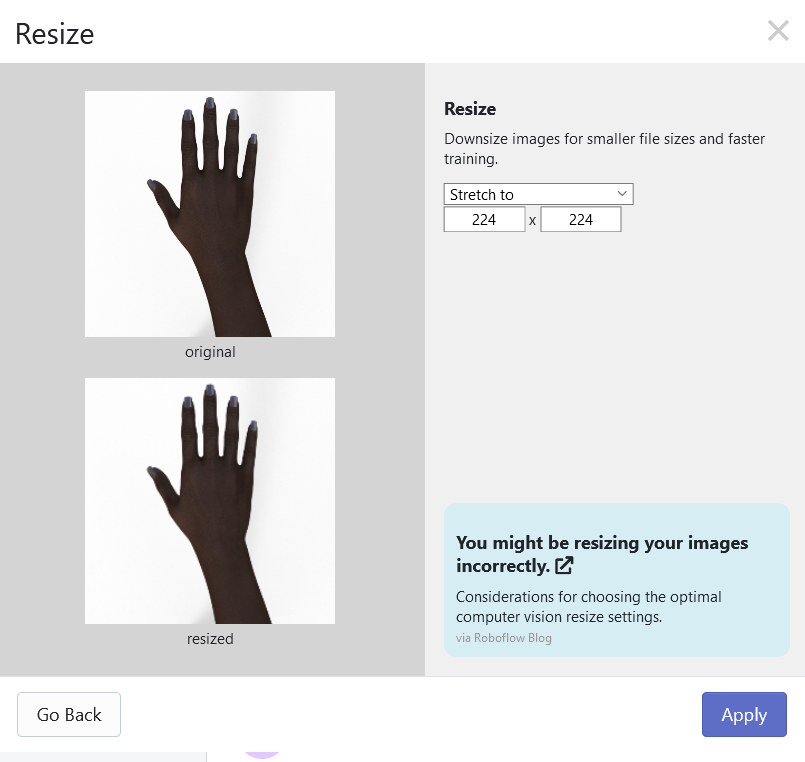
After forking the dataset, you will want to add one preprocessing step which would be to resize all of the images to a size of 224 x 224 because the model we will be using has been pretrained on images with a size of 224 x 224.
***Using Your Own Data***
To export your own data for this tutorial, sign up for Roboflow and make a public workspace, or make a new public workspace in your existing account. If your data is private, you can upgrade to a paid plan for export to use external training routines like this one or experiment with using Roboflow's internal training solution.
Then simply generate a new version of the dataset and export with a "Folder Structure". You will recieve a Jupyter notebook command that looks something like this:
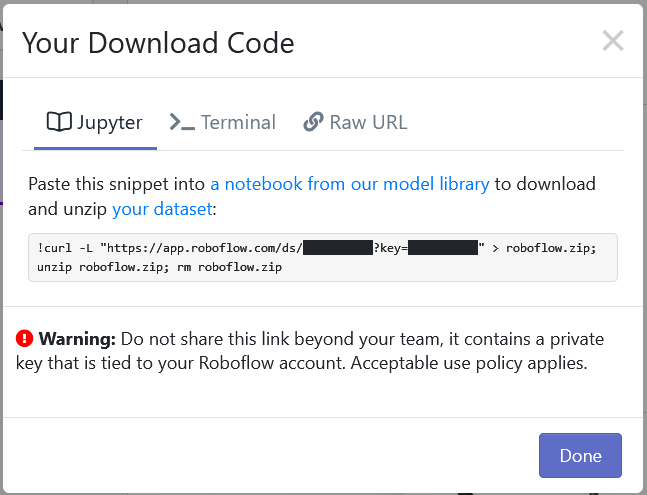
Copy the command, and replace the line below in the notebook with the command provided by Roboflow:
*** Note you can now download your data with the Roboflow PIP Package
#from roboflow import Roboflow
#rf = Roboflow(api_key="YOUR_API_KEY")
#project = rf.workspace().project("YOUR_PROJECT")
#dataset = project.version("YOUR_VERSION").download("folder")
import torchvision
from torchvision.transforms import ToTensor
train_ds = torchvision.datasets.ImageFolder('/content/' + dataset.location + '/train/', transform=ToTensor())
valid_ds = torchvision.datasets.ImageFolder('/content/' + dataset.location + '/valid/', transform=ToTensor())
test_ds = torchvision.datasets.ImageFolder('/content/' + dataset.location + '/test/', transform=ToTensor())Define the Vision Transformer Model
Our vision transformer can be split up into three different layers:
- ViTModel: This is the base model that is provided by the HuggingFace transformers library and is the core of the vision transformer. Note: this can be used like a regular PyTorch layer.
- Dropout: Used for regularization to prevent overfitting. Our model will use a dropout value of 0.1.
- Linear: This is the final layer that ultimately classifies the image. It takes in an input size as large as the number of hidden nodes on the ViTModel and has an output layer equal to the number of different classes.
Our model will also have other settings:
- Epochs: The number of iterations through the training data. We will be able to train our vision transformer in 3 epochs.
- Batch Size: Number of training examples used in 1 iteration. We will use a batch size of 10.
- Learning Rate: The step size when finding the minimum of a loss function. We will use 2e-5 for our learning rate.
- Feature Extractor: A tool that identifies key components and patterns in our images. We will use the custom ViT Feature Extractor because it has been specifically designed for the ViTModel.
- Optimizer: An algorithm to change network parameters. We will use an Adam optimizer.
- Loss Function: A function that defines how well our model is performing. We will use a cross entropy loss function.
Note: Some of these settings may need to be changed depending on your dataset.
Use the Vision Transformer Feature Extractor to Train the Model
To train the model, we have written up a manual training script (can be found in the notebook). Before each batch of images can be fed through the model, it is necessary to feed the images to the ViT feature extractor to obtain embeddings. To do this, we first need to apply transformations to the batch to ensure it fits the appropriate constraints of the feature extractor. The feature extractor requires a list of images and each image should have a shape of (num_channels, height, width)We can do this by converting the single matrix that holds the batch of images into a list of matrices with each element of the list being the matrix of an individual image.
# Split the batch of images into a list of images & remove unecessary dimension
x = np.split(np.squeeze(np.array(x)), BATCH_SIZE)
# Remove unecessary dimensions (i.e. dimensions of size 1)
for index, array in enumerate(x):
   x[index] = np.squeeze(array)
Finally, we apply the feature extractor and restack the individual matrices back into one large matrix because the ViTModel requires a tensor object with a shape of (batch_size, num_channels, height, width):
x = torch.tensor(np.stack(feature_extractor(x)['pixel_values'], axis=0))
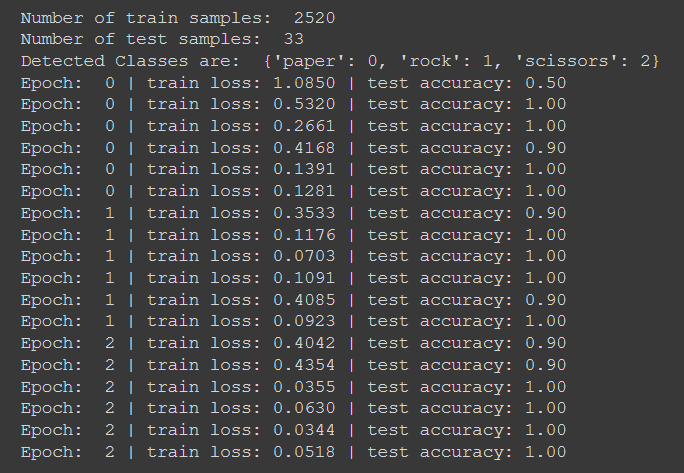
The HuggingFace documentation has more information about the ViTFeatureExtractor and ViTModel. These features will then be fed through the model and will undergo the remainder of the training process. Looking at the loss and testing accuracies, it appears as if the vision transformer is able to train quickly while obtaining a high accuracy. For example:
Apply the Vision Transformer on a Test Image
Finally, we can test our vision transformer on a random image from our dataset. Doing this we get:
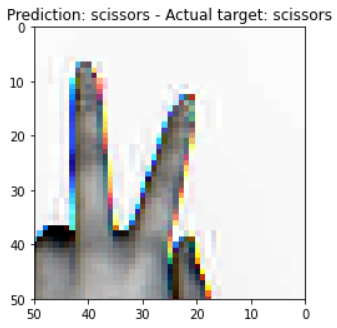
From the looks of it, the Vision Transformer seems to be working pretty well!
Conclusion
The vision transformer is a powerful intersection between computer vision and natural language processing. In this tutorial we were able to:
- Use Roboflow to preprocess and download images to train a Vision Transformer
- Define a Vision Transformer Model
- Use the ViT Feature Extractor to train a highly accurate classification model in little time
- Test our ViT model on a random image from the dataset
You can get the full code in our Vision Transformer Colab notebook.
Cite this Post
Use the following entry to cite this post in your research:
Samrat Sahoo. (Jun 6, 2021). How to Train the Hugging Face Vision Transformer On a Custom Dataset. Roboflow Blog: https://blog.roboflow.com/how-to-train-vision-transformer/