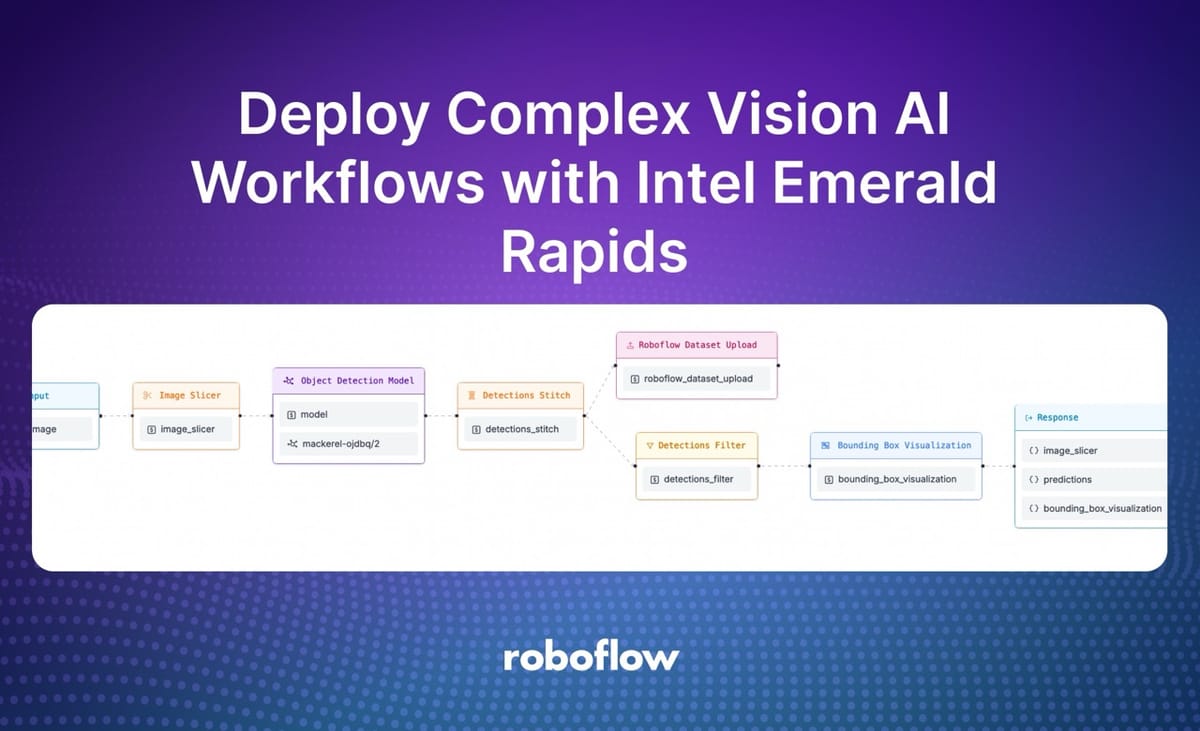
Roboflow Workflows is a low-code, web-based application builder for computer vision. With Workflows, you can build complex computer vision systems without manually coding every step of the logic that you want to implement. Applications that may have taken hours or days to code can be implemented in a few minutes with Workflows.
You can deploy Workflows on any hardware, from CPUs to GPUs or VPC to edge devices. In this guide, we are going to show how to deploy a Workflow with the Intel Emerald Rapids series of CPUs, deployed on Google Cloud Platform Compute Engine.
We will walk through an example showing how to build a system that accurately identifies small objects in a controlled setting. We will use Sliced Aided Hyper Inference (SAHI), a technique to improve performance detecting small objects, with our model to ensure we identify all objects of interest.
Our example will use an aquaculture environment but you can use the same tactics for solving any small object detection problems (i.e. detecting cars on a highway, detecting small metal parts on a product part passing through an assembly line).
Here is what our Workflow looks like:
Here are the results of our Workflow with SAHI (left) and without SAHI (right):
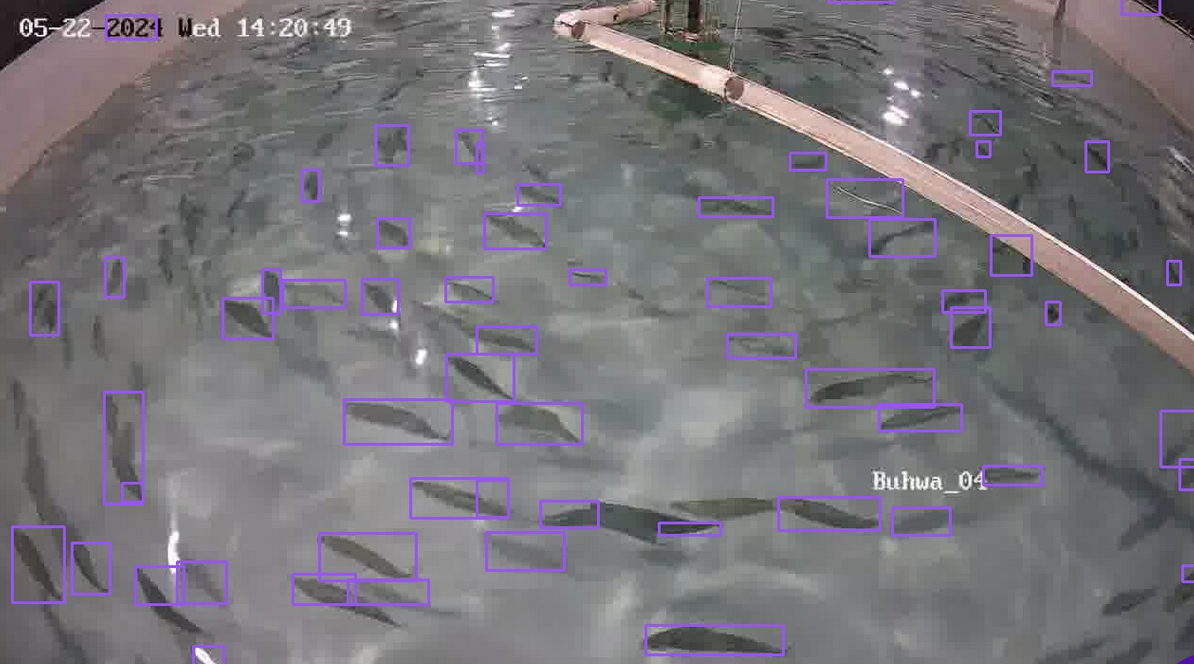
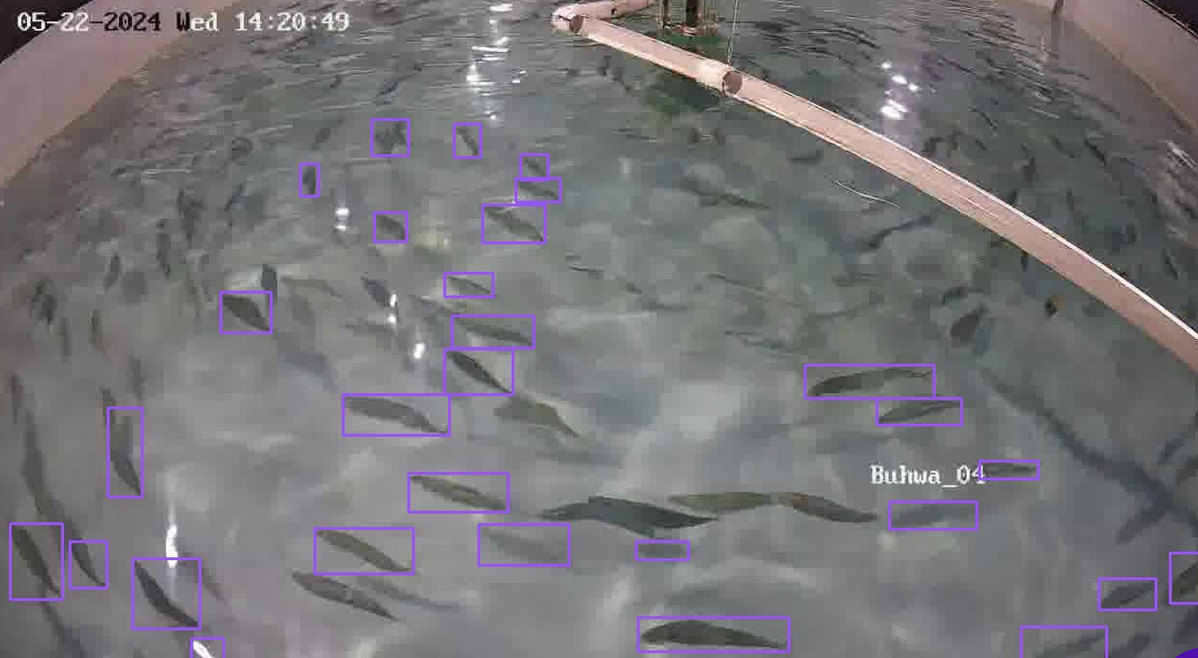
Above, you can see a significant performance improvement using SAHI (left) versus running the model without SAHI.
Without further ado, let’s get started!
Step #1: Create a Workflow
To get started, first create a free Roboflow account. Then, navigate to the Roboflow dashboard and click the Workflows tab in the left sidebar. This will take you to the Workflows homepage, from which you can create a workflow.
Click “Create Workflow” to create a Workflow.
A window will appear in which you can choose from several templates. For this guide, select “Custom Workflow”:
Click “Create Workflow” to create your Workflow.
You will be taken into the Workflows editor in which you can configure your Workflow:
Step #3: Add an Image Slicer
With a Workflow created, you can start adding blocks. Blocks are individual steps in a Workflow. You can chain several blocks together to make complex Workflows.
For this guide, we will use two blocks:
- Image Slicer, which slices an input image into several smaller images for inference, and;
- An object detection model that identifies fish.
The Image Slicer block implements the SAHI paradigm. SAHI is a technique where you split an image into smaller images, run inference independently on each smaller image, then combine the results to create a final set of detections.
With SAHI, you can improve object detection performance on a range of use cases, particularly those involving small object detection.
To add the Image Slicer block, click “Add Block” in the top right corner of the Workflow builder. Then, search for and select Image Slicer:
When you click the block, it will be added to your Workflow.
For this block, no configuration is required. Thus, you do not need to adjust any of the block settings.
Step #4: Add an Object Detection Block
We need a model through which we can send our image slices. You can use any model that you have uploaded to or trained on Roboflow.
If you do not already have an object detection model on Roboflow, check out the Roboflow Getting Started guide to learn how to start building projects on Roboflow.
For this guide, we are going to use a fish detection model trained on Roboflow.
Click “Add Block” and select the Roboflow Object Detection block:
Update the block settings so that it takes in the image_slicer.slices:
Next, choose the model that you want to use with the block:
You can either use a model in your workspace or any of the 100,000+ fine-tuned models available on Roboflow Universe. For this guide, we will use the model mackerel-ojdbq/2, which detects mackerel.
SAHI runs inference on each image slice independently. We need to recombine the results. To do so, we can use the Detections Stitch block. This block stitches detections back together that have been generated using an Image Slicer.
Add the Detections Stitch block:
Then, configure the block to work with the image_slicer.slices slices and the model.predictions from our model:
We now have a Workflow that slices an image, then runs inference, then returns results.
Let’s add one more step: Active Learning.
Step #5: Add a Visualization Block
Next, add a Bounding Box Visualization block:
This block will let us see the results from our model. Make sure the block is connected to the Object Detection Model.
Step #6: Add Active Learning
Active Learning is a methodology wherein you periodically save results from a computer vision model for use in training future versions of a model. Active Learning helps you improve model performance over time by collecting data that you don’t need to label manually. The model predictions are the labels.
You can add an Active Learning step to automatically save image results to a Roboflow dataset.
Then, click “Add Block” again then add the Roboflow Dataset Upload block:
When you add the block, you need to choose the dataset to which you want to upload results from your Workflow. Set the Target Project to the name of the project in Roboflow to which you want to upload results from your model:
Make sure the Image is equal to image.image
Next, click “Optional Properties” and make sure the Predictions value is set to detections_stick.detections. This will ensure the detections from your system are uploaded back to Roboflow.
We can also filter detections to remove any large detections that are likely to be false positives.
Click “Add Block” and add a Detections Filter block:
Configure the block to use the detections_stick.predictions predictions. Then, click “Operations” to add a filter:
For this project, we will filter any detections to retrieve only those less than or equal to 65% of the size of the input image:
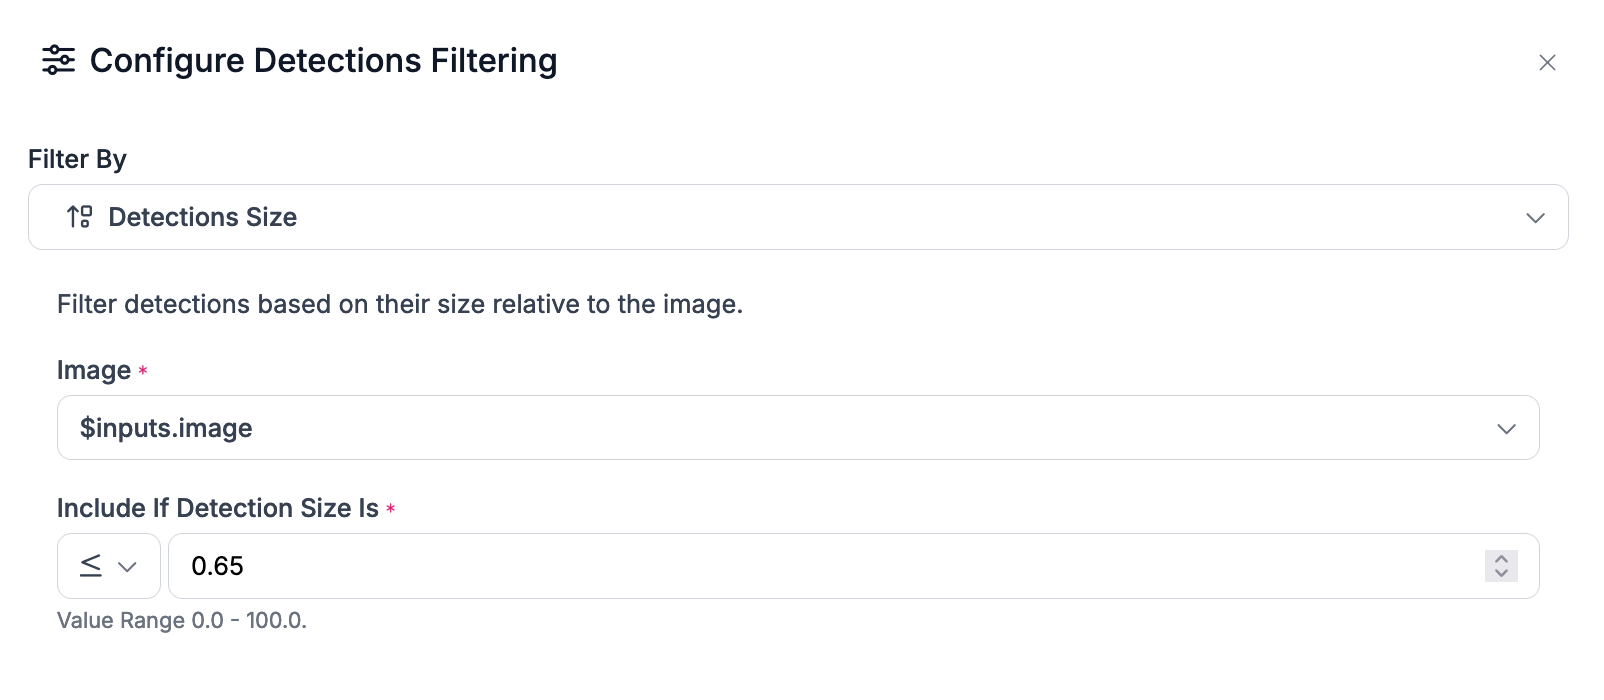
This will ensure any large predictions from our model, which are likely to be inaccurate, are filtered out from our project results.
Finally, make sure the Bounding Box Visualization block connects to the results from the Detection Filter:
Step #6: Test the Workflow
Here is what our final Workflow looks like:
We are now ready to test our Workflow.
To test the Workflow, click “Run Preview” at the top of the page. Then, drag the image you want to run your Workflow on into the page.
Once you have uploaded an image, click “Run Preview” to run the Workflow:
The results of your Workflow will be on the right hand side. There will be two display options: JSON, which returns a structured response from the Workflow, and Visual, which returns the images with our detections that we generated using the Detections Visualization block.
Click “Show Visual” to see the results from your Workflow. There will be a few images: one for each slice of the image.
Here is the result from our Workflow:
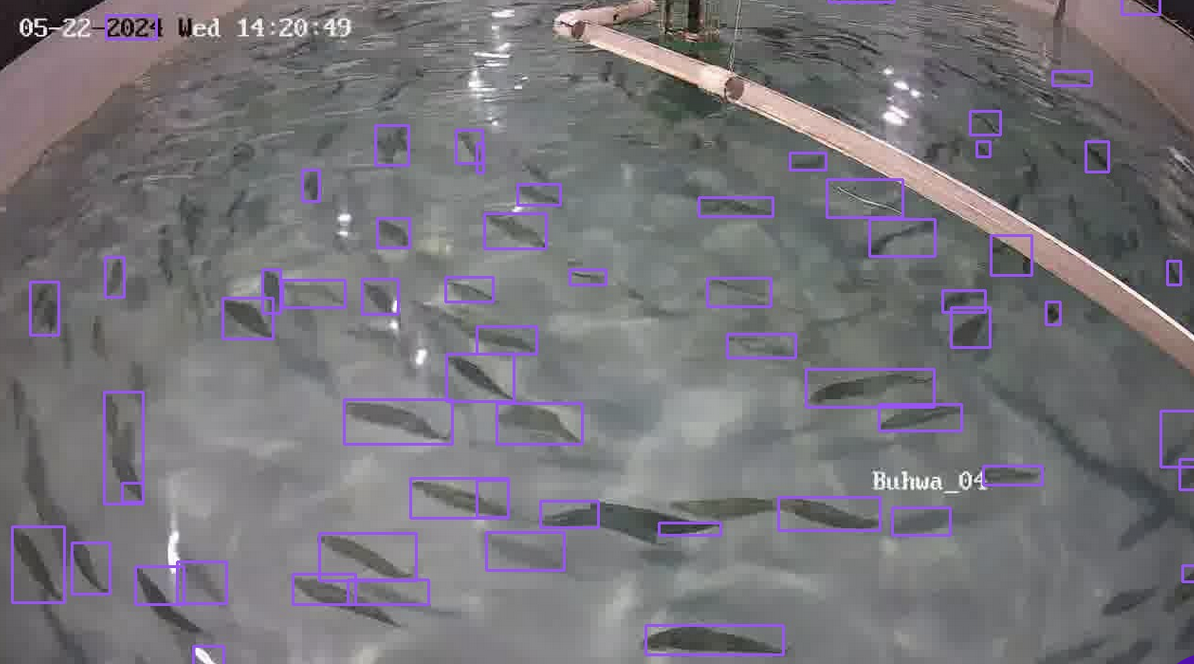
Our Workflow successfully identified many fish. With that said, it missed a few, and a few predictions are off. This is something we can address with our active learning system, which automatically adds images into a dataset.
For context, here is what the system returned without SAHI:
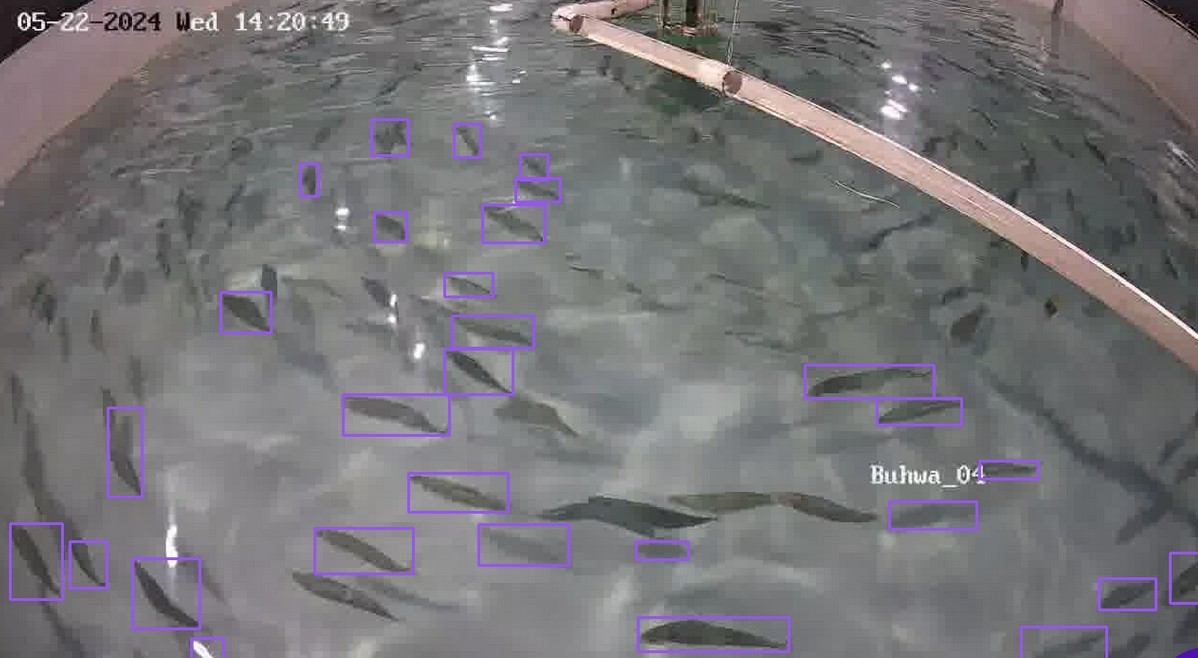
In this example, many fish were undetected, and there were still inaccurate predictions.
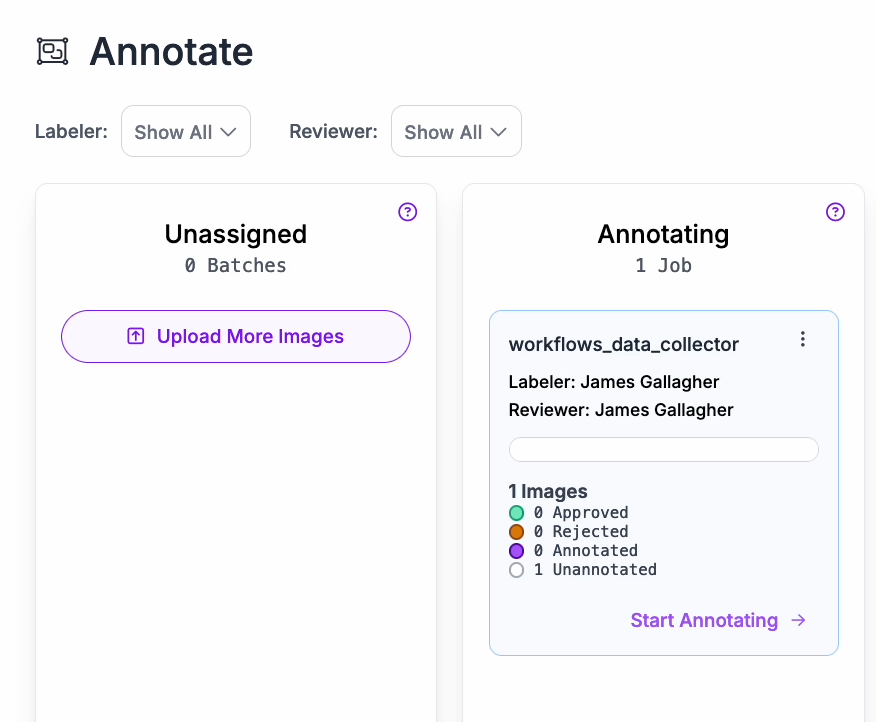
Navigate to the dataset you created and check the Unassigned tab of the Annotate page in your dataset. You should have annotated images from your Workflow.
Here is one that was added to our dataset:
Step #7: Provision an Intel Emerald Rapids CPU instance
With a Workflow ready, we are now ready to deploy our system.
For deployment, we are going to use an Intel Emerald Rapids CPU instance on Google Cloud Platform. We will use Roboflow Inference, an open source inference server, on the Intel Emerald Rapids instance to deploy our model.
Open Google Cloud Platform and navigate to Compute Engine. Then, click “Create Instance”.
You can then configure your new server with the hardware you need. Select the C4 Series, which uses Intel Emerald Rapids. Then, set up your system with the vCPUs, memory, and disk space you need.
For this blog post, we will create a c4-standard-4 instance with 4 vCPUs, 2 cores, and 15 GB of memory.
Step #6: Deploy the Workflow
Once you have created your server, navigate to the instance you created in GCP and copy the relevant SSH command to access your server. Open a terminal window, then SSH into your server.
There is a bit of setup we need to do to get started.
First, run the following commands:
sudo apt install python3.11-venv
python3 -m venv venv
source venv/bin/activate
curl -sSL https://bootstrap.pypa.io/get-pip.py -o get-pip.py
python3 get-pip.py
pip3 install roboflow inference
sudo apt-get install ffmpeg libsm6 libxext6 git-all -y
These commands will install Python and set up a virtual environment in which to work. We will also install the Inference dependency, which we will use to deploy our model.
Then, navigate to your Workflow in Roboflow Workflows and click “Deploy Workflow”.
A window will appear with several deployment options:
Copy the code on the “Run on an Image (Local)” tab and paste it into a new file. Add the following code at the bottom of the file:
print(result)Then, run the script.
When you first run the script, your Workflow will be initialized. Any models you have used in your Workflow will be downloaded to your device and cached for later use.
The script will then return results from our system.
You can then process these results using custom logic in Python. For example, you can send them to a Google Sheet, send them over MQTT to another service – whatever you need to do to complete your project.
Explore Workflows
Roboflow Workflows offers an extensive range of tools for building vision systems that leverage state of the art technology.
With Workflows, you can build applications that use:
- Your fine-tuned models hosted on Roboflow;
- State-of-the-art foundation models like CLIP and SAM-2;
- Visualizers to show the detections returned by your models;
- LLMs like GPT-4 with Vision;
- Conditional logic to run parts of a Workflow if a condition is met;
- Classical computer vision algorithms like SIFT, dominant color detection;
- And more.
To explore ideas for Workflows, check out the Roboflow Workflows Templates gallery, in which there are over a dozen Workflow templates you can try and copy to your Workspace for use in your own projects.
Conclusion
Roboflow Workflows allows you to build complex, multi-stage computer vision applications. You can then run those Workflows on your own hardware.
In this guide, we built a Workflow to identify fish. We used the SAHI technique to improve detection performance from a fish detection model, and added active learning to save model predictions in a dataset for use in training future model versions.
After testing our Workflow, we deployed it on an Intel Sapphire Rapids system. This system, the latest CPU offering from Intel on Google Cloud Platform’s Compute Engine, is fully compatible with the Roboflow Inference technology we used to run our model.
To learn more about the Intel Emerald Rapids system and its use in cutting-edge computer vision applications, check out our Intel Emerald Rapids YOLOv10 training and model deployment guide.
Cite this Post
Use the following entry to cite this post in your research:
James Gallagher. (Sep 3, 2024). Deploy Complex Vision AI Workflows with Intel Emerald Rapids. Roboflow Blog: https://blog.roboflow.com/intel-emerald-rapids-vision-ai/
