
On July 29th, 2024, Meta AI released Segment Anything 2 (SAM 2), a state-of-the-art image and video segmentation model.
With SAM 2, you can specify points on an image and generate segmentation masks for those points. You can also generate segmentation masks for all objects in an image.
Here is an example of segmentation masks generated by SAM 2:
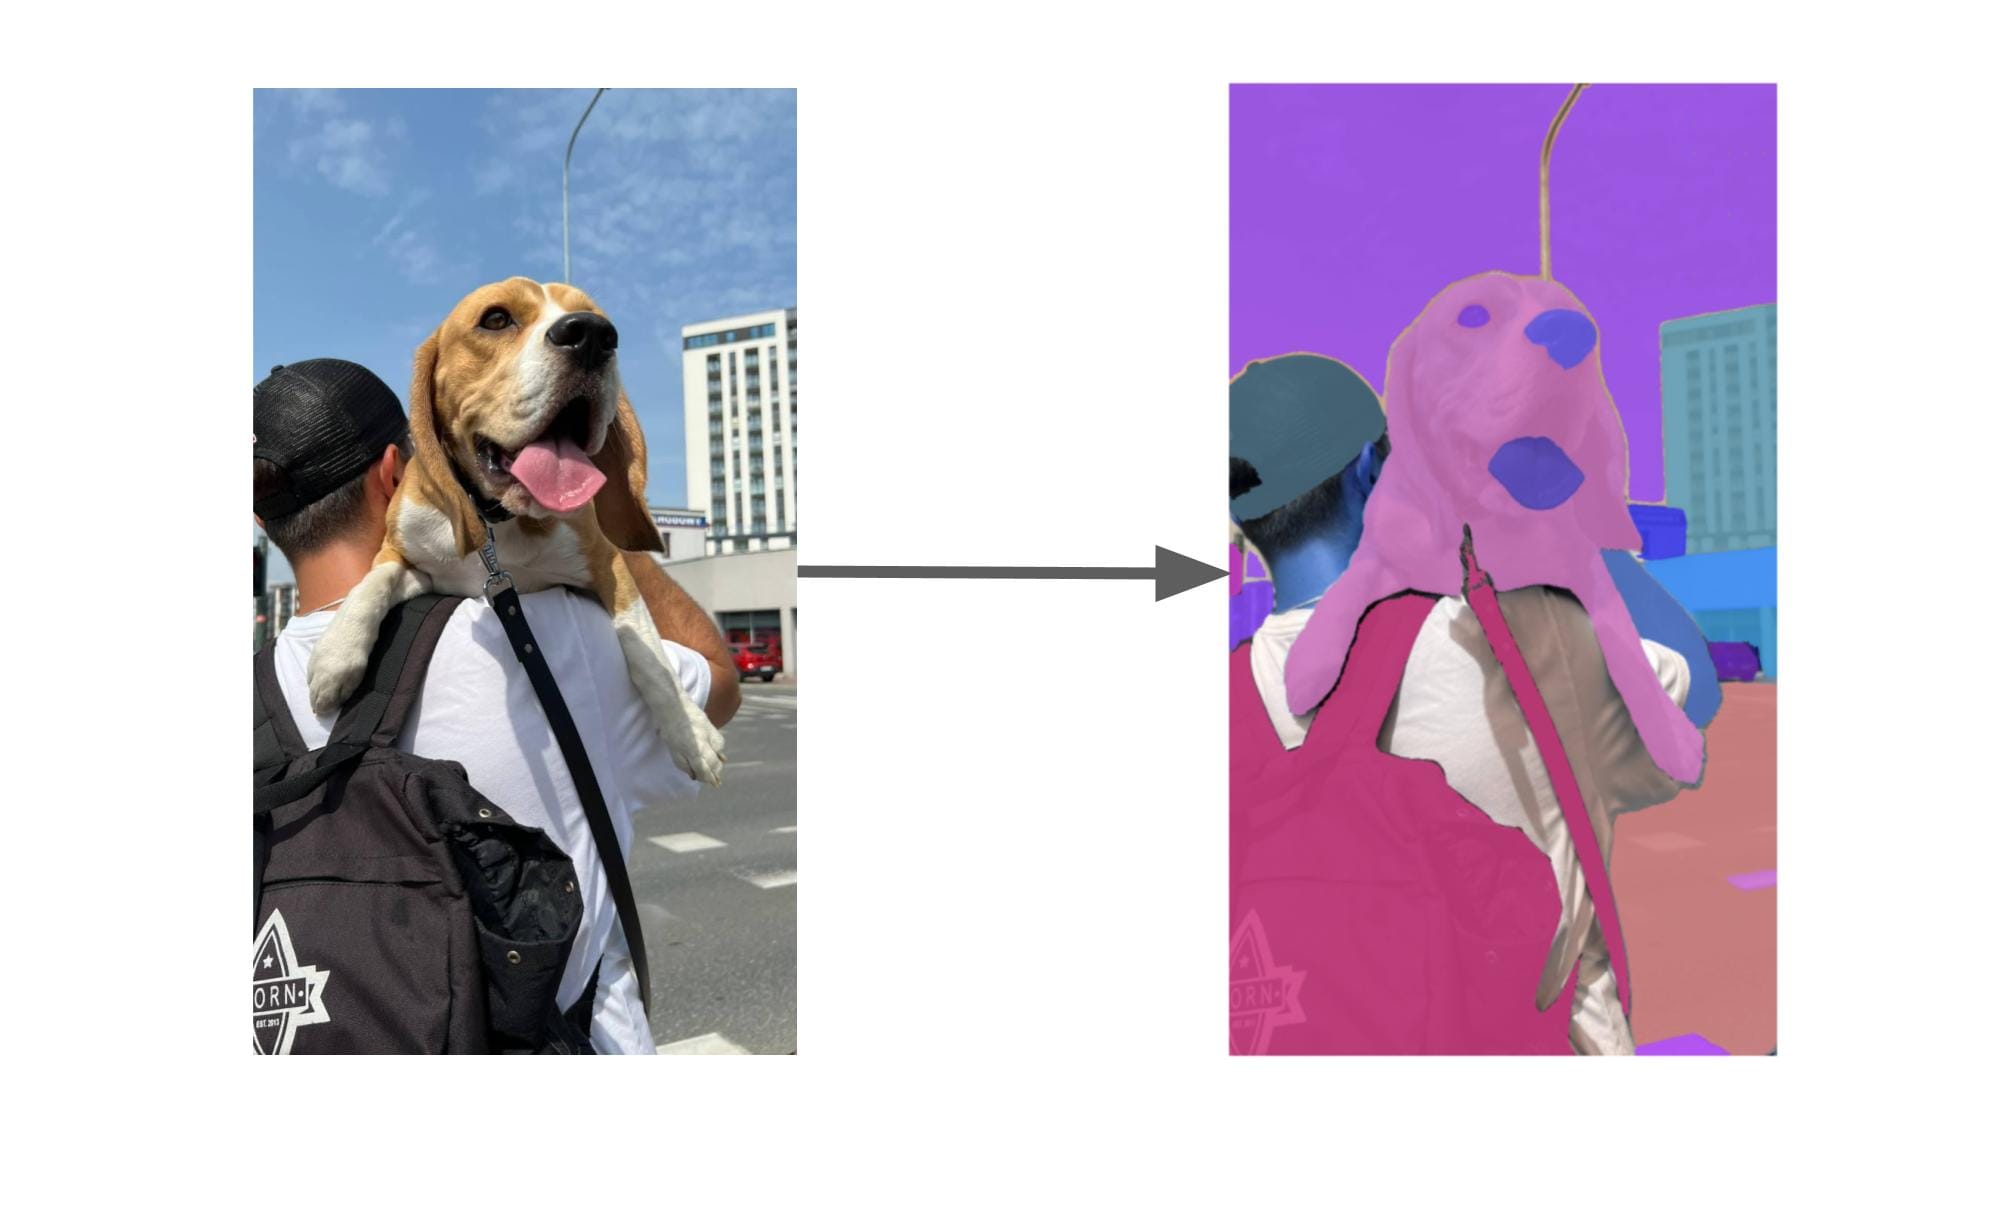
While SAM 2 has no understanding of what the objects are, you can combine the model with Florence-2, a multimodal model, to generate segmentation masks for regions in an image with text prompts.
For example, you could have a dataset of screws and provide the label “screw”. Florence-2 can identify all the regions that contain screws, then SAM can generate segmentation masks for each individual screw.
In this guide, we are going to walk through how to label computer vision data using Grounded SAM 2, a combination of SAM 2 and Florence-2. This model uses the Autodistill framework, which lets you use large, foundation models to auto-label data for use in training smaller, fine-tuned models (i.e. YOLOv8, YOLOv10).
Without further ado, let’s get started!
You might also be interested in using the newer Segment Anything 3 - a zero-shot image segmentation model that detects, segments, and tracks objects in images and videos based on concept prompts.
Step #1: Prepare a dataset
To get started, you will need a dataset of images. For this guide, we are going to label a dataset of shipping containers. You can download the dataset using the following command
wget https://media.roboflow.com/containers.zip
Our dataset contains pictures of a yard on which there are several shipping containers. Here is an example of an image:
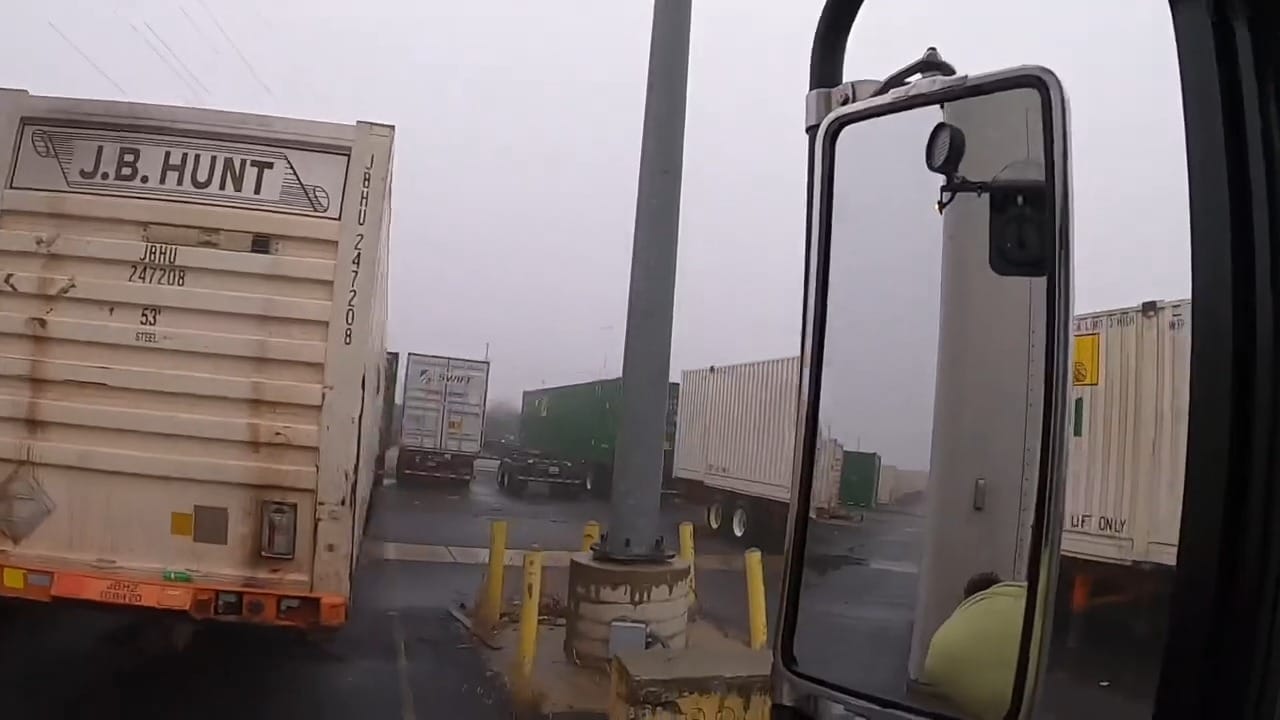
We are going to use Grounded SAM 2, a combination of Florence-2 (the grounding model) and SAM 2 (a segmentation model) to generate segmentation masks for each screw in our dataset.
Step #2: Install Autodistill Grounded SAM 2
With a dataset ready, we can install Grounded SAM 2. This is a model available in the Autodistill ecosystem. Autodistill allows you to use large, foundation models to auto-label data for use in training smaller, fine-tuned models.
Run the following command to install Autodistill Grounded SAM 2, the foundation model we will use in this guide:
pip install autodistill-grounded-sam-2
Once you have installed the model, you are ready to start testing which prompts perform best on your dataset.
Step #3: Test prompts
Using Grounded SAM 2, we can provide a text prompt and generate segmentation masks for all objects that match the prompt. Before we auto-label a full dataset, however, it is important to test prompts to ensure that we find one that accurately identifies objects of interest.
Let’s start by testing the prompt “shipping container”.
Create a new Python file and add the following code:
from autodistill_grounded_sam_2 import GroundedSAM2
from autodistill.detection import CaptionOntology
from autodistill.utils import plot
import cv2
import supervision as sv

base_model = GroundedSAM2(
	ontology=CaptionOntology(
    	{
        	"screw": "screw"
    	}
	)
)
results = base_model.predict("image.png")

image = cv2.imread("image.png")

mask_annotator = sv.MaskAnnotator()

annotated_image = mask_annotator.annotate(
	image.copy(), detections=results
)

sv.plot_image(image=annotated_image, size=(8, 8))
Above, we import the required dependencies, then initialize an instance of the GroundedSAM2 model. We set an ontology where “screw” is our prompt and we save the results from the model with the class name “screw”. To customize your prompt, update the first “screw” text. To customize the label that will be saved to your final dataset, update the second instance of “screw”.
We then run inference on an image called “image.png”. We use the supervision Python package to show the segmentation masks returned by our model.
Let’s run the script on the following image:
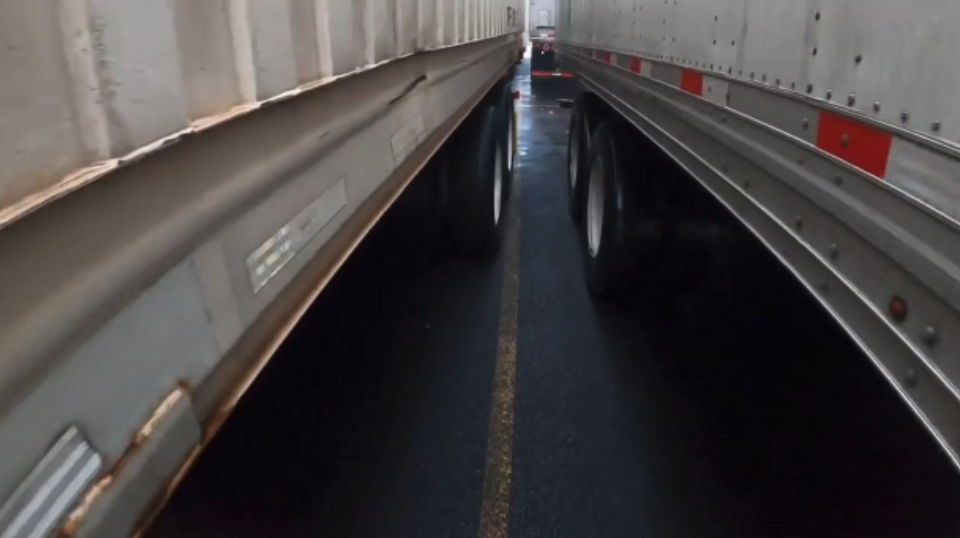
Our script returns the following visualization:
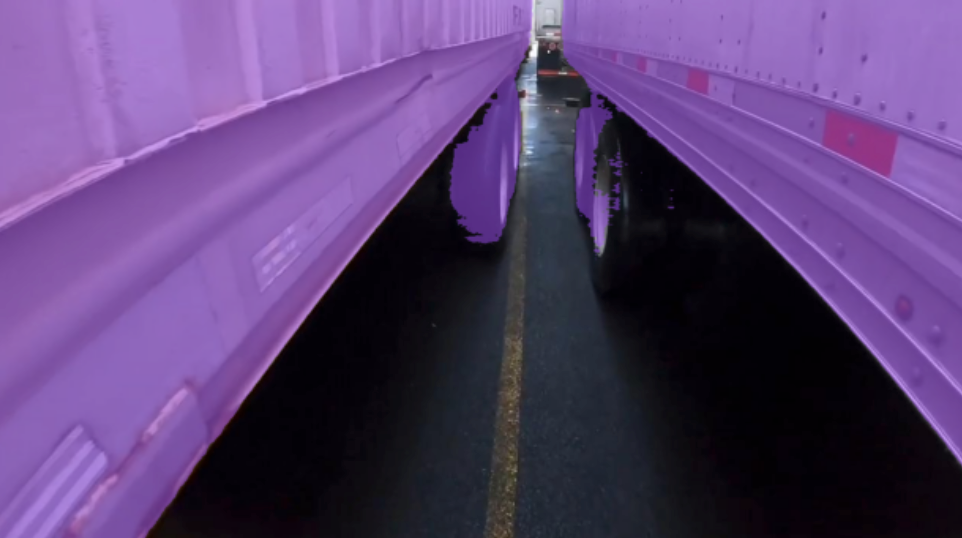
The purple color shows where containers have been identified. Our system has successfully identified both containers!
If your prompt does not work for your data, update the “shipping container” prompt above and explore different prompts. It may take a few tries to find a prompt that works for your data.
Note that some objects will not be identifiable with Grounded SAM 2. Grounded SAM 2 works best on generic objects. For example, the model can identify containers, but will likely struggle to find the location of container IDs.
Step #4: Auto-label data
With a prompt that successfully identifies our objects, we can now label our full dataset. Create a new folder and add all the images you want to label in the folder.
We can do this using the following code:
base_model.label("containers", extension="jpg")
Above, replace data with the name of the folder where your images are that you want to label. Replace “jpg” with the extension of the images in the folder.
When you are ready, run the code.
Your images will be labeled using Grounded SAM 2 and saved into a new folder. When the labeling process is done, you will have a dataset that you can import into Roboflow.
Step #5: Train a model
With a labeled dataset ready, the next step is to inspect the quality of the labels and train your model. Roboflow has utilities for both of these steps. With Roboflow, you can review and amend annotations, then use your dataset to train a model.
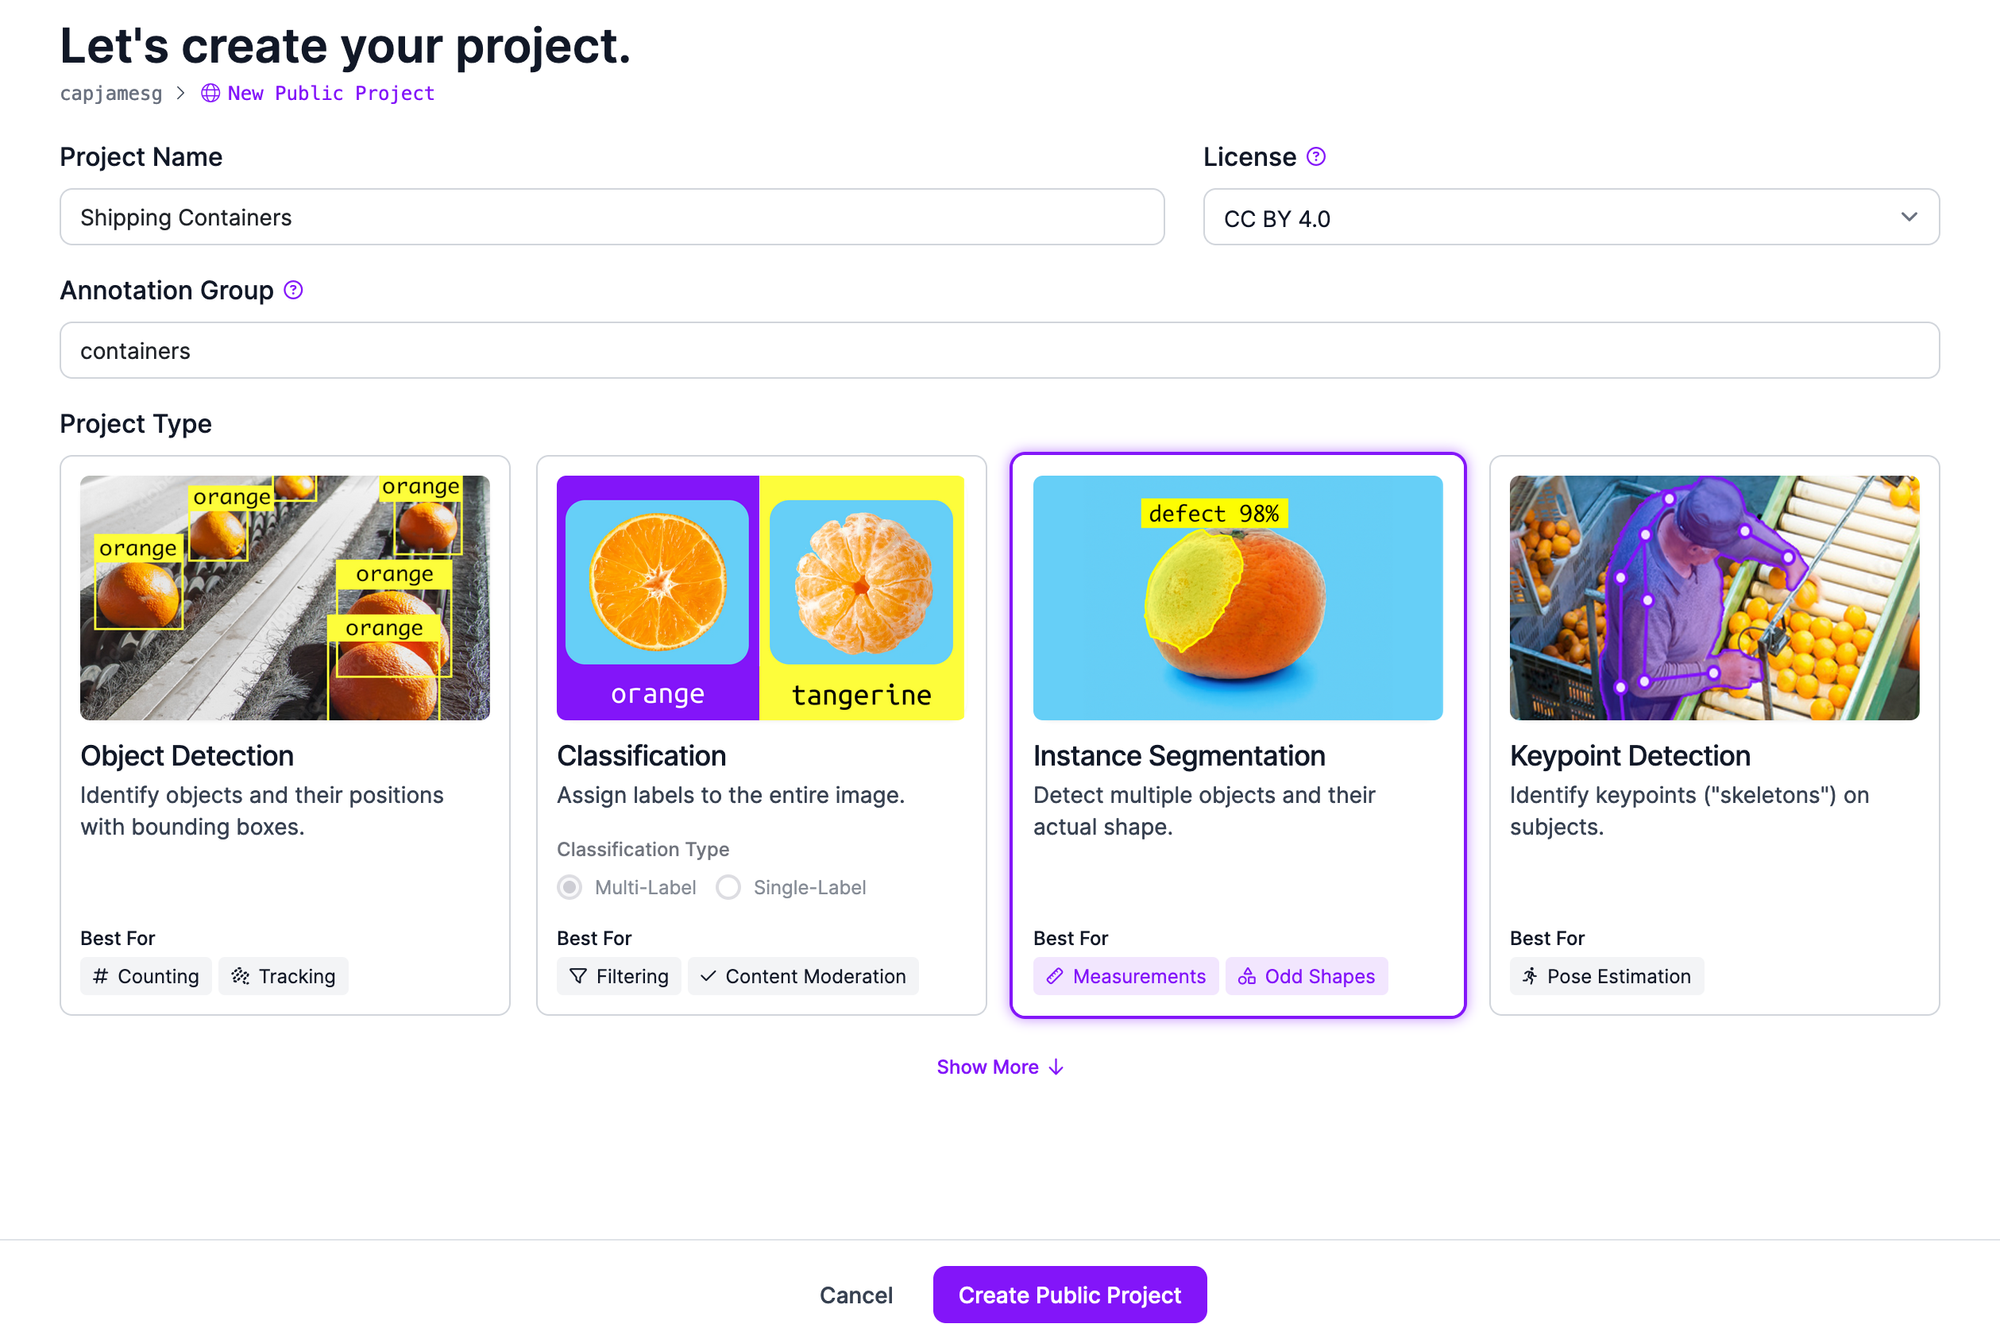
To inspect your dataset and train a model, first create a free Roboflow account. Then, click “Create Project” on your Roboflow dashboard. Set a name for your project, then select “instance segmentation” as your project type.
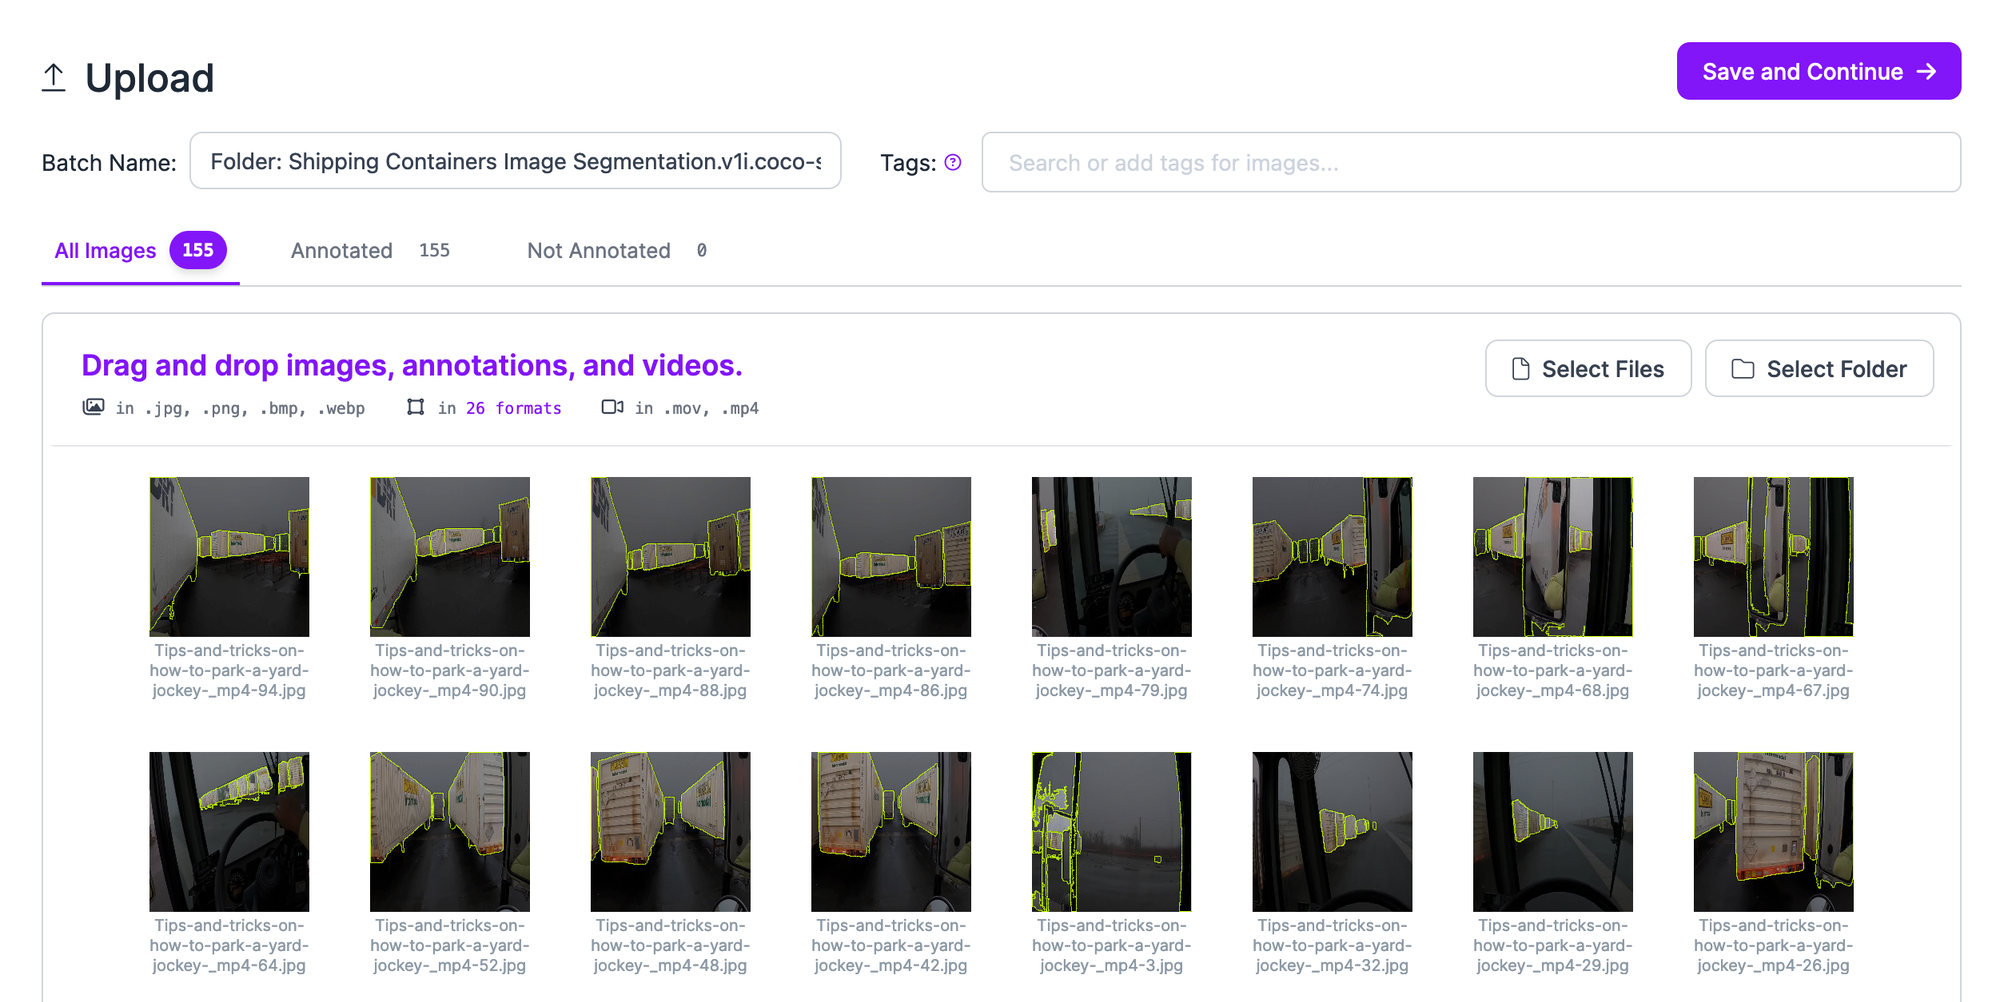
You will be taken to a page where you can upload your images for review. Drag and drop your folder of labeled images generated by Grounded SAM 2 into the page. Your images will be processed in the browser. When the images are ready for upload, click “Save and Continue”.
You can now review your images and make changes to your annotations. Click on the dataset batch that you uploaded, then select an image to inspect and modify the annotations.
You can add, adjust, and remove polygons. To learn more about annotating with Roboflow and the features available, refer to the Roboflow Annotate documentation.
A quick way to add a new polygon is to use the Segment Anything-powered labeling tool. This tool allows you to click on a region of an image and assign a polygon using Segment Anything.
To enable this feature, click on the magic wand feature in the right task bar, then click “Enhanced Smart Polygon”. This will enable the Segment Anything-powered Smart Polygon annotation tool. With this tool, you can hover over part of an image to see what mask will be created, then click to create a mask.
Once you have labeled your images, you can generate a dataset version from the “Generate” tab in Roboflow. On this tab, you can apply augmentations and preprocessing steps for your dataset. Read our guide to preprocessing and augmentation to learn how to help improve model performance with preprocessing and augmentation.
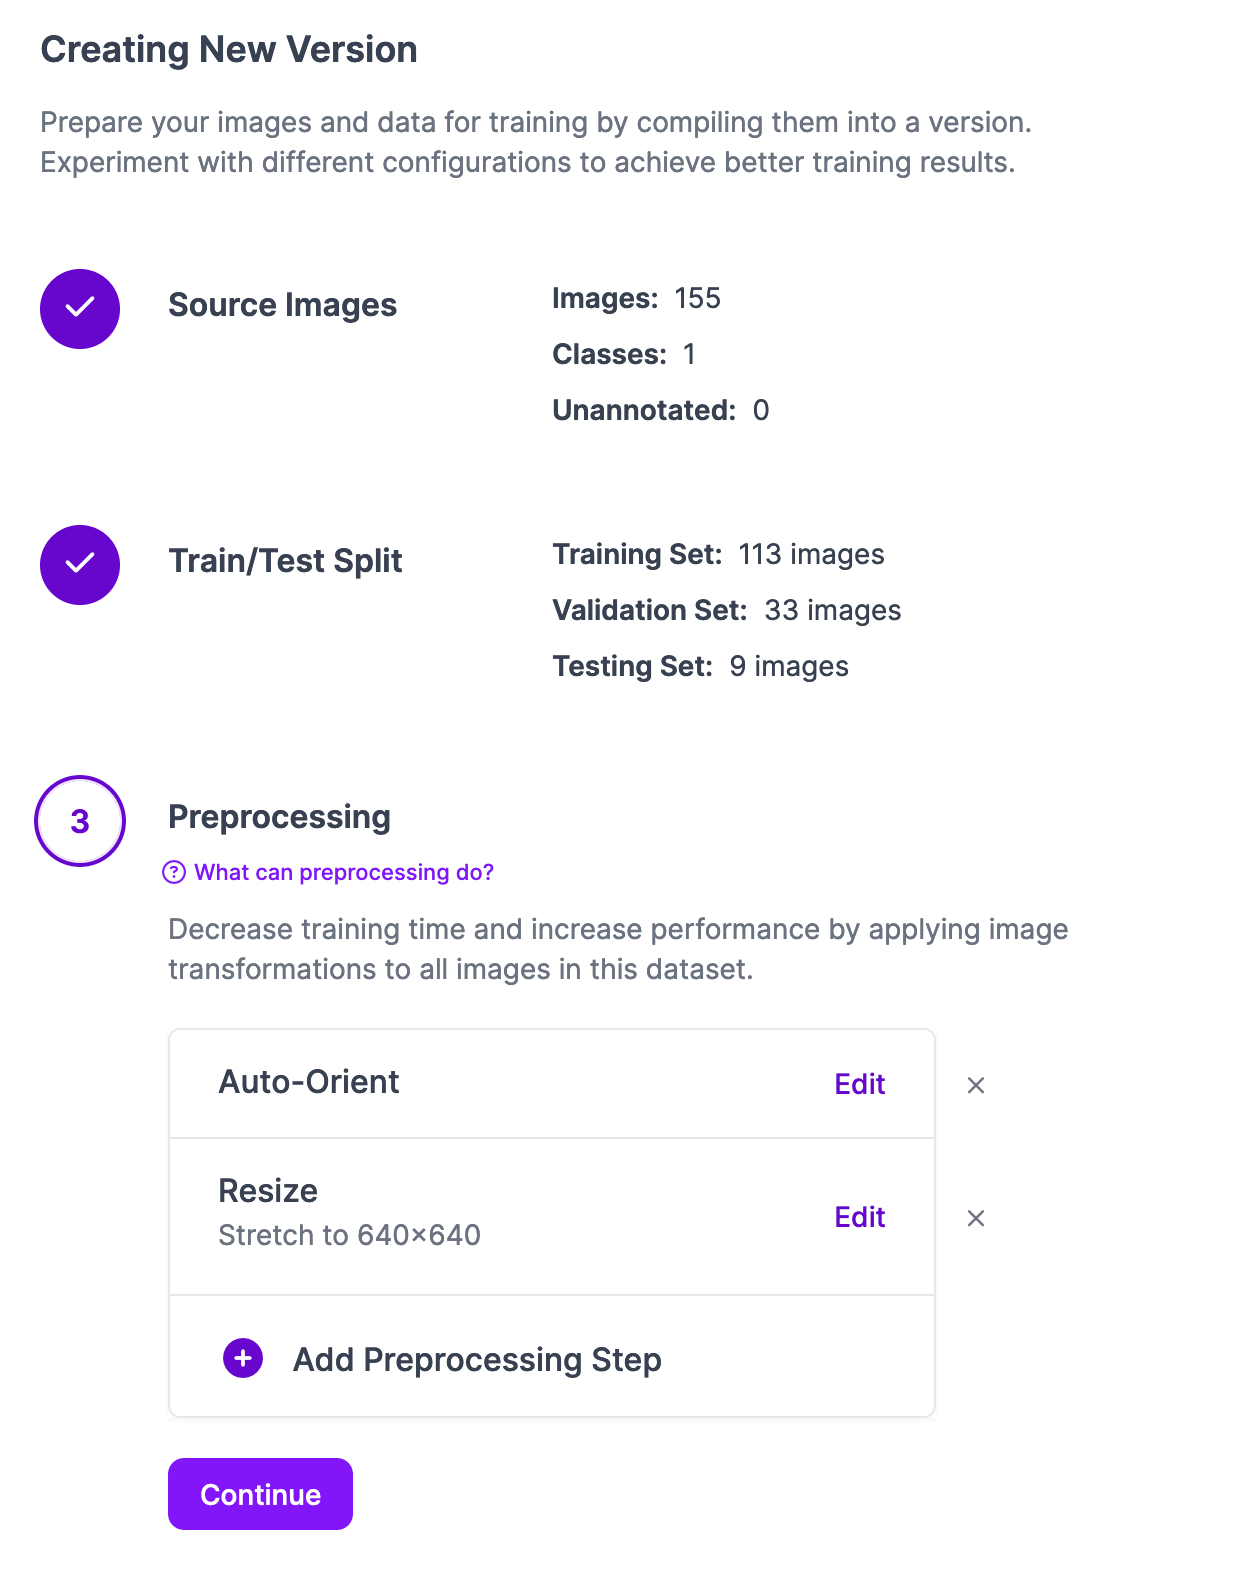
When you are ready, click “Create” on the dataset generation page. This will create a version of your dataset with any selected preprocessing and augmentation steps. You will be taken to your dataset page where you can train a model.
Click the ‘Train with Roboflow” button to train your model. You will be able to customize the training job. For your first training job, choose all the “Recommended” options: fast training, and train from the COCO checkpoint.
When training begins, you will be able to monitor training progress in the Roboflow dashboard.
Next Steps
Once you have a trained model, you can preview it from the Visualize tab in the Roboflow dashboard. Here is an example of our container detection model running:

Our model successfully identifies the location of conainers in our dataset.
With a trained model, the next step is to deploy the model. You can deploy the model to the cloud using the Roboflow API, or on your own hardware. If you choose to deploy the model to your own hardware, you can run your deployment with Roboflow Inference. Inference is our high-performance self-hosted computer vision Inference server.
You can deploy Inference on NVIDIA Jetson devices, Raspberry Pis, on your own cloud GPU server, an AI PC, and more.
To learn more about deploying segmentation models with Inference, refer to the Inference documentation.
Cite this Post
Use the following entry to cite this post in your research:
James Gallagher. (Jul 31, 2024). How to Label Data with Grounded SAM 2. Roboflow Blog: https://blog.roboflow.com/label-data-with-grounded-sam-2/