
“Garbage in, garbage out.”
This old machine learning adage conveys a salient machine learning point: unless input data is of high quality, model accuracy - even with the best computer vision architectures - will suffer.
But what’s forgotten is how much control data scientists, developers, and computer vision engineers have over input data, even if not the principal agent collecting the data. What’s more: steps taken in the image input pipeline can turn what was once high quality data into lower signal-producing inputs.
This is not to say data quality is not an a priori concern. Striving to collect high quality data for the task at hand is always important. But there are instances where deep learning engineers may blindly apply preprocessing and augmentation steps that reduce model performance on the same data. And, even when having high quality data, preprocessing allows the best possible results to be obtained.
Understanding what preprocessing and augmentation are at their core enables data scientists to get the most out of their input data.
What Is Image Preprocessing?
Image preprocessing is the steps taken to format images before they are used by model training and inference. This includes, but is not limited to, resizing, orienting, and color corrections.
Image preprocessing may also decrease model training time and increase model inference speed. If input images are particularly large, reducing the size of these images will dramatically improve model training time without significantly reducing model performance.
For example, the standard size of images on iPhone 11 are 3024 × 4032. The machine learning model Apple uses to create masks and apply Portrait Mode performs on images half this size before its output is rescaled back to full size.
Why should I preprocess images?
Preprocessing is an essential step to clean image data before it is ready to be used in a computer vision model. There are both technical and performance reasons why preprocessing is essential.
Fully connected layers in convolutional neural networks, a common architecture in computer vision, require that all images are the same sized arrays. If your images are not in the same size, your model may not perform as expected. If you are building a model in code using a library like Tensorflow, you are likely to encounter an error if your image is not the same size.
What Is Image Augmentation?
Image augmentations are manipulations applied to images to create different versions of similar content in order to expose the model to a wider array of training examples. For example, randomly altering rotation, brightness, or scale of an input image requires that a model consider what an image subject looks like in a variety of situations.
Image augmentation manipulations are forms of image preprocessing, but there is a critical difference: while image preprocessing steps are applied to training and test sets, image augmentation is only applied to the training data. Thus, a transformation that could be an augmentation in some situations may best be a preprocessing step in others.
Knowing the context for data collecting and model inference is required to make informed preprocessing and augmentation decisions.
Why should I augment images?
It’s impossible to truly capture an image that accounts for every real world scenario a model may encompass. This is where augmentation can help. By augmenting your images, you can increase the sample size of your training data and add in new cases that might be hard to find in the real-world.
Augmenting existing training data to generalize to other situations allows the model to learn from a wider array of situations.
This is particularly important when collected datasets may be small. A deep learning model will (over)fit to the examples shown in training, so creating variation in the input images enables generation of new, useful training examples.
Consider the scenario where you need to identify all instances of cars that drive past a camera to monitor traffic on a road. Your model needs to be able to identify cars well. But, cars can be many different colours. If your dataset doesn't contain enough images of cars of a certain color, you may encounter issues identifying some cars.
In this case, you could add a grayscale augmentation. This will help your computer vision model infer more general data about what a car is and depend less on the color of a car.
Image Augmentation vs. Preprocessing
Augmentation refers to creating new images based on existing images in your dataset to improve your dataset, whereas preprocessing involves modifying existing images to meet a particular set of requirements (i.e. all images must be the same size). Augmentation happens after preprocessing.
Consider altering image contrast. A given dataset could contain images that are generally low contrast. If the model will be used in production on only low contrast in all situations, requiring that every image undergo a constant amount of contrast adjustment may improve model performance.
This preprocessing step would be applied to images in training and in testing. However, if the collected training data is not representative of the levels of contrast the model may see in production, there is less certainty that a constant contrast adjustment is appropriate. Instead, randomly altering image contrast during training may generalize better. This would be augmentation.
What Image Preprocessing Steps Should I Use?
Identifying the correct preprocessing steps most useful for increasing model performance requires a firm understanding of the problem, data collected, and production environment. What may work well in one situation is not appropriate in all others. This is also the case in image augmentation.
Thus, considering techniques and why each may be valuable enables informed decisions. In this post, we’ll surface considerations and provide recommendations that are generally best. Again, there is no free lunch, so even “generally best” tips can be disproven.
Let's start with image preprocessing steps that you should keep in mind when you are ready to start training your computer vision model.
Resize
Changing the size of an image sounds trivial, but there are considerations to take into account.
Many model architectures call for square input images, but few devices capture perfectly square images. Altering an image to be a square calls for either stretching its dimensions to fit to be a square or keeping its aspect ratio constant and filling in newly created “dead space” with new pixels. Moreover, input images may be various sizes, and some may be smaller than the desired input size.
Best tips: Preserving scale is not always required, filling in dead pixels with reflected image content is often best, and downsampling large images to smaller images is often safest.
Orientation
When an image is captured, it contains metadata that tells our machines the orientation by which to display that input image relative to how it is stored on disk. That metadata is called its EXIF orientation, and inconsistent handling of EXIF data has long been a bane of developers everywhere.
This applies to models, too: if we’ve created annotated bound boxes on how we perceived an image to be oriented but our model is “seeing” that image in a different orientation, we’re training the model completely wrong!
Best tips: Strip EXIF orientation from images and ensure pixels are all ordered the same way.
What Image Augmentation Steps Should I Use?
There is no standard set of augmentation steps that are instantly going to improve the performance of the model on which you are working. In fact, some augmentations may have a negative impact on your model performance.
Below, we'll discuss the augmentation steps that you will want to keep in mind as you prepare for training a model. The knowledge you acquire below will help you make an informed decision about what augmentations ay be worth trying.
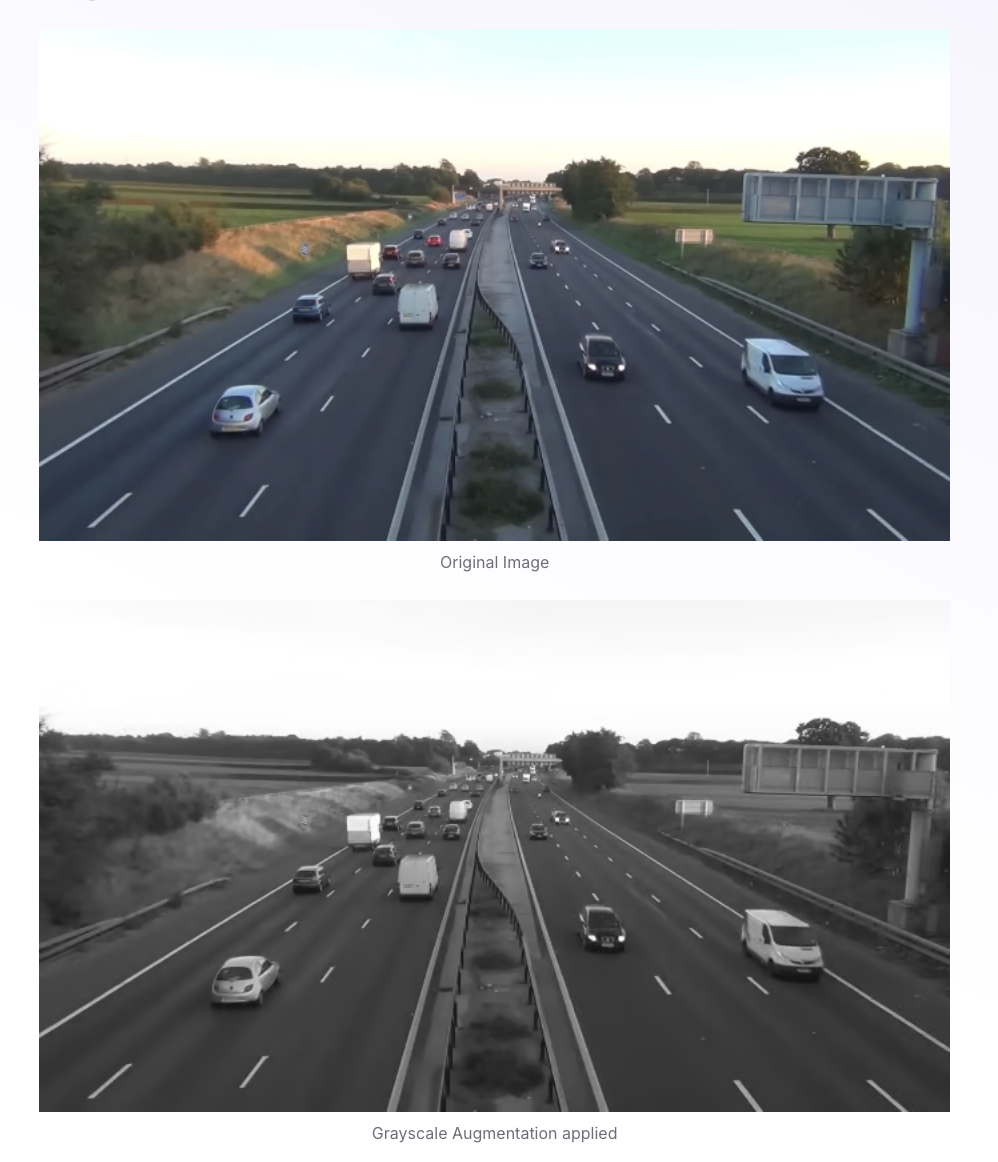
Grayscale
Color changes are an example of image transformations that may be applied to all images (train and test) or randomly altered in training only as augmentations.
Generally, grayscaling is a color change applied to all images. While we may think “more signal is always better; we should show the model color,” we may see more timely model performance when images are grayscaled.
In addition, color is sometimes not as relevant to a model. If you use greyscale, you don't need to worry about gathering images for every color of an object; your model will learn more general features about an object that do not depend on color.
Color images are stored as red, green, and blue values, whereas grayscale images are only stored as a range of black to white. This means for CNNs, our model only needs to work with one matrix per image, not three.
Best tips: Grayscale is fairly intuitive. If the problem at hand explicitly requires color (like delineating a white line from yellow line on roads), it’s not appropriate. If we’re, say, deciphering the face of a rolled set of dice, grayscale may be a great option.
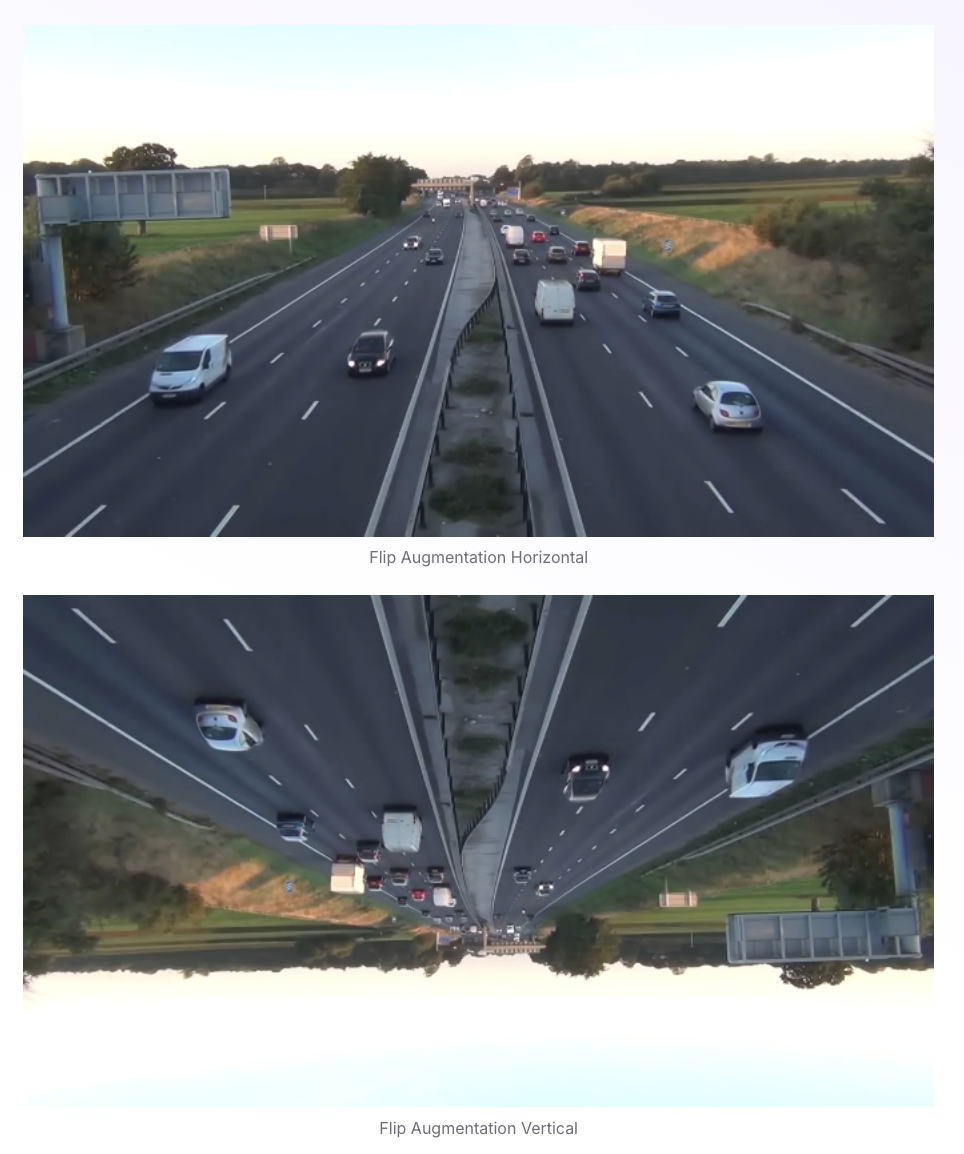
Random Flips
Randomly mirroring an image about its x- or y-axis forces our model to recognize that an object need not always be read from left to right or up to down. Flipping may be illogical for order-dependent contexts, like interpreting text.
Best tips: For most real world objects, flipping is a strong way to improve performance.
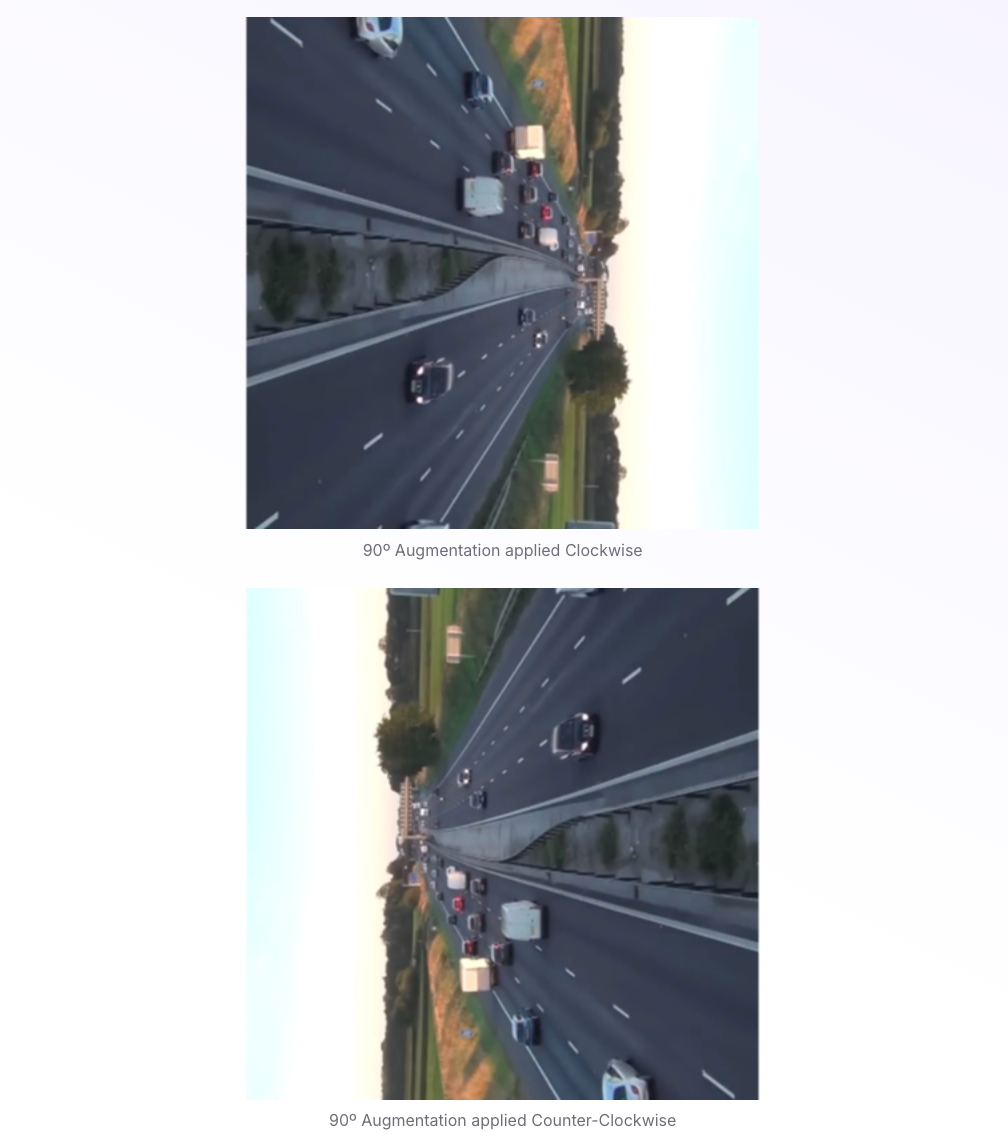
Random Rotations
Rotating an image is particularly important when a model may be used in non-fixed position, like a mobile app. Rotating can be tricky as it, too, generates “dead pixels” on the edges of our images and, for bounding boxes, requires trigonometry to update any bounding boxes.
Best tips: If an object may be a variety of different orientations relative to the captured images, rotation is a good option. This would not be true for, say, screenshots, where the image content is always in a fixed position.
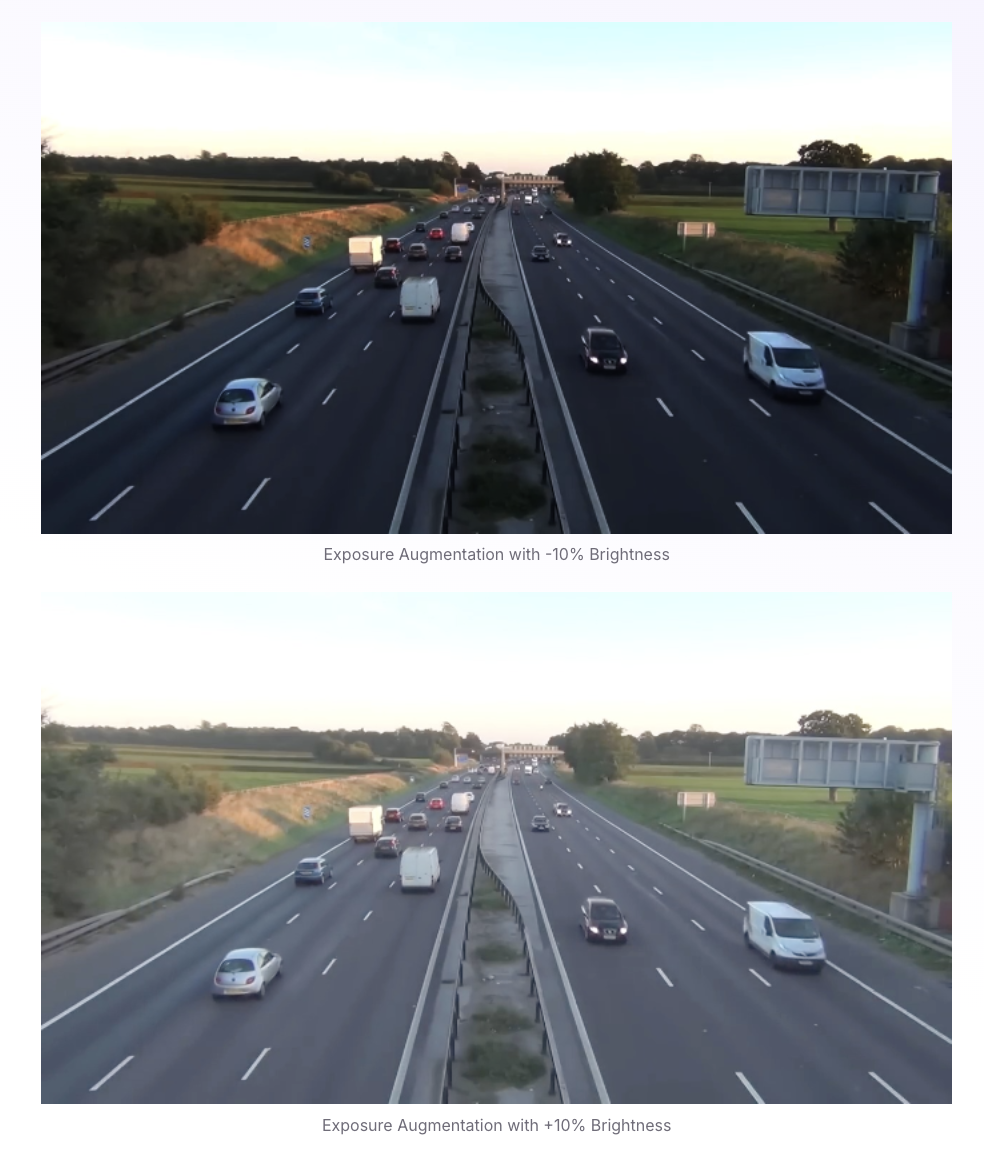
Random Brightness and Exposure
Adjusting image brightness to be randomly brighter and darker is most applicable if a model may be required to perform in a variety of lighting settings. It’s important to consider the maximum and minimum of brightness in the room.
Best tips: fortunately, brightness is fairly intuitive as well. Adjust brightness to match conditions the model will see in production relative to the images available for training.
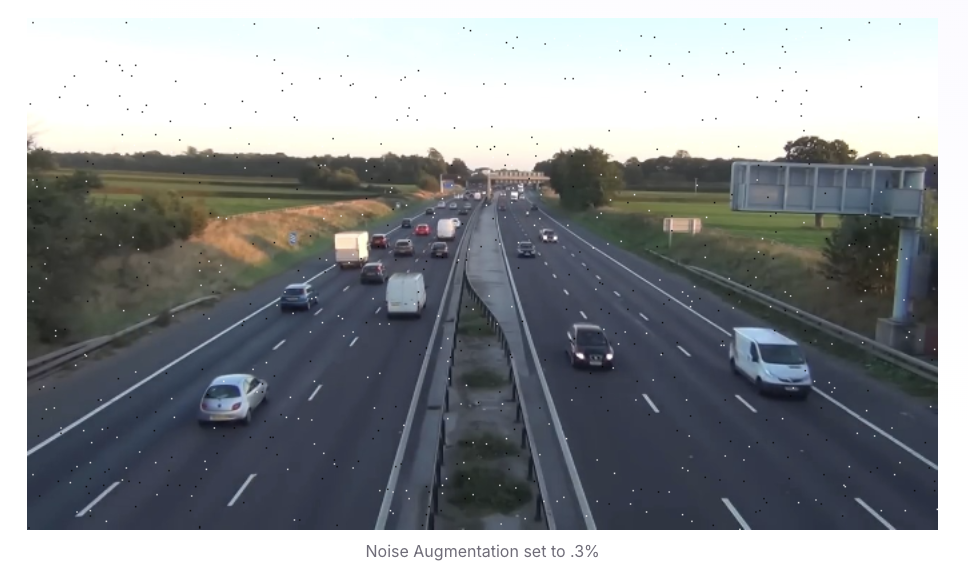
Random Noise
Adding noise to images can take a variety of forms. A common technique is “salt and pepper noise,” wherein image pixels are randomly converted to be completely black or completely white. While deliberately adding noise to an image may reduce training performance, this can be the goal if a model is overfitting on the wrong elements.
Best tips: If a model is severely overfitting on image artifacts, salt and pepper noise can effectively reduce this.
How Do I Apply Preprocessing and Augmentations?
Roboflow supports one-click preprocessing and augmentation options as well as handling all annotation corrections required to keep bounding boxes accurate. It’s free to get started, and you can use it with your models whether they're written in Tensorflow, PyTorch, Keras, or some other tool.
Frequently Asked Questions
What augmentations are right for aerial photography?
Aerial photography may benefit from hue, crop, brightness, flip, and 90-degree rotation augmentations, although you should test each augmentation on your dataset to see what works best for you.
How many augmentations should I apply to my dataset?
How many augmentations you apply will depend on the problem you are trying to solve. There is not a recommendation. You should always consider what problem you are trying to solve and test the augmentations that you think are appropriate.
Should preprocessing and augmentations be applied before or after annotation?
Be sure that you have properly annotated all images within your dataset, designated appropriate images as null annotation, and/or omitted any unnecessary classes prior to preprocessing and augmentations. Preprocessing applies to all images in your Roboflow Train, Valid, and Test set (unlike Augmentations, which only apply to the Train set).
How do I prevent augmentations from breaking my bounding boxes or segmentation masks?
Geometric augmentations (flip, rotate, shear, perspective) change pixel locations, so your annotations must transform with them. If you’re doing this manually, it means recalculating bounding-box coordinates or reprojecting polygon vertices. Roboflow handles this automatically, updating all annotation formats (boxes, masks, polygons, keypoints) so every transformation stays consistent with the image.
How do I choose augmentation strength (angles, brightness ranges, noise levels)?
Start with real-world realism. Set ranges that mimic the actual variation your model will encounter in production—not more. Augmentations that create impossible scenarios typically hurt performance. If a human would still recognize the object, the augmentation is probably safe.
How do I validate whether preprocessing or augmentation improved or hurt my model?
To validate preprocessing and augmentation, train a model with them, then train a separate model without them and compare their performance on a consistent test set using the metrics and tools provided by Roboflow's Model Evaluation. You can compare metrics such as precision and recall, examine the confusion matrix to find class-specific weaknesses, and use the interactive vector explorer to identify areas where the model excels or struggles.
Learn more about how to augment images for classification, for object detection, and for segmentation.
Cite this Post
Use the following entry to cite this post in your research:
Joseph Nelson. (Nov 12, 2025). What Is Image Preprocessing and Augmentation?. Roboflow Blog: https://blog.roboflow.com/why-preprocess-augment/