
Autodistill automates the labeling step of a computer vision pipeline by using foundation models (Grounding DINO, SAM, CLIP) to annotate images based on text prompts, then trains a smaller task-specific model on the resulting dataset. A single CLI command covers the full sequence: label images, train a target model such as RF-DETR, and push the result to Roboflow for deployment. This tutorial works through a concrete example of detecting milk bottles on a conveyor belt and explains the tradeoffs, including that foundation models cannot reliably identify every object class.
In this guide, we are going to show you how to label data for, train, and deploy a computer vision model in a single command using the new autodistill command line interface. Autodistill uses foundation models to label images for use in training models. We will train a small model that can identify milk bottles on a conveyor belt.
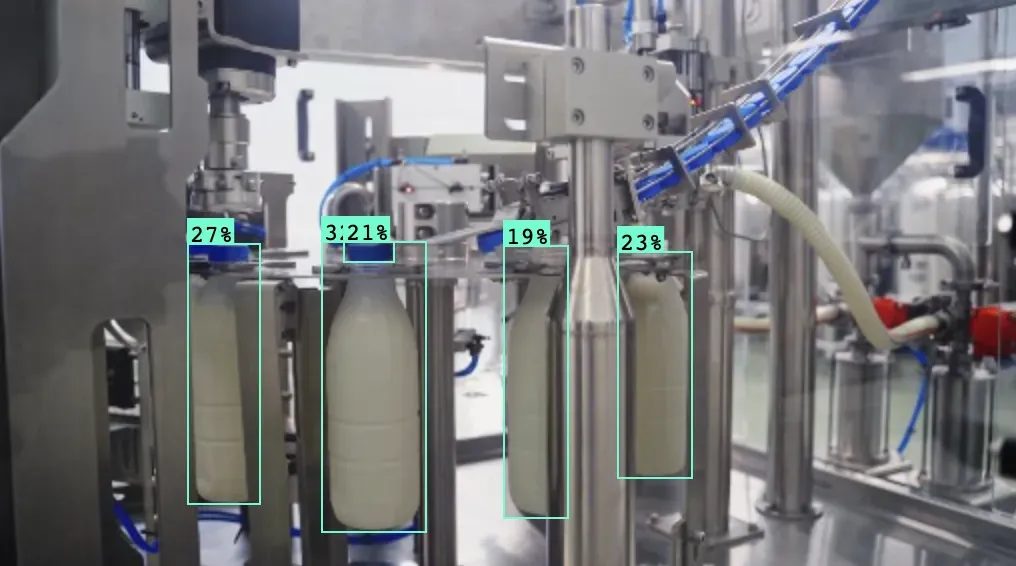
Here is an example of our model working on an image in our dataset:
Without further ado, let's get started!
What is Autodistill?
Autodistill is an open source utility that lets you use foundation vision models to train smaller, task-specific models. Autodistill accepts images and prompts. In most cases, prompts are text inputs that indicate what you identify, and are mapped to a particular label (i.e. "milk bottle" may be the prompt, and "bottle" is the label that is saved). Autodistill will then use a foundation model to label all the images in your dataset with the provided prompts.
Large, foundation vision models are playing a growing role in computer vision. These models have a vast range of knowledge about a lot of different topics, but require a lot of memory to run in contrast to fine-tuned, task-specific models. The compute requirements make foundation models impractical to use on the edge. Foundation models are also expensive and time consuming to tune to a particular use case.
With a foundation model such as CLIP, Grounding DINO, or Segment Anything (SAM) used with Grounding DINO, you can automatically label custom data for use in training a vision model. Since you know all of the data that you will include in your dataset, you will have all the information you need to tune, debug, and improve your model over time.
Autodistill supports a range of models. For example, you can use Grounding DINO for object detection labeling, SAM for segmentation, CLIP, DINOv2, and BLIP for classification, and more. You can then use your labeled data to train a model with an architecture relevant to the task type with which you are working (i.e. RF-DETR for detection, or ViT for classification).
Supported foundation models can identify a range of objects, from boxes to trash to people to ladders. They are not suitable for every use case, however: for brand-specific objects, foundation models will not perform well; for uncommon objects (i.e. defects), foundation models will likely not be able to help as much.
For more background information on Autodistill, check out our Autodistlil introductory guide, in which we walked through an example of a model that identifies bottles of milk in a factory that produces milk.
Below, we'll use Autodistill to train a milk bottle detection model, but in one command.
How to Label Data, Train, and Deploy a Vision Model in One Command
With the autodistill command line interface and Roboflow, you can label data for, train, and deploy a vision model in one command. Let's walk through an example!
Step #1: Install Autodistill
First, you will need to install Autodistill. You can do so using the following command:
pip install autodistillAutodistill will be available as a single command: `autodistill`. We'll use this command in a few moments. But before we can train a model, we need images on which to train our model.
Step #2: Collect Image Data
The basis of a well performing vision model is a dataset representative of the objects you want to identify. If you don't have images yet, Roboflow can help. Roboflow offers a range of tools you can use for collecting image data. For example, you can use Roboflow Collect to intelligently collect data on the edge. Collect is useful if you need to gather data in a specific environment.
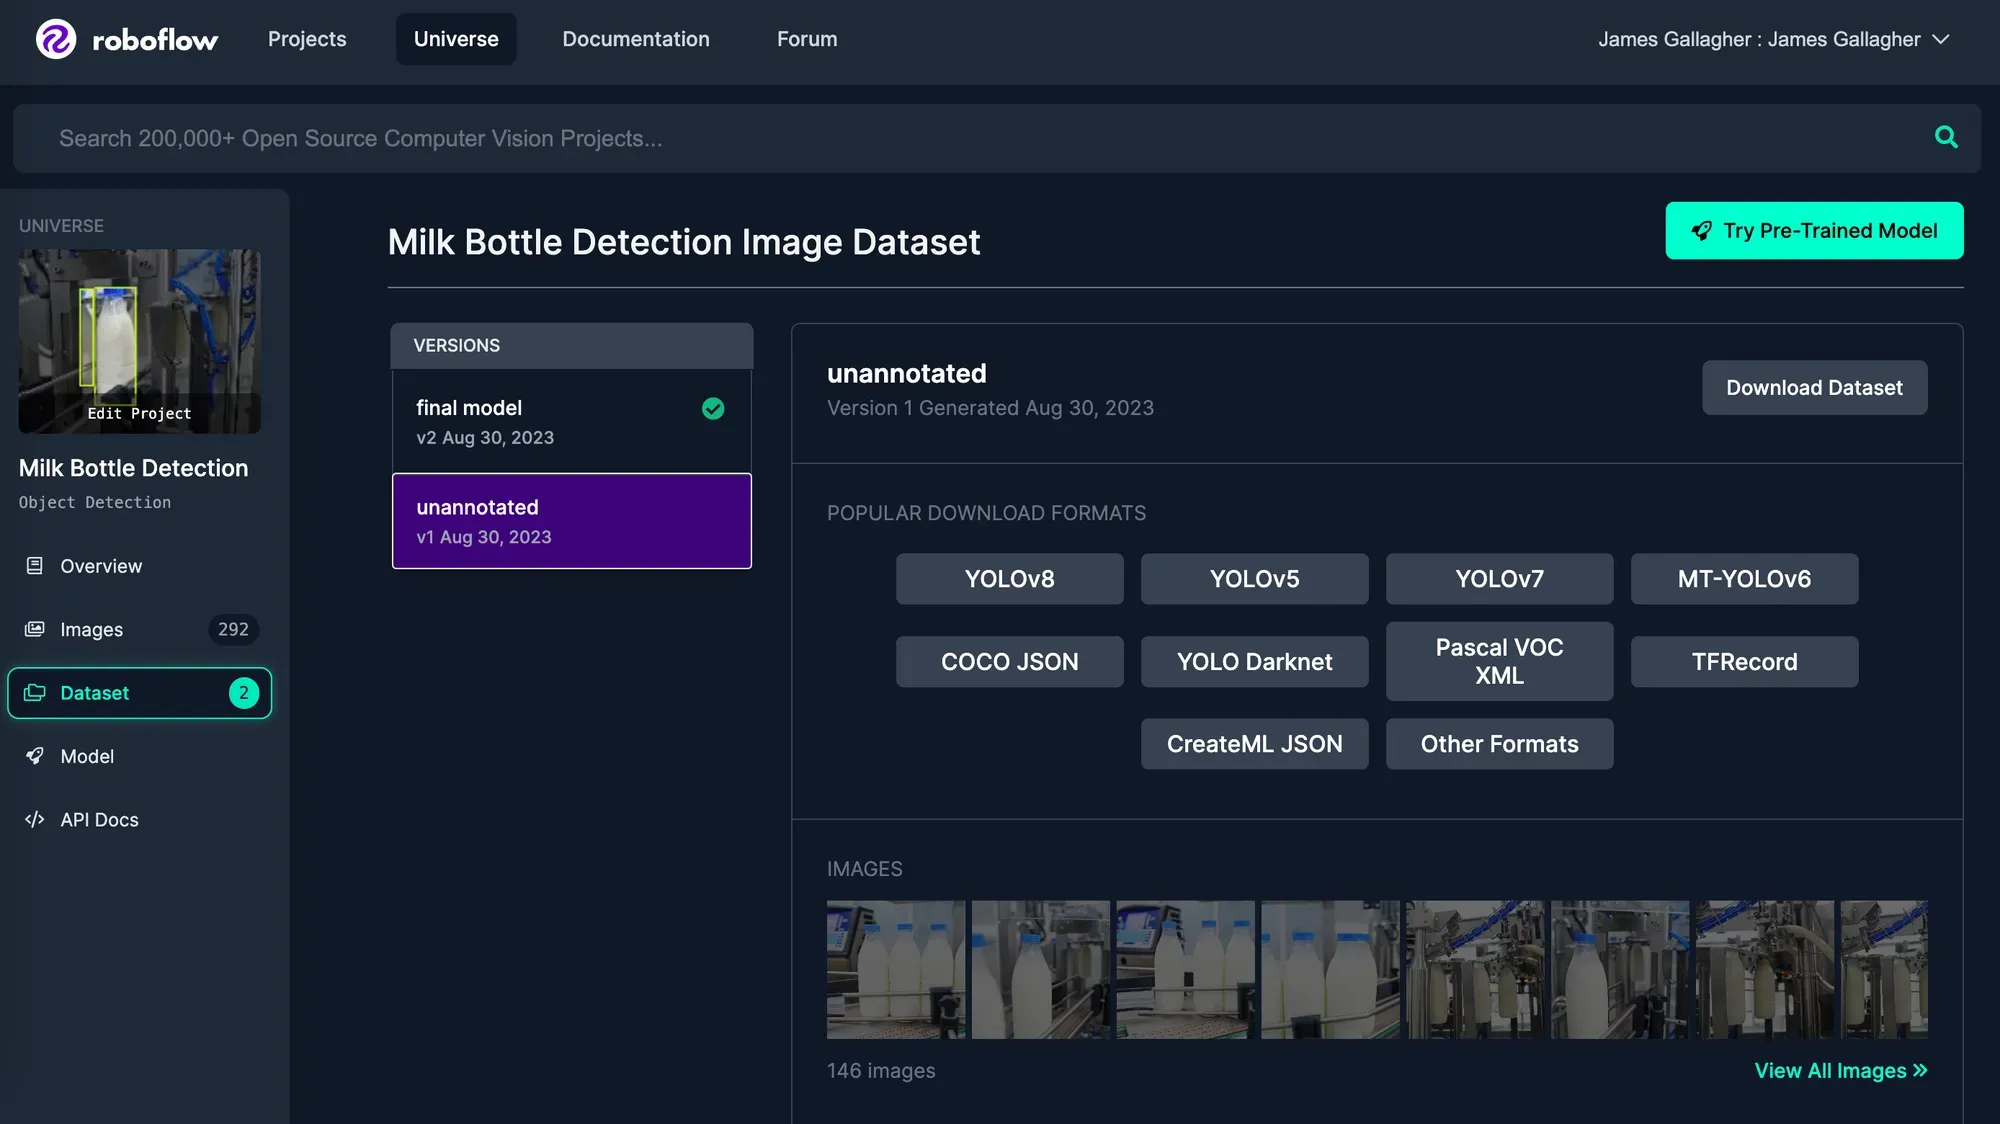
For this guide, we will use Roboflow Universe for gathering data. Universe is a community that shares vision datasets and models. There are more than 200,000 public datasets available on Universe. You can use the semantic search feature on Universe to find datasets relevant to your use case.
We will use a milk bottle detection model. We have created a version called "unannotated" for this example (version 1). This contains only the raw images without augmentations.
Search for a dataset relevant to your use case. When you have found one, sign up for or sign in to your Roboflow account then click the "Download this dataset" button to export the dataset. Export the dataset in a format compatible with your target model (for example, YOLOv8 PyTorch TXT is a common choice). When asked, specify that you want to download the dataset as a ZIP file. When the file has downloaded, unzip the file.
We will be using the images in the train/images directory, which is where the training images are in the ZIP export downloaded from Roboflow.
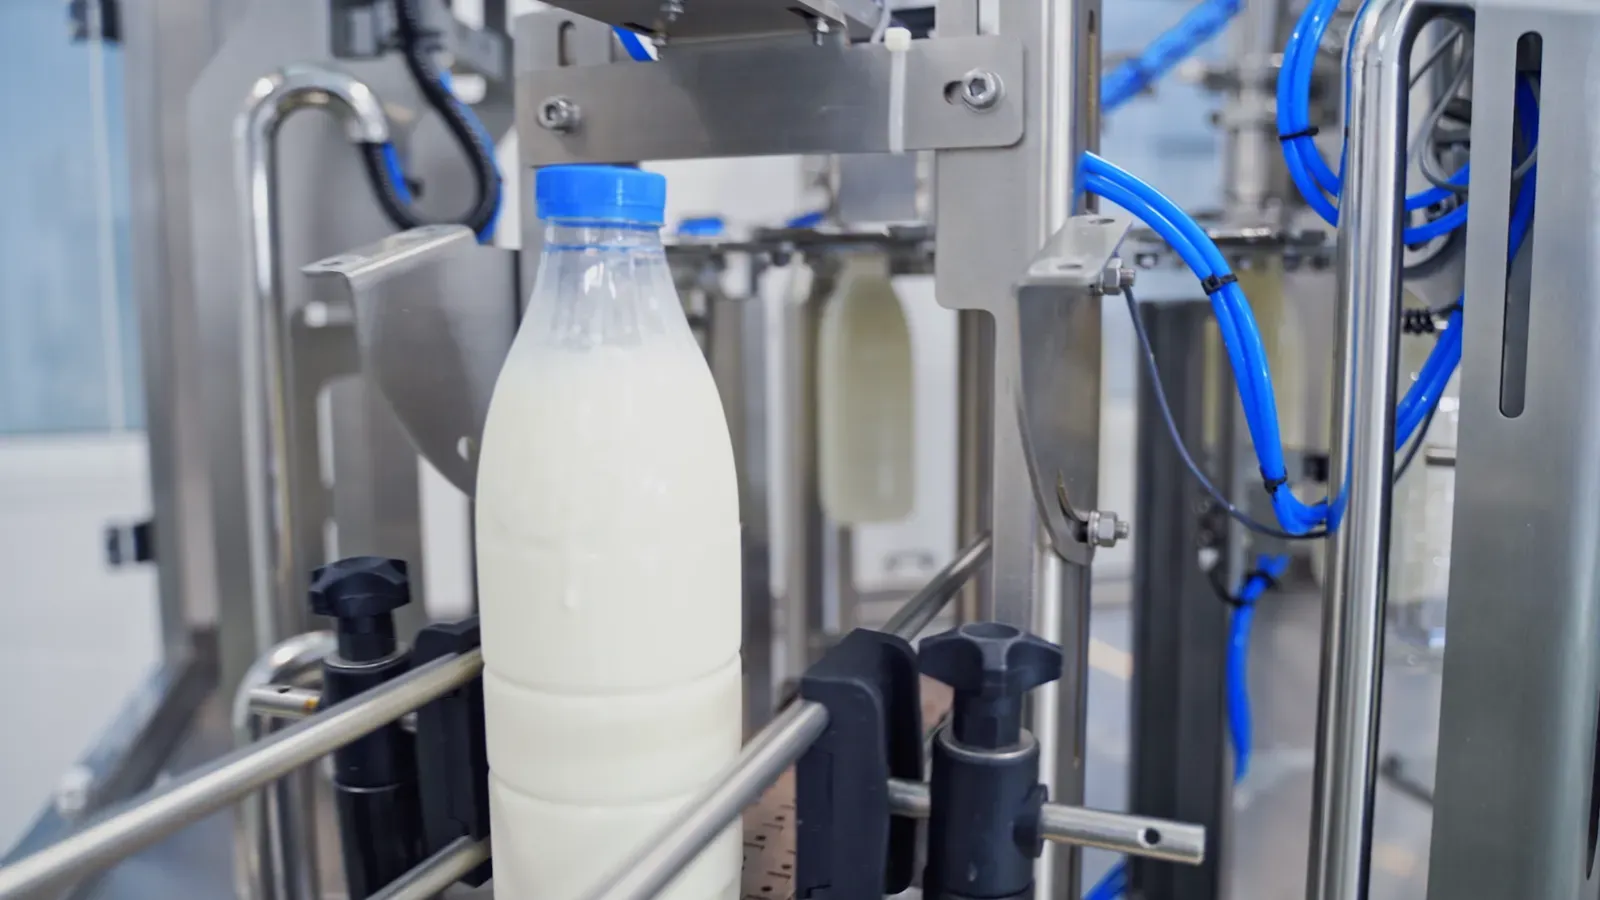
Here is an example image in our milk bottle detection dataset:
Step #3: Create and Evaluate an Ontology
Next, we need to define an ontology. An ontology converts what you want to find in an image (the "prompt" given to a foundation model) to a label that will be saved in your final dataset. You can identify many different types of objects in an image using a single ontology.
For this example, we are labeling packages. We will use the following ontology as a starting point:
{ "milk bottle": "bottle", "blue cap": "cap" }In this ontology, we map the prompt "milk bottle" to the label "bottle", and "blue cap" to "cap". Let's see how this ontology performs on an image.
Run the following command, and substitute out the image path with an image on which you want to test an ontology:
autodistill testing --ontology='{ "milk bottle": "bottle", "blue cap": "cap" }' --test=True -yThis command will download the Grounding DINO for use in labeling imagex, then run the ontology on a single image and show the results:
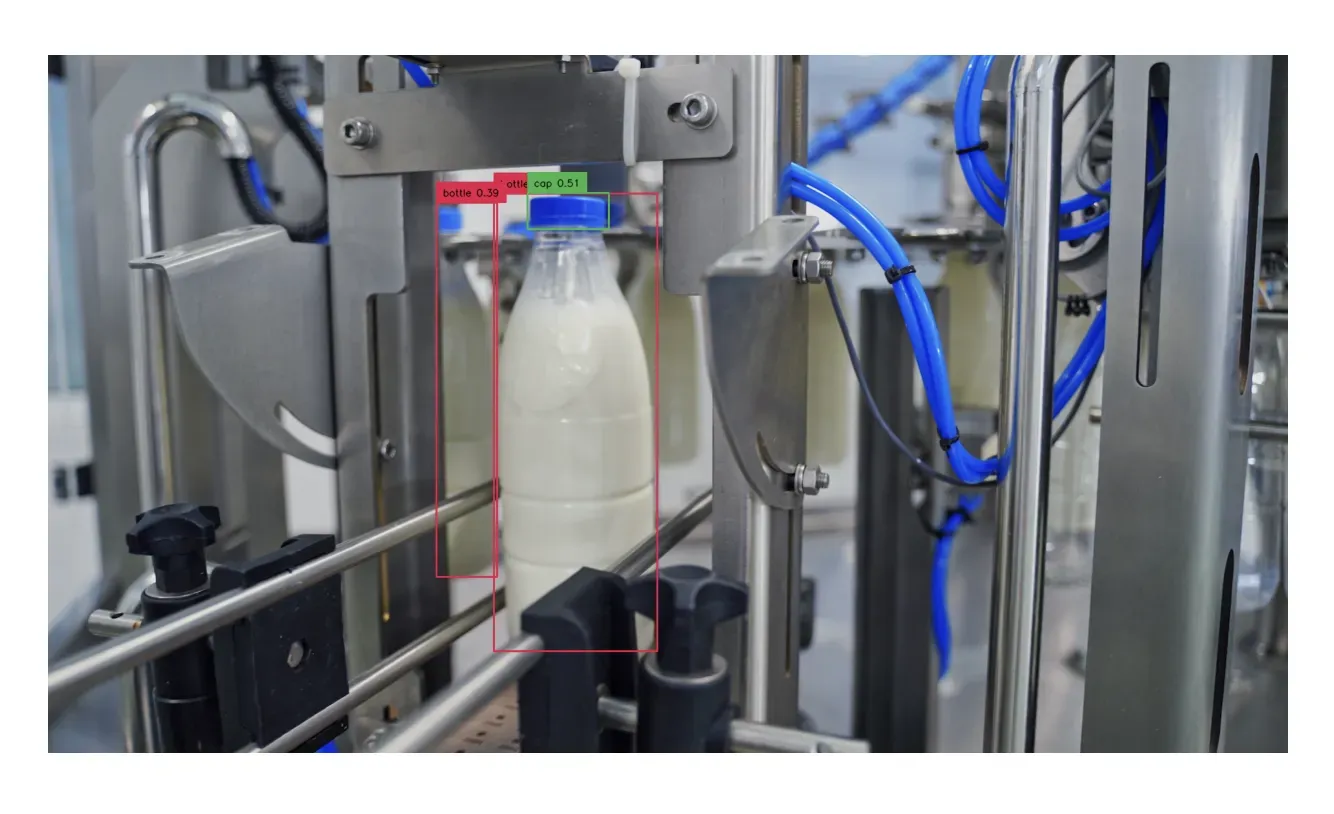
Our model was able to successfully identify both bottles (in red boxes) and a bottle cap (in the green box).
We can evaluate our prompt on multiple images at a time, too.
Copy up to four images representative of your dataset into a new folder called "testing". We recommend doing this for consistency during evaluation. Then, run the following command:
autodistill testing --ontology='{ "milk bottle": "bottle", "blue cap": "cap" }' --test=TrueWhere your ontology is a JSON string like the one we defined earlier.
When you run this command, the base model will label up to four images in the provided folder and display the results, one by one. You can use this to test an ontology to visually evaluate how the ontology performs. When an image pops up, you can close it to view the next one, until all four images have been displayed.
Our ontology performed well with our images, identifying milk bottles (red boxes) and bottle caps (green boxes). If your ontology doesn't perform well, try a different prompt ("milk bottle" and "blue cap" in the above example).
By default, Grounding DINO is chosen as the model for use with labeling. You can define a different model using the –base_model flag. You can find a list of supported models, along with the task types for which you can use the models, by running autodistill models.
For instance, you could use the following command to auto-label images for a classification model using CLIP. This command will label an object either "milk bottle" or "something else:
autodistill testing –-ontology='{ "milk bottle": "bottle", "something else": "something else" }' --task_type="classification" --base="clip"Step #4: Run Autodistill
To run Autodistill, we need to decide on:
- Images (which we have)
- A base model
- A target model
The base model is the model we'll use to label images. The target model is the type of model that will be trained. For this guide, we'll use Grounding DINO as our base model, since it performs well on object detection tasks, and RF-DETR for our target model.
Once our model has been trained, we will upload it to Roboflow for deployment. To do so, create a free Roboflow account and retrieve your API key. By deploying your model on Roboflow, you get access to a scalable API through which you can run inference, as well as SDKs you can use to run inference on a range of devices (i.e. in the browser and on iOS).
Now we're ready to run Autodistill. Run the following command below, substituting the requisite values:
autodistill images --base-model="grounding_dino" --target-model="yolov8" --ontology '{"prompt": "label"}' --output-folder ./dataset --upload-to-roboflow=True --project_license="mit" --project_name="Project name"Substitute the model names, ontology, output folder, license, and project name in the comamdn above as necessary. If you want your project to be private, set --project_license to "private". This is only available for customers on a starter or enterprise plan.
When you run the command above, your images will be labeled, then a model will be trained. This model will be uploaded to Roboflow for use in running inference. An interactive progress bar will appear showing the status of labeling, then the model training process will kick off.
You can find your project on your Roboflow dashboard. Navigate to the "Deploy" tab on your project to see the status of the model weight deployment:
The amount of time it takes for the Autodistill command to run will depend on the number of images in your dataset, what base and target models you are using, as well as the hardware on which you are running Autodistill.
The weights from your trained model will always be saved on your local machine so you can use them as you need.
Step #5: Use Your Trained Model on Roboflow
Once your model has been trained and uploaded to Roboflow, you are ready to test your model! We can do so in the interactive Roboflow web interface. Go to the Roboflow dashboard, open the new model you have created with the name you specified in the Autodistill command. Click on "Deploy" in the sidebar to open up an interactive widget in which you can test your model.
Here is an example of our model working on an image from our test set:
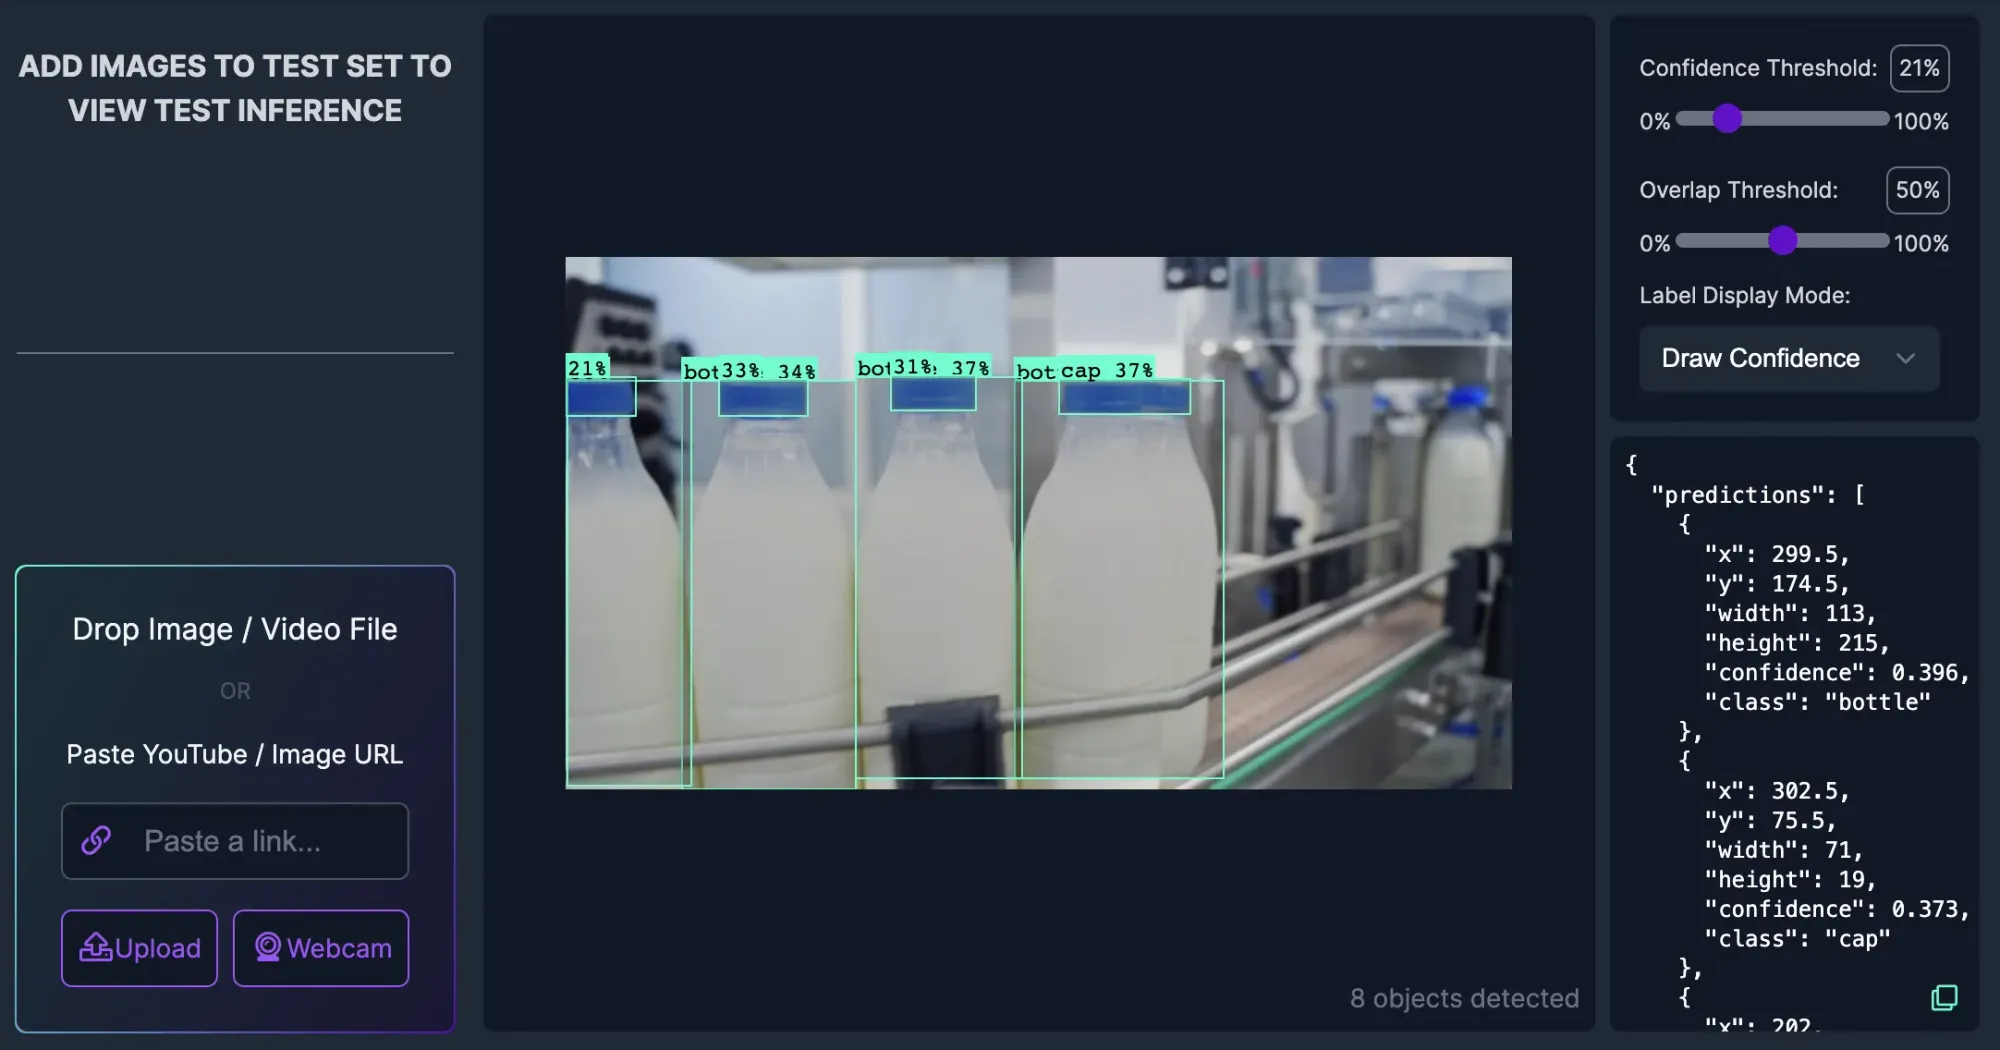
Our model successfully identified bottles and bottle caps! The model confidence is quite low, but the confidence would likely increase if we were to train for more than the 25 epochs over which this model was trained. You can try out the model on Roboflow Universe.
Conclusion
Autodistill enables you to, in one command, label data for, train, and deploy computer vision models. Foundation models like Grounding DINO, SAM, and CLIP can be used for automatically labeling images in your dataset. Autodistill will then use your labeled images to train a target model (i.e. RF-DETR).
You can use Autodistill for a vast range of use cases. With that said, there are limitations: foundation models cannot identify every object. Above, we outlined an approach for testing inference on an image. This can be used for both testing different ontologies and evaluating whether Autodistill can help with your use case.
Now you have the knowledge you need to train a vision model without labeling images using Autodistill.
Cite this Post
Use the following entry to cite this post in your research:
James Gallagher. (Aug 31, 2023). Label Data, Train, and Deploy a Vision Model in One Command. Roboflow Blog: https://blog.roboflow.com/label-train-deploy-autodistill/