Roboflow is always asking the question “what can we do to help reduce the time spent between having an idea for a computer vision model and bringing that model to production?” We spend a lot of time working on ways to streamline annotation, a process that constitutes a significant amount of the time investment required to create and train a model.
Today, we are announcing a new integration with the Make Sense annotation tool that enables you to use Roboflow models in the annotation environment. With this integration, you can select a model to suggest annotations for new images. You can accept, reject, and modify annotations.
With this extension, you can spend less time manually annotating images and prepare the dataset for the model you need when using the Make Sense tool.
In this guide, we’ll show how to use model-assisted labeling powered by Roboflow in Make Sense. Without further ado, let’s get started!
Step 1: Add Images to Make Sense
To start, first go to the Make Sense website and click the "Get Started" button in the bottom left corner. Then, drag the image(s) you want to annotate into the box on the page. In this example, we will annotate images of solar panels, but you can use any image you want to annotate.
0:00/1×
When you have uploaded your images, you will be asked to create labels for your project. These are the classes that you will assign to objects in the annotation tool. You can either upload a list of labels from a TXT file or write in the labels you want to use in the app. We’ll add our labels in the web application.
To add labels in the app, click the middle of the box and type in the labels you want to add. In this case, we can skip adding any classes because we’ll use the ones from our model. Click “Start project” to begin annotation.
Now that we have uploaded images to annotate, we are ready to load a Roboflow model into Make Sense.
Step 2: Configure Make Sense with Roboflow
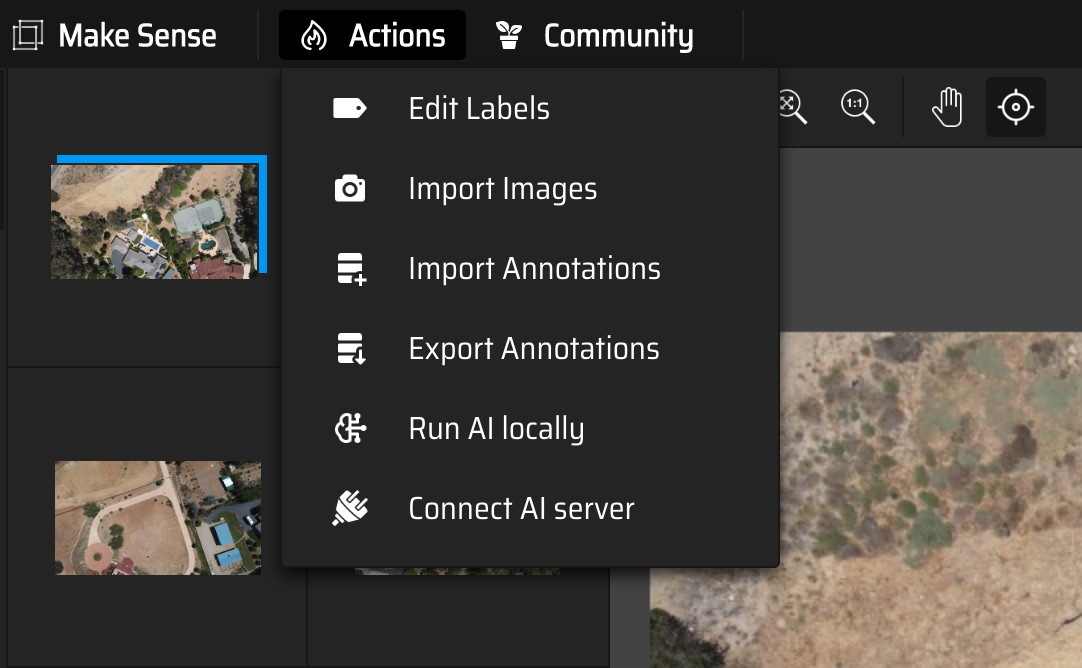
We’re going to use a model that detects solar panels to help us annotate images in Make Sense. To use a Roboflow model to assist you with annotating in Make Sense, first click "Actions" in the top left corner. Then, click "Connect AI server":

A box will pop up asking for the ID associated with your Roboflow model as well as your API key. To retrieve your API key, follow our guide on finding your API key in the Roboflow dashboard. You will need your private API key.
To find your model ID, navigate to the model that you want to use for model-assisted labeling in the Roboflow dashboard. Then, copy the ID and number text that appears towards the top of the page:
In this example, our ID is “aerial-solar-panels/6”.
Paste in the ID and API key into the Connect AI server modal. Then, click to continue. Next, you will be asked what classes you want to add into the annotation tool. Select all the classes that you want to use when annotating, then continue. The modal will close and annotations will automatically be added to the image you are viewing.
Step 3: Use Model-Assisted Labeling
Model-assisted labeling triggers whenever you open a new image in Make Sense. The image is sent to Roboflow and inference is run to find predictions. Those predictions are then drawn as bounding boxes in Make Sense. You can move, resize, and delete bounding boxes as needed, then continue to use Make Sense to add additional labels to the image.
0:00/1×
In the video below, we click through different images we uploaded. Make Sense automatically adds annotations where possible.
When you are finished annotating, click “Actions” then “Export Annotations” to export your annotations. You can then upload the annotations into Roboflow for use in training a computer vision model.
Conclusion
In this guide, we have explored how to use a Roboflow model to assist you with labeling in Make Sense. After uploading images into Make Sense, you can use the “AI server” feature to connect to Roboflow. This feature sends images you want to annotate to Roboflow, runs your specified model, and retrieves predictions. These predictions are plotted as bounding boxes, ready for review and modification in Make Sense.
With the integration between Roboflow and Make Sense, annotating images in the Make Sense platform just became significantly faster.
Cite this Post
Use the following entry to cite this post in your research:
James Gallagher. (Mar 31, 2023). How to Use Roboflow Models in Make Sense. Roboflow Blog: https://blog.roboflow.com/make-sense/
