
This pipeline trains an object detection model for traffic lights without collecting or labeling a single real-world image by chaining together LLaMa 2, Midjourney, and Roboflow's Autodistill. LLaMa 2 iteratively writes and refines Midjourney prompts until the generated images match the target domain, Midjourney produces 100 synthetic training images, and Autodistill handles automated labeling and model training using a foundation model as the annotation source. The resulting model is then uploaded to Roboflow for deployment, with active learning configured to pull in real images over time to improve subsequent iterations.
Introduction
In recent months and years, there has been a drastic rise in the availability, popularity, and usability of AI models that can tackle a host of tasks. This guide will show you how to use multiple models together to bootstrap an initial computer vision model with little manual work by using the latest advancements in computer vision and machine learning.
Model Training Pipeline
Large language models (LLMs), such as the recently released LLaMa 2, can perform language tasks and have the ability to follow up and iterate on them. Midjourney allowed the quick generation of detailed, customizable images. Roboflow's Autodistill made it possible to train smaller, faster, and more specialized models based on the massive amount of data and information held by larger models.
In this article, we work to combine these newly unlocked capabilities into training an object detection model end-to-end without the need for collecting or labeling data.
LLaMa 2: Writing the prompts
With the responsive and iterative nature of chat LLMs, we found that it would be possible to use the newly released LLaMa 2 model from Meta to have it write and iterate through prompts to have Midjourney create the images we want for our project dataset.
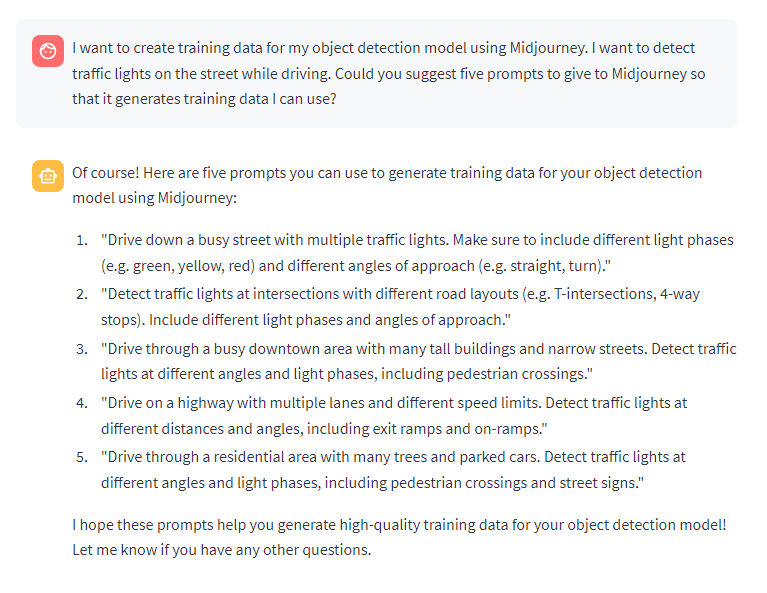
First, we started with a task. For this tutorial, we decided to create an object detection model for detecting traffic lights in intersections.
Then, we explained what we wanted to do to LLaMa 2 and then asked it to write five prompts for us:
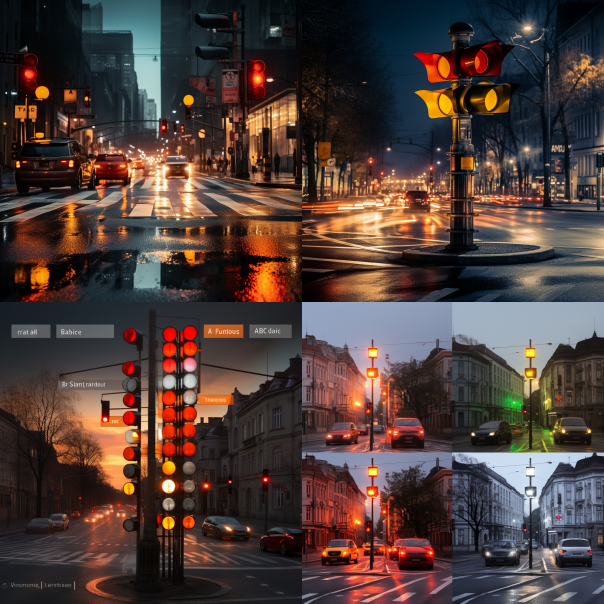
We tried these prompts on Midjourney, which did provide results, but not the ones we wanted:
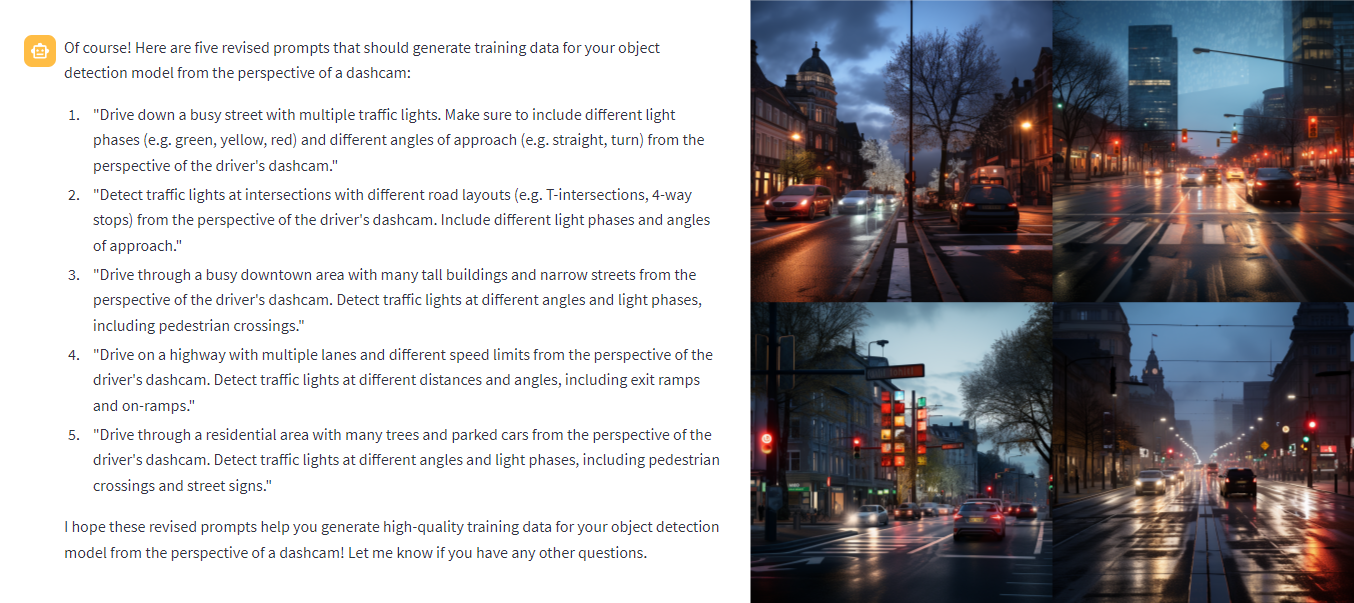
Communicating these issues to LLaMa 2, we asked it to write new prompts:
Midjourney: Creating the dataset
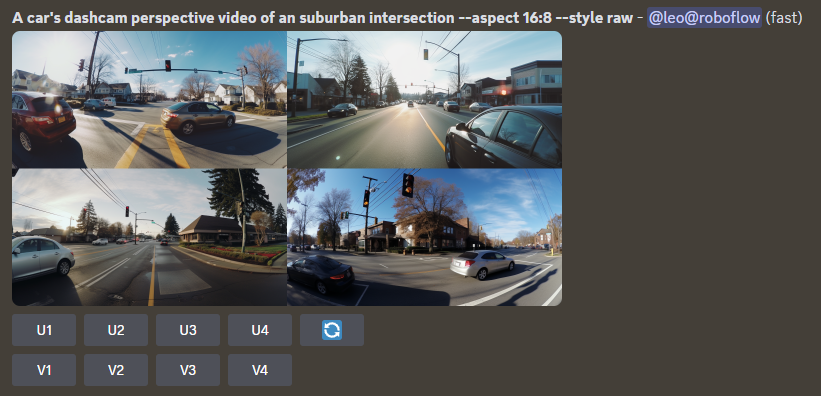
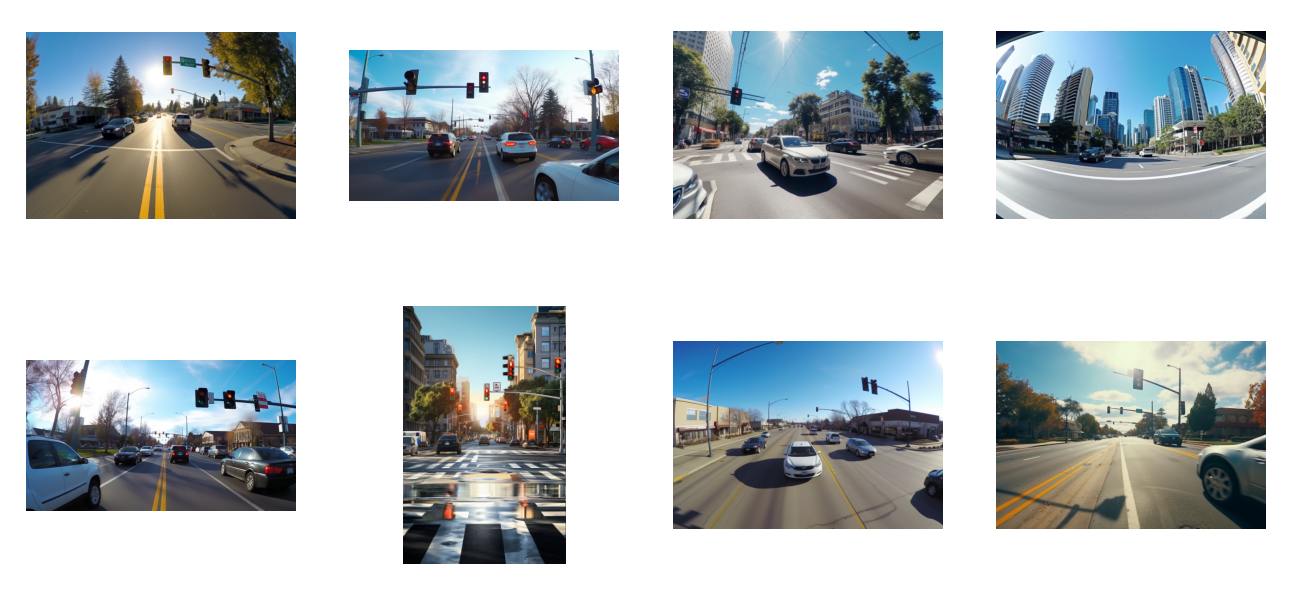
After a few iterations of prompting Midjourney and iterating through them with LLaMa 2, we landed on the prompts we wanted to use. Now, it was time to generate the images we were going to use for training our model.
Since Midjourney already creates a set of four images per generation, we decided to create 100 images or 25 generations using Midjourney. We split that up with five attempts for each of the five prompts, as the nature of Midjourney meant it would create unique images with each attempt.
In addition to the generated images, we also used the additional `--style raw` parameter to create more photo-realistic images, the `–aspect` parameter to generate more realistic and varied image sizes, and `--repeat 5` to run each prompt five times automatically.
Converting the image grid to individual images
The four-image grid is useful for seeing the multiple possibilities that our prompt provides, but is useless for training models, as we want to recreate the conditions in which the model will be used in order for it to perform well.
So, we use Python's PIL to crop and save each quadrant of the image grid, turning the 4x image into a singular image:
import os
import glob
import cv2
from PIL import Image

for im_dir in midjourney_images:
    im = Image.open(im_dir)

    im_width, im_height = im.size

    res_im1_props = 0,0,im_width/2,im_height/2
    res_im2_props = im_width/2,0,im_width,im_height/2
    res_im3_props = 0,im_height/2,im_width/2,im_height
    res_im4_props = im_width/2,im_height/2,im_width,im_height

    for i in range(1,5):
        res_im = im.crop(locals()[f'res_im{i}_props'])
        res_im_dir = f'converted/{i}-{os.path.basename(im_dir)}'
        res_im.save(res_im_dir)
These images are saved in our `converted` folder, which we can then use to train our model.
Autodistill: Automated Data Labeling and Model Training
Now we move on to labeling and training our model using RF-DETR. We'll do this using the GroundedSAM and RF-DETR modules for Autodistill.
We install and import our necessary packages and create our ontology, which is used to categorize our prompts for GroundedSAM and the class names we want them to have:
base_model = GroundedSAM(ontology=CaptionOntology({
  "traffic light": "traffic_light"
}))
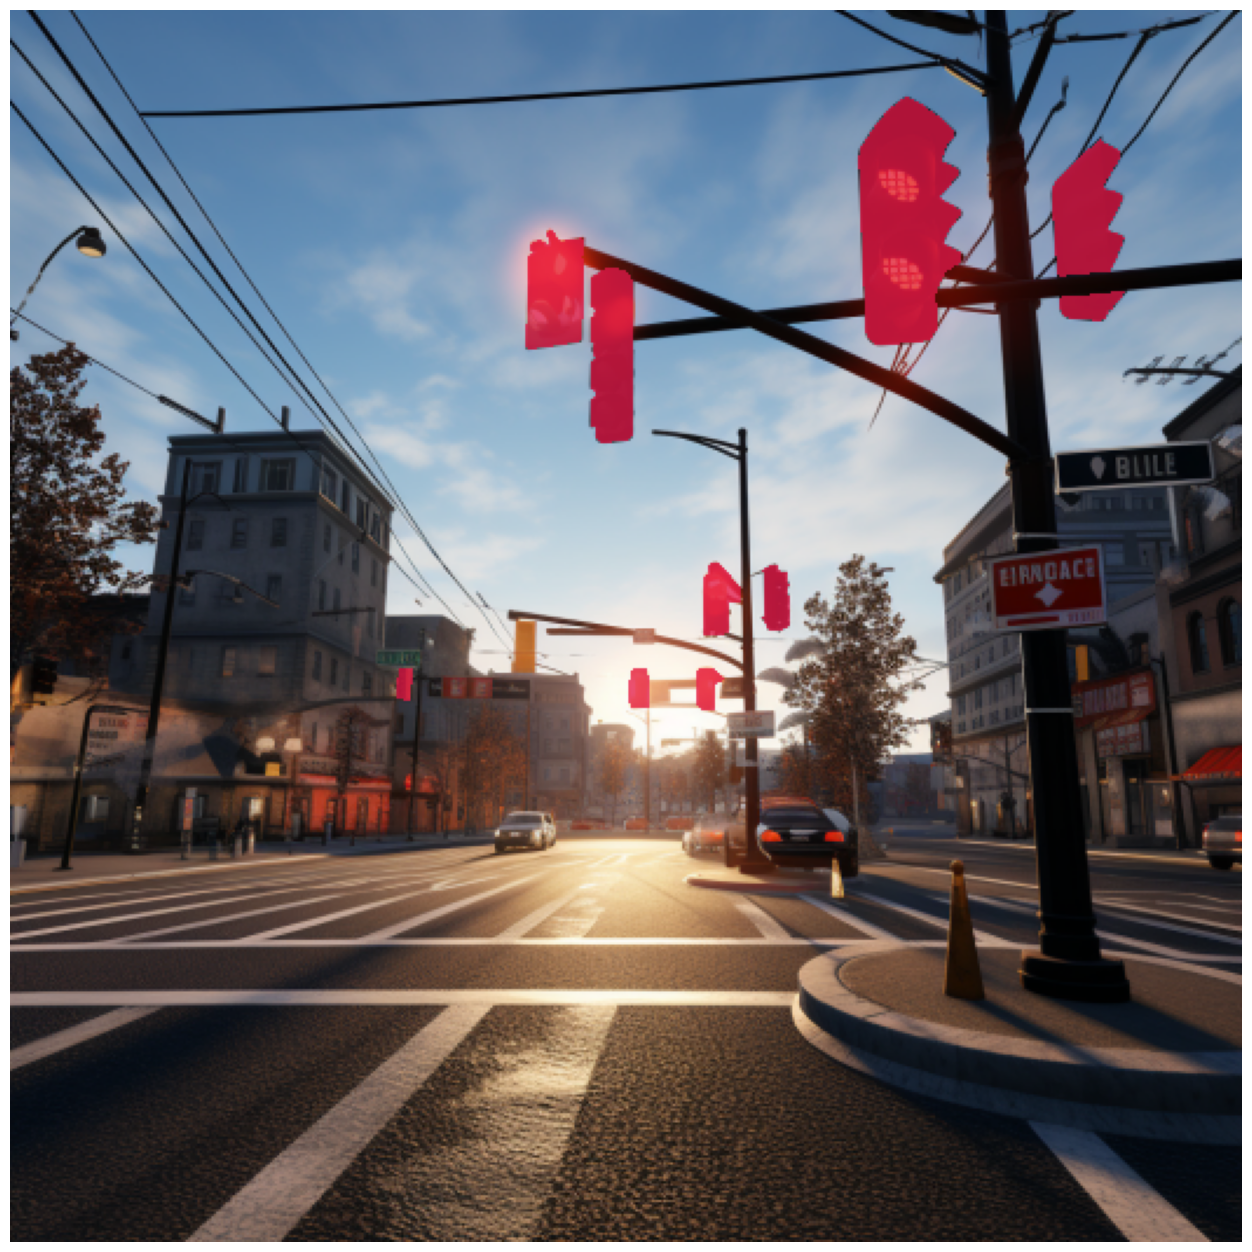
Then, we can quickly examine and iterate the prompting of GroundedSAM by checking how it masked a sample image from our dataset, which showed that it was able to label all the traffic lights in the image successfully:
Automated Data Labeling and Model Training
Now that we nailed down our ontology for Autodistill, now we can label our full dataset and train it, which can be done in three lines of code.
base_model.label(
  input_folder = input_dir,
  extension = "",
  output_folder = output_dir,
)

target_model = YOLOv8("yolov8n.pt")
target_model.train("dataset/data.yaml", epochs=200)
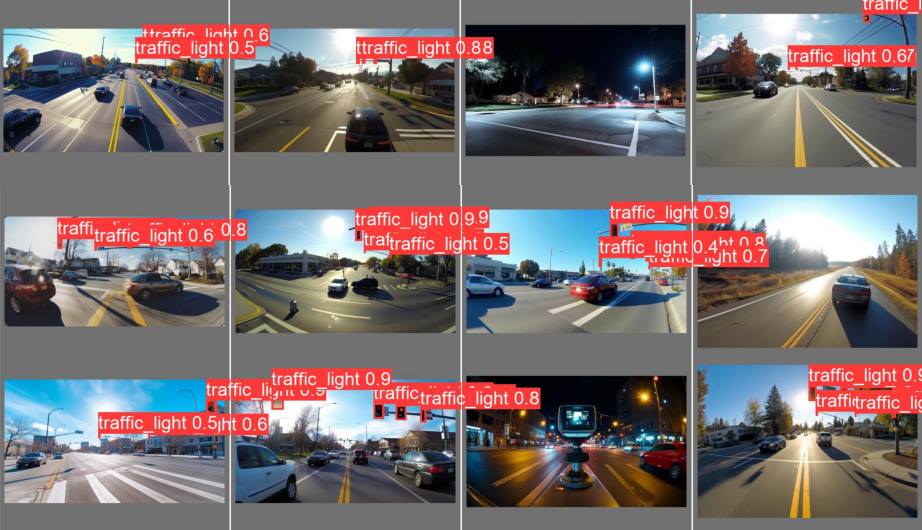
Model Training Results
Once that's done we can evaluate how the model did and take a look at some test dataset images to see how our trained model performed.
Roboflow: Upload and deploy the model
Now that we have an initial model and initial dataset, we have successfully bootstrapped a model to use in production. With this, we can upload the model and dataset into Roboflow to manage further improvements and additions to our model.
First, we'll upload the dataset using the `roboflow` Python package by converting it into a VOC dataset using Supervision.
images_path = Path("voc_dataset/images")
images_path.mkdir(parents=True, exist_ok=True)

annotations_path = Path("voc_dataset/annotations")
annotations_path.mkdir(parents=True, exist_ok=True)

train_dataset = sv.DetectionDataset.from_yolo(images_directory_path="dataset/train/images", annotations_directory_path="dataset/train/labels", data_yaml_path="dataset/data.yaml")
valid_dataset = sv.DetectionDataset.from_yolo(images_directory_path="dataset/valid/images", annotations_directory_path="dataset/valid/labels", data_yaml_path="dataset/data.yaml")

dataset = sv.DetectionDataset.merge([train_dataset,valid_dataset])
dataset.as_pascal_voc(
    images_directory_path = str(images_path),
    annotations_directory_path = str(annotations_path)
)

for image_name, image in dataset.images.items():
  print("uploading:",image_name)

  image_path = os.path.join(str(images_path),image_name)
  annotation_path = os.path.join(str(annotations_path),f'{os.path.splitext(image_name)[0]}.xml')
  print(image_path,annotation_path)

  project.upload(image_path, annotation_path)
After that, we can generate a version of the dataset, then upload our model there.
project.version("1").deploy(model_type="yolov8", model_path=f"runs/detect/train/")
Adding Active Learning
Once the model is uploaded, we can deploy it and use active learning to add real-world data into our dataset to train the next iteration of our model.
model = project.version("1").model

model.confidence = 50
model.overlap = 25

image_path = "/converted/b0816d3f-3df7-4f48-a8fb-e937f221d6db.png"
prediction = model.predict(image_path)

prediction.json()

project.upload(image_path)
Conclusion
In this project, we were able to automate the task of creating an object detection model using a variety of new AI tools.
If you'd like to learn more about Autodistill's ability to label and train models automatically, check out the docs for Autodistill. If you'd like to recreate this process, or create your own project using this process, check out our notebook that we made.
Cite this Post
Use the following entry to cite this post in your research:
Leo Ueno. (Jul 31, 2023). A LLaMa 2, Midjourney & Autodistill Computer Vision Pipeline. Roboflow Blog: https://blog.roboflow.com/midjourney-computer-vision-data/