
Food recalls are every manufacturer's nightmare. Beyond the massive financial cost, they erode consumer trust and, more importantly, pose serious health risks. While many might assume recalls are primarily due to bacteria or spoilage, the reality is often simpler: undeclared allergens are the leading cause, stemming from subtle but critical errors in product labelling. In 2024, undeclared allergens accounted for over 34% of all food recalls, making mislabeling the leading cause of safety withdrawals.
Historically, preventing these errors relied on manual spot-checks, which are prone to human fatigue and the sheer speed of modern production lines. Today, computer vision is transforming this landscape. By leveraging sophisticated AI, manufacturers can implement a 24/7 automated "cross-check" that catches labelling inconsistencies before products ever leave the factory.
In this guide, we will explore how an AI-powered system can verify packaging labels, focusing on the critical ingredient-to-allergen statement cross-check, a method that directly tackles the root cause of the most frequent food recalls.
The Role of Computer Vision in Food Safety
Most food recalls stem from two categories: physical contamination and labelling errors. Computer vision addresses both by providing real-time, "always-on" monitoring.
1. Foreign Object Detection (FOD)
Physical contaminants like glass shards, metal fragments, or plastic from machinery are often too small or transparent for traditional sensors. High-resolution models like RF-DETR can be trained to identify these "out-of-place" objects on high-speed conveyor belts, triggering an immediate stop or rejection mechanism.
2. Label and Allergen Verification
A food recall occurs when a product is deemed unsafe or illegal after it has already entered the market. For allergens, this typically happens when:
- Wrong Product in the Wrong Box: A product containing a common allergen (like peanuts) is accidentally packaged in a box designed for an allergen-free product.
- Missing Allergen Statement: The product contains an allergen, but the mandatory "Contains: [Allergen]" statement is either missing, unreadable, or incorrect on the label.
These errors put consumers with allergies at severe risk and can lead to costly recalls, regulatory fines, and long-term brand damage.
The AI Solution: A Two-Stage Verification Process
In this project, you are building an Automated Allergen Verification System; essentially a "Label Checker" that acts as a digital safety inspector for food packaging.
Instead of a human manually reading thousands of tiny ingredient lists, you are creating a system that does the following:
- Identifies the Target: It uses the RF-DETR model to find and "crop" the specific parts of a package that matter (the Ingredient List and the Allergen/Contains Statement).
- Reads and Reasons: It uses Gemini 3 Pro to "read" the text in those crops, just like a human would, but at lightning speed.
- Detects Mismatches: It cross-references the two sections. For example, if it sees "Whey" in the ingredients but notices the "Contains" statement is missing "Milk," it flags a critical error.
- Triggers Alerts: It automatically sends an email or notification to the production team the moment a dangerous label is found.
Instead of a single model trying to do everything, we will split the workload into two specialized roles to in order to make this a vision agent: Detection and Verification.
- Stage 1: The Detector (Perception Layer): You will train an RF-DETR model to act as the "eyes" of the system. Its specific job is to scan the product and pinpoint exactly where the Ingredient Block and the Allergen Statement are located, cropping those regions for closer inspection.
- Stage 2: The Inspector (Reasoning Layer): You will then build a Vision Agent using Gemini 3 Pro. This serves as the "brain" that reads the text within those crops and performs a logic-based cross-check to ensure the allergens listed in the fine print actually match the bold warning label.
If you prefer a visual walkthrough over the written steps, check out this video. It covers everything from cloning the dataset on Roboflow Universe to training your custom detection model:
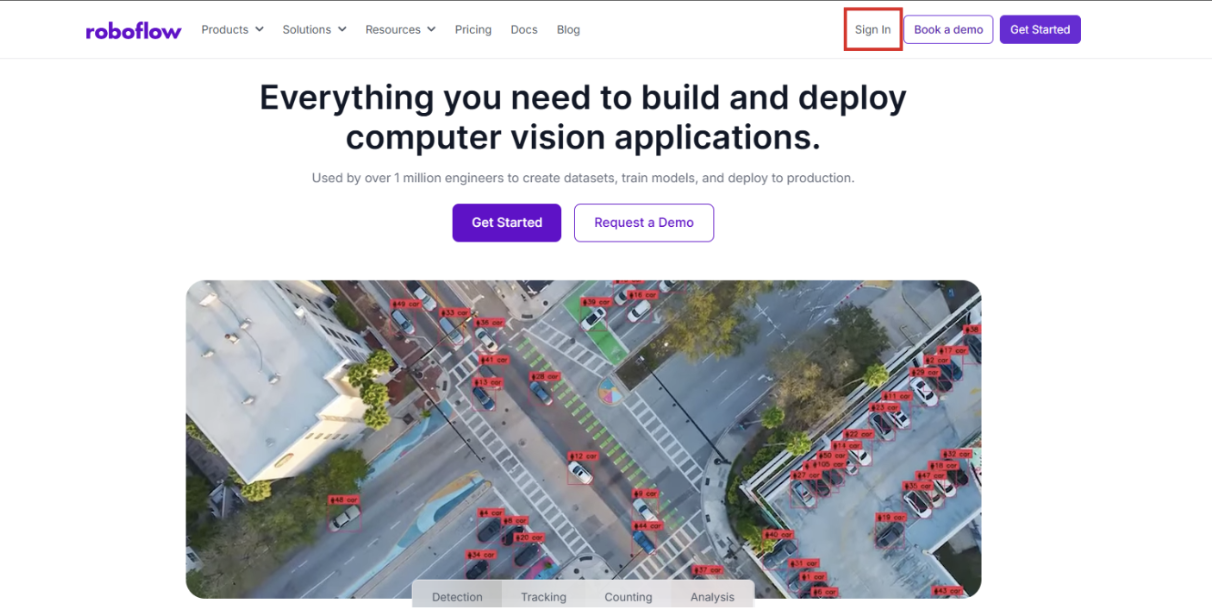
Step 1: Log into Roboflow
Ensure you have a workspace set up for your projects.
Navigate to Roboflow and sign in. If you don’t have an account, sign up for free; it takes just a minute.
Step 2: Import the Dataset
The foundation of any vision system is a high-quality dataset. For food label analysis, we’ll need an object detection model in the background to serve as the perception layer for the vision agent for the workflow. To learn more about vision agents and how to build one in Roboflow, please take a look at this tutorial.
If you don't have your own data yet, you can search Roboflow Universe for open-source datasets related to food quality or foreign object detection.
Visit Roboflow Universe and search for "Food Labels" or "ingredient label model". For this demonstration, we are using a sample Universe dataset containing annotations of packaging text blocks.
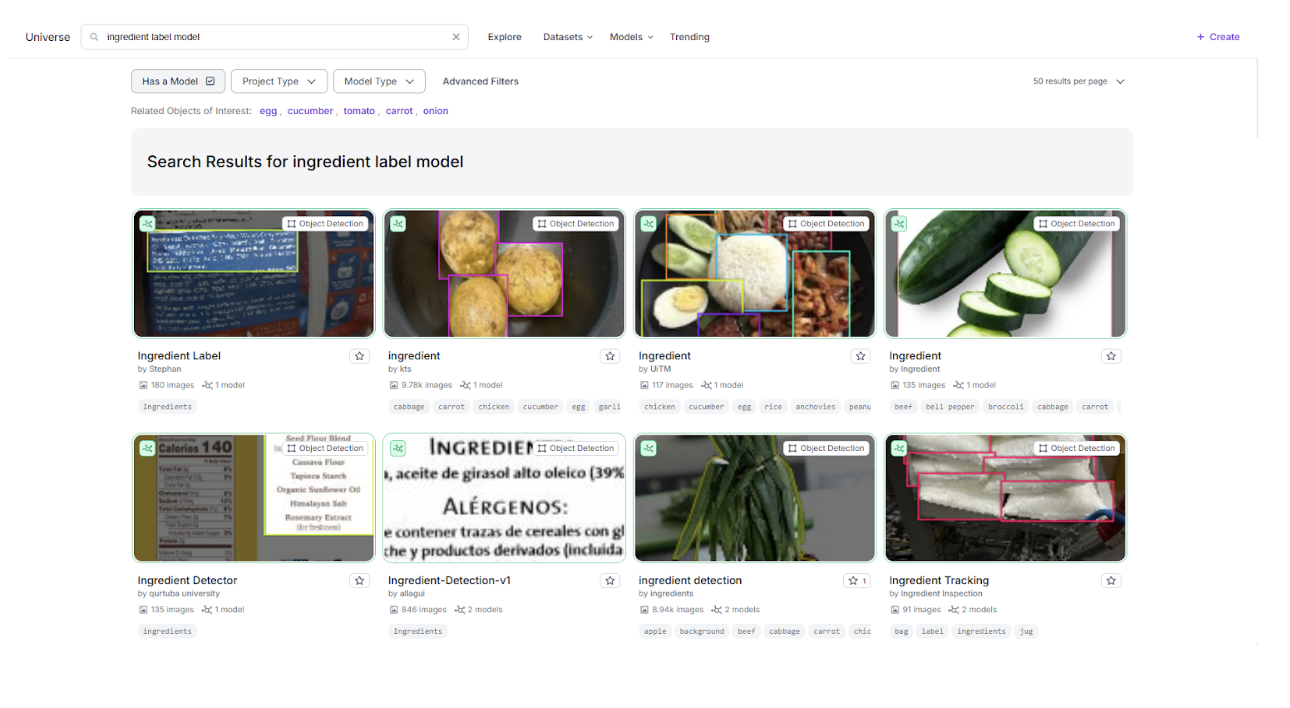
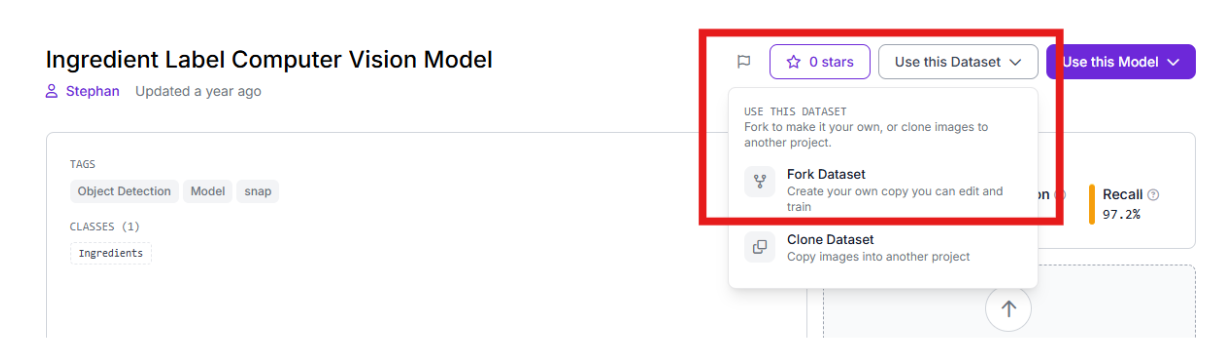
Click "Fork Project" to import the images and annotations into your own workspace so you can customize the training.
Step 3: Labeling and Annotation
If you wish to add more images, simply use Roboflow’s annotation tools to separate the images into classes and then use them in the dataset.
Step 4: Apply Preprocessing and Augmentations
We need the model to be "hardware agnostic," meaning it should work whether the factory camera is slightly blurry or the lighting changes.
- Resize: Stretch to 512x512. This standardizes input sizes, balancing fine-text detail with computational speed.
- Augmentations (Outputs per training example: 3):
- Saturation: Between -25% and +25% (handles varying print colours).
- Brightness: Between -15% and +15% (simulates different factory lighting).
- Blur: Up to 0.9px (accounts for motion blur on high-speed conveyors).
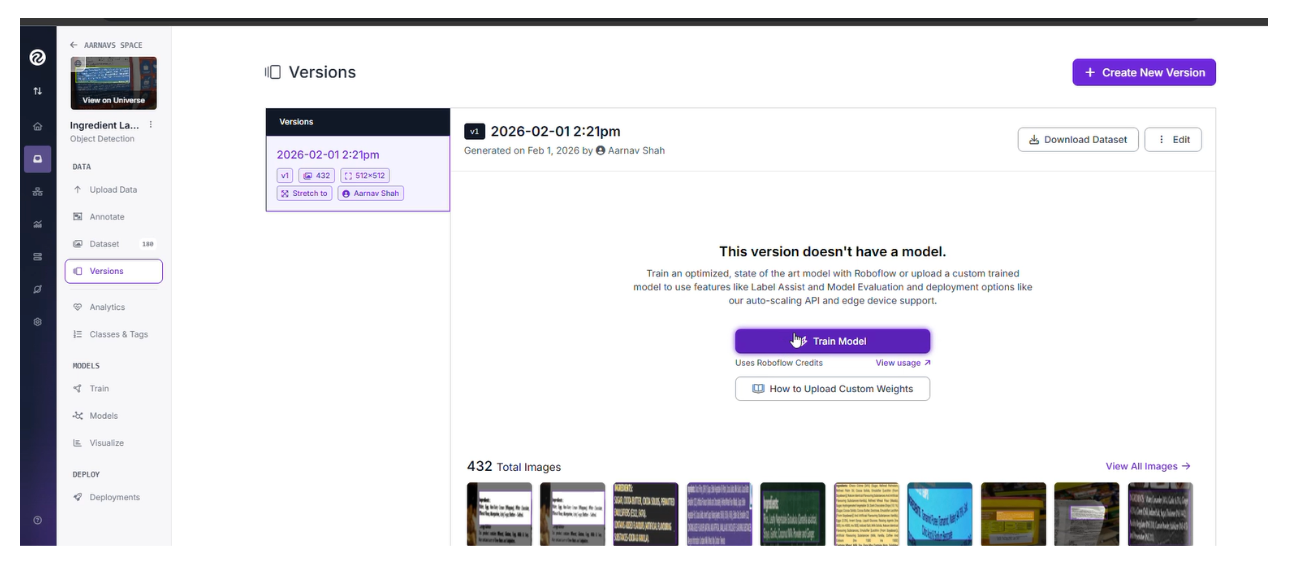
Step 5: Train the RF-DETR Object Detection Model
With the dataset ready, we will train an RF-DETR (Roboflow Detection Transformer) model. Unlike traditional models, RF-DETR is a state-of-the-art transformer-based architecture that excels at understanding the global context of an image, making it ideal for identifying specific text blocks on complex packaging.
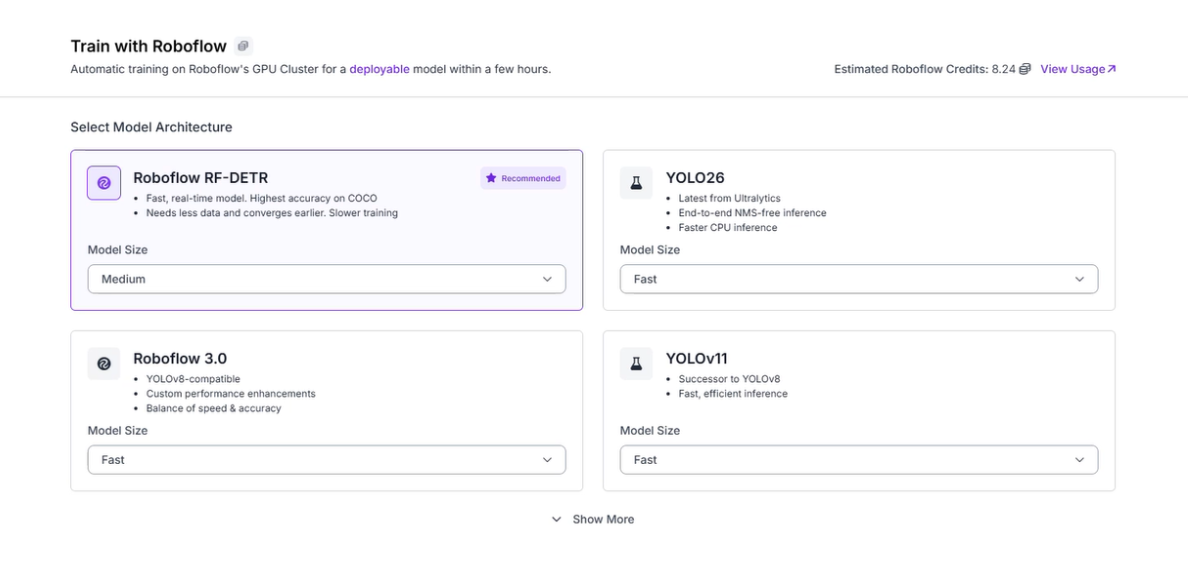
Start Custom Training
Navigate to the "Train" tab in your project and select "Train Model." This allows you to utilize Roboflow’s cloud-based GPUs for maximum efficiency.
Select RF-DETR
Choose the RF-DETR medium model architecture. This model is designed for high accuracy and is the first real-time model to break the 60 mAP barrier, making it ideal for the precision required in food safety.
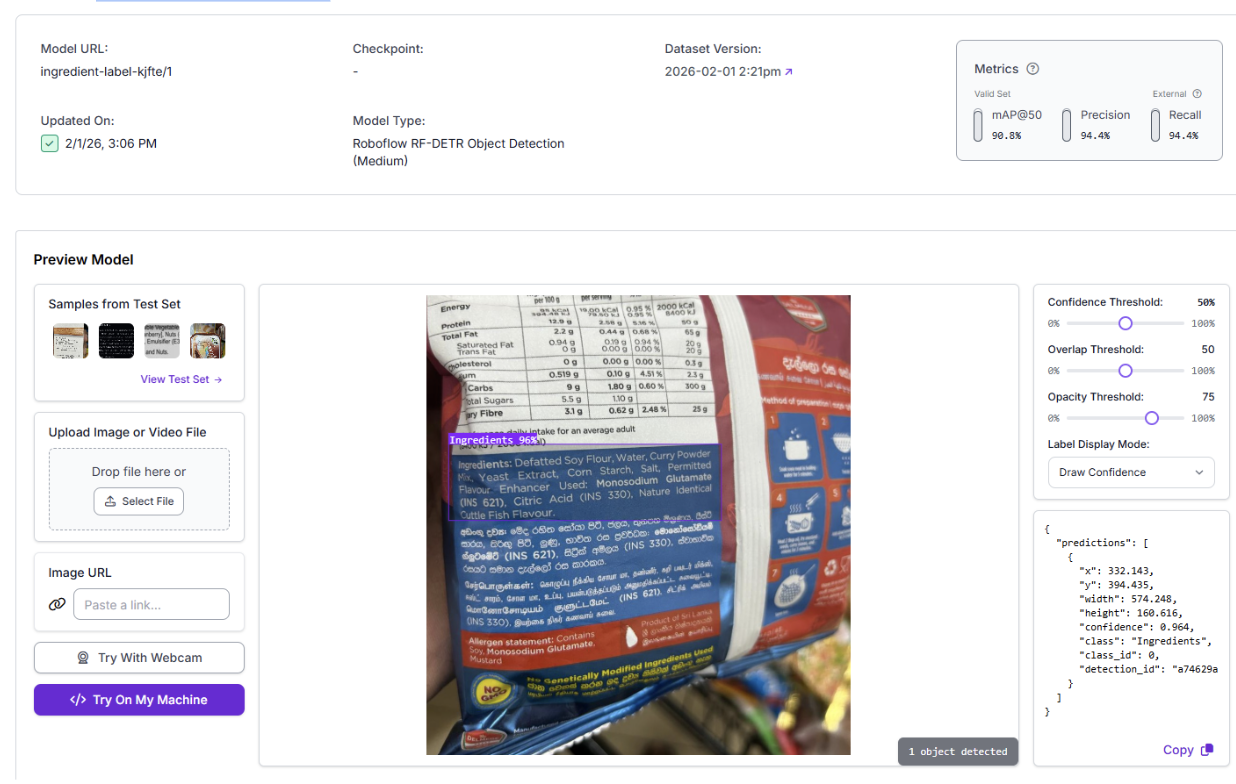
Evaluate Results
Once training completes, review your dashboard:
- Confusion Matrix: Ensure the model isn't confusing the "Ingredient Block" with "Branding/Logos."
- mAP (Mean Average Precision): Aim for >90% for a production-ready model.
Step 6: Create the Vision Agent Workflow
Training a model is just the first half. To increase detection efficiency and automate the "cross-check," we will build a Vision Agent Workflow. This allows the system to not only find the label but also "reason" about the contents in real-time. This is the workflow we're building.
1. Initialize the Workflow
Start by creating a new workflow in Roboflow Workflows. Navigate to the Workflows tab on the left and click "Create Workflow."
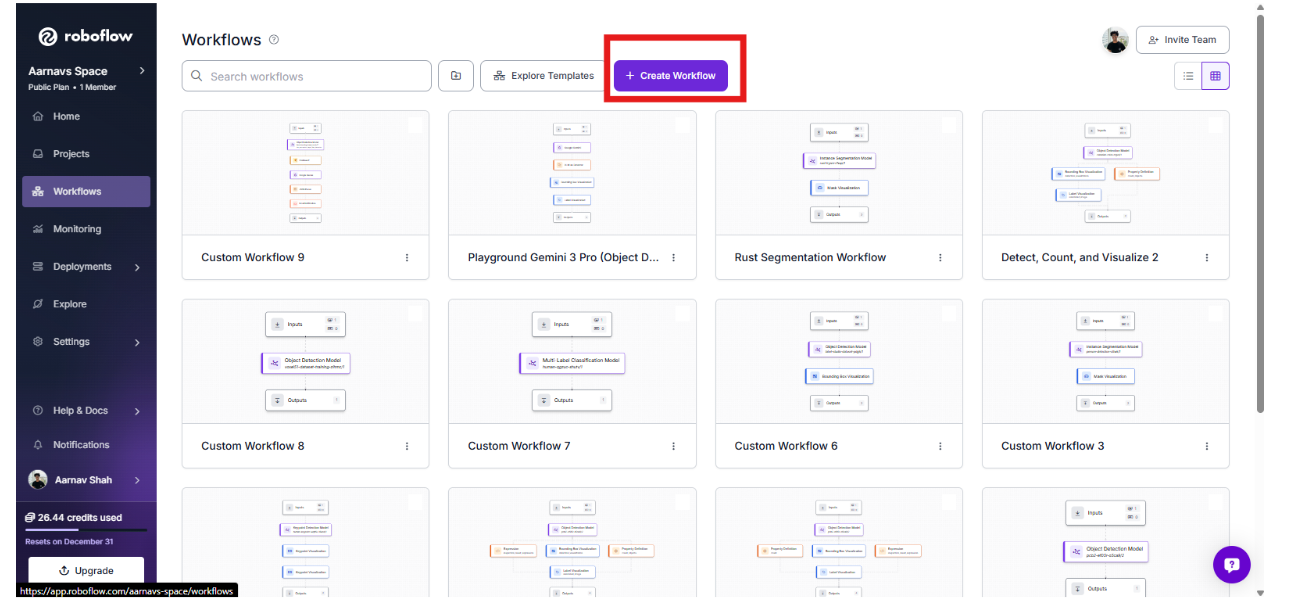
Select "Build Your Own" and confirm.

2. Add the RF-DETR Perception Layer
The first block in our workflow is the Object Detection block.
- Select your custom RF-DETR model trained in the previous steps.
- Why this comes first: RF-DETR is fast and deterministic. It acts as the "Perception Layer," filtering out empty frames and ensuring we only send images to the AI "Brain" when a label is actually present.
3. Gate the Workflow with Conditional Logic
Next, add a Continue If block. This block ensures that the workflow only proceeds if the model finds a label.
- Configure Condition: Set the signal to $steps.model.predictions.
- Condition: "Condition based on the Number of Bounding Boxes" set to ≥ 1.
- This gating prevents unnecessary and expensive API calls to the Large Language Model (LLM) when there is nothing to inspect.
4. Add the reasoning layer: Gemini 3 Pro
Once a label is detected, the image is passed to the Google Gemini block, which acts as the "Reasoning Layer."
- Select Gemini 3 Pro and provide your API key in the additional properties panel. If you don’t have one, Roboflow will use its own.
- Use the structured JSON prompt we developed:
{
  "ingredients_found": "List all allergens identified in the Ingredient Block text (e.g., Peanuts, Wheat, Soy). If ingredients are missing or unreadable, set to 'Unknown'.",
  "allergen_statement_present": "true ONLY if a clear, explicit 'Contains X' allergen statement exists. Precautionary or facility statements count as false.",
  "mismatch_detected": "true if (a) an allergen exists in ingredients but is not explicitly declared in a 'Contains' statement, OR (b) ingredient allergens exist and allergen info is missing or ambiguous.",
  "recall_risk_level": "High, Medium, Low, or Unknown based on rules below",
  "decision_logic": "Brief explanation justifying the risk level and mismatch decision"
}
5. Structured Data & Automated Alerts
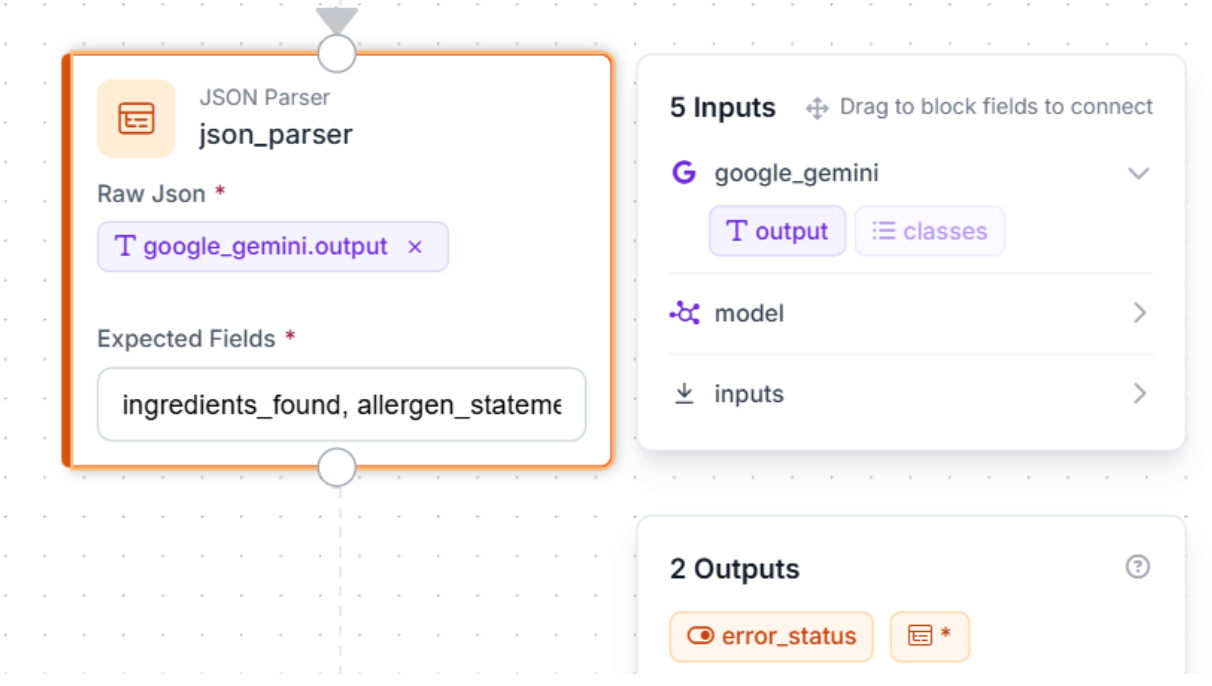
To turn Gemini's text into action:
Add a JSON Parser: This block transforms Gemini's reasoning into machine-readable data. Define the expected fields: ingredients_found, allergen_statement_present, mismatch_detected, recall_risk_level, and decision_logic.
6. Send an Automated Email Alert
To wrap up the workflow, add an Email Notification block to act as your final automated action. While we are using email for this tutorial, this same mechanism can be used to trigger more advanced downstream actions like calling a webhook, logging to a central safety database, or integrating directly with factory floor hardware.
This block ensures that an alert is only sent when the entire pipeline is successful: the RF-DETR model has spotted a label, Gemini 3 Pro has analyzed the text, and the JSON Parser has extracted the risk data.
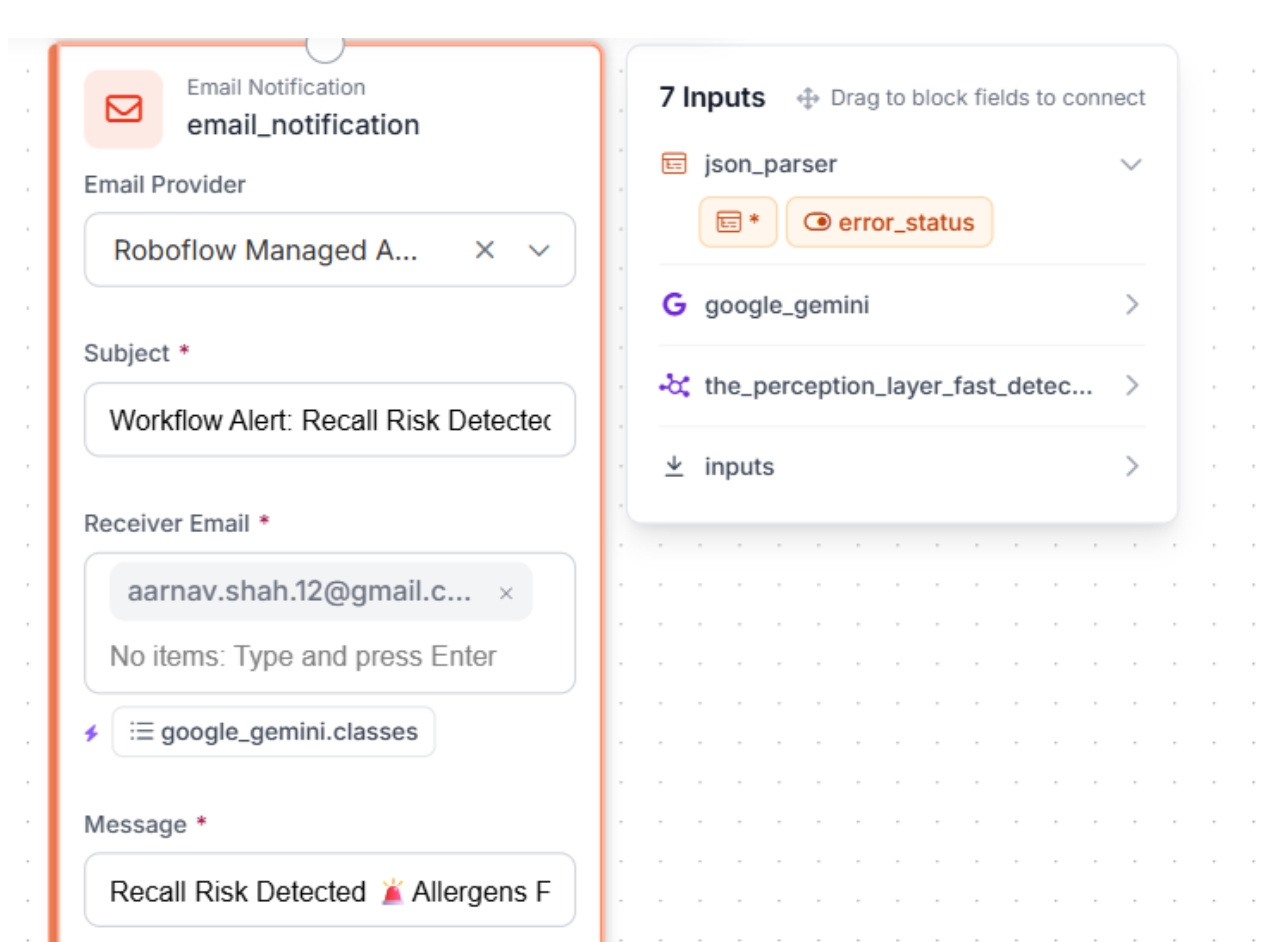
Block Setup: Give the block a specific name, like email_notification, for easy debugging. Under Email Provider, select Roboflow Managed API Key to let Roboflow handle the delivery without needing your own SMTP server.
Subject & Recipient: Set a clear subject line like Workflow Alert: Recall Risk Detected and enter the email address for your quality assurance team.
Craft the Message: Use the Message field to create the human-readable alert. By using {{ $parameters.name }} syntax, you can insert dynamic data from your analysis. For our food safety use case, use the following template:
Recall Risk Detected
Allergens Found: {{ $parameters.ingredient_list }}
Warning Label Present: {{ $parameters.allergen_statement_found }}
Mismatch Found: {{ $parameters.mismatch_detected }}
Risk Level: {{ $parameters.recall_risk }}
Analysis: {{ $parameters.details }}
It is important to remember that the message field cannot pull data directly from previous steps. You must use the Message Parameters section to bind the "Real Data" from your JSON Parser to the placeholders in your message.
Each property you add here performs two functions:
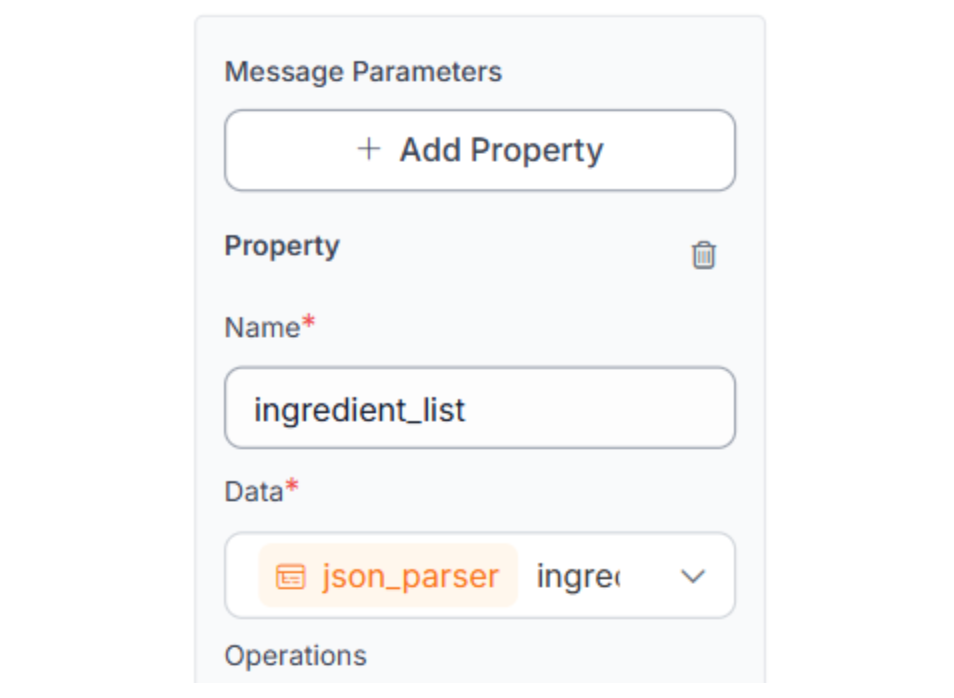
- It pulls the specific output (e.g., ingredients_found) from your JSON Parser.
- It maps it to a parameter name (e.g., ingredient_list) so it can be rendered in the email.
Repeat this exact pattern for all variables from previous steps that you wish to put into your message. This step is required.
Step 7: Test, Activate, and Iterate
With your workflow logic complete, it’s time to validate and deploy. This is where you prove the system can distinguish between a safe product and a potential recall.
Test the Workflow in the Browser
Use the "Run Preview" button in the Roboflow Workflow editor to simulate real production scenarios. Upload images of your packaging to see the logic in action:
- Scenario A: Correct Labelling
- Result: RF-DETR detects the label → Gemini finds "Peanuts" in both sections → Mismatch is false → No alert sent.
- Scenario B: The Mismatch (The Recall Risk)
- Result: RF-DETR detects the label → Gemini finds "Milkfat" in ingredients but no milk warning in the allergen statement → Mismatch is true → Recall Alert Email sent immediately.
- Scenario C: Missing Data
- Result: RF-DETR detects a label, but it's too blurry, or the ingredient block is missing → Gemini flags "DATA MISSING" → Risk Level set to High → Emergency Alert sent.
Verify Your Gating Logic
The "Continue If" block we added in Step 3 is your efficiency champion. Verify that:
- Success: Emails only arrive for images where labels were actually found.
- Efficiency: The system stops immediately if the camera sees an empty conveyor belt, saving you from unnecessary AI processing costs.
Deploy to the Edge
Once you are happy with the browser tests, click "Deploy Workflow." You can run this pipeline on-site using a simple Python script or a dedicated edge device (like an NVIDIA Jetson) to monitor your production line in real-time.
Conclusion: How to Prevent Food Recalls with Computer Vision
Preventing food recalls is no longer just about compliance; it's about leveraging the latest in AI to ensure every product that leaves the facility is safe. By implementing machine vision inspection, companies can catch defects that human inspectors might miss due to fatigue or speed.
Ready to start building your own food safety solution? Sign up for a free Roboflow account and explore thousands of food-related datasets on Universe.
Written by Aarnav Shah
Cite this Post
Use the following entry to cite this post in your research:
Contributing Writer. (Feb 3, 2026). How to Prevent Food Recalls with Computer Vision. Roboflow Blog: https://blog.roboflow.com/prevent-food-recalls/