
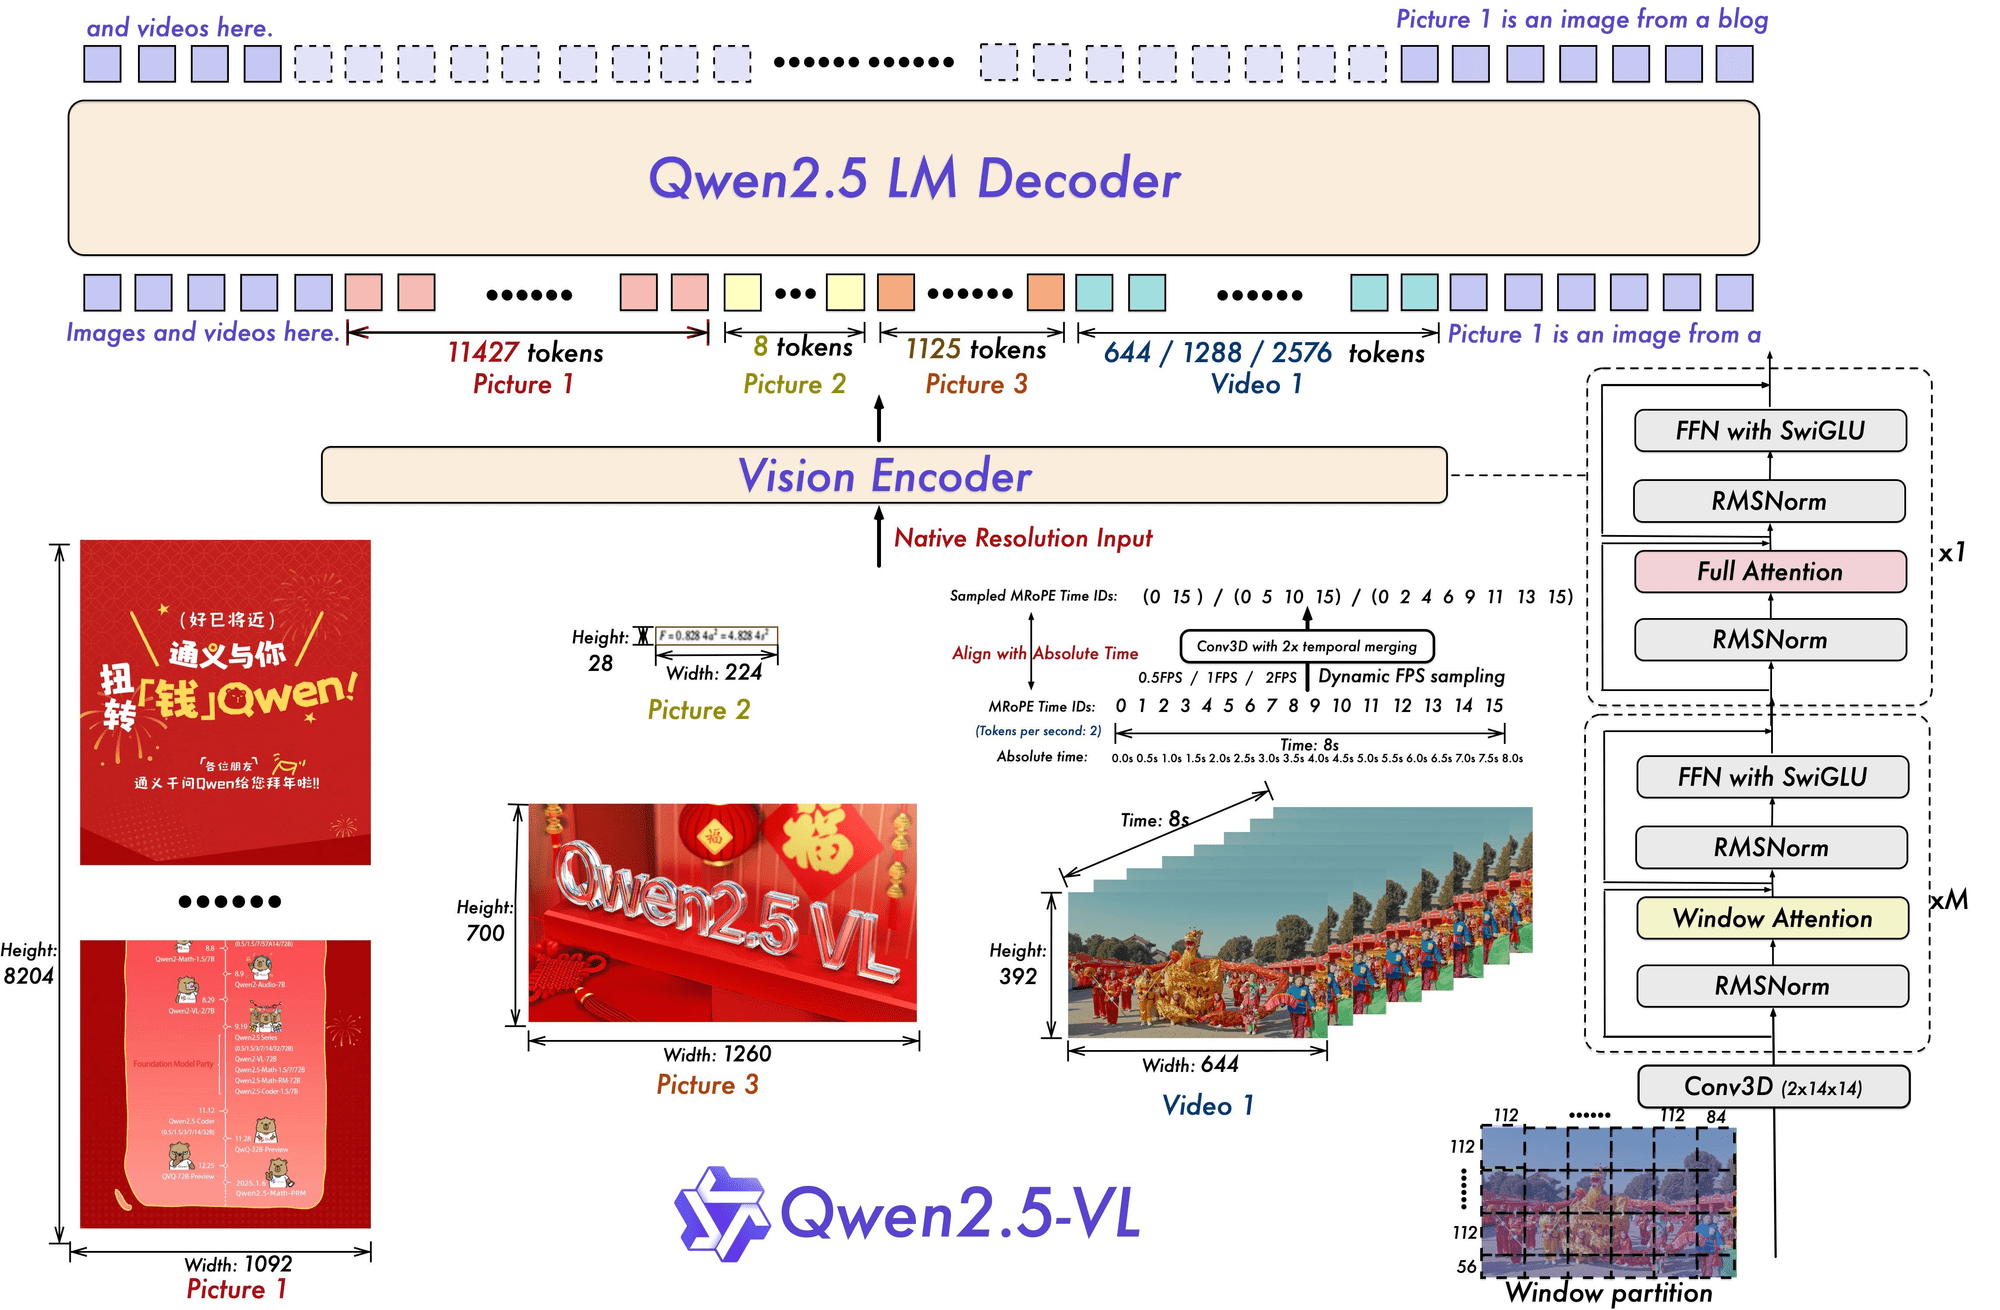
Qwen2.5-VL is the latest addition to the Qwen vision-language model series, offering cutting-edge capabilities for image, text, and document understanding.
Available in three model sizes—3B, 7B, and 72B—it excels at tasks such as object detection, OCR for multi-language and rotated text, and structured data extraction from complex documents like invoices, forms, and tables.
In this guide, we will show how to use the open source Qwen2.5-VL model for zero-shot object detection. If you're interested in fine-tuning Qwen models, you can read our Qwen2.5-VL fine-tuning guide.
Environment Setup
To access Qwen2.5-VL, we'll need a Hugging Face API key. Hugging Face is a platform that hosts a variety of models, including Qwen2.5-VL. The notebook provides a helpful link to the settings page (once you've signed up/logged in). From here, click on access tokens and create a new access token.
Additionally, you'll need to get a Roboflow API key.
The colab notebook has a quick snippet and instruction that allows you to easily store these keys in an environment variables, and import it for future use.
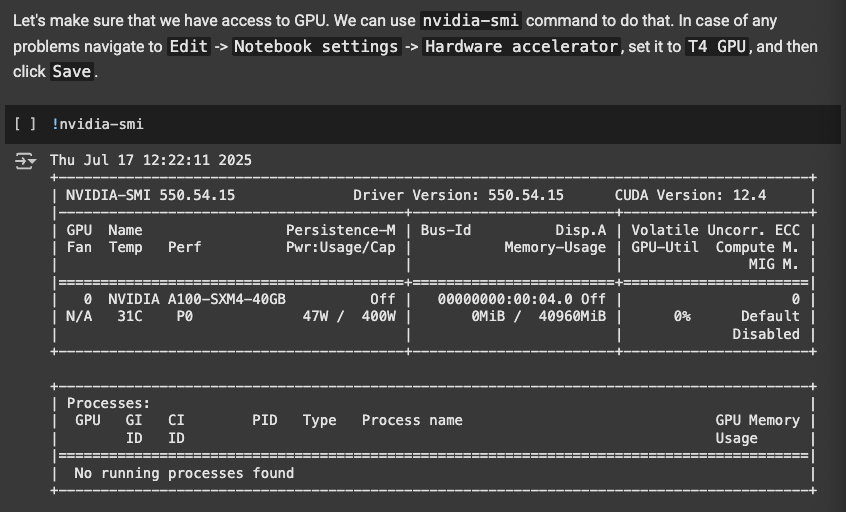
The next step is to use the T4 GPU in colab, because running the model requires accelerated hardware. Following these instructions should allow you to include the T4 GPU:
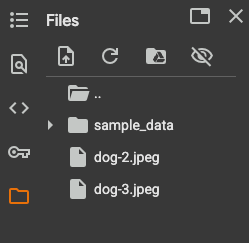
The next two snippets install the necessary libraries, Supervision, Roboflow's library for reusable computer vision tools, as well as the Qwen2.5-VL model that we're using for object detection. It also installs sample images from Roboflow, however, you can change what images you chose to detect on by uploading your own data to colab.
Now that you've installed the necessary libs and images, we can move on to the implementation of object detection with Qwen2.5-VL.
Qwen2.5-VL Implementation
The next snippet in colab loads the model:
from maestro.trainer.models.qwen_2_5_vl.checkpoints import load_model, OptimizationStrategy

MODEL_ID_OR_PATH = "Qwen/Qwen2.5-VL-7B-Instruct"
MIN_PIXELS = 512 * 28 * 28
MAX_PIXELS = 2048 * 28 * 28

processor, model = load_model(
    model_id_or_path=MODEL_ID_OR_PATH,
    optimization_strategy=OptimizationStrategy.NONE,
    min_pixels=MIN_PIXELS,
    max_pixels=MAX_PIXELS
)
Here, we're setting the model's id and the minimum and maximum image size we plan to pass. Then, we run the lib's built in method for loading the model. Once again, the colab notebook snippet makes this process efficient, as for future executions we will no longer need to load the model.
The next snippet shows the inference function, which is how we'll get predictions/boxes from a prompt that we pass in:
from PIL import Image
from typing import Optional, Tuple, Union

from maestro.trainer.models.qwen_2_5_vl.inference import predict_with_inputs
from maestro.trainer.models.qwen_2_5_vl.loaders import format_conversation
from maestro.trainer.common.utils.device import parse_device_spec
from qwen_vl_utils import process_vision_info

def run_qwen_2_5_vl_inference(
    model,
    processor,
    image: Image.Image,
    prompt: str,
    system_message: Optional[str] = None,
    device: str = "auto",
    max_new_tokens: int = 1024,
) -> Tuple[str, Tuple[int, int]]:
    device = parse_device_spec(device)
    conversation = format_conversation(image=image, prefix=prompt, system_message=system_message)
    text = processor.apply_chat_template(conversation, tokenize=False, add_generation_prompt=True)
    image_inputs, _ = process_vision_info(conversation)

    inputs = processor(
        text=text,
        images=image_inputs,
        return_tensors="pt",
    )

    input_h = inputs['image_grid_thw'][0][1] * 14
    input_w = inputs['image_grid_thw'][0][2] * 14

    response = predict_with_inputs(
        **inputs,
        model=model,
        processor=processor,
        device=device,
        max_new_tokens=max_new_tokens
    )[0]

    return response, (int(input_w), int(input_h))
Here, the run_qwen_2_5_vl_inference function wraps the full pipeline for running inference with Qwen 2.5-VL, combining both vision and language inputs.
It takes in an image and a natural language prompt, formats them into a multi-modal conversation using Qwen’s chat template, and processes visual features with process_vision_info. The function then tokenizes and prepares the inputs using the model’s processor, runs the model to generate a response, and calculates the effective input resolution used by the vision encoder. It returns the model’s generated text alongside the internal resolution.
Next, we'll be using the Supervision library we imported to display annotations that we provide as a parameter on the image we pass in.
import supervision as sv
from PIL import Image


def annotate_image(image: Image, detections: sv.Detections) -> Image:
    text_scale = sv.calculate_optimal_text_scale(resolution_wh=image.size)
    thickness = sv.calculate_optimal_line_thickness(resolution_wh=image.size)

    if detections.mask is not None:
        mask_annotator = sv.MaskAnnotator(color_lookup=sv.ColorLookup.INDEX)
        image = mask_annotator.annotate(image, detections)
    else:
        box_annotator = sv.BoxAnnotator(color_lookup=sv.ColorLookup.INDEX, thickness=thickness)
        image = box_annotator.annotate(image, detections)

    label_annotator = sv.LabelAnnotator(
        color_lookup=sv.ColorLookup.INDEX,
        text_color=sv.Color.BLACK,
        text_scale=text_scale,
        text_thickness=thickness - 1,
        smart_position=True
    )
    image = label_annotator.annotate(image, detections)
    return image
This snippet uses the the mask and label annotator, both of which are common and useful tools from Supervision. If you would like more customizations/variety in your annotations, check out the annotator docs in Supervision.
Now, we're ready to do some object detection.
Qwen2.5-VL Execution
The rest of the notebook shows how you can performs different detection on different images. For example, for detecting each chair in a sample photo, the first step is shown in this snippet:
IMAGE_PATH = "/content/dog-3.jpeg"
SYSTEM_MESSAGE = None
PROMPT = "Outline the position of each chair and output all the coordinates in JSON format."

image = Image.open(IMAGE_PATH)
resolution_wh = image.size
response, input_wh = run_qwen_2_5_vl_inference(
    model=model,
    processor=processor,
    image=image,
    prompt=PROMPT,
    system_message=SYSTEM_MESSAGE
)

print(response)
This code sets the image path for the image we plan to predict on, as well as the prompt telling the VLM what to detect for. The ease of use of a VLM in this form is what makes them so powerful. Next, using the image and the prompt, we call the inference function we made in the previous step to get the response, which includes the data for the annotations.
All thats left is to then display the annotations on the image, for which we'll use the visualization function we made with Supervision.
import supervision as sv

detections = sv.Detections.from_vlm(
    vlm=sv.VLM.QWEN_2_5_VL,
    result=response,
    input_wh=input_wh,
    resolution_wh=resolution_wh
)
image = annotate_image(image=image, detections=detections)
image.thumbnail((800, 800))
image
Results after executing with prompt "Outline the position of each chair and output all the coordinates in JSON format.":
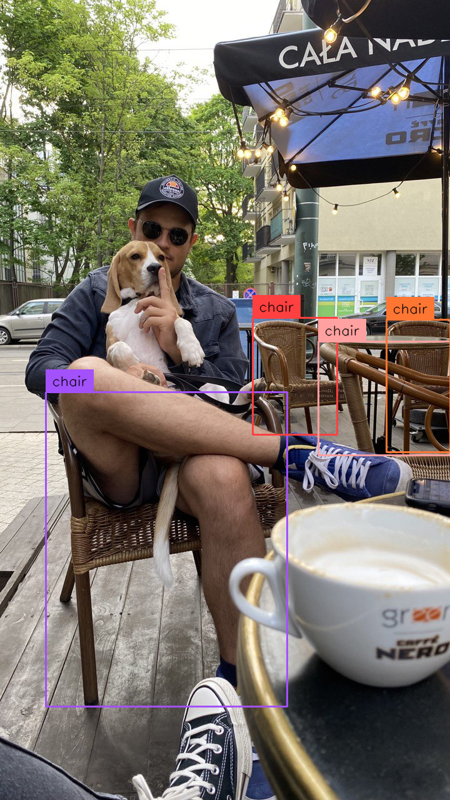
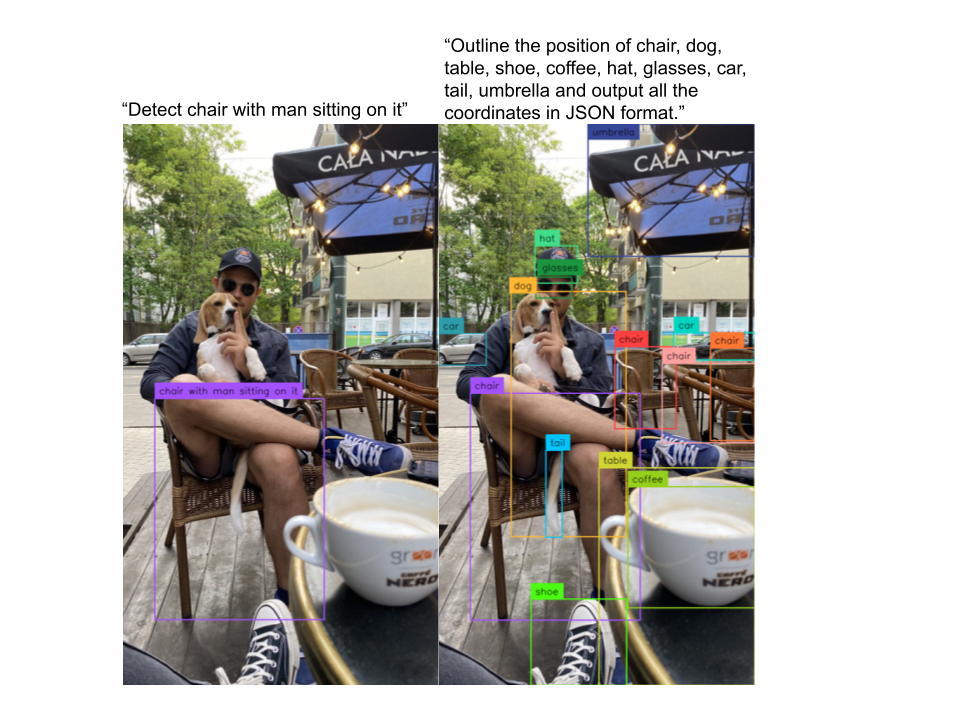
And with that, we've successfully performed object detection with Qwen2.5-VL. The fast execution makes its super easy to change the image/prompt, so here's some more examples of what its able to detect:
Conclusion
Congratulations! You have successfully used Qwen2.5-VL and Supervision to perform zero-shot object detection—all without writing a single training loop or collecting labeled data.
By simply changing the prompt and re-running the script, you can detect entirely new objects, making this approach incredibly flexible and efficient.
Cite this Post
Use the following entry to cite this post in your research:
Aryan Vasudevan. (Jul 18, 2025). Use Qwen2.5-VL for Zero-Shot Object Detection. Roboflow Blog: https://blog.roboflow.com/qwen2-5-vl-zero-shot-object-detection/