
Removing the background in an image can be used in nearly every kind of computer vision project. Many people remove the background of a picture to manipulate it creatively for art or advertisements while others find it is best to isolate an object so you can do further analysis.
In this post, you'll learn how to build your own custom background removal application using computer vision.
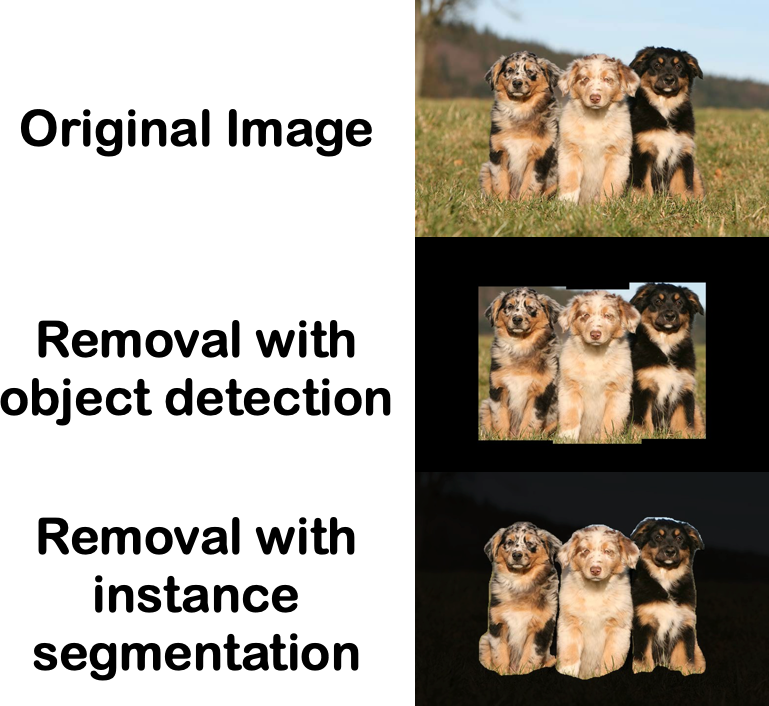
Let’s check out an example:
How Background Removal Works
Background removal can be in many ways but generally works in these steps:
- Identify something in an image considered important (generally in what we refer to as the “foreground”)
- Create a boundary around that important thing or things
- Delete everything outside that boundary and make it transparent
- Save the new image as a .png because that image format allows transparent backgrounds
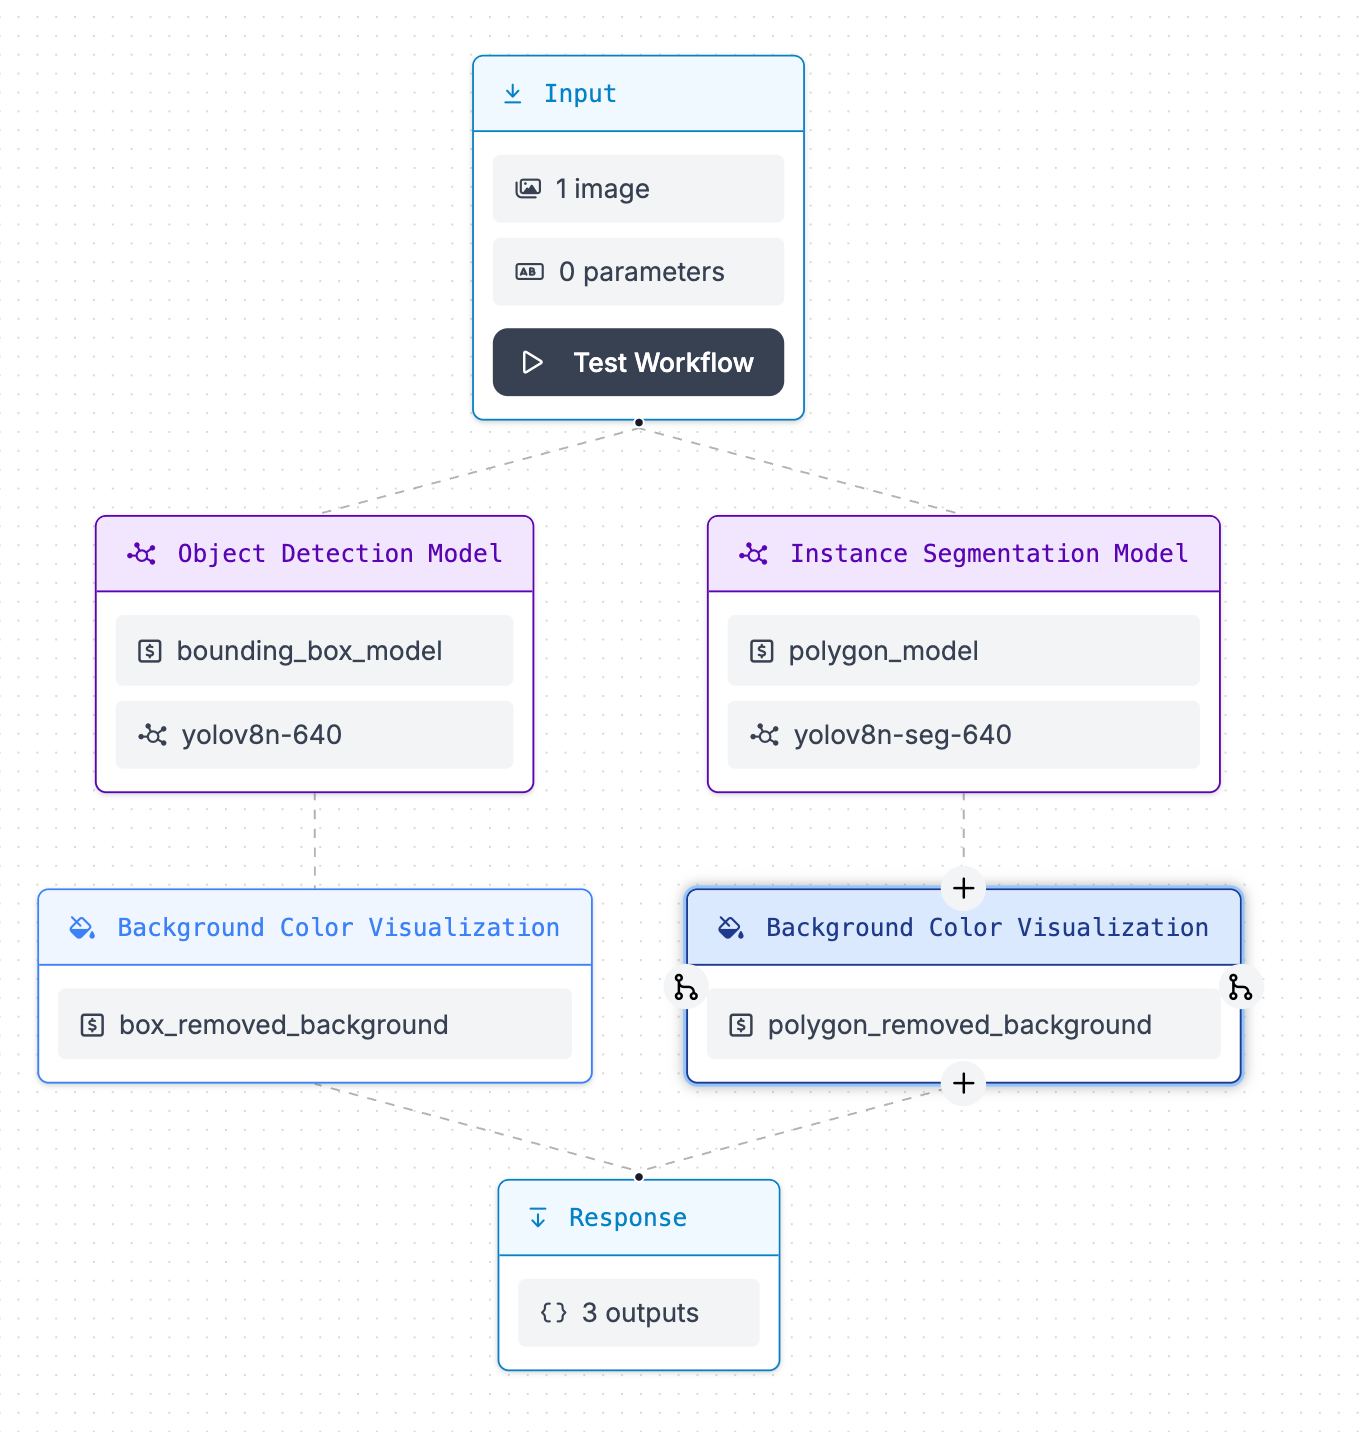
This workflow template includes two different methods for background removal: with the results put as box_removed_background and polygon_removed_background.
In most cases polygon_removed_background is the better option.
box_removed_background uses YOLOv8 object detection to identify anything it can in the image and draw a bounding box around the object. If the object is not perfectly rectangularly shaped, this will include some features behind the object.
YOLOv8 Object Detection: https://universe.roboflow.com/microsoft/coco/dataset/3
polygon_removed_background uses YOLOv8 segmentation to identify anything it can in the image and segment around that object. As you can see, this will crop along many points of the object it detects, removing nearly all of the background visible to the human eye.
YOLOv8 Instance Segmentation: https://universe.roboflow.com/microsoft/coco/dataset/3
Make a Background Removal Workflow
To get started, first create a free Roboflow account. Then, navigate to the Roboflow dashboard and click the Workflows tab in the left sidebar. This will take you to the Workflows homepage, where can create a workflow.
Click “Create Workflow” to create a Workflow.
A window will appear in which you can choose from several templates. For this guide, select “Background Removal”:
Customize the Background Removal Workflow
Because this is a Workflow you can mix and match the models as you like without coding!
There are many YOLO models that may work better or worse depending how fast you want the workflow to run and how large your image is.
In the workflow, click on either of the model blocks and double-click the Model box under "Roboflow model identifier"
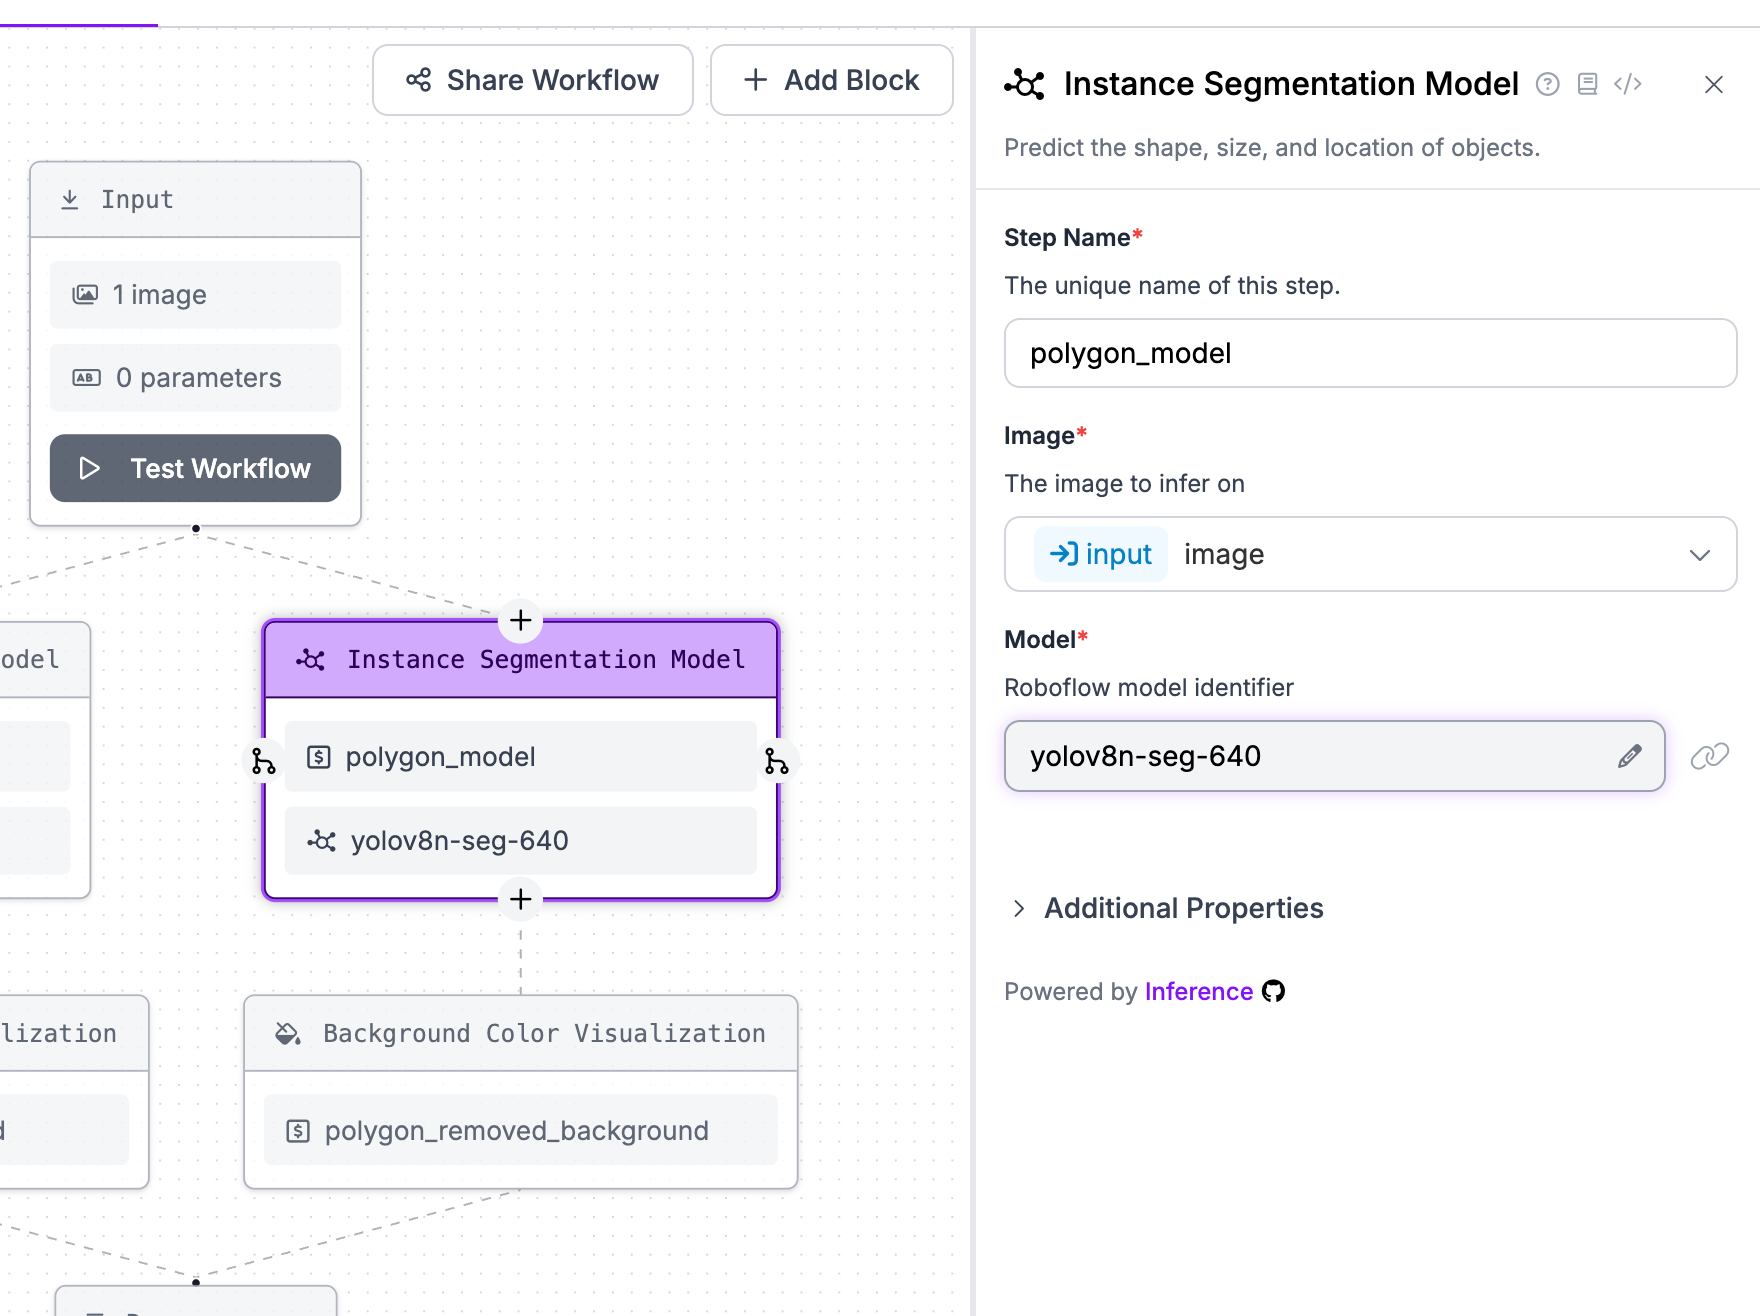
You can choose from tons of foundational models, but the defaults will generally work best in most cases. Learn more about the various types of object detection models you can use to build computer vision projects.
Background Removal Use Cases
Removing the background from an image is useful for many computer vision projects.
You can remove backgrounds in order to photoshop and paste objects from one image into another for advertisements.
You can also isolate the object so further computer vision can be done. Sending a full picture to a model can lead to accidental detections of things in the background. If you know you just care about the dogs in the foreground on an image you can use this to isolate them and then run YOLOv11 or another model on it again for more accuracy.
Say you want to detect the hands of every person in a very crowded image. It will be more accurate to crop out each person first with a YOLO model and then run a model for detecting on hands on each one separately.
Summary
Background removal is a process that can be used in a wide variety of use cases both creative and productive. Workflows allows you to run and customize this process without even coding.
To learn more about applications you can build with Roboflow Workflows, refer to the Workflows Template gallery. To explore more blocks available in Workflows, refer to the Workflow Blocks gallery.
Cite this Post
Use the following entry to cite this post in your research:
James Steinberg. (Oct 14, 2024). How to Remove Background of an Image with Computer Vision. Roboflow Blog: https://blog.roboflow.com/remove-background-image-computer-vision/