

Launched on September 27, 2024, YOLOv11 (referred to by its authors as YOLO11) is a computer vision model that supports a wide range of vision tasks, including object detection, instance segmentation, image classification, pose estimation, and oriented bounding box (OBB) detection.
YOLOv11m achieves a higher mean Average Precision (mAP) on the COCO dataset while using 22% fewer parameters than YOLOv8m. This improved efficiency enables faster inference while maintaining strong accuracy, making YOLO11 well suited for real-time computer vision applications.
YOLOv11 can also be trained on custom datasets for domain-specific tasks, allowing it to detect objects and perform computer vision tasks beyond the classes covered in its original training dataset.
In this guide, we will walk through the complete process of training and deploying a YOLOv11 object detection model using Roboflow. You will learn how to:
- Create a custom object detection dataset
- Train a YOLOv11 model using Roboflow Train
- Evaluate the trained model's performance
- Build a computer vision workflow using the trained model
- Run inference with the model
- Deploy the model using Roboflow Deploy
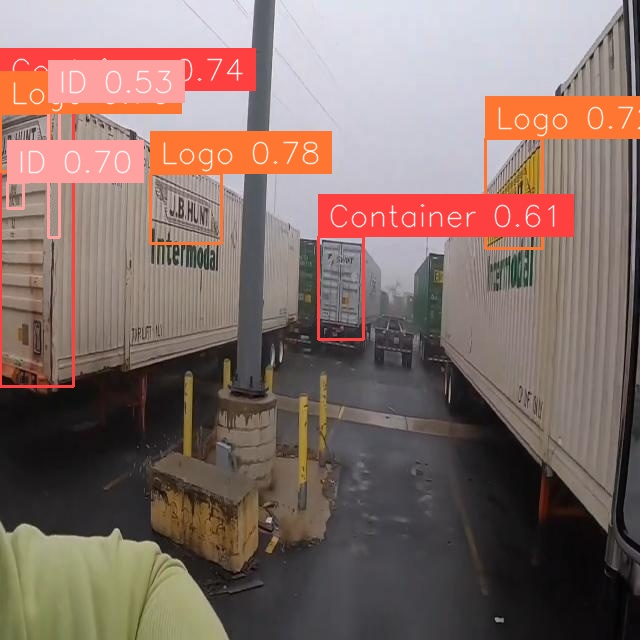
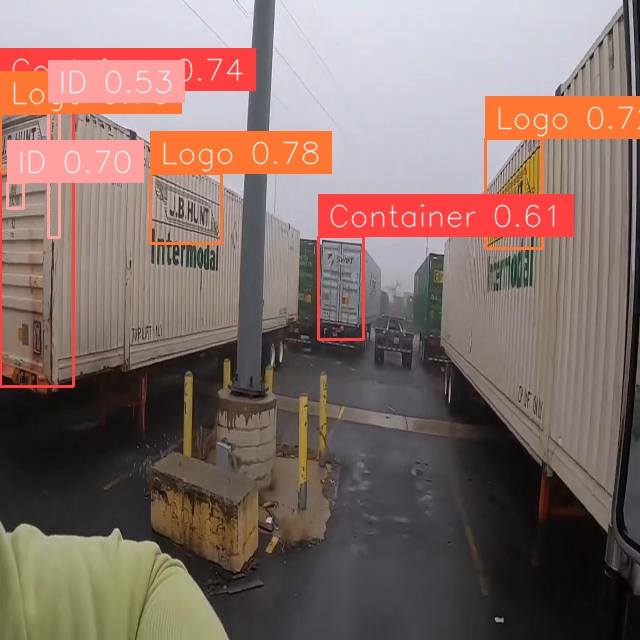
The following image shows predictions from the YOLOv11 model that we will train in this guide to detect shipping containers and related features, including container id, container logo, and chassis id.
Train a YOLOv11 Object Detection Model on a Container Dataset Using Roboflow Train
In the following steps, you'll create a Roboflow project, build and label a dataset, generate a dataset version, and use it to train a YOLOv11 model with Roboflow Train.
Step 1: Create a Roboflow Project
Before training a model with Roboflow, you first need to create a Roboflow project. Projects store your images, annotations, and dataset versions within your workspace.
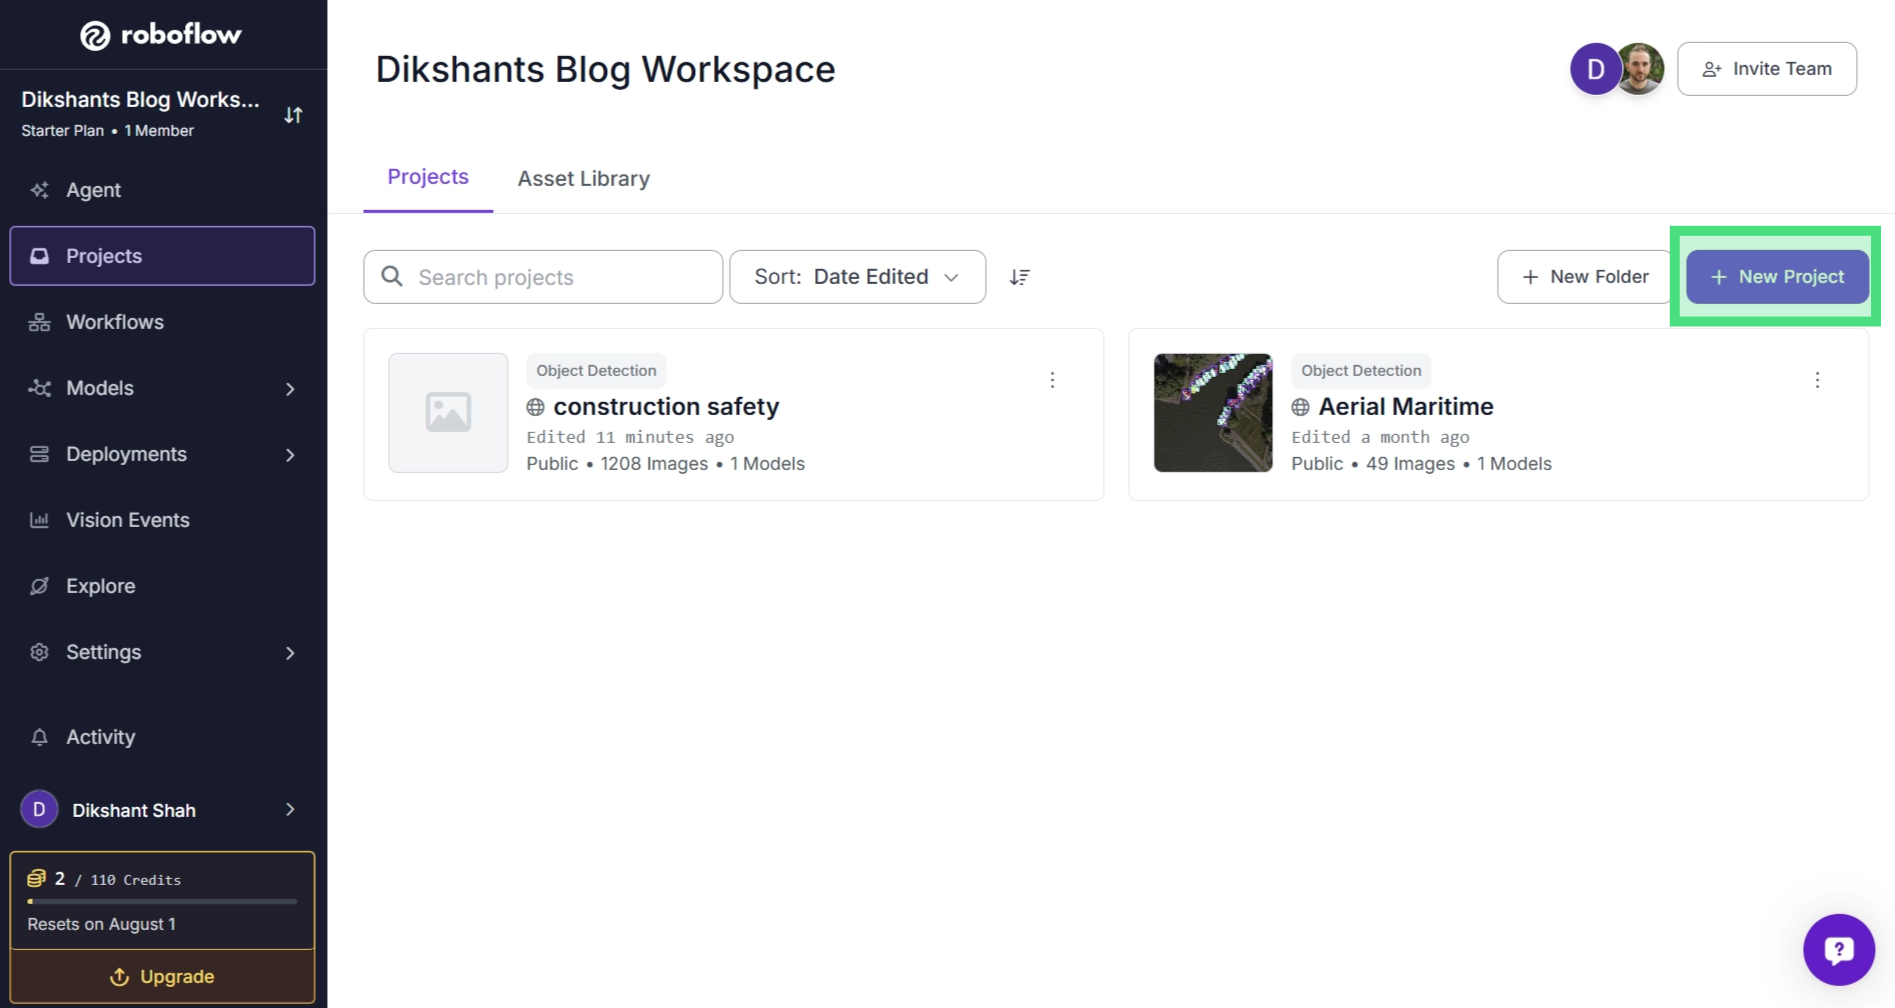
To create a project, sign in to your Roboflow account. From your workspace, select Projects in the left sidebar, then click + New Project.
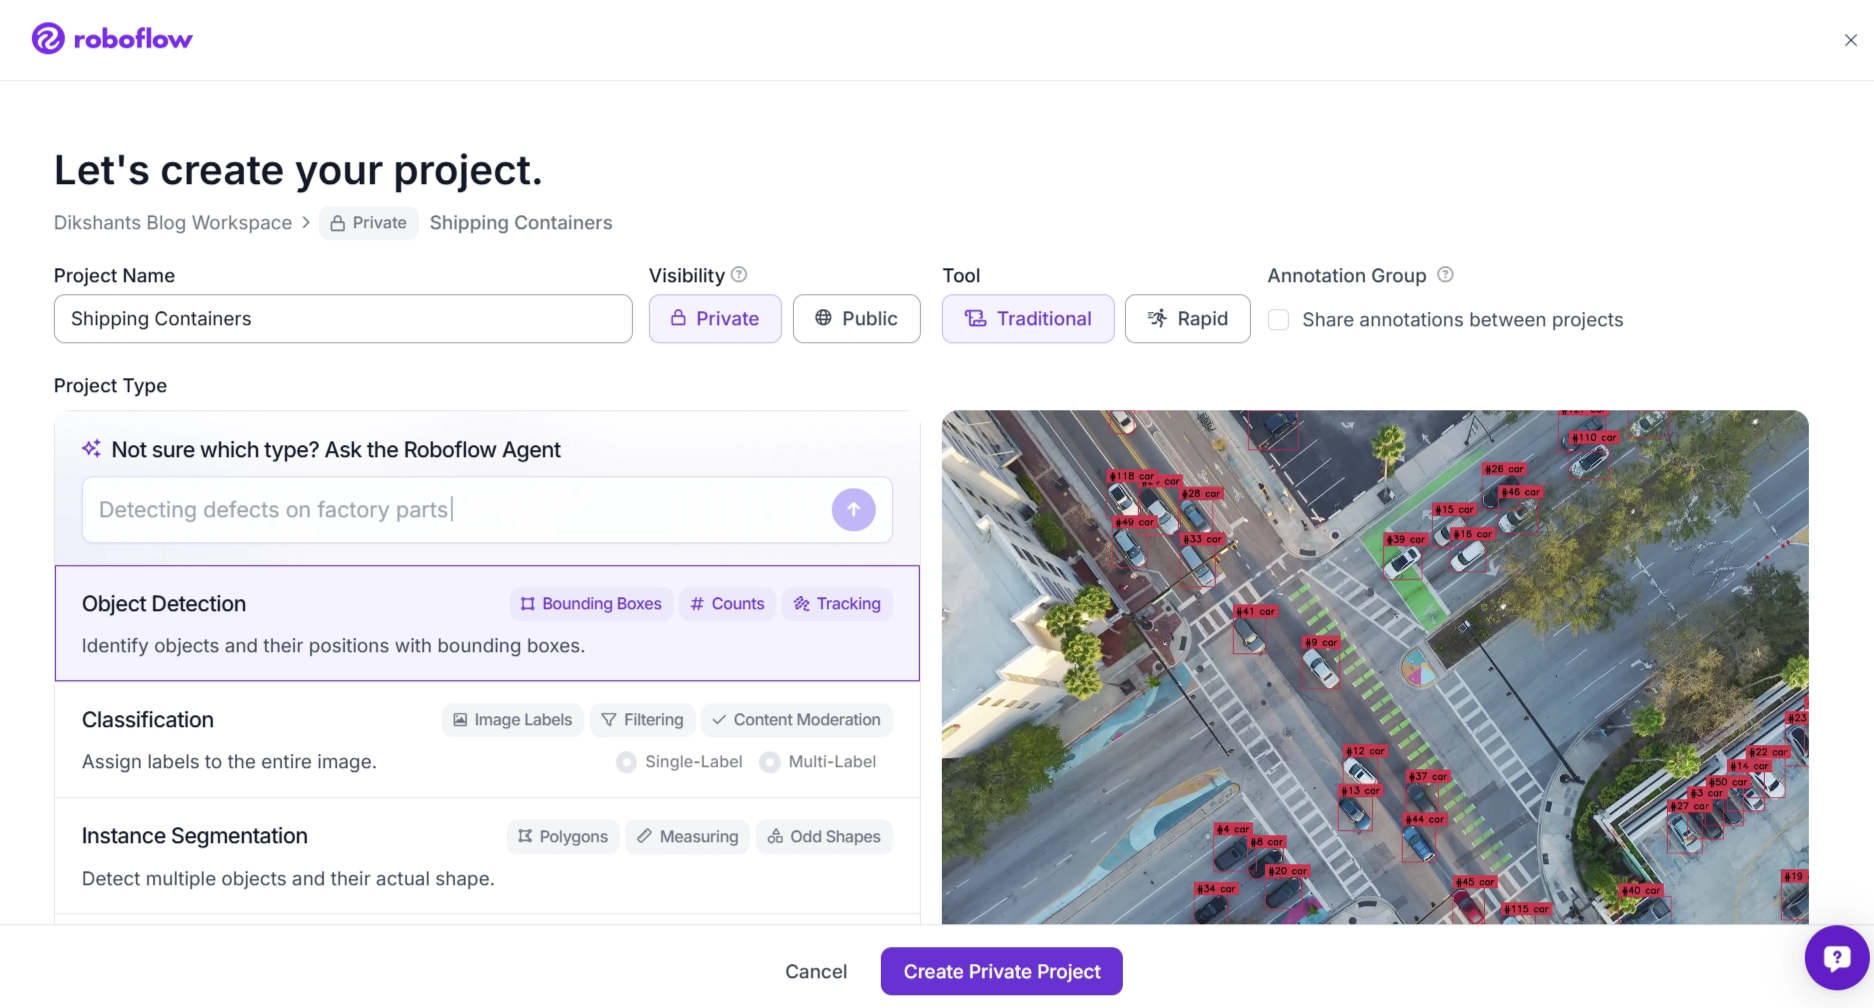
A page will appear where you can enter a project name and select the type of computer vision task you want to perform. For this guide, select Object Detection. Enter a project name, then click Create Project to create your project.
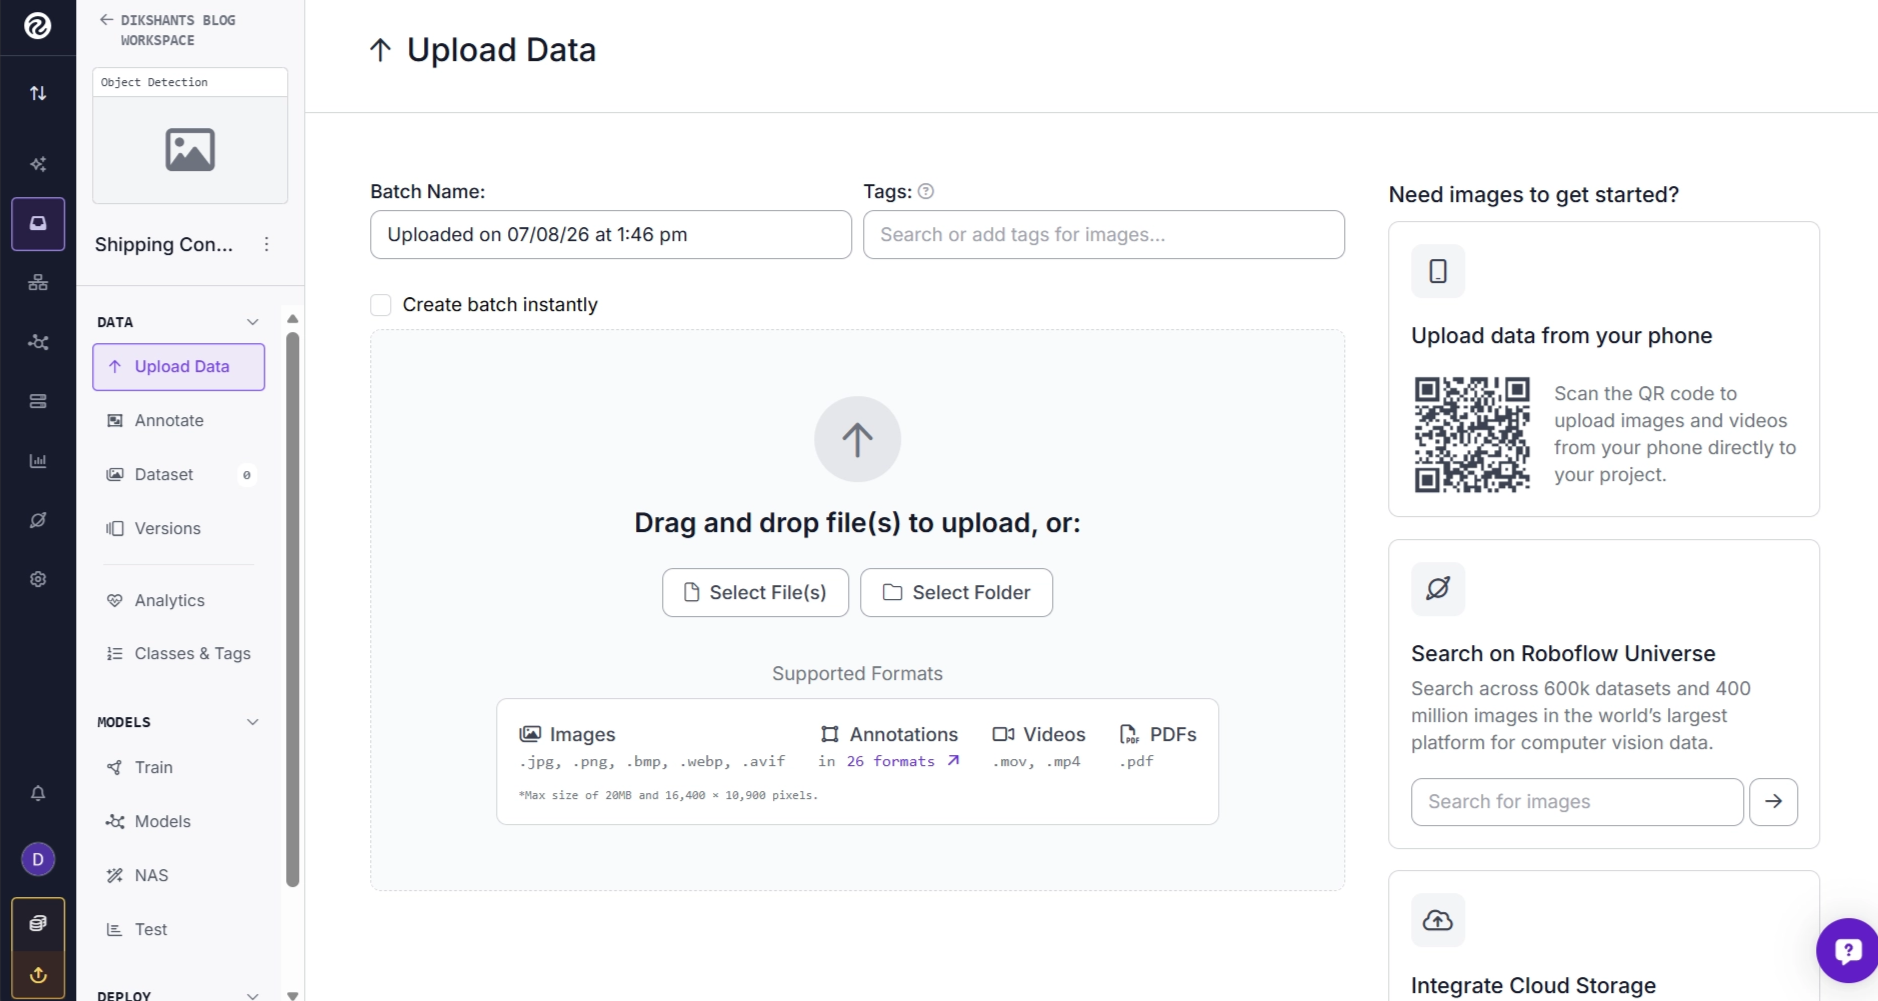
Once your project has been created, you can begin uploading images to build your training dataset.
Step 2: Build a Labeled Dataset
To train an object detection model, you first need a labeled dataset. Begin by dragging and dropping one or more images into your Roboflow project.
After your images are uploaded, Roboflow Annotate provides several options for creating annotations:
- Label Myself: Annotate the images manually.
- Label With My Team: Collaborate with teammates on the annotation process.
- Hire Outsourced Labelers: Send your images to professional annotation teams.
- Auto-Label Entire Batch: Generate annotations automatically using AI models such as SAM 3.
Roboflow Annotate is a web-based annotation tool that lets you label images and videos for computer vision tasks.
For this guide, we'll use Label Myself to manually annotate the dataset. We will create bounding boxes around each shipping container using the Bounding Box tool available in the annotation toolbar.
In addition to annotating the shipping containers, we will create bounding boxes around the Container ID, Container Logo, and Chassis ID.
Including these additional annotations helps the model learn to identify specific container-related features, allowing it to perform more detailed detection tasks during inference rather than only detecting the presence of a shipping container.
To speed up the labeling process, you can also use Roboflow Smart Select. Smart Select uses the Segment Anything Model (SAM) to generate segmentation masks with a single click.
When working on an object detection project, these segmentation masks are automatically converted into bounding box annotations when the images are added to your dataset.
You can switch between the Bounding Box tool and Smart Select at any time while annotating your images.
After finishing an image, click Next (>) to continue. Once all uploaded images have been annotated, a checkmark will appear, indicating that the images are ready to be added to your dataset. Click the checkmark to save the annotations and add them to the dataset.
Step 3: Download a Dataset from Roboflow Universe
Training high-quality models requires a sufficiently large and diverse dataset. You can either create your own dataset by uploading and annotating images, or start with an existing public dataset from Roboflow Universe.
Roboflow Universe is a community platform where developers, researchers, and organizations share computer vision datasets and pretrained models. It hosts more than one million public datasets covering tasks such as object detection, segmentation, image classification, pose estimation, and oriented bounding box detection.
For this guide, we'll use the Yard Management System dataset, which contains images of shipping containers in a container yard. The dataset already includes object detection bounding box annotations, so no additional labeling is required. To use this dataset, simply fork it.
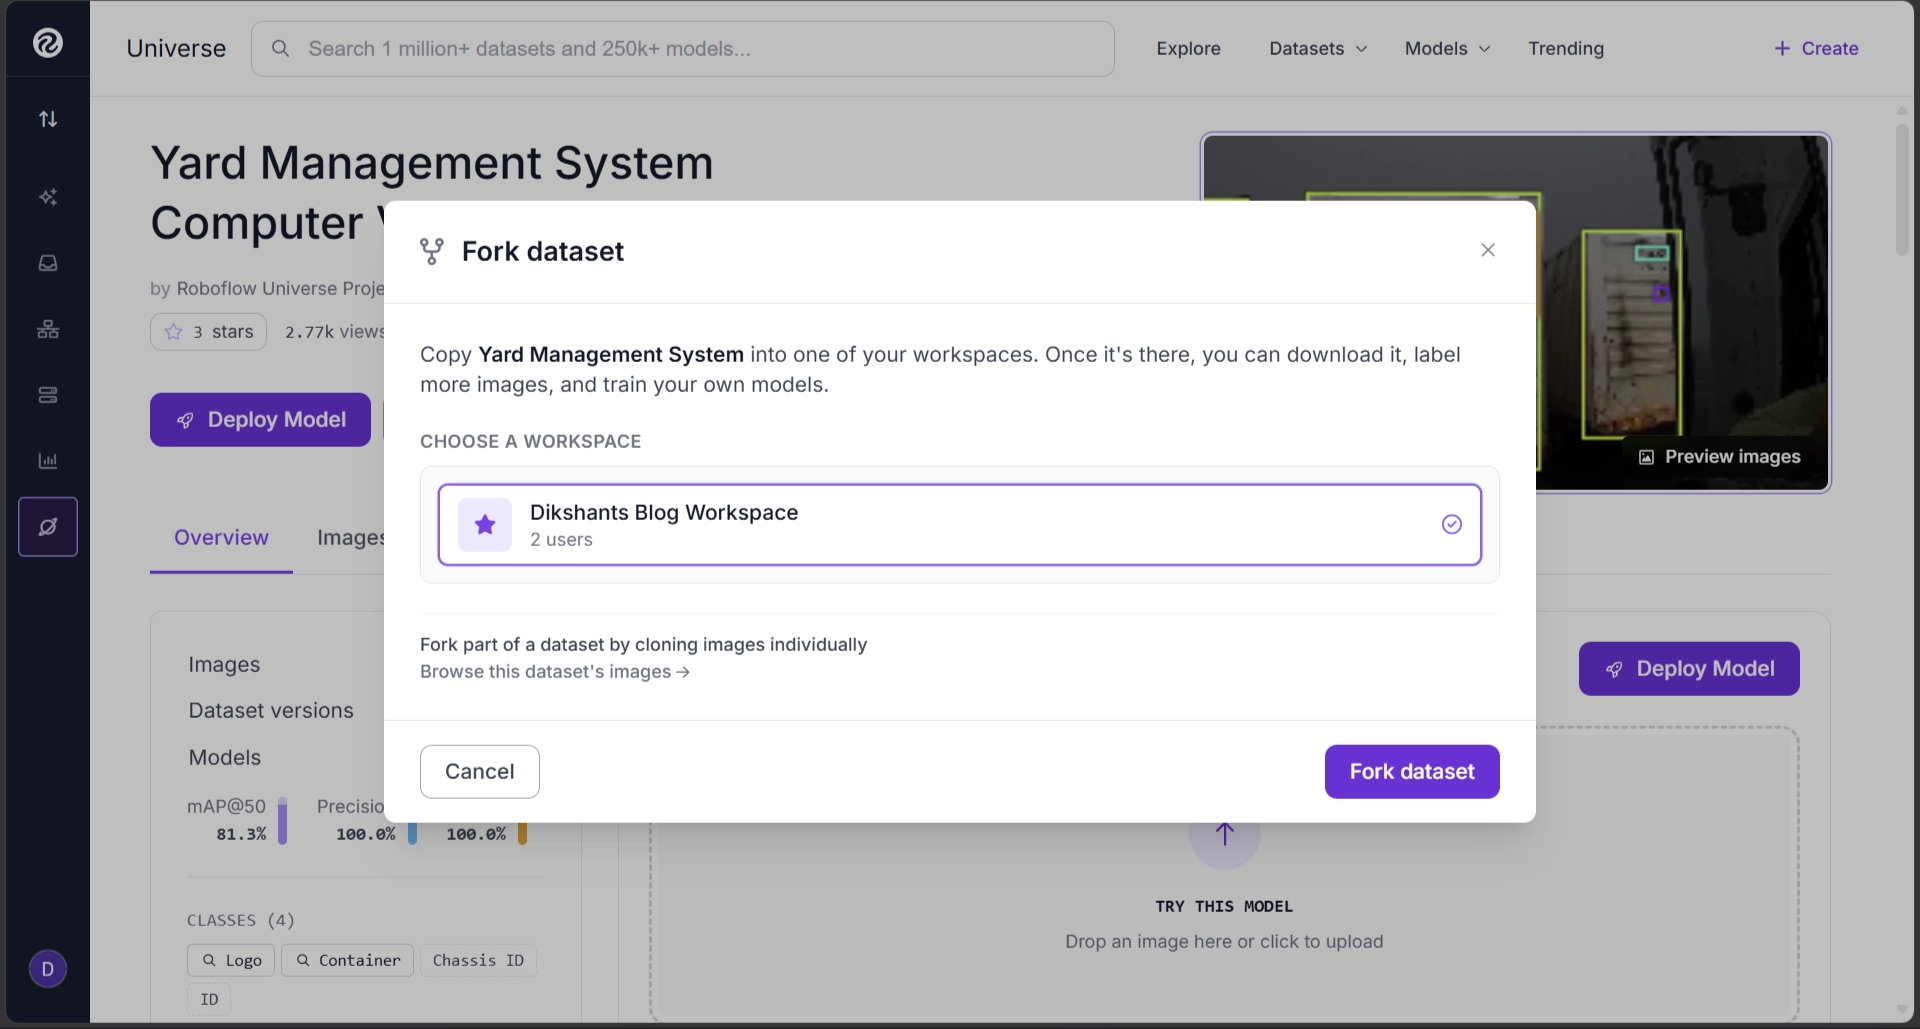
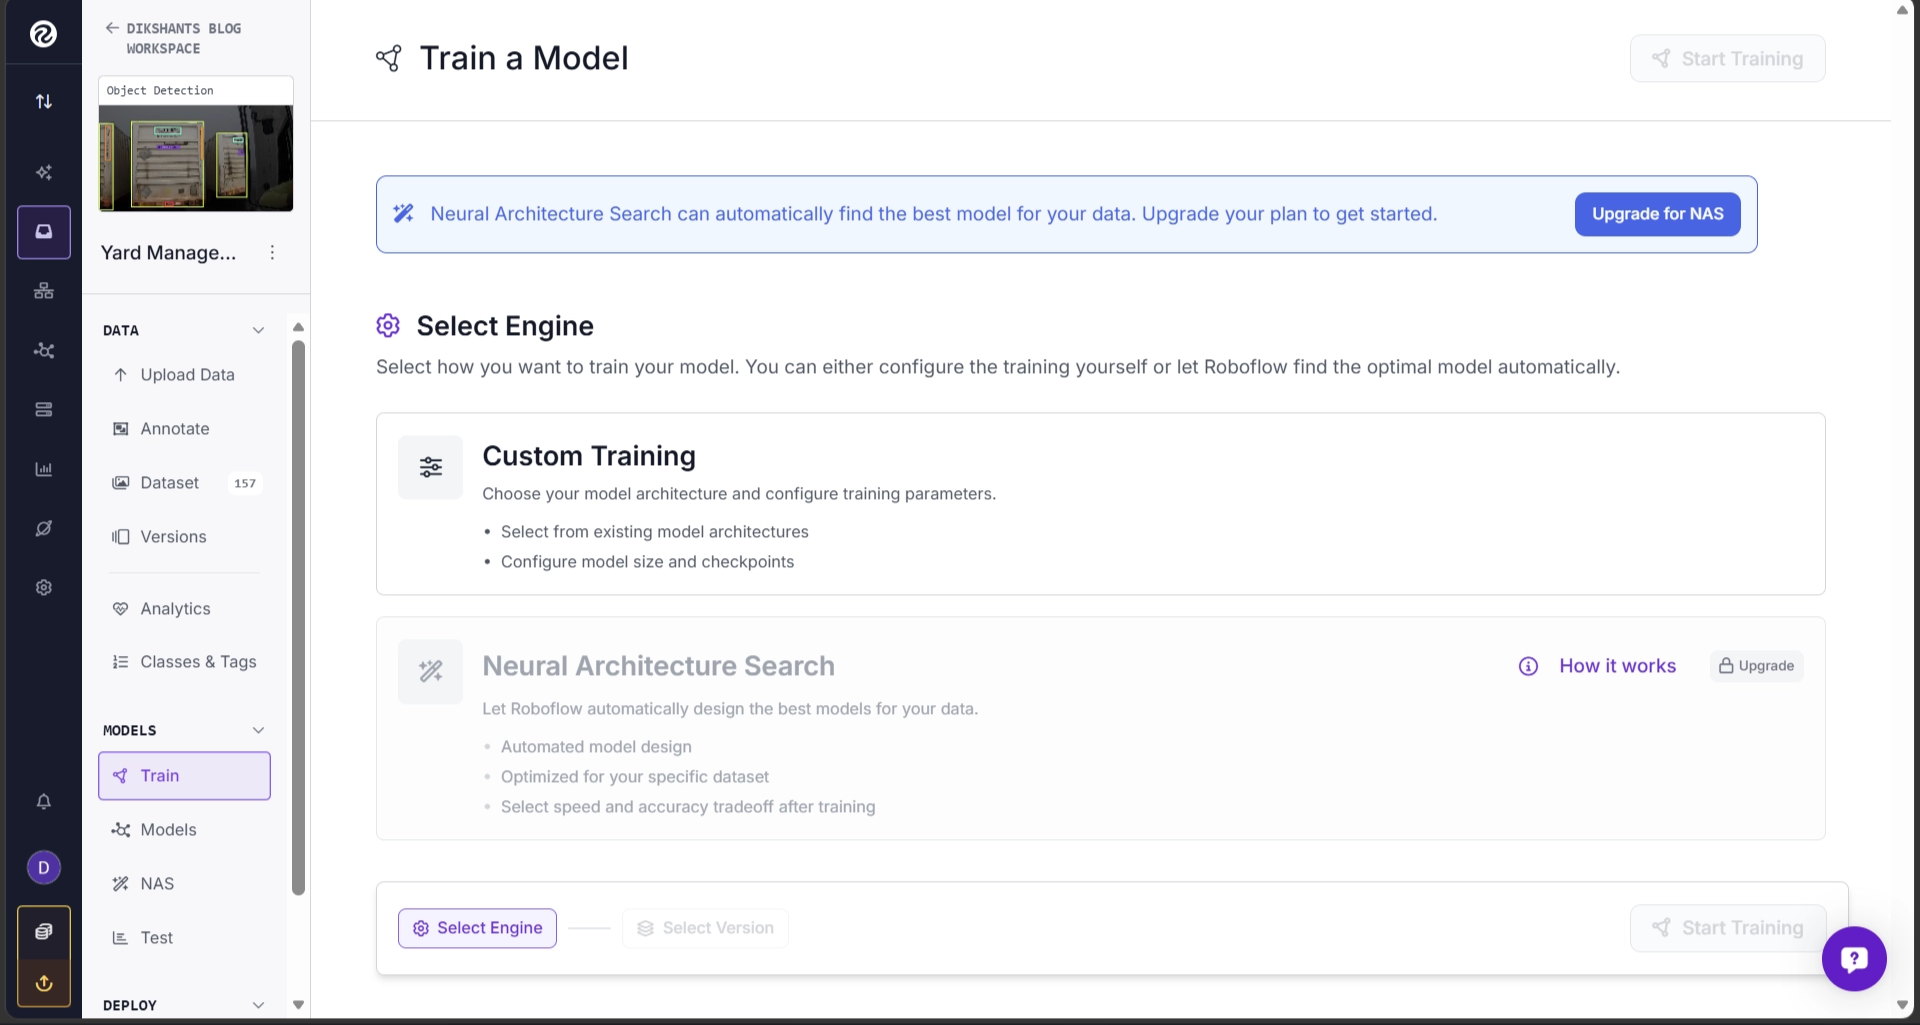
Once the dataset has been forked, it will appear as a new project in your workspace. Open the project and navigate to Train under the Models section in the left sidebar to start training a model on your dataset using Roboflow Train.
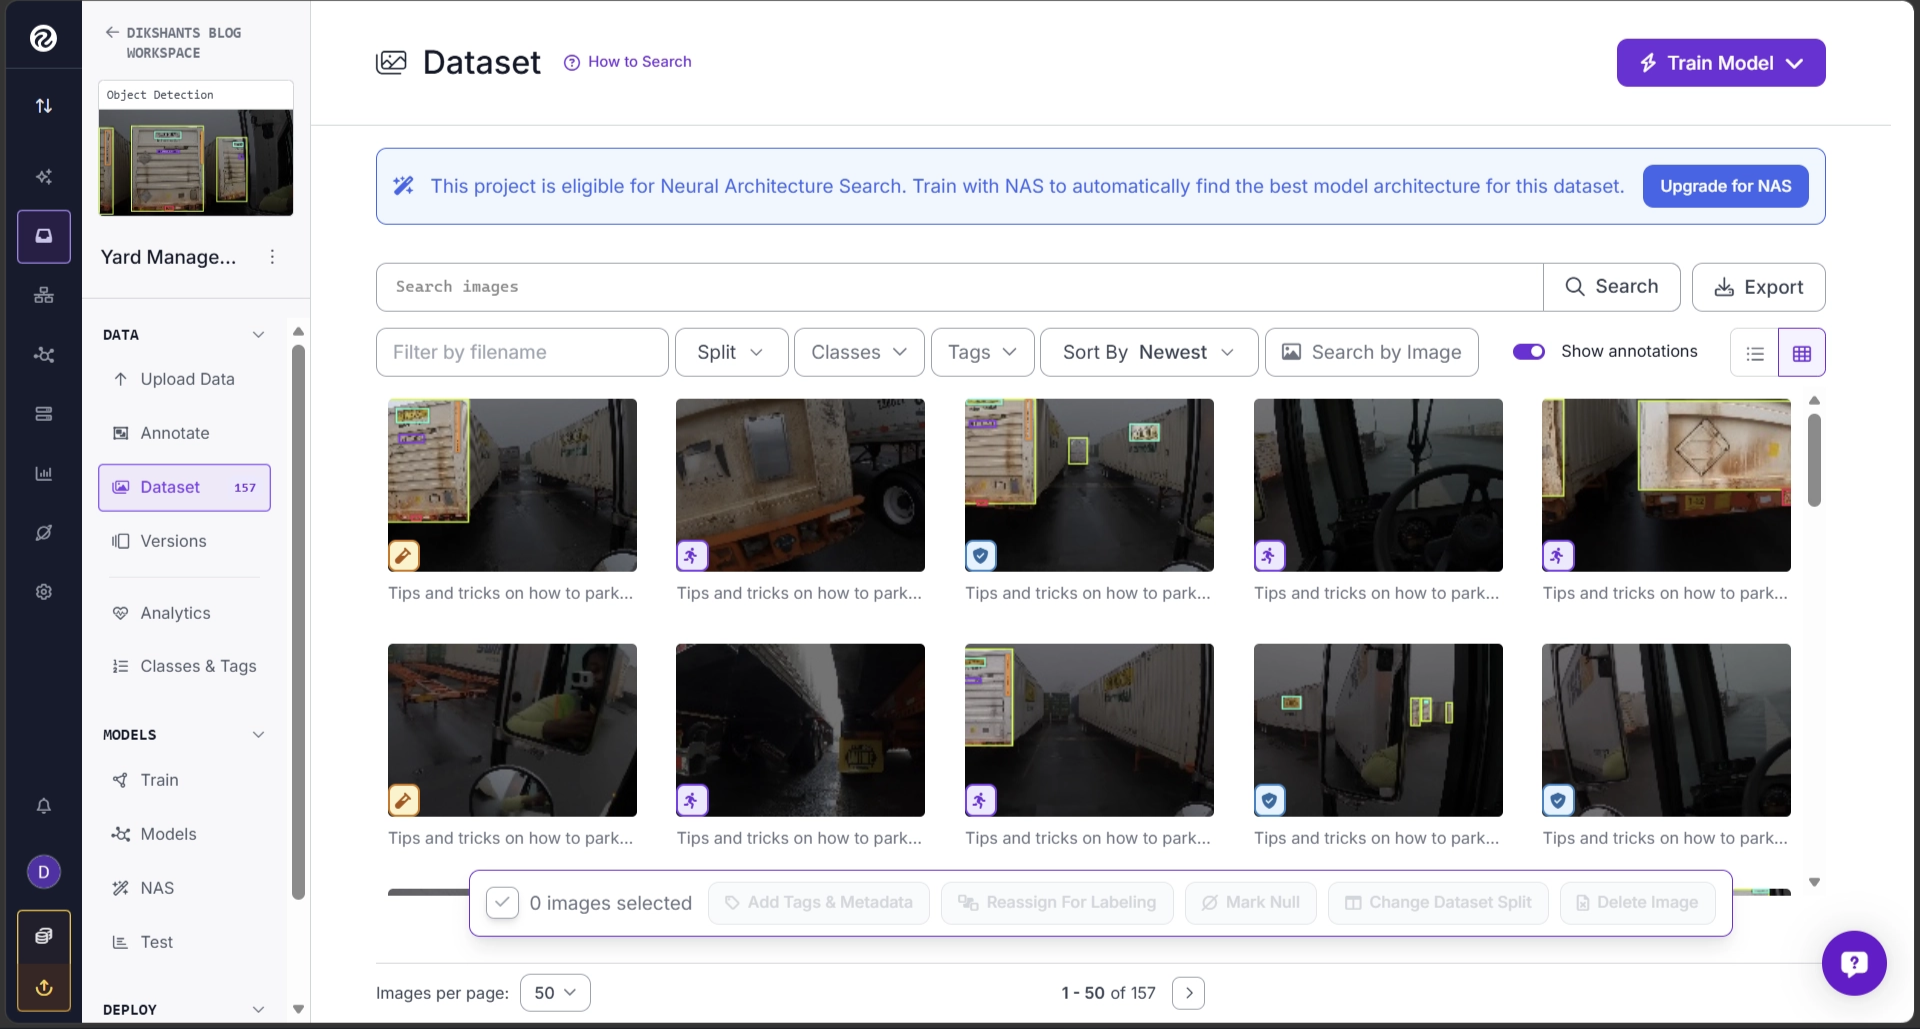
You can also explore the images and annotations by opening Dataset under the Data section.
Alternatively, if you already have a project and want to expand it with the Yard Management System dataset, you can download the dataset and upload it to your existing project.
To download the dataset, open the Dataset section on the Yard Management System page. Select the dataset version you want to use, then click Download Dataset.
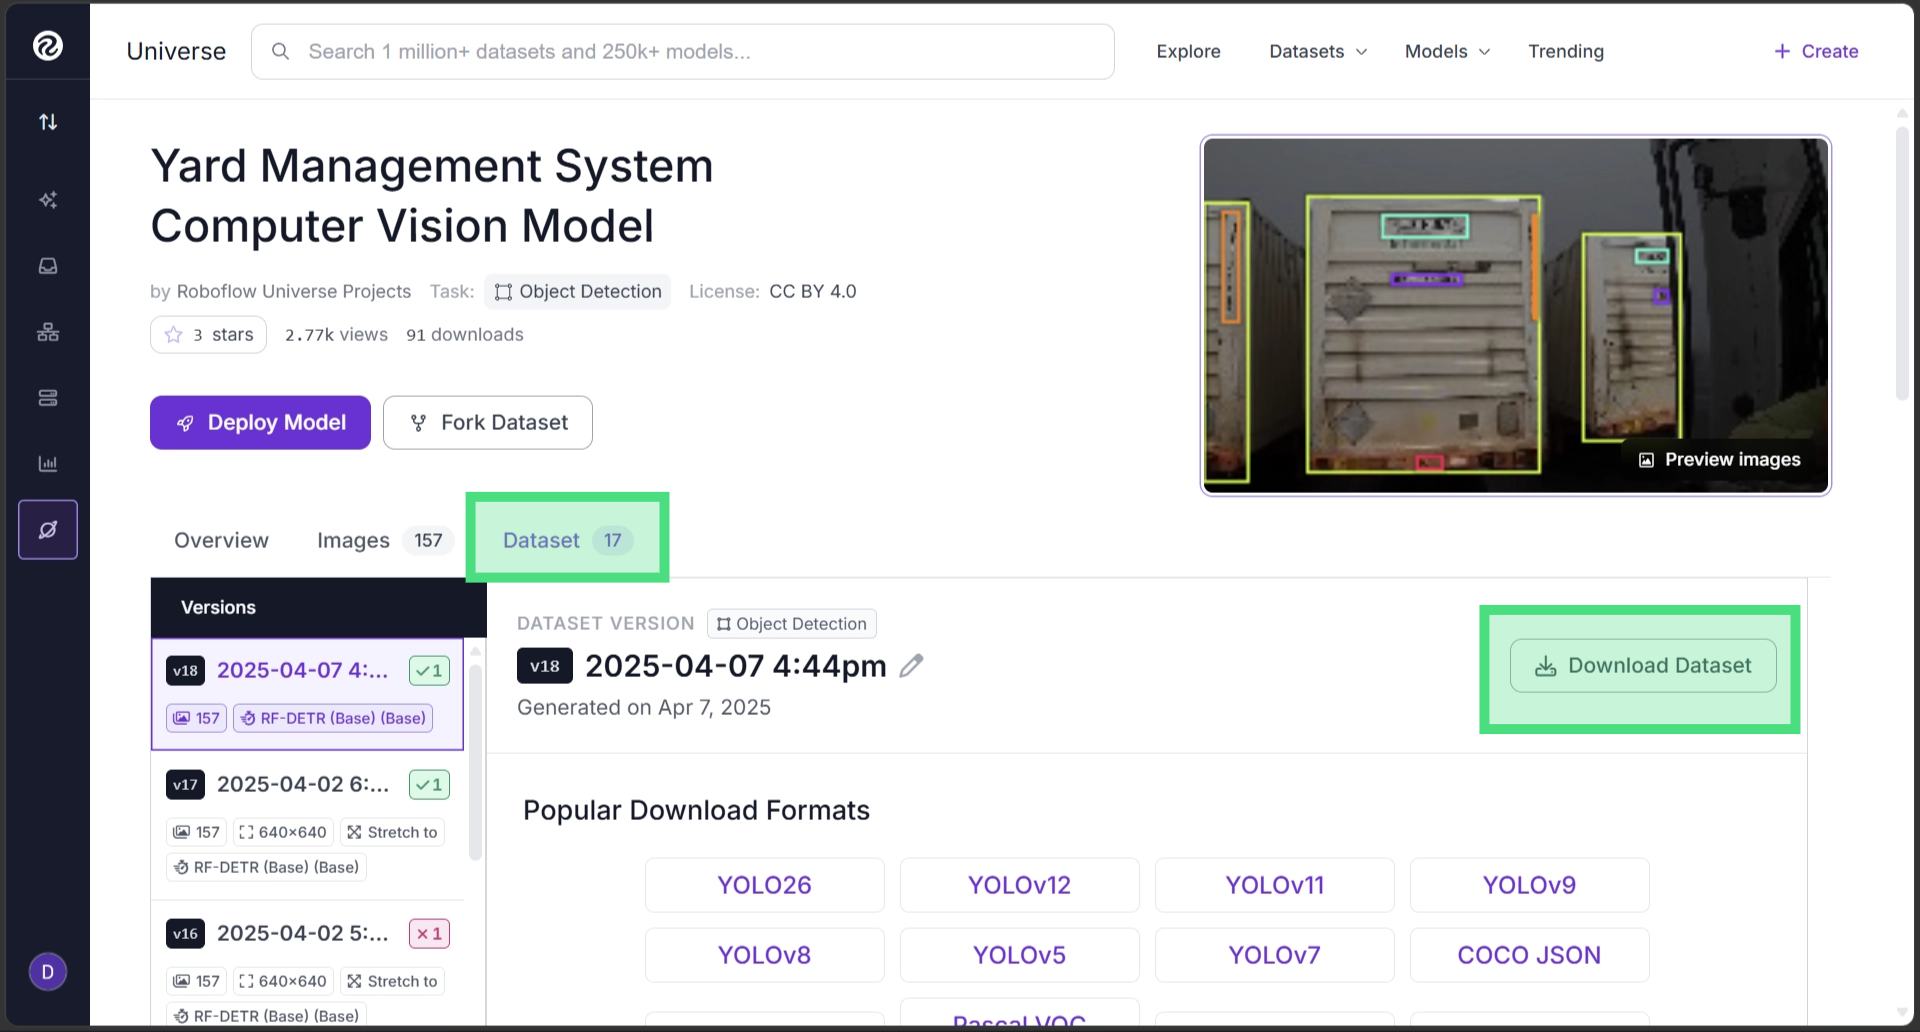
A menu will appear with several download options and annotation formats. Select Download ZIP, then choose the COCO annotation format, which is widely used for object detection datasets.
Although notebook download scripts are also available, we'll use the ZIP download for this guide.
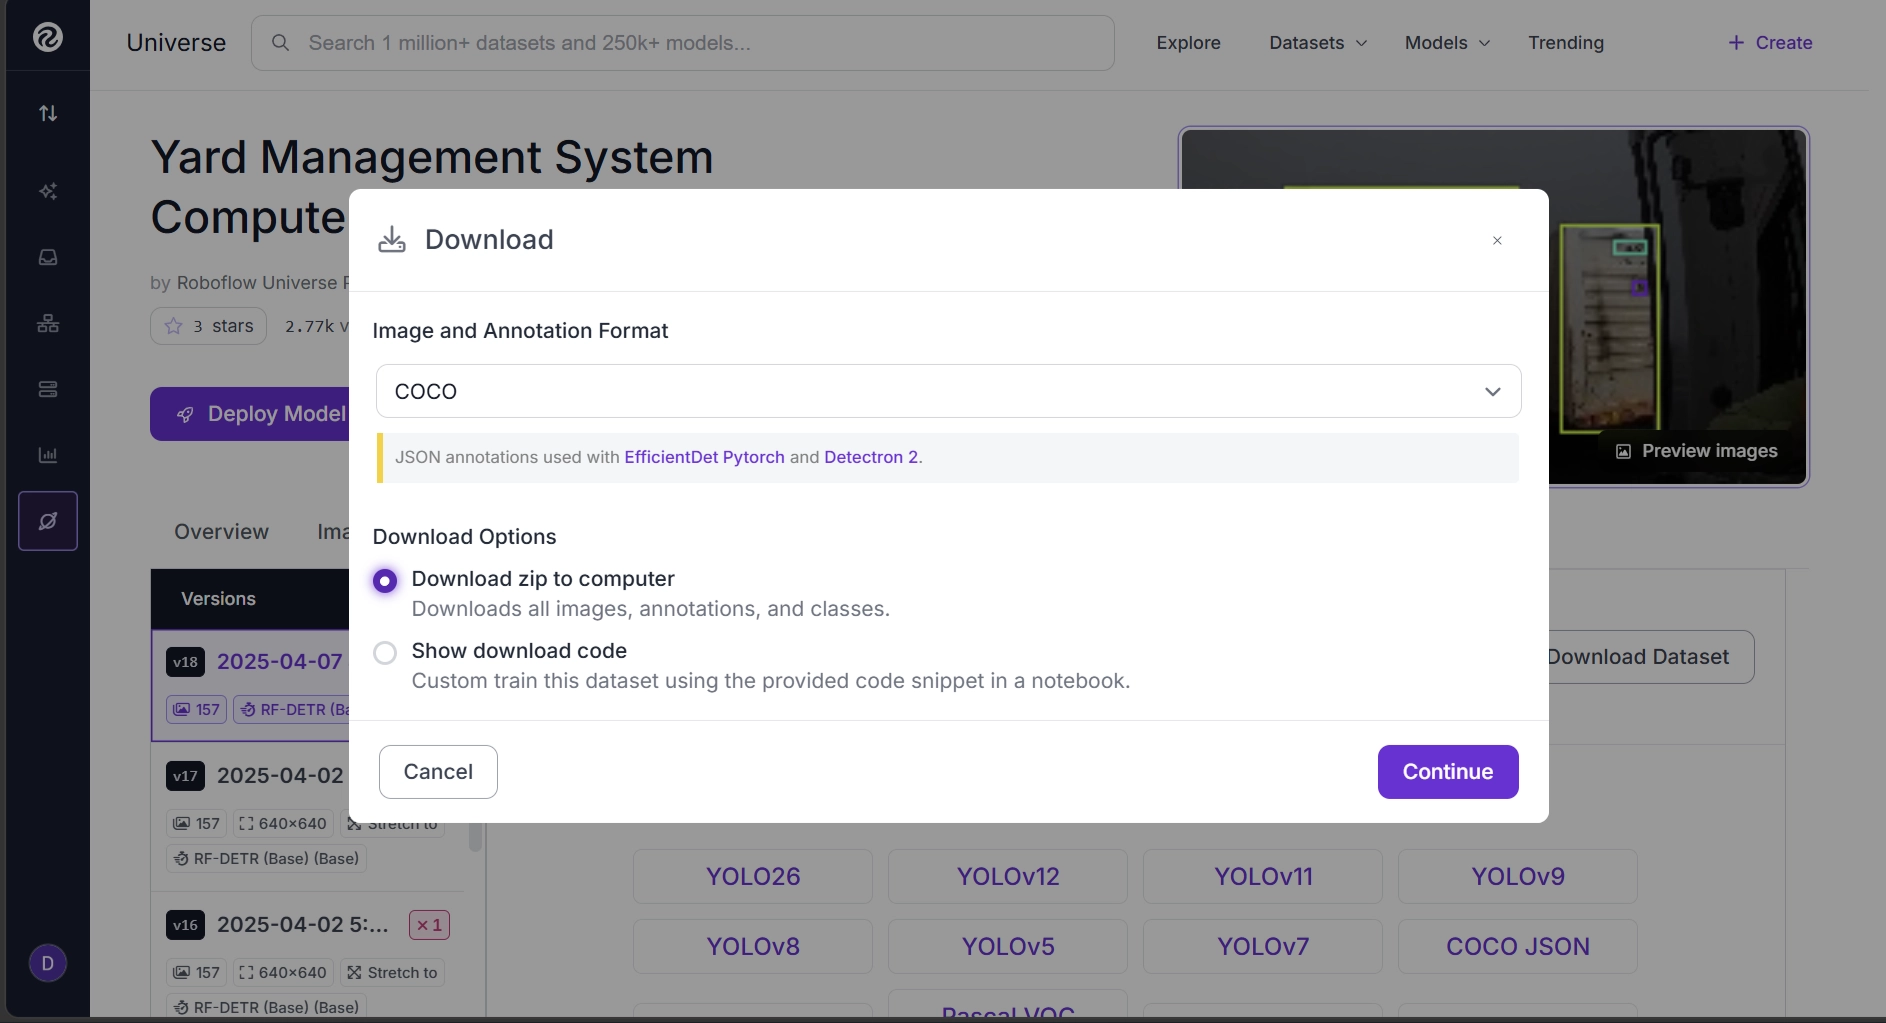
After downloading the dataset, extract the ZIP. The extracted folder contains separate train, valid, and test directories. Drag and drop the entire extracted folder into your Roboflow project.
After the upload finishes, save the dataset. Roboflow automatically recognizes the dataset structure and assigns images to the appropriate train, validation, and test splits.
You will then be redirected to the Versions section, where you can generate a new dataset version for training.
You can view all images in the project, whether annotated or not, under the Annotate section in the left sidebar. Because the uploaded dataset already includes annotations and dataset splits, it will appear in the Dataset section, ready for training.
Once your dataset contains enough annotated images, you're ready to create a dataset version for training.
Step 4: Create a Dataset Version
A dataset version is a snapshot of your dataset at a specific point in time. It preserves your images, annotations, preprocessing, and augmentation settings, allowing you to train models using a reproducible version of your data.
Dataset versions make it easier to:
- Track changes as your dataset grows.
- Reproduce previous training results.
- Compare model performance across different dataset iterations.
- Roll back to an earlier version if needed
When creating a dataset version, you can configure the train, validation, and test splits, as well as apply preprocessing and augmentation steps.
Preprocessing includes operations such as resizing images, auto-orienting images, converting them to grayscale, or applying dynamic crops.
While augmentation includes applying transformations such as flips, rotations, brightness adjustments, blur, noise, and other image modifications.
To learn more about preprocessing and augmentation, refer to image preprocessing and augmentation guides.
To create a dataset version, open the Versions tab under the Data section in the left sidebar of your Roboflow project.
For this guide, we apply the Auto-Orient preprocessing option and resize all images to 640 × 640.
After configuring your dataset version, click Continue. Roboflow will process your dataset and generate a new dataset version using the selected settings.
Step 5: Train a YOLOv11 Model with Roboflow Train
With your dataset version ready, you can begin training your YOLOv11 model using Roboflow Train.
Roboflow Train is a model training platform that allows you to train computer vision models on custom datasets without managing complex training infrastructure.
It provides automated training pipelines, optimized model configurations, and evaluation tools to help you build accurate, deployable vision models for a wide range of computer vision tasks.
To begin training with Roboflow Train, open the dataset version you just created and click Train Model.
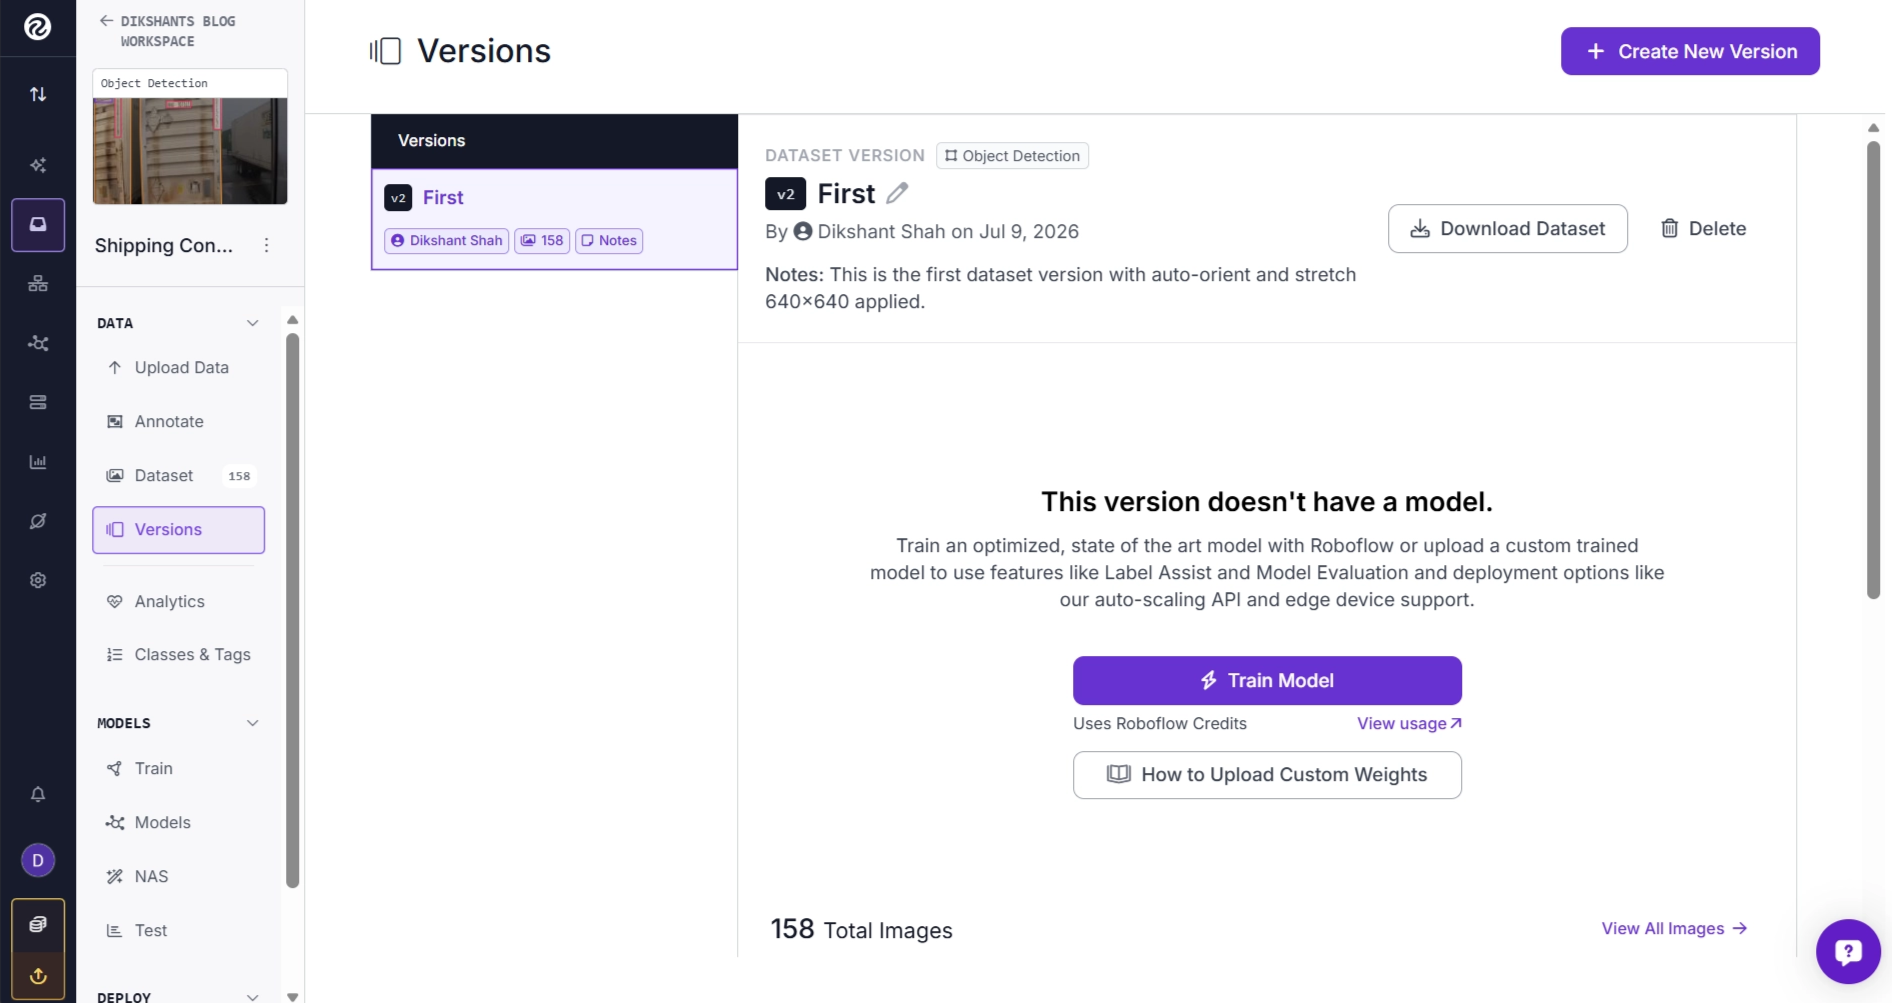
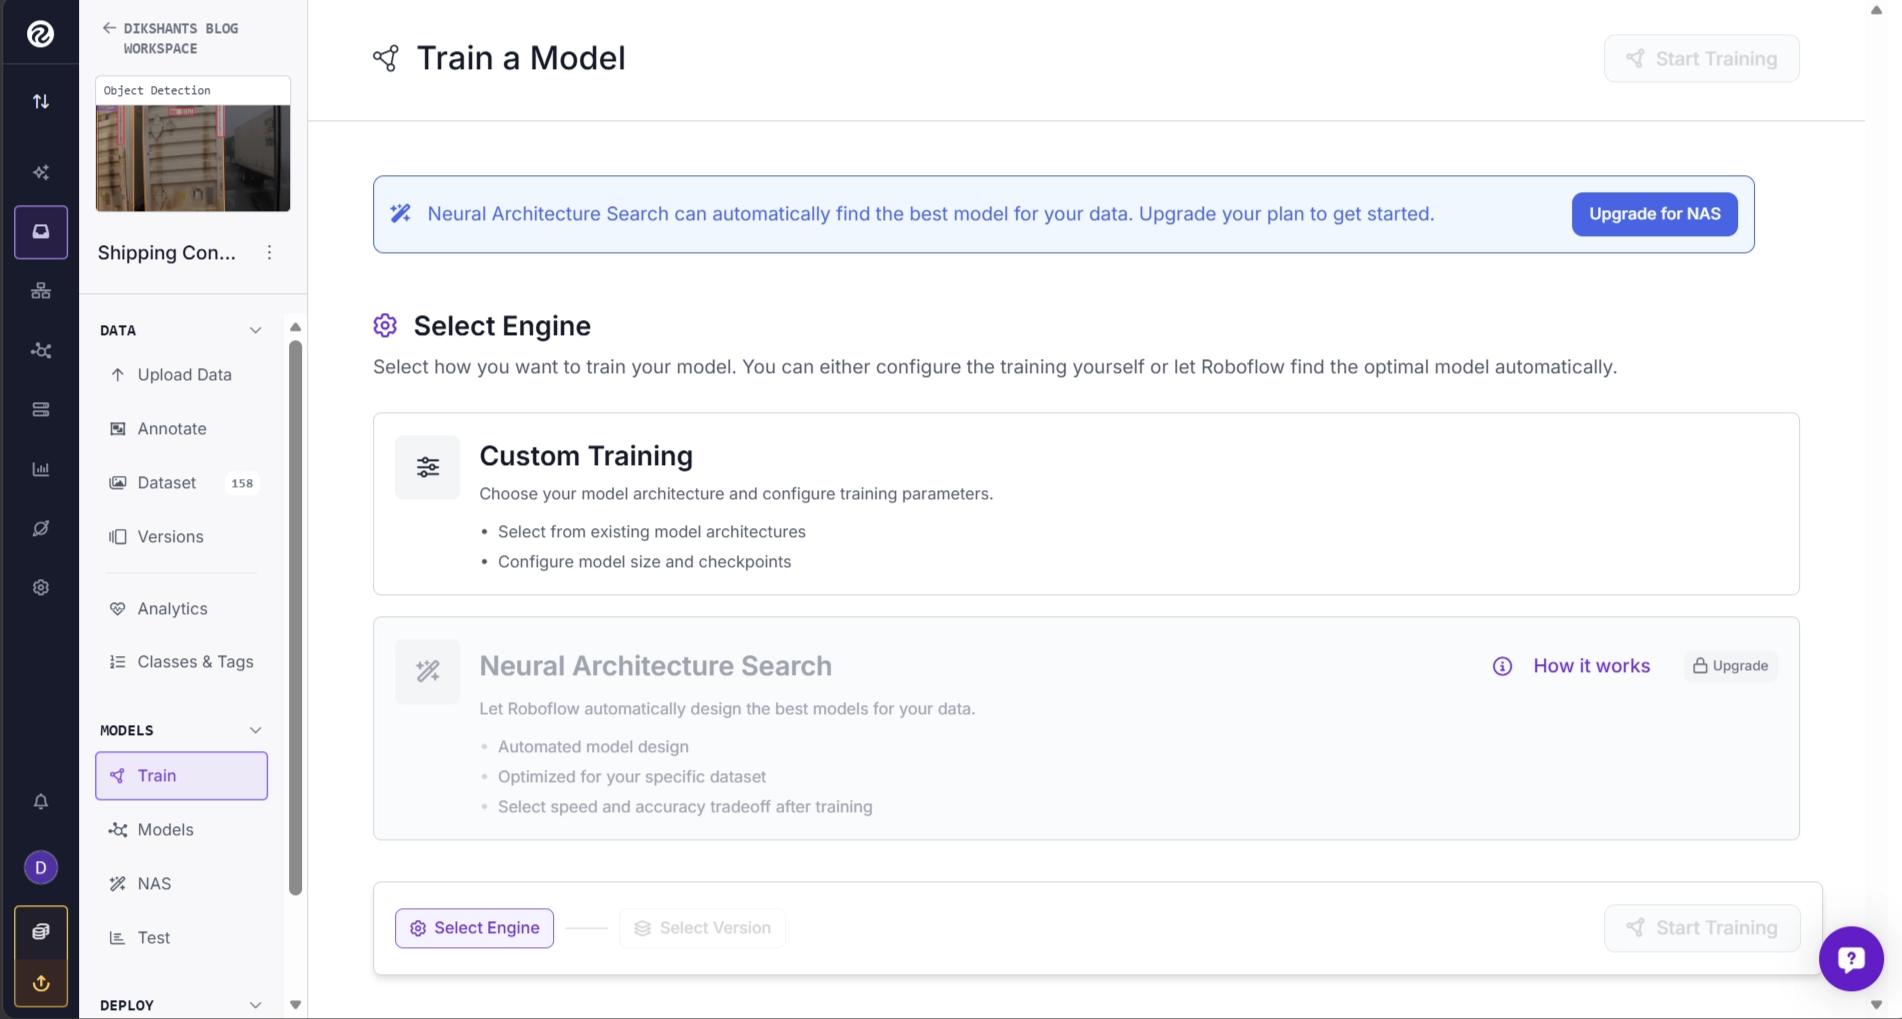
This opens the Roboflow Train interface, where you can choose from multiple training engines.
Among them, Neural Architecture Search (NAS) automatically trains and evaluates dozens of model architectures on your dataset, then presents the best-performing models across different speed versus accuracy tradeoffs.
Custom Training gives you full control over the training process, allowing you to select the architecture, choose checkpoints, and configure training settings manually.
For this guide, choose Custom Training so we can explore the available training configurations, such as selecting a model architecture and setting the number of training epochs.
After selecting the Custom Training engine, Roboflow displays the available model architectures for your project.
The available architectures depend on your project type. Since this is an object detection project, only object detection models are shown.
Select YOLOv11, then choose the model size that best fits your application. Smaller models generally provide faster inference with lower computational requirements, while larger models typically achieve higher accuracy at the cost of increased inference time.
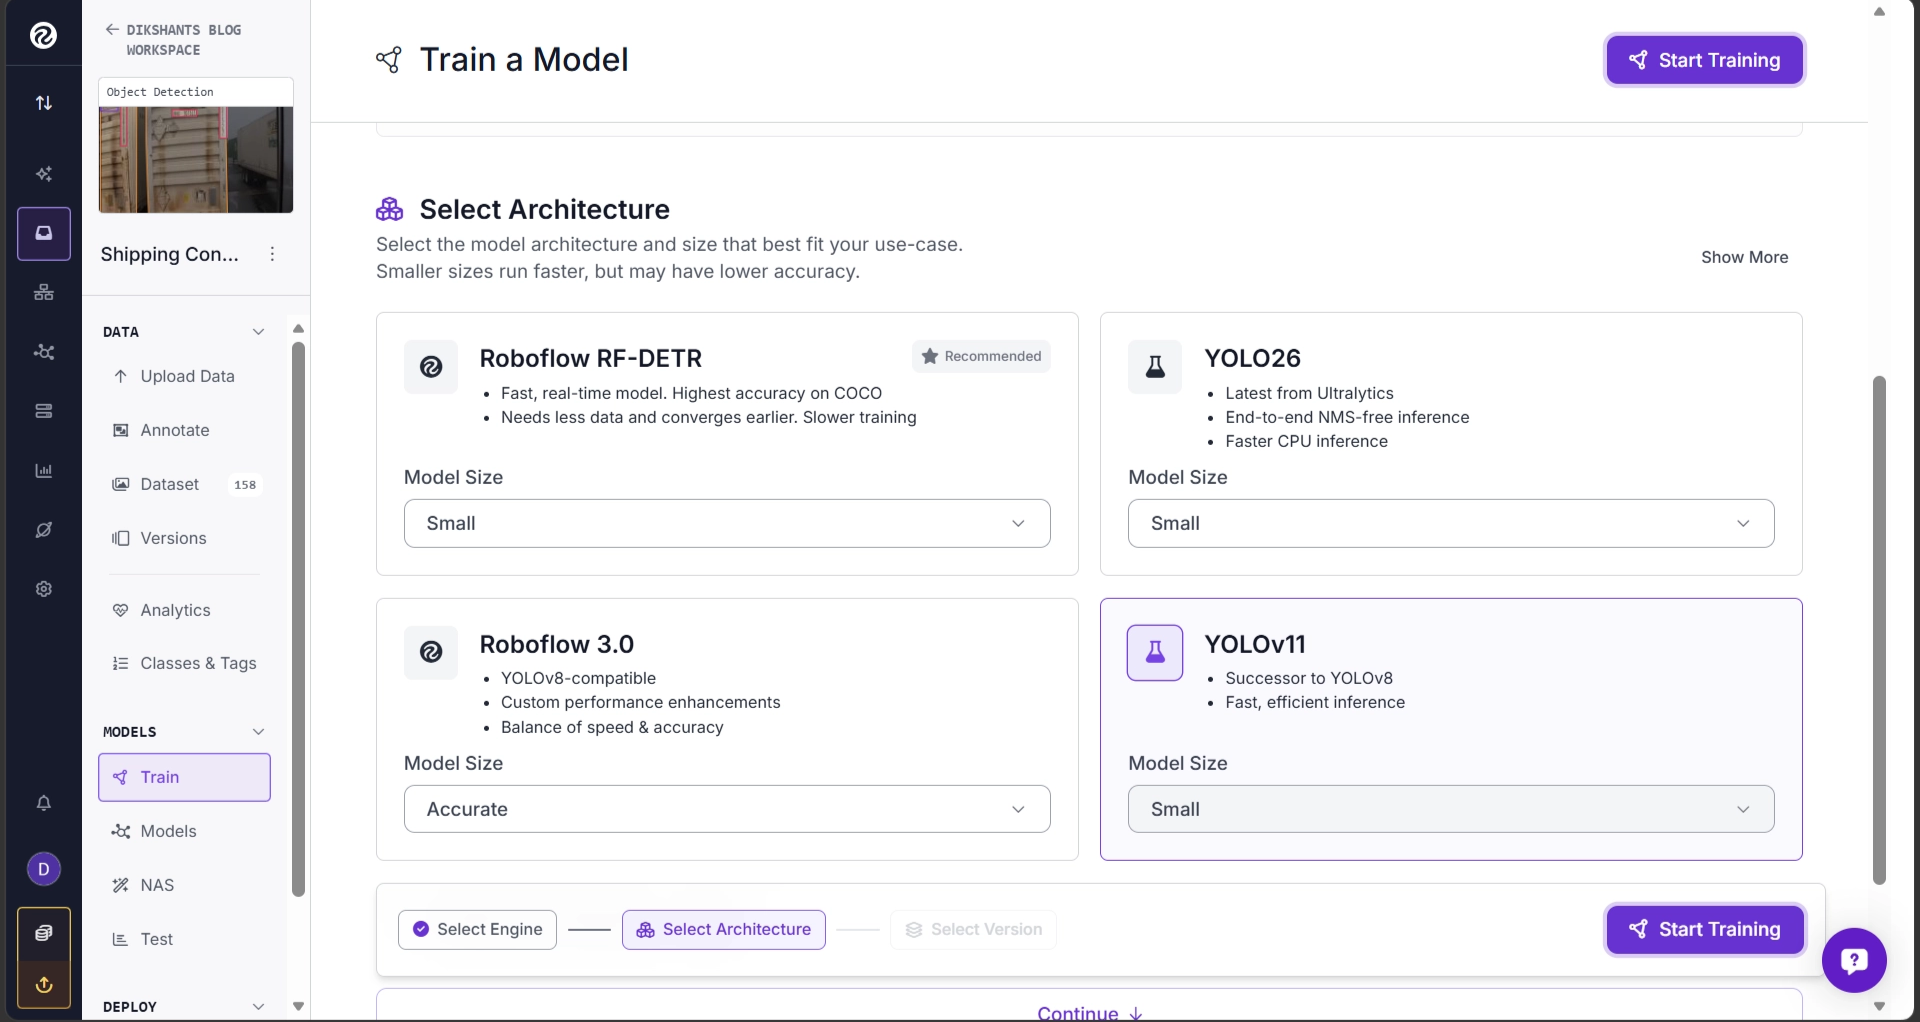
For this guide, we'll use YOLOv11 Small (YOLOv11s).
Roboflow Train also lets you initialize training from an existing checkpoint. Since this is our first training run, we'll use the pretrained YOLOv11 weights.
You can also configure hyperparameters such as the number of training epochs or leave them at their default values, such as 300 epochs.
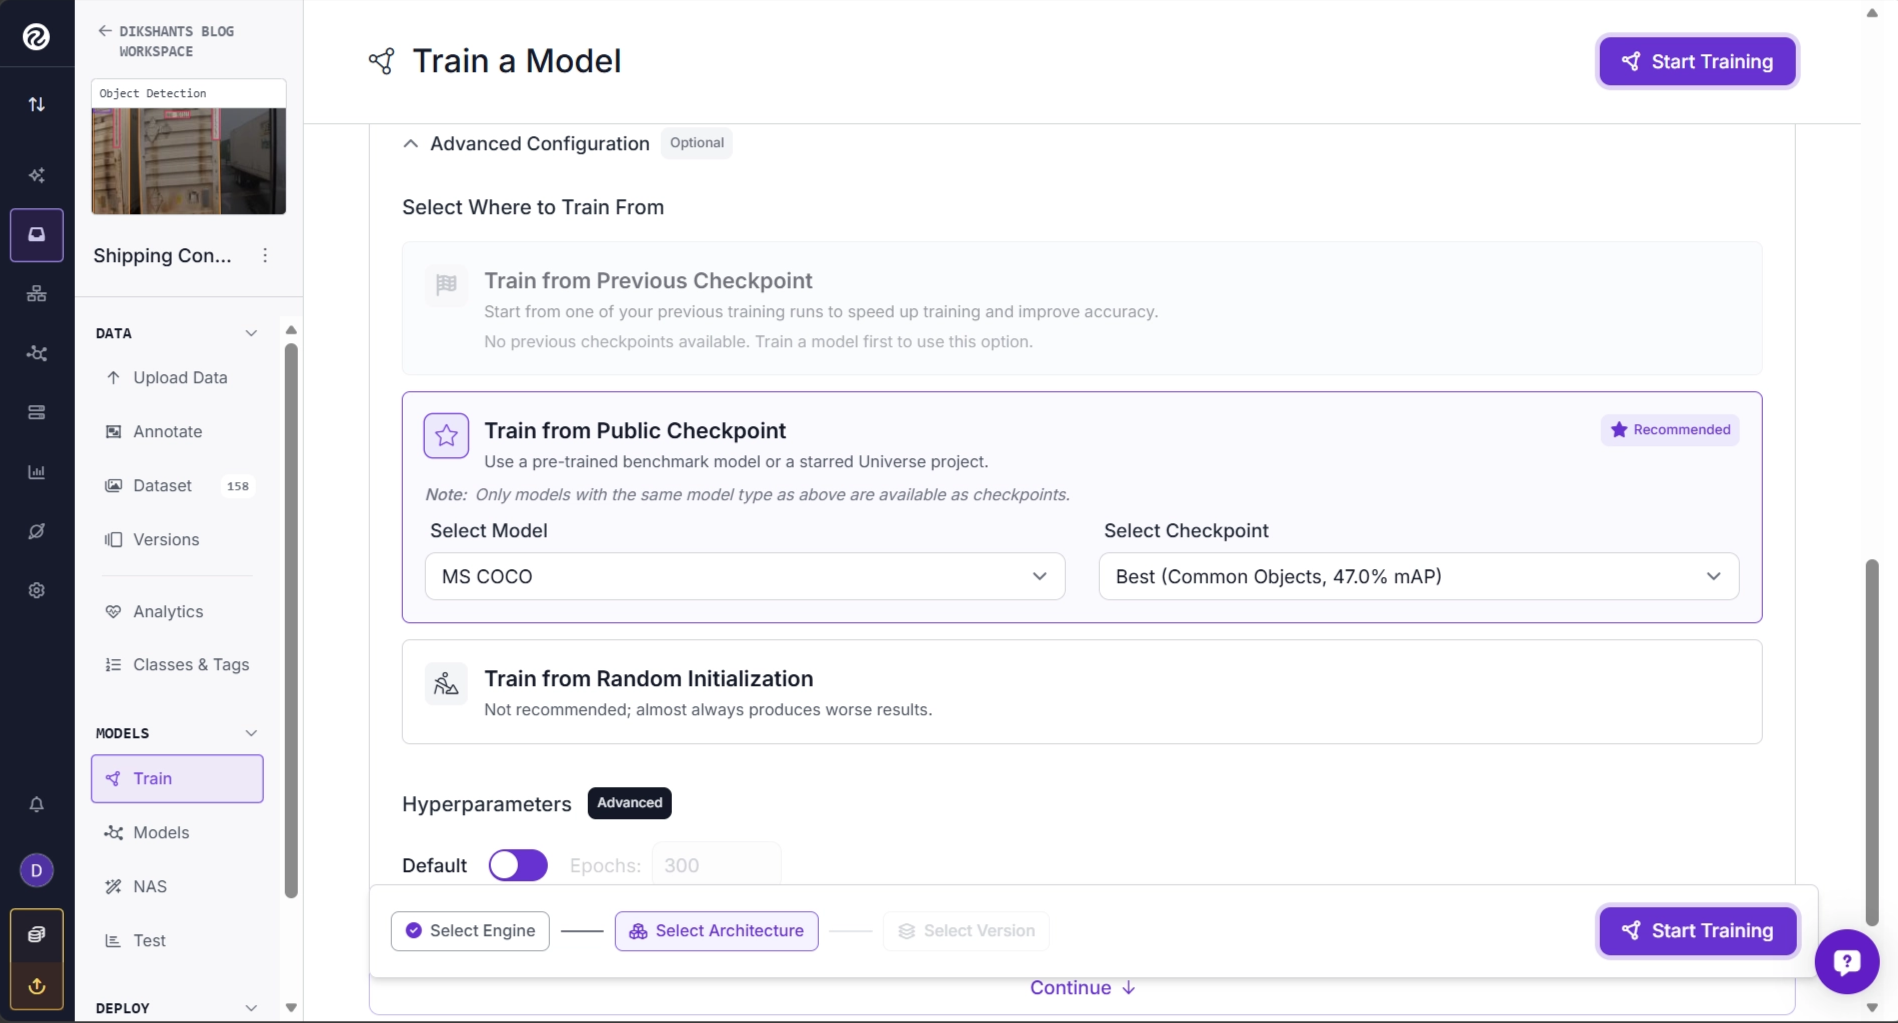
Before training begins, Roboflow Train presents a summary of your selected configuration, including:
- Model architecture
- Training settings
- Preprocessing and augmentation steps
- Estimated training time
- Expected credit usage
Review these settings to ensure everything is configured correctly.
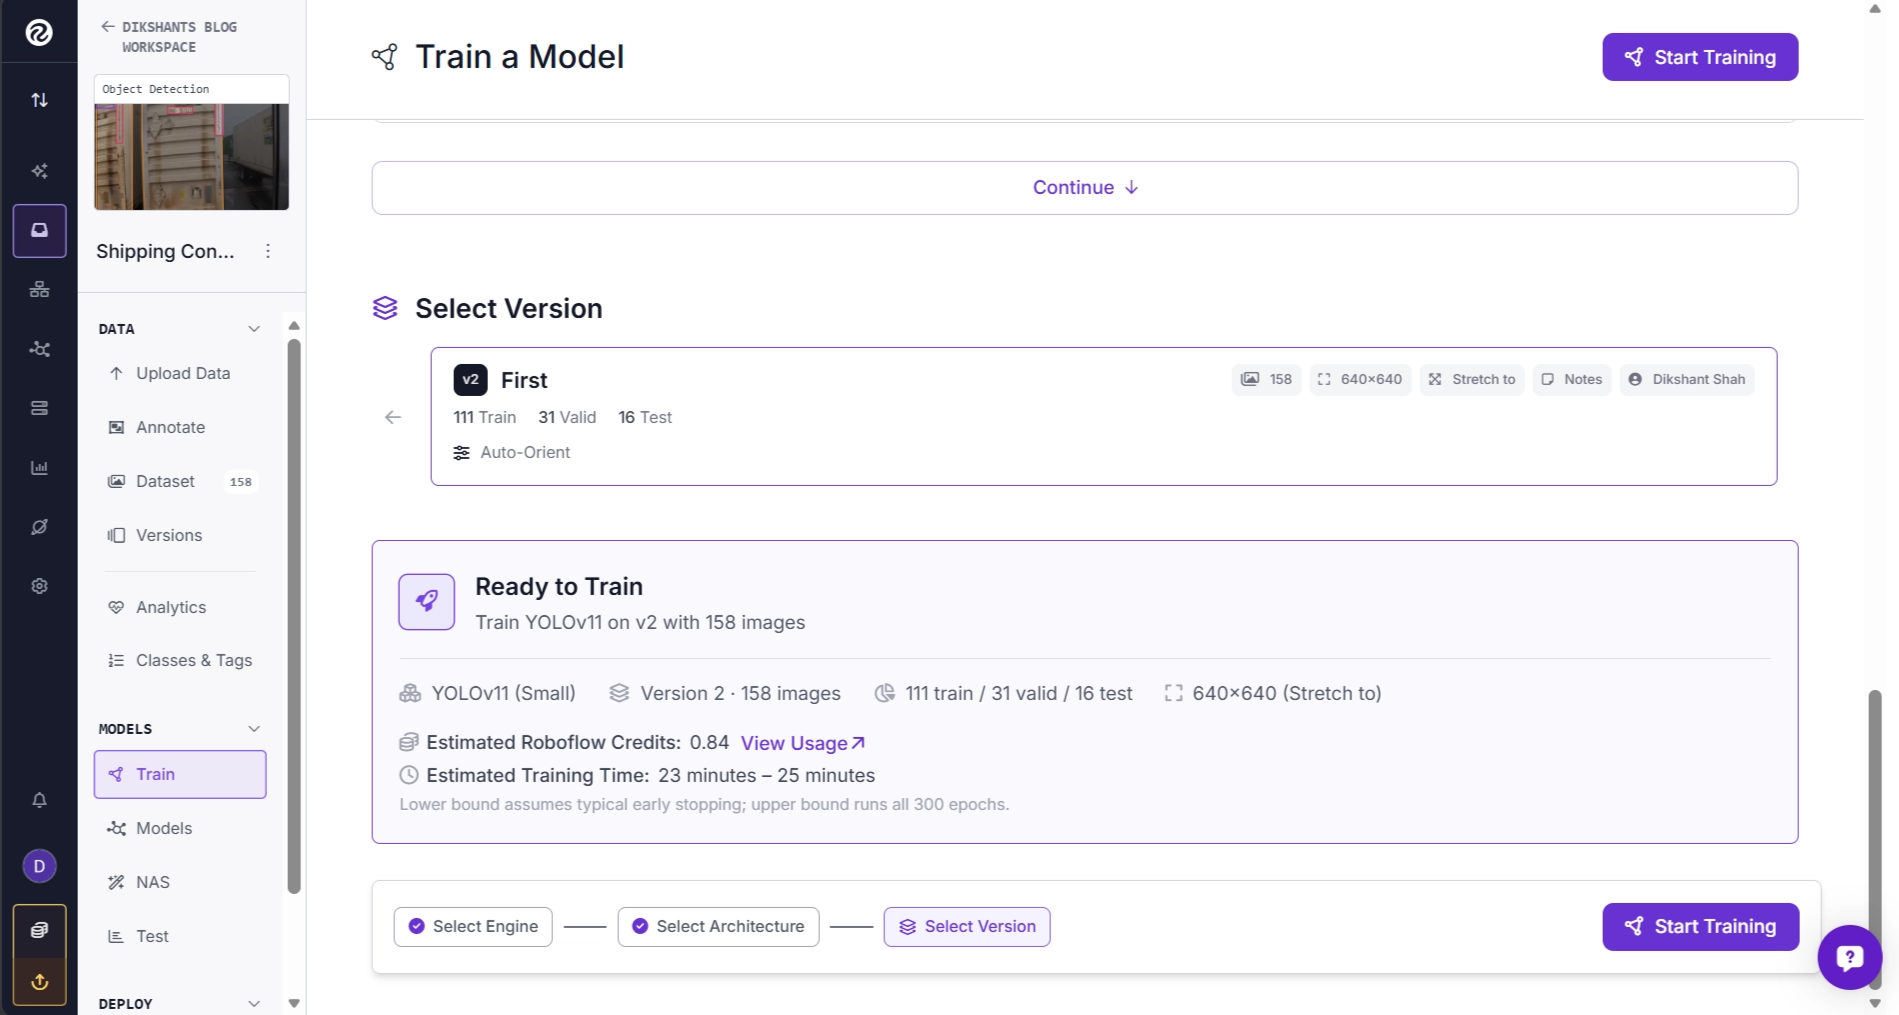
Once you're satisfied with the configuration, click Train to begin training your model.
Step 6: Monitor Training and Analyze Results
While your model is training, Roboflow Train provides real-time progress updates and performance metrics. You can monitor information such as:
- Current training epoch
- Overall training progress
- Estimated time remaining
- Performance metrics throughout training
You can cancel a training job at any time. If your model has already converged and additional training is unlikely to improve performance, you can also stop training early to save time and credits.
Once training finishes, Roboflow sends an email notification summarizing the training results, including key evaluation metrics such as mAP, precision, and recall.
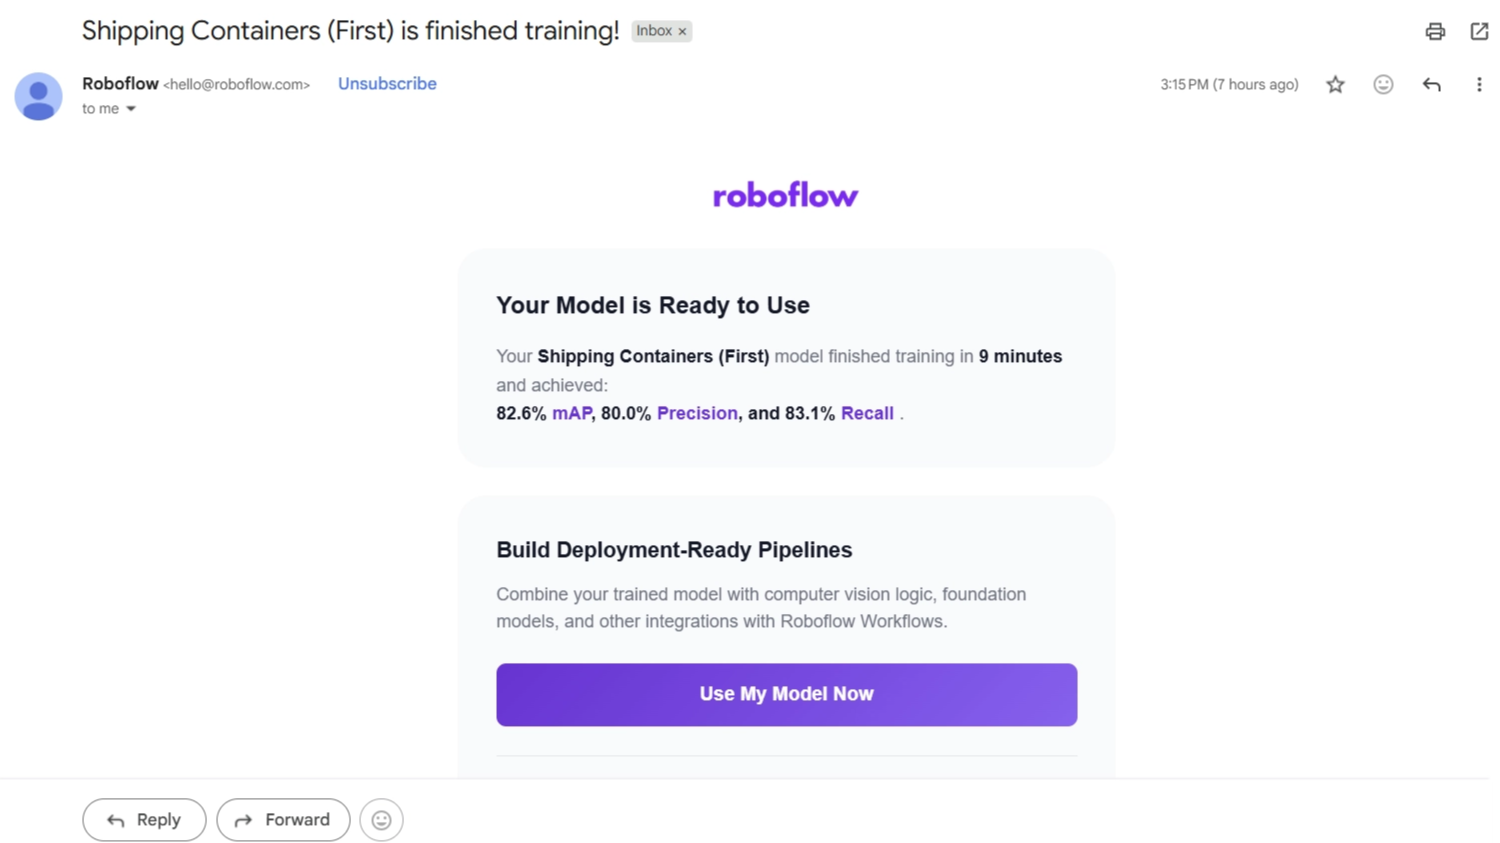
The trained model is also added to your workspace, where it is available for inference and deployment.
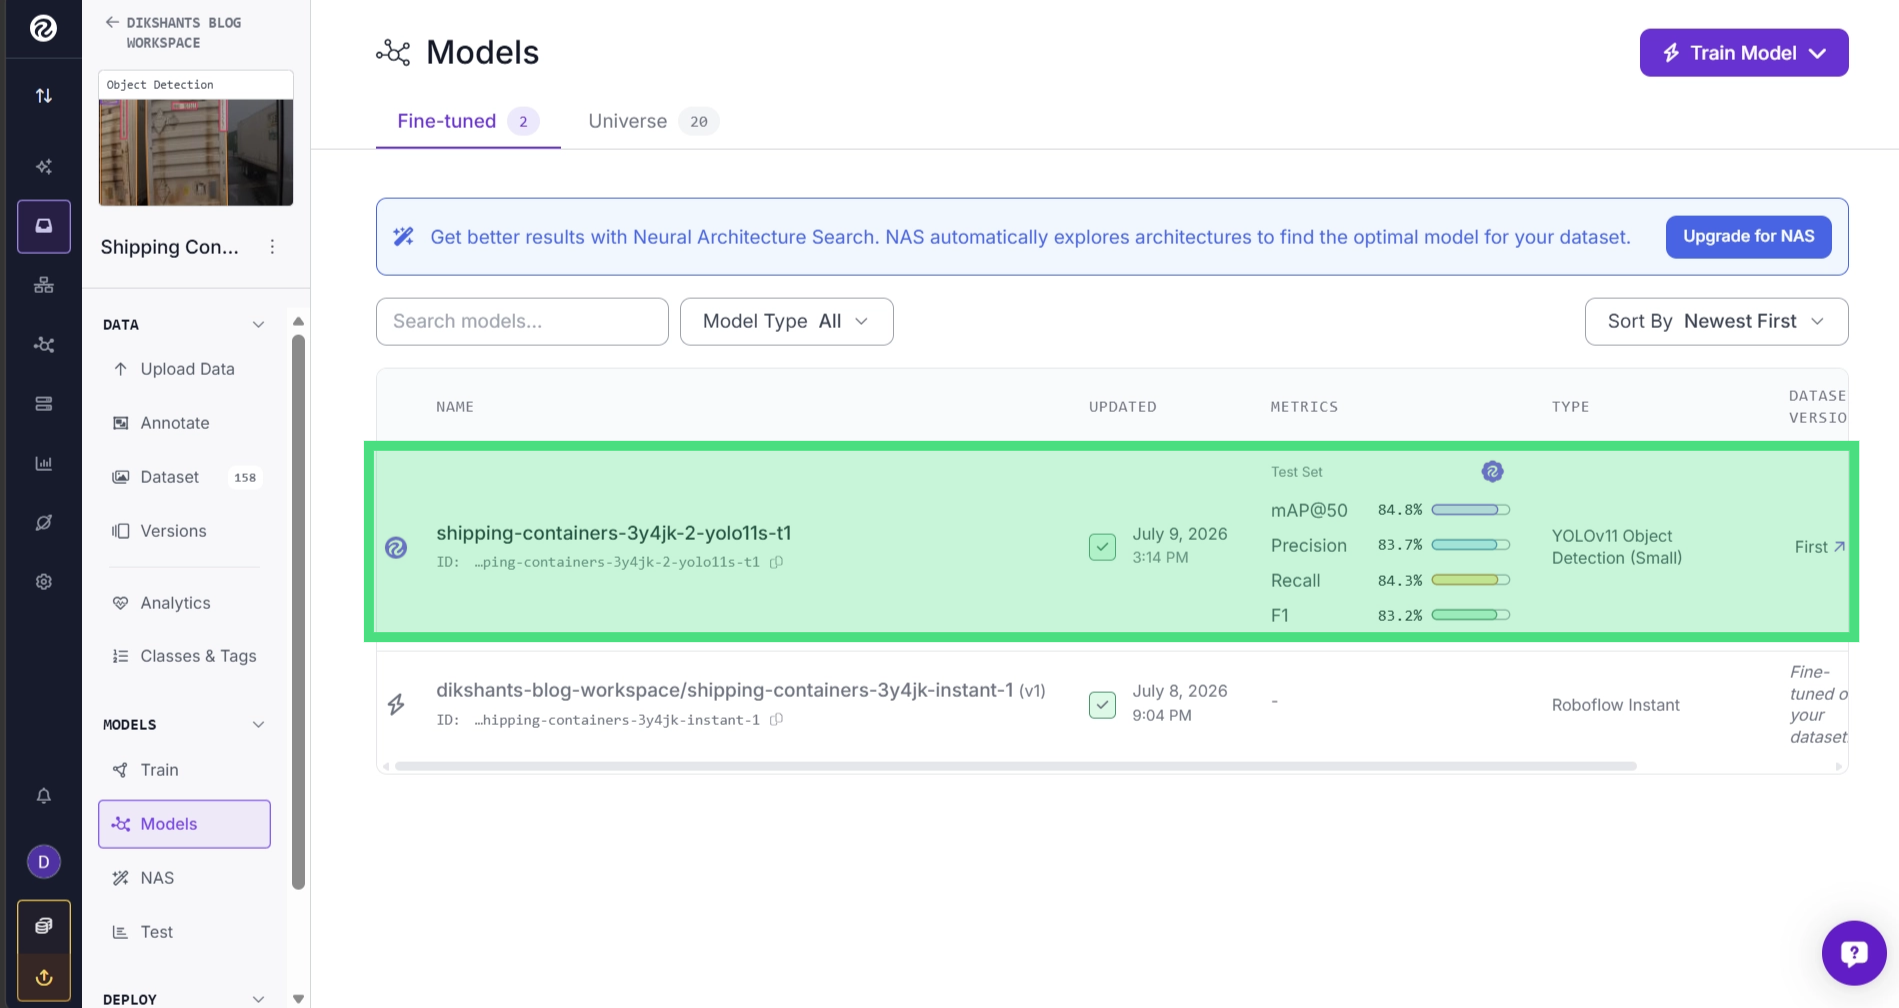
Under the project versions, you can access a complete evaluation report for the trained model, which includes mAP scores, per-class performance metrics, confusion matrices, and additional evaluation statistics.
Step 7: Run Your Trained Model
Once training is complete, you can immediately test your model from within your Roboflow workspace. Open your project and navigate to Models, where you'll find the model you just trained.
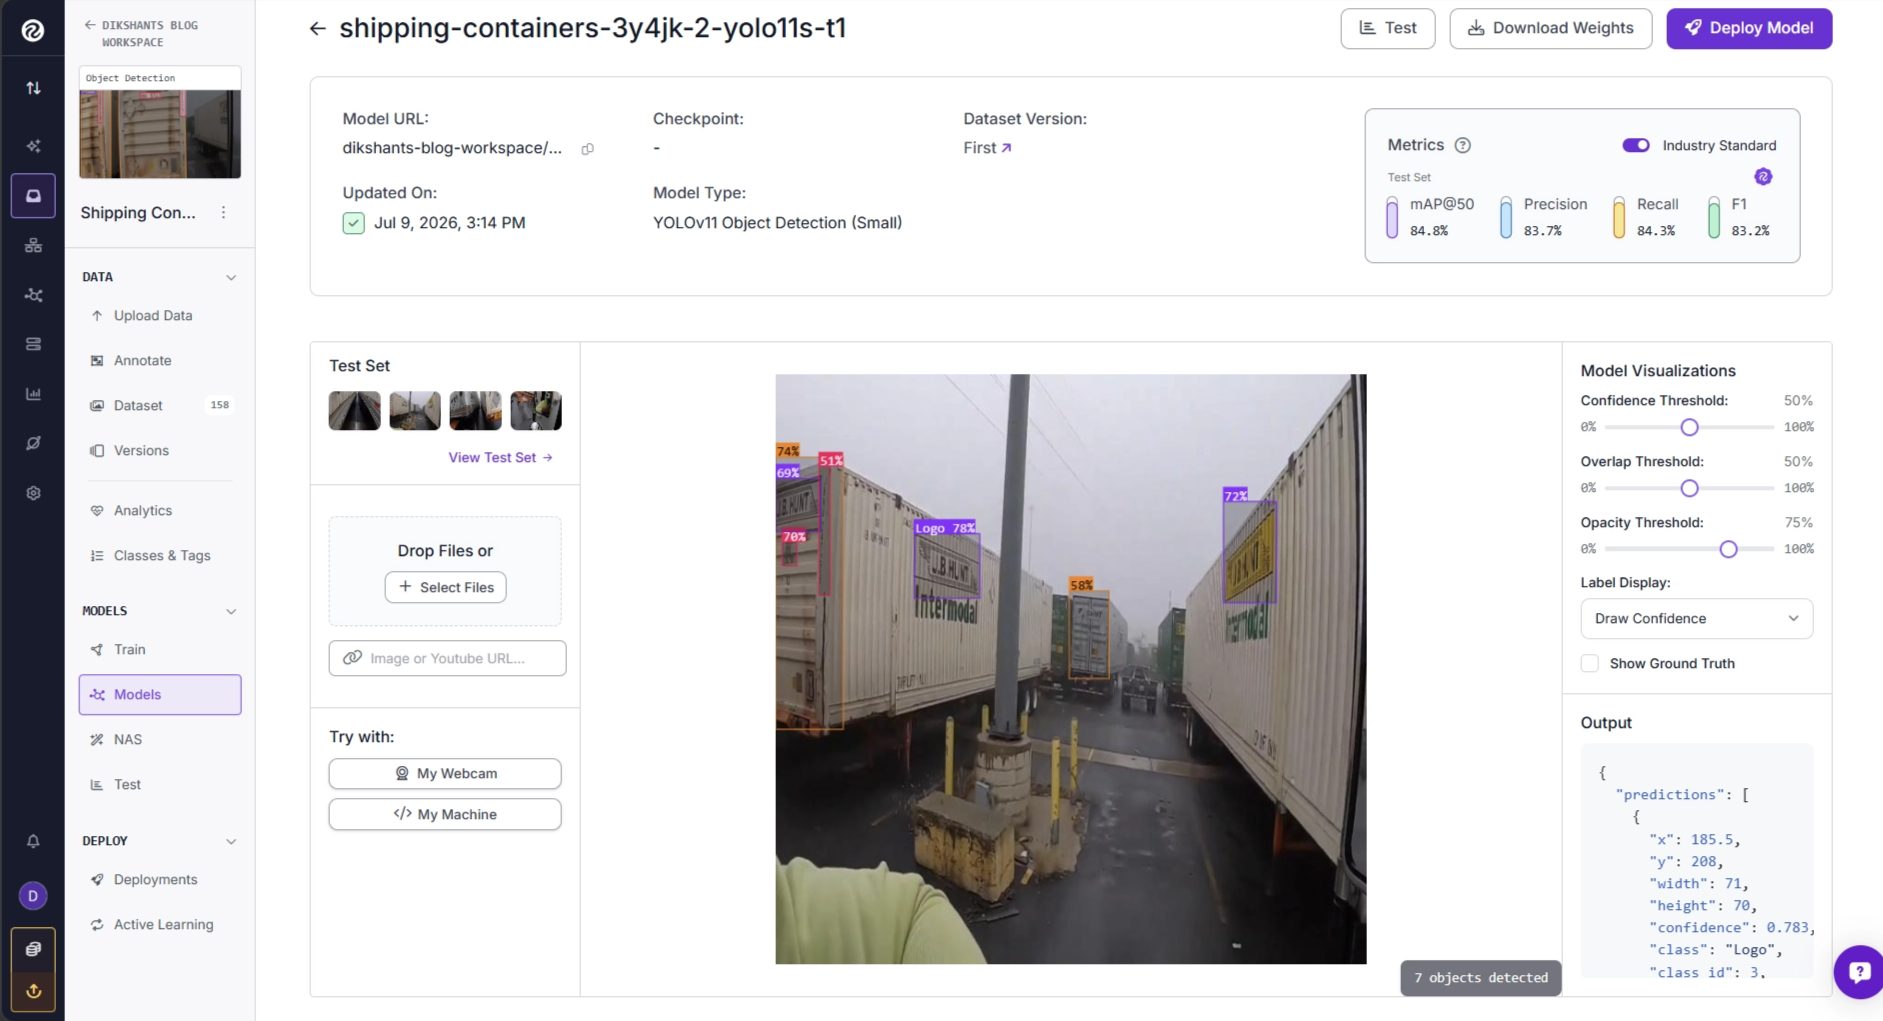
From here, you can upload images and run inference directly in your browser. You can also visualize the model's predictions, making it easy to evaluate its performance without writing any code.
You can also run the trained model locally using the Python script below. Learn more about running fine-tuned models locally.
Make sure you have the inference package installed and are using Python >=3.10 and <3.13 (as of 7/12/2026) before running the script.
from inference import get_model
from inference.models.utils import ROBOFLOW_MODEL_TYPES
import supervision as sv
import cv2

# Fix YOLO11 model naming mismatch (needed for this model architecture):
# Roboflow metadata returns "yolo11s", while the local Inference SDK registry expects "yolov11s".
# Add an alias so get_model() can correctly load the YOLO11s model.
ROBOFLOW_MODEL_TYPES[
    ("object-detection", "yolo11s")
] = ROBOFLOW_MODEL_TYPES[
    ("object-detection", "yolov11s")
]

# define the image to use for inference
image_file = "container_sample.jpg"
image = cv2.imread(image_file)

# load the model
model = get_model(
    model_id="your-workspace/shipping-containers-3y4jk-2-yolo11s-t1",
    api_key= "YOUR_ROBOFLOW_API_KEY"
)

# run inference
results = model.infer(image)[0]

# load results into supervision
detections = sv.Detections.from_inference(results)

# create annotators
bounding_box_annotator = sv.BoxAnnotator()
label_annotator = sv.LabelAnnotator()

# annotate image
annotated_image = bounding_box_annotator.annotate(
    scene=image,
    detections=detections
)

annotated_image = label_annotator.annotate(
    scene=annotated_image,
    detections=detections
)

# display image
sv.plot_image(annotated_image)
This script loads a fine-tuned YOLO11s object detection model locally using Roboflow Inference, runs it on an input image, and generates predictions. It then uses Supervision to draw bounding boxes and labels on detected objects before displaying the annotated image.
Create a Computer Vision Workflow with Your Trained YOLOv11 Model Using Roboflow Agent
Once your YOLOv11 model has been trained, you can use it as part of an end-to-end computer vision pipeline with Roboflow Workflows.
Roboflow Workflows is a visual, low-code platform for building computer vision pipelines by connecting AI models, image processing operations, and custom logic through a drag-and-drop interface.
Instead of writing inference pipelines from scratch, you can assemble them visually and deploy them with just a few clicks.
You can also use Roboflow Agent, available in your workspace after you log in, to automatically generate workflows from natural language prompts.
Roboflow Agent acts as a conversational interface on top of Roboflow tools such as Workflows.
Instead of manually creating a workflow block by block, simply describe the application you want to build. Roboflow Agent will generate a workflow that you can review, edit, and customize in the Workflow Editor.
This provides a fast starting point while still giving you full control over the generated workflow.
For this guide, we asked Roboflow Agent to create a workflow using the YOLOv11 model we trained in the previous section with the following prompt:
“Create an Object Detection Visualization Workflow using the "dikshants-blog-workspace/shipping-containers-3y4jk-2-yolo11s-t1" model I just trained.”
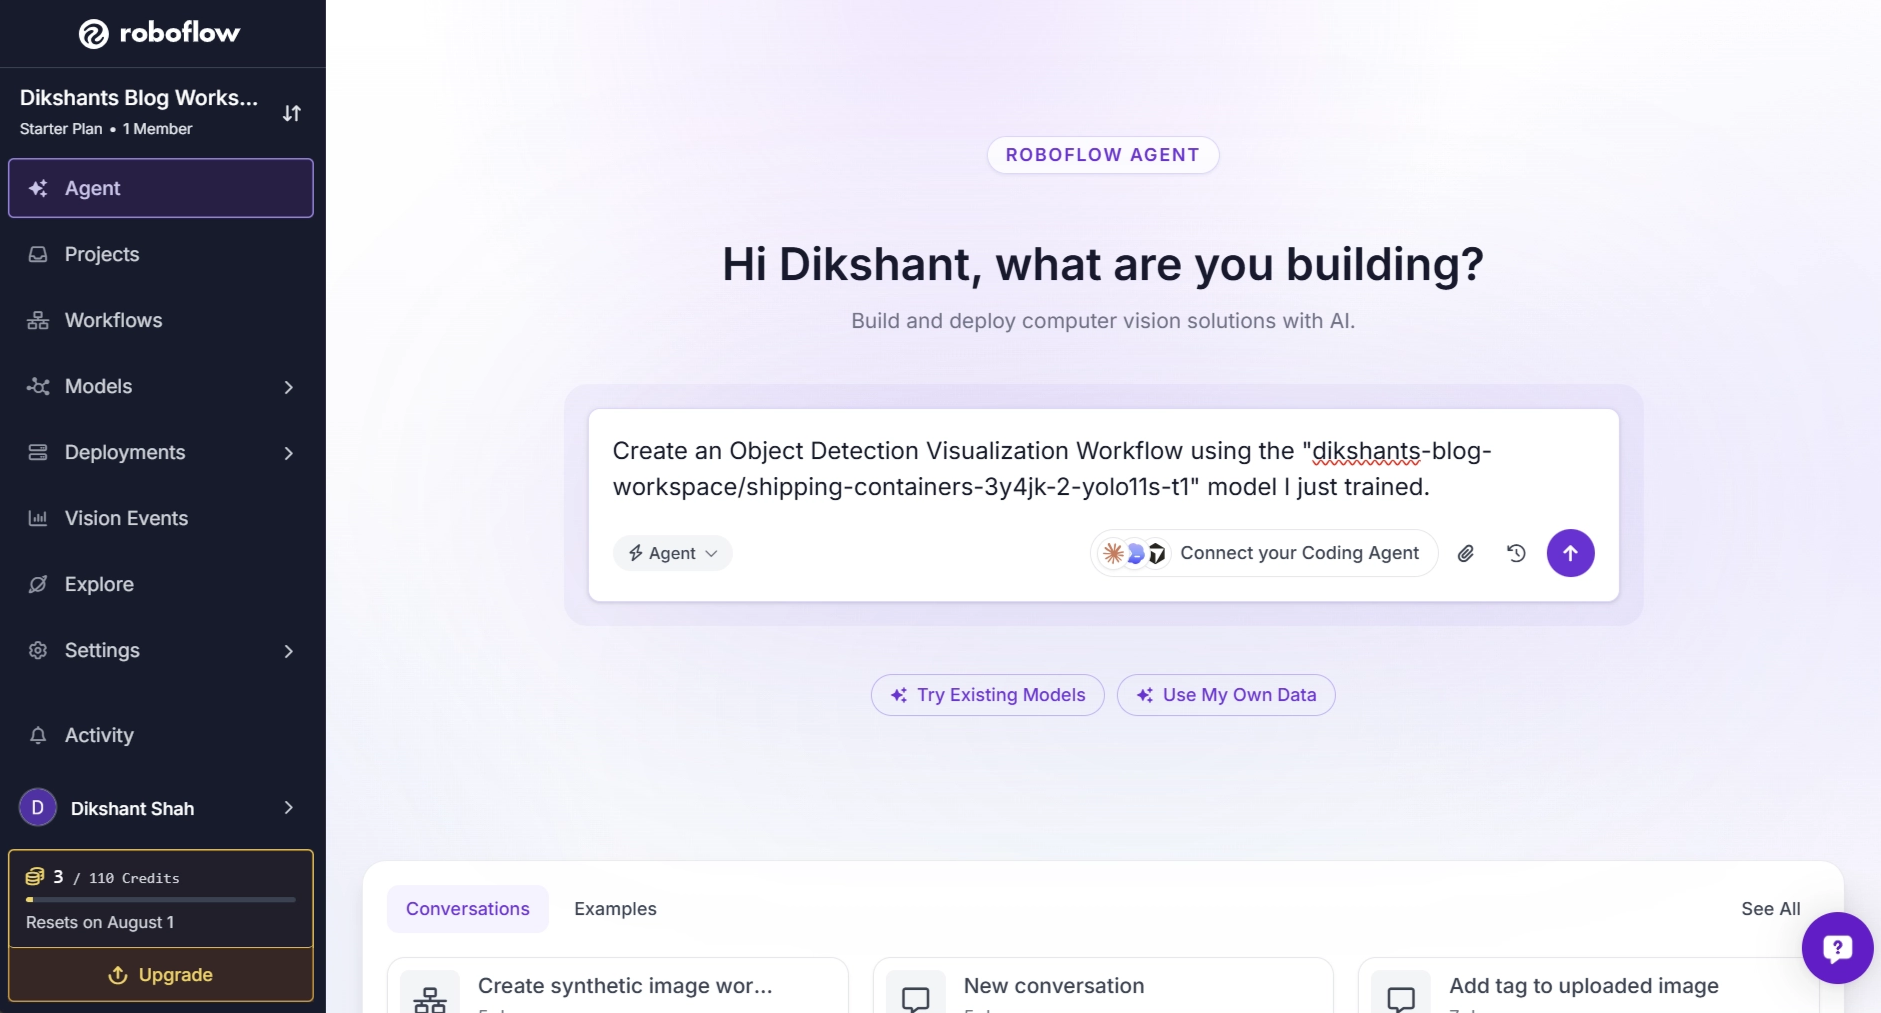
After submitting the prompt, Roboflow Agent generates a complete workflow based on your request.
The generated workflow includes the necessary blocks to accept image inputs, run inference using your trained YOLOv11 model, visualize the predicted bounding boxes, and return the annotated output. Try the generated workflow.
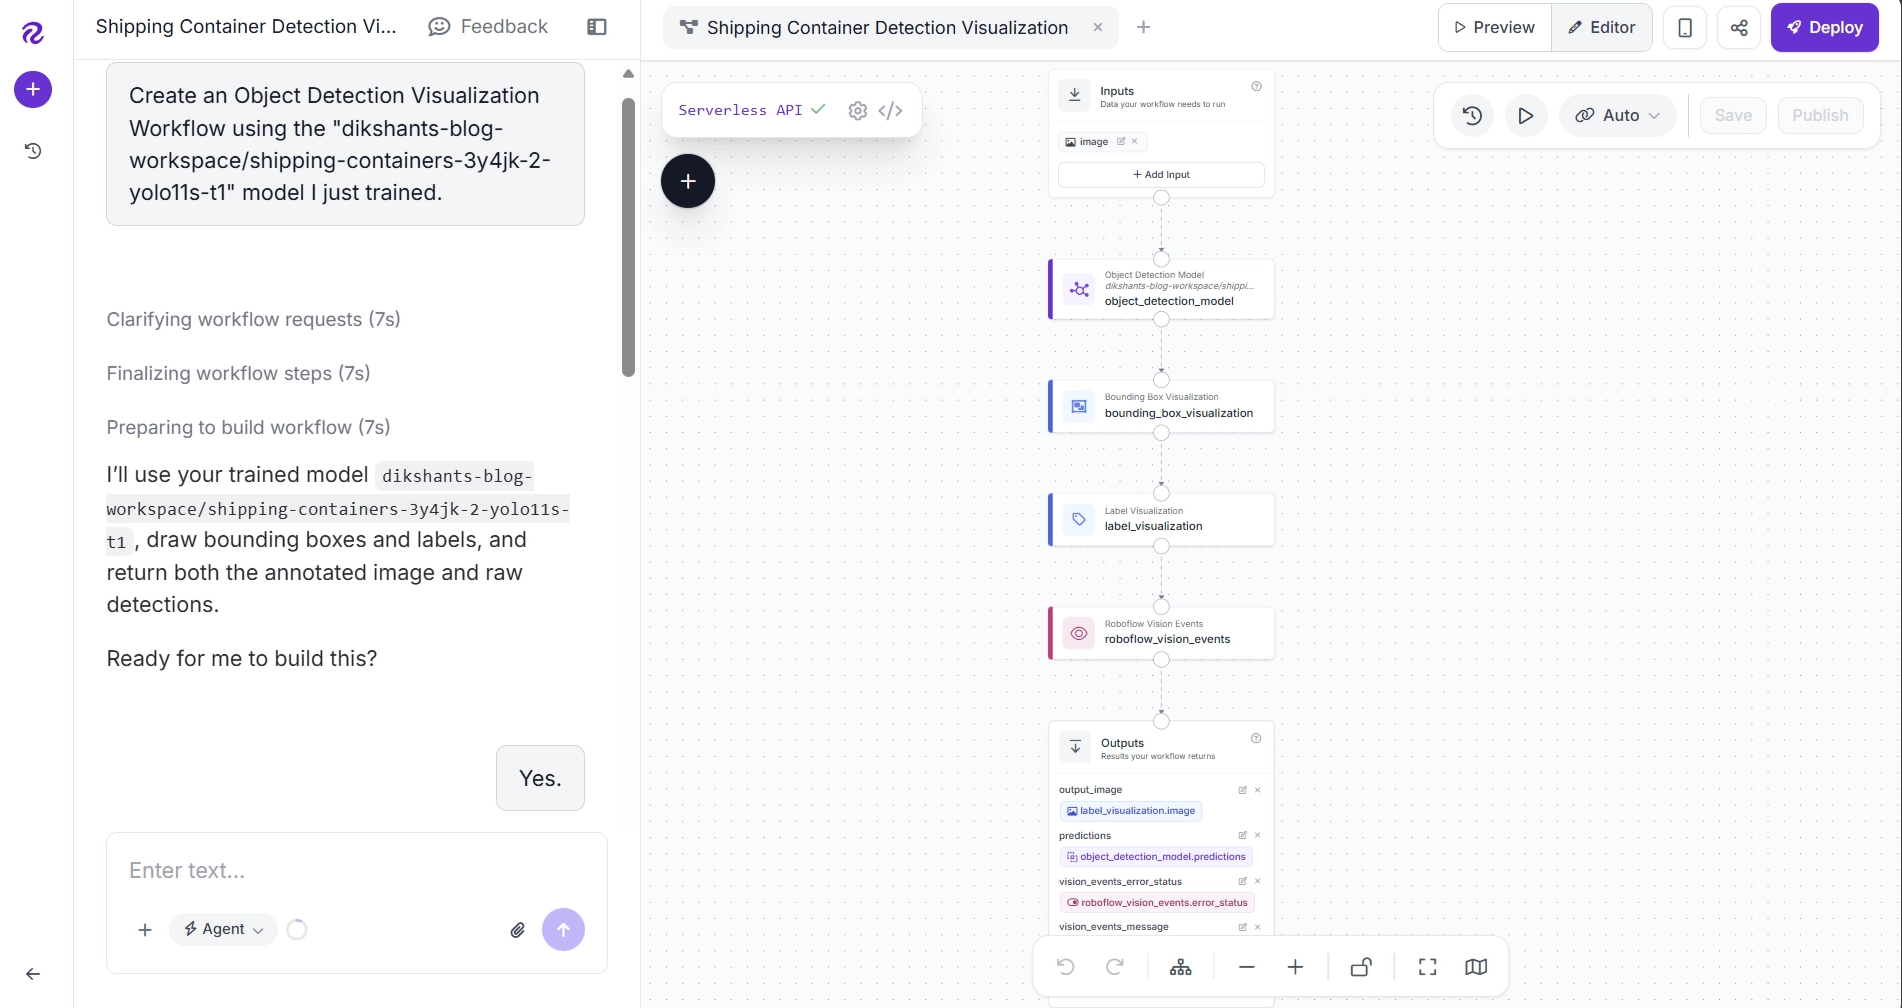
Based on the results, you can continue refining the workflow through additional prompts or by manually configuring individual blocks.
You can also ask Roboflow Agent to explain what each block does, making it easier to understand and customize the workflow.
Roboflow Agent also provides a built-in interface for testing and evaluating the workflow.
Below is an example output produced by the workflow using the container detection model trained earlier with Roboflow Train.
Deploy Your Trained YOLOv11 Model with Roboflow Deploy
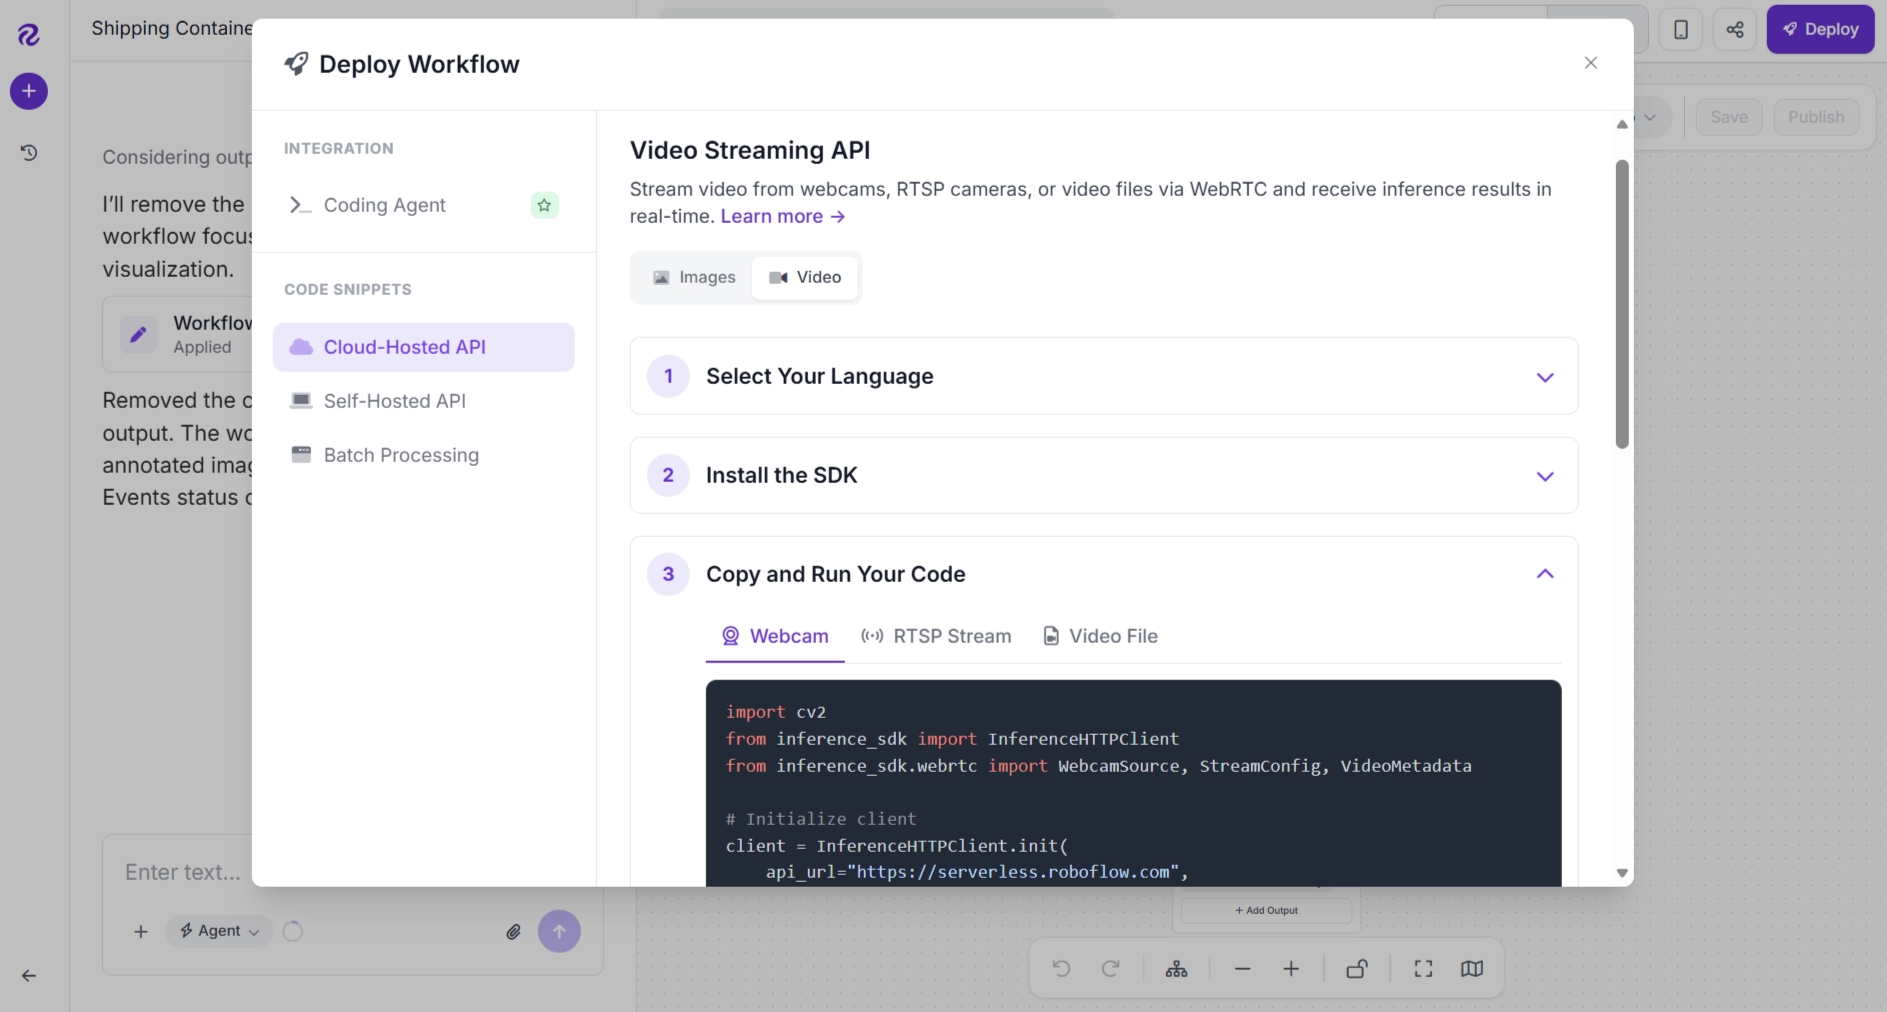
Once your workflow is ready, click Deploy in the Workflow Editor. A deployment window will open, providing deployment instructions and multiple options for running your workflow in production.
Roboflow Deploy generates ready-to-use deployment code that you can use directly in your applications.
The generated code can also be used with AI coding assistants such as Codex, Claude, Cursor, and ChatGPT to quickly integrate your workflow into existing projects.
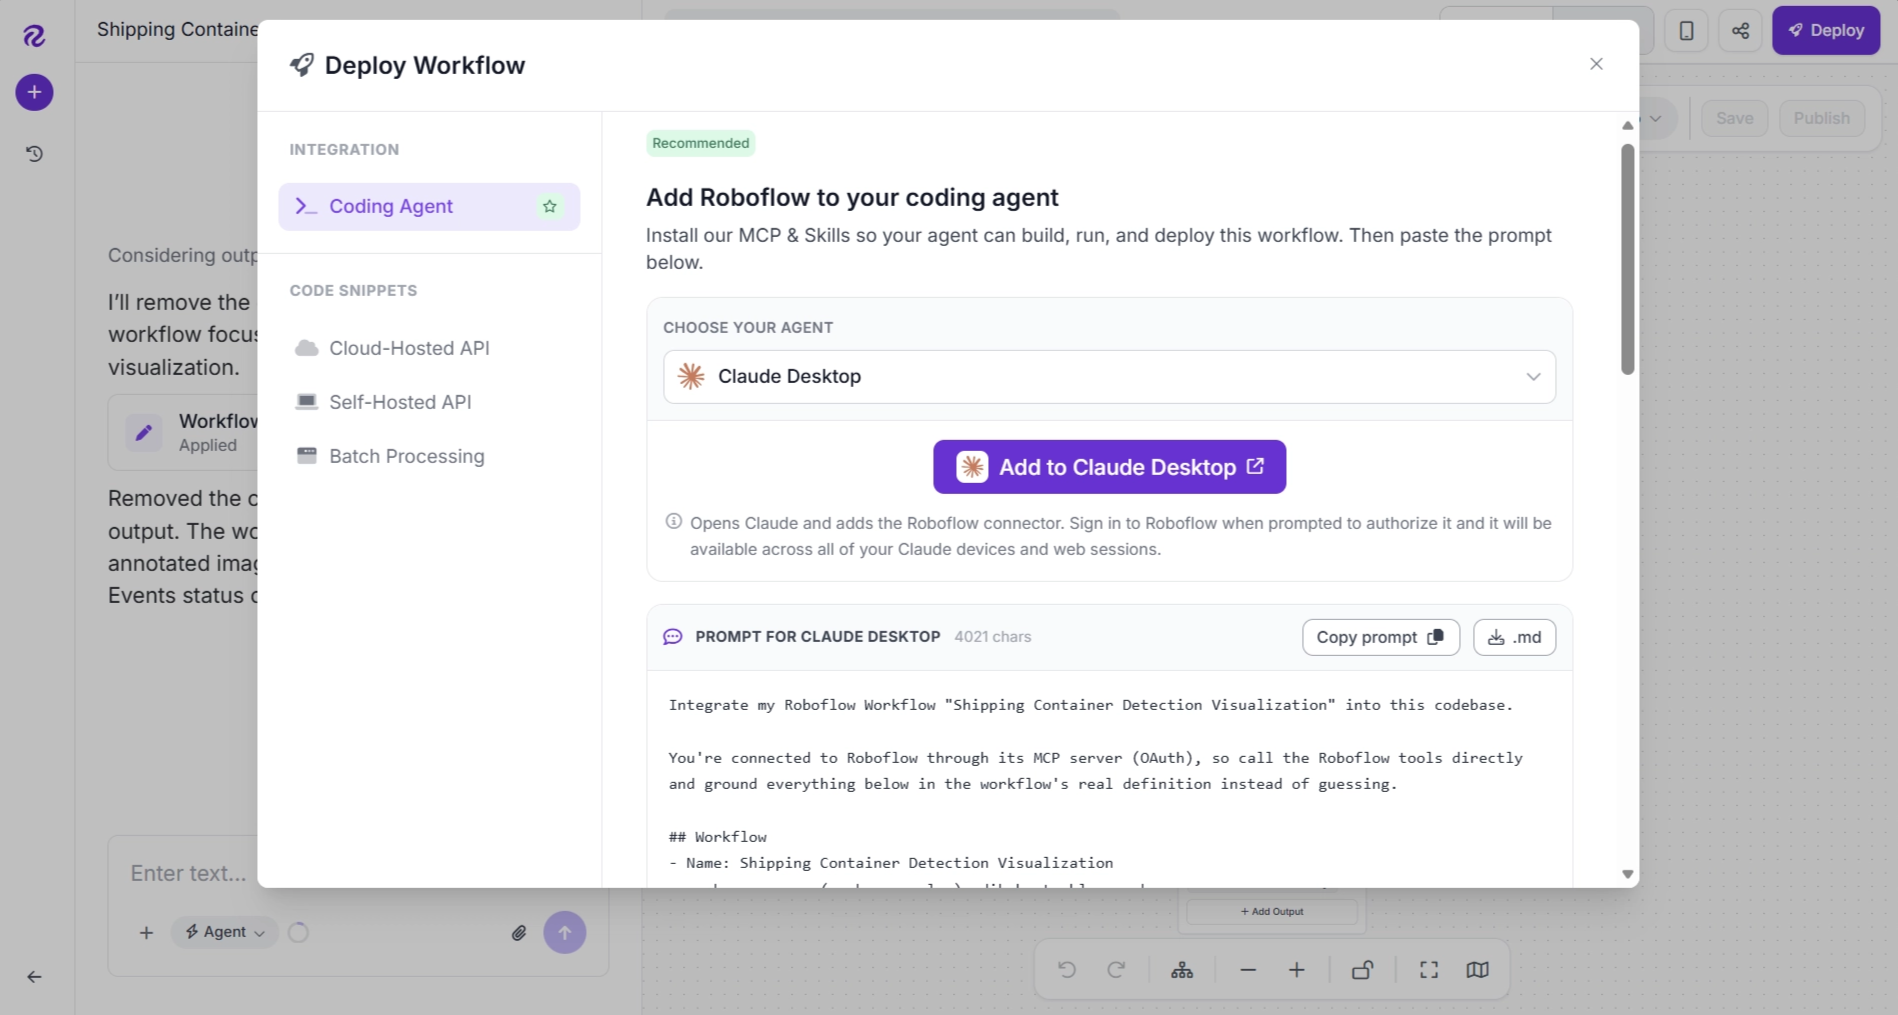
Roboflow Deploy supports both local and cloud deployments, making it easy to run workflows on images, video files, live webcam streams, and RTSP streams.
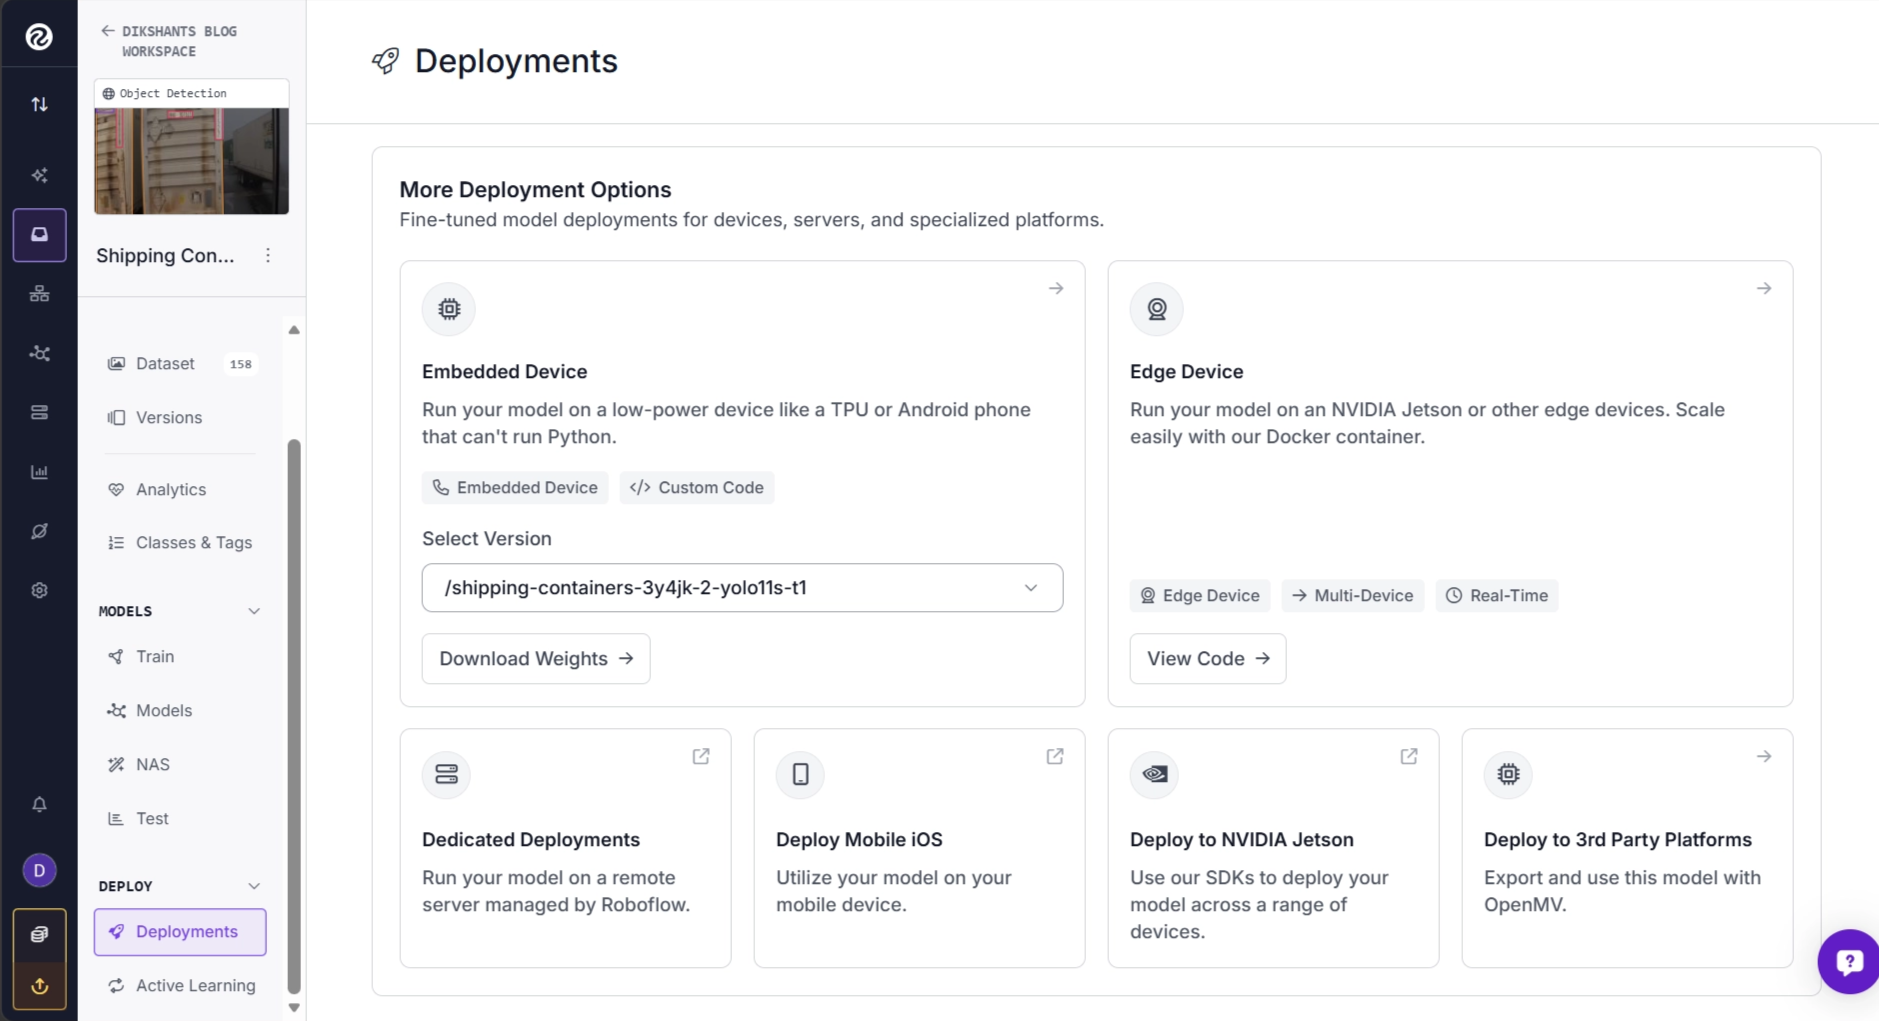
Alternatively, if you only need inference from your trained YOLOv11 model without any additional complex workflow logic, navigate to Deploy in the left sidebar of your project, then select Deployments. This page provides two deployment options:
- Deploy My API provides a Python script that runs a basic workflow. The workflow accepts an input image and returns your model's inference results.
- Customize with Logic opens this same basic workflow in the Workflow Editor, where you can use Roboflow Agent to add additional logic and processing steps.
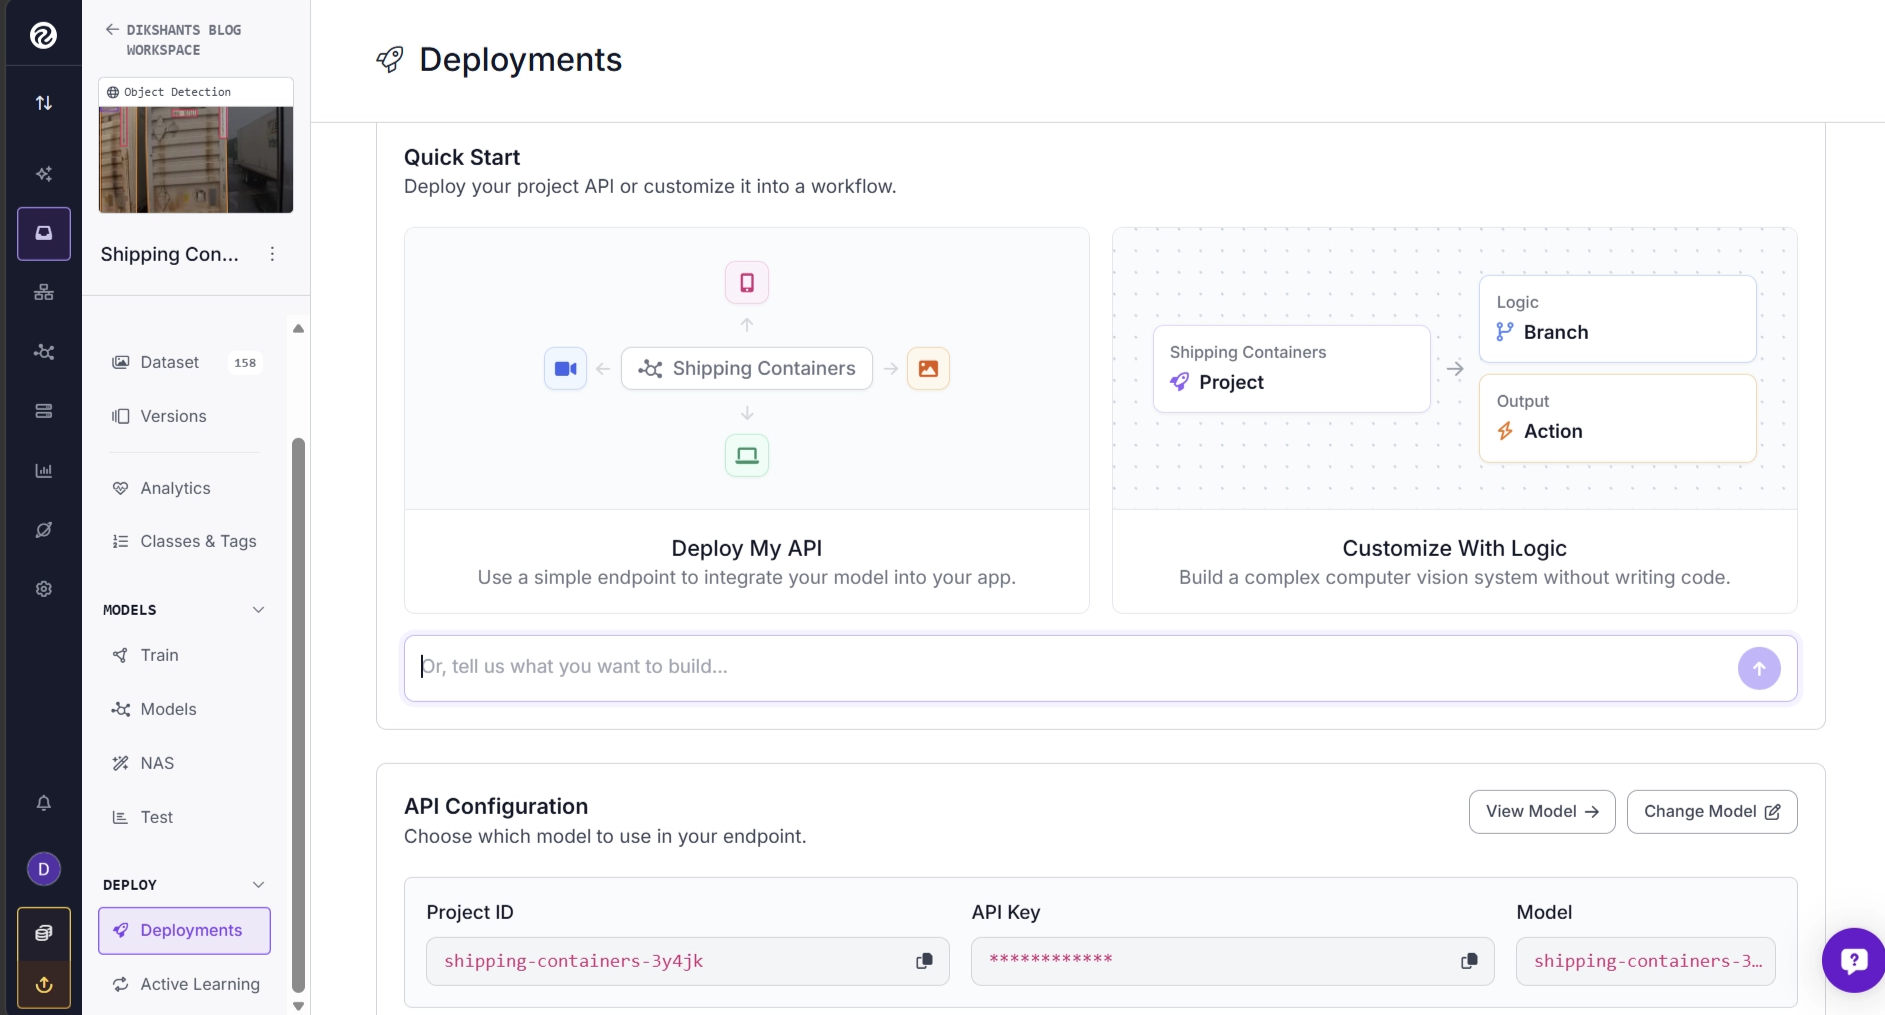
Both deployment options are based on the simple default workflow shown below.
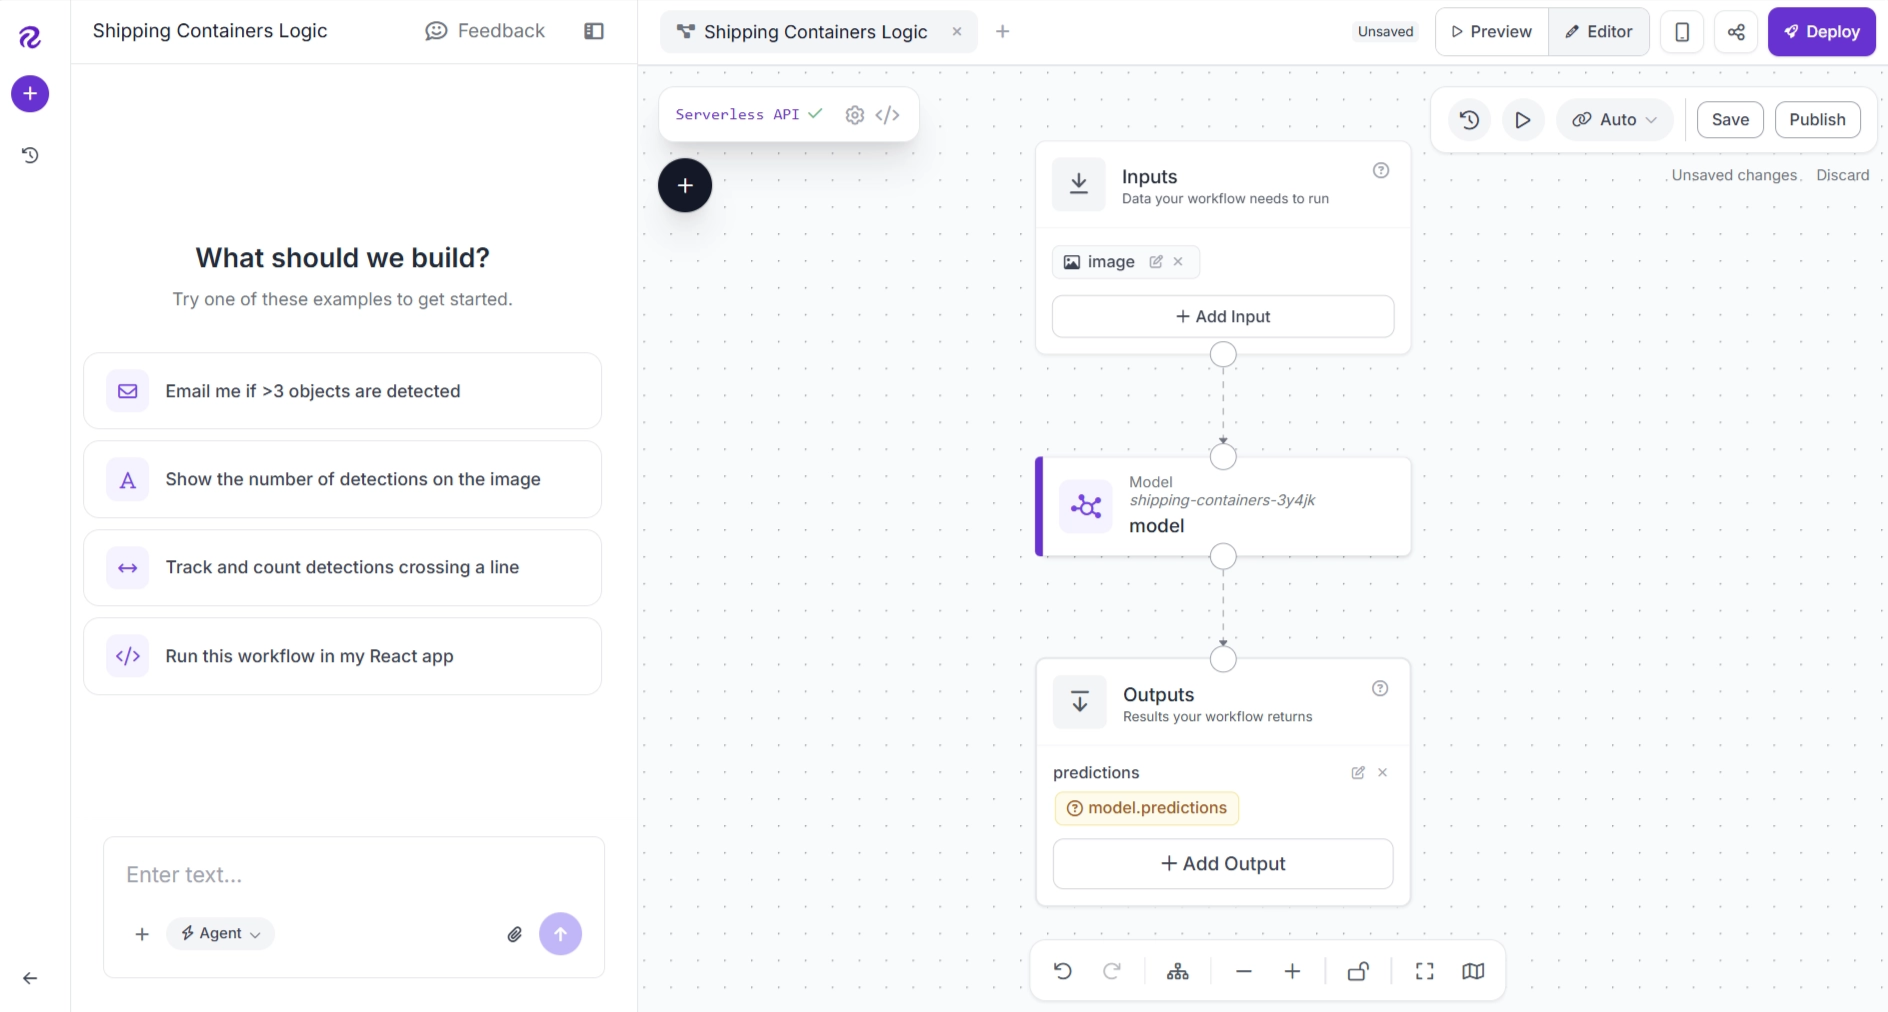
The Deployments page also provides additional deployment options, including downloading your trained model weights and deploying directly to supported edge devices such as NVIDIA Jetson.
Train a YOLOv11 Object Detection Model on a Custom Dataset Conclusion
Training a custom YOLOv11 model traditionally requires configuring datasets, managing training environments, and setting up deployment pipelines.
Roboflow simplifies each of these steps into a unified platform. With Roboflow Train, you can create dataset versions, train YOLOv11 models, monitor training progress, and evaluate performance without configuring complex training environments.
Once your model is trained, Roboflow Agent makes it easy to turn it into a complete computer vision application by generating workflows from natural language prompts, while Roboflow Deploy provides ready-to-use deployment options for local, cloud, and edge environments.
Together, these tools make it possible to move from raw images to a production-ready vision application with minimal effort.
Roboflow Train is free to use. Try it on Roboflow.


Cite this Post
Use the following entry to cite this post in your research:
Dikshant Shah, James Gallagher. (Jun 4, 2026). How to Train a YOLOv11 Object Detection Model on a Custom Dataset. Roboflow Blog: https://blog.roboflow.com/yolov11-how-to-train-custom-data/