
Most retail foot traffic systems count entries. A sensor at the door logs a number, and the store team is left to guess where those visitors went, how long they stayed, or which aisles they skipped entirely.
That gap is expensive. Most stores have cameras already installed, yet the footage loops and gets deleted without any structured data ever being extracted from it.
Computer vision closes that gap automatically. With a detection model, a tracker, and a line counter, every frame of existing CCTV footage becomes a structured data source: who entered, who left, and how they moved in between.
In this tutorial, you'll build a complete retail people tracking pipeline with Roboflow Workflows. You'll use a pre-trained people detection model available directly in Roboflow, wire it into the ByteTrack Tracker block to assign stable IDs to each shopper across frames, and connect a Line Counter that records every entry and exit automatically.
Build a Workflow That Tracks Shoppers Across Frames
This is where a static detection model becomes a live analytics system. Roboflow Workflows is the connective workflow: it takes each video frame, runs detection, hands the results to ByteTrack, counts crossings at a virtual line, and produces an annotated output showing exactly who is where and where they've been.
At a high level, the workflow is straightforward: video frame → detect people → assign persistent IDs → count line crossings → annotate and output. The power is in the ByteTrack block, which handles motion prediction and ID association automatically — you don't need to implement any tracking logic yourself.
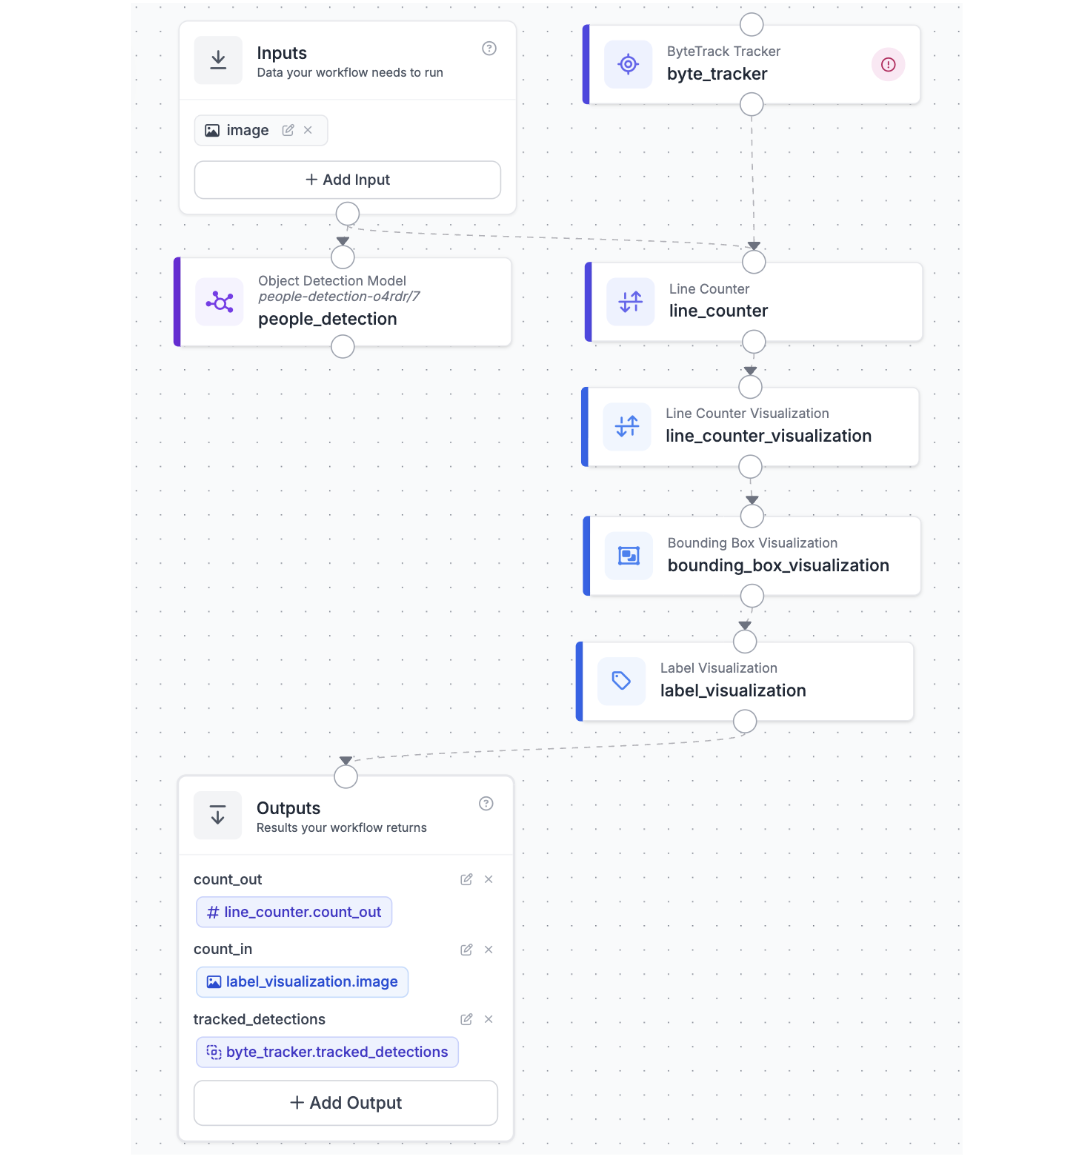
Here is a preview of what the final workflow looks like:
Step 1: Generate the Workflow Scaffold
Navigate to your trained model in Roboflow and click Try Workflows → Build My Own. Roboflow generates an Inputs block connected to an Object Detection Model block, connected to an Outputs block. This gives you the detection pipeline out of the box. From here, you will insert the ByteTrack block between the model and the outputs, and add a visualization block to render the tracked IDs on the video.
Step 2: Set Up the Video Input
In the Inputs block, configure the workflow to accept a video source. The workflow operates frame by frame, so each video frame is treated as an individual image input. In the Inputs block, you will see a default image input already wired in.

Step 3: Connect the Object Detection Model Block
The Object Detection Model block was already added by the workflow scaffold. Click on it and select your trained person detection model from the dropdown. This block receives the image from Inputs, runs inference, and outputs a set of bounding box predictions, one per detected person in the frame. These predictions are what ByteTrack will receive as its input in the next step.

Step 4: Add the ByteTrack Tracker Block
This is the core step. Click the + button in the workflow canvas to add a new block, then search for ByteTrack in the Video section. The ByteTrack Tracker block will appear as an option alongside SORT and OC-SORT. Select ByteTrack and place it in the workflow.
Wire the ByteTrack block by connecting the detections output from the Object Detection Model block to the predictions input of the ByteTrack block. The block will consume the raw bounding boxes from each frame and output enriched predictions where each detection now carries a tracker_id, a stable integer that persists across frames for as long as the person remains visible.
ByteTrack works by combining high-confidence detections (the “high byte”) with lower-confidence detections (the “low byte”) using Kalman filter-based motion prediction. This two-stage association makes it more robust than simpler IoU-based trackers when people briefly disappear behind shelves, other shoppers, or display stands, exactly the kind of events you get in a busy store.

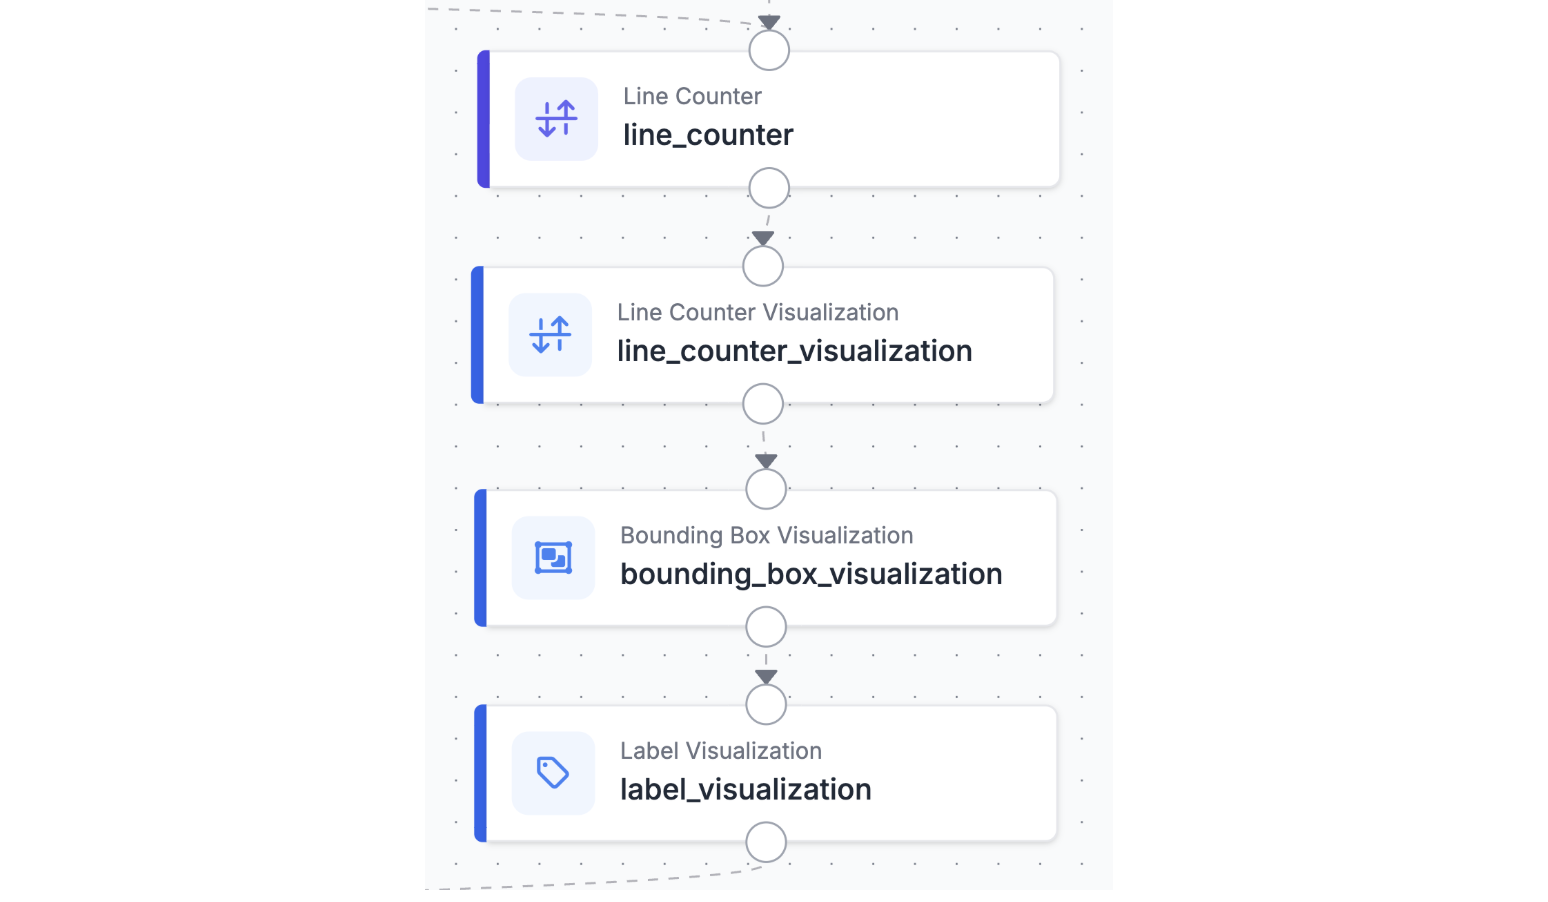
Step 5: Add a Bounding Box Visualization Block
Add a Bounding Box Visualization block after ByteTrack. Connect the predictions output from the ByteTrack block to this visualization block, along with the original image from Inputs. The visualization block will render each detected person as a labeled bounding box where the label displays the tracker_id rather than just the class name. This gives you the annotated output frame showing which ID belongs to which shopper.
You can also add a Label Visualization block alongside the Bounding Box block to render the tracker ID numbers directly on each person in larger, more readable text, helpful when reviewing footage with many simultaneous shoppers in frame.
Step 6: Configure Outputs and Test the Workflow
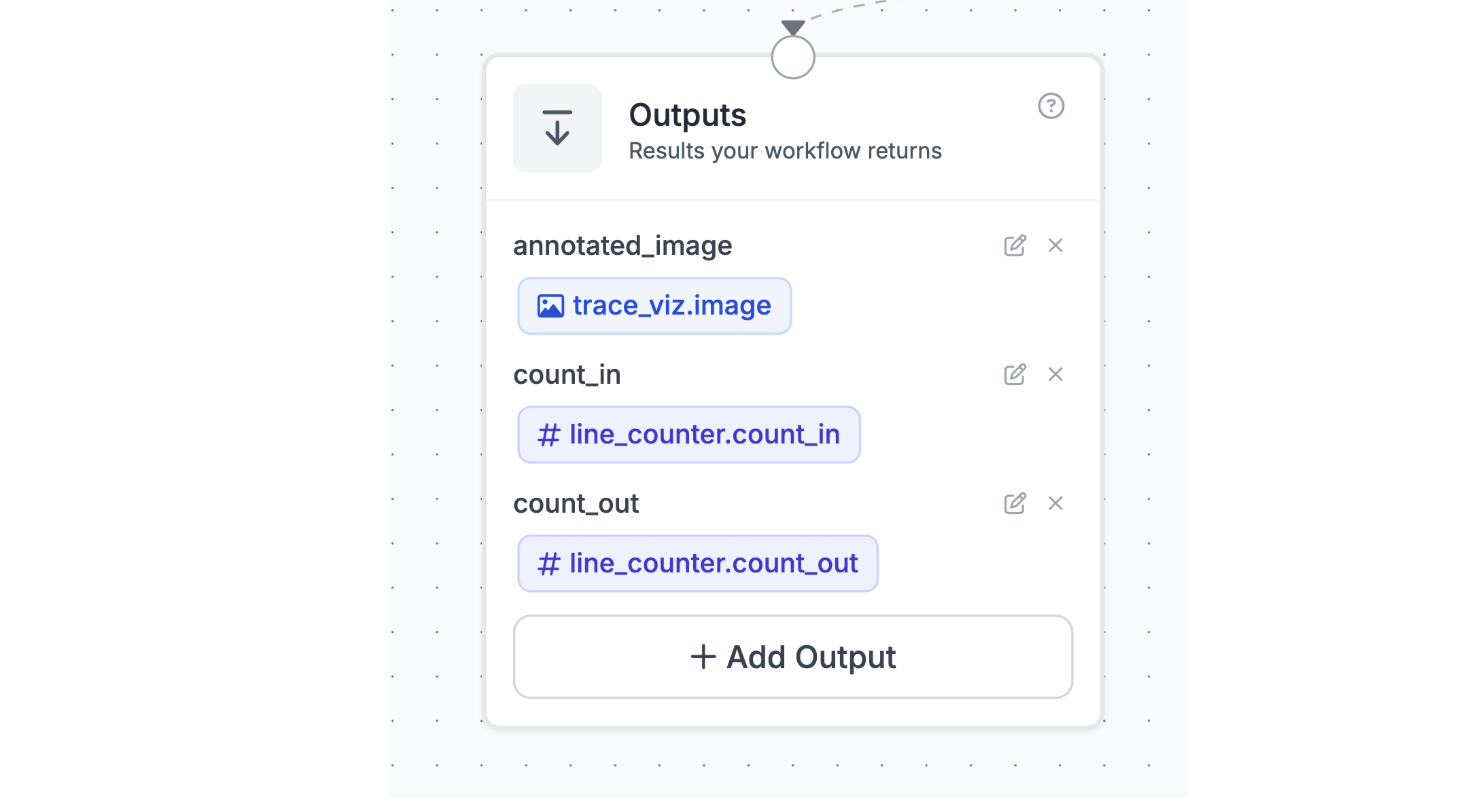
In the Outputs block, route the annotated image from the visualization block so it becomes the workflow’s output. You can also include the raw predictions from the ByteTrack block as a JSON output this gives you the structured per-frame data (bounding boxes, tracker IDs, confidence scores) that you can log for analytics purposes.
To test the workflow, run a quick sanity check with a short clip of store footage:
- Submit a sample video clip of your store
- Confirm that each person receives a unique, stable tracker_id across multiple frames
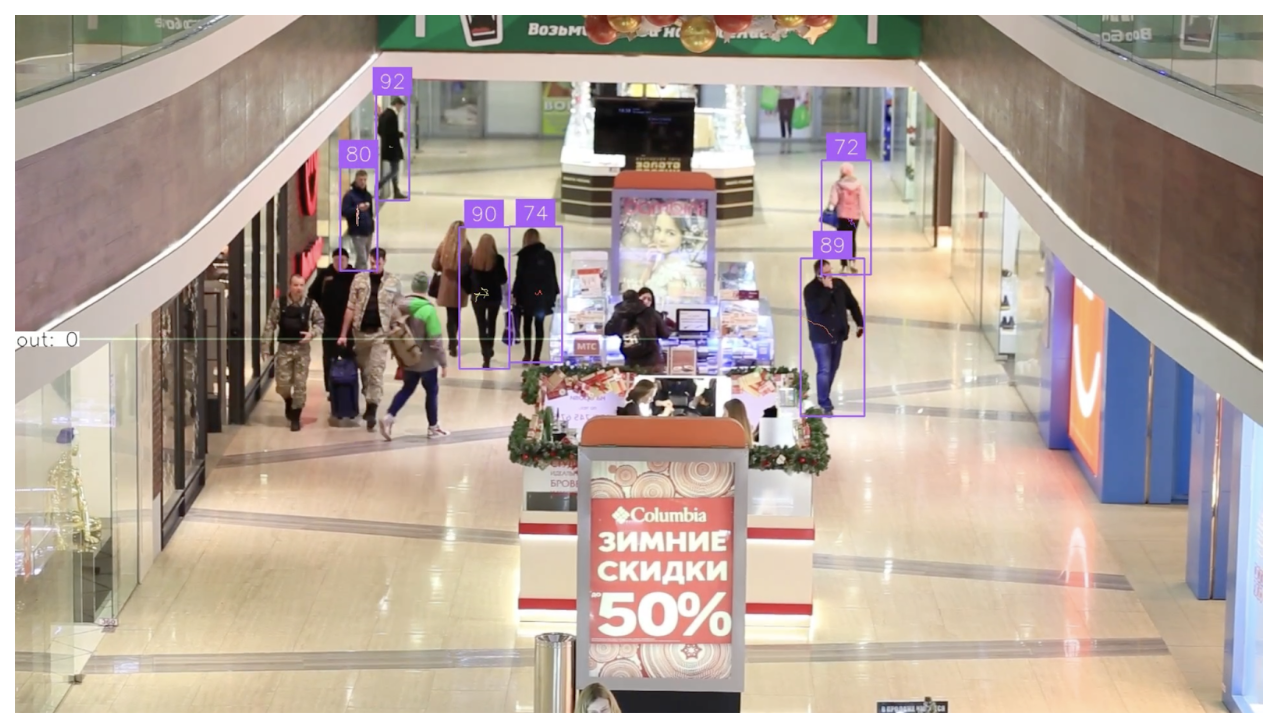
- Verify the annotated output video shows bounding boxes with ID labels rendered correctly
- Check that IDs remain consistent when a person is briefly occluded and reappears
With those checks passing, your workflow is ready to process full store video footage. Each frame will produce a set of tracker-annotated predictions you can use downstream for any analytics you need.
From Prototype to Production
The workflow you have built is a functional starting point. When you move it to a real store environment, a few things will need to change to make the analytics trustworthy and scalable.
Tune the detector to your store’s cameras. A public dataset is a fast starting point, but your store’s camera angles, lighting conditions, and shopper densities will surface edge cases quickly. Capture and label a few hundred frames from your actual cameras and fine-tune the model on those. Even a small store-specific training set can significantly reduce missed detections at unusual angles or under fluorescent lighting.
Add zone-based analytics. Tracker IDs alone tell you that people are moving. To extract meaningful retail insights measure time in a product zone, traffic through a congestion at the checkout queue you need to define polygon zones on your camera views. Roboflow Workflows supports polygon zone blocks that can check whether a tracker’s bounding box center falls inside a defined region, letting you count zone entries, exits, and dwell time per tracker ID.
Scale across multiple cameras with camera_id context. The camera_id string parameter you added to the Inputs block becomes essential here. When you are running the same workflow against feeds from ten different cameras, tagging each output with the source camera identifier means your downstream logs always tell you which part of the store the data came from. Different cameras, lighting conditions, and shopper densities may surface new failure modes quickly, the camera_id tag makes debugging straightforward.
The core pattern stays the same no matter how complex the deployment grows: detect, track, tag with context, and iterate on the data until the analytics are reliable enough to act on.
Retail Analytics ByteTrack Tracker Conclusion
Foot traffic data is only useful if you trust it. Raw detection without tracking inflates counts because the same person registers as a new detection in every frame. Tracking without a line counter gives you presence, not flow. The combination detection, ByteTrack, Line Counter is what makes the numbers reliable enough to act on.
In this tutorial, you built the full pipeline in Roboflow Workflows: a pre-trained people detection model feeds ByteTrack, which assigns persistent IDs to every shopper across frames, and a Line Counter records every entry and exit with direction. The annotated output includes bounding boxes, tracker IDs, trajectory traces, and a live count everything needed to understand traffic patterns at a glance.
From here, the path to production is incremental: fix the camera mount, tune the tracker for each location, add zone blocks for dwell time, and route outputs into your analytics stack. The core pipeline stays exactly the same.
Further Reading
Cite this Post
Use the following entry to cite this post in your research:
Contributing Writer. (Apr 6, 2026). Retail Analytics with ByteTrack and Roboflow. Roboflow Blog: https://blog.roboflow.com/retail-people-analytics-with-bytetrack/