
As data scientists, developers, and machine learning engineers continue to build, train, and deploy computer vision applications, it is crucial to ensure these systems integrate seamlessly with an organization's infrastructure. In this blog, we'll explore how to connect Roboflow Workflows with Ignition, a robust industrial automation solution, using the MQTT (MQ Telemetry Transport) protocol and modules.
We will use a custom-trained YOLOv11 model deployed with Roboflow Workflows to track coffee bags as they move along a manufacturing line. This information will then be sent to Ignition via MQTT, where we will display the counts and annotations directly within a Perspective dashboard in Ignition. By the end of this blog, we’ll have built the following:
Let's get started.
Prerequisites
Before diving in we’ll need to ensure we have a few prerequisites in place.
Create a Roboflow Account
Make sure you’ve signed up for a Roboflow account if you haven’t already. We’ll annotate our data, train our model, and build a workflow that can be deployed anywhere with the Roboflow platform.
Download the Ignition Platform and MQTT Modules
Make sure to have the ignition software installed on your system or a network attached device. You can install Ignition Gateway on any operating system by visiting their download page.
We’ll use the Ignition Gateway to configure our settings and install additional modules for MQTT.
We’ll also need to install the Ignition Designer Launcher to configure tags and our Perspective dashboard. Lastly make sure you’ve installed the MQTT modules called MQTT Distributor Module and the MQTT Engine Module. Both modules can be installed on the strategic partners module page.
Building in Roboflow
The Roboflow platform has everything we need to upload data, annotate images, train computer vision models, and deploy them to production. If you haven’t experience building with Roboflow yet, I encourage you to follow this guide on getting started with the platform.
Coffee Bag Model
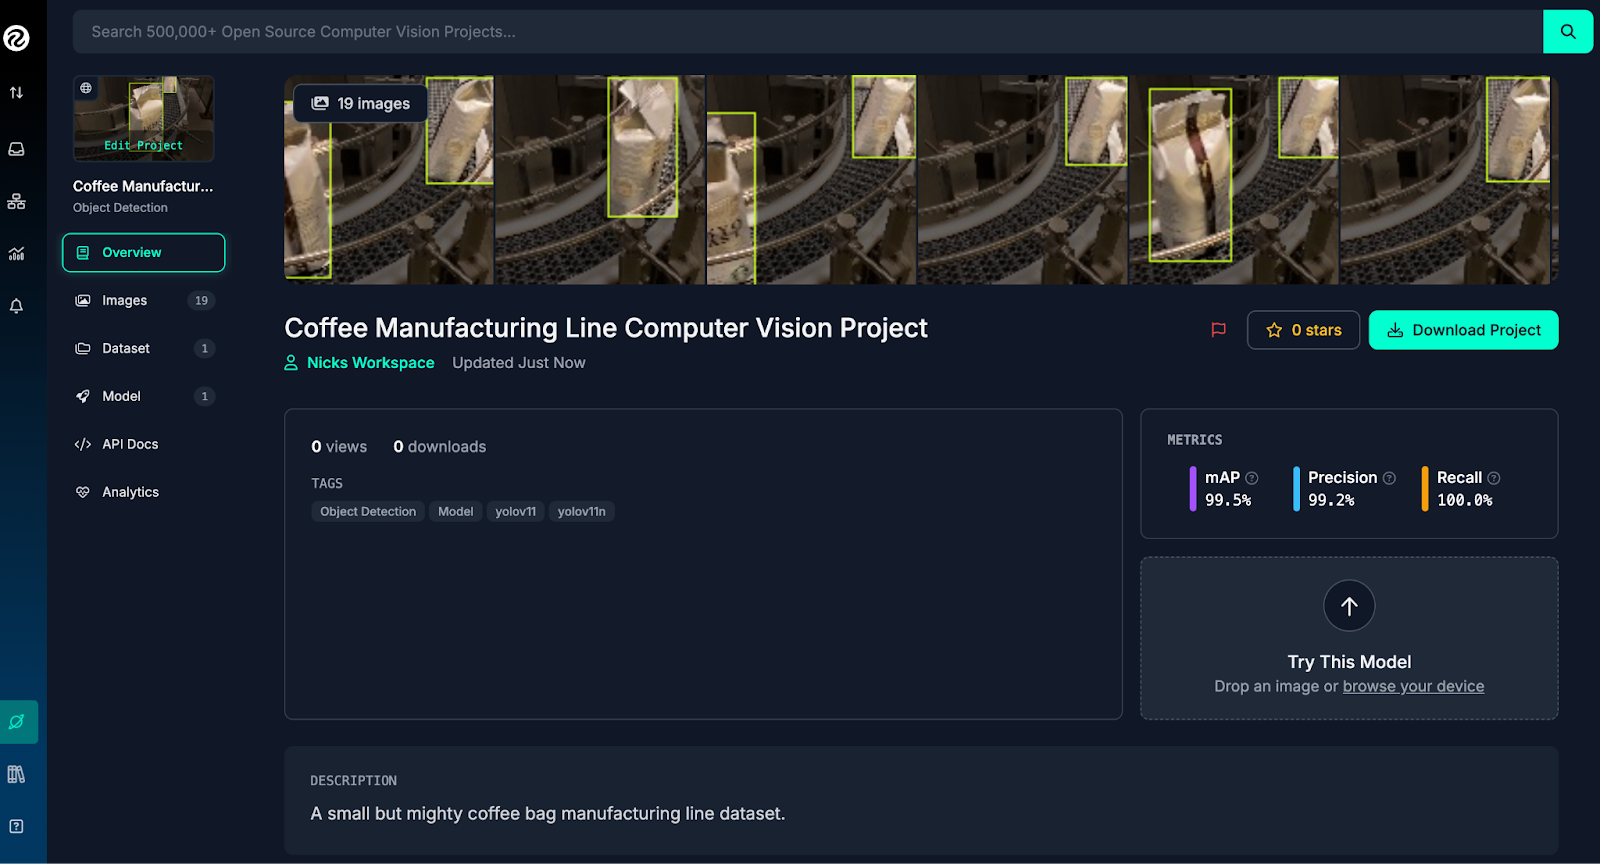
For this blog, we’ll use a small but mighty open source dataset (using this video) I’ve prepared and distributed on Roboflow Universe, the world's largest collection of open source computer vision datasets and APIs. You can take a look at the dataset by visiting the publicly available project.
Build the Workflow
If you’re new to workflows feel free to fork the workflow for this integration. This can be done by visiting this shareable workflow link and hitting the “Fork Workflow” button.

Roboflow Workflows is an ecosystem that enables users to create machine learning applications using a wide range of pluggable and reusable blocks. New blocks are coming out every week to support new models, control flow, and syncing to external data sources. You can read more about workflows by visiting the documentation.
Configure Ignition MQTT Module
Now that we have our model and workflow ready for our integration, let’s make sure that our Ignition modules are configured correctly. For this, you’ll first need to navigate to the Ignition Gateway with a web browser. If you’ve installed Ignition locally you’ll visit http://localhost:8088. Otherwise you’ll need the IP address of the device you installed ignition on. You may also need to reset your trail and login.

Once logged in, navigate to the Config page, and click on MQTT Engine Settings. From here we will click on Namespaces > Custom > “Create new Custom Namespace…”.
This is where we will configure the MQTT engine to listen on a particular topic. Name your topic, and provide a list of Subscriptions. Below i’ve set the Subscription to “/location/coffee/#” which means that ignition will pull in any data I publish under the topic path “/location/coffee/” into a unique tag.
Integrate Roboflow with Ignition
Now that our Ignition is subscribed to our topics, let’s take a look at the short script needed to integrate our application. We’ll use python and Roboflow Inference to run our workflow against our video. Let’s first install our python packages.
pip install inference paho-mqttNext let’s write our code snippet that will process our video stream and publish messages to our MQTT topics. Note that the default ignition MQTT Distributor broker has basic authentication enabled by default, so make sure to change these credentials in production.
This script established a connection to the Ignition MQTT broker, and processes our video stream frame by frame by using our Roboflow Workflow ID. We then publish our coffee bag count and the latest frame of the video to our MQTT topics.
from inference import InferencePipeline
import cv2
import paho.mqtt.client as mqtt


client = mqtt.Client()
client.username_pw_set("admin", "changeme") # Default MQTT module user/pass
client.connect("localhost", 1883) # Default MQTT broker hostname/port


def my_sink(result, video_frame):
    count = result["counts"]["count_in"]
    base64_latest_frame = result["output_image"].base64_image
    client.publish("/location/coffee/count", int(count))
    client.publish("/location/coffee/latest_frame", base64_latest_frame)


pipeline = InferencePipeline.init_with_workflow(
    api_key="YOUR_API_KEY",
    workspace_name="YOUR_WORKSPACE_ID",
    workflow_id="YOUR_WORKFLOW_ID",
    video_reference="PATH_TO_VIDEO",
    max_fps=30,
    on_prediction=my_sink
)

pipeline.start()
pipeline.join()
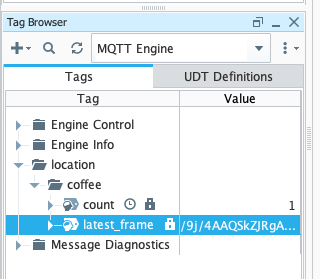
Now when we open up the Ignition Designer, you should be able to navigate to your tag browser and view our tags being updated directly in our system.
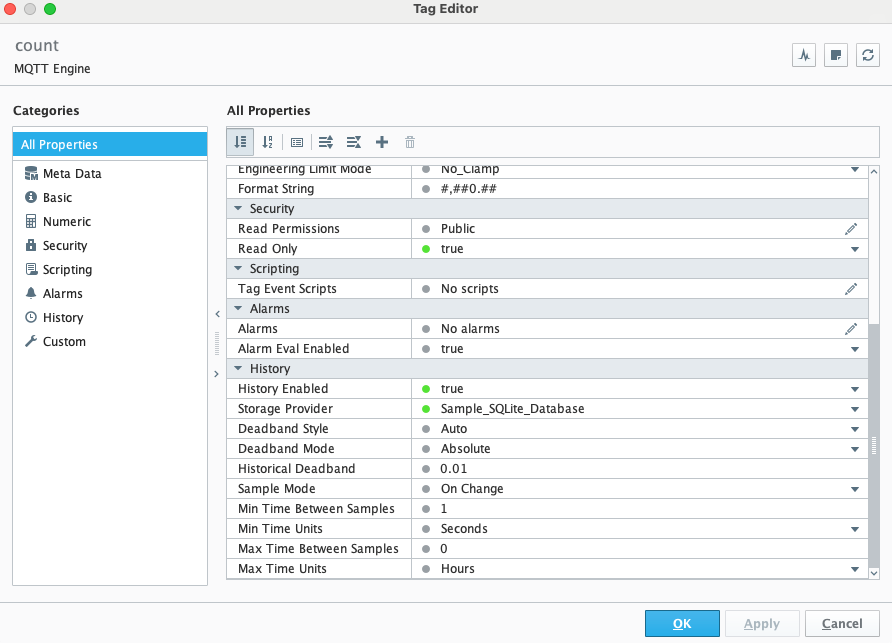
Prior to building our dashboard, let’s click on our count tag and ensure that we have History Enabled, and set up your desired Storage Provider.
Configure Perspective Dashboard
With data in Ignition, we now have the full power of dashboarding, alerting, and storing information in historian. Let’s take a look at building a simple dashboard.
First, let’s open the home page update the title and description to match our use case. Next let’s add an Image and a SimpleGauge.
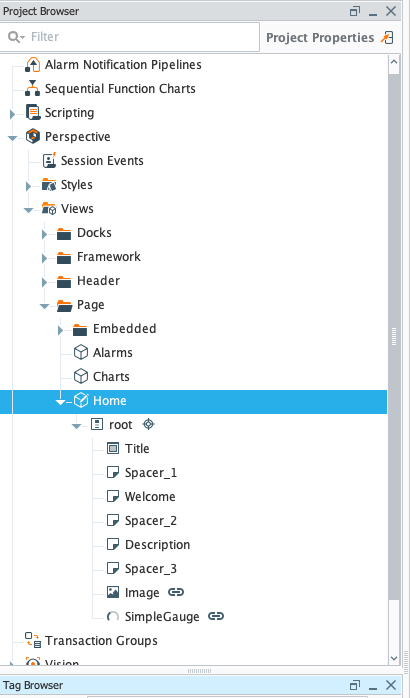
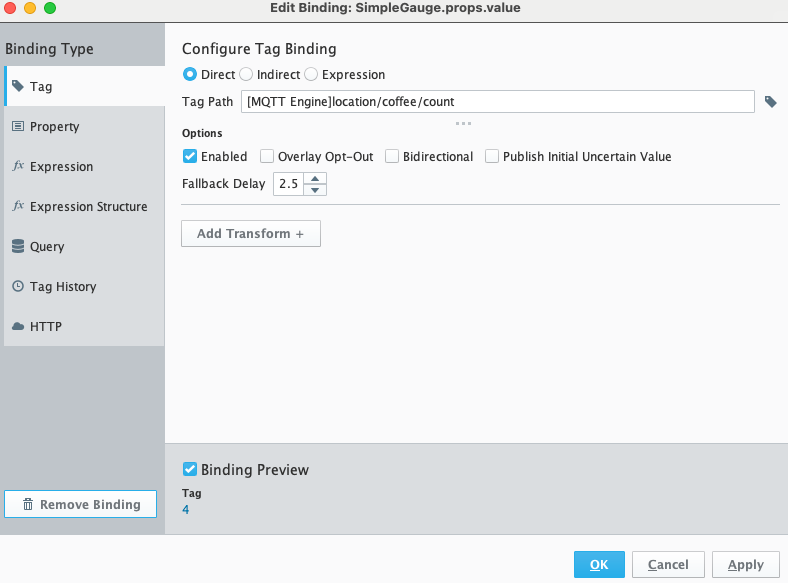
We’ll configure the SimpleGauge with a binding to our coffee count tag as seen below.
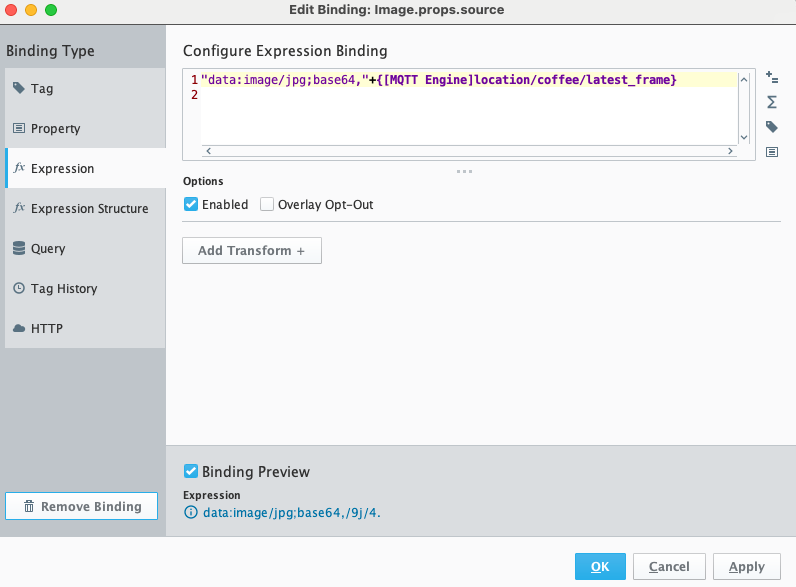
Next we’ll configure our image. In order to display a base64 encoded image in Perspective we can use an Expression to concatenate the string “our base64 value. Here’s how that looks in the Expression binding.
Once you save your project you can navigate to your new dashboard by visiting http://localhost:8088/data/perspective/client/Roboflow_MQTT where “Roboflow_MQTT” is the name of your project.
Conclusion
Integrating Roboflow with Ignition using MQTT provides a powerful solution for real-time monitoring and data analysis in industrial settings. By leveraging computer vision with Roboflow and Ignition, you can enhance operational efficiency and gain valuable insights into your processes.
Cite this Post
Use the following entry to cite this post in your research:
Nick Herrig. (Oct 11, 2024). How to Use Roboflow with Ignition using MQTT. Roboflow Blog: https://blog.roboflow.com/roboflow-ignition-mqtt/