When you are building computer vision models, you will oftentimes want to use a model’s predictions to make real world business decisions. This can range from detecting if a defect is present on an object, a shelf is out of stock, or if there is a blockage on an assembly line.
In this guide, we are going to discuss how to build out your business logic using expressions with Roboflow Workflows. Roboflow Workflows is a web application where you can build computer vision pipelines with a visual editor.
Here is a demo of our Workflow running to determine if a checkout counter is occupied at a retail store:
Here is an example image that this Workflow is built to understand.
To build this Workflow, we will:
- Create a new Workflow in Roboflow.
- Configure an input image.
- Determine a zone of interest.
- Configure an object detection model.
- Count the number of people at a supermarket checkout.
- Use the expression block to return TRUE/FALSE depending on if there are or are not people at the checkout.
If you are looking exclusively for information on the expression block, skip to Step #5.
What is Roboflow Workflows?
Workflows is a computer vision application builder. With Workflows, you can build complex computer vision applications in a web interface and then deploy Workflows with the Roboflow cloud, on an edge device such as an NVIDIA Jetson, or on any cloud provider like GCP or AWS.
Workflows has a wide range of pre-built functions available for use in your projects and you can test your pipeline in the Workflows web editor, allowing you to iteratively develop logic without writing any code.
What is the Workflow Expression Block?
The Workflows Expression block uses the output of other blocks in your workflow, along with any additional inputs you specify during execution, to perform business logic computations.
It can be used to determine if an object is present in an image, to configure pass/fail logic, or to determine the winner of a board game.
How to Use the Workflow Expression Block
In this guide, we will be going over how to use the Workflow Expression block to identify whether a checkout counter is occupied by shoppers. When the model runs, we’ll count the number of people present in the target zone, and return true/false depending on if the number meets the specified threshold.
Here is what our final workflow will look like, click here to copy the finished workflow to follow along with the guide.
Step #1: Create a New Workflow
To get started, first you will need a model in Roboflow. Follow the Roboflow Getting Started guide to learn how to create a project and train a model in Roboflow.
Once you have a model, navigate to Roboflow Workflows by clicking “Workflows” in the sidebar of your Roboflow dashboard.
Click the “Create Workflow” button to create a new Workflow, and use the “Custom Workflow” option to get started.
Step #2: Configure inputs
Our system accepts two inputs:
- An image (which could also be a frame from a video), and;
- A people threshold for determining a checkout counter as occupied.
We will use these values to run our model and make a determination if there’s enough people in the target zone to count it as occupied.
Step #3: Determine a zone of Interest
Our workflow accepts an image (or frame from a video), that has several checkout counters present. In order to isolate the area of interest, we will add a “Relative Static Crop” block and configure the X Center, Y Center, Width, and Height values to crop to the checkout counter.
You may need to experiment a few times by running the workflow on a sample image, you can test your workflow by selecting “Run Preview” on the top of the screen.
Note: If your input image already is looking at the zone of interest, you can skip this step.
Here’s the final values for the crop block:
Step #4: Configure model
Next, we’ll want to run an object detection model on our area of interest, and return the objects found. We need to configure what model we want to use in our workflow.
To do this, click on the “Object Detection Model” block and select a model. We’ll be using a model trained on Microsoft COCO filtered out to only include the person class.
You’ll want to configure the model block to use the target zone as the input image, and the optional “Class Filter” parameter to only predict the “person” class.
Step #5: Count objects in target zone
Next, we'll want to count the number of people detected. Add the Property Definition block and select "Sequence Length" to count the number of people found.
Step #6: Configuring the Expression Block
Next, we'll use the expression block to read the count_people value and check if it’s greater than the input people_threshold. If the number of people detected is greater than or equal to the threshold, the system will return TRUE. Otherwise, the system will return FALSE.
If the system returns TRUE, that means that our checkout counter is occupied, according to the minimum detection threshold.
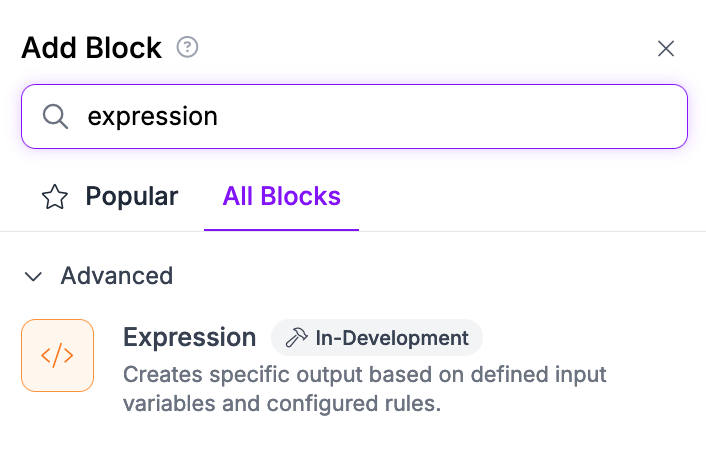
Add the Expression block and let's configure it below.

Configuring the Expression Block
First, we'll want to add the people_count as a parameter input to the Expression block.
- Click "Add Parameter" in the Expression block "switch" configuration.
- Type in people_count as the parameter name, and select the output of the Property Definition block, "$steps.count_people.output" from the dropdown list
- Click "Add" to save the parameter for future use
Repeat steps 1-3 to add the people_threshold input as a parameter.
Now we'll be configuring the occupied logic using the case statement section.
- Click "Add Case Statement"
- Setup the logic to return true if the people_count is greater than or equal to the people_threshold value. You can click the link icon to reference a parameter value instead of taking a number as input.
The completed case statement can be seen below.
Finally we'll want to set the default output to be "false". The fully configured expression block is shown below.
Step #7: Visualizing Model Predictions
When testing Workflows, it is helpful to visualize the predictions from the model. These visuals can be used to inspect whether the model you have trained performs well on example images.
To visualize model predictions, we use a Bounding Box Visualization block. This block reads predictions from a model and plots the corresponding bounding boxes on the input image.
Note: You’ll want to use the target_zone as the input image for this step.
Here is how the block is configured:
Step #7: Configuring the Output
Our Workflow returns three values:
- The predictions from the object detection model;
- The number of people detected
- The TRUE or FALSE determination that indicates whether our checkout counter is occupied is over or not over capacity, and;
- A visualization showing bounding boxes returned by our model.
Let’s run the system!
Testing the Workflow
To test a Workflow, click “Run Preview” at the top of the page.
To run a preview, first drag and drop an image into the image input field. Then, set the person threshold. For this demo, let’s say 1 person means a counter is occupied.
Click “Run Preview” to run your Workflow.
The Workflow will run and provide two outputs:
- A JSON view, with all of the data we configured our Workflow to return, and;
- A visualization of predictions from our model, drawn using the Bounding Box Visualization block that we included in our Workflow.
Let’s run the Workflow on this image:
Our Workflow returns TRUE, which indicates that more than 1 person was detected in the leftmost checkout counter.
Here are the locations of the people identified:
Deploying the Workflow
Workflows can be deployed in the Roboflow cloud, or on an edge device such as an NVIDIA Jetson or a Raspberry Pi.
To deploy a Workflow, click “Deploy Workflow” in the Workflow builder. You can then choose how you want to deploy your Workflow.
Conclusion
You can use the Expression block in Roboflow Workflows to perform business logic on the output of a computer vision model.
In this guide, we built a system that uses an object detection model to identify people and determine if a checkout counter is occupied in a retail store. The system first detects people and then checks if there are more than a certain number of people in an area at a given point in time. If the provided person threshold is exceeded, the system returns TRUE, indicating counter occupancy.
This system was built with Roboflow Workflows, a web-based computer vision application builder.
To learn more about building computer vision applications with Workflows, refer to the Roboflow Workflows documentation.
Cite this Post
Use the following entry to cite this post in your research:
Emily Gavrilenko. (Sep 3, 2024). How to Use the Roboflow Workflows Expression Block. Roboflow Blog: https://blog.roboflow.com/workflows-expressions/
