
Roboflow Annotate now includes a brightness and contrast adjustment tool that lets annotators modify image parameters in real time without altering the underlying image data. The feature is particularly useful for low-contrast sources like x-rays, where default settings can cause annotators to miss features such as fractures. Adjustments persist across images in an annotation job, so the values only need to be set once per session.
Depending on your data and use case, it can be difficult to visually identify a particular feature in an image. This is especially the case in x-ray images, where the default contrast and brightness may impair one’s ability to fully inspect the contents of the image.
Roboflow Annotate now has a brightness and contrast adjustment tool, allowing you to modify these parameters so you can identify all of the features you need when labeling images. This tool is available to all users.
In this guide, you will learn how to use the brightness and contrast adjustments tool. Without further ado, let’s get started!
Adjust Image Brightness and Contrast
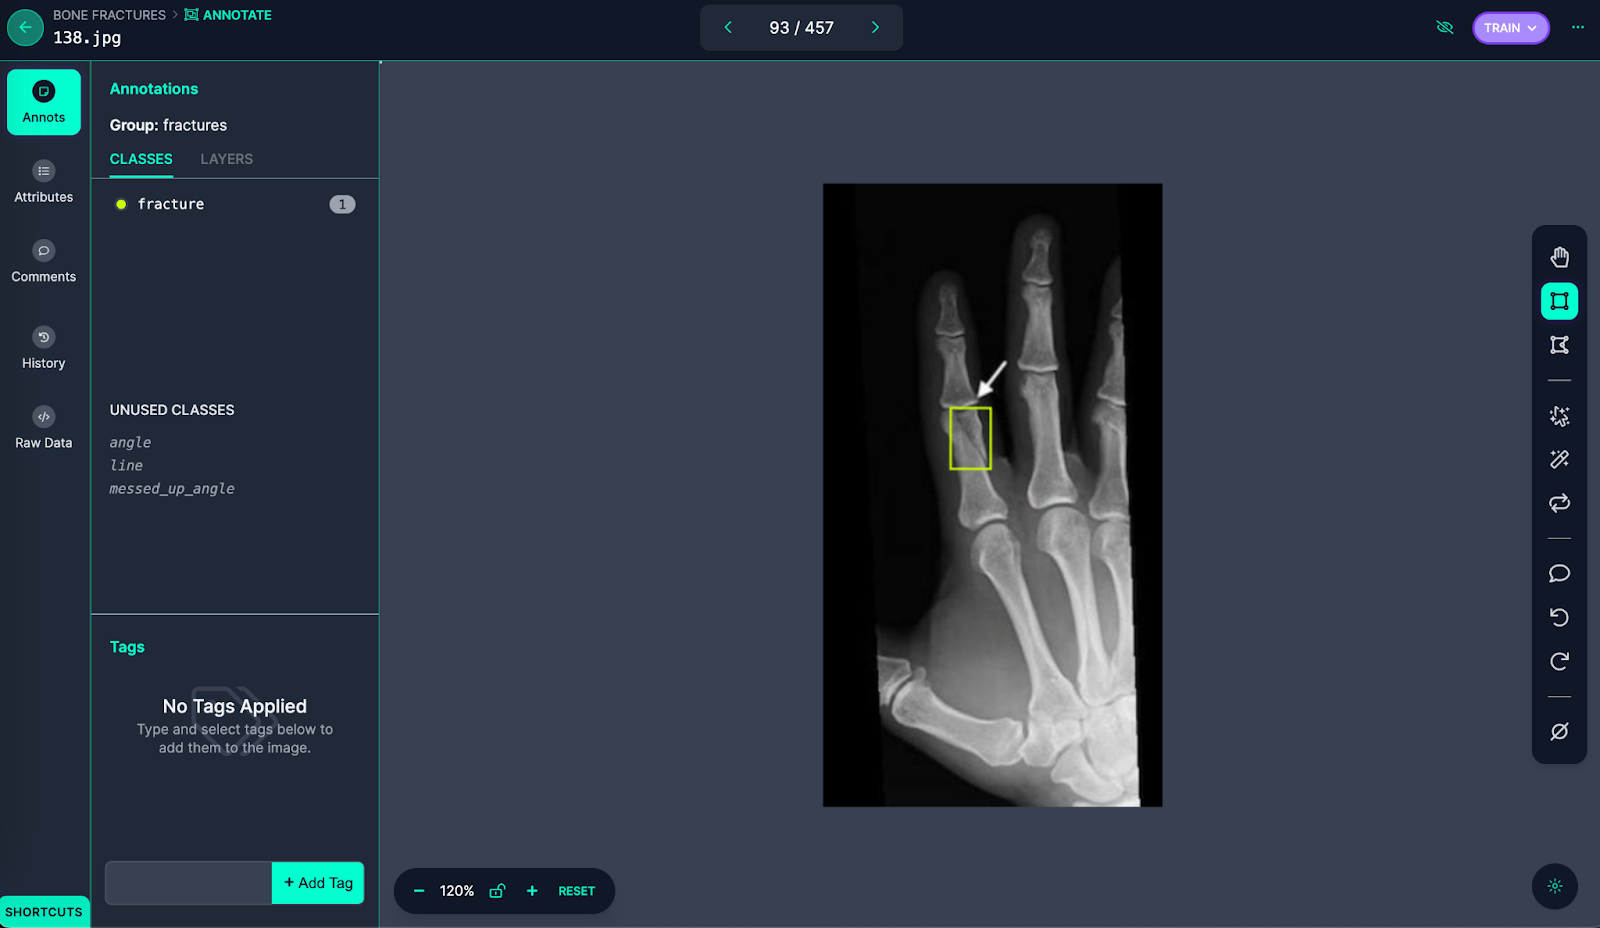
Suppose we are annotating bone fractures for a fracture identification model. It may be difficult to see a particular feature – a fracture, for example – with the standard image contrast. Here is an example of an x-ray image in our dataset:
To better evaluate the image, we can adjust brightness and contrast. To do so, click on the button in the bottom right corner of the annotation tool (the button with the sun icon). This button will open up a panel where you can set brightness and contrast:
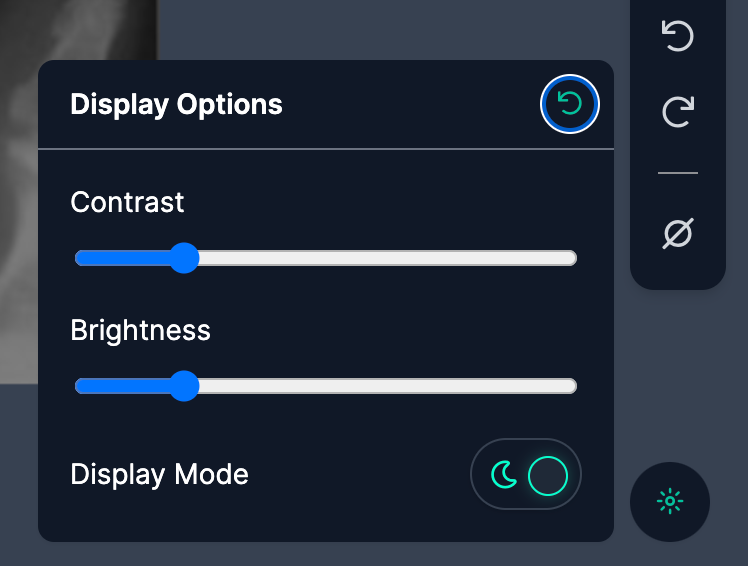
The contrast and brightness will be adjusted in real-time as you change the values.
Brightness and contrast changes persist between annotations. Thus, you will not need to modify the contrast for each image in an annotation job should you have multiple images to label.
Conclusion
In this guide, we have demonstrated how to use the new contrast and brightness adjustment features in Roboflow. These features are useful for both annotating features that are hard to see and reviewing annotations that may have been missed as a result of being difficult to see. You can start using these features today in Roboflow Annotate.
Cite this Post
Use the following entry to cite this post in your research:
James Gallagher. (Jun 16, 2023). Launch: Adjust Image Brightness and Contrast in Roboflow Annotate. Roboflow Blog: https://blog.roboflow.com/adjust-brightness-contrast-annotate/