
A developer built a webcam-based computer vision tool to interrupt Trichotillomania (compulsive hair-pulling) by detecting the behavior in real time and triggering an audio alert through the browser. The project walks through each stage: capturing training data, annotating it in Roboflow, applying augmentations, iterating on model accuracy using Label Assist, and deploying the final model with a small JavaScript layer that sounds a tone when the detected behavior persists beyond a set time threshold. The full source is available on GitHub.
This post was contributed to the Roboflow blog by Charles Modrich.
We all have our own quirks and habits when it comes to sitting alone at a desk, working on some document or another. How many of you, though, have found that without your mind to restrain it your body goes off and does something entirely on its own?
Strange question, I know. But what if, for some strange reason, whenever unguided, your body wanted to pull out its own hair? Strange question, I know.
You’d want it to stop, probably!
Understanding Trichotillomania and Trying Available Solutions
Nail biters, skin pullers and pimple-poppers alike will probably know a flavor of this pain. Trichotillomania (tri·kuh·ti·luh·may·nee·uh), the compulsive desire to pull out one’s hair, is a nefarious and seemingly ever-looming impulse that lies in the fringes of many a moment for those who have it.
Whenever I’m off somewhere else in my head, my body is right at home wiling away at my once-respectable beard. Millions of others like myself have similar troubles, usually focused on the scalp, eyebrows, eyelashes, or crown.

The best medicine for conditions like these seem to be constant vigilance against one’s self; to try to catch the behavior before it does too much damage. Unsurprisingly, this gets exhausting quickly, particularly if attention itself is already a guarded resource.
Failing that, at least for me, the second best thing to help me address the issue was a good slap on the wrist from a loving significant other to bring me back to reality and drop my arm back down to my side. Bittersweet, but effective.
Aneela from HabitAware, ailed by this inclination, had a similar experience once:
”One day, as [my husband and I] sat on the couch watching tv, he noticed me pulling out my eyelashes and gently took my hand. That was the "aha" moment for our invention.”
Their invention being this neat little wristband that buzzed gently whenever it detected the programmed behavior, which in this case, is hair pulling. With some simple setup it could be trained to figure out when a limb is where it shouldn’t be when a person is idle.
It worked great! When I tried it, it was the gentle ever-present reminder that I needed to snap back to reality for a split second, then go back to whatever I was doing. Unlike me, it didn’t lose track of where my arm was, and that’s really what I needed more than anything.
However, I hit a bit of a wall with how far I could push the platform eventually. As a hardware developer, I’m using my hands really close to my face A LOT of the time. Soldering circuit boards, touching up 3D prints, fastening tiny little screws, all require my hands to be right by my face for me to do my work properly.
This, unfortunately, exploited a blindspot in the wristband’s view of things and led to a lot of false positives. Ever try screwing in a 1.5mm screw while your hand is vibrating? Well, you shouldn’t.
The reason why this is, is likely because the wristband ultimately relies on an IMU (Inertial Measurement Unit) for detecting behavior.
Incredible devices that they are, IMUs aren’t completely foolproof. They are excellent tools at being able to tell how they are oriented in space, however one critical thing they lack is the ability to differentiate very well where they are in space. It can precisely tell you its current angulation with respect to gravity to the hundredth degree at a given point, but it can’t tell if it’s angled like that right by my neck, or a foot away in front of me.
This critical difference meant that whenever I was holding something at just the right angle, even if my fingers weren’t touching my face, my wrist would buzz. Small, harmless, but still, more intrusive than I would like.
The spirit of the bracelet was definitely there, but I needed something with a little more awareness that could fill the same role for my specific situation when I was in front of my computer.
In the spirit of that, I set out to build a vision based model instead, and succeeded! Honestly, it was easier than I would have thought thanks to Roboflow.
So, with that, here’s how to do it!
Step 1: Data Acquisition
First step: get images. All the images. So many images.
For me, sensitivity wasn’t nearly as important as rejecting false positives. Thus,I set out to make a model that while not 100% accurate, had an extremely low false detection rate. To accomplish this, I set out to make a very diverse dataset. Keep in mind, depending on the application, a developer may opt to emphasize sensitivity over specificity instead like I have done.
To accomplish this, I had to vary the images as much as you can to make the model resilient to different situations that different types of cameras might encounter. You can make a model that’s very specific to one person, in one location, in the same brightness setting, etc. It could result in a perfectly usable model. But, if things shift a little bit – the lights get darker, you wear glasses, your hair grows out, something in the background changes, any of these things can throw off your model’s detection to a large degree.
In particular, it’s suggested to vary:
- Lighting (color temperature, brightness, background, light source direction, low light);
- Camera type (cell phone, webcam, esp32cam, laptop camera);
- People (different genders, hair lengths, skin color, heights) (note: I didn’t do this but a proper model should) and;
- Setting (different backgrounds, different camera placements, camera rotation)
For my own model I intentionally limited the setting to my lab (since that’s the only environment I’d be running the model in). I tried to vary as many other factors as I could as well: what clothes I wore, wearing glasses or not, shooting in the day, at night, and with three different camera sensors.
By varying the data this way we’re making the model more tolerant to changes in the subject and environment, as well as improving its ability to toss out superfluous data that is not relevant to making a prediction. Effectively we’re not only teaching the model what to look for, we’re teaching it what not to look for in this way.
A widely varying dataset like this is a more “difficult” problem for a neural network to handle, and can result in counter intuitive performance statistics. This varying data set is great for real world performance, false positive rejection and the like, but on paper it can actually look like the model is actually underperforming compared with similar models that are trained on less diverse training data.
Put another way, it’s better to have a model that can get a B+ on a difficult test, than to have a model that can only get 100% on an easy one. One related pro tip: be very wary of public datasets on Roboflow that have extremely high performance values. I found models that had 88% mAP and lots of images, outperformed 99% mAP models with less images, every time.
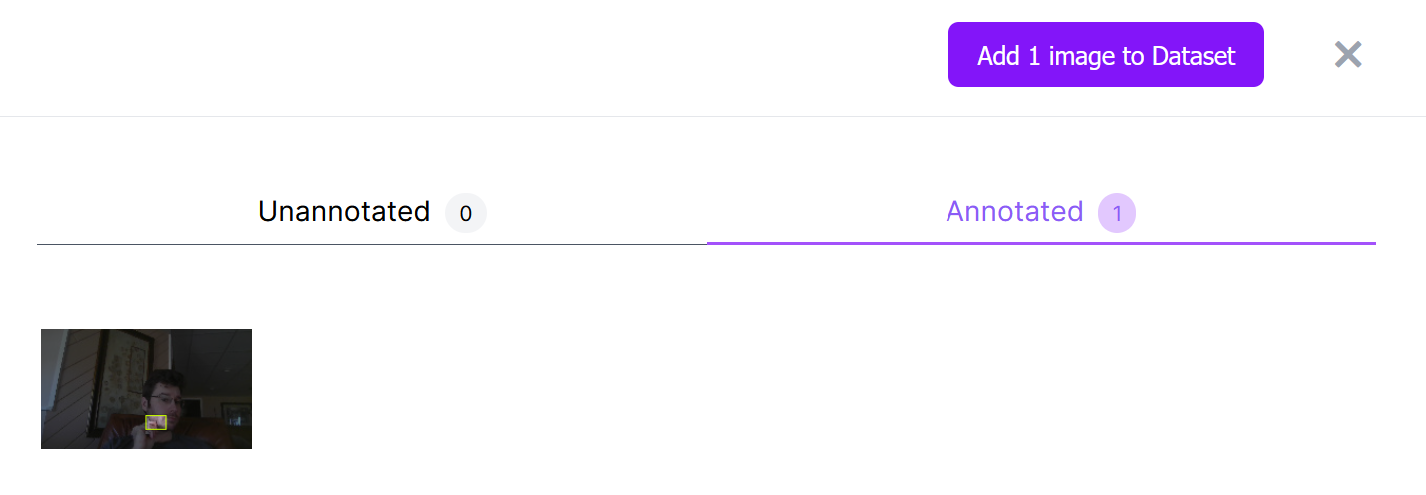
Step 2: Data Annotation
The most effective way I found to build a dataset was to essentially have two large image sets: images that had the behavior in them I was looking for, and the images that didn’t.
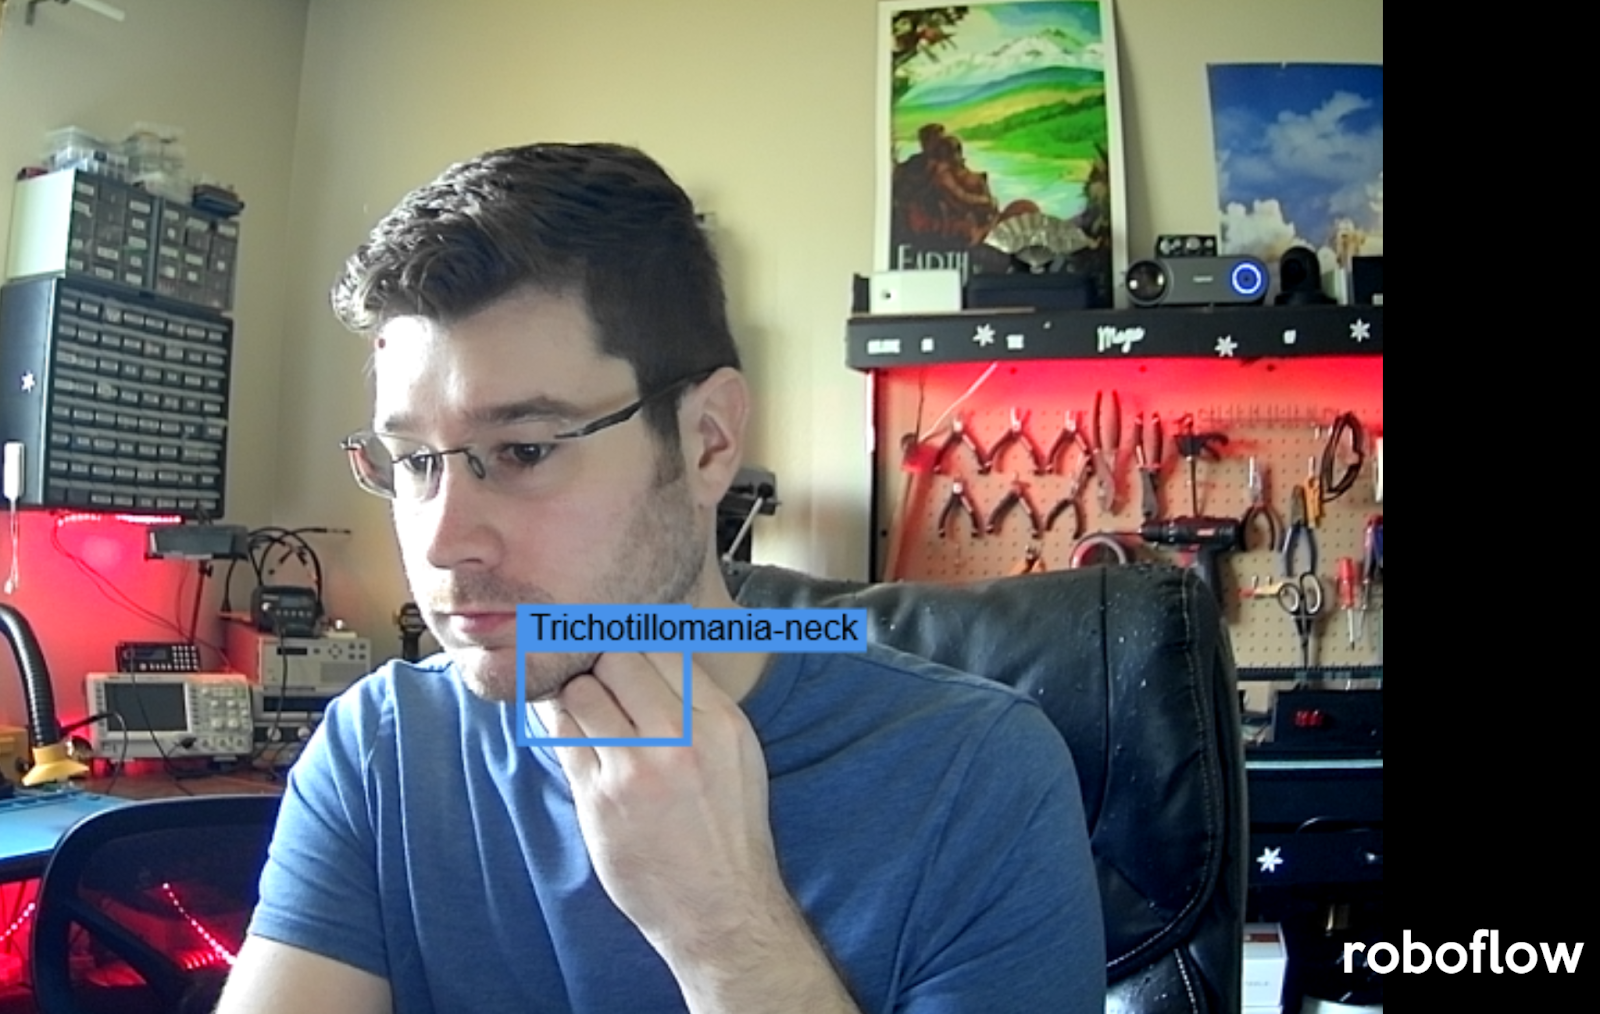
For my dataset this meant I would have two categories of images: ones that contain “Trichotillomania-neck”, and null.
(Suggestion: If anyone else makes a similar database, please name it Trichotillomania-[body part], and also tag it with Trichotillomania. That way we can pool public datasets and make even better models!)
Far and above, the null category was the thing that eliminated false positives the most, and was crucial to fill with as many images as possible. Particularly, with images that looked like the behavior we needed to flag, but weren’t actually that behavior. For me, this meant taking pictures of resting my hand on my face, or scratching my nose, or even just not being in the frame at all!
Since we’re building this model from scratch, not using any other model as a checkpoint, it has no idea what a human is. It doesn’t know about desks or lamps or a bottle on my back wall, or nearly anything about anything.
We need to go through every image and draw a small box around every detection region.

Normally, this would have meant clicking one by one through thousands of images. Hours and hours and hours of clicking.
But today is a new day, with new technology! Using Roboflow we actually only have to annotate a couple dozen images to get started. Doing that will make us a basic model to help us tag the rest of the data, avoiding a good deal of manual labor in the process.
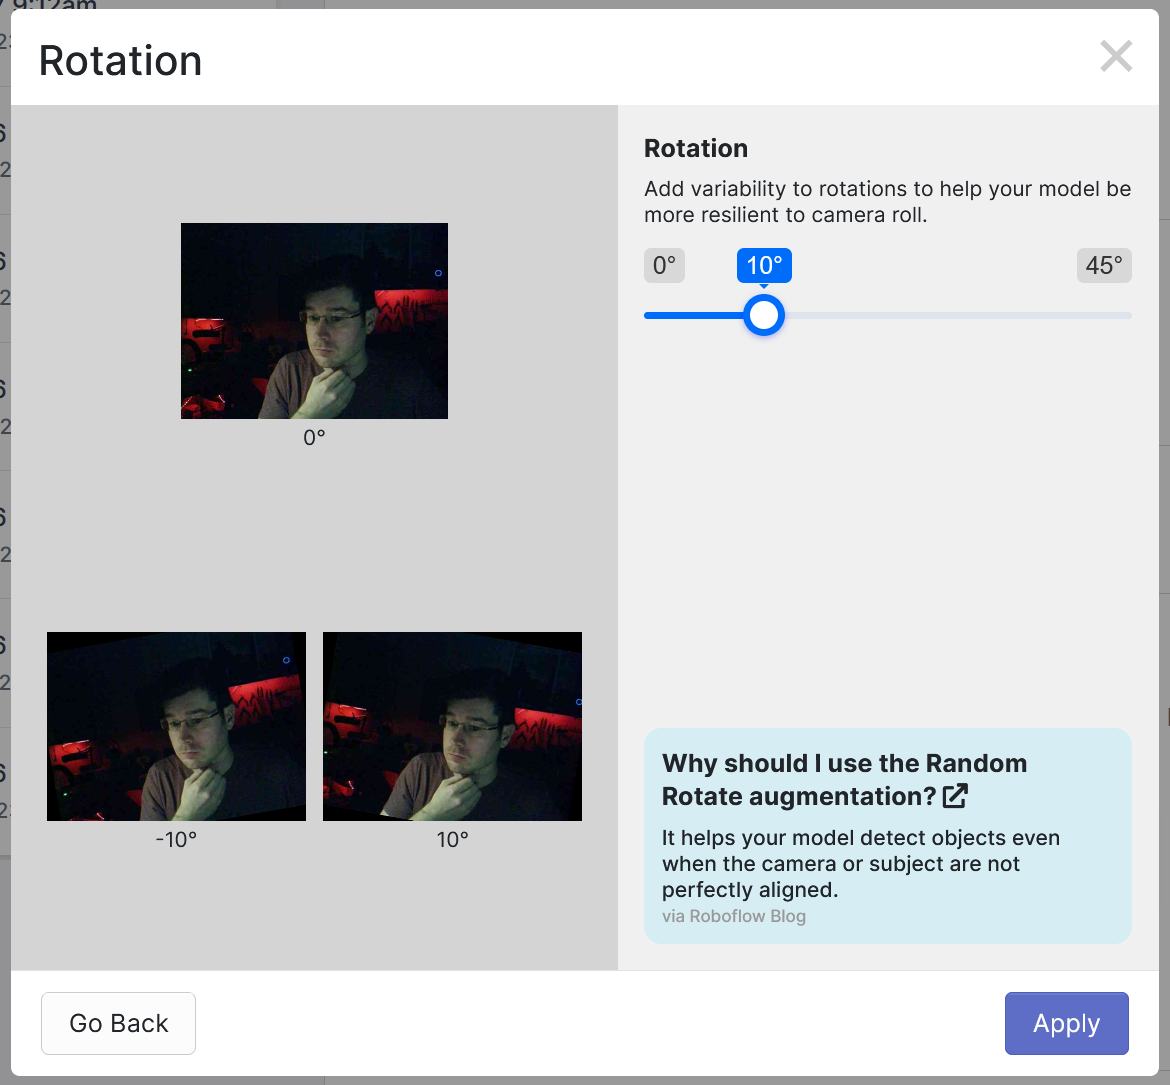
Step 3: Applying Image Augmentations
One of the coolest things about Roboflow is its ability to artificially boost the number of images in a dataset to help our model learn to infer general features from our dataset. Even if we only have a few dozen images annotated, we can still balloon that up to the respectable hundreds with image augmentation and permutation.
Instead of taking brand new images that vary slightly in brightness, camera rotation, exposure etc, we have the computer simulate these changes for us and generate new artificial images in the process, strengthening our dataset.
It’s important to not go overboard here; having too many augmented images can harm the performance of a model. With this in mind, when using permutations try to stick to realistic scenarios. (Will the camera ever be upside down, or tilted 90 degrees in a deployment scenario? If not, maybe don’t use the vertical flip option, and put a damper on the random image rotation slider.)
Once you have all the pre-processing and augmentation steps set up you can continue on to generate a new dataset. After some time, Roboflow will use your specifications and raw images to create an optimized dataset for machine learning learning. Once done, you can export the results of this generation to whatever form you please, or pipe that right into Roboflow’s AutoML training solution.
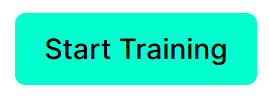
Once you have generated your first dataset with Roboflow, training your first model is as easy as pressing a button. From the Versions page of your dataset, click the “Start Training” button as seen in green below.
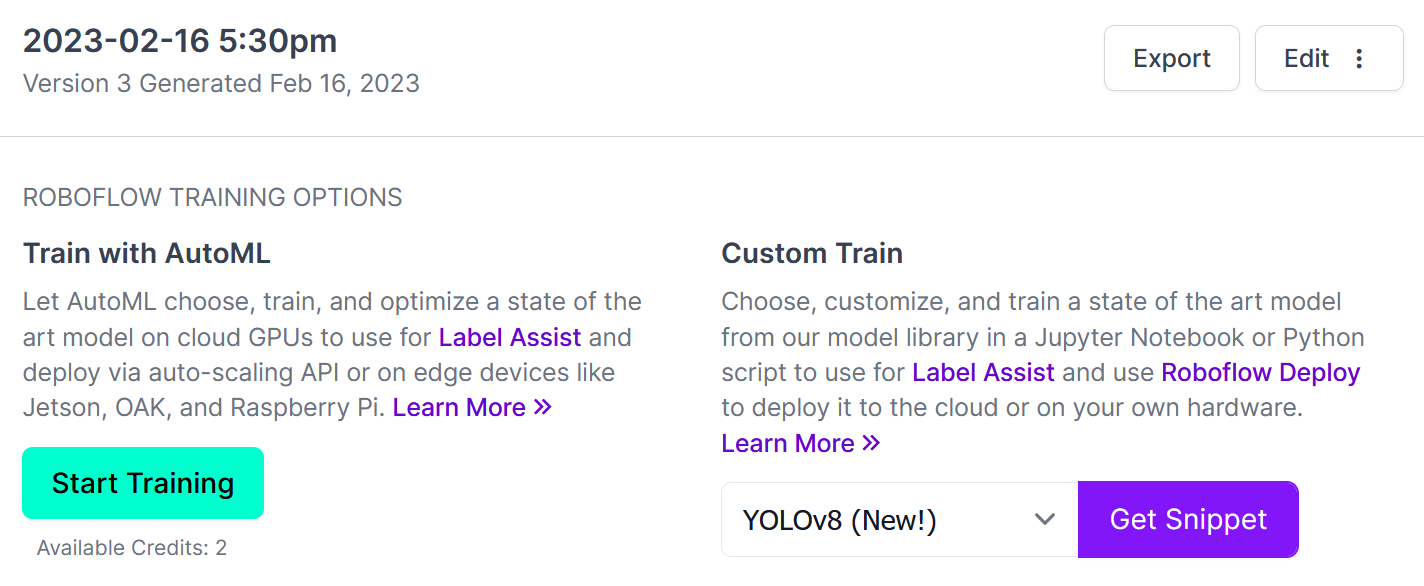
After some time, your model will be ready to test, deploy, and most importantly at this stage, use for tagging the rest of the images remaining in our initial dataset.
Step 4: Annotating with Magic Annotations (“Label Assist”)
Once the model has been trained, Label Assist will become unlocked within the annotation UI. On the first new image to be annotated, click the Label Assist button on the toolbar. For this and every remaining image that you go to annotate, the AI will kick in and try to annotate the image for you.
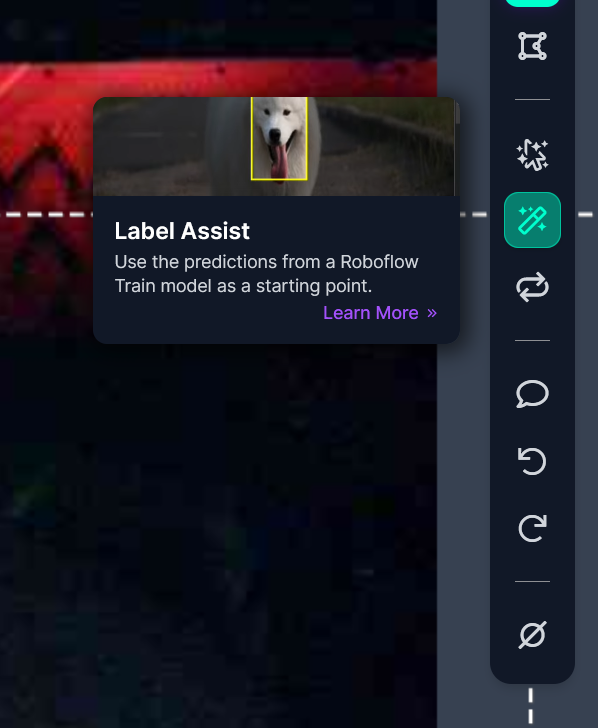
Depending on how good your first model was (and how difficult your recognition task is for a computer), the AI-assisted labelling tool will usually either get its guess spot-on, or may draw the bounding box in a slightly different area than intended. When this happens, resize the bounding box to where it should be, and continue on.
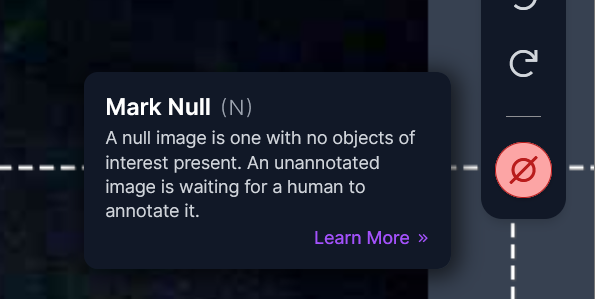
If you encounter any images in your uploaded set that don’t contain your desired behavior, make sure you label them as such with the “Mark Null” button.
Usually this first model is good enough to give a significant speed boost compared to full manual annotations. However if you have the credits for it, don’t be afraid to label more images, retrain another model, and then finish annotating the rest with a more accurate assistant. Step 6: Testing the First Deployed Model
We’ve finally made it to our first model. Now it’s time to test it! Head over to your model versions tab on the left side navigation menu, and hit the “Use your webcam” button.

Once the screen is up, really put the model through its paces to see if there are any weak spots for detection, or over sensitivities for false positives. If there’s a certain position or object or camera position that causes your model to misbehave, make sure you get an image capture of it.
For me, the first model I made with my dataset really liked a spray bottle in the background. Something about the shadows, perhaps?, I’m really not sure. Neural networks being the black boxes that they are, the only way we can really see how to improve them is by putting something in one end, and seeing what comes out the other.
Step 5: Improving the Model
Once you have a few dozen images from the first step, improving your model is a matter of repeating the annotation process to put the images in one bin or the other. After trying out your models for some time you’ll get an idea of situations or positions that trick it, resulting in either false positives or negatives. Try as best you can to capture these events over the subsequent days and weeks to be used to improve your dataset.
New images can be added to your raw dataset at any time in the Upload tab.
Once you have amassed enough newly annotated images, re-generate the dataset to apply preprocessing and augmentations to the set in the Generate tab. Settings used for previous generations should auto-apply, so adding to an existing dataset is always easy.
Step 6: Deploying for the Final Model
Retraining a new model off the new dataset is easy too, just like before you have to hit Start Training on the Versions tab to get a fresh, new, high performance model.
Once done, preview your model using the webcam tool one more time, to make sure you’re happy with the performance.
Step 7: Adding JavaScript Tweaks
Once you have a model you’re happy with, it’s time to put it to work. We finally have a model that can tell us with confidence when a certain behavior is occurring, so now we have to build in a way to bug the user about it to get them to stop.
For this application I wanted to keep all the action within the web browser, so I proceeded with Javascript. Keeping it simple, all I wanted was a beep to play over the speakers when a behavior was detected for more than X seconds. Thanks to Roboflow being awesome, they have provided us with the code for a webcam app that can be used as a jumping off point.

With some simple additional JavaScript added to the provided web app *.js file to create a tone and play it after the behavior time threshold.
We have our behavior detector!
Playing around with this model has been a really educating experience, and has actually been really effective in my daily life. With any luck this guide or the result of my work will help someone else out there in a similar way.
The source code for the full project is available on GitHub.
Cite this Post
Use the following entry to cite this post in your research:
James Gallagher. (Mar 31, 2023). Automatic Habit Disruption with Computer Vision. Roboflow Blog: https://blog.roboflow.com/automatic-habit-disruption-with-computer-vision/