
Background blurring is a powerful image processing technique used to focus attention on the main subject by softening or removing distractions in the surrounding environment. With the help of modern segmentation models, this process can now be automated at scale.
SAM 2 (Segment Anything Model 2) is Meta AI’s state‑of‑the‑art foundation model for visual segmentation. It can accurately identify and isolate objects at the pixel level in both images and videos, providing precise object cutouts in still frames, and tracking those objects consistently throughout a video.
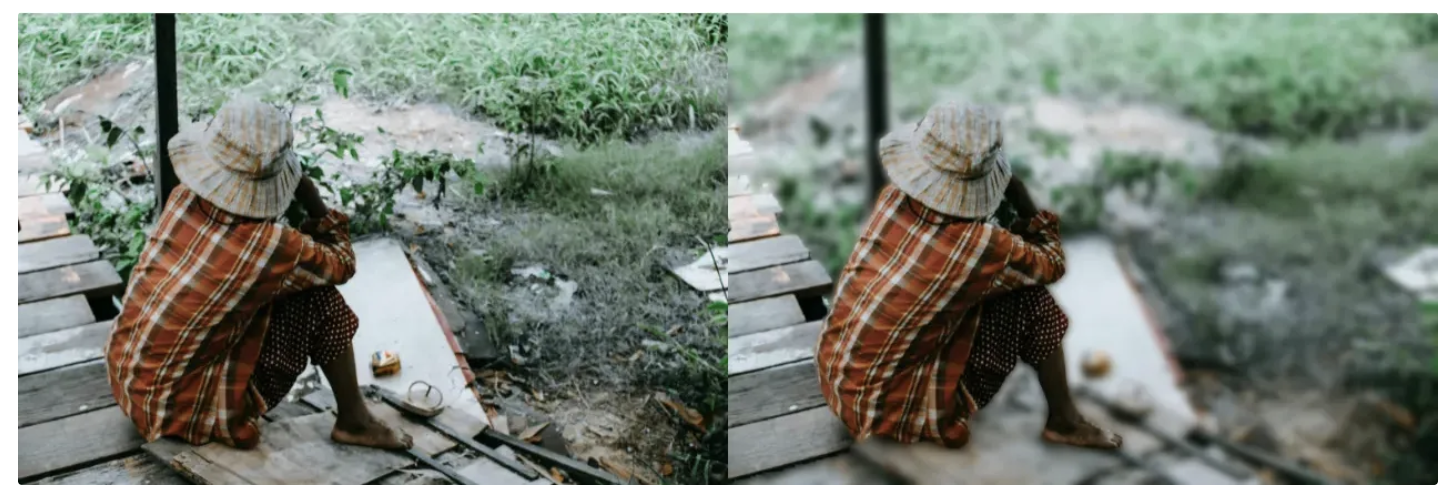
In this blog, I’ll walk you through how to build a background blurring workflow using SAM 2 to automatically blur the background of images and produce results like these:
You might also be interested in using the newer Segment Anything 3 - a zero-shot image segmentation model that detects, segments, and tracks objects in images and videos based on concept prompts.
Building a Background Blurring Workflow using SAM 2
In this blog, we'll be using Roboflow Workflows, a web-based tool for building visual AI applications.
Roboflow Workflows lets us chain together multiple computer vision tasks such as object detection, image blurring, or advanced segmentation with models like SAM 2, all within a no-code interface, while also offering the flexibility to add custom code blocks when needed. Here's the workflow I created.
Setup Your Roboflow Workflow
To get started, create a free Roboflow account and log in. Next, create a workspace, then click on “Workflows” in the left sidebar and click on Create Workflow.
You’ll be taken to a blank workflow editor, ready for you to build your image processing pipeline. Here, you’ll see two workflow blocks: Inputs and Outputs.

In the top left corner, you'll see either Running on Serverless Hosted API or Hosted API. Both of these options support common tasks such as object detection, segmentation, and chaining logic blocks, but only the Serverless V2 API supports custom Python code blocks. If you need custom code in your workflow, you’ll need to use Serverless V2, a Dedicated Deployment or self host your own Roboflow Inference server.
Since our workflow requires custom code, we'll switch to a locally hosted inference server. To do this, click the text that follows Running on in the top-left corner, then select Local Device.
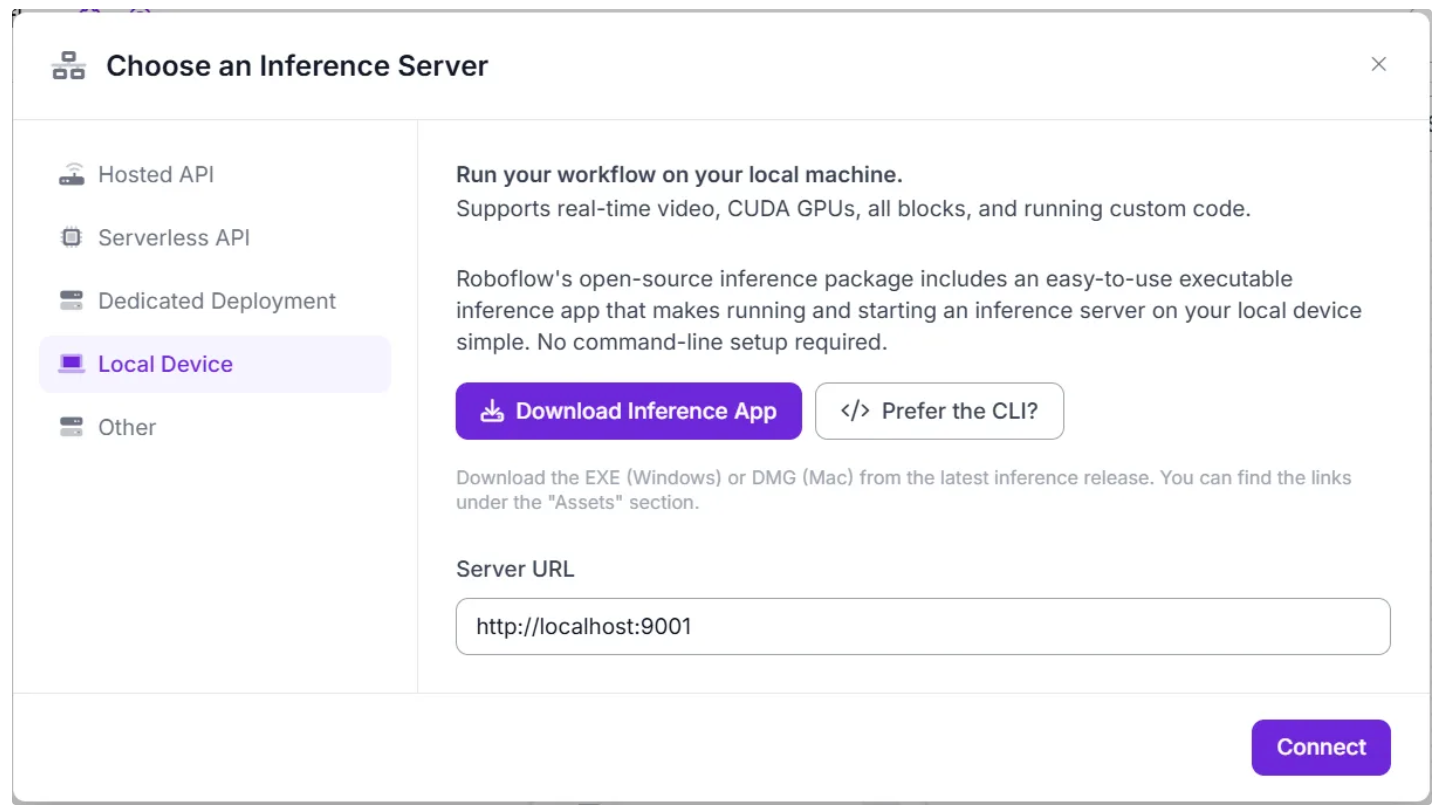
Before connecting to http://localhost:9001, you need to run an inference server on your local device. You can do this either by downloading and installing the Roboflow inference app and running it, which starts a local server on port 9001, or by following the command-line instructions provided here.
Once the local inference server starts, you can verify it by visiting http://localhost:9001 in your browser and click Connect. After connecting, your workflow will run locally on your device.
Step 1: Setup Additional Input Parameters
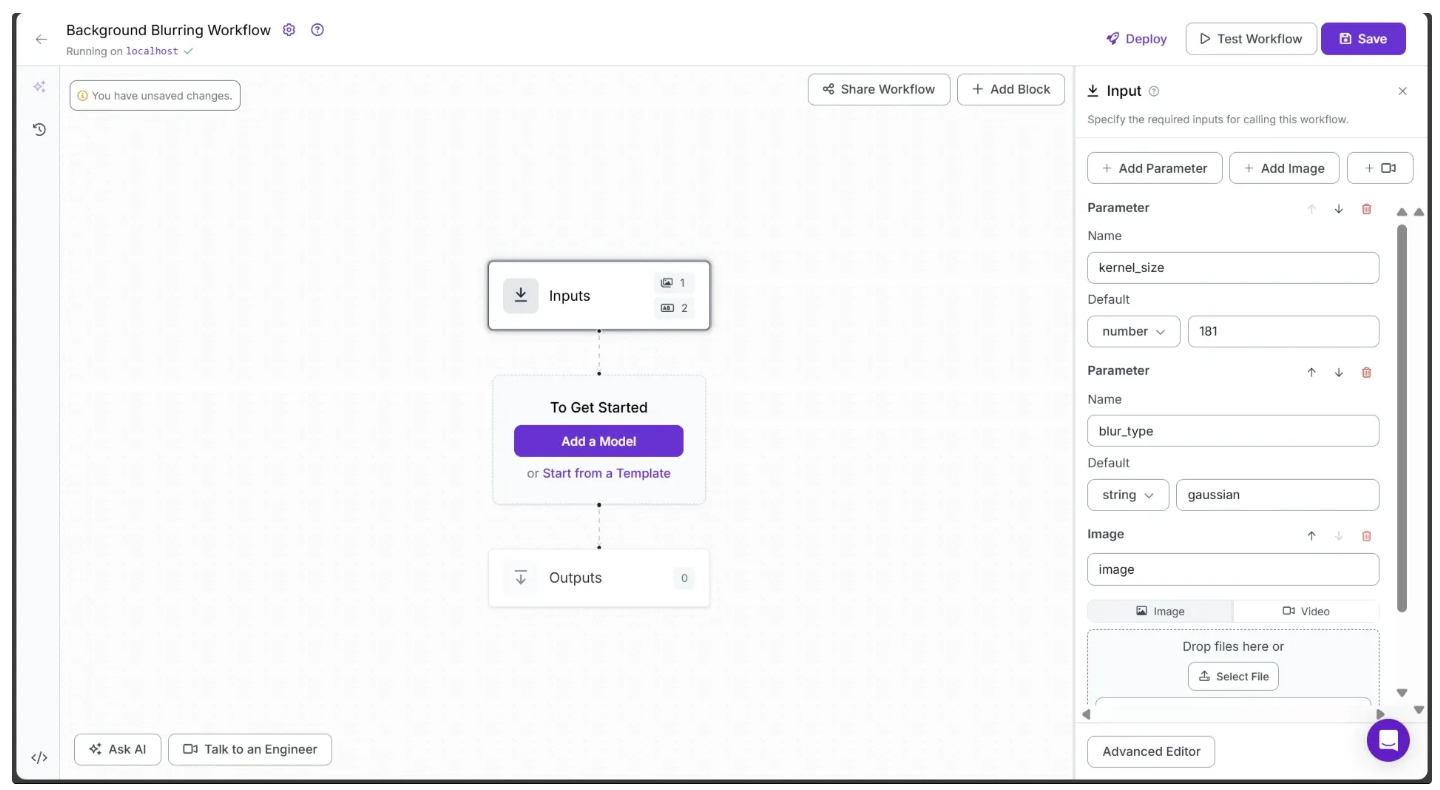
If you click on the Inputs block, a sidebar will appear on the right displaying a default parameter called image, which lets you add images as input to the workflow. This image will be the one to which the background blurring is applied.
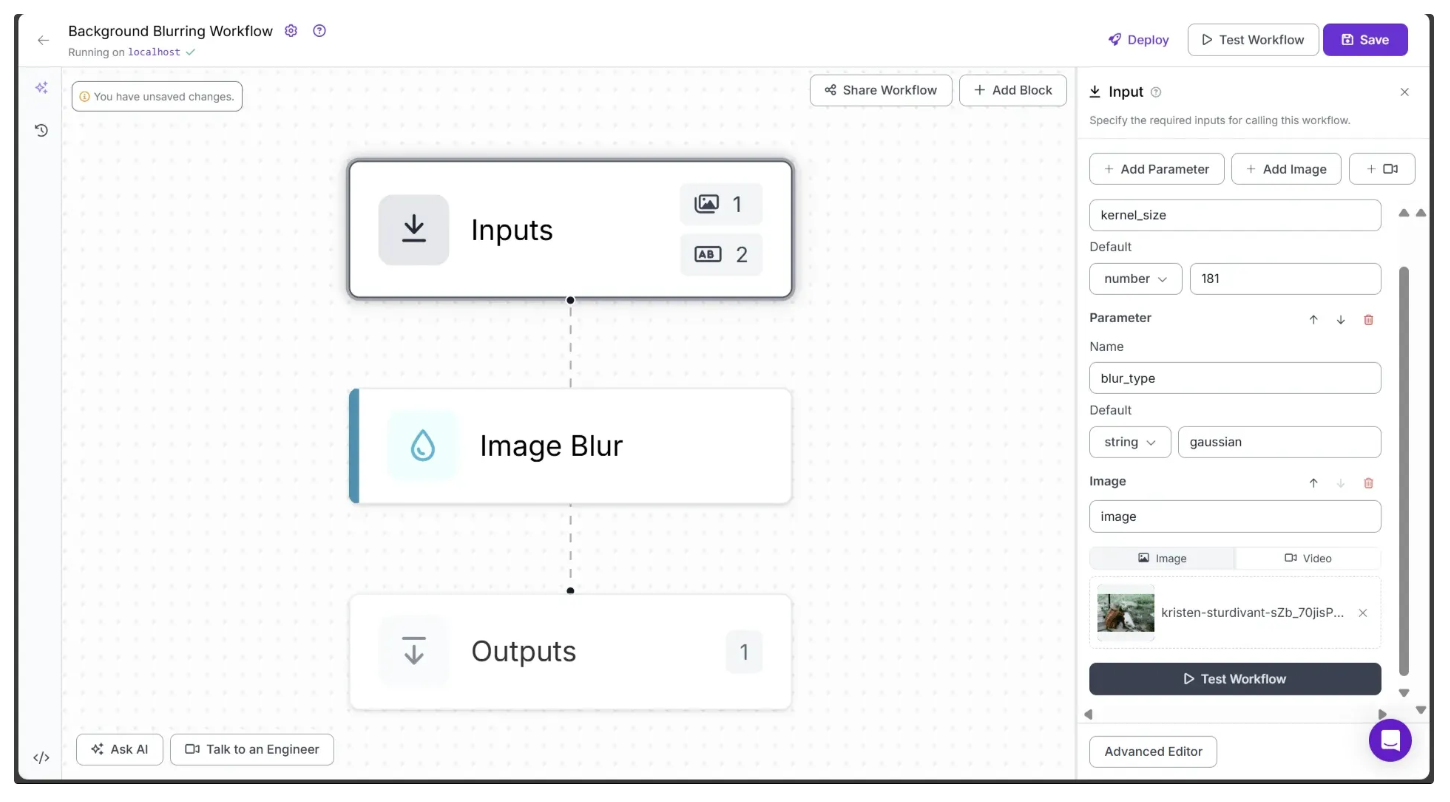
You can also use the Add Parameter option to include additional parameters that control the blurring behavior applied to the image.
In our case, we add two more parameters: kernel_size, which controls the strength of the blur and must always be an odd number, and blur_type, which defines the type of blur to apply. The blur_type parameter must be one of the following string: "average," "gaussian," "median," or "bilateral," as shown below:
Step 2: Add a Image Blur Block
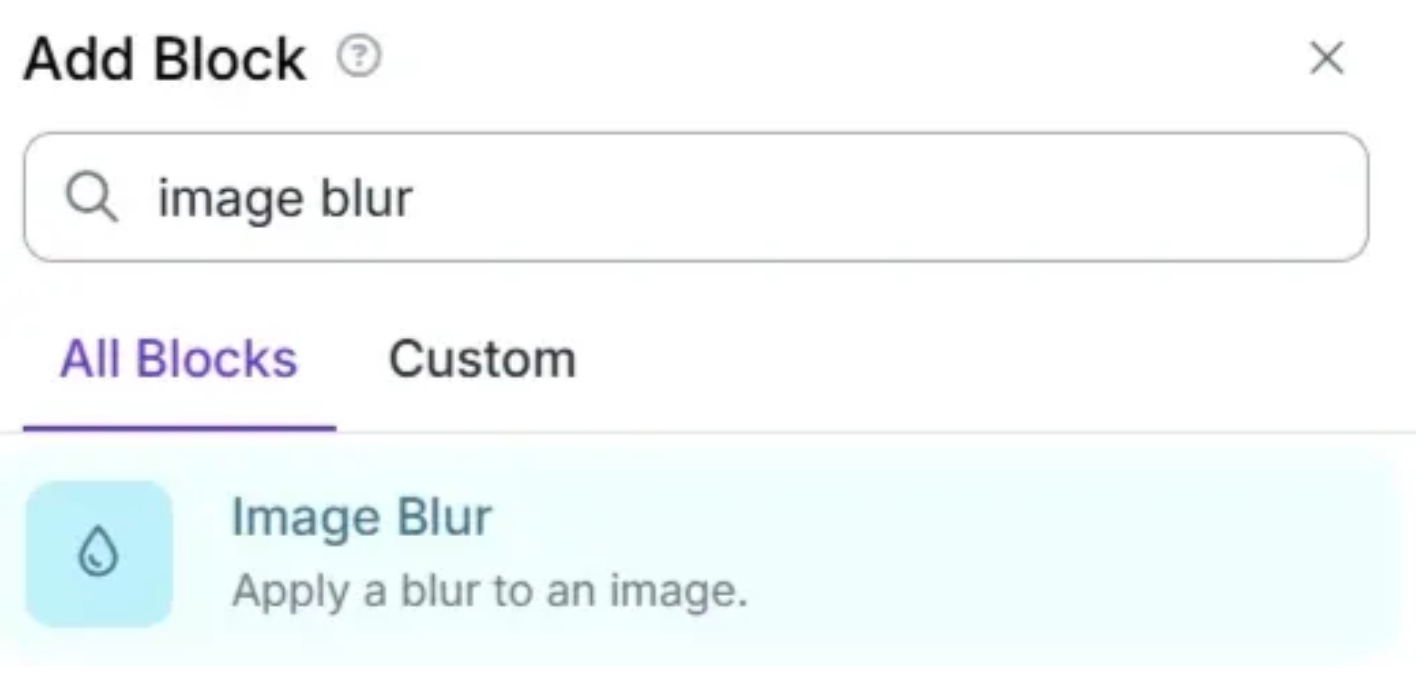
Roboflow Workflows provides an Image Blur block, which we'll use to apply the blurring effect. You can add it by clicking the Add Block button in the top-right corner and searching for "Image Blur."
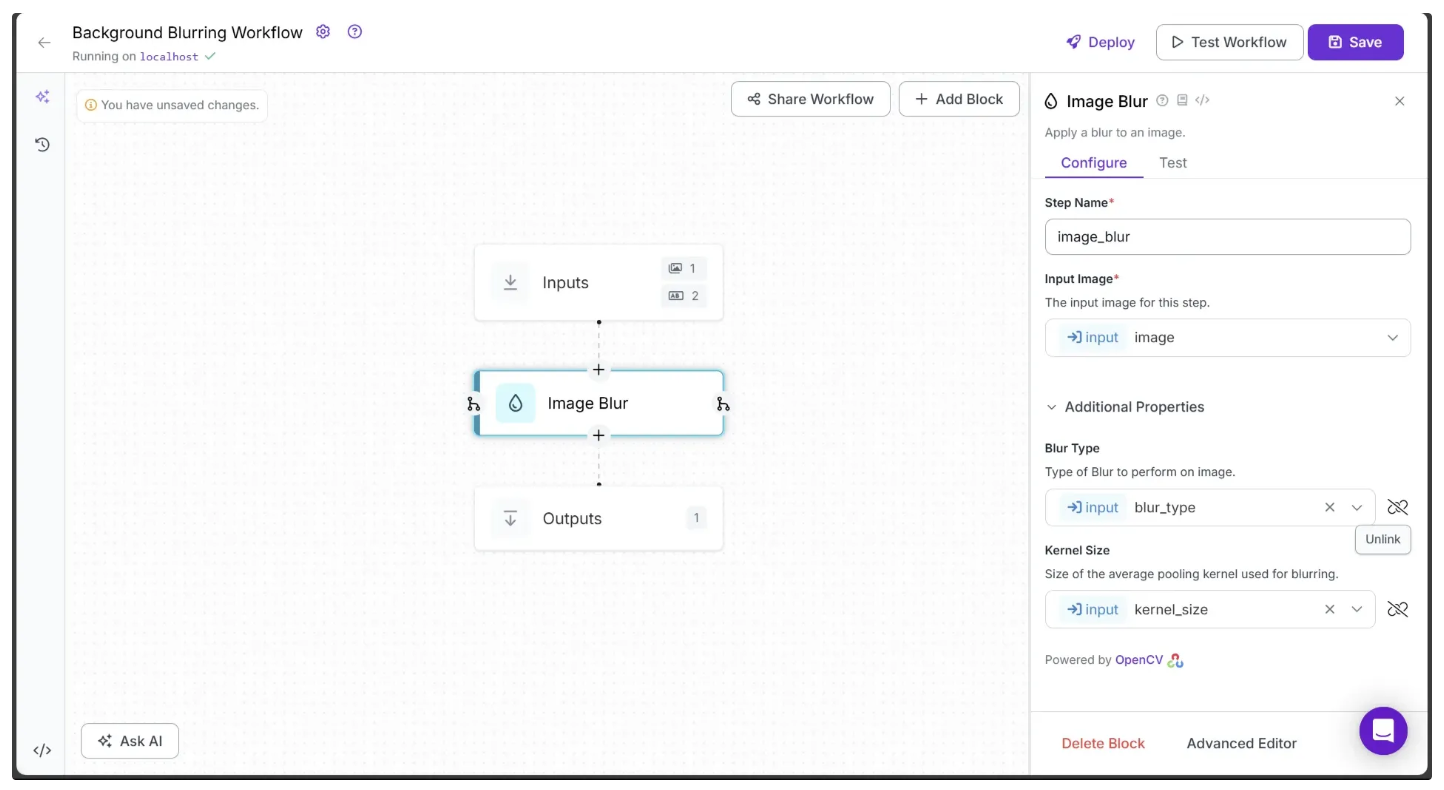
After adding the Image Blur block to your workflow, it will automatically be connected to the Inputs block. Next, configure the parameters of the Image Blur block to use the values provided by the Inputs block.
To do this, click the link 🔗 icon next to each parameter and select the corresponding input value, as shown below:
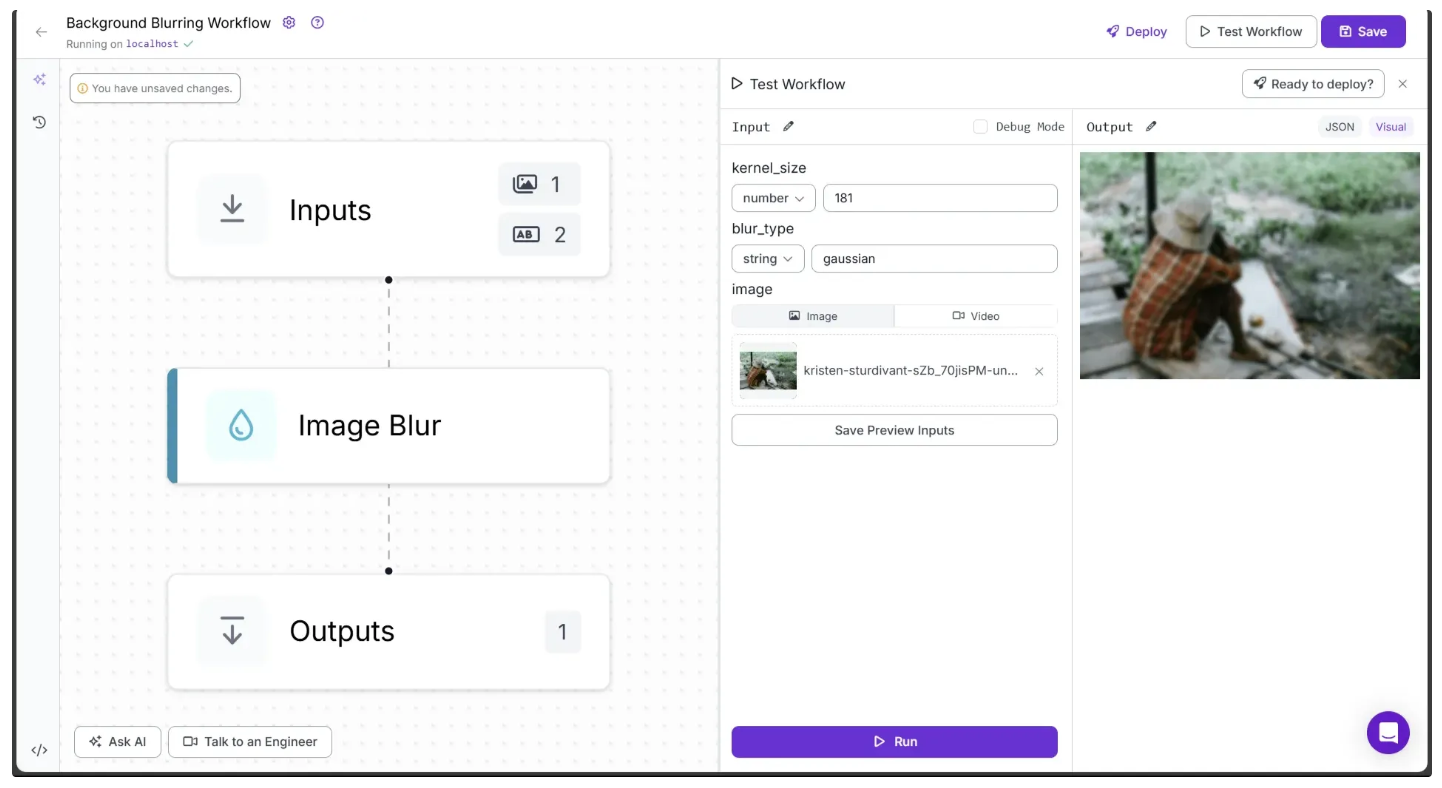
You can also test the workflow you've built so far by going to the Inputs block, dragging and dropping an image onto the image parameter, and clicking Test Workflow, as shown below:
After running the workflow, you’ll notice that the output image is completely blurred. This is not the result we’re aiming for. To achieve the desired output, we’ll continue adding new blocks to our workflow.
Step 3: Add a Object Detection Model Block
To avoid blurring the foreground objects and ensure only the background is blurred, we first need to detect these foreground objects. We can do this by adding an object detection model block into our workflow through which we can get the exact box coordinates of one or many foreground objects present in the image.
Roboflow offers a range of object detection models, including YOLOv8, YOLO-NAS, and more. For this workflow, we’ll use the RF-DETR model. RF-DETR is a state‑of‑the‑art, real-time object detection model architecture developed by Roboflow.
To add it, simply hover over the Image Blur block and click the branching icon that appears on its left side. Once you do this, the Add Block options will appear. Then search for the “Object Detection Model”, as shown below:
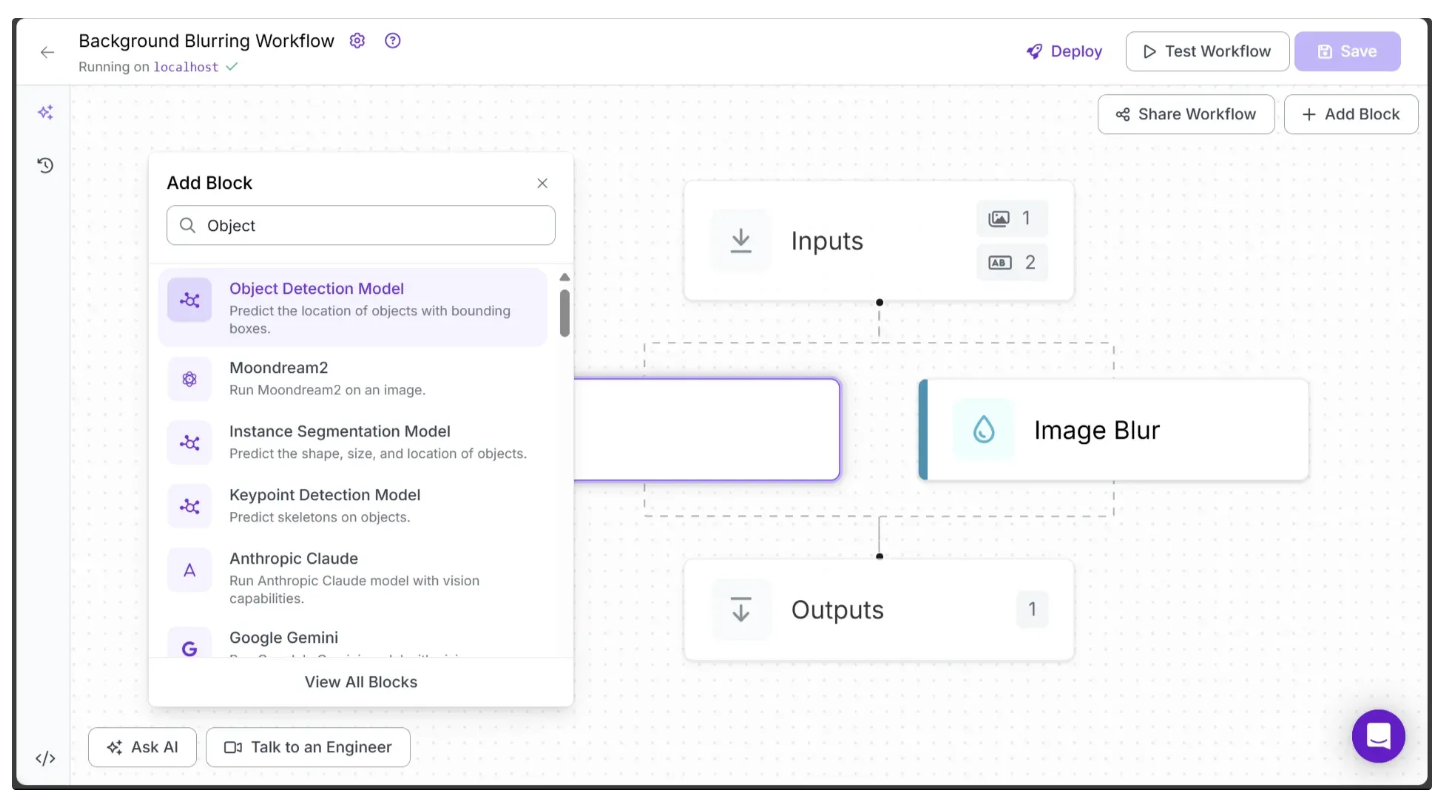
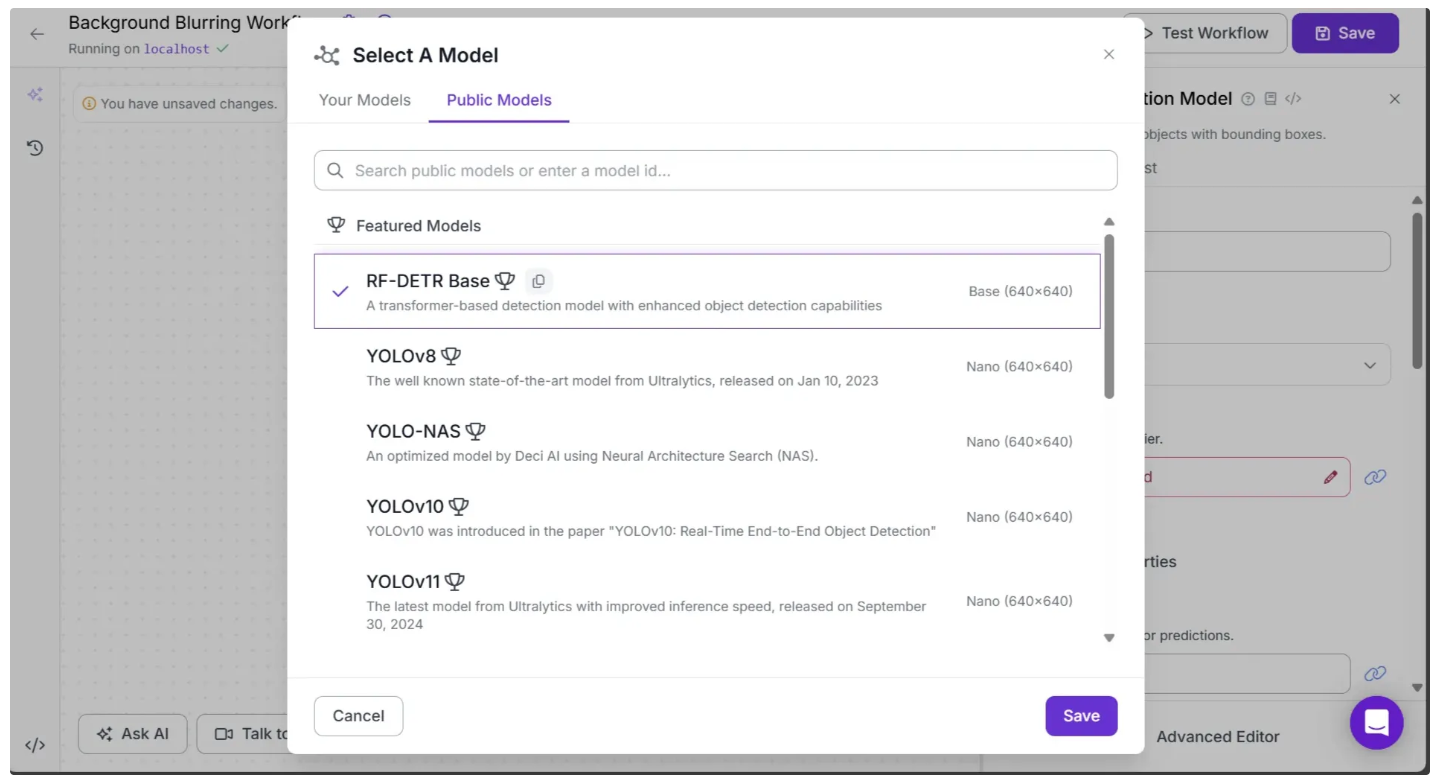
Select the Object Detection Model, then choose the RF-DETR model from the Public Models, as shown below:
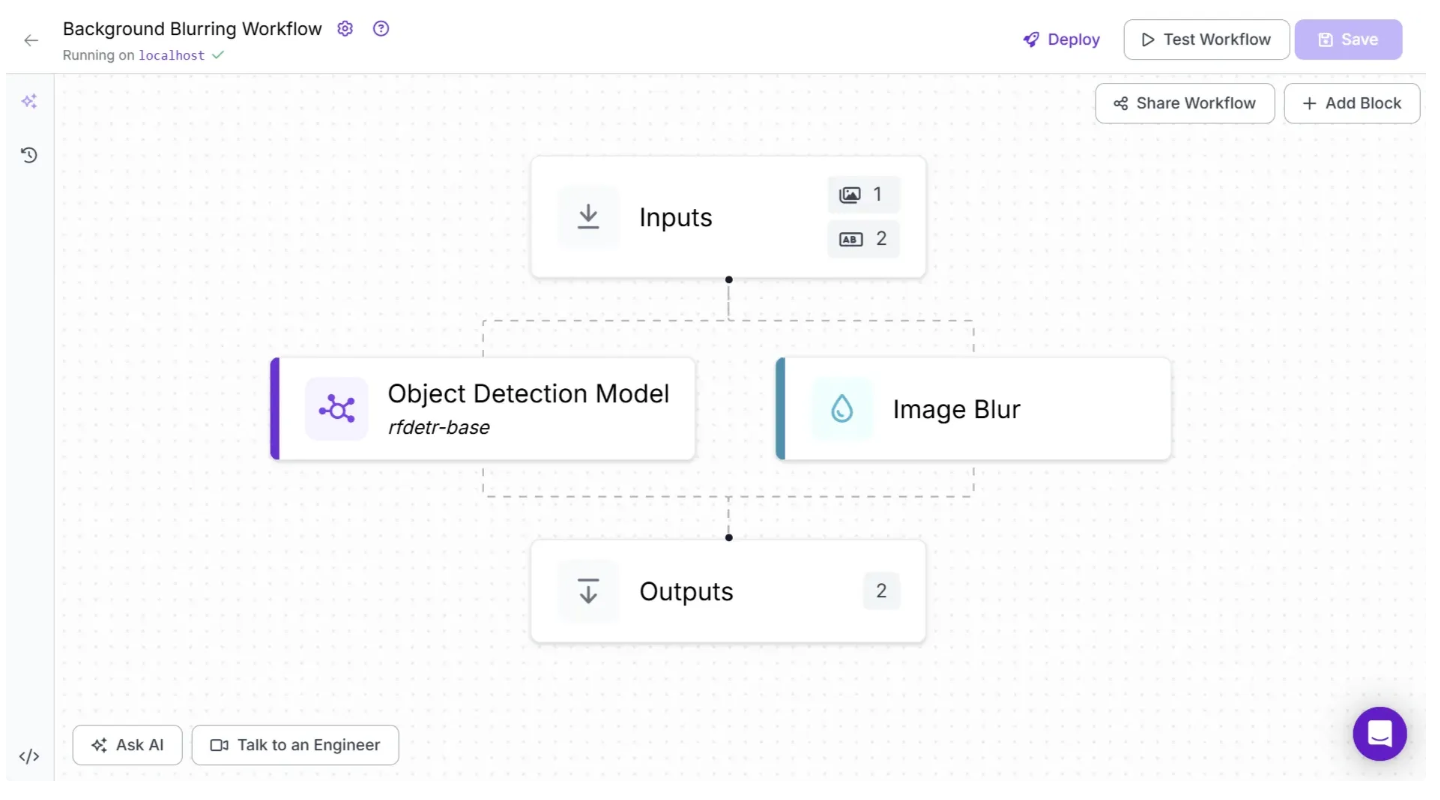
Your workflow should now look like this:
Step 4: Add a SAM 2 Block
Now, we can use the bounding box coordinates of the foreground objects produced by the object detection model to generate segmentation masks with SAM 2, which precisely outline each object's shape. To achieve our goal of blurring everything except the foreground, we’ll apply the blur only to the areas outside these segmented regions.
SAM 2 is easily accessible in Roboflow Workflows as a dedicated block. To add it, hover over the Object Detection block, click the + icon that appears on it, and search for “SAM 2” to insert it into your workflow.
Now your workflow should look like this:

Each block in the workflow represents a step. You can rename the object detection and SAM 2 steps by clicking on these blocks to open the Configure tab on the right, then updating the Step Name field. To make the step names more relevant, I renamed the step names of Object Detection and SAM 2 from model and model_1 to foreground_detection and foreground_segmentation, respectively.
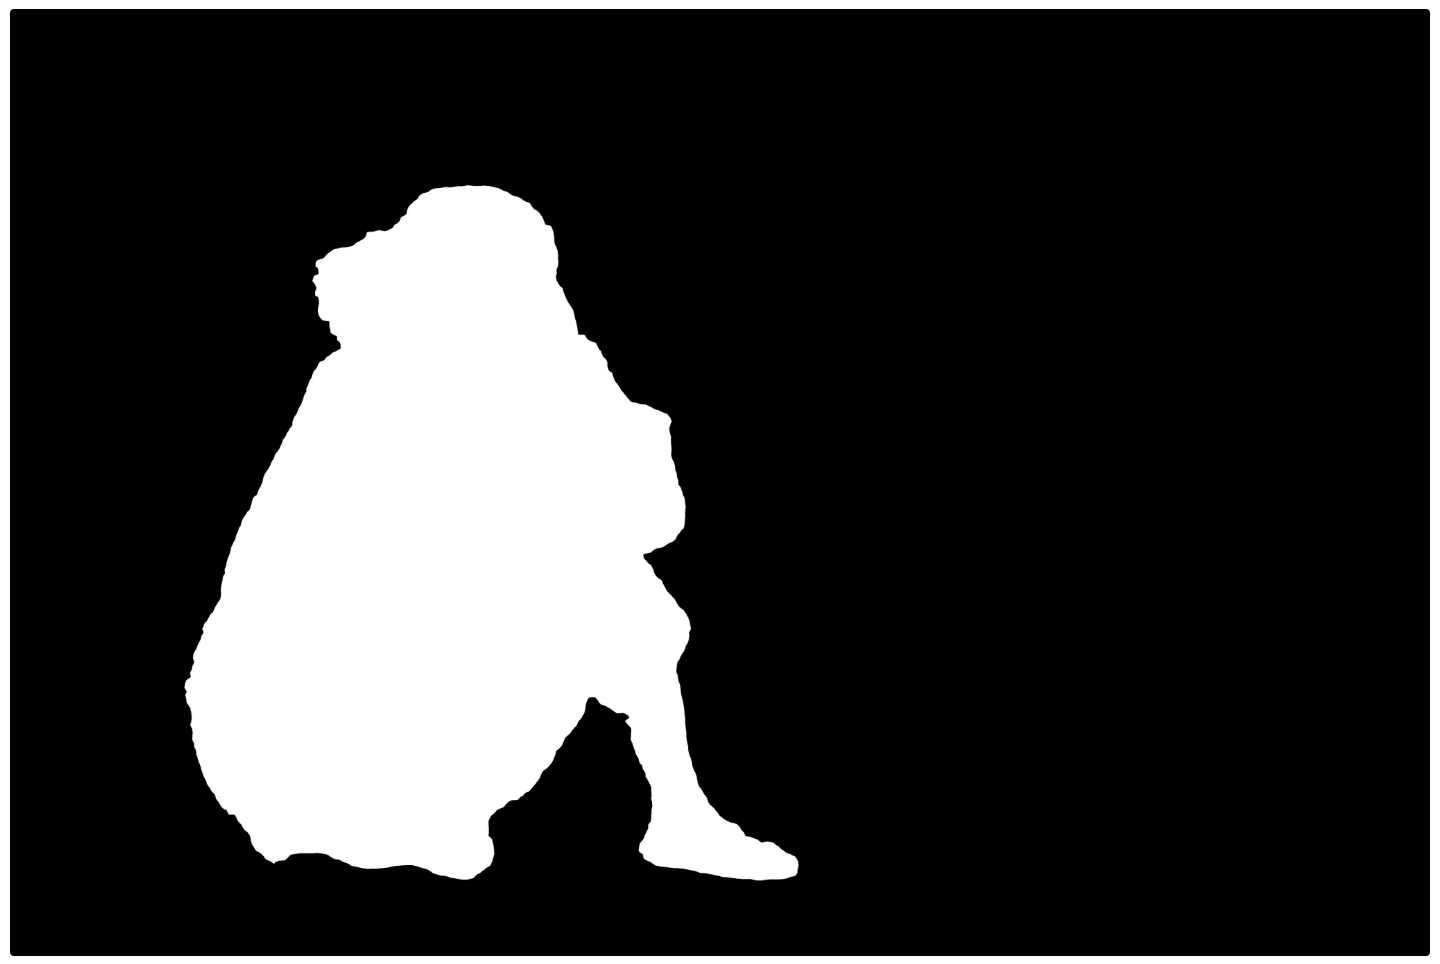
Below is a visualization of the segmentation masks generated by SAM 2 as prediction outputs:
Step 5: Compositing Foreground with Blurred Background
SAM 2 generates segmentation masks, represented as polygon points, for each foreground object detected by an object detection model. We can now utilize these masks based on the following algorithm to create an image with a blurred background while keeping the foreground objects sharp:
- Merge each mask generated by SAM 2 for a foreground object into a single mask, then convert the mask to 8-bit assigning 255 to foreground pixels and 0 to background pixels.
- Use this binary mask to extract the foreground region from the original image.
- Invert the mask to isolate the background.
- Apply the inverted mask to a blurred version of the image to extract the background.
- Combine the sharp foreground and the blurred background into a single final image.
- The result is a visually enhanced image with clear foreground elements and a softly blurred background.
This algorithm can be incorporated into our workflow using a Custom Python block. A Custom Python block is a user-defined processing step that enables us to extend or customize the workflow’s functionality beyond the built-in blocks provided by Roboflow.
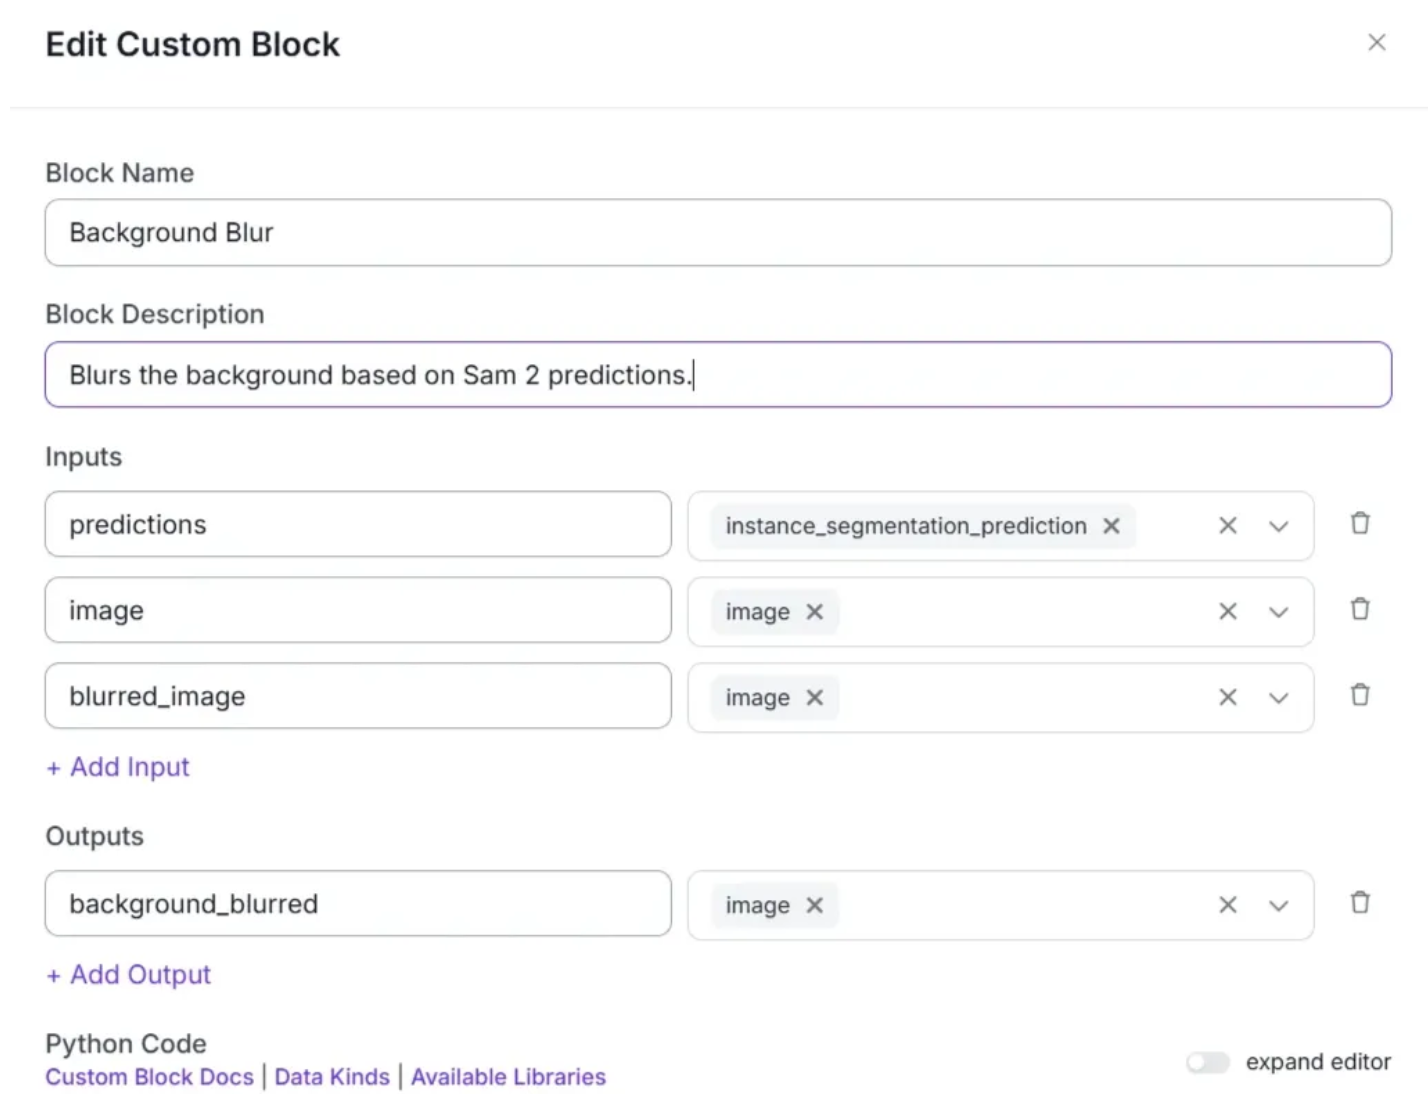
To add the Custom Python block, hover over the SAM 2 block and click the + icon that appears. In the search bar, type “Custom Python block” and select it to insert the block into your workflow. Then, configure the block settings as shown below:
In the Python Code input box, paste the code provided below. This code implements the exact algorithm described earlier:
import numpy as np
import cv2

def run(self, predictions, image, blurred_image) -> BlockResult:
    # Get NumPy arrays (H x W x 3 color channels) from the original and blurred images
    image_np   = image.numpy_image
    blurred_np = blurred_image.numpy_image

    # Get all object masks (n, H, W)
    # n = number of detected objects
    # Each mask is a black-and-white image showing where one object is
    mask_stack = predictions.mask

    # Combine all object masks into one
    # If a pixel is white (foreground) in any mask, mark it as foreground in the final mask
    mask_any = np.any(mask_stack > 0, axis=0)  # Output: 2D True/False mask (H x W)

    # Convert True/False mask to 8-bit format: 255 for foreground, 0 for background
    mask_bin = (mask_any.astype(np.uint8)) * 255

    # Cut out the foreground from the original image using the mask
    fg = cv2.bitwise_and(image_np, image_np, mask=mask_bin)

    # Invert the mask to get the background area
    mask_inv = cv2.bitwise_not(mask_bin)
    # Cut out the background from the blurred image
    bg = cv2.bitwise_and(blurred_np, blurred_np, mask=mask_inv)

    # Add the foreground and blurred background together
    composited = cv2.add(fg, bg)

    # Create a new image object with the combined result
    background_blurred = WorkflowImageData.copy_and_replace(
        origin_image_data=image,
        numpy_image=composited
    )

    return {"background_blurred": background_blurred} # Background Blurred Image
Since this Custom code block takes in predictions, image and blurred_image as inputs you need to configure this block to take in these values as inputs from other blocks as shown below:

Step 6: Setup Outputs
To output the background_blurred image produced by the final Custom Python block, make sure it is defined as an output parameter in the Outputs block and is properly linked to the background_blurred output of the preceding Custom Python block. To do this, click on the Outputs block and add the parameter as shown below:
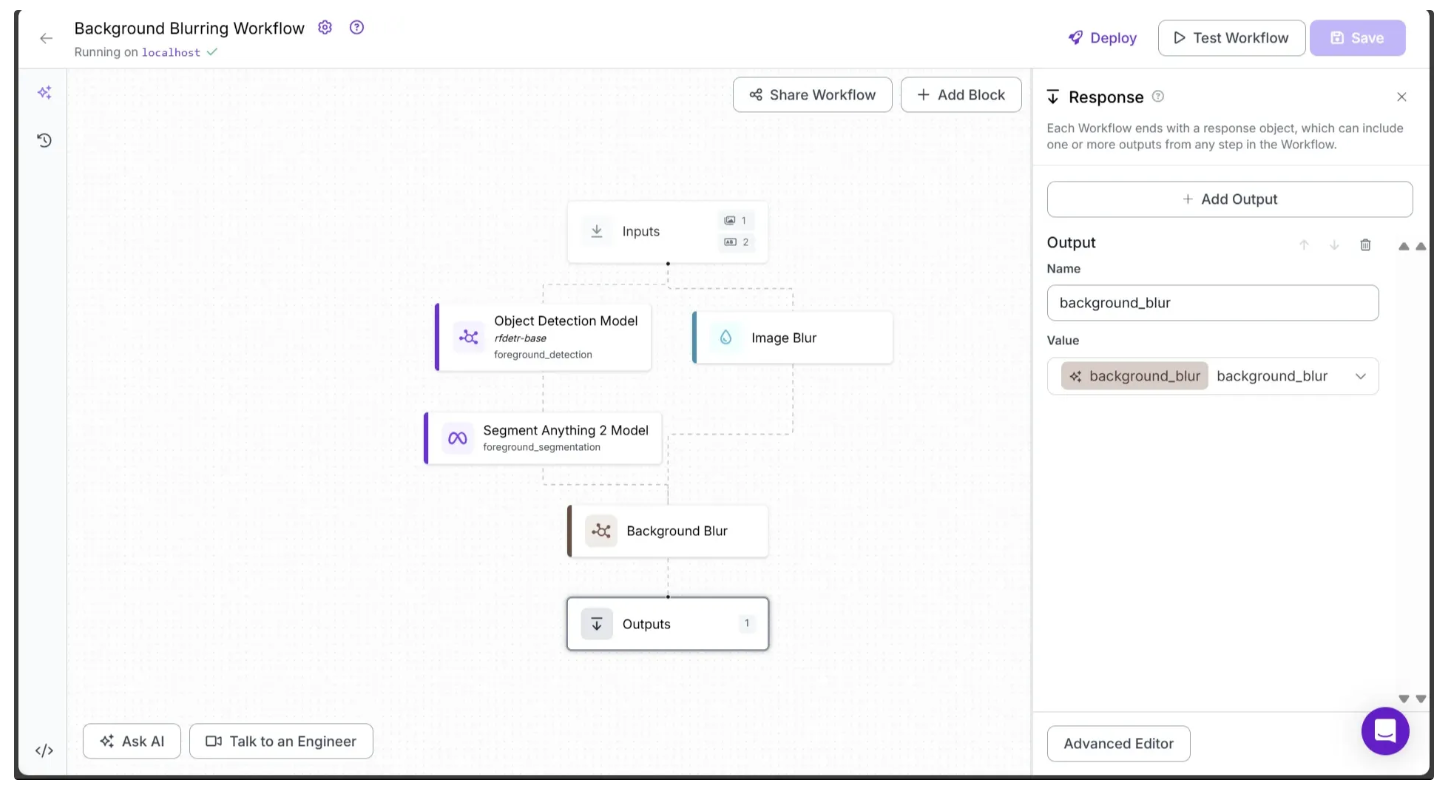
Note: You can also include intermediate values from previous blocks as outputs by adding them as output parameters and linking them to the corresponding output variables of earlier blocks.
Step 7: Running the workflow
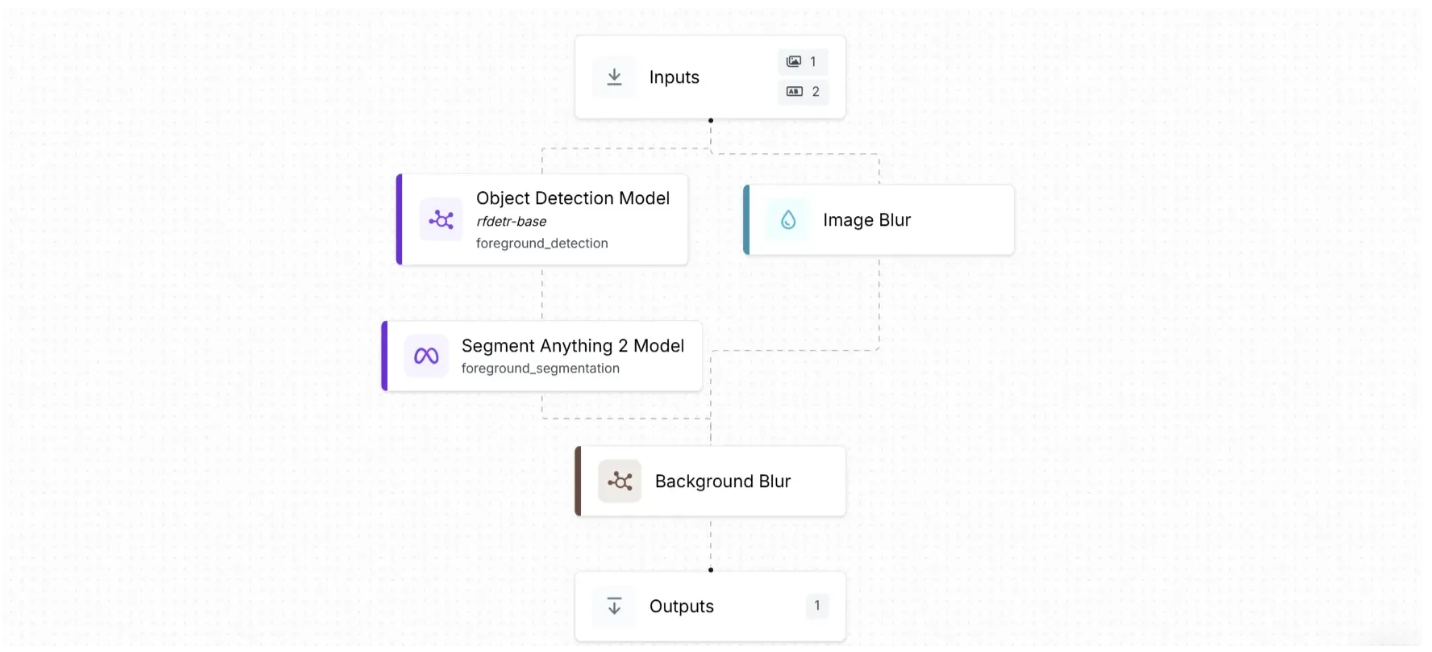
Below is our final workflow, which takes an input image and outputs a background-blurred version, with adjustable parameters to control the level and type of blurring.
You can run this directly from the workflow's UI, or use it via API, command line, and other methods. To find the code for different execution options, click the Deploy button in the top-right corner of the workflow.
For example, to access and run the workflow as an API using Python, start by running the following code:
pip install inference-sdkThen execute the below script:
from inference_sdk import InferenceHTTPClient
import base64

client = InferenceHTTPClient(
    api_url="http://localhost:9001",
    api_key="******************"
)

result = client.run_workflow(
    workspace_name="your-workspace",
    workflow_id="your-workflow-id",
    images={
        "image": "YOUR_IMAGE.jpg"
    },
    parameters={
        "blur_type": "gaussian",
        "kernel_size": 181
    },
    use_cache=True # Cache workflow definition for 15 minutes
)

# Extract base64 string from result
base64_data = result[0]['background_blur']

# Decode and save to file
with open("background_blur.png", "wb") as f:
    f.write(base64.b64decode(base64_data))

print("Image saved as background_blur.png")
Use Cases of Background Blurring with Computer Vision
- Enhancing foreground focus by minimizing background distractions
- Protecting privacy by obscuring sensitive or identifying information
- Improving aesthetics in social media posts and profile pictures
- Highlighting products in e-commerce images for better visual appeal
- Reducing visual clutter in documentation or presentation materials
How to Blur an Image's Background with Computer Vision
Background blurring is a powerful tool for enhancing visuals, protecting privacy, and emphasizing the foreground in images. With Roboflow’s intuitive workflow and the advanced SAM 2 model, building an automated background blur pipeline is simple and accessible for users of all technical backgrounds. Additionally, there's no need to manage model deployment for object detection or segmentation, as Roboflow provides these functionalities pre-integrated, enabling faster development and iteration.
To learn more about building with Roboflow Workflows, check out the Workflows launch guide.
You might also be interested in the free background remover template or face blur template.
Written by Dikshant Shah
Cite this Post
Use the following entry to cite this post in your research:
Contributing Writer. (Aug 4, 2025). Automate Image Background Blurring Using SAM 2. Roboflow Blog: https://blog.roboflow.com/background-blurring-sam-2/