

SAM 3, Meta's zero-shot instance segmentation model released November 2025, accepts text prompts to generate pixel-precise masks for any described object class, and its performance on domain-specific problems improves substantially when fine-tuned on labeled data from that domain. This guide walks through every step of fine-tuning SAM 3 on a custom dataset using Roboflow: uploading and annotating data with the SAM 3-powered Label Assist tool, generating a dataset version, launching a fine-tuning job, and then deploying the resulting model to the cloud or local hardware via Roboflow Workflows and the Roboflow Inference server.
Segment Anything 3 (SAM 3) is Meta's zero-shot segmentation model, released November 19th, 2025. Give it a text prompt like shipping container and it returns precise segmentation masks for every matching object in an image or video, a capability Meta calls Promptable Composable Segmentation (PCS). Unlike SAM and SAM 2, no clicks or boxes are required: the prompt carries the class.
Zero-shot performance is strong on common concepts and weaker on specialized ones, which is where fine-tuning comes in. In this guide, you will fine-tune SAM 3 on a custom dataset in Roboflow, then deploy the fine-tuned model in the cloud and on your own hardware.
Curious to try SAM 3 out of the box first? Run it free in the Roboflow Playground, or in the embedded widget below:
Want to learn how SAM 3 works from the people who built it? Watch our interview with two researchers from the Meta SAM 3 team:
How to Fine-Tune SAM 3
Without further ado, let’s get started!
Step 1: Prepare Dataset
To fine-tune SAM 3, you will need an instance segmentation dataset. This dataset should be annotated with precise masks that correspond to the objects that you want your fine-tuned model to be able to identify.
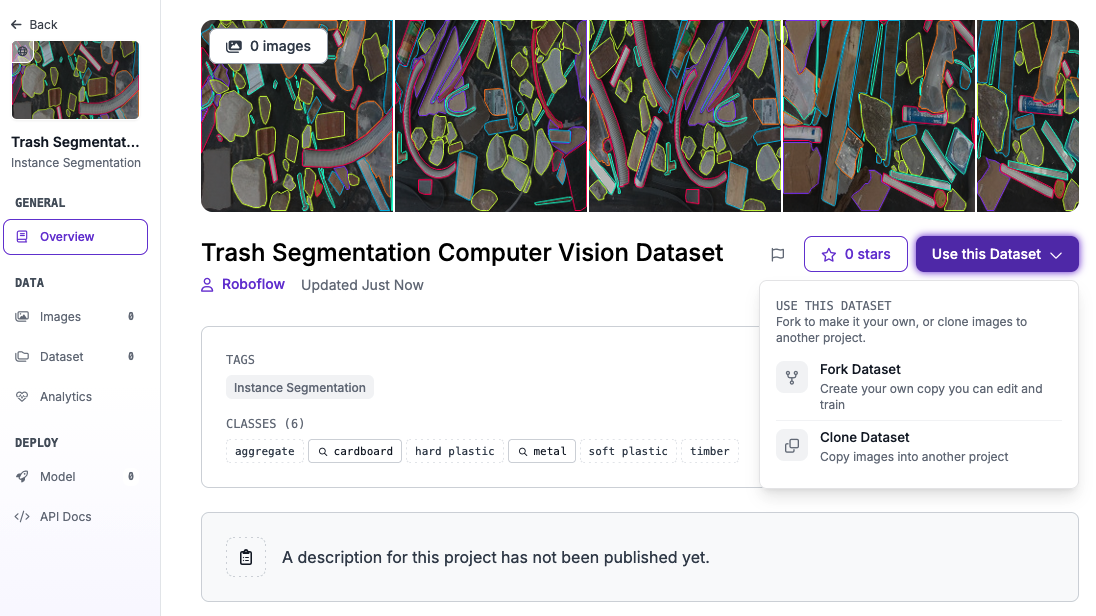
For this guide, we are going to use a dataset that identifies various different types of trash. This dataset is available on Roboflow Universe, the world’s largest repository of labeled computer vision data on the web.
To follow along with this guide using our trash dataset, you can open the dataset on Roboflow Universe and click “Fork Dataset” to copy the dataset into your account.
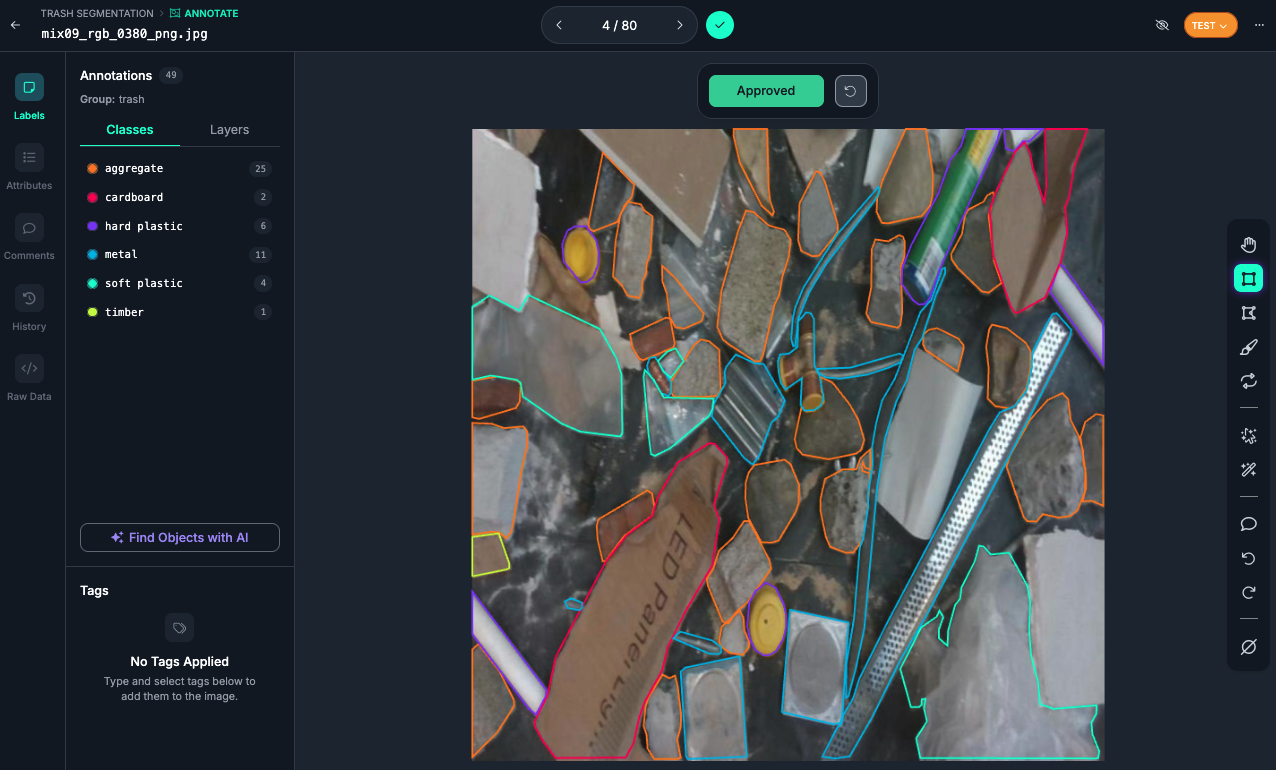
Here is an example image in our dataset:
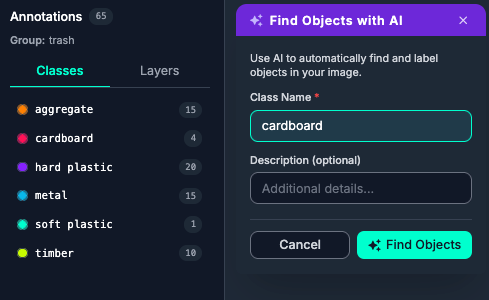
To fine-tune SAM 3 for a different task, you can use Roboflow to prepare a dataset using our SAM 3-powered Label Assist tool. This tool lets you provide a text prompt to identify all objects in an image, or hover over an object to generate a segmentation mask for that specific object.
Step 2: Create a Dataset Version
With a dataset ready, the next step is to create a dataset version. A dataset version is a snapshot of your dataset frozen in time. You will use the dataset version to train a model.
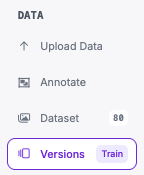
To get started, first click “Versions” in the left sidebar:
Then click “Create New Version":
You will then be taken to a page where you can configure your dataset version.
In Roboflow, you can apply various augmentations and preprocessing steps to prepare your dataset for use in training.
For this guide, we need to apply one preprocessing step: to resize our data to 1008x1008. This is the input size that our SAM 3 fine-tuning pipeline expects.
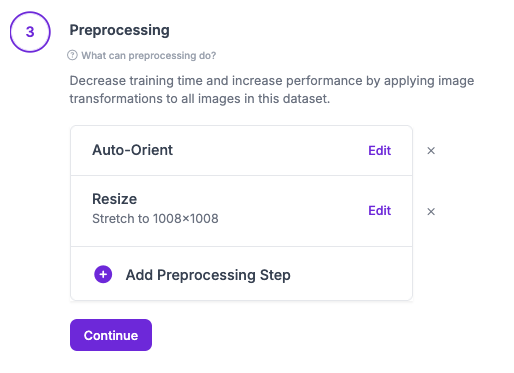
For your first training job, we recommend applying no augmentations so that you can see how well your model performs before introducing augmented data.
Once you have applied the requisite data resizing preprocessing step, click “Generate” at the bottom of the page to generate your dataset. The amount of time this will take depends on the size of the dataset.
Step 3: Start a SAM 3 Fine-Tuning Job
Once your dataset version is ready, you will be taken to a page on which you can start training a model using your dataset.
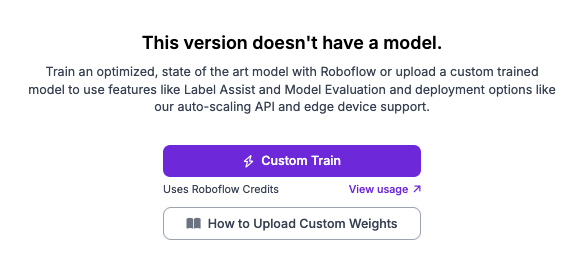
Click the “Custom Train” button to start configuring a training job:
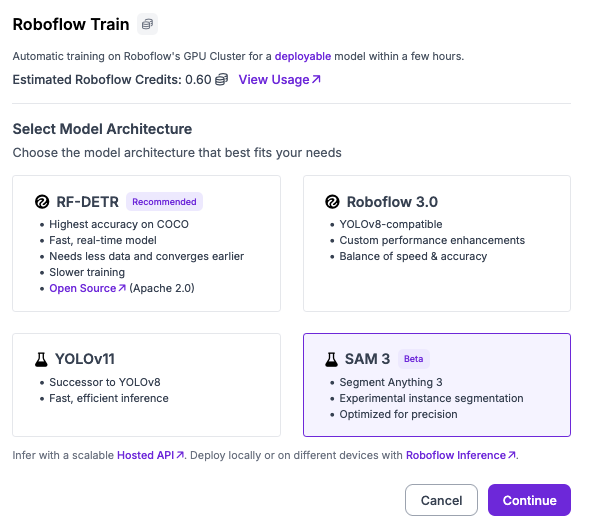
A window will appear with a selection of models from which you can choose for fine-tuning. For this guide, select “SAM 3”:
You will then be asked to select the checkpoints from which you want to start training. We support fine-tuning from the base SAM 3 checkpoints:
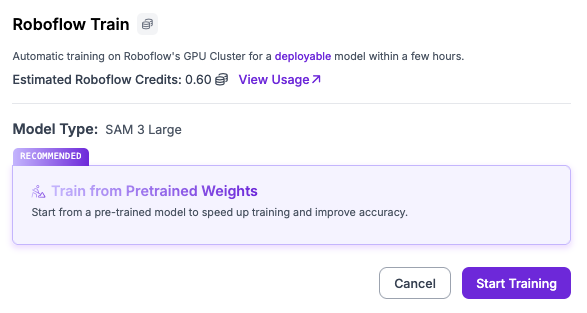
Click “Start Training” to start your training job.
You will receive an estimate of how long we think it will take to fine-tune your model.
As your model trains, you will be able to see training graphs that show the progress being made throughout the training run:
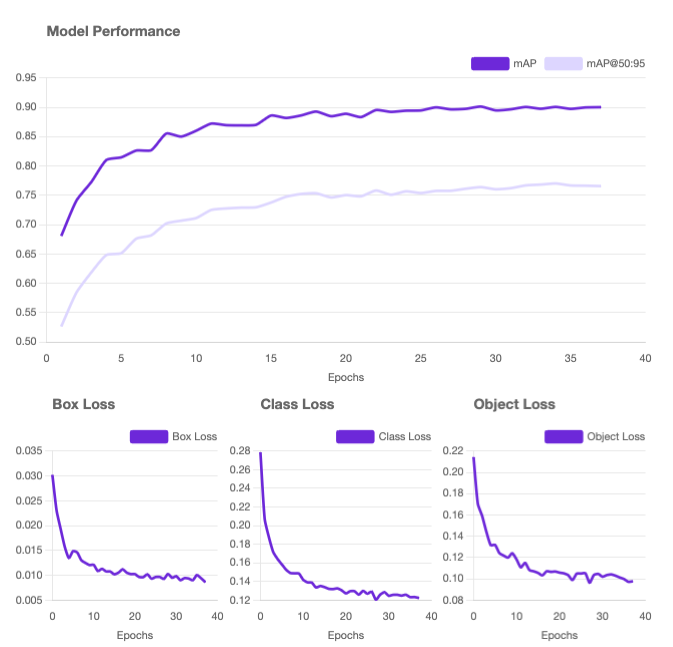
Once your model has finished training, you can start using it in the cloud and on your own hardware using Roboflow Workflows.
Step 4: Use Your Fine-Tuned SAM 3 Model
Now that your model has finished training and you have tested it, you are ready to use it in an application. We are going to use Roboflow Workflows to deploy our model.
Roboflow Workflows lets you use a wide range of “blocks” with which you can build logic on top of your model. There are over 100+ blocks you can use to build an application to do everything from running a model to displaying detections to sending alerts when a model returns a specific detection.
For this guide, we’ll build a Workflow that runs our SAM 3 model and displays the results. We will then deploy our model using the Roboflow Serverless API. Later in this guide, we will also discuss how to deploy your model on your own hardware with Roboflow Inference, our open source inference server.
To get started, click “Try Workflows” on your dataset version page:
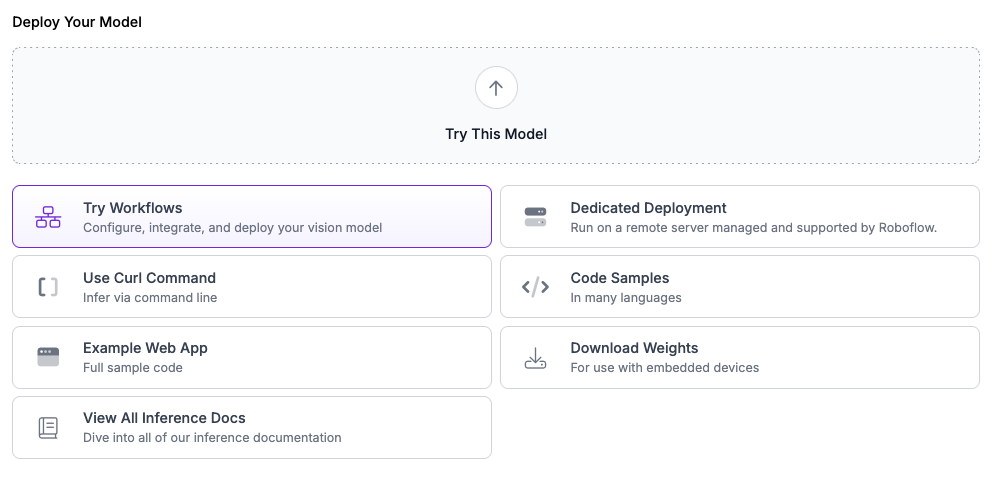
You will then be able to choose one of any of the several pre-built Workflow templates as a starting point for your SAM 3 deployment. Let’s choose the Workflow that will run our model, display the predictions, and count the number of detections for a given input image:
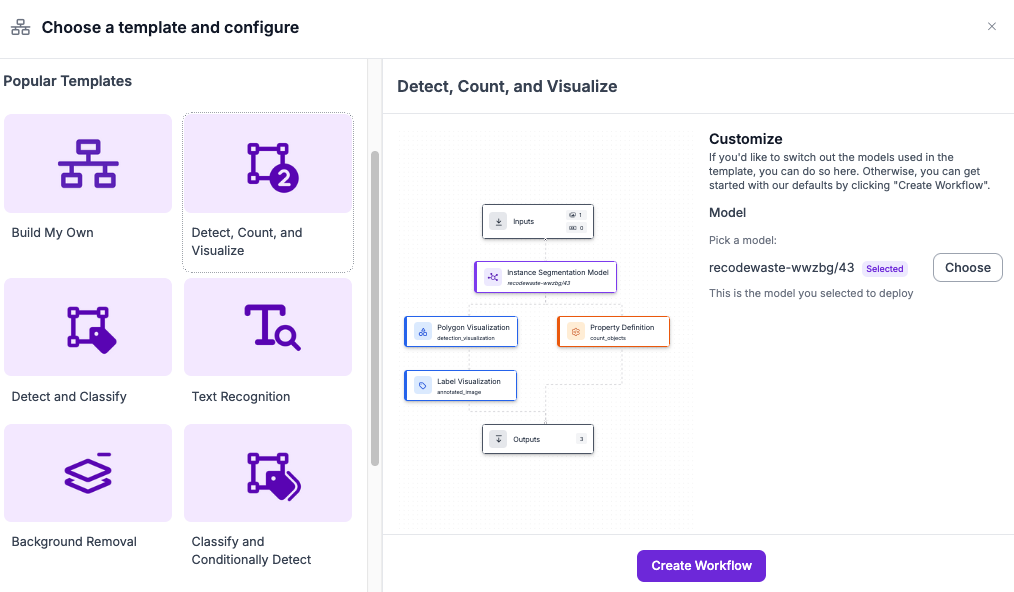
Click “Continue” to create your Workflow.
You will then be taken to the Workflows editor where you can build, try, and extend Workflows:
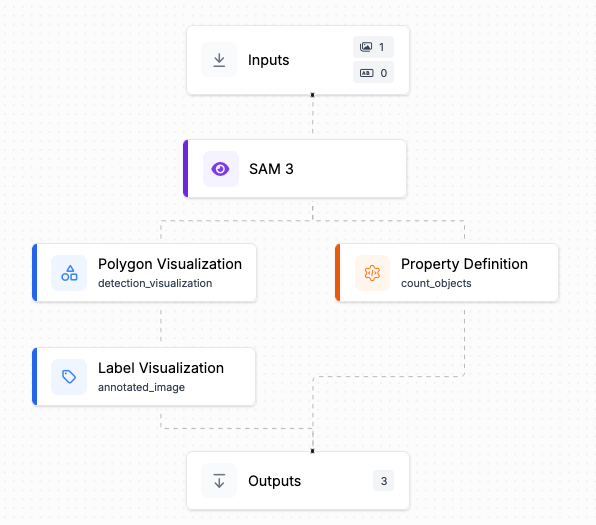
This Workflow will:
- Run our fine-tuned SAM 3 instance segmentation model.
- Plot the masks returned by the model.
- Plot the labels that correspond to the objects SAM 3 has identified.
We can edit the SAM 3 block to specify a custom prompt. For this guide, set the prompt to "cardboard".
Let’s try our Workflow as it is. Click “Test Workflow” at the top of the page and drag and drop an image that you want to use to test your model:
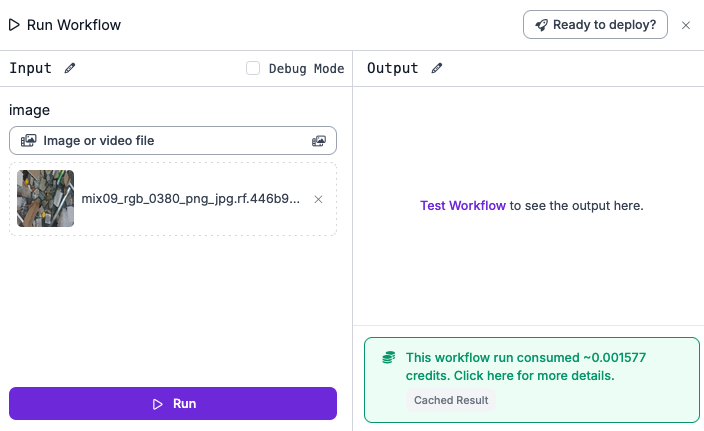
Then, click “Test Workflow” at the bottom of the page. You will see the results from your Workflow:
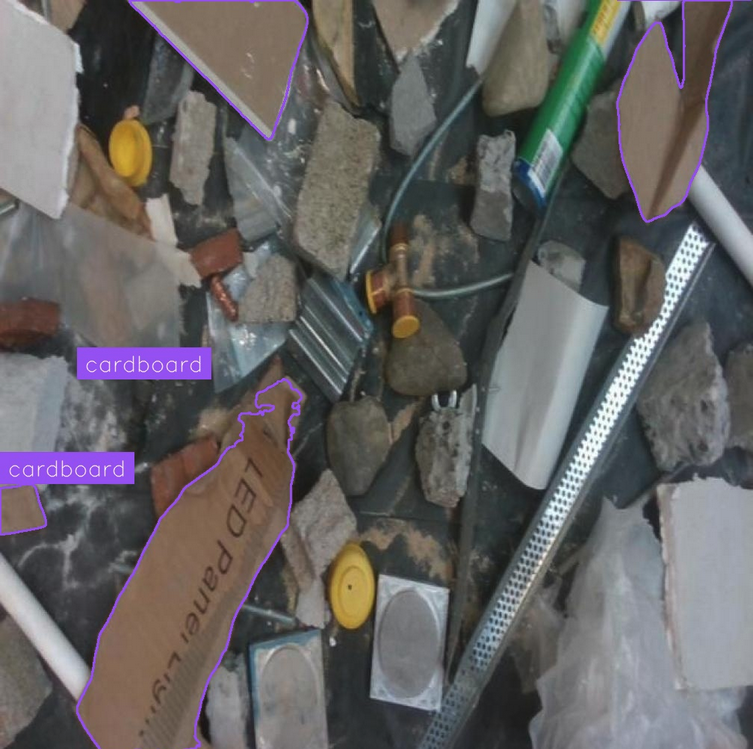
Our Workflow is successfully running our model and showing us the results from the model plotted on our input image!
We can now start deploying our model.
Step 5: Deploy SAM 3
Out-of-the-box, all Roboflow Workflows have a Serverless API that you can use to call your Workflow. You can also deploy Workflows on your own hardware using Roboflow Inference, our on-device inference server.
To deploy our SAM 3 Workflow, we can click “Deploy” in the top navigation bar within the Workflows editor. Choose Image as your input option, then choose the option to “Integrate with Your App or Website”. You will then see a code snippet you can use to call your cloud API that runs your SAM 3 Workflow:
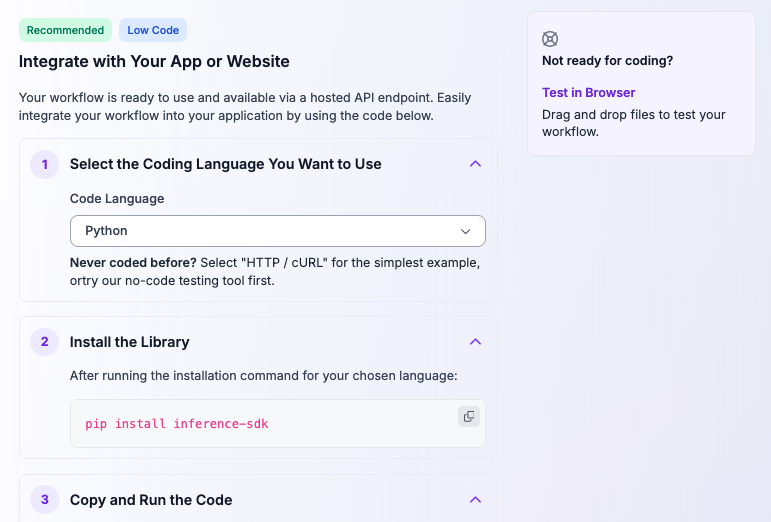
Here is an example code snippet that calls our cloud API:
# 1. Import the library
from inference_sdk import InferenceHTTPClient

# 2. Connect to your workflow
client = InferenceHTTPClient(
    api_url="https://serverless.roboflow.com",
    api_key="API_KEY"
)

# 3. Run your workflow on an image
result = client.run_workflow(
    workspace_name="roboflow-jvuqo",
    workflow_id="SAM 3-workflow",
    images={
        "image": "YOUR_IMAGE.jpg" # Path to your image file
    },
    use_cache=True # Speeds up repeated requests
)

# 4. Get your results
print(result)
To use this code, we can pass in our own input image. We can also extend our code to display the output image with mask visualizations that our Workflow generates with the following code:
import supervision as sv
import cv2

image = cv2.imread("img.jpg")
box_annotator = sv.BoxAnnotator()
annotated_frame = box_annotator.annotate(
    scene=image.copy(),
    detections=result
)
sv.plot_image(annotated_frame)
Here is an example snippet of the JSON output of our Workflow:
{'model_predictions': {'image': {'width': 1008, 'height': 1008}, 'predictions': [{'width': 88.0, 'height': 290.0, 'x': 44.0, 'y': 348.0, 'confidence': 0.8046875, 'class_id': 0, 'points': [{'x': 0.0, 'y': 203.0}, {'x': 0.0, 'y': 304.0}, {'x': 1.0, 'y': 304.0} ...}Here is the visualisation that our Workflow generated:
Our Workflow successfully plots segmentation masks for our input image!
To deploy the model on your own server or computer, click “Deploy” in the top navigation bar, then select Image as an input, then choose the option to “Run on Your Server or Computer”. You will then receive instructions for how to run your Workflow on your hardware:
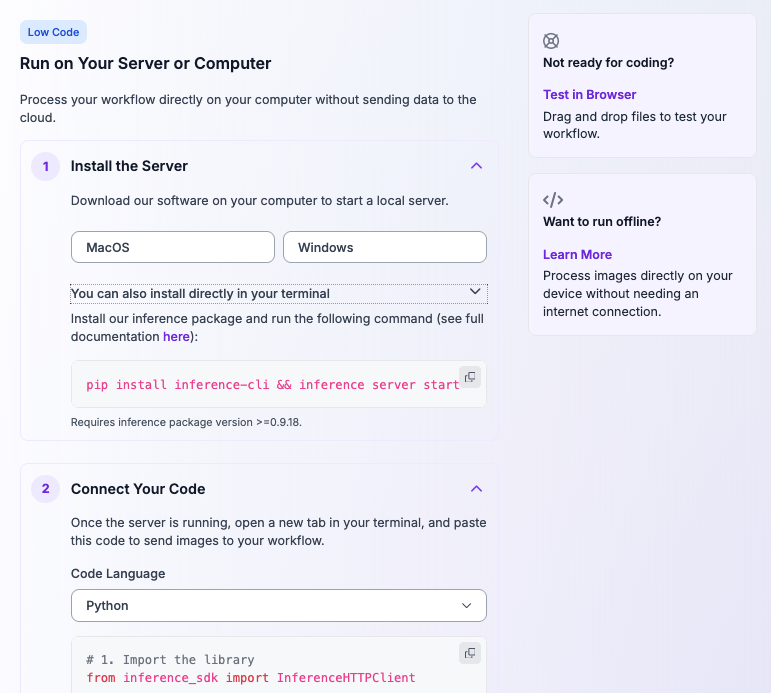
The server setup instructions ask you to set up a locally-running instance of Roboflow Inference, our open source computer vision inference server. You can do this with either our pre-packaged binaries or using your terminal. The instructions then provide a code snippet to call your local inference server.
When you first make a request to your local inference server, your SAM 3 model weights will be downloaded and cached locally. This may take several minutes depending on the strength of your internet connection. Then, the inference server will return a response to your request, and be faster in subsequent requests because the model weights will be ready to use.
Use Roboflow Agent to Fine-Tune SAM 3
If you would rather describe the outcome than click through the steps, Roboflow Agent can run the platform side of this tutorial from a plain-text prompt. For example:
Fork the trash segmentation dataset from Universe, create a dataset version
resized to 1008x1008 with no augmentations, fine-tune SAM 3 from the base
checkpoint, and build a Workflow that runs the model with the prompt
"cardboard" and visualizes the masks.
The Agent creates the project, generates the version with the required preprocessing, starts the fine-tuning job, and assembles the Workflow, with each step surfaced in the chat for your review.
It is especially useful for iteration: when evaluation shows a weak class, telling the Agent to label more examples of that class and retrain is one instruction instead of another pass through the editor.
Going Further: From Fine-Tuned SAM 3 to Production Scale
Two patterns are worth knowing once your fine-tuned model works. For video, the SAM 3 Video Tracker block segments and tracks objects across frames from the same text prompts, maintaining identities through occlusion. And for high-volume deployments where SAM 3's inference cost adds up, use your fine-tuned model as a labeling engine: auto-label a larger dataset with SAM 3 and train RF-DETR Seg, a compact real-time segmentation model, on the output. You keep SAM 3 quality masks at a fraction of the per-image cost, in an Apache 2.0 model that runs on edge hardware.
SAM 3 Fine Tuning
Fine-tuning SAM 3 turns a general-purpose segmentation model into a specialist on your data, with labeling, training, and deployment in one loop. Create a free Roboflow account to label your dataset with SAM 3-powered Label Assist and try the model zero-shot, then start a fine-tuning job when you are ready. To learn more about the model itself, read What is SAM 3?
Do I need a paid plan to fine-tune SAM 3?
Yes, SAM 3 fine-tuning is available on paid Roboflow plans with usage-based billing. Zero-shot SAM 3 in Workflows and SAM 3-powered labeling are available to try free.
When should I fine-tune SAM 3 instead of using it zero-shot?
Fine-tune when zero-shot prompts miss your domain-specific concepts: specialized parts, subtle defect types, or classes where the text prompt is ambiguous. If zero-shot prompts already segment your objects reliably, skip fine-tuning and deploy directly.
What dataset format does SAM 3 fine-tuning need?
An instance segmentation dataset with polygon masks, resized to 1008x1008 in your dataset version. Label it in Roboflow with SAM 3-powered Label Assist, or fork a labeled dataset from Universe.
Can I run my fine-tuned SAM 3 model on my own hardware?
Yes. Deploy the Workflow with Roboflow Inference on your own server or edge device; weights download and cache locally on first request, and the API interface matches the hosted version.


Cite this Post
Use the following entry to cite this post in your research:
James Gallagher. (May 15, 2026). How to Fine-Tune Segment Anything 3 (SAM 3) on a Custom Dataset. Roboflow Blog: https://blog.roboflow.com/fine-tune-sam3/