
Object detection has come a long way. It can now detect everything from traffic signs, facial emotions, and manufacturing defects. But what if you want to detect something more custom, like different cat breeds in real-world images?
In this guide, we'll walk through building a custom object detection pipeline from scratch, using cat breed detection as an example. We'll start with dataset creation, move on to training and evaluation, and finally end with deployment. This entire process can be simplified with Roboflow.
Let’s get started!
How to Build a Custom Object Detection Pipeline
Firstly, what is object detection? Object detection is a computer vision technique that identifies and localizes objects within an image. Unlike classification, which only tells you what is in an image, detection tells you what and where by drawing bounding boxes around objects of interest. In our specific case, we'll be determining the cat's breed and its location in the picture.
Step 1: Collect Your Dataset
Finding data is the first step in building an object detection model. You can use Roboflow Universe, a large collection of publicly available computer vision datasets and models, to find data for your project.
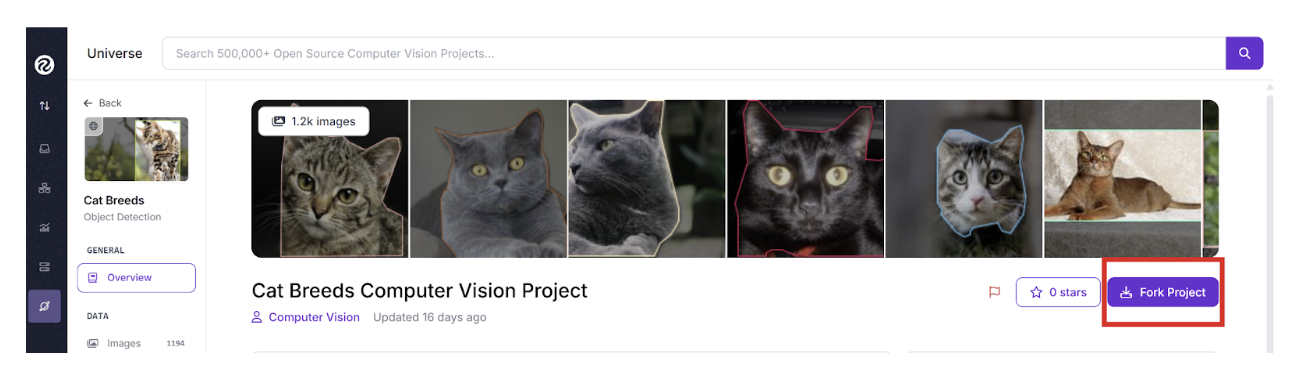
- Find a Dataset: Go to Roboflow Universe and search for a dataset related to your project. The platform hosts a wide range of datasets for various tasks, including object detection, classification, and segmentation. In this tutorial, we will use this cat breeds dataset.
- Fork the Project: Once you find a suitable dataset, click the Fork Project button in the top right corner. This action copies the entire dataset and its annotations into your own Roboflow Workspace.
- Use Your Workspace: After forking, the dataset is now in your personal workspace, where you have full control. From here, you can modify it, add more images, or proceed to the next steps of the computer vision pipeline, like training and deployment.
Label Your Data
Fortunately, this dataset is already labeled. To build a high-performing model, having high-quality, labeled data is essential. If you upload your own images, it's crucial to have a sufficient number of pictures for training and testing. Roboflow offers a variety of labeling options, so you can label images yourself, collaborate with a team, or use auto-labeling features.
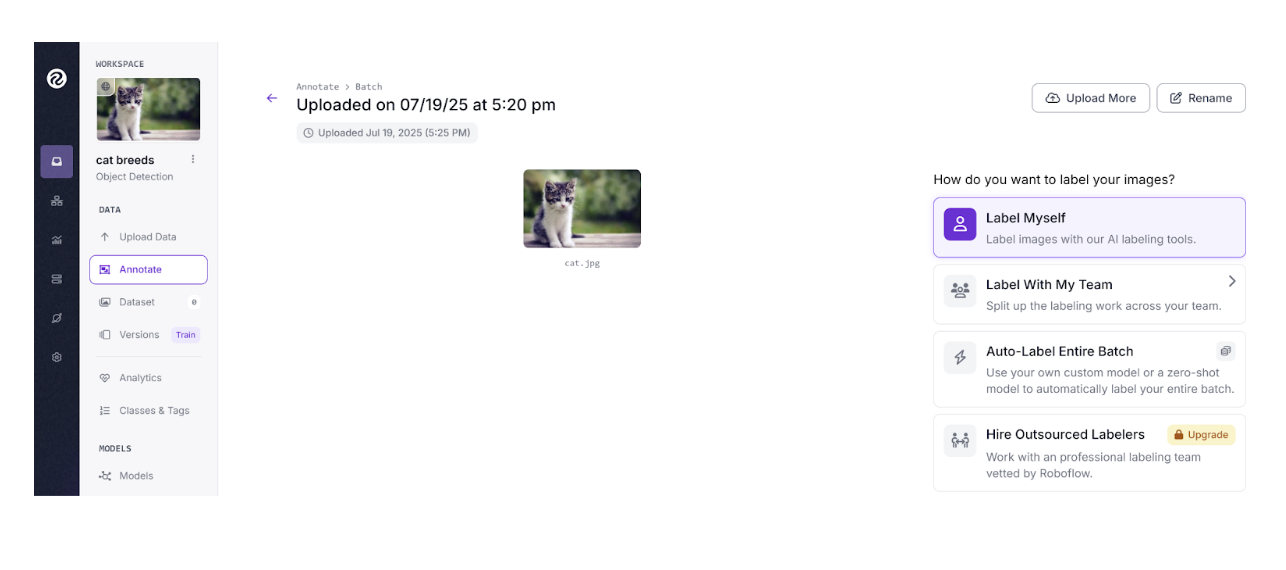
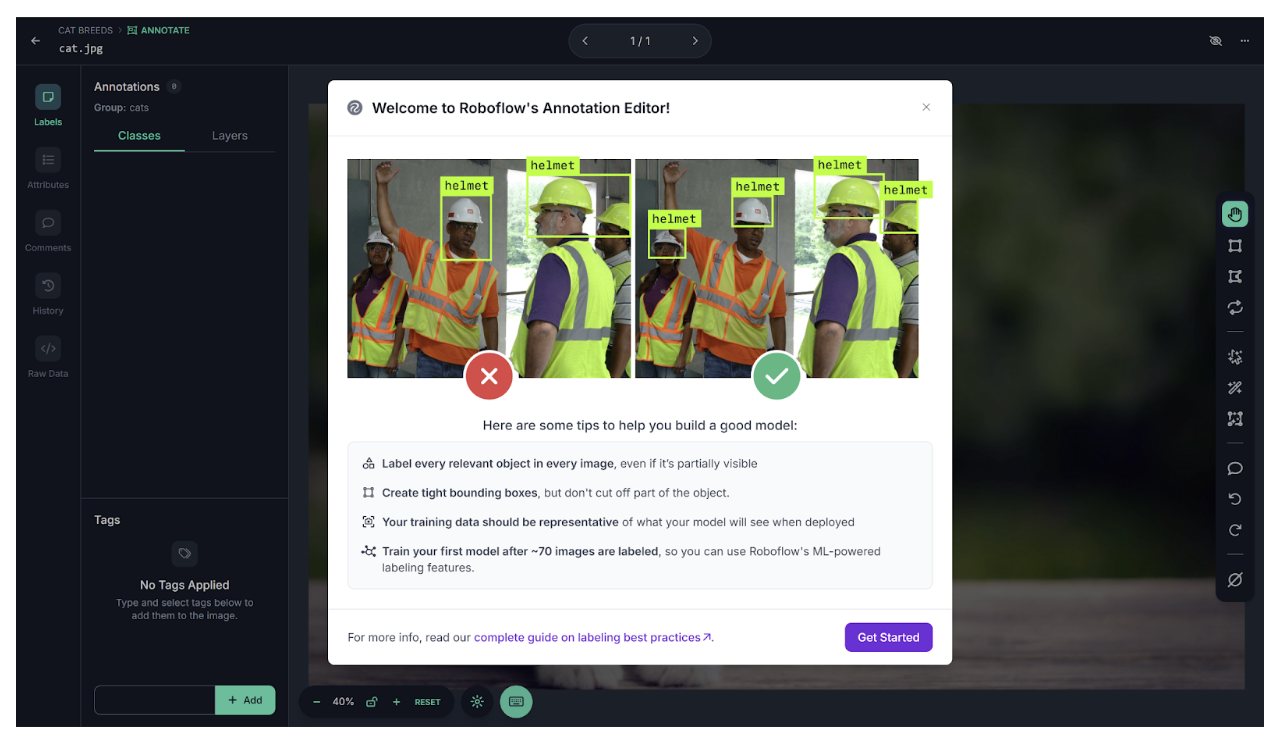
If you choose to label images yourself or with a team, Roboflow offers a user-friendly, built-in labeling feature.
Key Steps for Dataset Creation and Labeling
When creating and labeling your dataset, remember these crucial steps for a successful model:
- Consistency in Label Names: Use consistent naming conventions for all your labels (e.g., use the same case styling).
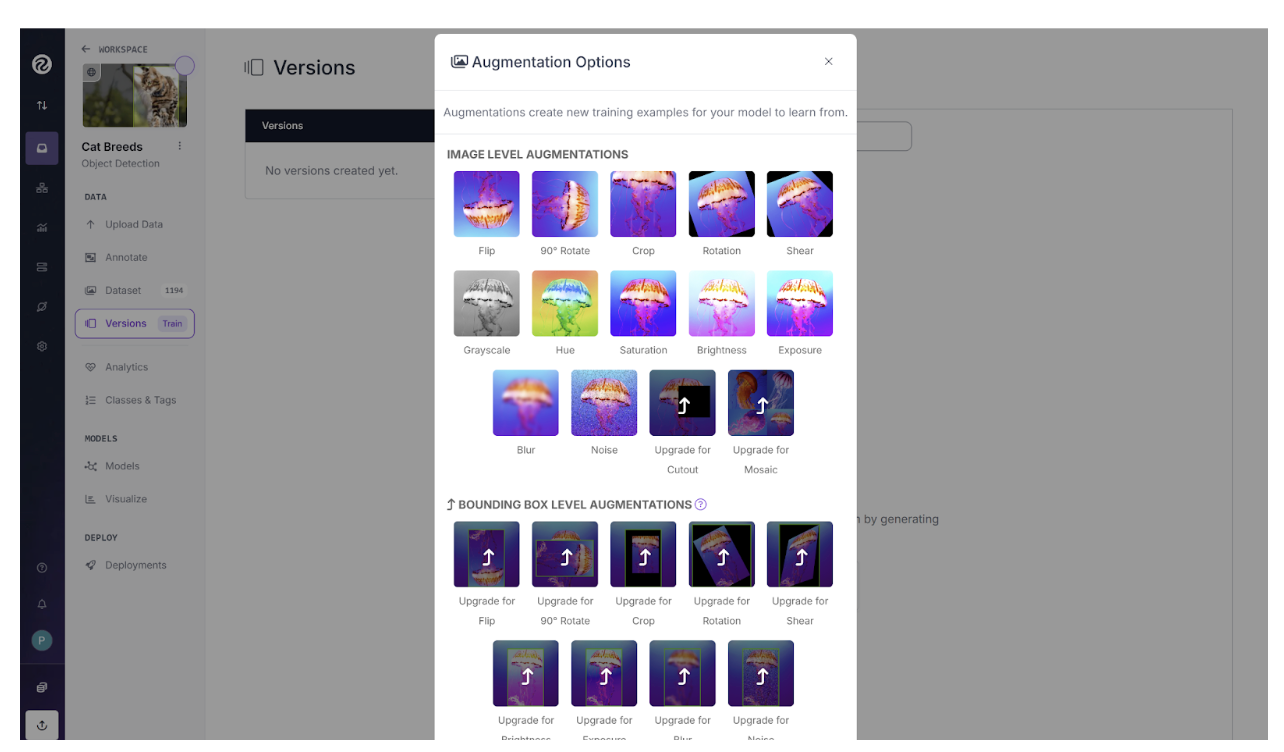
- Data Augmentation: Include augmentations such as partial occlusions, various angles, and different lighting conditions. Roboflow automates this step in the Augmentation section.
- Gather Enough Images: A larger number of images per class generally leads to better model performance. It’s best to start by gathering as many images as you can for each class.
Dataset Creation with Roboflow
After forking a project, customize your dataset by adding your own preprocessing and augmentation steps.
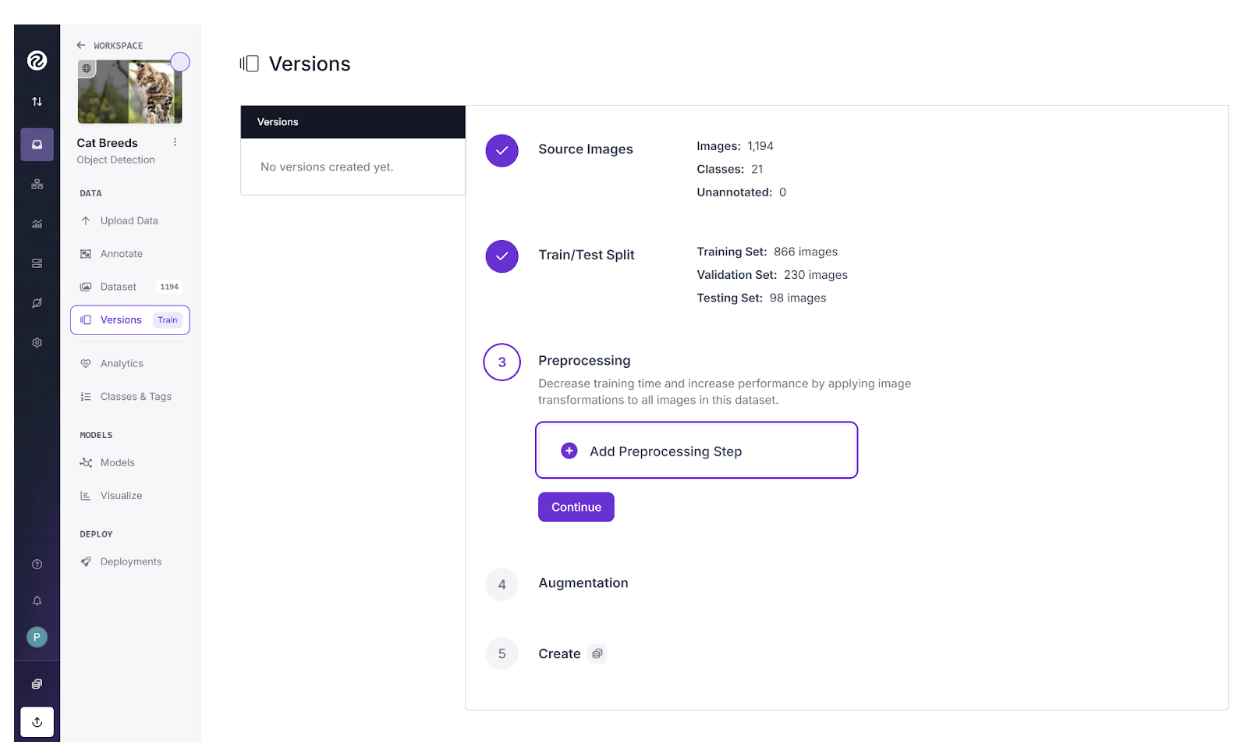
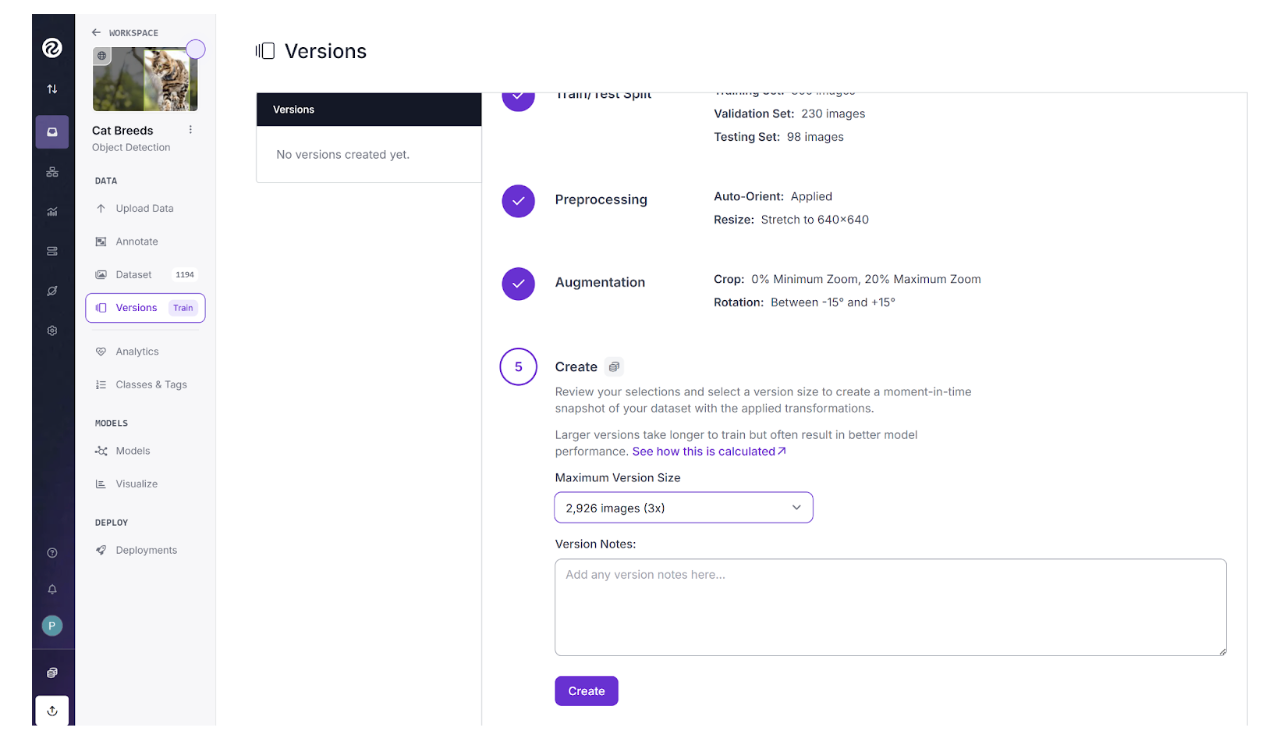
When preparing your dataset, preprocessing is a key step to ensure consistency and improve model performance. For this project, we'll apply two common preprocessing steps: auto-orient and resize. While we are only using these two, Roboflow offers a variety of other options you can use, depending on the needs of your specific project.
Auto-Orient: The auto-orient feature automatically corrects the orientation of images. Sometimes, an image's metadata can cause it to display sideways or upside down, even if it looks correct on your computer. Auto-Orient ensures that all images are properly oriented before they are used for training.
Resize: Resizing is crucial for ensuring that all images in your dataset have the same dimensions. Training a model on images of different sizes can be inefficient and lead to poor results. By resizing every image to a uniform width and height, you create a standardized dataset that a model can process effectively.
Furthermore, when preparing your dataset for training, data augmentation is also an important step. It helps improve your model's performance and robustness by artificially creating new, modified versions of your images. For this project, we'll use two common augmentation techniques: cropping and rotation.

Cropping: Cropping helps the model learn to recognize objects even when they are partially visible. It creates new images by zooming in on parts of the original image, which forces the model to focus on specific features of the object rather than the entire scene.
Rotation: Rotation helps the model learn to detect objects regardless of their orientation. It creates new images by rotating the original image by a certain number of degrees, which can be useful for objects that might appear at different angles in real-world scenarios.
With our preprocessing and augmentation steps selected, all that's left to do is click the Create button. Roboflow will then take the forked dataset and create a new version with all of our chosen modifications applied.
Step 2: Train Your Model
After creating your new dataset version by selecting preprocessing and augmentation steps, the next step is to custom train your model. Roboflow automates this process, so you can start training as soon as the dataset generation is complete. The platform will guide you to a training page where you can begin the process with a few simple clicks.
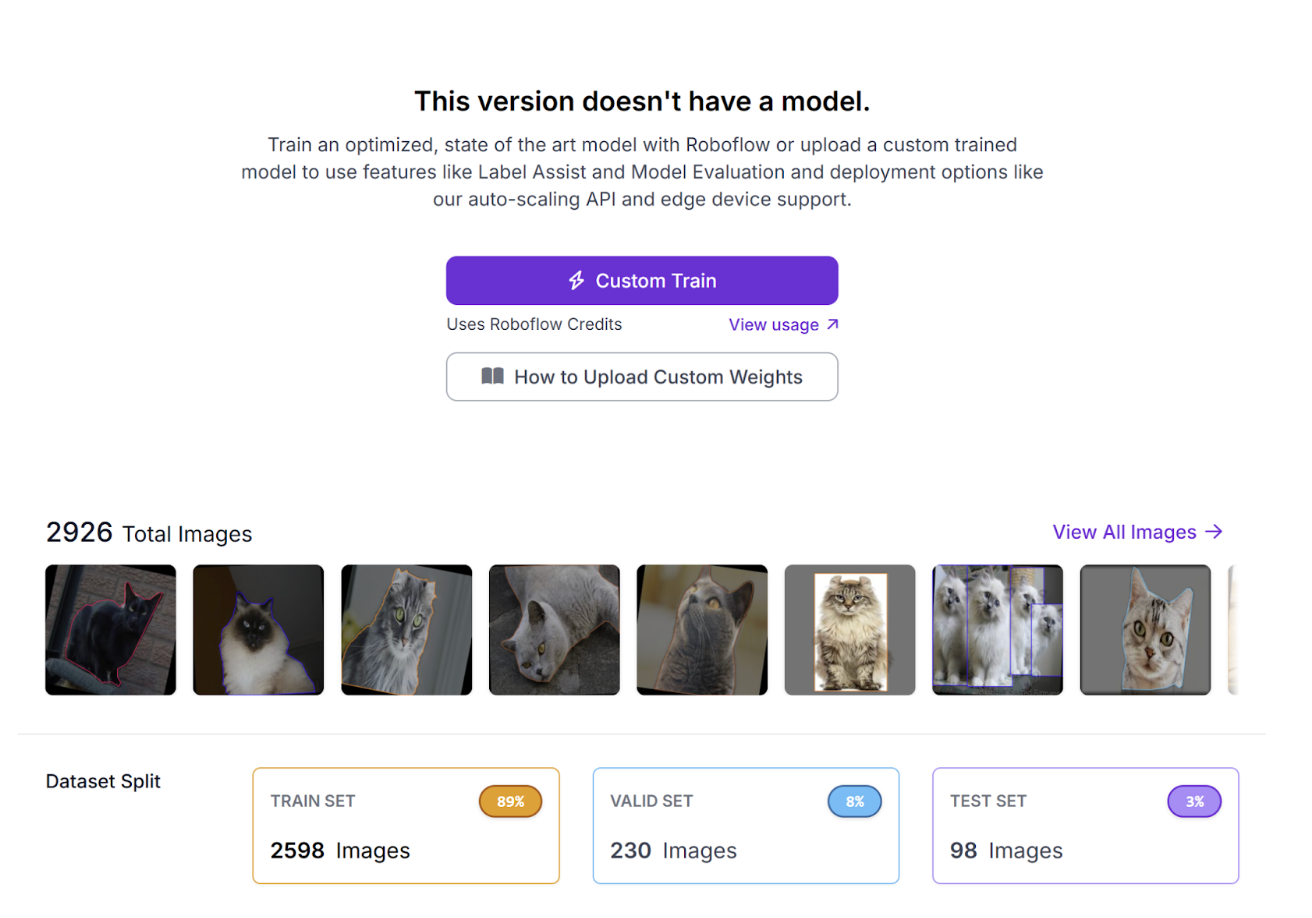
Click on Custom Train and a pop-up window will appear with the available models. For this guide, we will use the RF-DETR model.
RF-DETR is an excellent choice because it's known for its faster convergence, which means it trains more quickly while still delivering high accuracy. This makes it a great option for getting strong results in less time.

Next, we will choose a size for the model. Choosing the Small size provides excellent results for our specific task without the massive computational resources and training time a larger model would require.
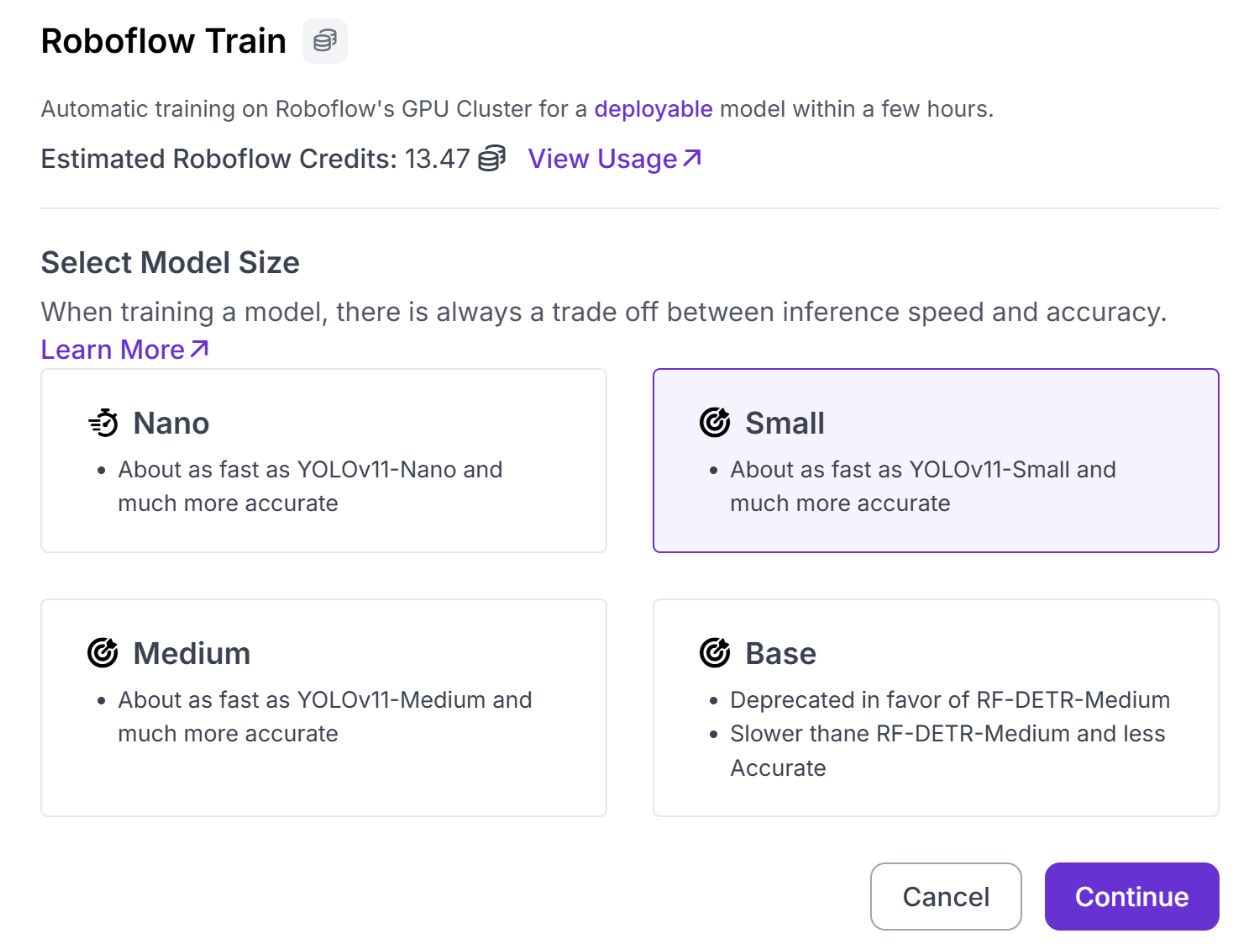
Lastly, it will ask you to select a checkpoint. By using a public checkpoint, we're leveraging a pre-trained model that has already learned a broad range of features, allowing us to start our training from an advanced state rather than from scratch. This approach is the fastest and most cost-effective way to get a high-quality, functional model.
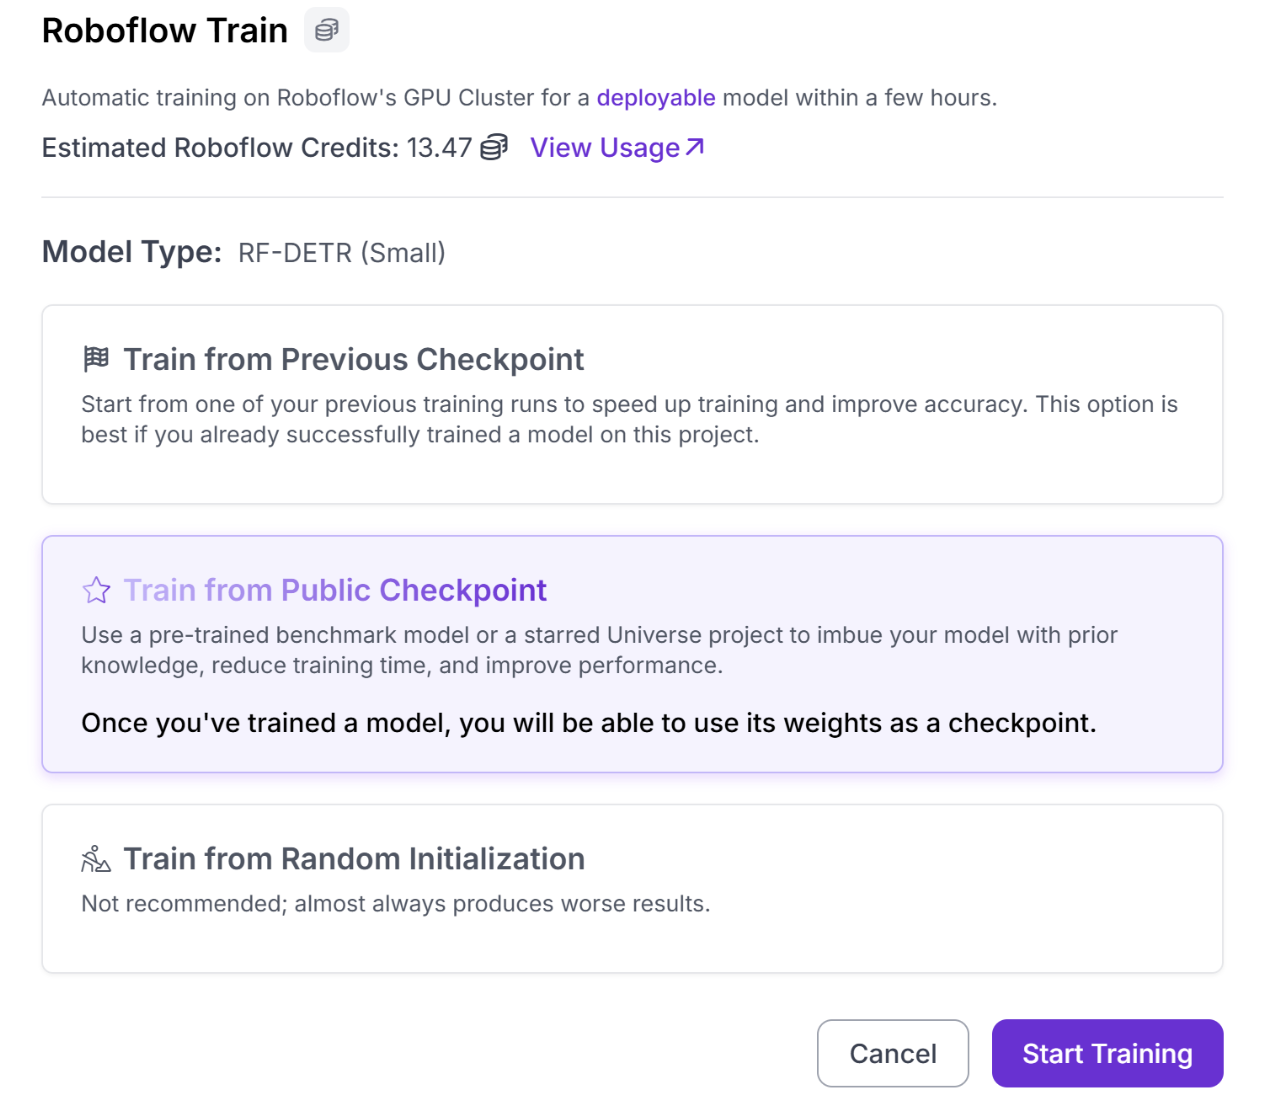
Finally, click Start Training. The estimated time will be shown, and an email will be sent to you when the training is complete. Throughout the process, you can monitor live metrics to see how well the model is performing.
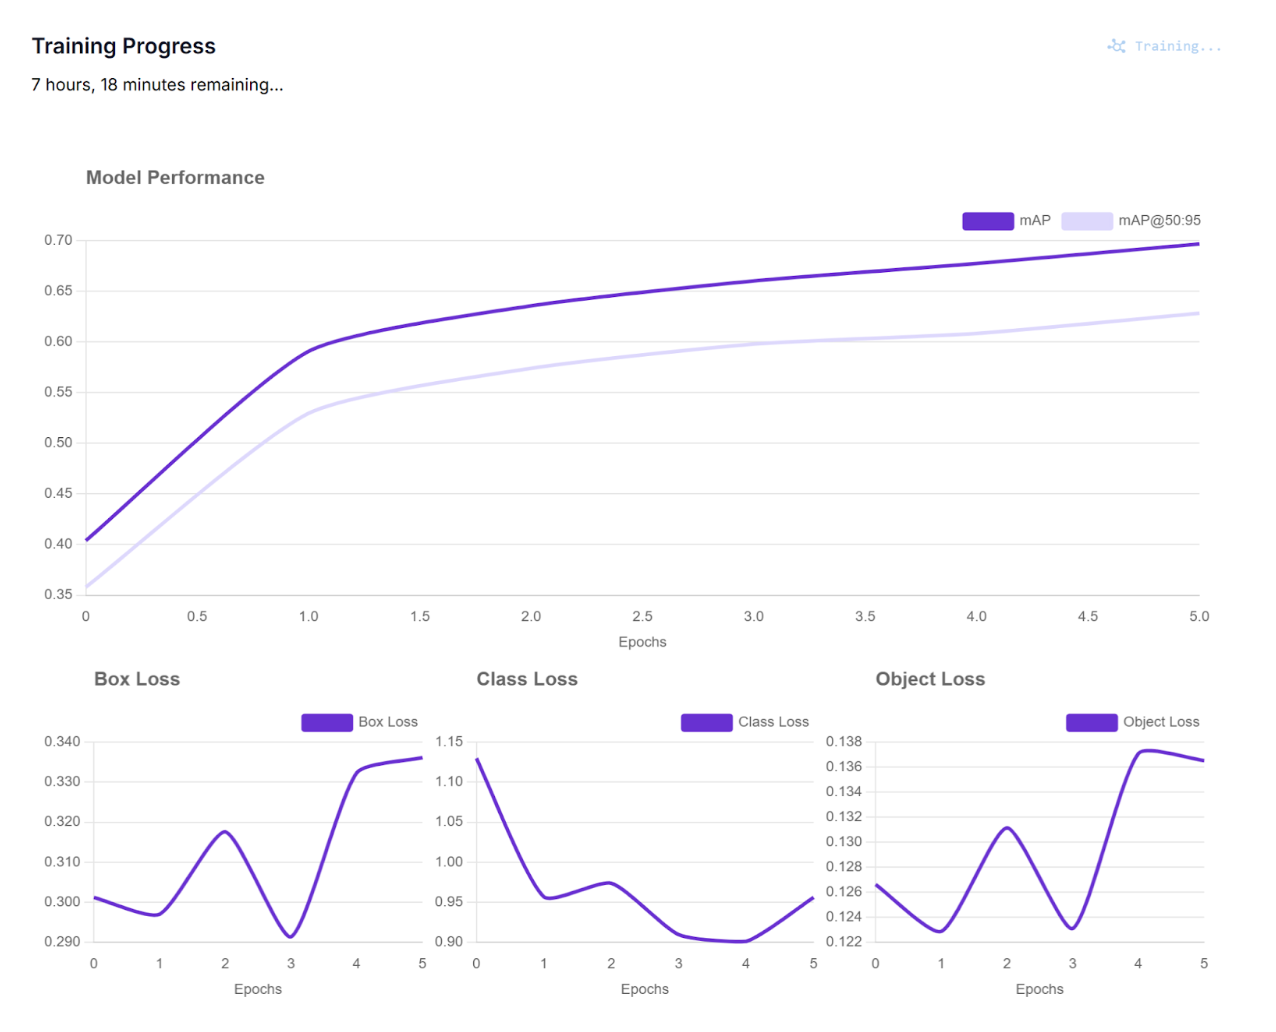
Step 3: Model Evaluation
Roboflow's dashboard provides all the tools you need to evaluate your model's performance with the big features shown below.
Review Key Metrics: Check the dashboard for key performance indicators like mAP (mean average precision), recall, and precision.

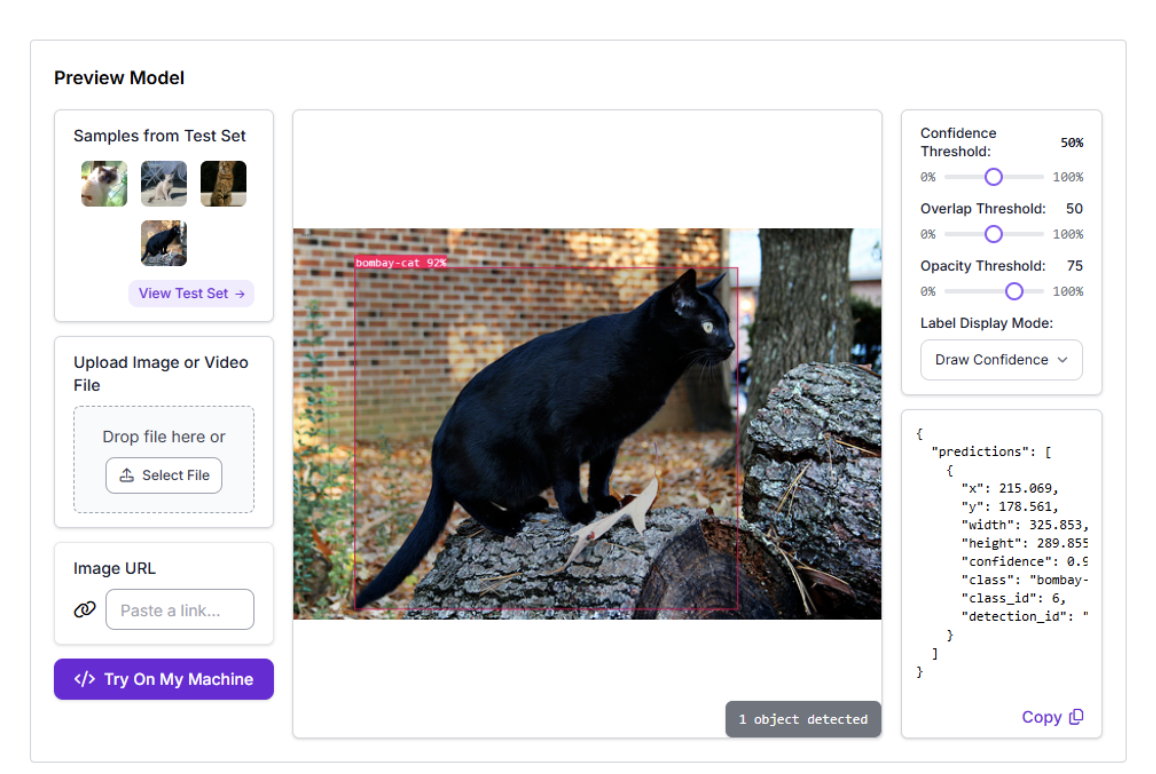
Analyze Your Model: Use the provided confusion matrices and class-by-class analysis to get a detailed understanding of how your model is performing.

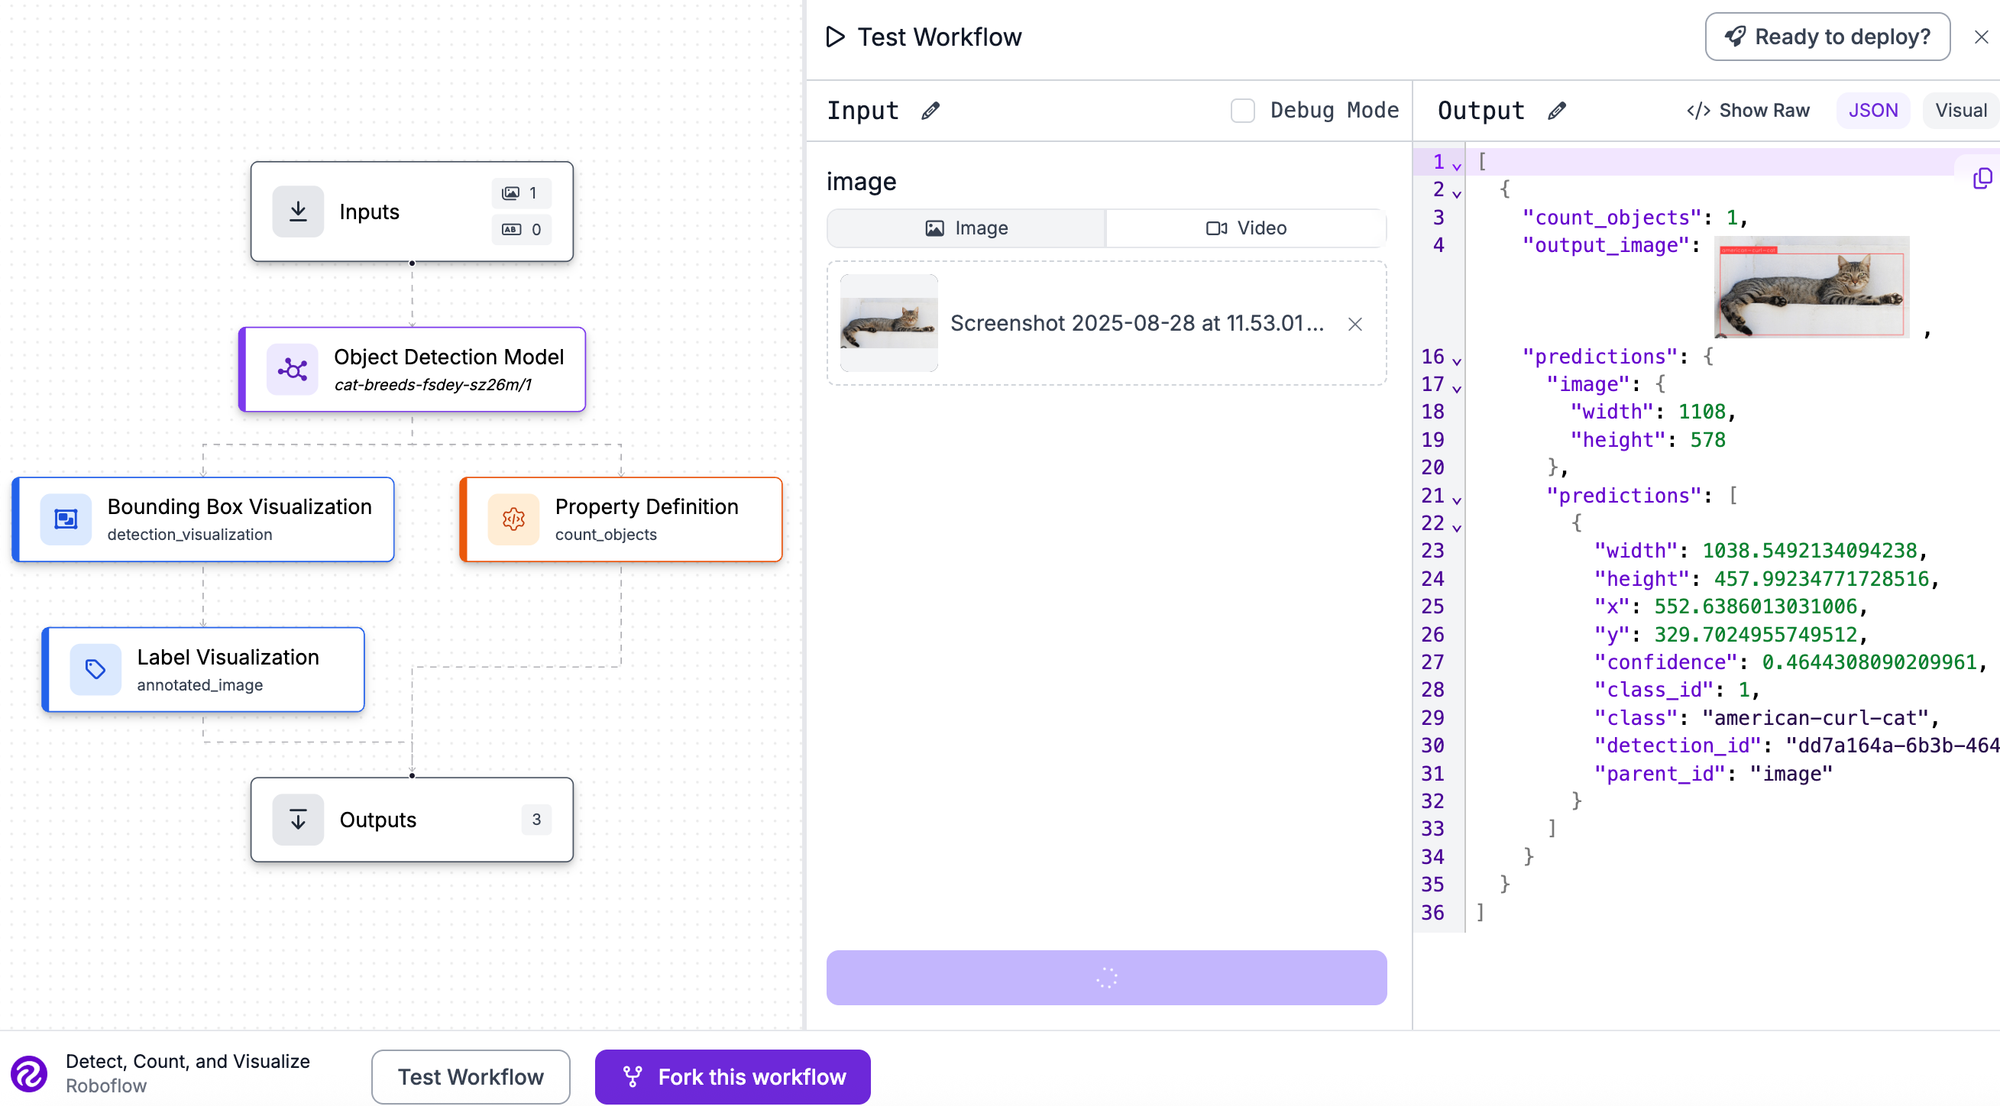
Test and Improve: Test your model with new images directly from the dashboard, and use the AI suggestions to identify potential improvements.
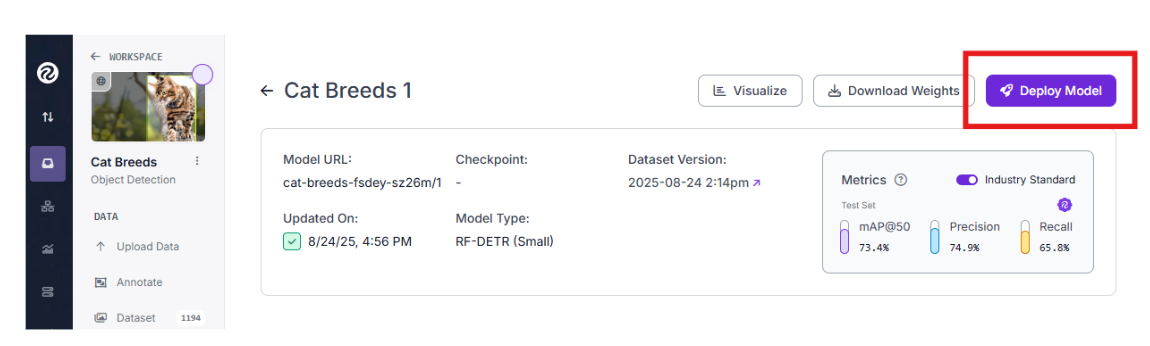
Step 4: Model Deployment
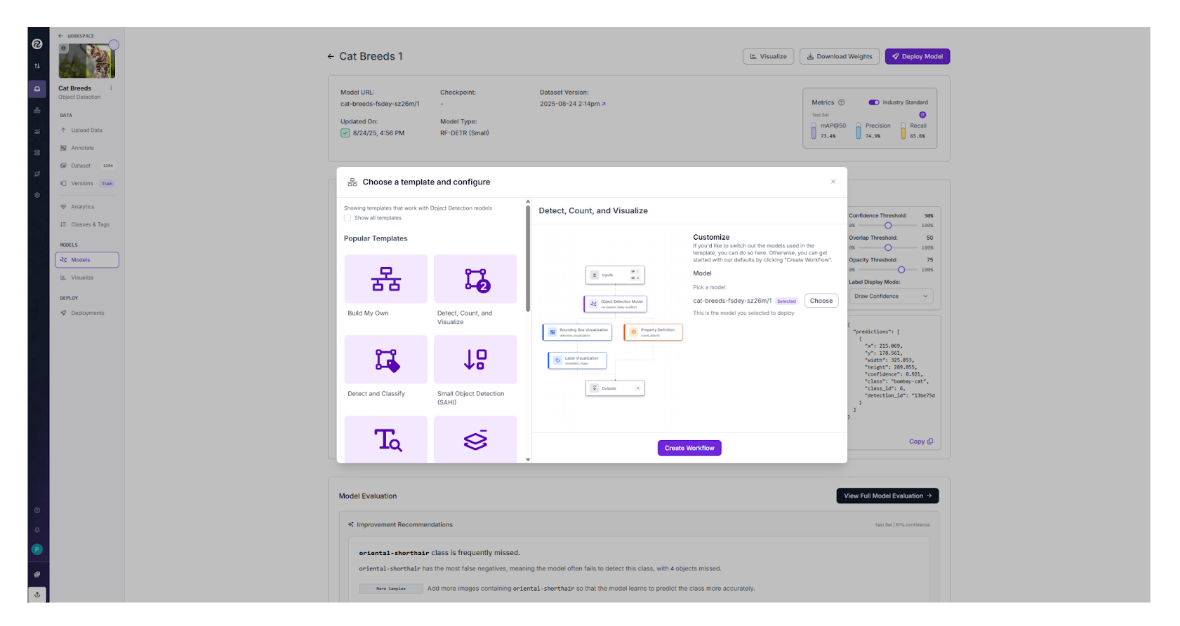
Once your model is up to your standards, it's easy to deploy with a few steps. First, click on the Deploy Model on the top right.
This brings you to a page where you can create a workflow. We will select the Detect, Count, and Visualize and click Create Workflow because our goal is to detect the cat in the picture, draw a box, and count how many cats there are.
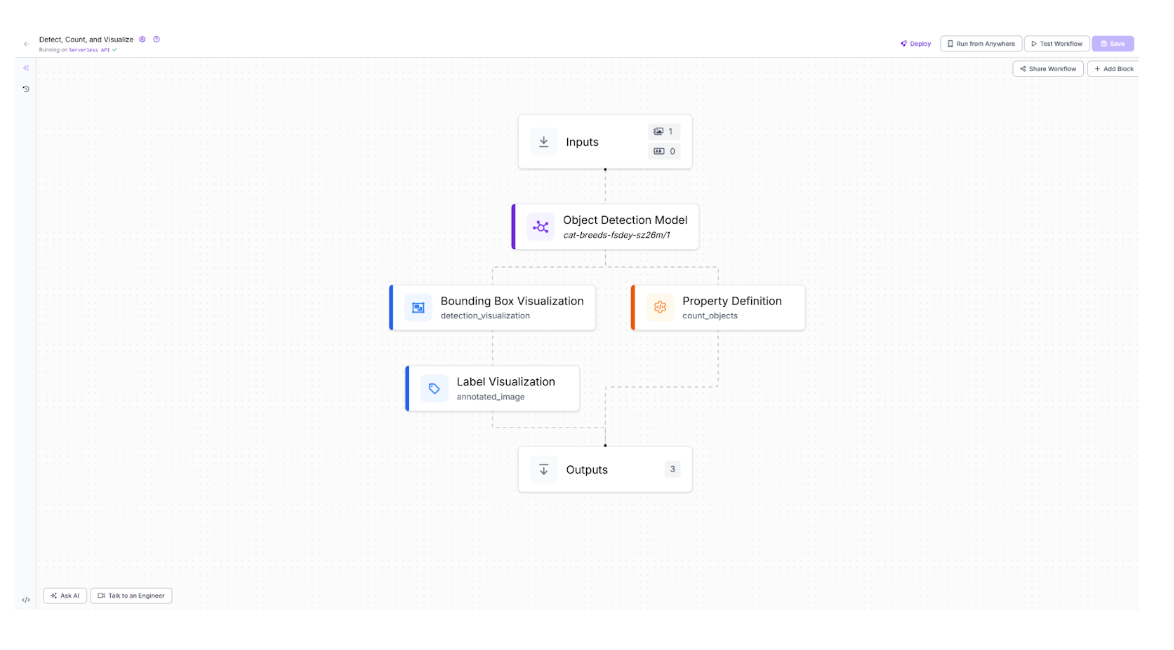
Below is a picture of the workflow. Starting with an Input picture, it passes the picture into our model and then the outputs will consist of a Bounding Box Visualization, Label Visualization, and Property Definition. Once you are ready, click Deploy near the top right.
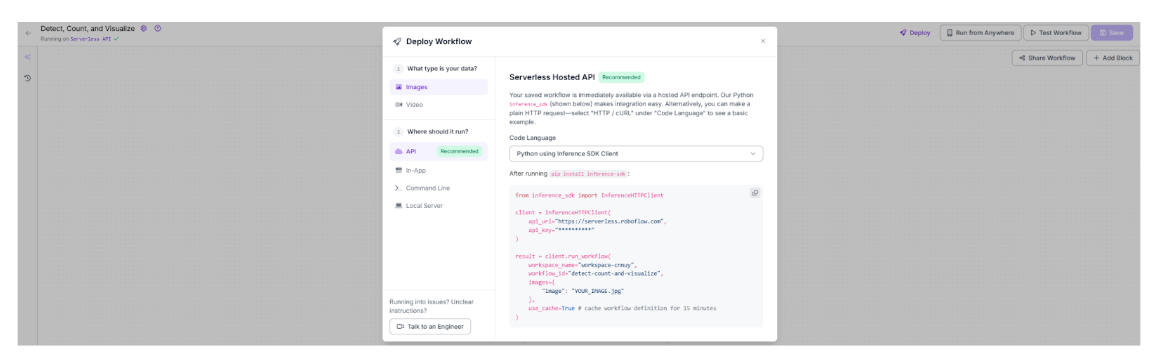
Roboflow provides multiple options to deploy with direct guidance in various languages. For example, when using an API interface with Python, Roboflow displays a “copy paste” solution. The api_key can be replaced with your Roboflow API key found in the Roboflow dashboard.
See the completed cat model here to see what you can achieve.
Custom Object Detection Pipeline Conclusion
Don't let the idea of building an object detection pipeline feel overwhelming. With Roboflow, the entire process is designed to be approachable and fast. We've shown how the journey from a dataset to a deployed model is just a few clicks (and labels!) away.
This end-to-end workflow is powerful and flexible enough to handle anything from simple projects, like classifying cats, to complex, large-scale deployments.
Ready to start your own project? Get started for free with Roboflow and build your own custom detection pipeline.
Cite this Post
Use the following entry to cite this post in your research:
Contributing Writer. (Aug 28, 2025). How to Build a Custom Object Detection Pipeline. Roboflow Blog: https://blog.roboflow.com/build-custom-object-detection-pipeline/