
In this guide, we are going to build an application that counts how many cars cross a given point in a video.
You can use the Roboflow Workflows to track objects that cross lines. Roboflow Workflows is a web-based computer vision application builder. With Workflows, you can build complex, multi-step applications in a few minutes.
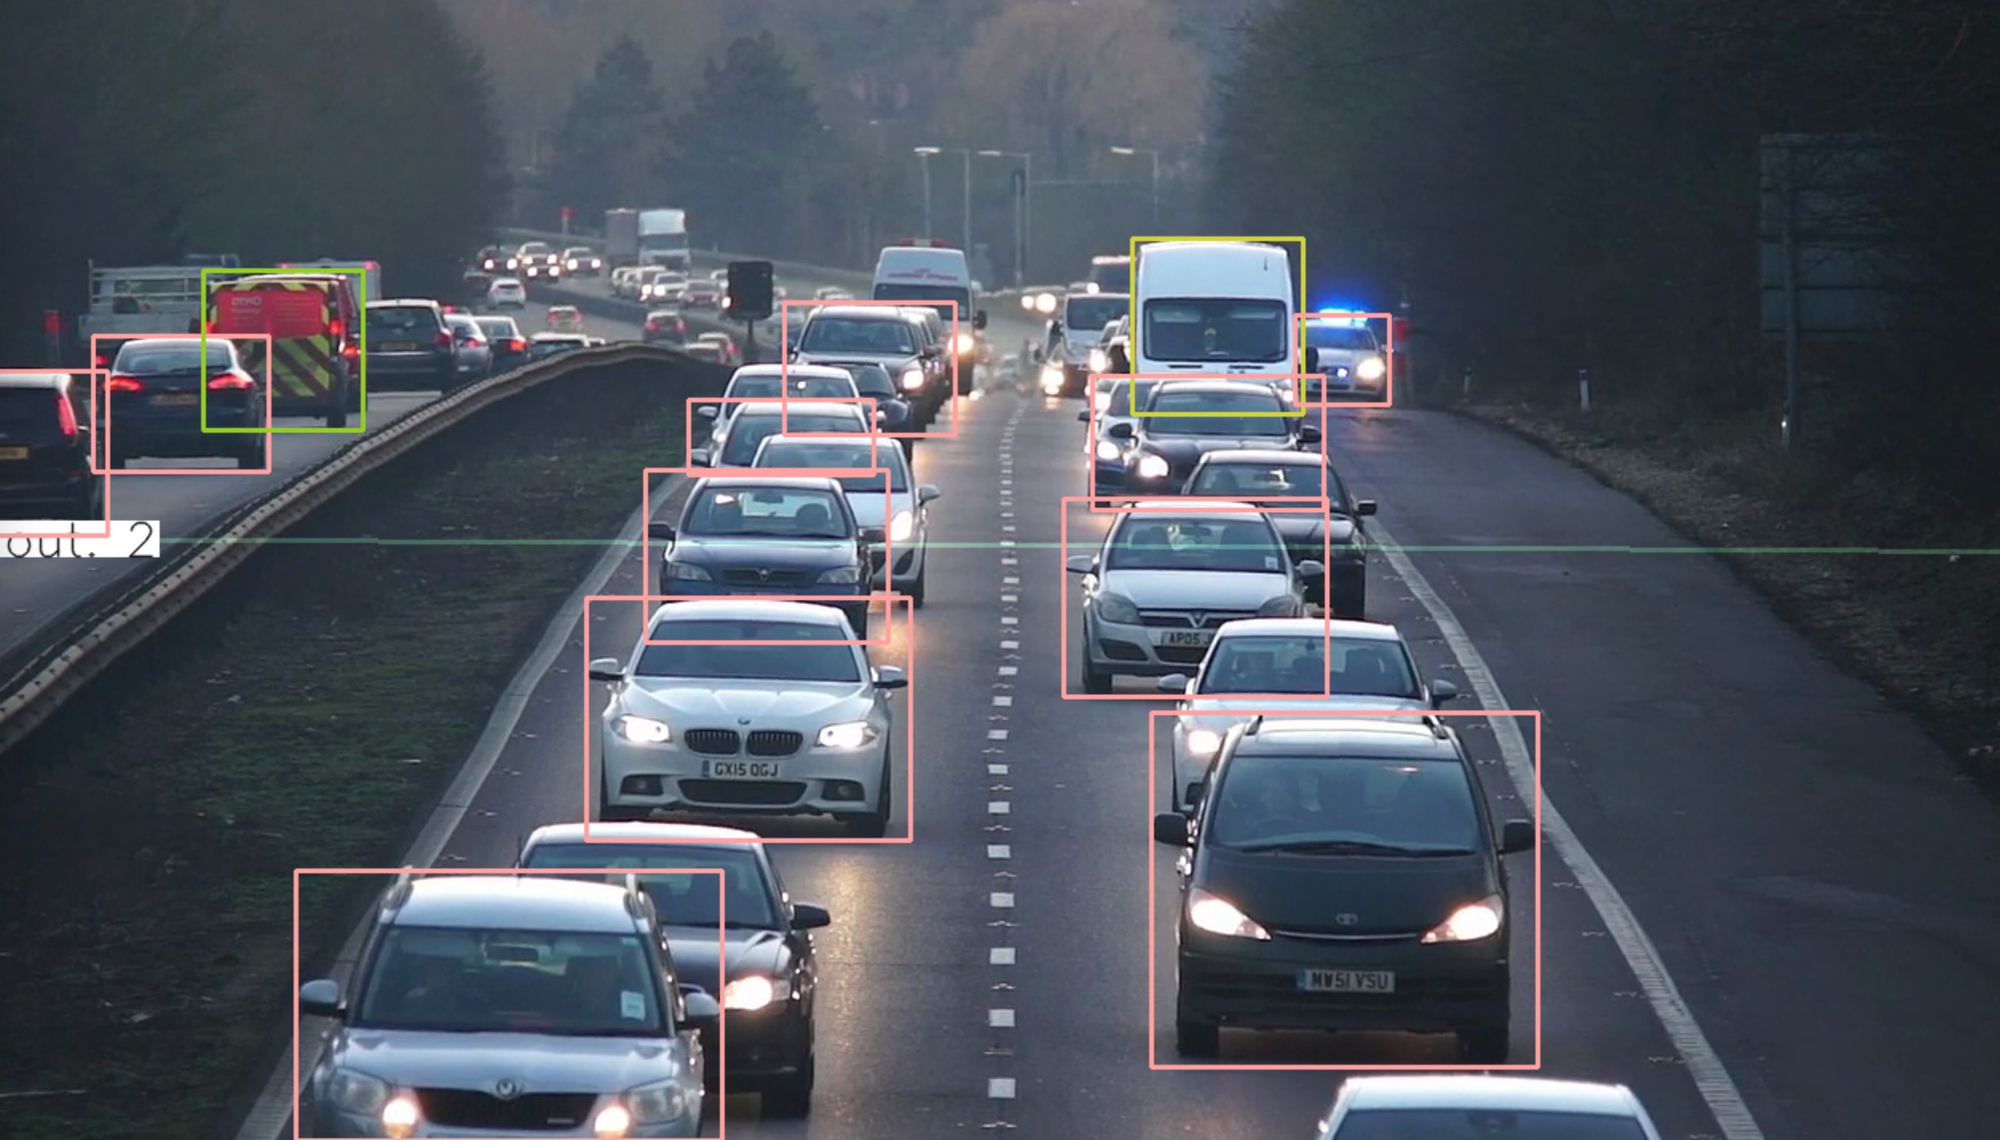
Below is an example showing the line counter. The line counter increments as cars cross a given point, showing an "out" counter on the right that is counting cars as they pass by.
Without further ado, let’s start building a Workflow!
Step #1: Create a Workflow
To get started, we need to create a Workflow.
Create a free Roboflow account. Then, click on “Workflows” in the left sidebar. This will take you to your Workflows home page, from which you will be able to see all Workflows you have created in your workspace.
Click “Create a Workflow” to create a Workflow.
You will be taken into the Roboflow Workflows editor from which you can build your application:
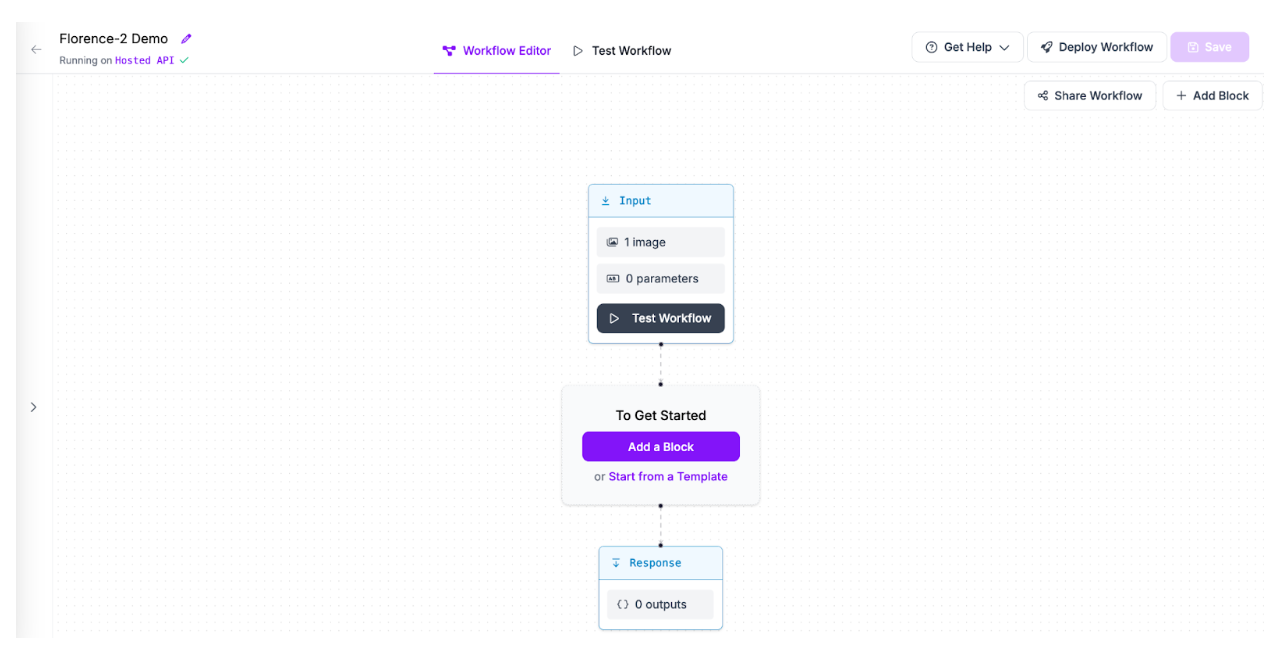
We now have an empty Workflow from which we can build an application.
Step #2: Add a Video Input
We will need a Video Metadata input. This input can accept webcam streams or video files local to your device, or RTSP streams.
Click “Input” on your Workflow. Click the camera icon in the Input configuration panel to add video metadata:
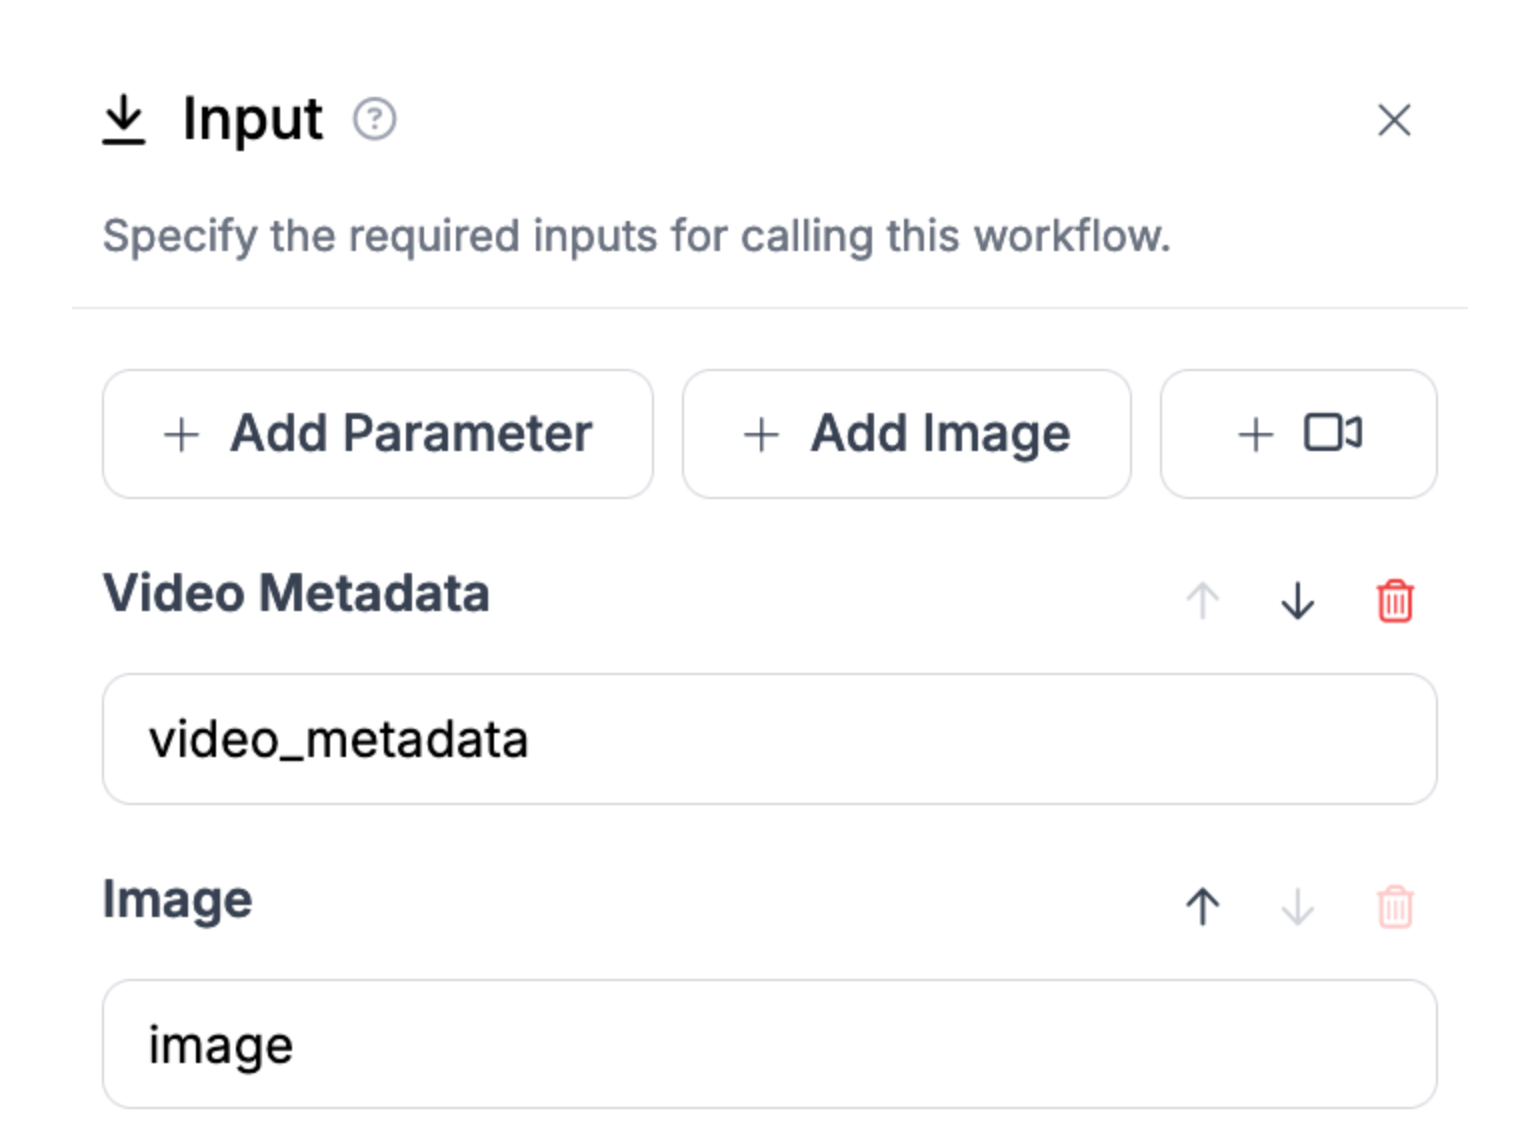
This parameter will be used to connect to a camera.
Step #3: Add a Detection Model
We are going to use a car detection model to detect cars on a road. We will then use video processing features in Workflows to track cars between frames.
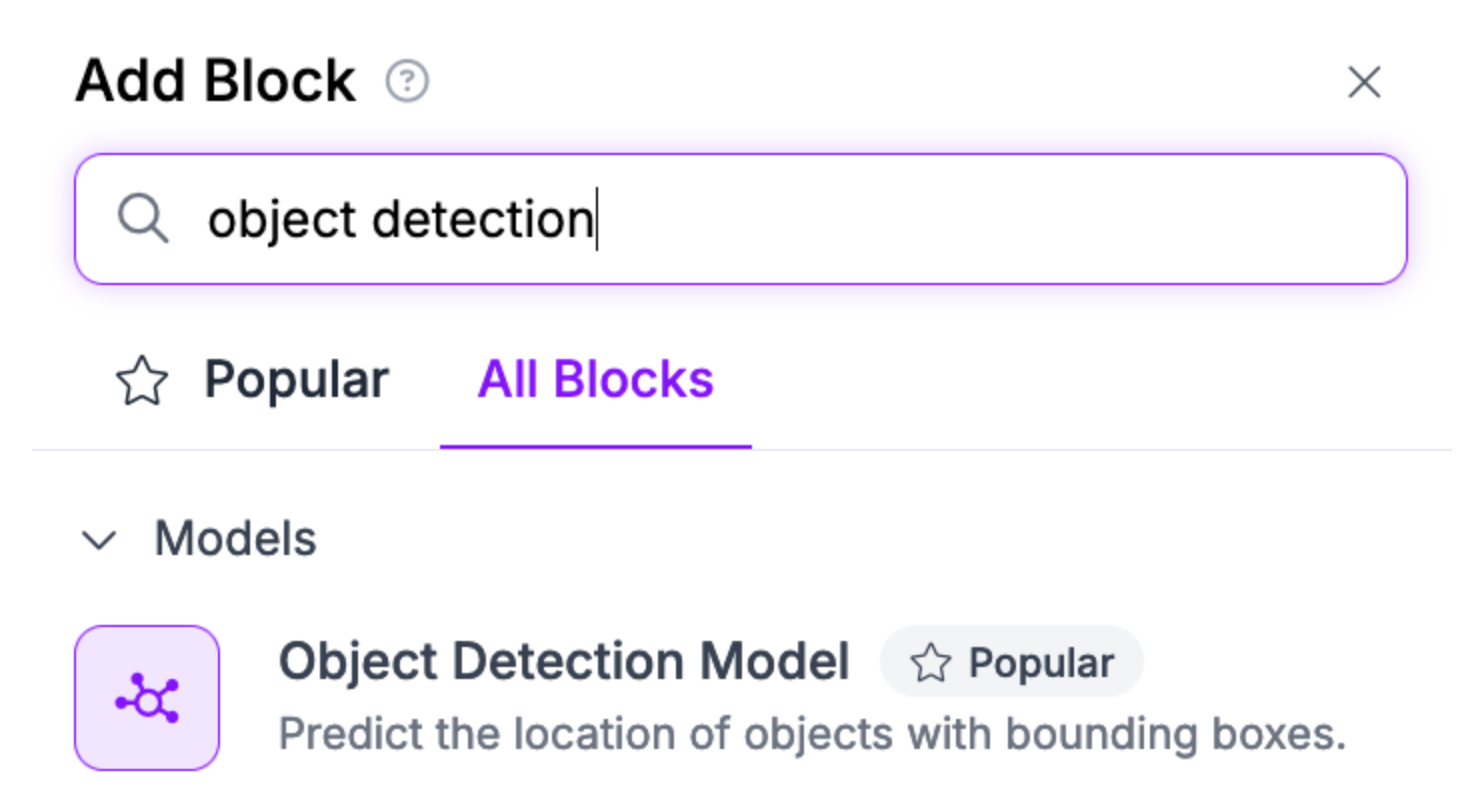
To add an object detection model to your Workflow, click “Add a Block” and choose the Object Detection Model block:
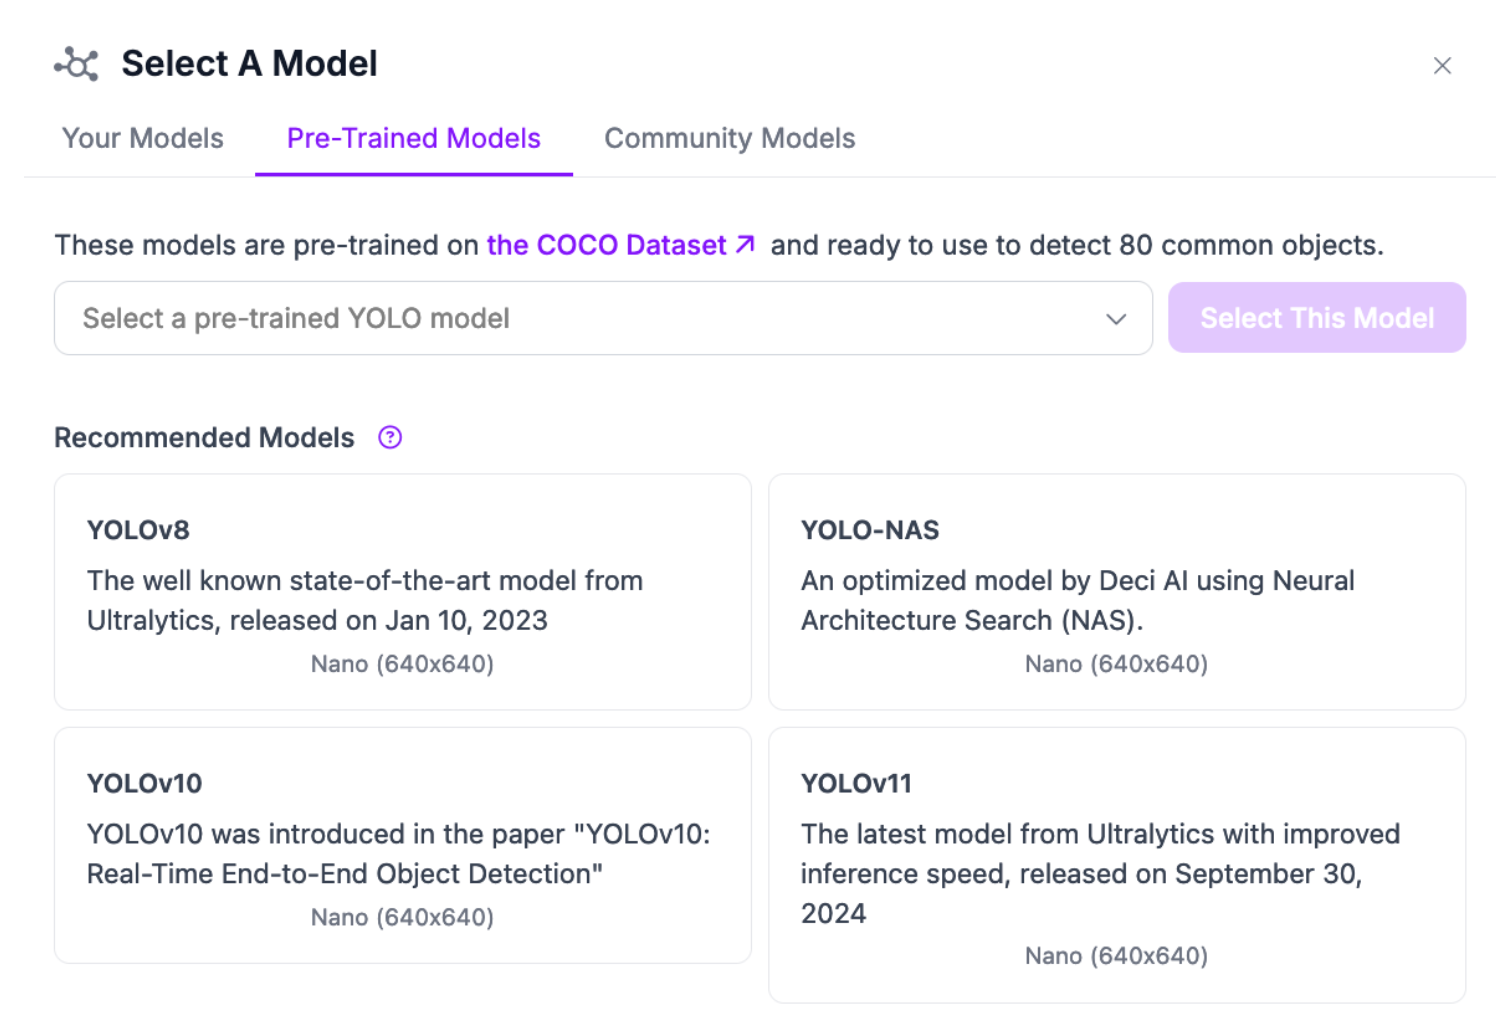
A configuration panel will open from which you can select the model you want to use. You can use models trained on or uploaded to Roboflow, or any model on Roboflow Universe.
For this example, let’s use a model trained on Microsoft COCO, which can detect vehicles. Click the "Pre-Trained Models" tab and select YOLOv11. This will pre-select a YOLO11 model trained using the Microsoft COCO dataset.
Step #4: Add Tracking
With a detection model set up, we now need to add object tracking. This will allow us to track cars between frames, a prerequisite for counting how many unique objects cross a line.
Add a “Byte Tracker” block to your Workflow:

The block should automatically configure to use your model.
Step #5: Add Line Counter
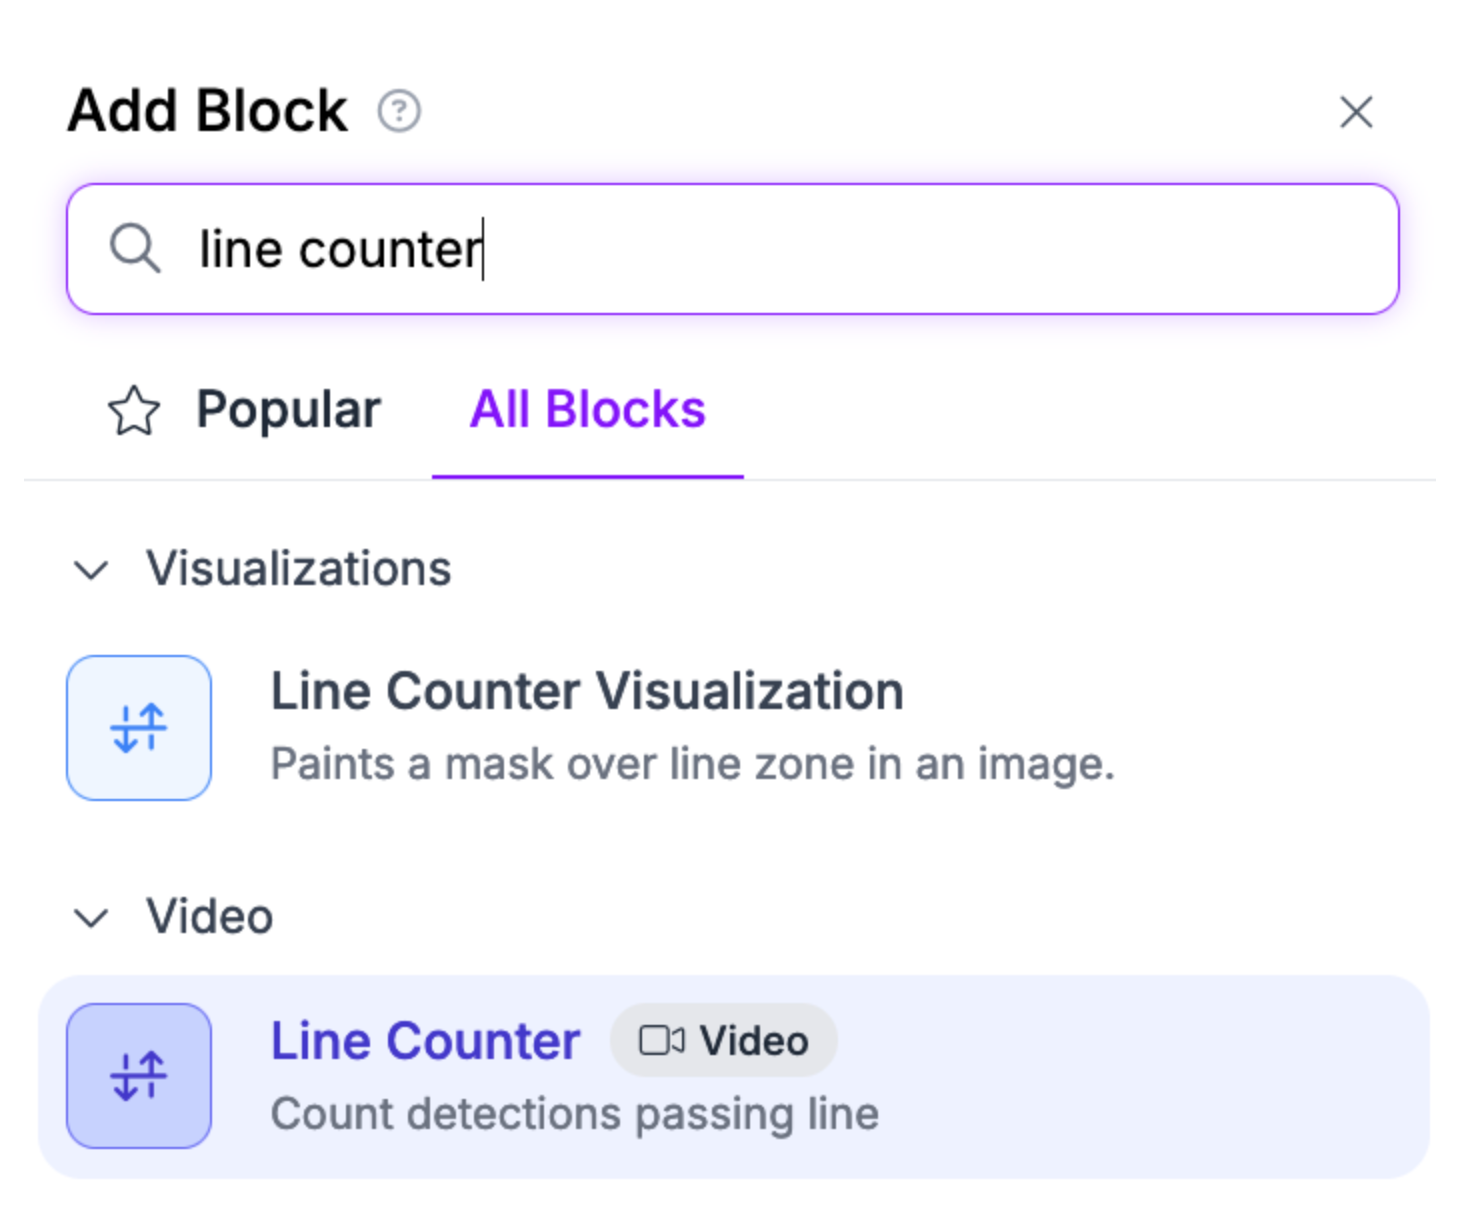
Next, we need to add a Line Counter block. This block will increment a count every time an object crosses a region.
You will need to set the line to use in your line counter.
You can calculate the coordinates of a zone using Polygon Zone, a web interface for calculating polygon coordinates. Open Polygon Zone, then drag in an image of the exact resolution of the input frame from your video. For example, if your input video is 1980x1080, your input image to Polygon Zone should be the same resolution.
Press L on your keyboard to enter line mode. This will allow you to calculate the coordinates of a specific line in an image.
The NumPy coordinates are formatted in x,y form. You can copy these into the Workflows editor. Do not need to copy the np.array() part of the coordinates.
Here example coordinates:
[[10, 341], [1263, 349]]Add the coordinates in the line counter configuration:
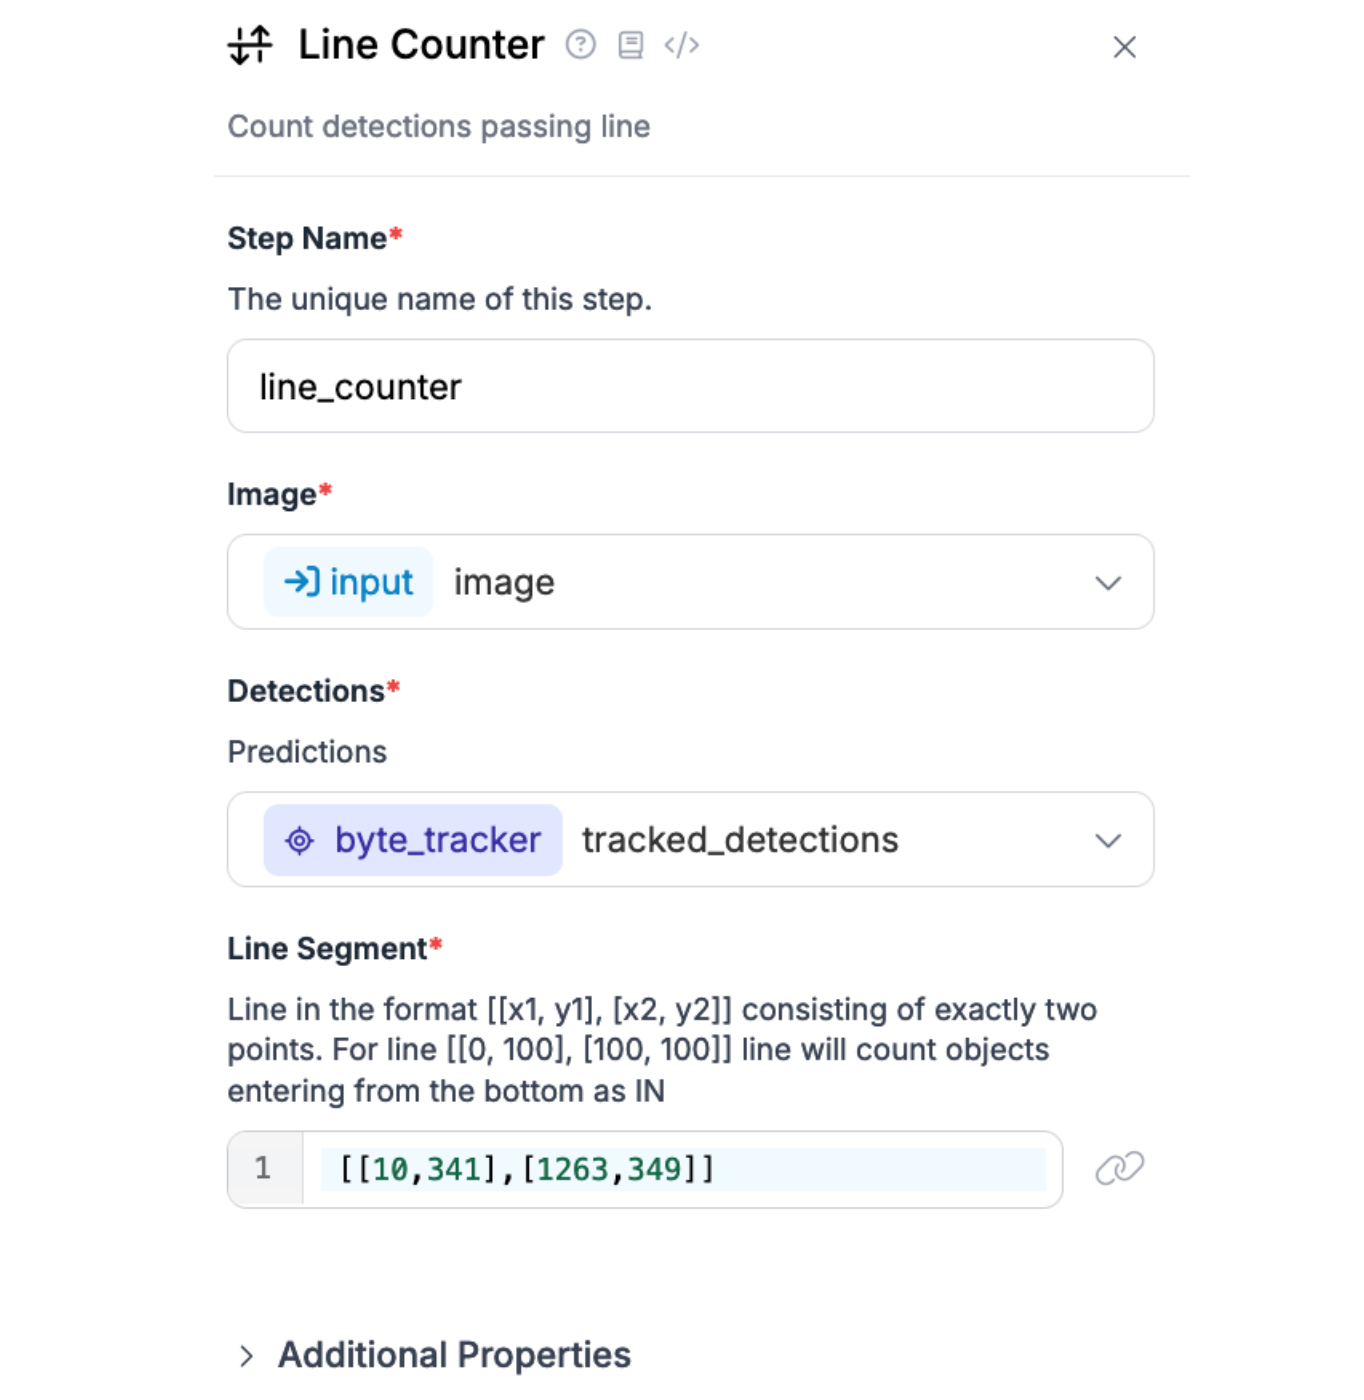
Make sure the line counter reads detections from the Byte Tracker you set up in the last step.
Step #6: Add Visualizations
By default, Workflows does not show any visual representation of the results from your Workflow. You need to add this manually.
For testing, we recommend adding three visualizations:
- Line counter visualization, which displays the line whose coordinates you specified earlier and how many objects have crossed the line;
- Bounding box visualization, which displays bounding boxes corresponding to detections from an object detection model, and;
- Label visualization, which shows the labels that correspond with each bounding box.
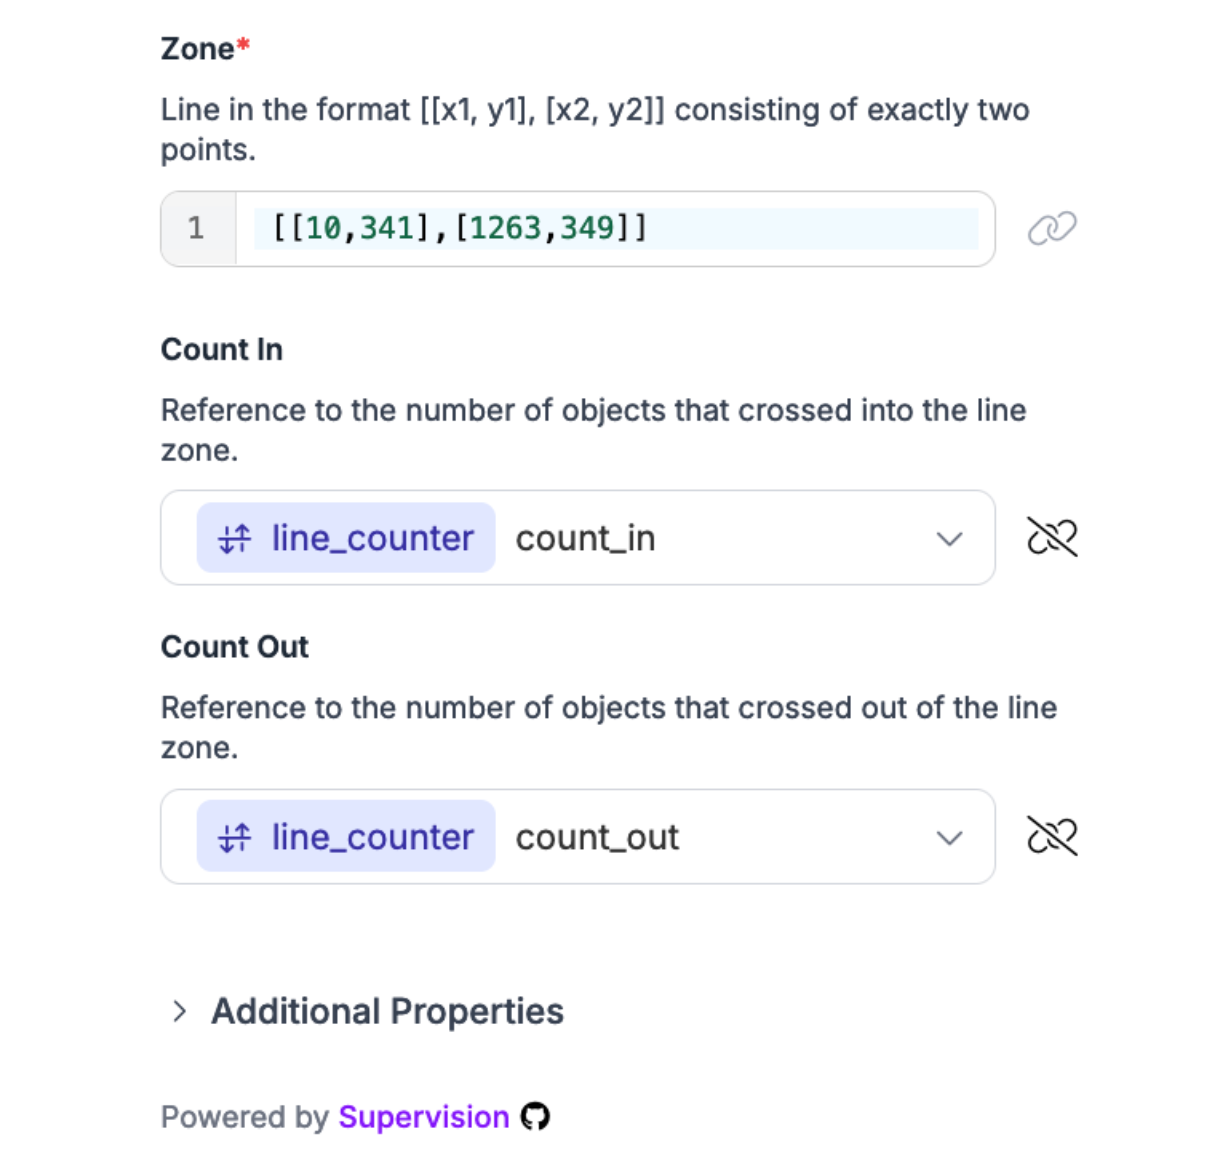
When you configure the line counter visualization, make sure the line points are set to the same ones you configured in the Line Counter block earlier:
Once you have added these visualizations, you are ready to test your Workflow.
Here is what your final Workflow should look like:

Step #7: Test Workflow
To test your Workflow, you will need to run your Workflow on your own hardware.
To do this, you will need an installation of Roboflow Inference, our on-device deployment software, set up.
Run the following command to install Inference:
pip install inferenceThen, create a new Python file and add the following code:
import argparse
import os

from inference import InferencePipeline
import cv2

API_KEY = os.environ["ROBOFLOW_API_KEY"]


def main(
    video_reference: str,
    workspace_name: str,
    workflow_id: str,
) -> None:
    pipeline = InferencePipeline.init_with_workflow(
        api_key=API_KEY,
        workspace_name=workspace_name,
        video_reference=video_reference,
        on_prediction=my_sink,
        workflow_id=workflow_id,
        max_fps=30,
    )
    pipeline.start()  # start the pipeline
    pipeline.join()  # wait for the pipeline thread to finish


def my_sink(result, video_frame):
    visualization = result["bounding_box_visualization"].numpy_image
    cv2.imshow("Workflow Image", visualization)
    cv2.waitKey(1)


if __name__ == '__main__':
    parser = argparse.ArgumentParser()
    parser.add_argument("--video_reference", type=str, required=True)
    parser.add_argument("--workspace_name", type=str, required=True)
    parser.add_argument("--workflow_id", type=str, required=True)
    args = parser.parse_args()
    main(
        video_reference=args.video_reference,
        workspace_name=args.workspace_name,
        workflow_id=args.workflow_id,
    )
This code will create a command-line interface that you can use to test your Workflow.
Export your Roboflow API key into your environment:
export ROBOFLOW_API_KEY=""Then, run the script like this:
python3 app.py --video_reference=0 --workspace_name=workspace --workflow_id=workflow-id
If you are running your model as a test on a Mac, instead run the following command:
ONNXRUNTIME_EXECUTION_PROVIDERS="[CoreMLExecutionProvider,CPUExecutionProvider]" python3 app.py --video_reference=0 --workspace_name=workspace --workflow_id=workflow-id
This will allow you to use the hardware available for use with CoreML when you run inference. With that said, for the best performance, you should run your model on a GPU.
Above, set:
- Video_reference to the ID associated with the webcam on which you want to run inference. By default, this is 0. You can also specify an RTSP URL or the name of a video file on which you want to run inference.
- workspace_name with your Roboflow workspace name.
- workflow_id with your Roboflow Workflow ID.
You can retrieve your Workspace name and Workflow ID from the Workflow web editor. To retrieve this information, click “Deploy Workflow” in the top right corner of the Workflows web editor, then copy these values from any of the default code snippets.
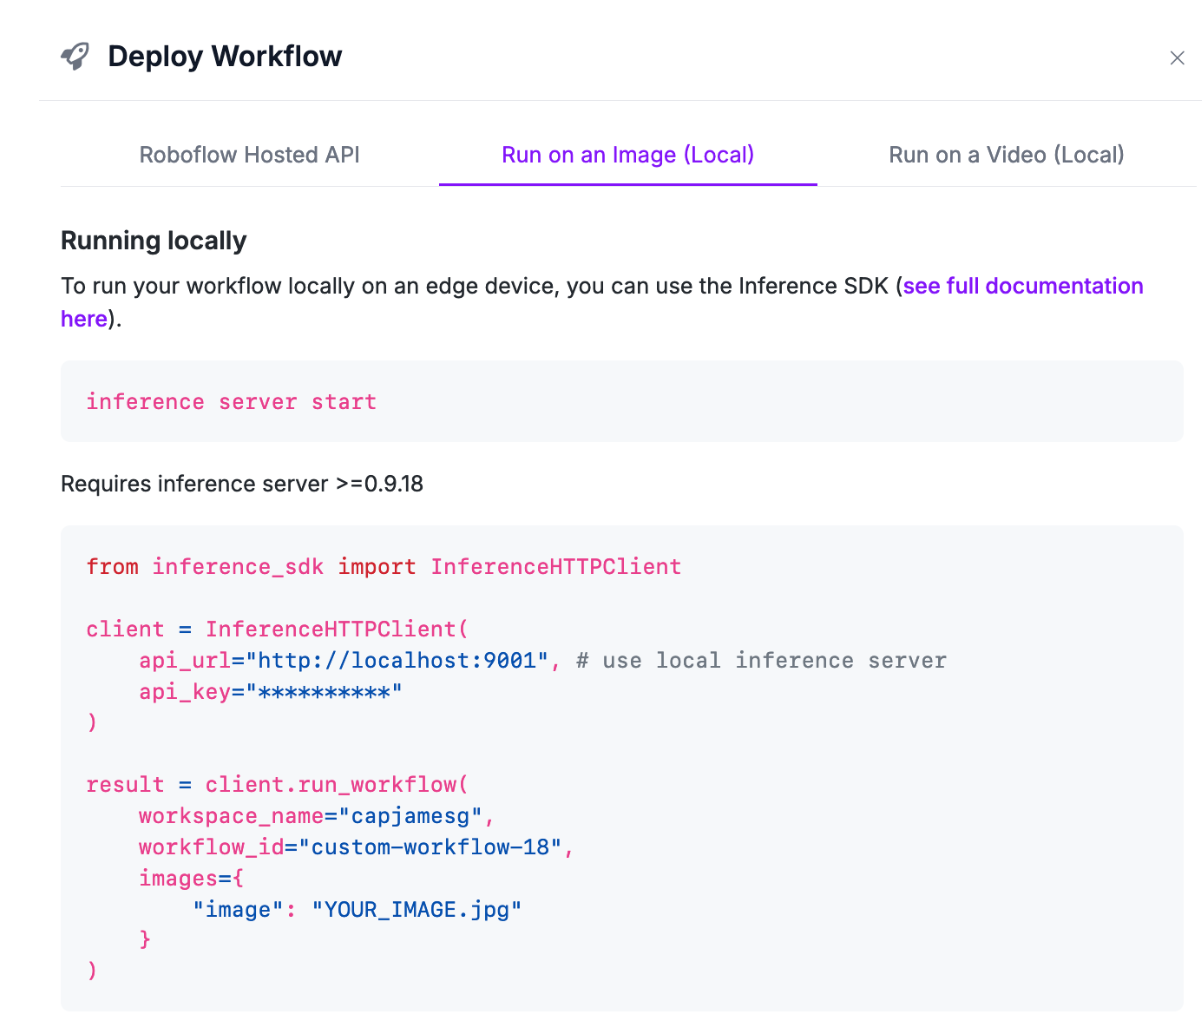
You only need to copy the workspace name and Workflow ID. You don’t need to copy the full code snippet, as we have already written the requisite code in the last step.
Run the script to test your Workflow.
You should start to see bounding boxes around objects, with a line counter overlaid on top of the image:

Our Workflow successfully tracks when cars pass by.
Conclusion
Roboflow Workflows is a web-based computer vision application builder. Workflows includes dozens of blocks you can use to build your application, from detection and segmentation models to predictions cropping to object tracking.
In this guide, we created an application that counts how many packages cross a line in a video.
We created a Workflow, set up an object detection model, configured object tracking, then used the Line Counter block to monitor when objects cross a line. We then created Workflow visualizations and ran the Workflow on our own hardware.
To learn more about Workflows and how to use Workflows on static images, refer to our Roboflow Workflows introduction.
Cite this Post
Use the following entry to cite this post in your research:
James Gallagher. (Oct 17, 2024). Count Objects Crossing Lines with Computer Vision. Roboflow Blog: https://blog.roboflow.com/count-objects-crossing-lines/