

Teams with datasets annotated in Supervisely can migrate to Roboflow by exporting in COCO format and importing directly into a Roboflow project, preserving mask annotations for instance segmentation without manual conversion. This tutorial covers the full pipeline: exporting the Supervisely Persons dataset, importing into Roboflow, training an RF-DETR segmentation model, building a Roboflow Workflow to visualize predictions, and deploying to a hosted API endpoint or edge device. A final step shows how to feed production images back into the dataset for continuous model improvement over time.
Roboflow simplifies the process of scaling datasets with its extensive library of pre-labeled data from Roboflow Universe, offers seamless integration with a variety of deployment options (including hosted API endpoints, private clouds, and edge devices), and provides an intuitive interface for fine-tuning and testing models. This makes Roboflow an excellent choice to enhance Supervisely-annotated datasets, and deploy models efficiently across diverse environments.
In this tutorial, you will learn how to import a Supervisely dataset into Roboflow, train a model, and deploy it.
Import Supervisely Datasets to Roboflow
By the end of this tutorial, you’ll have a fully functional person segmentation application powered by an RF-DETR model. You’ll learn how to:
- Export annotated data from Supervisely in a compatible format.
- Import and preprocess the dataset in Roboflow.
- Train a high-performance model for instance segmentation.
- Create a workflow to visualize and evaluate model performance.
- Deploy the model for real-world use.
- Continuously improve the model with production data.
Let’s get started with the step-by-step process!
Step 1: Export the Supervisely Persons Dataset
The Supervisely Persons dataset contains images with annotated masks for individual people, making it ideal for instance segmentation tasks. To use this dataset in Roboflow, we need to export it in a format that Roboflow supports, such as COCO, which includes both image files and annotation files (e.g., text files defining bounding boxes and masks). This step ensures compatibility and sets the stage for seamless data import.
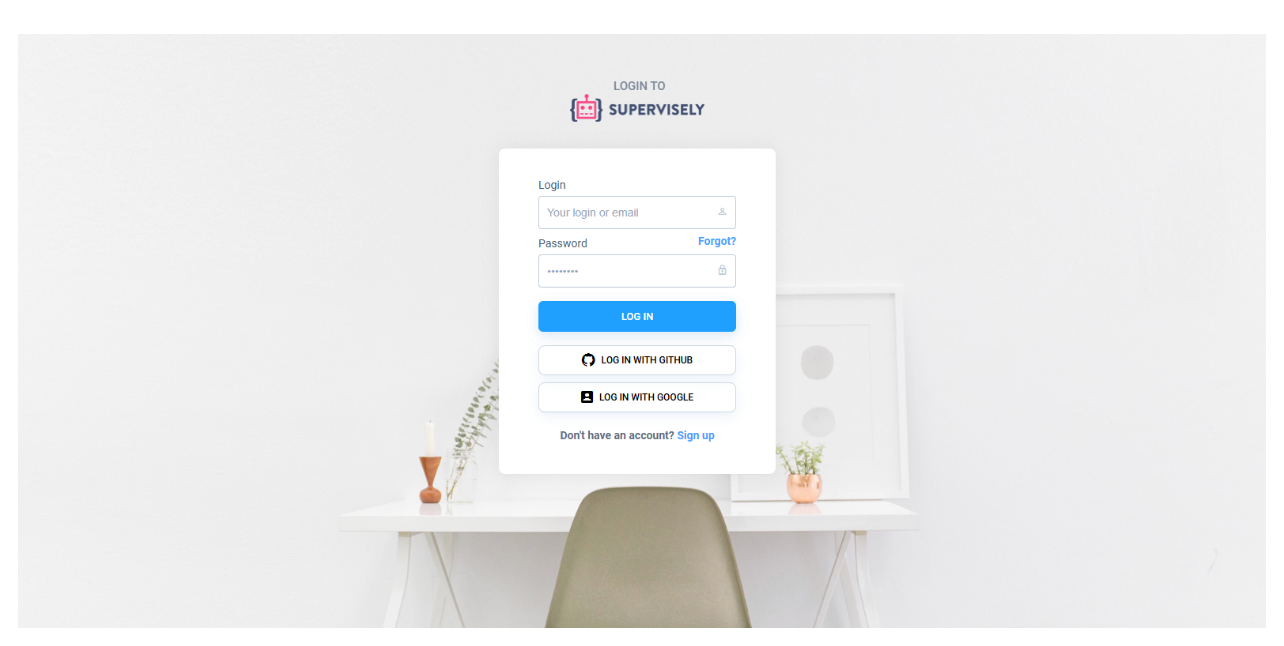
Log into Supervisely: Navigate to the Supervisely platform and sign into your account. If you don’t have an account, sign up and ensure you have access to the Supervisely Persons dataset.
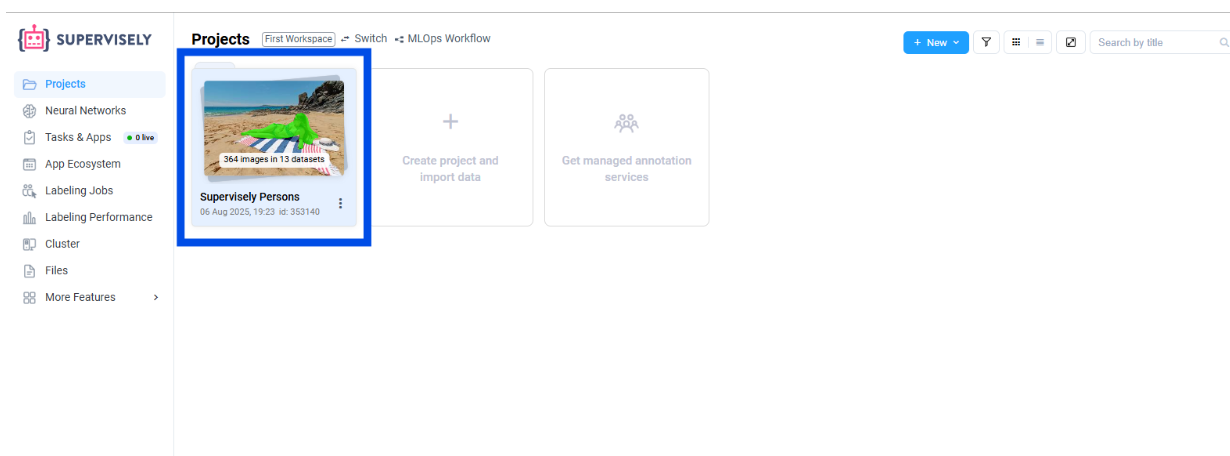
Access Your Projects: From the Supervisely homepage, locate the “Projects” section in the left sidebar. Click on your project containing the Persons dataset. If you’re using a public dataset, you may need to import it into a new project first.
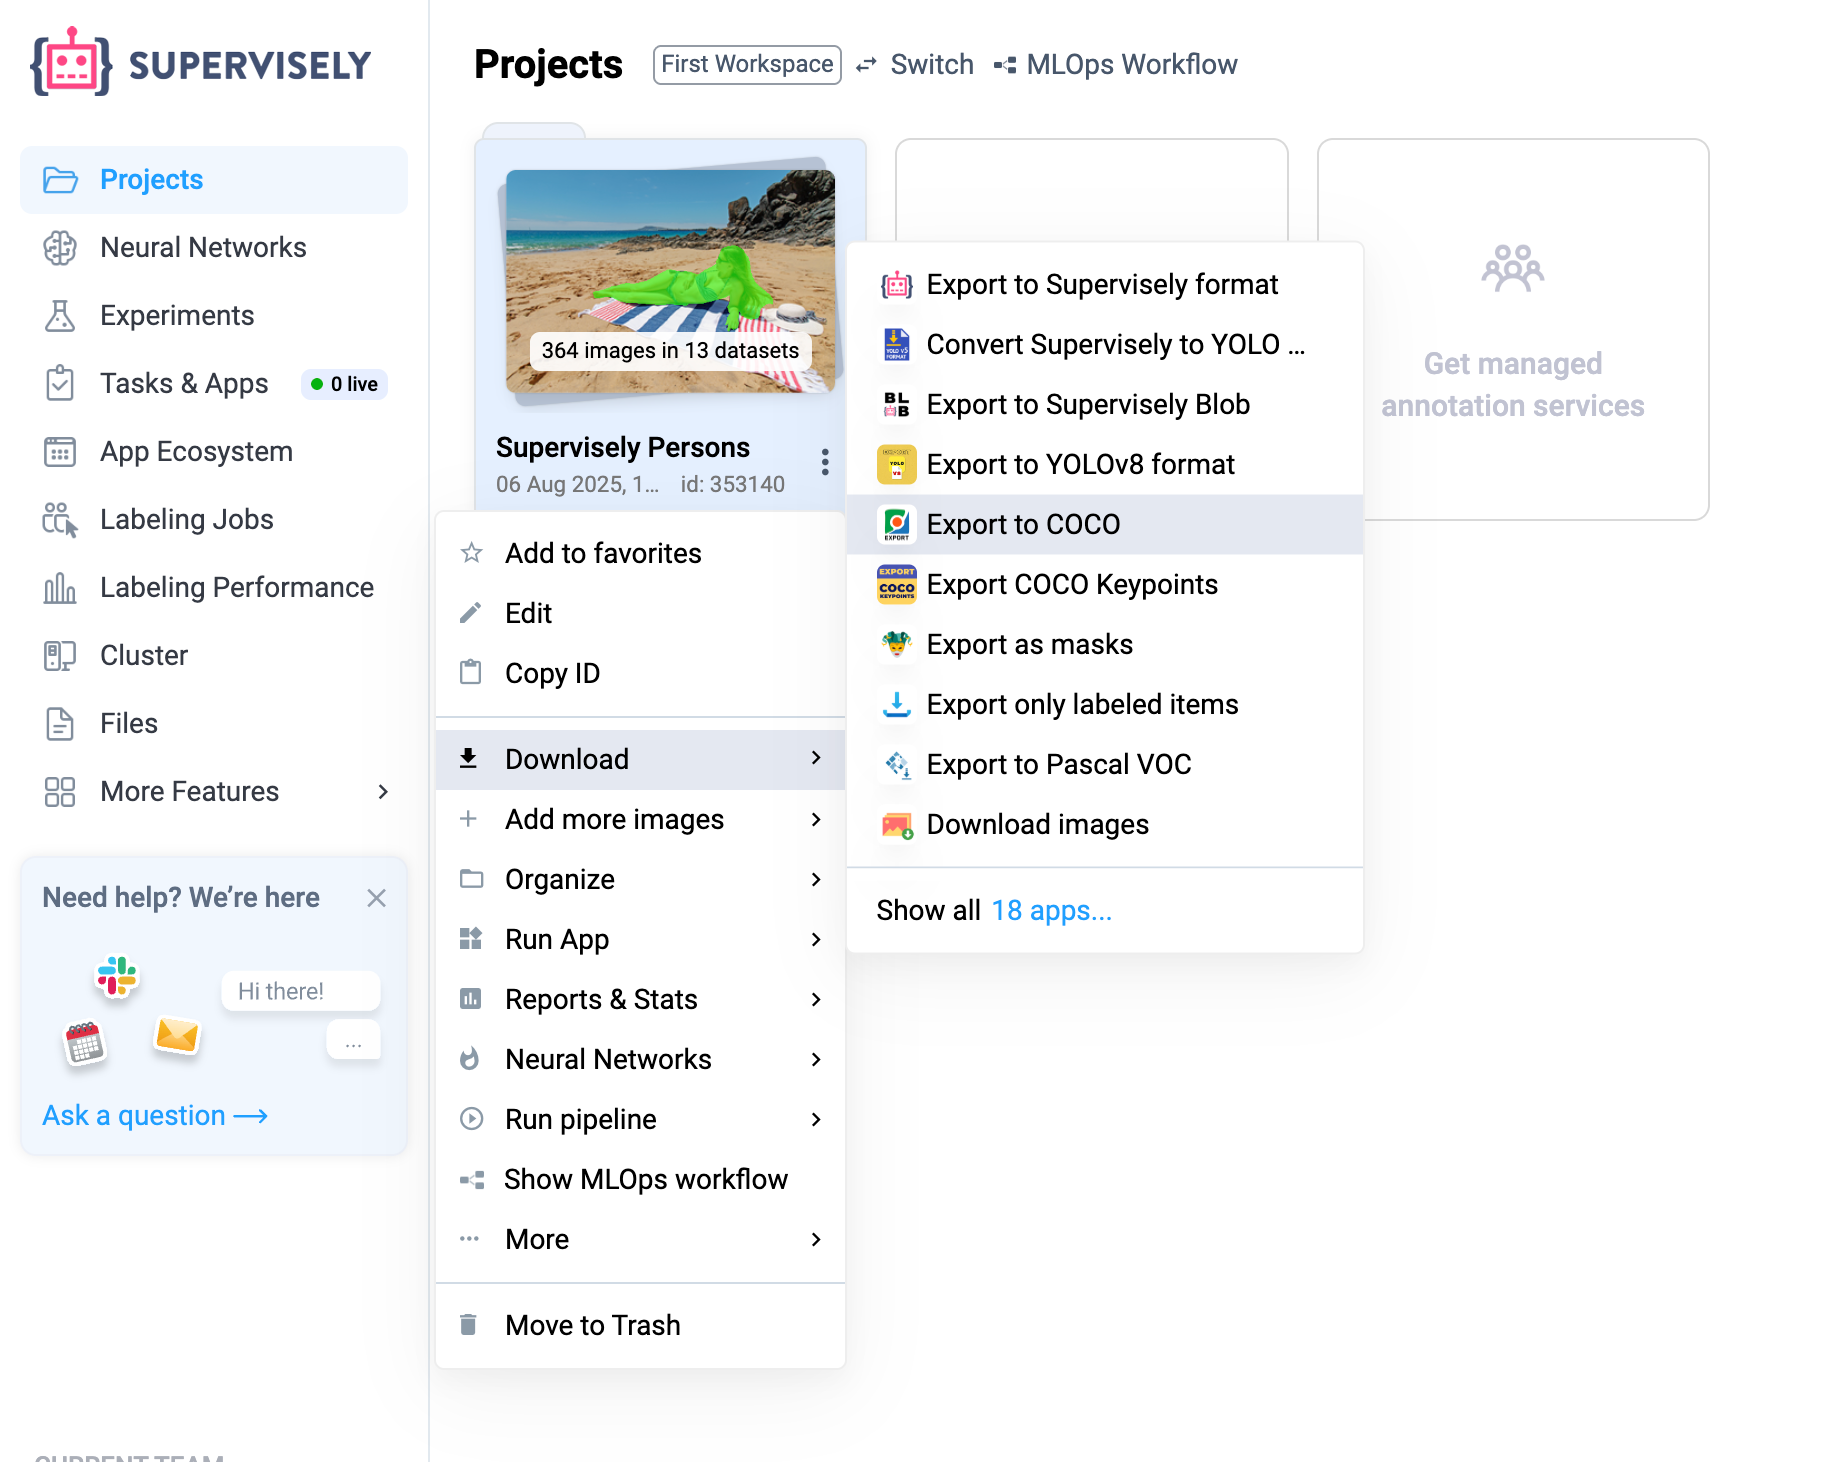
Select the Dataset: Click the three-dot menu (⋮) next to the project you want to export. This opens a menu with various options for dataset manipulation.
- Select the “Download” option from the menu.
- Choose the COCO format for export. This format is widely supported by Roboflow and includes image files (e.g., .jpg or .png) and annotation files (.txt) that define the segmentation masks and class labels.
- Confirm the export settings and download the dataset as a .zip file to your local machine.
Step 2: Set Up Your Roboflow Account and Project
Roboflow is a user-friendly platform that simplifies dataset management, model training, and deployment. Creating a project in Roboflow allows you to organize your dataset, apply preprocessing, and train a model tailored to your use case. For person segmentation, we’ll set up an instance segmentation project to handle the Supervisely dataset.
Create a Roboflow Account: Visit Roboflow and sign up for a free account or log in if you already have one.
Create a New Project:
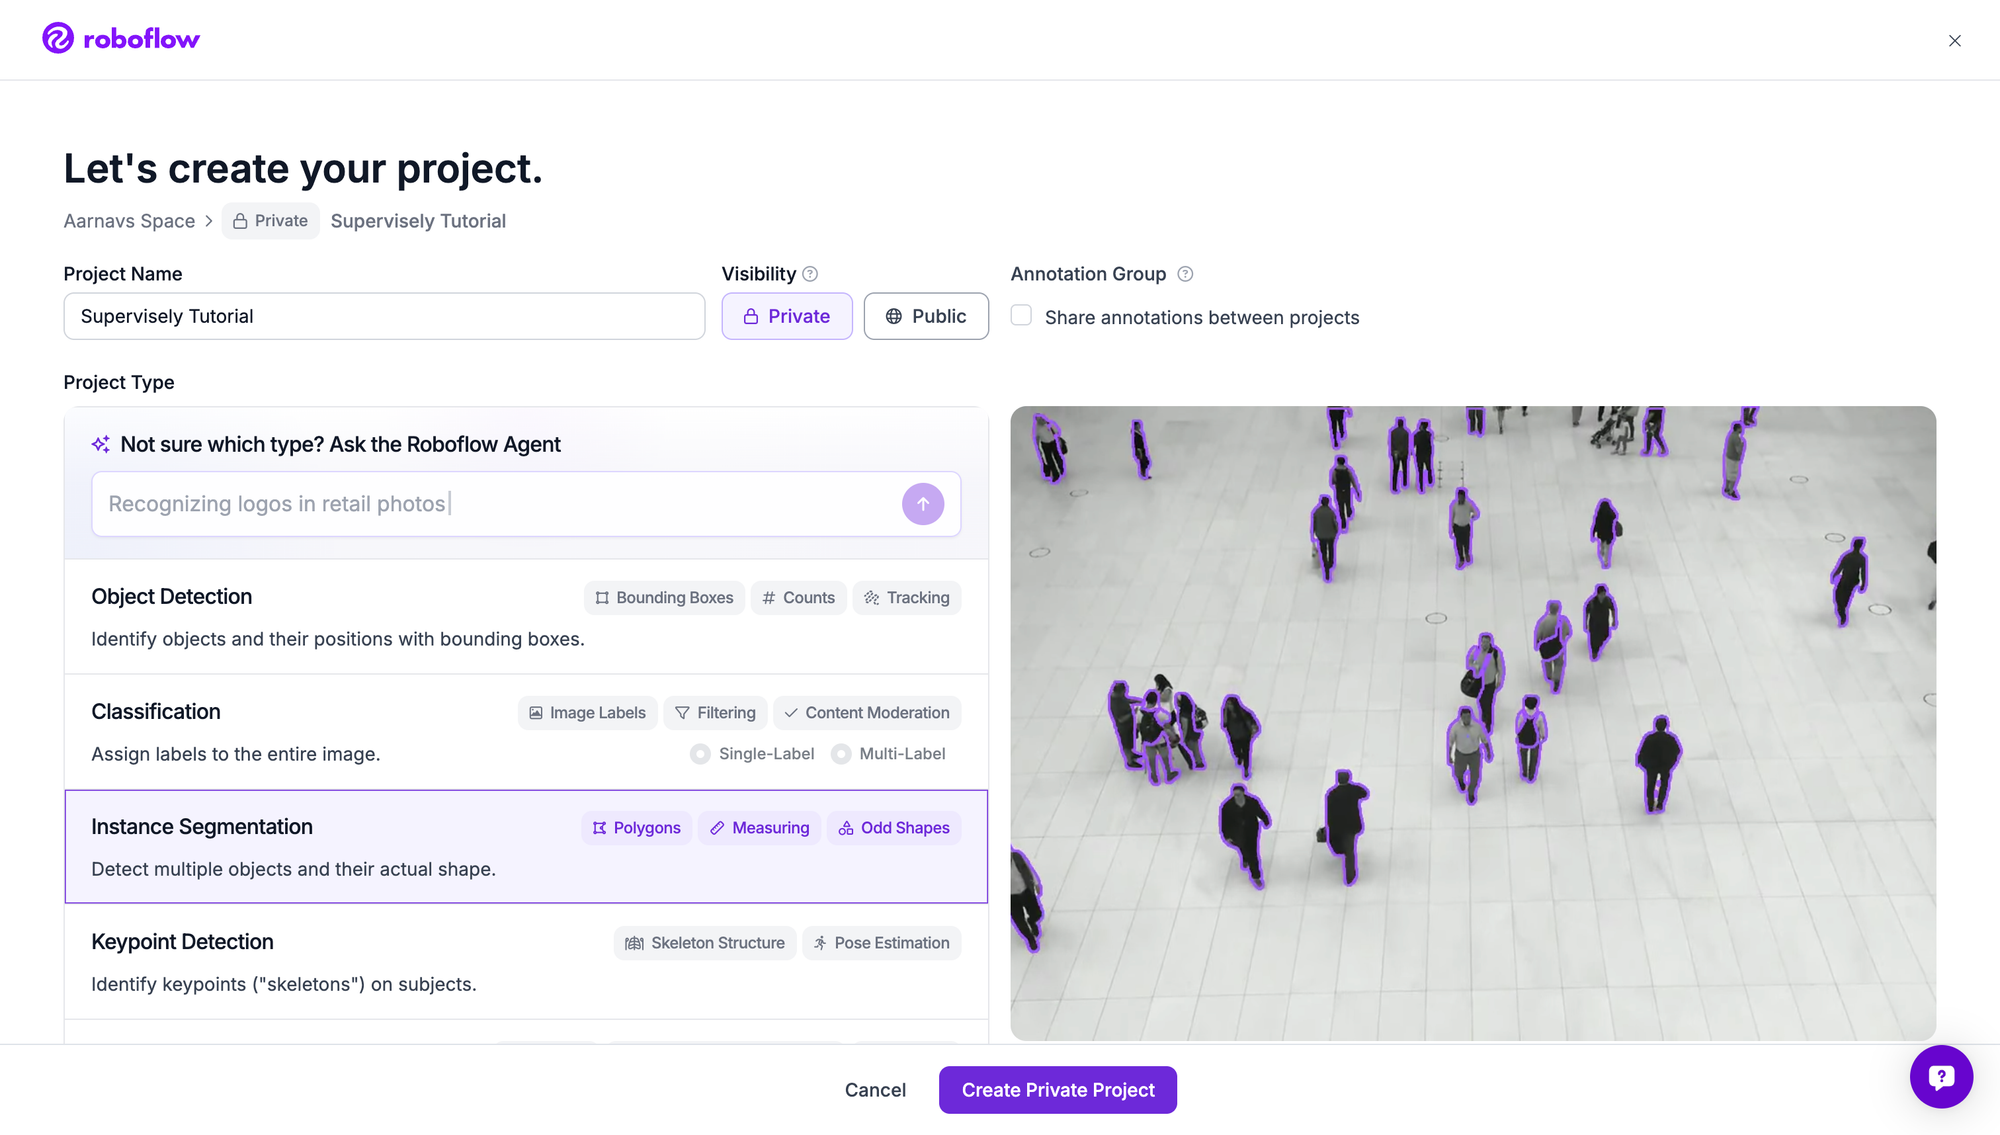
- On the Roboflow dashboard, click the “Create Project” button in the top-right corner.
- Enter a project name and select Instance Segmentation as the project type. This tells Roboflow that you’re working with masks to outline individual objects (people) rather than just bounding boxes or classifications.
- Optionally, add a description to keep track of your project’s purpose.
Understand the Project Setup:
- Roboflow’s instance segmentation project type is designed to handle datasets like Supervisely Persons, where each person in an image is annotated with a pixel-level mask.
- This setup ensures that your model learns to distinguish individual people, even in crowded or overlapping scenarios.
Step 3: Import the Dataset into Roboflow
Now that you have the dataset in COCO format, it’s time to bring it into Roboflow. Importing the dataset allows you to leverage Roboflow’s tools for preprocessing, augmentation, and dataset management, ensuring your model trains on high-quality, well-organized data.
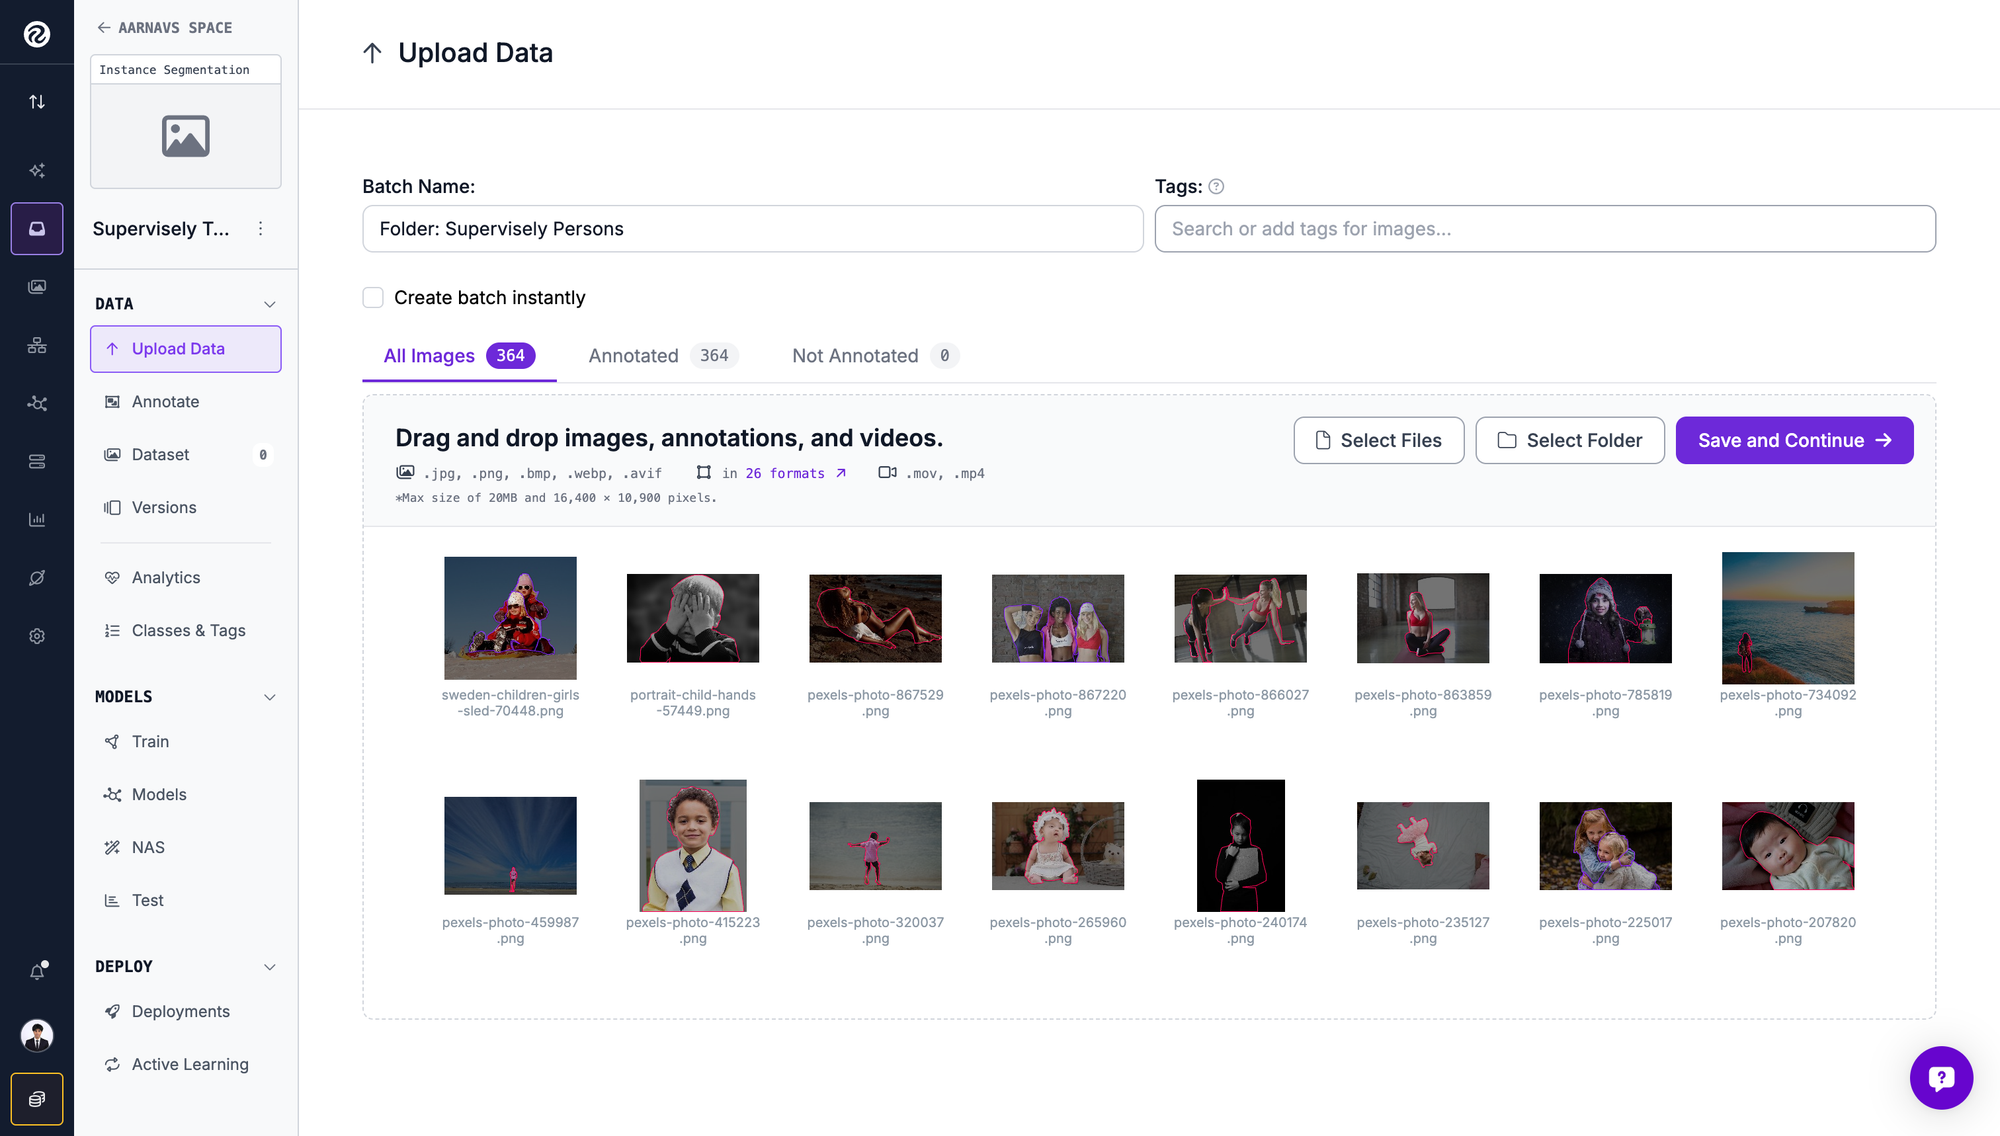
Navigate to the Upload Section: In your Roboflow project, click the “Upload” button on the dataset page or find the dataset folder in your file explorer and drag and drop it onto the upload section:
Step 4: Train a RF-DETR Model in Roboflow
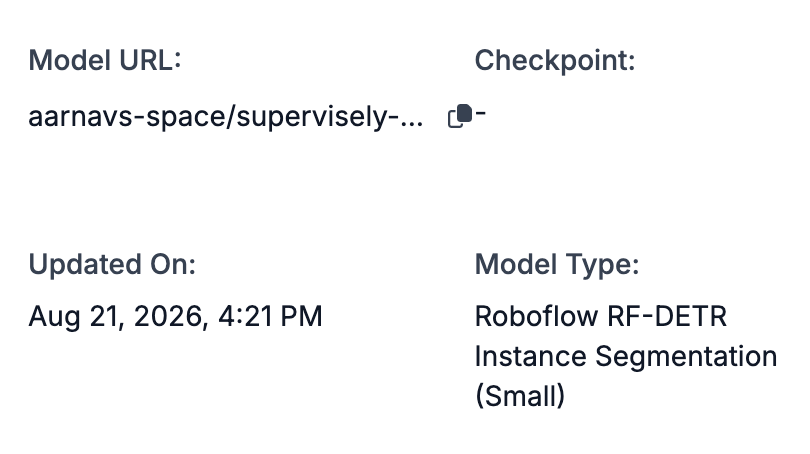
Training a model is where the magic happens! We’ll use Roboflow to train a an RF-DETR small model, an architecture known for its accuracy in object detection and segmentation tasks. By configuring preprocessing and training parameters, we’ll ensure the model learns to accurately segment people in the dataset.
Navigate to the Train Section:
- In your Roboflow project dataset section, go to the “Train Model” button on the top right.
- Select “Custom Training” to use Roboflow’s cloud-based training infrastructure.
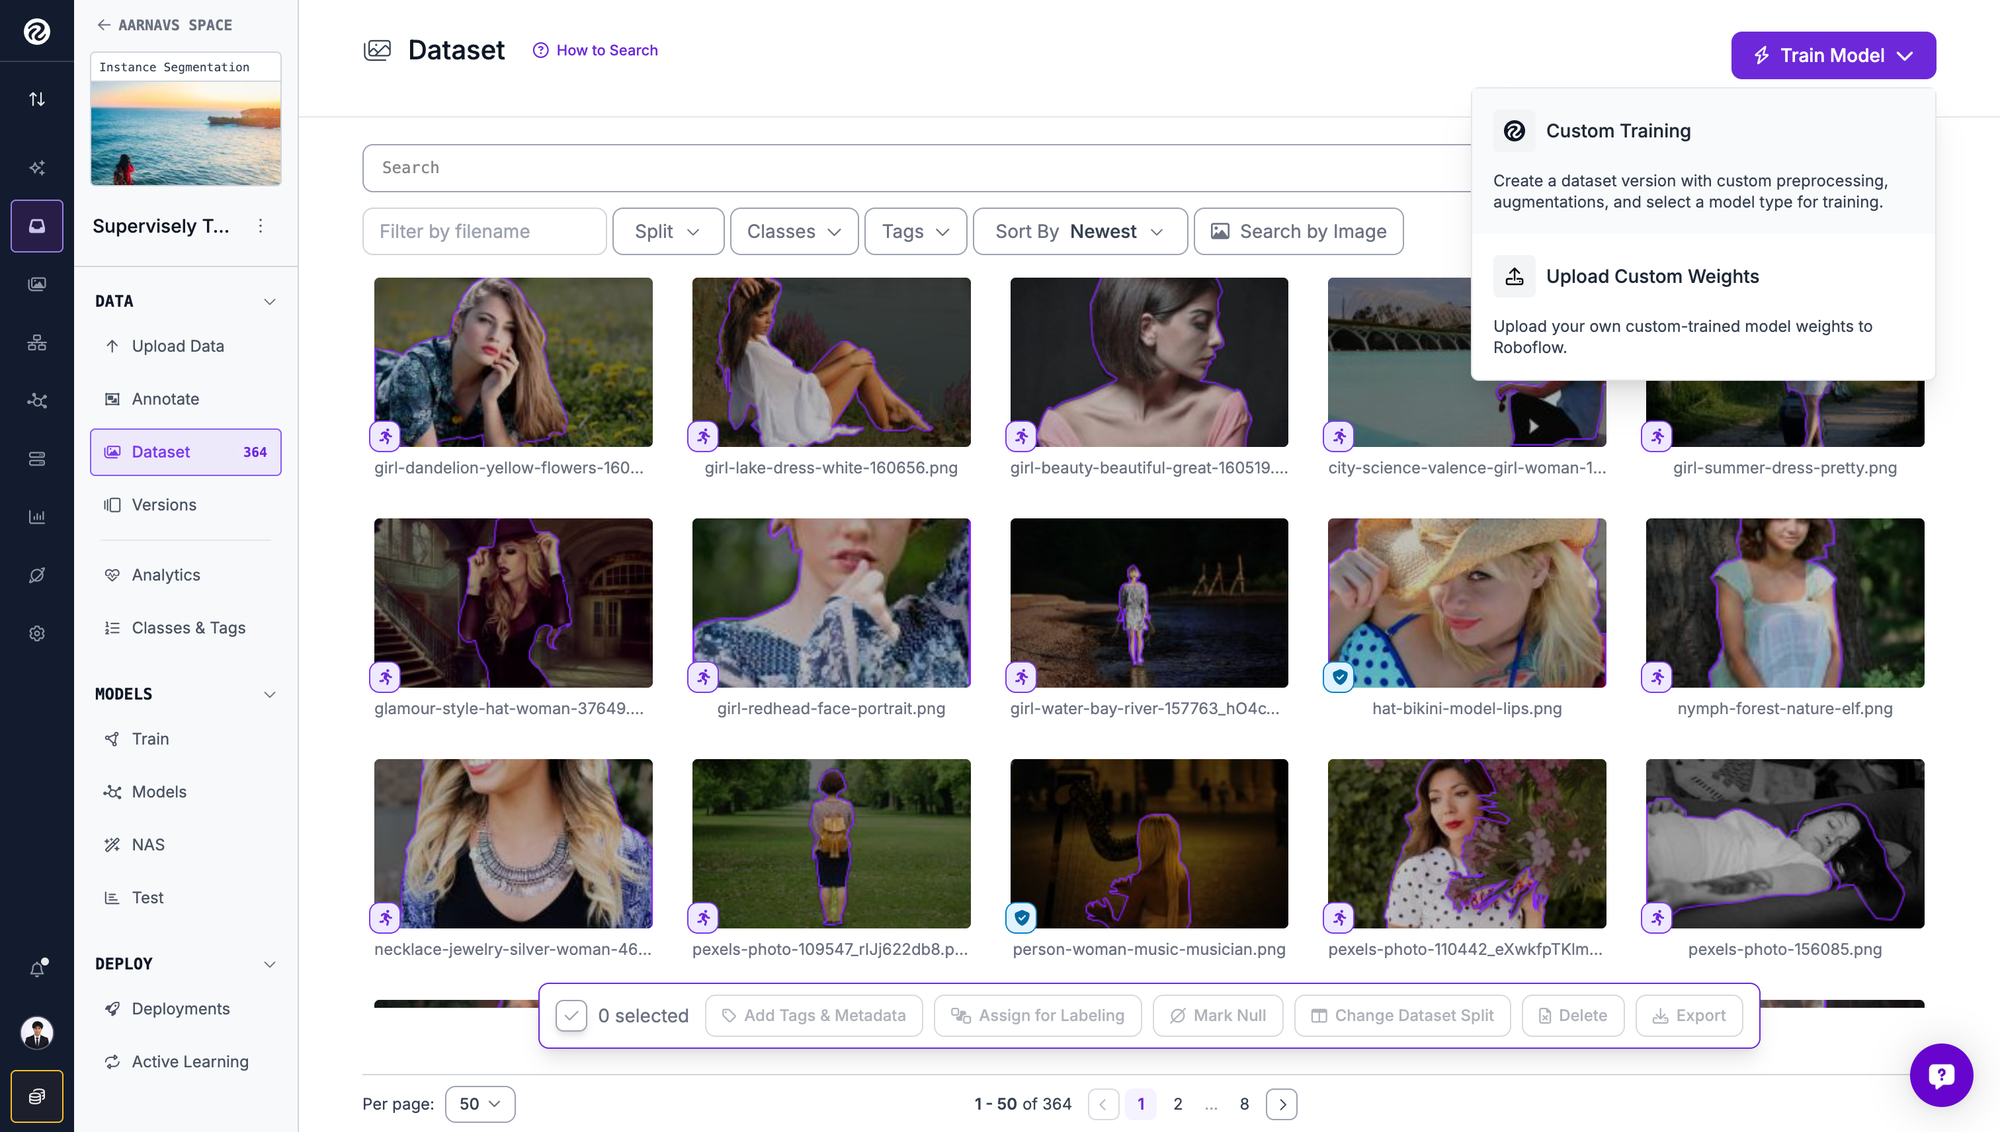
Select Roboflow RF-DETR as the architecture to be used:
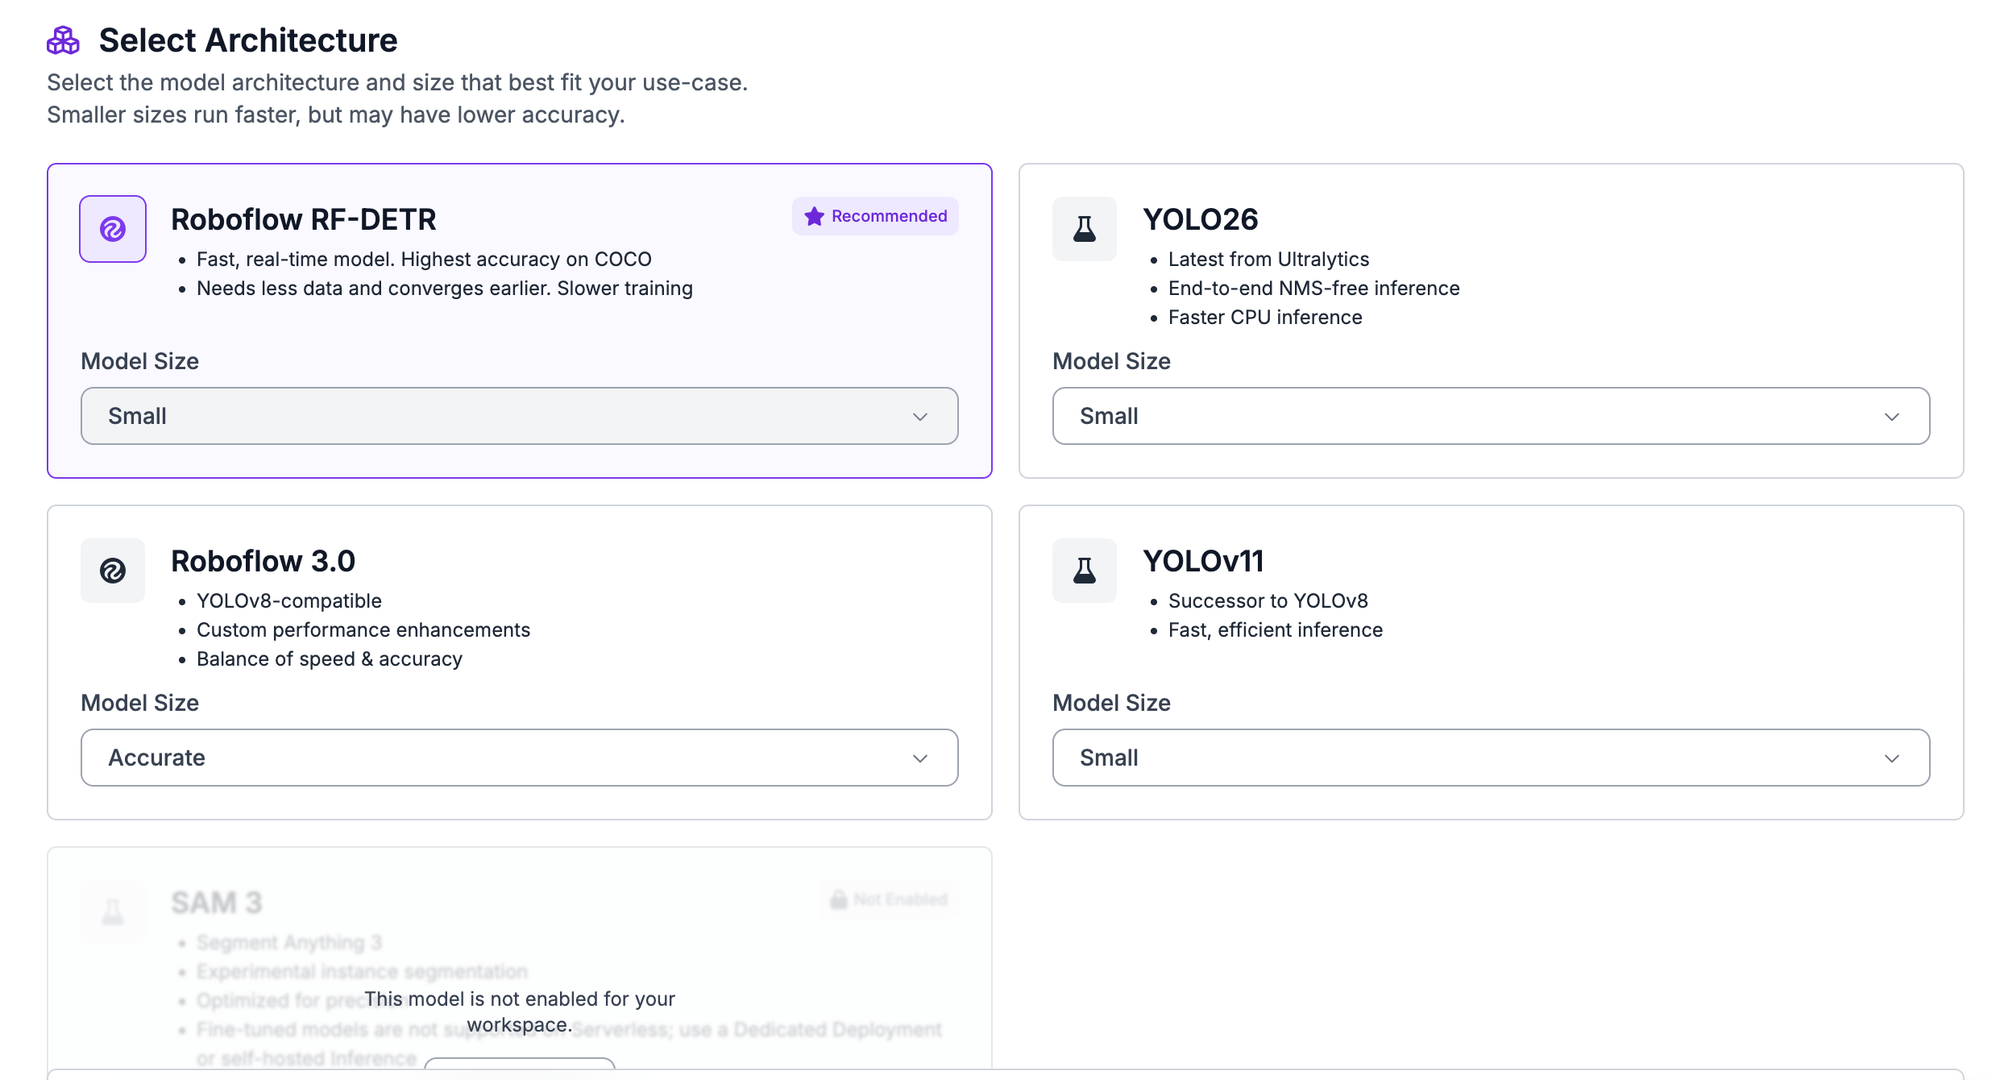
Configure Preprocessing:
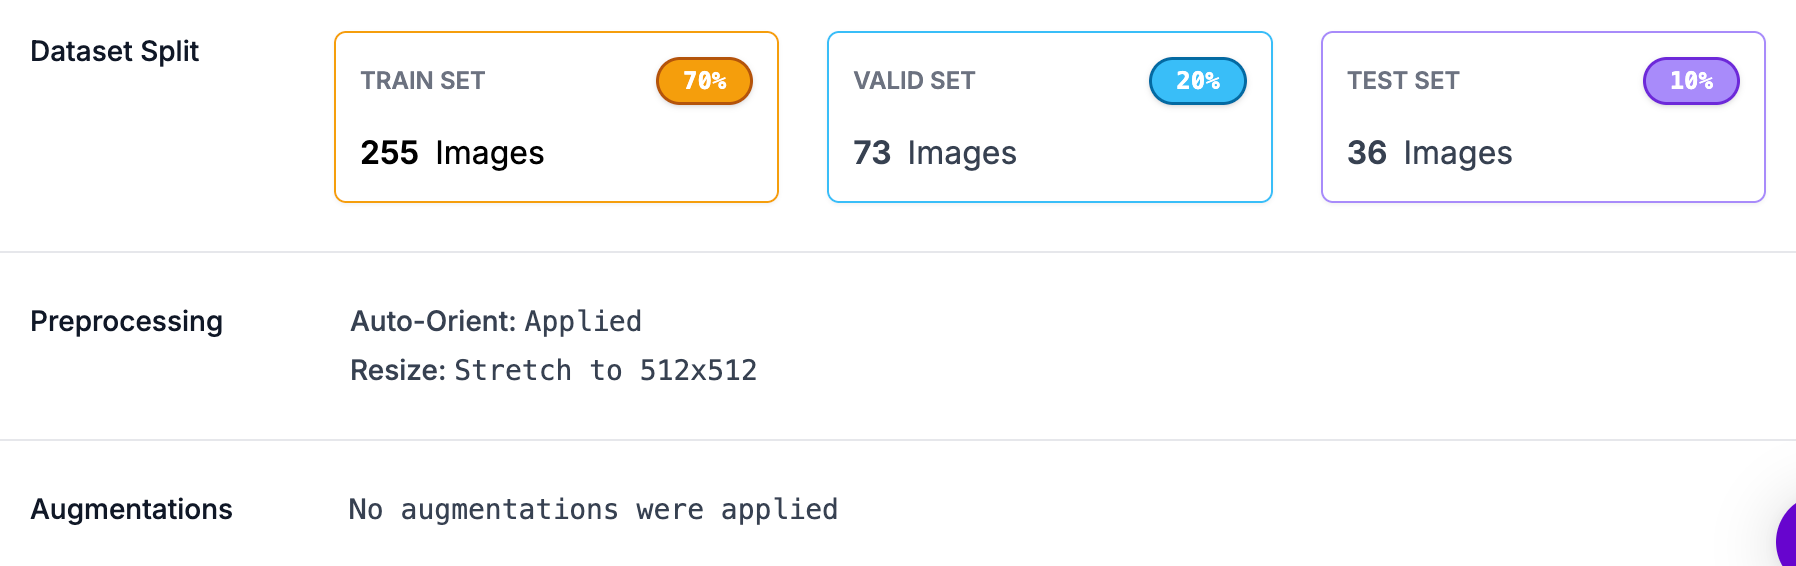
- Firstly, confirm that the dataset splits (train/validation/test) are correctly set (70%, 20%, 10%).

- Auto-Orient: Enable this to correct image orientations, ensuring consistency during training.
- Resize: Set the image size to 640x640 pixels (stretched). This standardizes the input size for the model, balancing detail and computational efficiency.
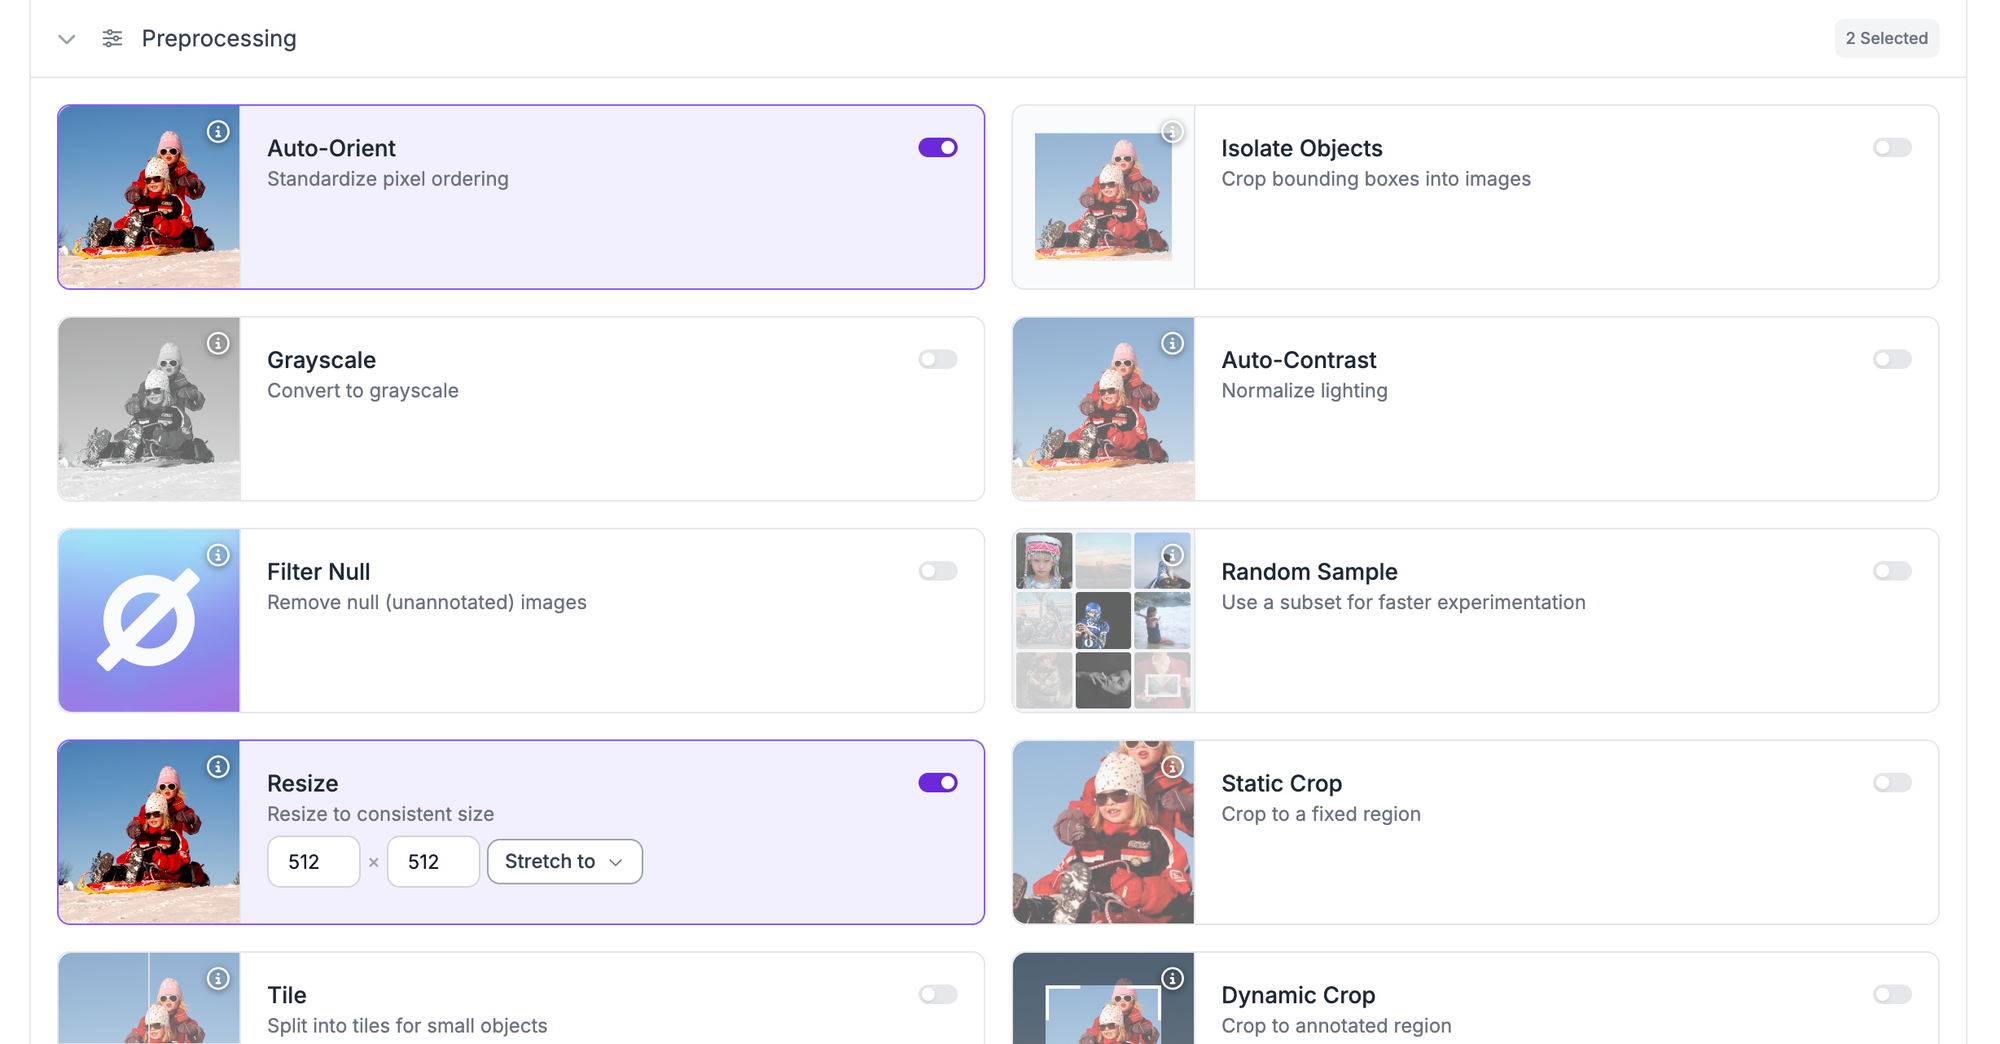
Augmentations: For this tutorial, disable augmentations to focus on the raw dataset. Later, you can experiment with augmentations like flips or rotations to improve model robustness.
Your model will be ready in some time!
Step 5: Build and Test a Workflow in Roboflow
Once the model is trained, we need to evaluate its performance. Roboflow’s workflow feature allows you to create a pipeline to process images, apply the trained model, and visualize the results. This step ensures the model accurately segments people and helps identify any areas for improvement.
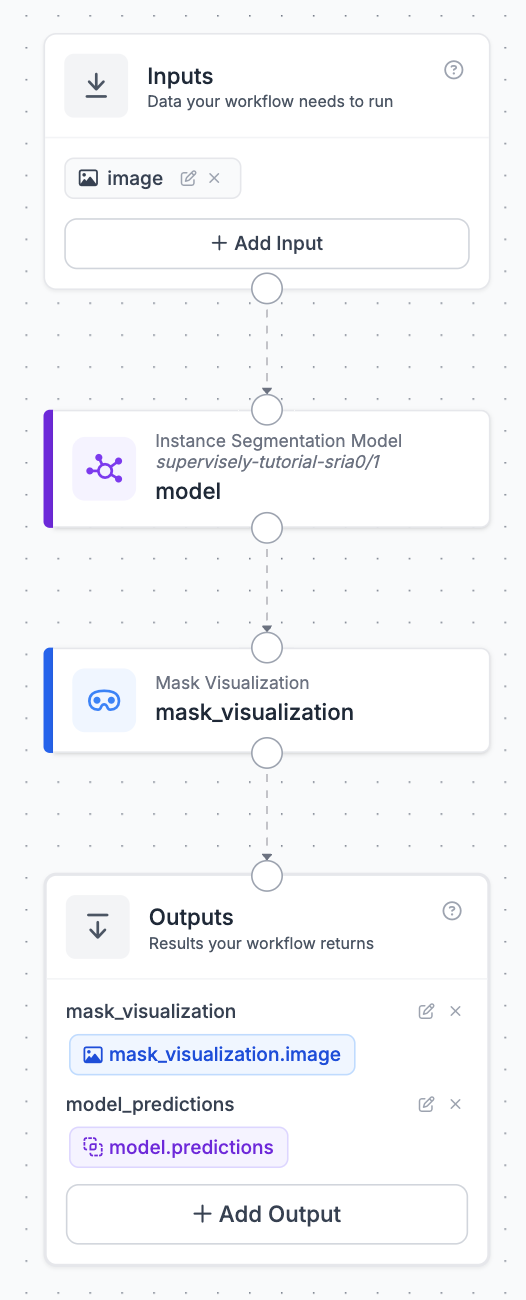
1. Create a Workflow:
In your Roboflow project, navigate to the “Workflows” tab and click “Create Workflow”. Name the workflow (e.g., “Person Segmentation Workflow”).
2. Add a Model Block:
Drag and drop a “Model” block into the workflow canvas. Select your trained RF-DETR model from the project.
3. Add a Visualization Block:
Add a “Visualization” block to the workflow and connect it to the model block. Configure the visualization to display segmentation masks, bounding boxes, and confidence scores for each detected person.
4. Test the Workflow:
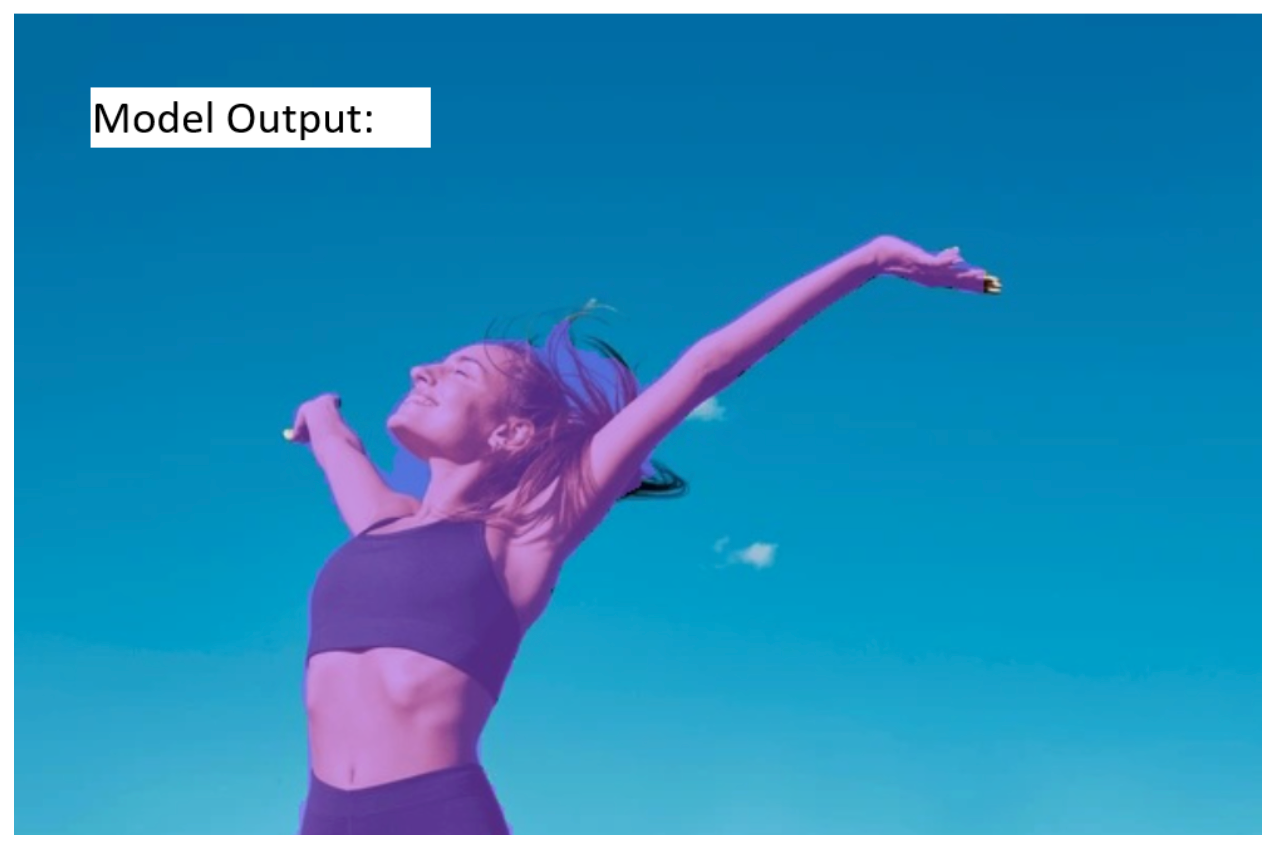
Upload a test image from the Supervisely dataset (or a new image) to the workflow. Run the workflow and review the output. The visualization block will overlay segmentation masks on the image, highlighting each detected person.
5. Evaluate Performance:
Check for accuracy: Are the masks correctly outlining individual people, even in crowded scenes? Look for false positives/negatives: Are there missed detections or incorrect segmentations?
The workflow feature is a game-changer! It lets you see your model in action, making it easy to validate its performance and share results with stakeholders. Visualizing detections builds confidence in the model and helps you fine-tune it for real-world use. For a sample workflow, check out this example.
Step 6: Incorporate Production Data for Continuous Improvement
A model is only as good as the data it’s trained on. In production, real-world data often differs from the initial dataset, leading to performance gaps. Roboflow makes it easy to bring production data into the platform, label it, and retrain your model to improve its accuracy over time. This iterative process ensures your person segmentation application remains robust in diverse scenarios, making Roboflow the go-to tool for labelling and model improvement.
Continuous improvement is the key to a successful AI application. By using Roboflow to label and integrate production data, you’re ensuring your model stays relevant and accurate as conditions change. This process transforms your application into a dynamic, evolving solution that adapts to the real world.
Step 7: Deploy the Model
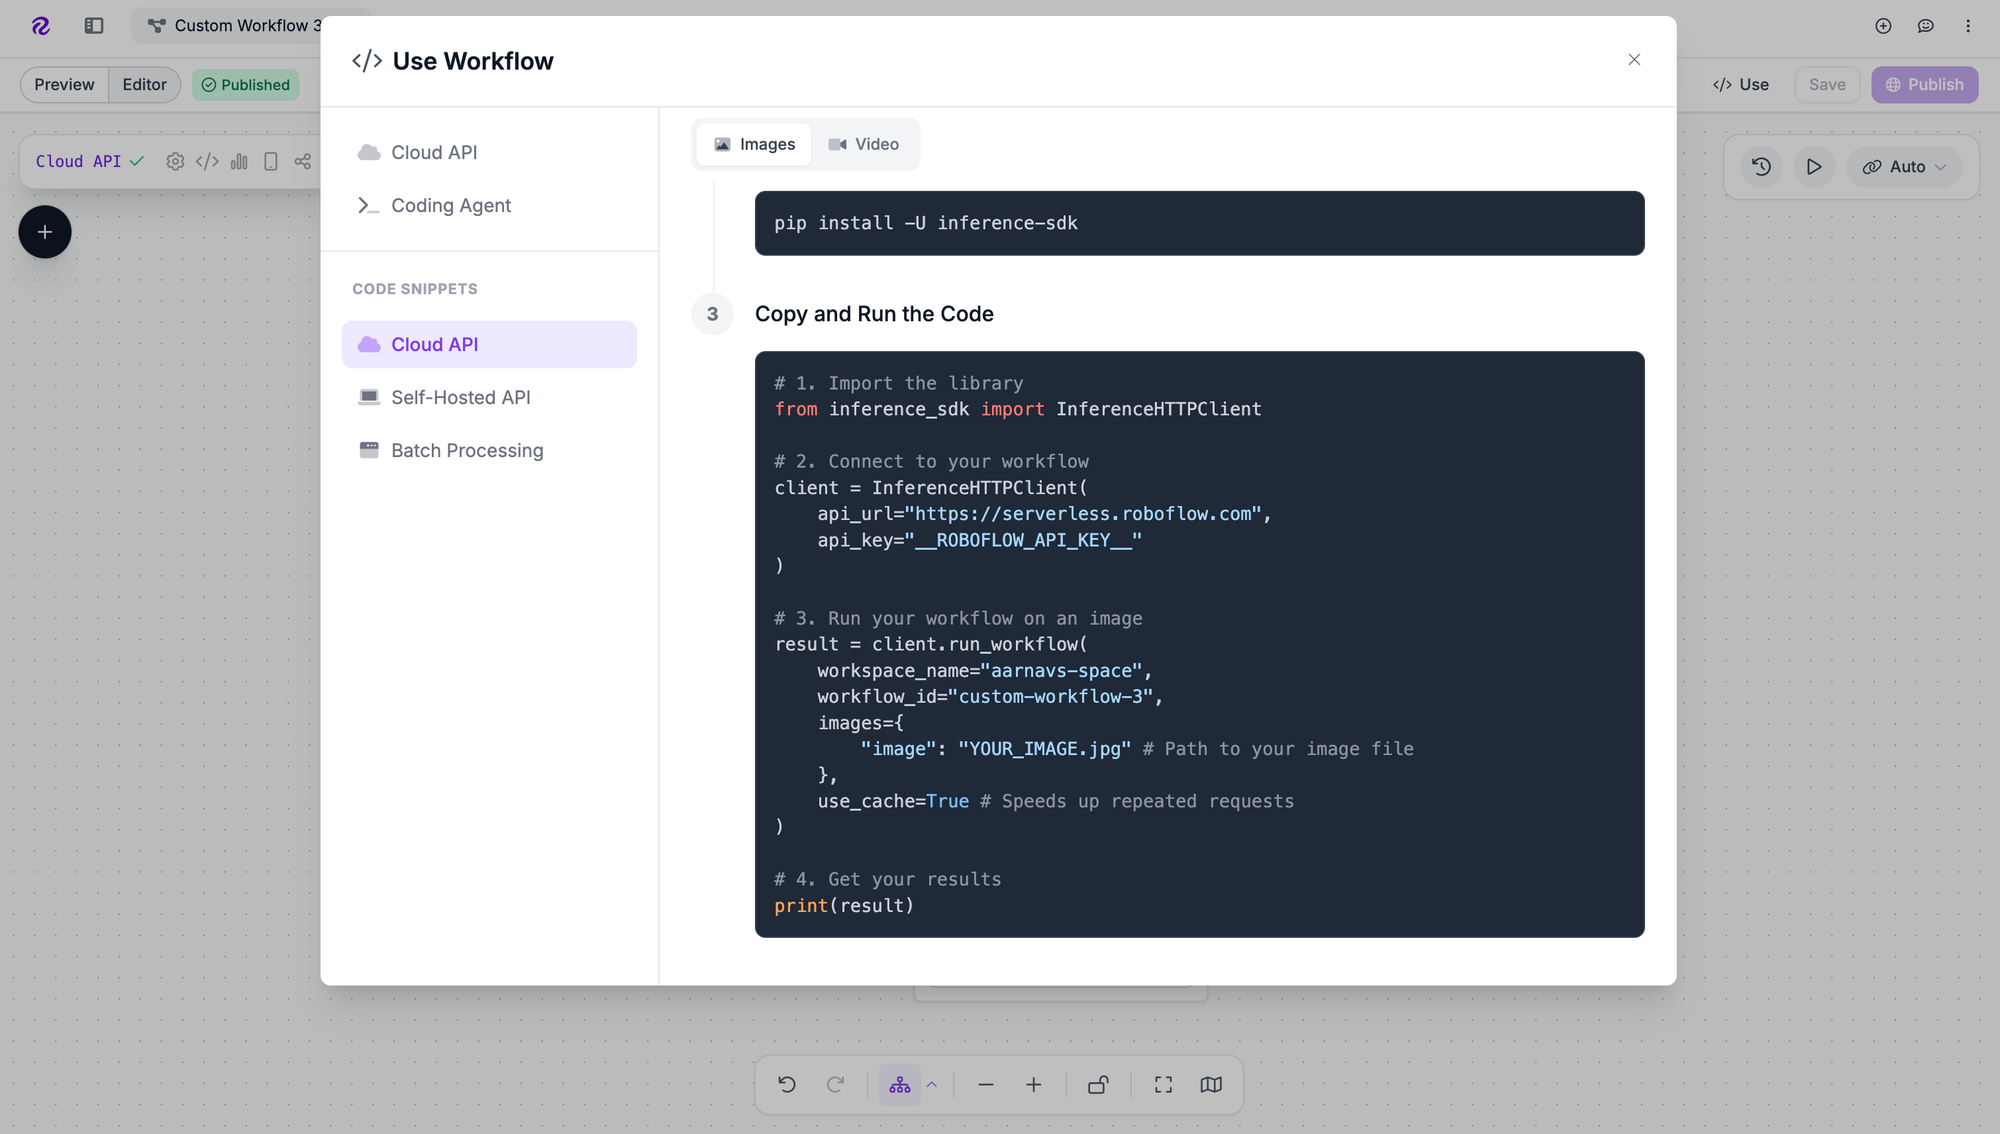
A trained and tested model is ready to make an impact! Deploying the model allows you to integrate it into your application, whether it’s a mobile app, a web service, or an edge device. Roboflow’s flexible deployment options make this process seamless, enabling real-time person segmentation in production.
Configure the Deployment:
For the Cloud API, install the inference-sdk with pip install inference-sdk, then use the following Python code:
# 1. Import the library
from inference_sdk import InferenceHTTPClient

# 2. Connect to your workflow
client = InferenceHTTPClient(
    api_url="https://serverless.roboflow.com",
    api_key="DyEyqDETHqpGhlxCxfEA"
)

# 3. Run your workflow on an image
result = client.run_workflow(
    workspace_name="aarnavs-space",
    workflow_id="custom-workflow-3",
    images={
        "image": "YOUR_IMAGE.jpg" # Path to your image file
    },
    use_cache=True # Speeds up repeated requests
)

# 4. Get your results
print(result)
- Replace YOUR_API_KEY with your Roboflow API key and custom-workflow-3 with your workflow ID. Obtain these from the Roboflow dashboard.
Integrate into Your System:
- Use the API or SDK to send images to the model and receive segmentation results.
- Test the deployed model with sample images to ensure it performs as expected in production.
Monitor and Scale:
- Monitor the model’s performance using Roboflow’s analytics tools.
- Scale the deployment as needed, leveraging Roboflow’s infrastructure for high-throughput applications or adjusting local resources accordingly.
Deployment is where your hard work pays off! Whether you’re building a security system that tracks people in real time or an AR app that overlays effects on users, Roboflow’s deployment options make it easy to bring your model to life. Check Roboflow’s deployment instructions for detailed guidance.
Conclusion: Import Supervisely Datasets to Roboflow
Congratulations! You’ve built an end-to-end person segmentation application using Roboflow and the Supervisely Persons dataset. From exporting data in COCO format to training an RF-DETR model, creating a workflow to visualize detections, and deploying the model, you’ve mastered the key steps of a computer vision pipeline. By incorporating production data, you’ve also learned how to keep your model improving over time, ensuring it remains accurate and relevant.
Roboflow’s powerful tools make it the ideal platform for dataset management, model training, and deployment. Whether you’re a beginner or a seasoned developer, Roboflow empowers you to create cutting-edge computer vision applications with ease. Now, go explore new datasets, experiment with augmentations, or deploy your model to solve real-world problems; the possibilities are endless!
Written by Aarnav Shah


Cite this Post
Use the following entry to cite this post in your research:
Aarnav Shah. (Aug 4, 2026). How to Import Supervisely Datasets to Roboflow. Roboflow Blog: https://blog.roboflow.com/import-supervisely-datasets/