
Computer vision development has traditionally been a time-intensive process, requiring developers to write boilerplate code, handle API integrations, manage data preprocessing pipelines, and debug complex model inference workflows. But what if you could accelerate this entire process using AI-powered coding assistance?
GitHub Copilot, GitHub's AI pair programming tool, has revolutionized how developers approach coding challenges across many domains. When combined with Roboflow's powerful computer vision platform, it creates an incredibly efficient workflow for building production-ready vision applications in a fraction of the time.
In this guide, we’ll be prompting our way with Copilot to build a simple tool that will monitor specific Chrome tabs (Discord, Instagram, Gmail) to watch for notifications and play an on screen overlay/sound when a notification is received:
How to Build Vision Apps with GitHub and Roboflow
Keep in mind, because of how powerful this method of building tools is, it serves as a great alternative to traditional methods.
Let’s get started!
Initialize the Project with Copilot
After signing up for Copilot and reaching the chat interface, you’ll need to describe the kind of project you’re building. Copilot will quickly grasp what you’re trying to make and, because of its nativity to GitHub, also be able to initialize a repository for you with a Readme:
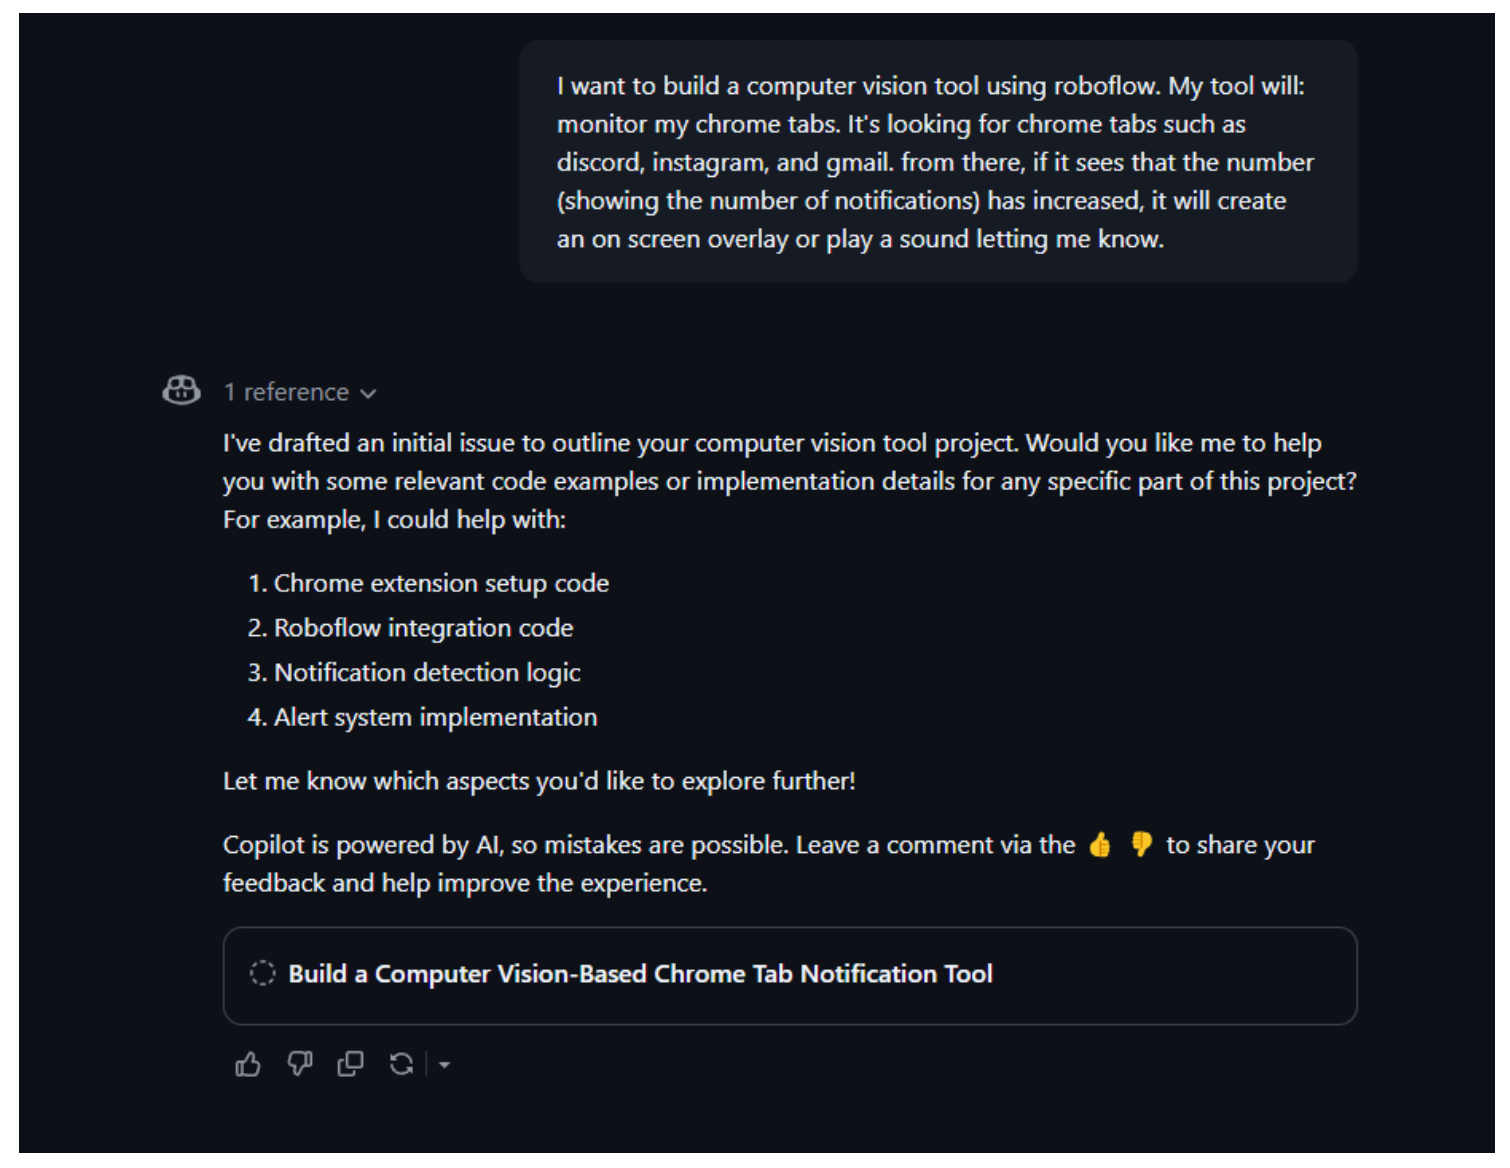
Copilot has now identified the project, and the different steps needed. Since we want this model to work well with minimal preprocessing, we can potentially use a Gemini model with Roboflow Workflows to quickly identify the info we need from screenshots of chrome tabs.
Create a Workflow For Identifying Relevant Information
We’ll start by creating a new Workflow (finished version). If you haven't already, create a Roboflow account, with an API key, and a new workspace. From here, create a new Workflow:
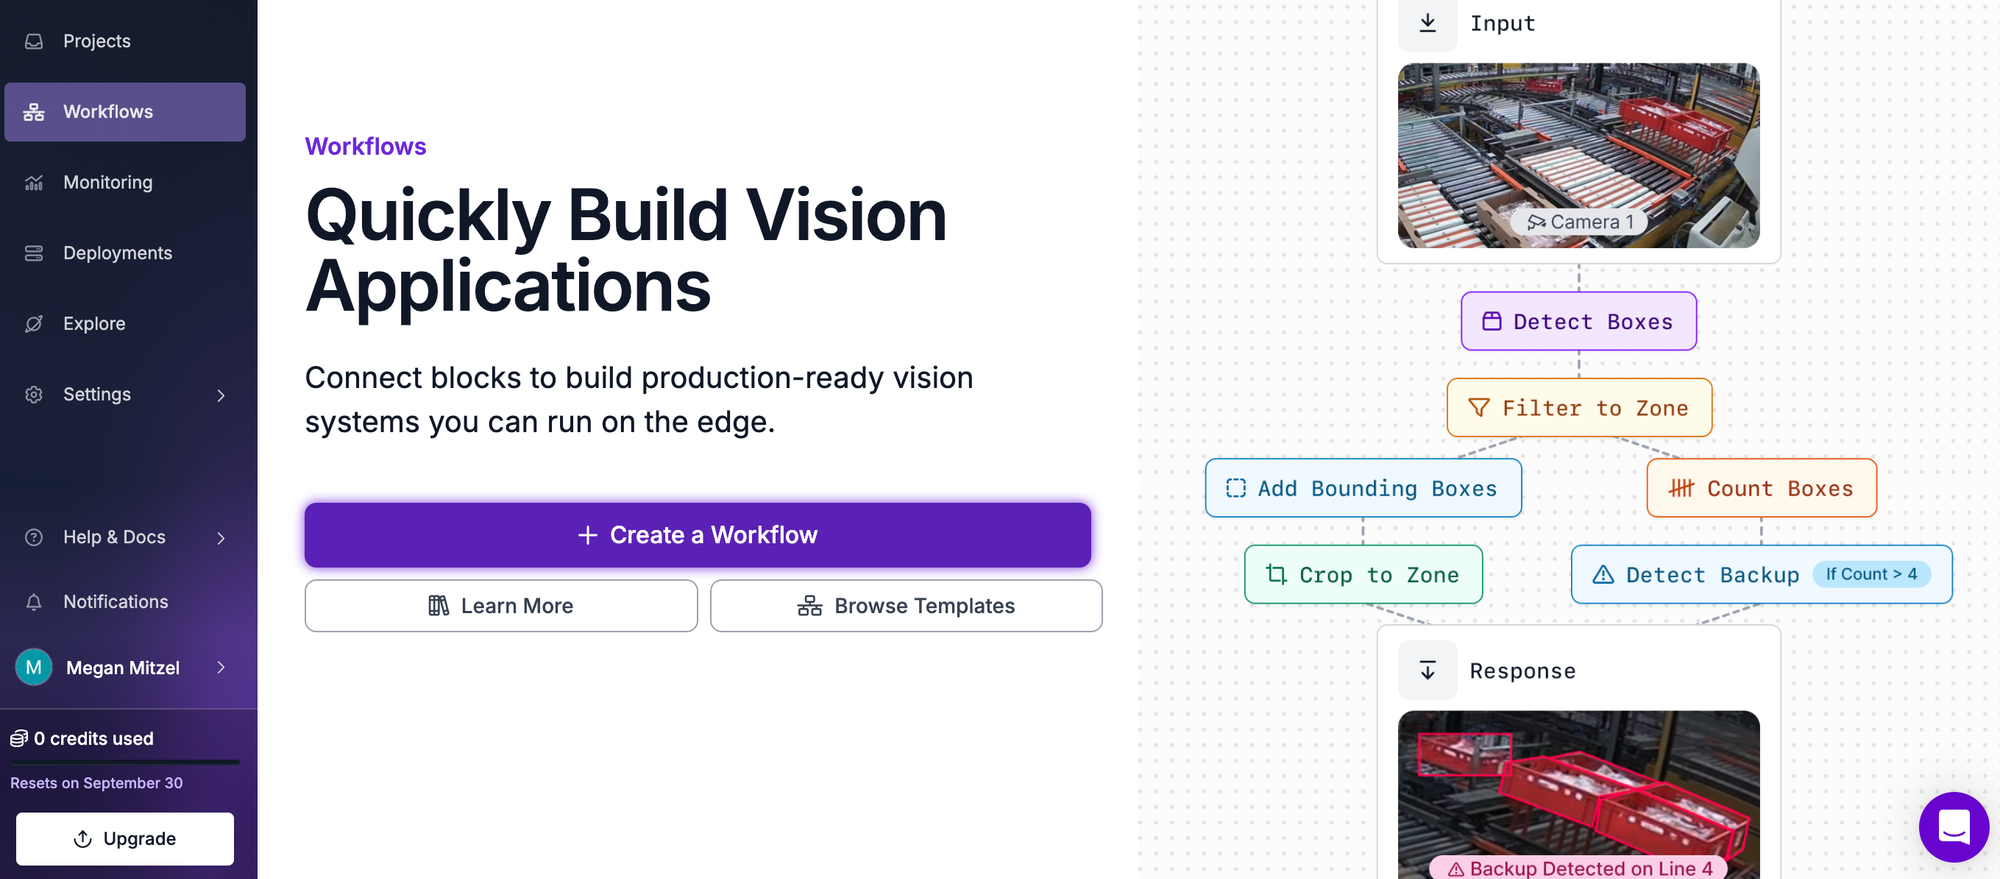
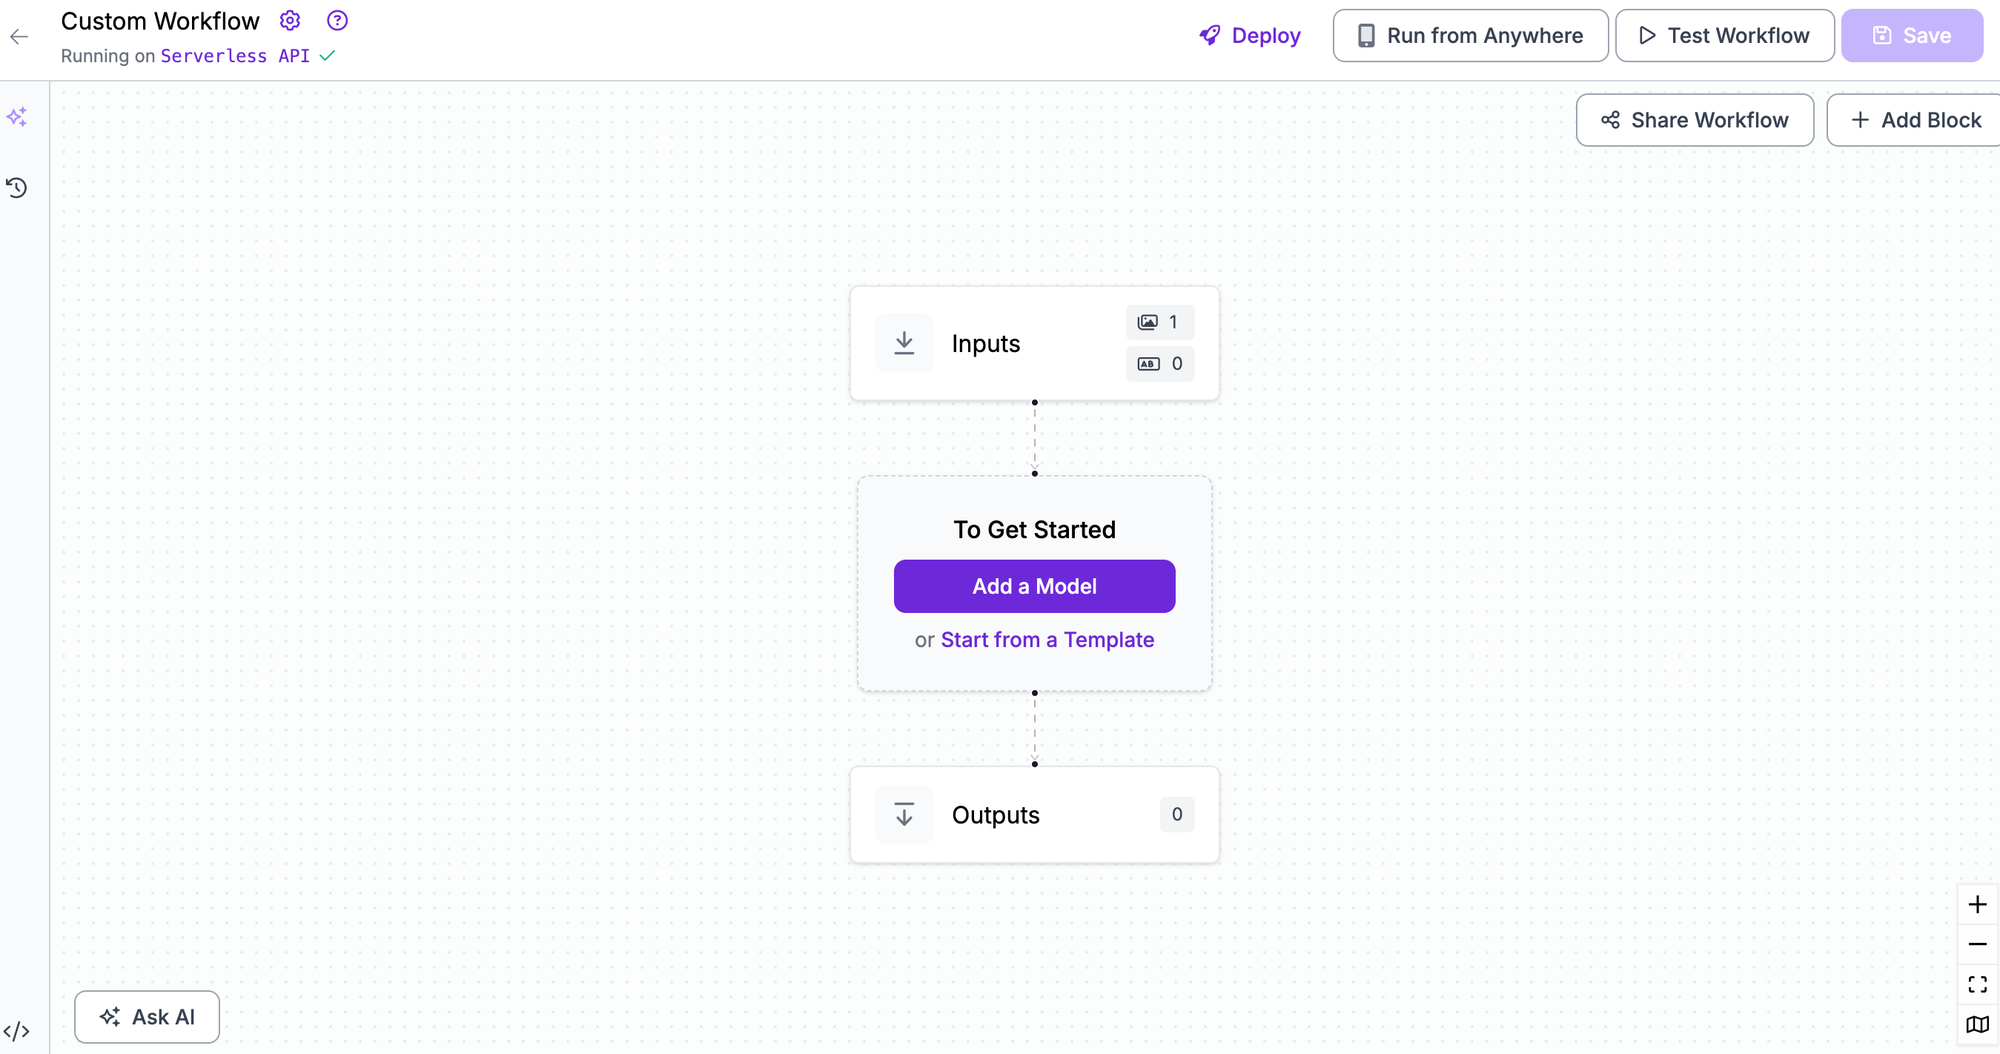
Start by clicking Create a Workflow in Roboflow.
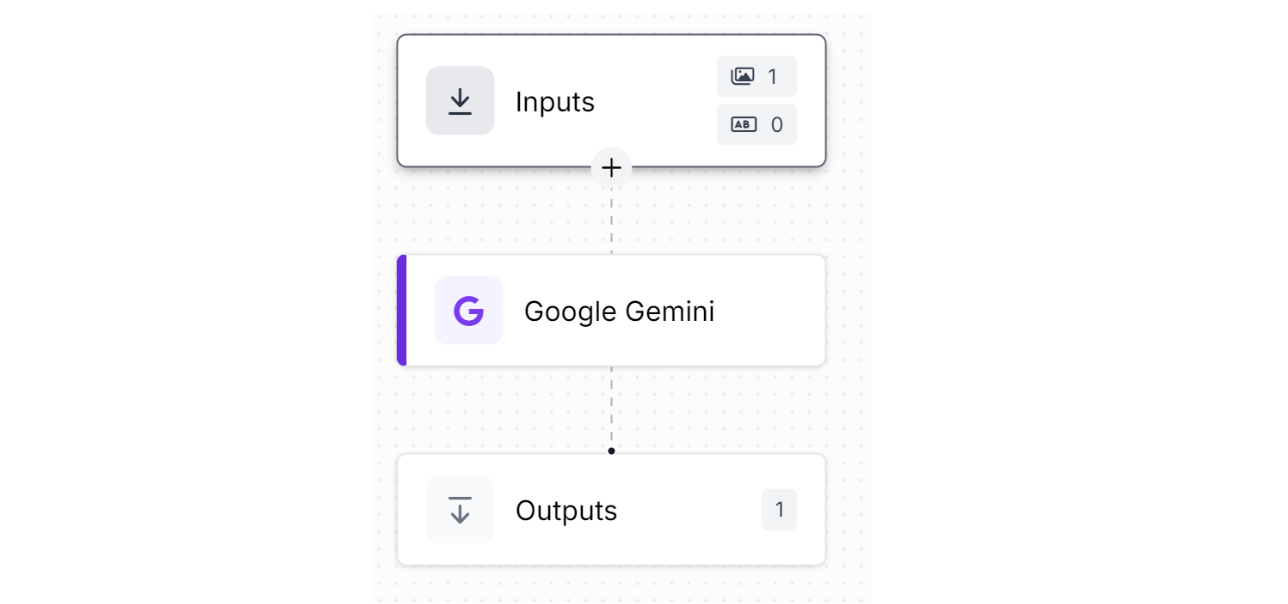
And adding the Gemini block:
From here, we’ll customize the specific output of the blocks to a structured, JSON response. This is because we want to be able to directly access the relevant info without actually having to deal with all of the extra clutter in the response:
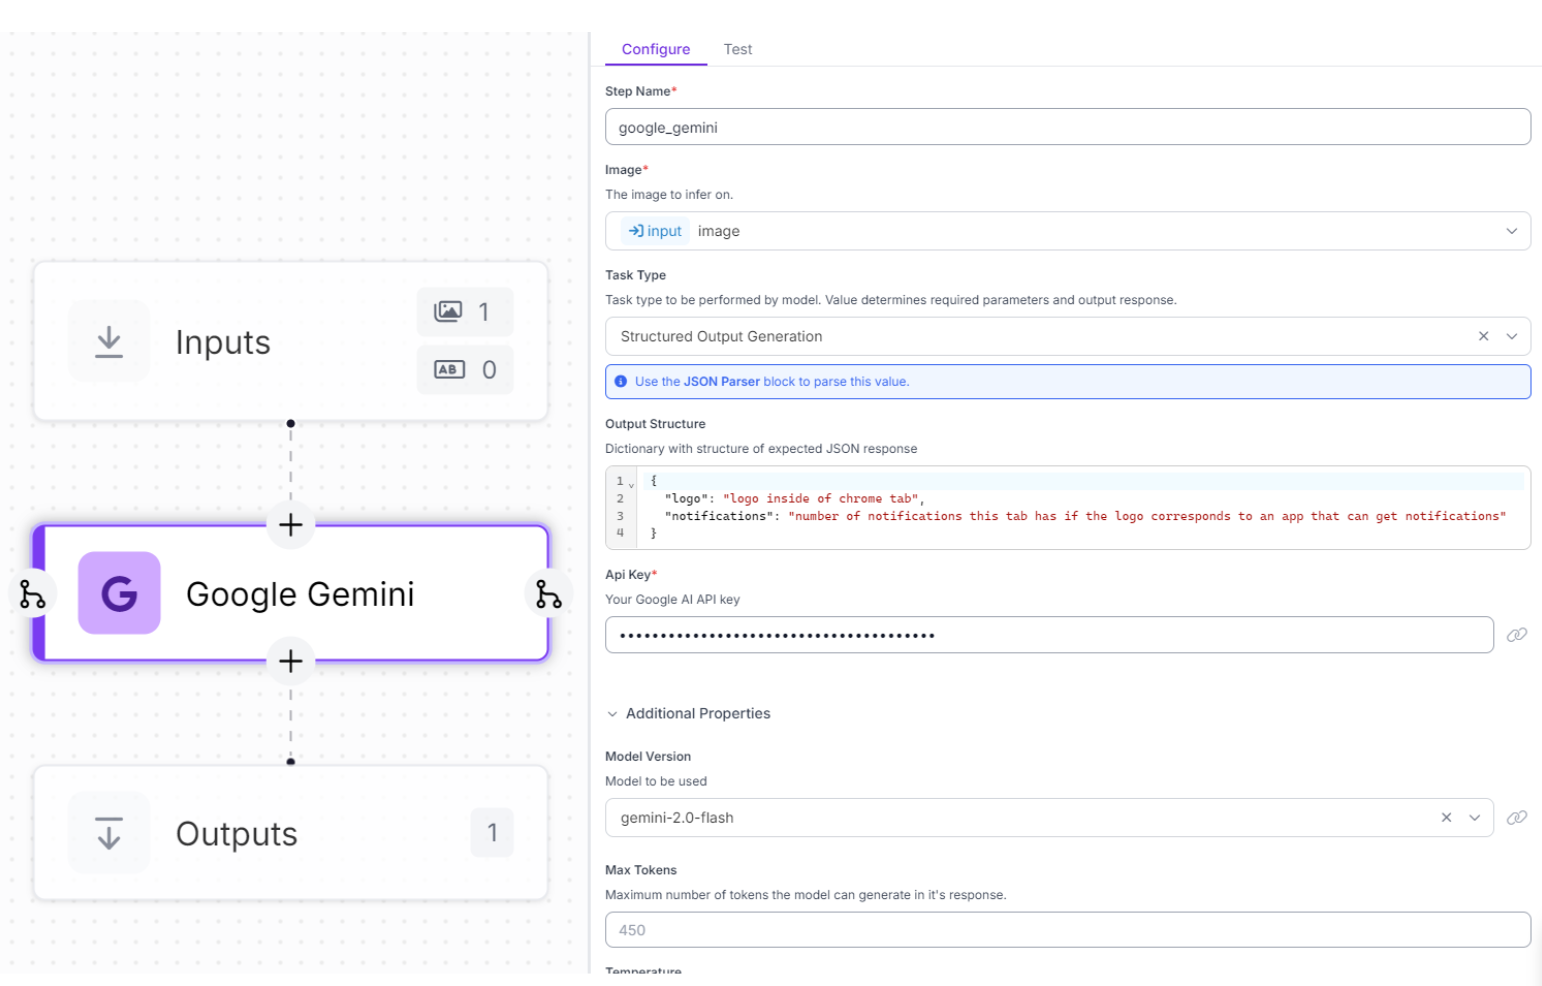
I’ve set descriptions for both the logo, and number of notifications output. Additionally, you’ll need to get a Gemini API key and add it inside the configuration for it to actually be able to make predictions. You can verify that this workflow works well. Here are two sample images of Chrome tabs and their response:


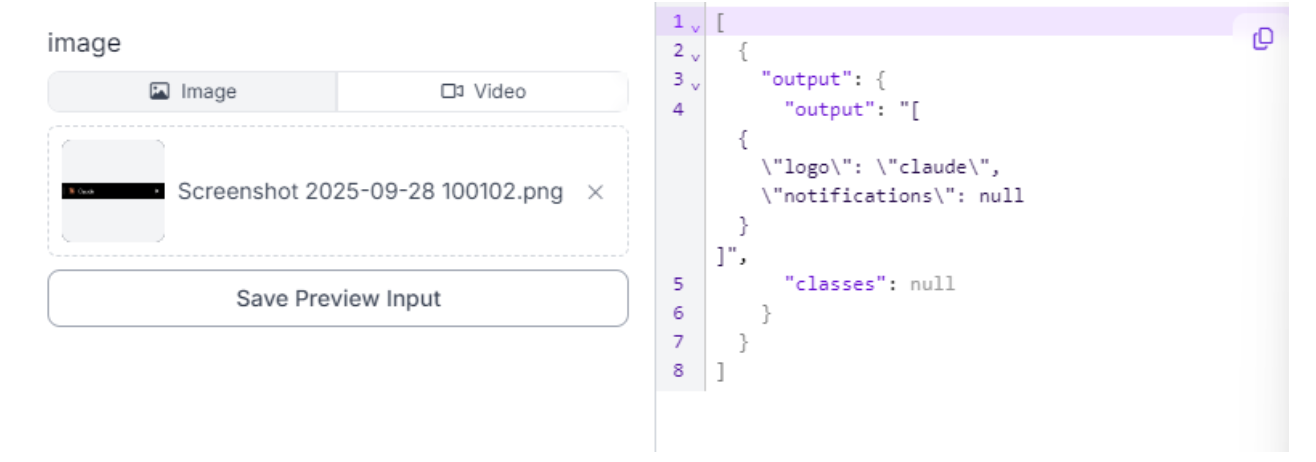
As you can see, this works quite well! Now, we can redirect it to Copilot, and ask it to continue building our app.
Build with GitHub Copilot
Once we’re here, we’re just prompts away from getting to our goal. We can feed it the info from our workflow, and see what it says:
For my preferences, I want a tool that runs on device, not a chrome extension:
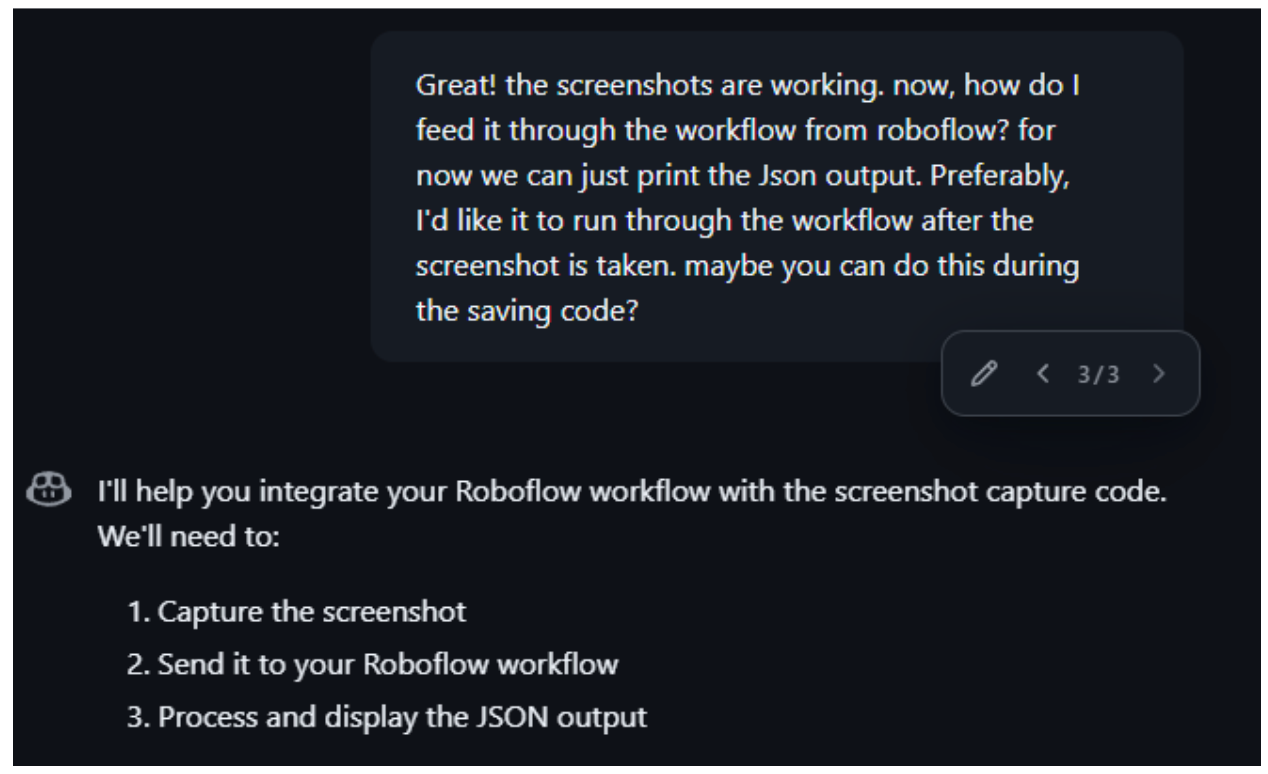
Now it’s fully understood my task, my goals, and how to do it. Let’s begin by getting the screenshot capture down:

Here is what it produced:
import pyautogui
import time
from PIL import Image
import os

class ChromeTabCapture:
    def __init__(self):
        # Define tab dimensions
        self.TAB_WIDTH = 200
        self.TAB_HEIGHT = 40

        # Create screenshots directory if it doesn't exist
        self.screenshot_dir = "tab_screenshots"
        if not os.path.exists(self.screenshot_dir):
            os.makedirs(self.screenshot_dir)

    def capture_first_tab(self):
        try:
            # Take screenshot of the entire screen
            screenshot = pyautogui.screenshot()

            # Crop to get just the first tab
            first_tab = screenshot.crop((0, 0, self.TAB_WIDTH, self.TAB_HEIGHT))

            # Save the screenshot with timestamp
            timestamp = time.strftime("%Y%m%d-%H%M%S")
            filename = f"{self.screenshot_dir}/tab_{timestamp}.png"
            first_tab.save(filename)

            print(f"Screenshot saved as {filename}")
            return filename

        except Exception as e:
            print(f"Error capturing screenshot: {str(e)}")
            return None

    def monitor_tabs(self, interval=5):
        """
        Continuously monitor the first tab and take screenshots
        interval: time between screenshots in seconds
        """
        try:
            print("Starting tab monitoring... Press Ctrl+C to stop.")
            while True:
                self.capture_first_tab()
                time.sleep(interval)

        except KeyboardInterrupt:
            print("\nMonitoring stopped by user.")

def main():
    capture = ChromeTabCapture()

    # Take a single screenshot
    # capture.capture_first_tab()

    # Or monitor continuously with 5-second intervals
    capture.monitor_tabs(interval=5)

if __name__ == "__main__":
    main()
To use this code, it says we’ll need to install the requirements. It also generated a requirements.txt file, so we’ll add these 2 files to our project directory and install requirements with pip:
After this, we can check if the screenshots are working, because it’s saving to a directory called tab_screenshots:
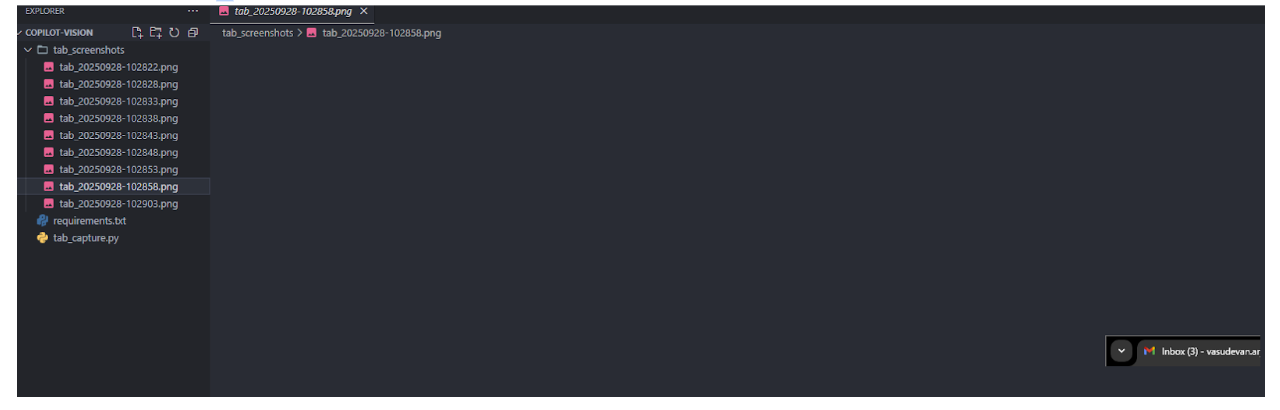
The program is successfully taking screenshots! We can proceed:
Here is the code that it generated:
import pyautogui
from inference_sdk import InferenceHTTPClient
import time
def capture_tab_screenshot():
# Capture the first Chrome tab (200x40 pixels from top-left corner)
screenshot = pyautogui.screenshot(region=(0, 0, 200, 40))
# Save temporarily (Roboflow needs a file path)
screenshot.save("current_tab.jpg")
return "current_tab.jpg"
def analyze_with_roboflow(image_path):
# Initialize the Roboflow client
client = InferenceHTTPClient(
api_url="https://serverless.roboflow.com",
api_key="YOUR_API_KEY" # Replace with your actual API key
)
# Run the workflow
result = client.run_workflow(
workspace_name="YOUR_WORKSPACE_NAME", # Replace with your workspace name
workflow_id="YOUR_WORKFLOW_ID", # Replace with your workflow ID
images={
"image": image_path
},
use_cache=True
)
return result
def main():
while True:
try:
# Capture screenshot
image_path = capture_tab_screenshot()
# Analyze with Roboflow
result = analyze_with_roboflow(image_path)
# Print the JSON output
print(f"Analysis Result: {result}")
# Wait for a few seconds before next capture
time.sleep(5) # Adjust this value as needed
except Exception as e:
print(f"Error occurred: {e}")
time.sleep(5) # Wait before retrying if there's an error
if __name__ == "__main__":
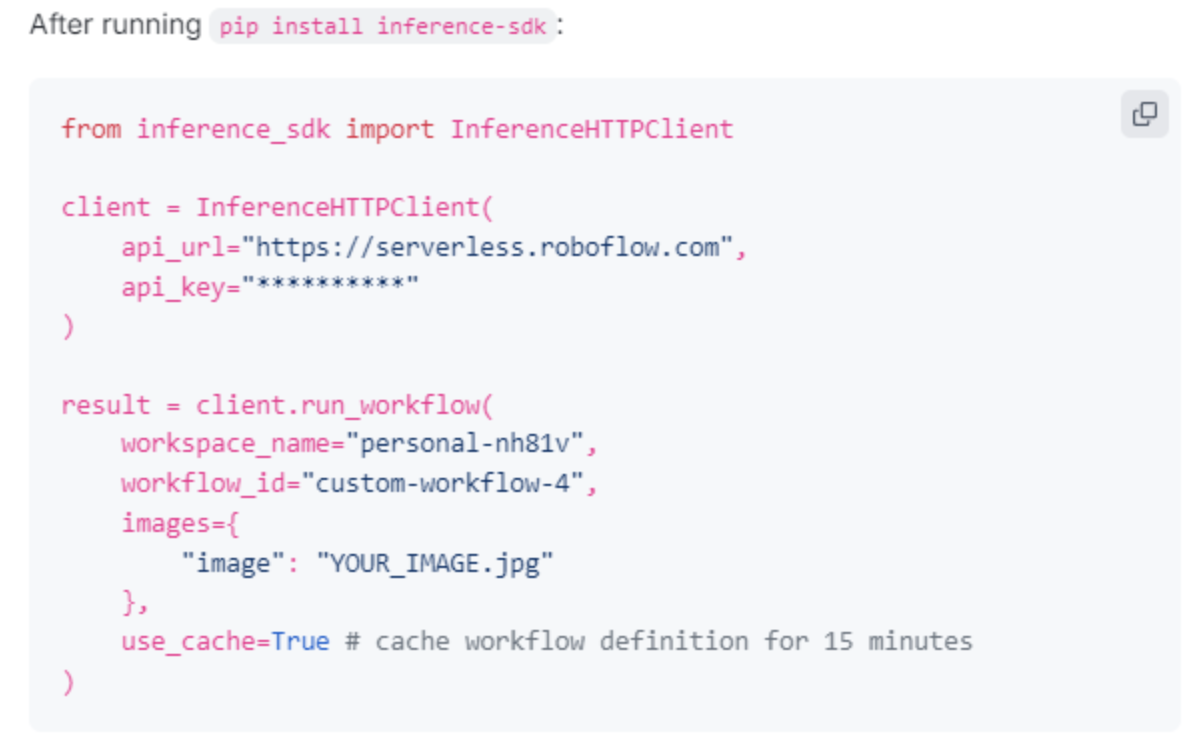
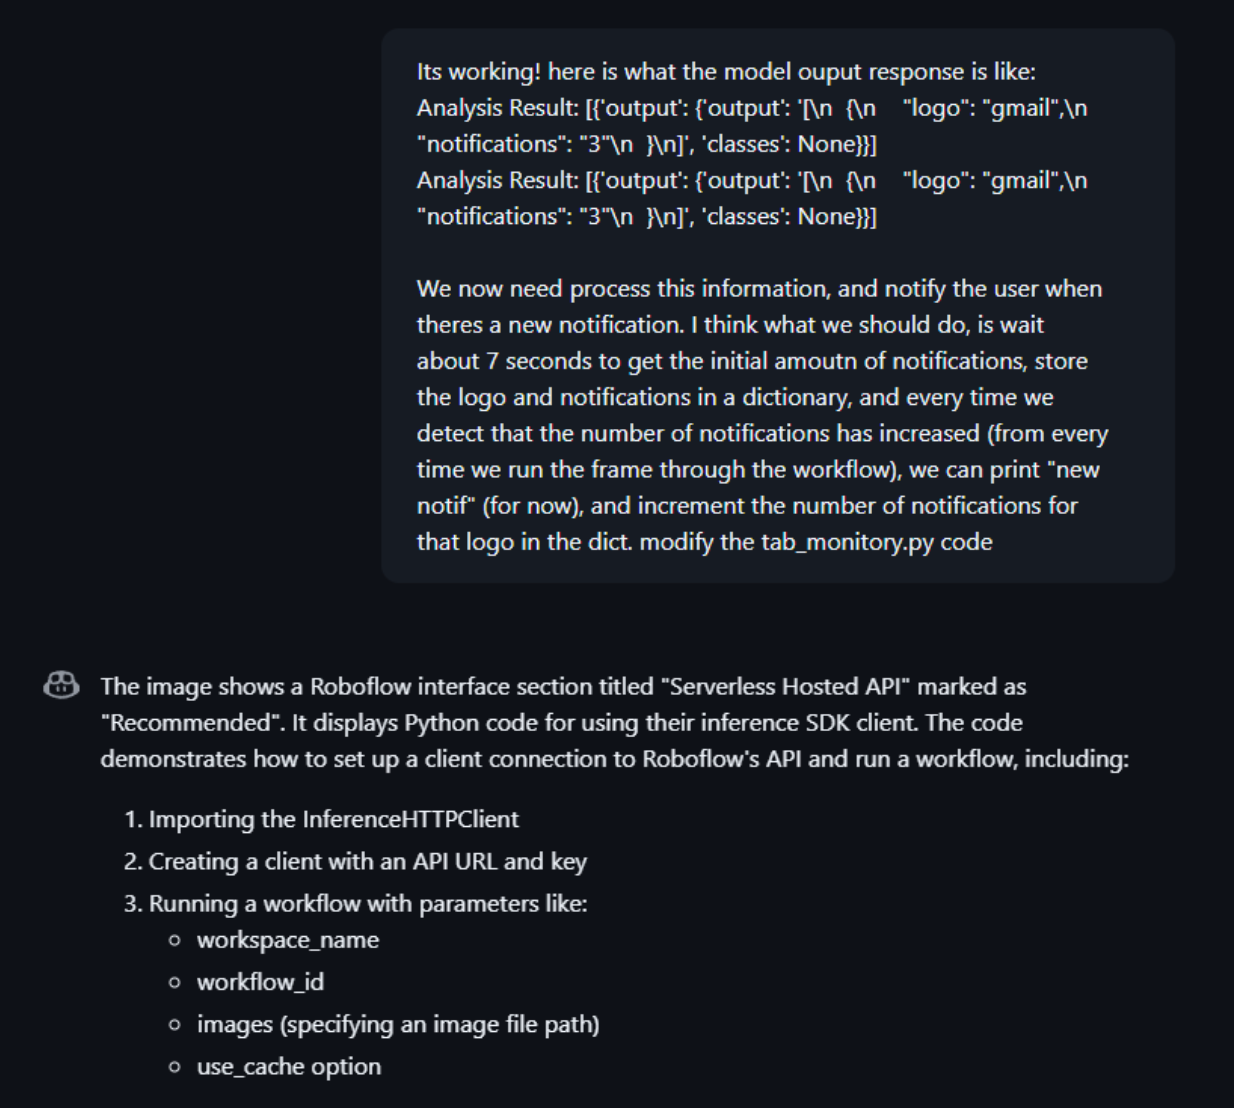
main()To use this code, it has picked up on the integration of Roboflow with the API key. It’s instructed us to install the Inference Client from Roboflow, which will allow us to deploy the workflow. Note that, since we’re no longer saving these screenshots in a folder, we no longer need the libraries for PIL and os. We do however, as copilot mentions, need to install the inference SDK library by Roboflow:

From here, we just replace the relevant credentials. You can find these from the deployment page:
After running it:

We’re successfully getting the logo, and the number of notifications! We can continue with Copilot:
Here is the updated version that it generated:
import json
import time
from PIL import ImageGrab
import pyautogui
from inference_sdk import InferenceHTTPClient
class TabMonitor:
def __init__(self):
# Initialize the Roboflow client
self.client = InferenceHTTPClient(
api_url="https://serverless.roboflow.com",
api_key="YOUR_API_KEY"
)
self.notification_counts = {}
self.initial_setup()
def initial_setup(self):
print("Starting initial setup...")
# Take initial screenshot and get baseline notification counts
result = self.capture_and_analyze()
self.update_notification_counts(result, initial=True)
time.sleep(7) # Wait 7 seconds for initial setup
def capture_and_analyze(self):
# Capture screenshot of the tab area (200x40 pixels from top-left)
screenshot = ImageGrab.grab(bbox=(0, 0, 200, 40))
# Save temporarily and analyze with Roboflow
screenshot_path = "temp_screenshot.png"
screenshot.save(screenshot_path)
# Run through Roboflow workflow
result = self.client.run_workflow(
workspace_name="YOUR_WORKSPACE_NAME",
workflow_id="YOUR_WORKSPACE_ID",
images={
"image": screenshot_path
},
use_cache=True
)
return result
def parse_result(self, result):
try:
# Extract the JSON string from the nested structure
json_str = result[0]['output']['output']
# Parse the JSON string
parsed_data = json.loads(json_str)
# If parsed_data is a list, get the first item
if isinstance(parsed_data, list):
parsed_data = parsed_data[0]
return parsed_data
except Exception as e:
print(f"Error parsing result: {str(e)}")
print(f"Raw result: {result}")
return None
def update_notification_counts(self, result, initial=False):
parsed_data = self.parse_result(result)
if parsed_data:
app = parsed_data.get('logo')
notifications = parsed_data.get('notifications')
if app and notifications:
try:
notifications = int(notifications)
if initial:
self.notification_counts[app] = notifications
print(f"Initial notification counts: {self.notification_counts}")
else:
# Check if notifications increased
if app in self.notification_counts:
if notifications > self.notification_counts[app]:
print(f"New notification for {app}! Count increased from {self.notification_counts[app]} to {notifications}")
self.notification_counts[app] = notifications
else:
self.notification_counts[app] = notifications
except ValueError:
print(f"Invalid notification count: {notifications}")
def monitor_tabs(self):
try:
while True:
result = self.capture_and_analyze()
self.update_notification_counts(result)
time.sleep(5) # Wait 5 seconds between checks
except KeyboardInterrupt:
print("\nMonitoring stopped by user")
if __name__ == "__main__":
monitor = TabMonitor()
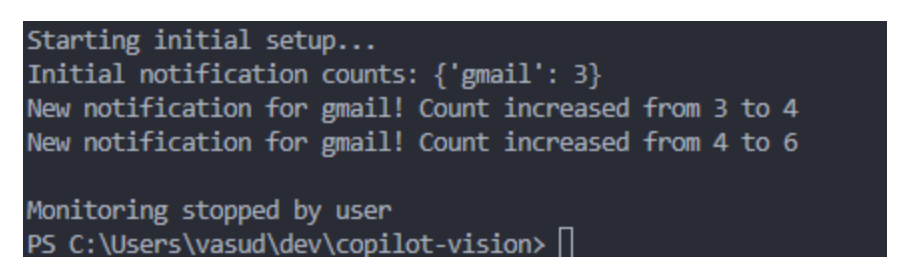
monitor.monitor_tabs()Now, whenever notifications are received, here’s the output:
Now we’re ready to implement playing a sound/on screen overlay when there's a notification:

And finally, here is the updated code it generated:
import pyautogui
import time
import json
from inference_sdk import InferenceHTTPClient
import ast
import winsound
import tkinter as tk
from threading import Thread
import os
import queue

class NotificationOverlay:
    def __init__(self):
        self.notification_queue = queue.Queue()
        self.gui_thread = None
        self.start_gui_thread()

    def start_gui_thread(self):
        """Start the GUI thread that handles all Tkinter operations"""
        self.gui_thread = Thread(target=self._gui_worker, daemon=True)
        self.gui_thread.start()

    def _gui_worker(self):
        """Worker thread that handles all GUI operations"""
        self.root = tk.Tk()
        self.root.withdraw()  # Hide the main window

        # Check for notifications every 100ms
        self.root.after(100, self._check_notifications)
        self.root.mainloop()

    def _check_notifications(self):
        """Check for pending notifications and display them"""
        try:
            while True:
                app, count, duration = self.notification_queue.get_nowait()
                self._create_notification_window(app, count, duration)
        except queue.Empty:
            pass

        # Schedule next check
        self.root.after(100, self._check_notifications)

    def _create_notification_window(self, app, count, duration):
        """Create a notification window (called from GUI thread)"""
        # Create a new toplevel window
        notification_window = tk.Toplevel(self.root)
        notification_window.wm_attributes('-topmost', True)  # Keep on top
        notification_window.wm_attributes('-alpha', 0.9)     # Slight transparency

        # Calculate position (bottom right corner)
        screen_width = self.root.winfo_screenwidth()
        screen_height = self.root.winfo_screenheight()
        window_width = 300
        window_height = 100
        x_position = screen_width - window_width - 20
        y_position = screen_height - window_height - 40

        # Configure window
        notification_window.geometry(f'{window_width}x{window_height}+{x_position}+{y_position}')
        notification_window.overrideredirect(True)  # Remove window decorations

        # Add notification text
        label = tk.Label(
            notification_window,
            text=f"New {app} Notification!\nCount: {count}",
            font=('Arial', 12),
            pady=20,
            bg='#2c2c2c',
            fg='white'
        )
        label.pack(fill=tk.BOTH, expand=True)

        # Auto-close after duration
        notification_window.after(duration * 1000, notification_window.destroy)

    def show_notification(self, app, count, duration=3):
        """Queue a notification to be displayed"""
        self.notification_queue.put((app, count, duration))

class TabMonitor:
    def __init__(self):
        self.notification_counts = {}
        self.client = InferenceHTTPClient(
            api_url="https://serverless.roboflow.com",
            api_key="e0MsKsQAKbK13vS6G8rM"
        )
        self.overlay = NotificationOverlay()
        self.initial_setup()

    def initial_setup(self):
        print("Starting initial setup...")
        result = self.capture_and_analyze()
        self.update_notification_counts(result, initial=True)
        print("Initial notification counts:", self.notification_counts)

    def play_notification_sound(self):
        """Play the notification sound using winsound"""
        try:
            sound_file = "notif.mp3"  # Changed to .wav for better winsound compatibility
            if os.path.exists(sound_file):
                # Play asynchronously so it doesn't block
                Thread(target=lambda: winsound.PlaySound(sound_file, winsound.SND_FILENAME | winsound.SND_ASYNC)).start()
            else:
                # Fallback to system beep if sound file not found
                Thread(target=lambda: winsound.Beep(800, 200)).start()  # 800Hz for 200ms
                print(f"Warning: Sound file {sound_file} not found, using system beep")
        except Exception as e:
            print(f"Error playing sound: {e}")

    def notify_user(self, app, count):
        """Handle both sound and visual notification"""
        self.play_notification_sound()
        self.overlay.show_notification(app, count)

    def capture_screenshot(self):
        screenshot = pyautogui.screenshot(region=(0, 0, 200, 40))
        return screenshot

    def analyze_with_roboflow(self, screenshot):
        screenshot.save("temp_tab.png")
        result = self.client.run_workflow(
            workspace_name="personal-nh81v",
            workflow_id="custom-workflow-4",
            images={"image": "temp_tab.png"},
            use_cache=True
        )
        return result

    def parse_roboflow_output(self, result):
        json_str = result[0]['output']['output']
        data = ast.literal_eval(json_str)
        return data

    def update_notification_counts(self, result, initial=False):
        try:
            data = self.parse_roboflow_output(result)

            for item in data:
                app = item['logo']
                notifications = int(item['notifications'])

                if initial:
                    self.notification_counts[app] = notifications
                else:
                    if app in self.notification_counts:
                        if notifications > self.notification_counts[app]:
                            print(f"New notification for {app}! Count increased from {self.notification_counts[app]} to {notifications}")
                            # Trigger notification
                            self.notify_user(app, notifications)
                        self.notification_counts[app] = notifications
                    else:
                        self.notification_counts[app] = notifications
        except Exception as e:
            print(f"Error processing result: {e}")
            print(f"Raw result: {result}")

    def capture_and_analyze(self):
        screenshot = self.capture_screenshot()
        return self.analyze_with_roboflow(screenshot)

    def monitor_tabs(self):
        try:
            while True:
                result = self.capture_and_analyze()
                self.update_notification_counts(result)
                time.sleep(7)
        except KeyboardInterrupt:
            print("\nMonitoring stopped by user")
        except Exception as e:
            print(f"Error during monitoring: {e}")

if __name__ == "__main__":
    monitor = TabMonitor()
    monitor.monitor_tabs()
Now, test to see that it works as intended. And with that, we’ve successfully used Copilot to build our notification tool!
Building Vision Apps with GitHub Copilot Conclusion
Building computer vision applications doesn't have to be a slow, repetitive process filled with boilerplate code and integration headaches. As we've demonstrated throughout this guide, GitHub Copilot transforms the development experience by intelligently generating the code patterns that power modern vision apps.
From our project, you've seen how Copilot can:
- Accelerate API integrations by suggesting complete Roboflow connection code
- Generate UI components for image handling and result visualization
- Provide intelligent error handling that covers edge cases you might miss
- Create deployment configurations following current best practices
The combination of Roboflow's powerful computer vision platform and GitHub Copilot's AI-assisted coding creates a development workflow that's not just faster - it's more enjoyable and less prone to common mistakes.
Written by Aryan Vasudevan
Cite this Post
Use the following entry to cite this post in your research:
Contributing Writer. (Sep 30, 2025). How to Use GitHub Copilot to Build Vision Apps. Roboflow Blog: https://blog.roboflow.com/github-copilot-roboflow-build-vision-apps/