
When a computer vision model returns x, y, width, and height for a detection, you often need to extract just that region of the image for a downstream step like OCR or classification. This tutorial shows how to convert those values into x1, y1, x2, y2 corner coordinates and use cv2 to crop the region of interest, with a license plate detection from Roboflow as the working example. The resulting crop is saved as a standalone image file ready for any further processing.
Cropping the regions where a prediction has been made is a common task in computer vision. For instance, it is common to crop the prediction regions before running Optical Character Recognition (OCR) on an image. This is necessary because running OCR on a whole image can result in a lot of noise and an output that is difficult to process.
In this guide, we’re going to walk through how to crop computer vision model predictions using the cv2 Python package. We’ll walk through an example of cropping license plates that appear in an image.
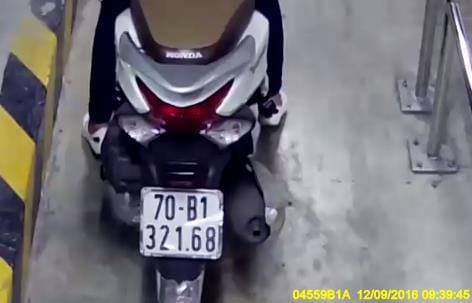
By the end of our tutorial, we’ll have created a small image containing only the license plate of a motorcycle like this:

Without further ado, let’s get started!
Crop Computer Vision Predictions with cv2
A common output from computer vision tools, including tensorflow.js and Roboflow, is to return an x, y, width, and height value that corresponds to the location of a prediction.
To crop model predictions using cv2, we need to calculate x1, y1, x2, y2 coordinates that map to each corner of the area that we want to crop. This area is commonly referred to as a “region of interest” (ROI). We'll use this acronym in some of our code below.
In this section, we’re going to crop the license plate out of this image of a motorcycle:
Calculate x1, y1, x2, y2 Coordinates
If you don’t already have the x1, y1, x2, y2 coordinates, we’ll need to do some transformation to calculate them. The following code takes x, y, width, and height values and transforms them into the coordinates we’ll need to draw an image.
This code assumes you already have the location of the prediction that you want to crop. If you don't already have a model from which to retrieve predictions, check out the "Set up a Model" section later in this article.
import cv2

image = cv2.imread("example.jpeg")

prediction = {'x': 181.5, 'y': 222.5, 'width': 97.0, 'height': 89.0}

roi_x = int(prediction['x'] - prediction['width'] / 2)
roi_y = int(prediction['y'] - prediction['height'] / 2)
roi_width = int(prediction['width'])
roi_height = int(prediction['height'])

roi = image[roi_y:roi_y+roi_height, roi_x:roi_x+roi_width]
If you already have x1, y1, x2, y2 coordinates, you can use them directly in the “roi” crop:
x1 = 133
y1 = 178
x2 = 230
y2 = 267

roi = image[y1:y2, x1:x2]
Crop Computer Vision Predictions
Now that we have a variable that stores the contents of our region of interest, we can save its contents to a file. We can do this using the cv2.imwrite() function:
cv2.imwrite("cropped_region.jpeg", roi)This code saves the cropped region to a file called “cropped_region.jpeg”. Let’s open up the resulting file to see the output:

Our code has successfully cropped the license plate!
Setting Up a Model (Optional)
This tutorial uses an open-source license plate detection model, containing over 10,000 images, hosted on Roboflow Universe. To use this model, you’ll need a free Roboflow account. When you create your account, you will be given an API key that you can use to run inference on public models on Universe.
Create a Roboflow account, then click the “Model” link in the sidebar on the license plate model page.

From the Model page, you can test the model to make sure it aligns with your needs. In the screenshot above, an image with one car has been run through the model.
One prediction was returned, annotated in a yellow-green box on the image. You can drag-and-drop images onto the page to run inference on them, or select from the other options on the page (webcam, select a sample from a test set, paste in a URL).
On the Model page, scroll down to the section that says “Hosted API” and copy the Python code snippet that appears on the page into a new Python file:
from roboflow import Roboflow

rf = Roboflow(api_key="YOUR_KEY")
project = rf.workspace().project("license-plate-recognition-rxg4e")
model = project.version(4).model
This code creates a “model” object that you can use to run inference on images. You can run inference on images uploaded to Roboflow or local images.
Now that we have our model ready, we can start running inference:
inference = model.predict("example.jpeg", confidence=40)

predictions = inference.json()
This code returns a list of dictionaries with information on all predictions made with a confidence value equal to or greater than 40%.
Each dictionary contains the x, y, width, and height values that you can use to calculate the x1, y1, x2, y2 coordinates that you’ll need to crop predictions from your model.
Conclusion
In this article, we have demonstrated how to crop computer vision model predictions and save the crop into a new file. We used a set of formulas to calculate x1, y1, x2, y2 coordinates and then used those coordinates to retrieve the image data associated with the region of interest. We then saved those results to a file.
Now you have all of the resources you need to crop the output of your computer vision predictions!
Cite this Post
Use the following entry to cite this post in your research:
James Gallagher. (Feb 16, 2023). How to Crop Computer Vision Model Predictions. Roboflow Blog: https://blog.roboflow.com/how-to-crop-computer-vision-model-predictions/