
The applications of computer vision and more specifically object detection are far reaching with uses in healthcare, finance, and transportation. While the applications may be far reaching, the process of setting up an appropriate model can be time-consuming and difficult--Roboflow helps throughout this whole process from image preprocessing to image augmentation to model training and deployment.
In this post, we'll walk you through creating a license plate detection and OCR model using Roboflow that you can programmatically use for your own projects. In this tutorial, you will learn to:
- Load data into Roboflow
- Preprocess data to ensure consistency
- Apply image augmentations to improve your model
- Train a model using Roboflow Train
- Conduct a video inference programatically
- Understanding the code to conduct a video inference
What is license plate detection?
Automatic Number Plate Recognition (ANPR), also known as license plate detection, is technology that detects the presence of license plates in an image and retrieves the text on a license plate using Optical Character Recognition (OCR).
ANPR technology is commonly used in law enforcement to aid with identifying people who have broken traffic laws and criminals who are traveling by car. For example, if a criminal was known to make a getaway in a particular car, ANPR technology could be used to inform police whenever the criminal passes a traffic camera. This information can then be used to help police track the criminal.
Furthermore, ANPR technology can be used for:
- Identifying uninsured vehicles on the road.
- Finding witnesses of a crime.
- Tracking if someone has been parking for too long in a space.
- Identifying abandoned cars.
Now, let's talk about how we can build our own license plate detection model.
Detect license plates with computer vision
In this section, we are going to talk about how to detect license plates with computer vision and read the text on license plates. By the end of this section, you will have a working model you can use to detect license plates.
Load Data Into Roboflow
Data can be complicated! With so many different formats, it can be confusing how to use certain types of datasets and the best way to process them. Roboflow eliminates this headache by automatically detecting the dataset format and adding annotations as respectively. Whether it be COCO, TFRecord, CreateML, or another format, chances are, Roboflow supports it. You can read more about our supported formats here.
For this project, we will be using this license plate detection dataset--this dataset is a subset of the Open Images Dataset. Because this is a public dataset, you are can load the project into Roboflow in two ways:
- Fork the dataset directly from Roboflow
- Export the dataset from Roboflow and upload manually
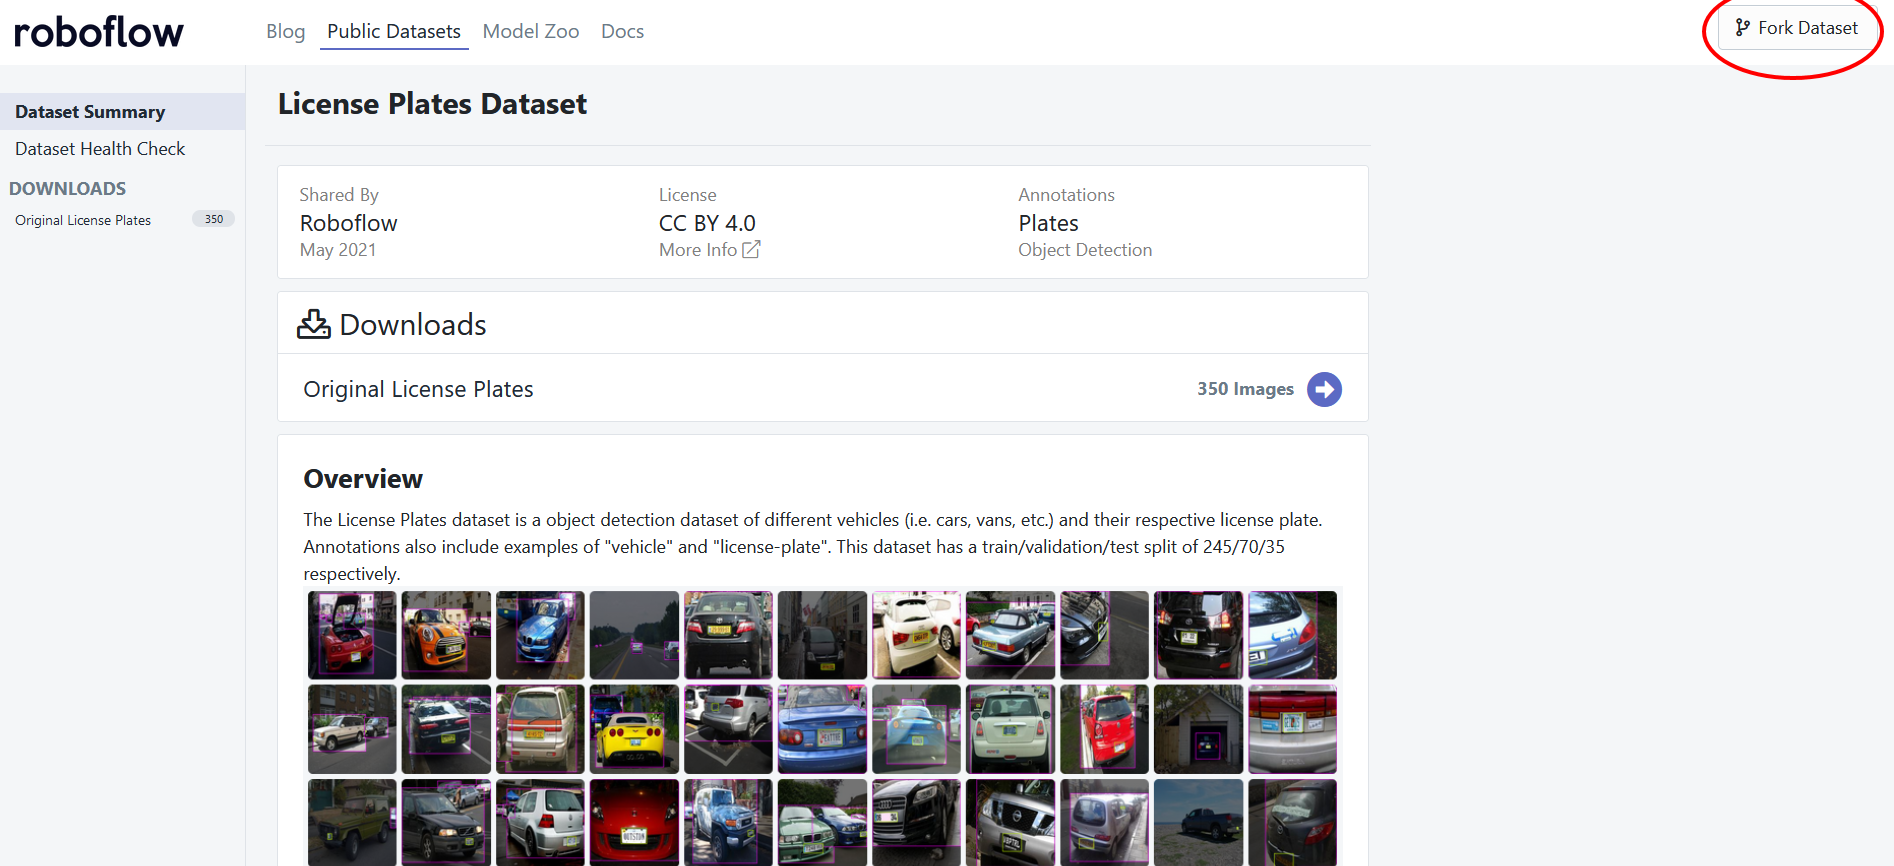
Fork the dataset Directly from Roboflow
To fork the dataset, there is a Fork dataset button that you can click and that will automatically load your dataset into Roboflow.
Export the Dataset from Roboflow and Upload Manually
To load data into Roboflow manually, you will want to create a Roboflow account. Once logged into your dashboard, you will want to create a new project:
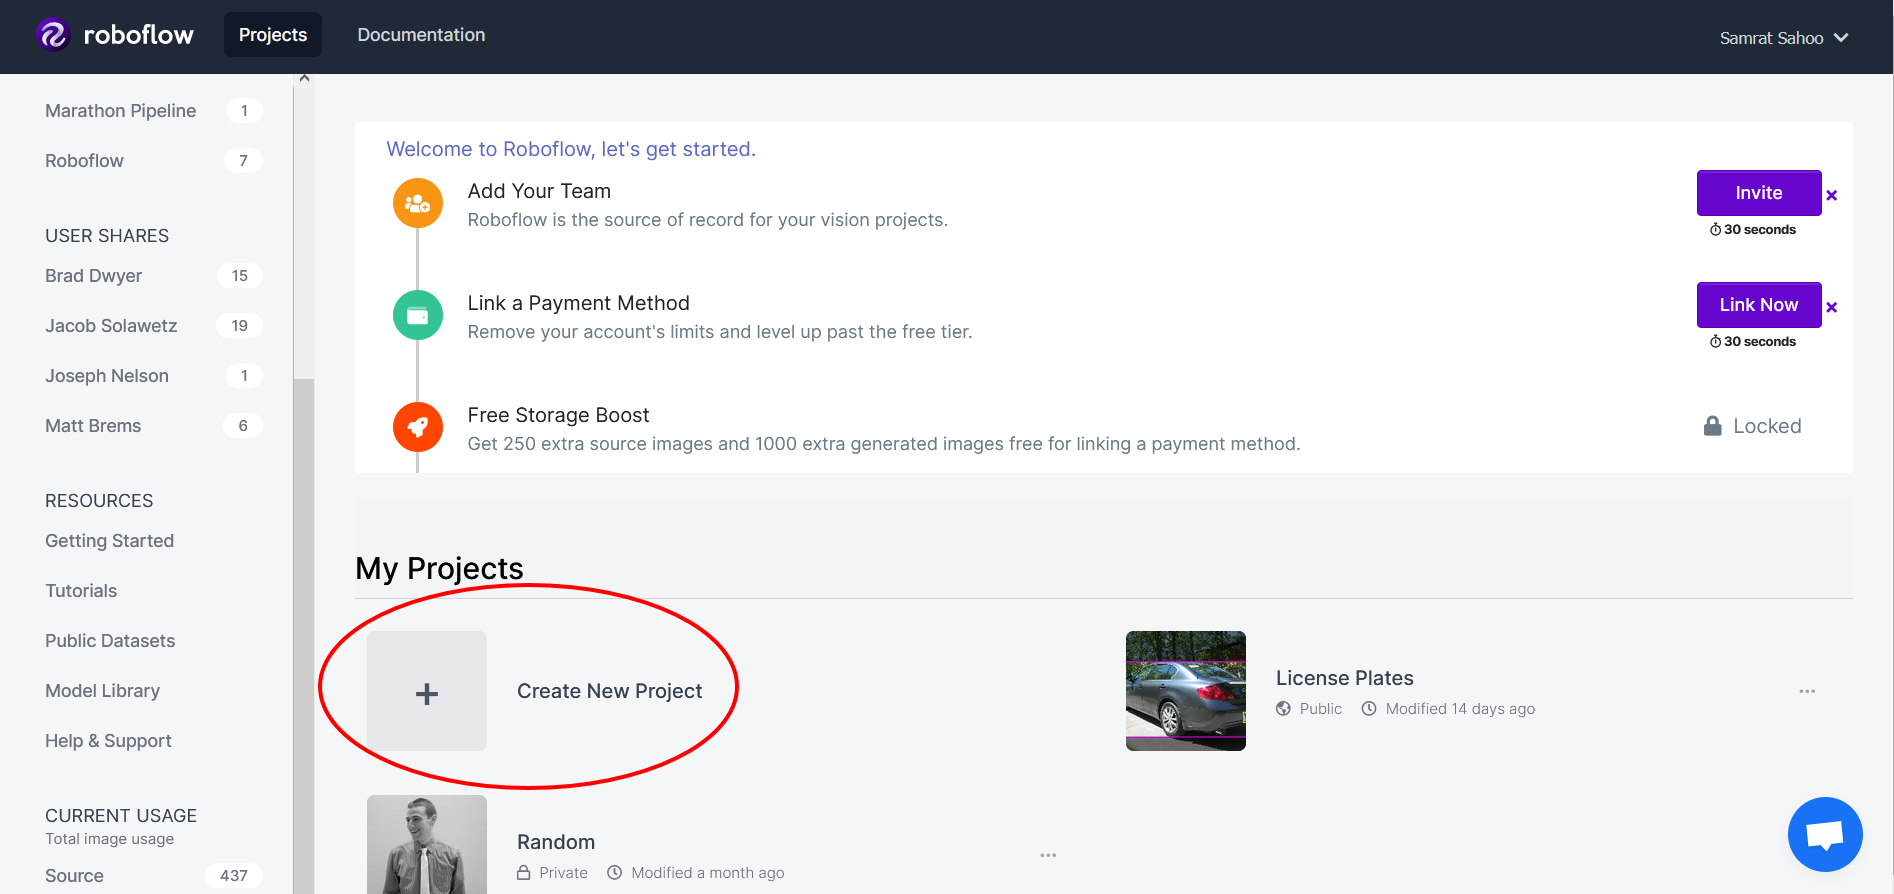
You should receive a pop-up that allows you to specify the project name, project type, and annotation group. This project will be an object detection project and will have an annotation group of license-plates. Upon creating this project you will be greeted with the upload page:
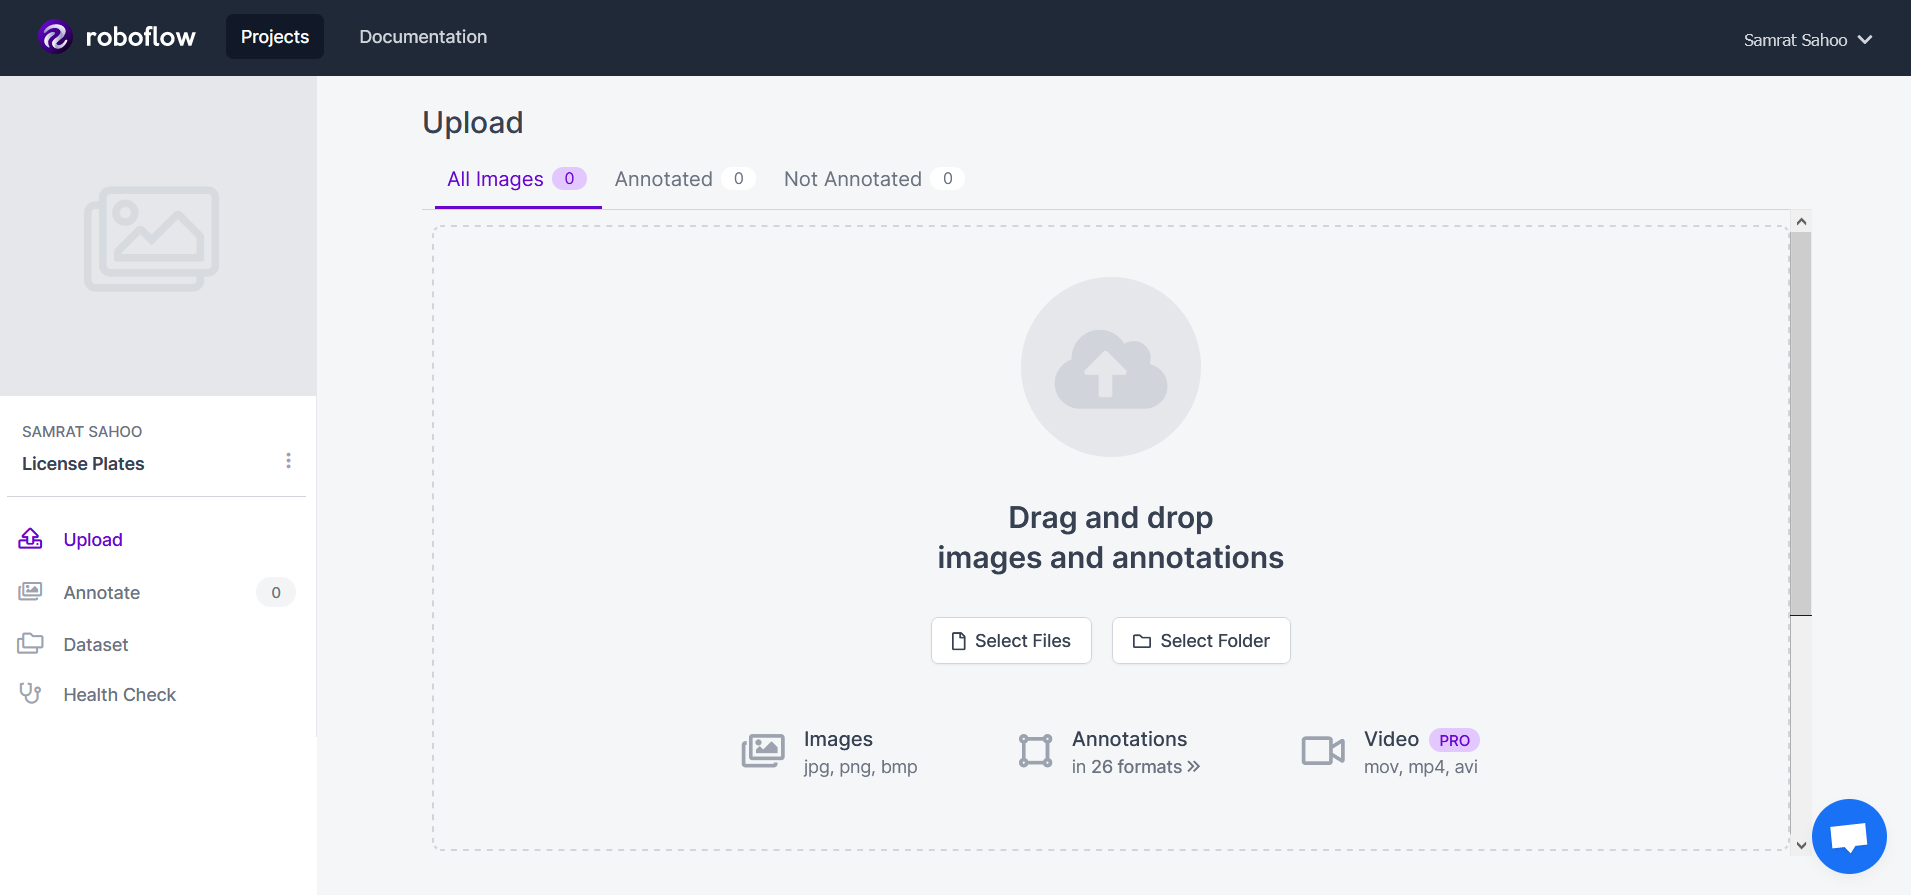
Here, you can upload individual pieces of data or complete datasets. We will come back to this!
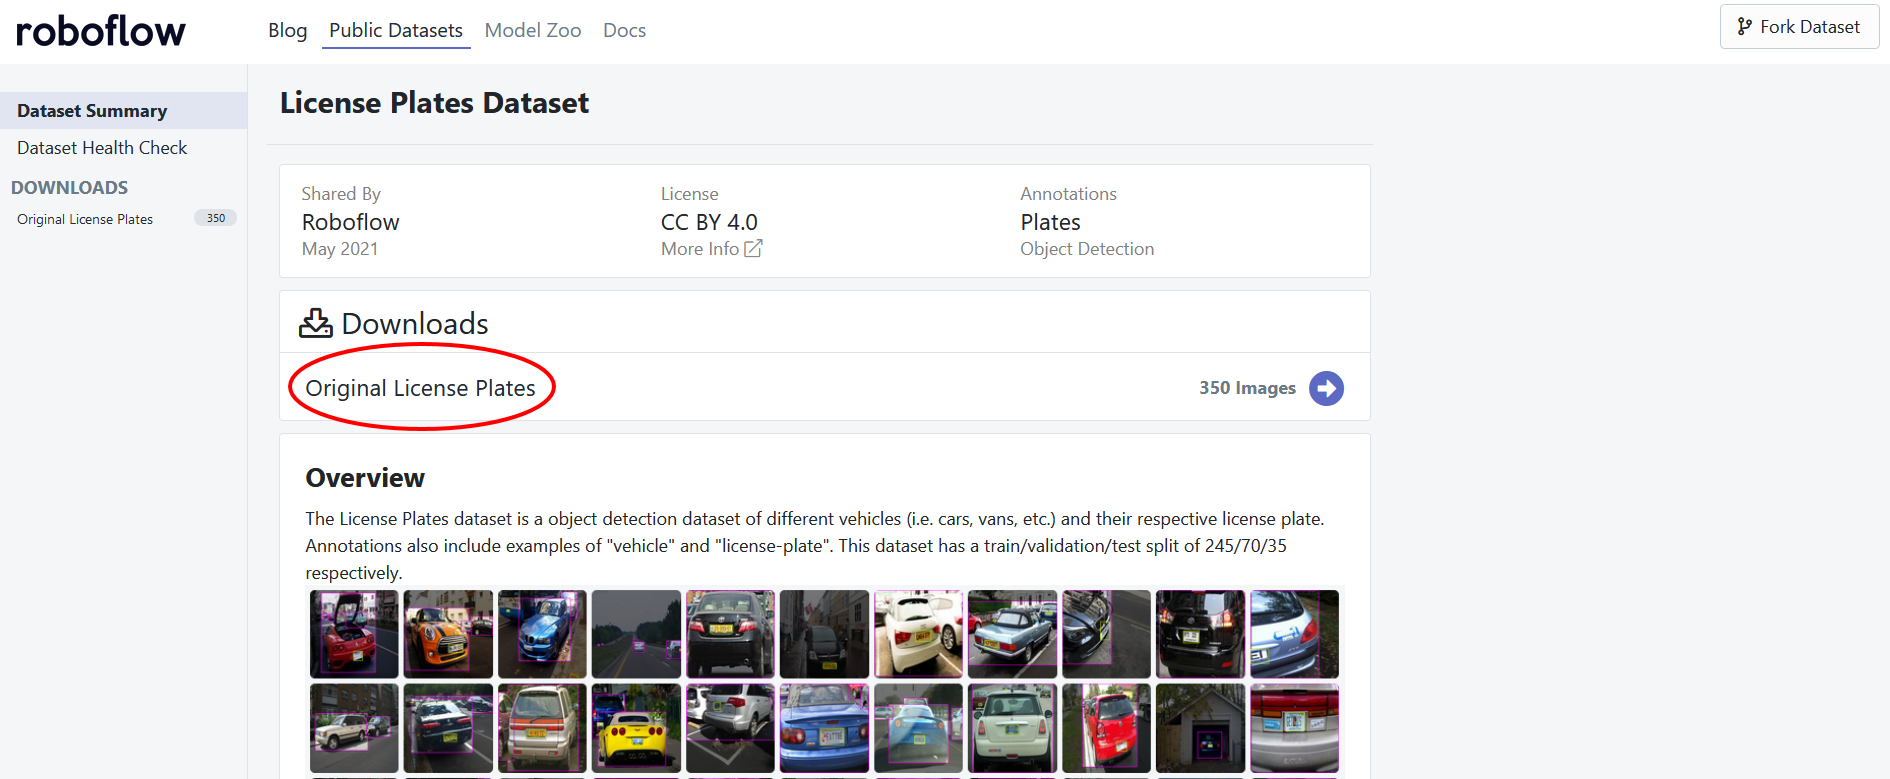
The next step will be to export the dataset! To export the dataset, click on the version of the dataset you want under the "Downloads" section.
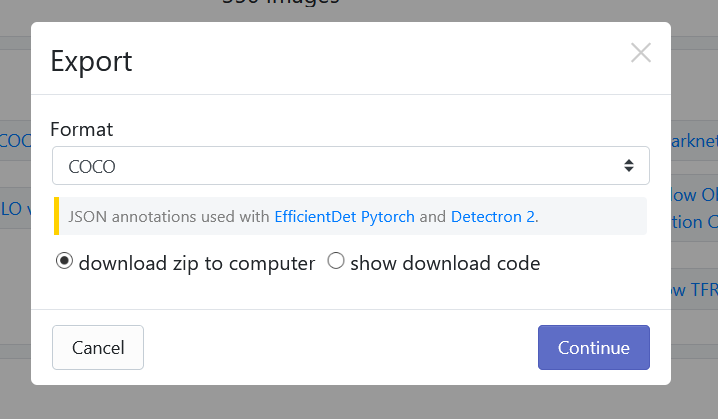
After which, you will receive a popup asking which format you want to download the dataset in. We will choose the "COCO" Format and download the zip directly to our computer.
After that, simply extract the zip file that is downloaded and drag the folder into the upload interface of the project you created and all your images along with your annotations will have been uploaded.
Preprocess Data To Ensure Consistency
Real-world data can oftentimes be inconsistent, messy, and overall difficult to work with when developing machine learning models. Preprocessing serves as an important key to deal with these issues; however, writing code to preprocess data can oftentimes be tedious.
Roboflow helps eliminate this code through its automatic preprocessing tools! After loading all of the data, you should notice a page that allows you to generate a new version of your data! The first step in generating the new version is the preprocessing. Roboflow offers a wide variety of settings ranging from resizing to applying a grayscale.
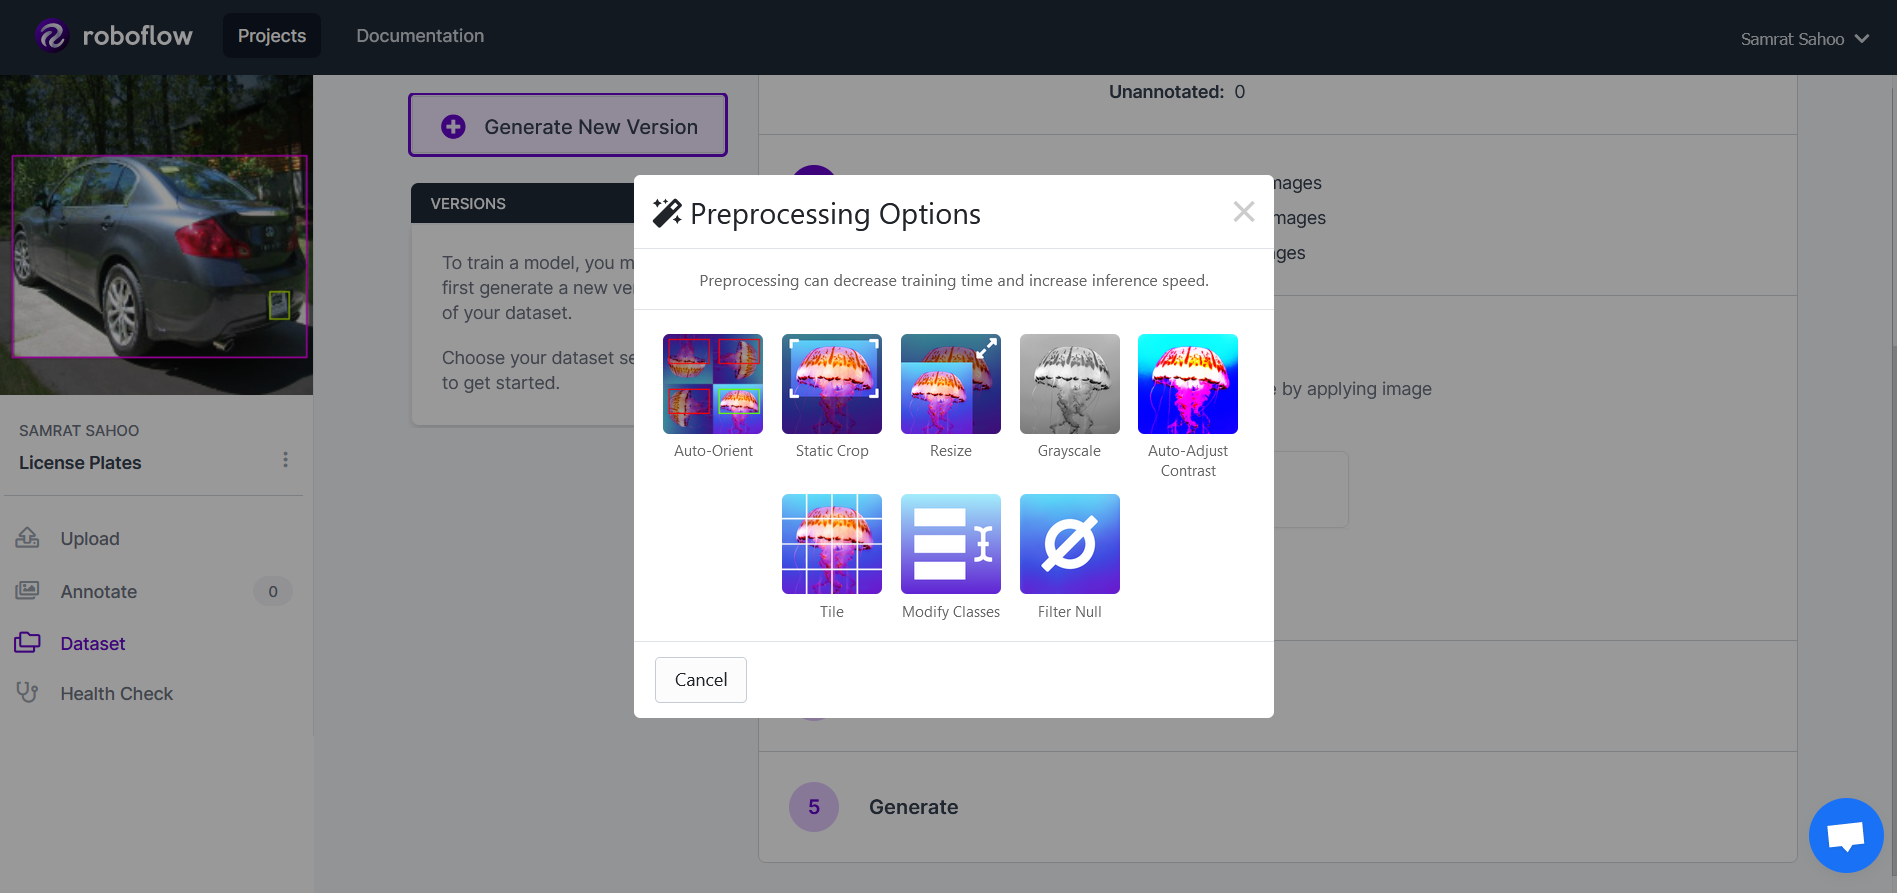
For this project, we will apply the auto-orient and resizing preprocessing steps. For the resizing, we will stretch all the images to be 416 pixels x 416 pixels in size.
Apply Image Augmentations To Improve Your Model
Augmentation is a step commonly used in machine learning to apply transformations to your data to increase the size and variety of the dataset. Some augmentations include rotations, changes in brightness, and blurring among many others. However, similar to preprocessing, writing code for image augmentations can be tedious.
Fortunately, Roboflow comes with automatic image augmentation tools. The second step in generating a new version of data is to add augmentations to the data. Here are some of Roboflow's augmentation steps:
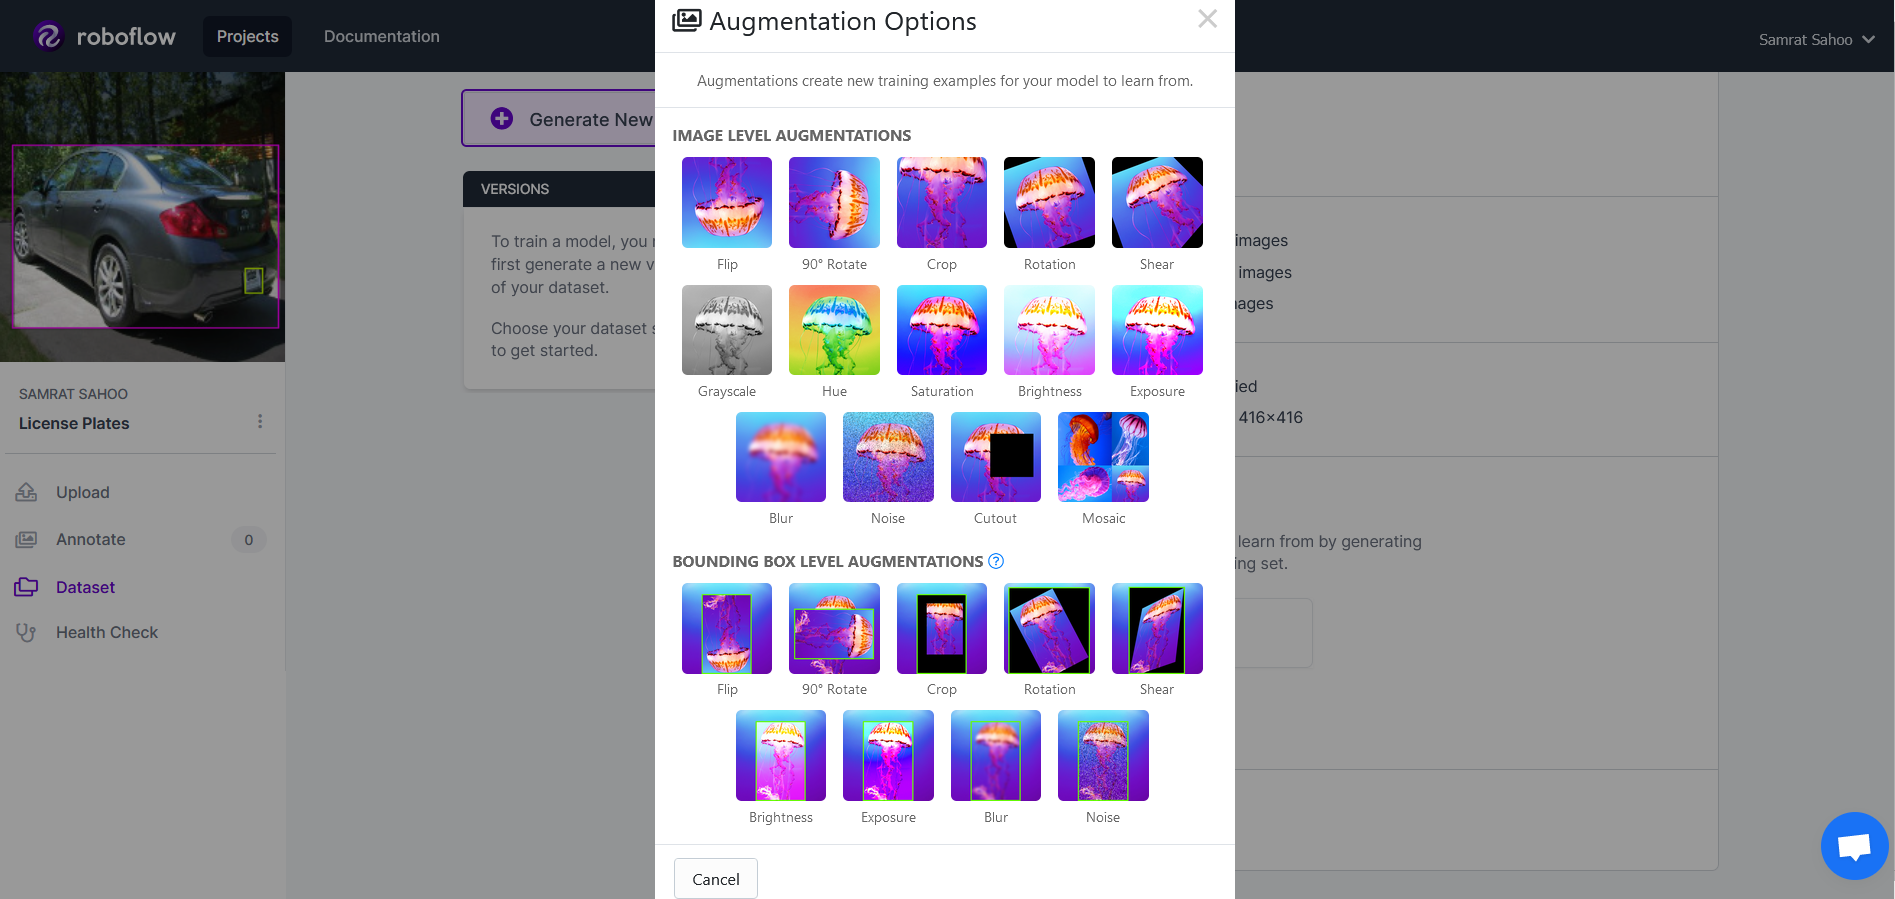
For this project, we will add a blurring augmentation with a 2 pixel range as well as an exposure augmentation with 25% variability.
After continuing, you will be able to select the desired amount of images for your dataset version. This project will quadruple the training data resulting in 1085 total images. After that, simply click generate and you should have your new dataset which has preprocessed and augmented data.
Train a Model Using Roboflow Train
Model training can be a difficult task with so many different frameworks and settigns to tune. Roboflow Train makes it easy to overcome this by allowing a one-click training process resulting in an optimal model.*
*Note: Roboflow Train is a Pro feature. To learn more about Roboflow Pro, click here. If you would like to train a model without Roboflow pro, consider using our model library--here is a great tutorial on RF-DETR to get you started!
To use Roboflow Train, simply click on the train button that can be found on the dataset version dashboard:
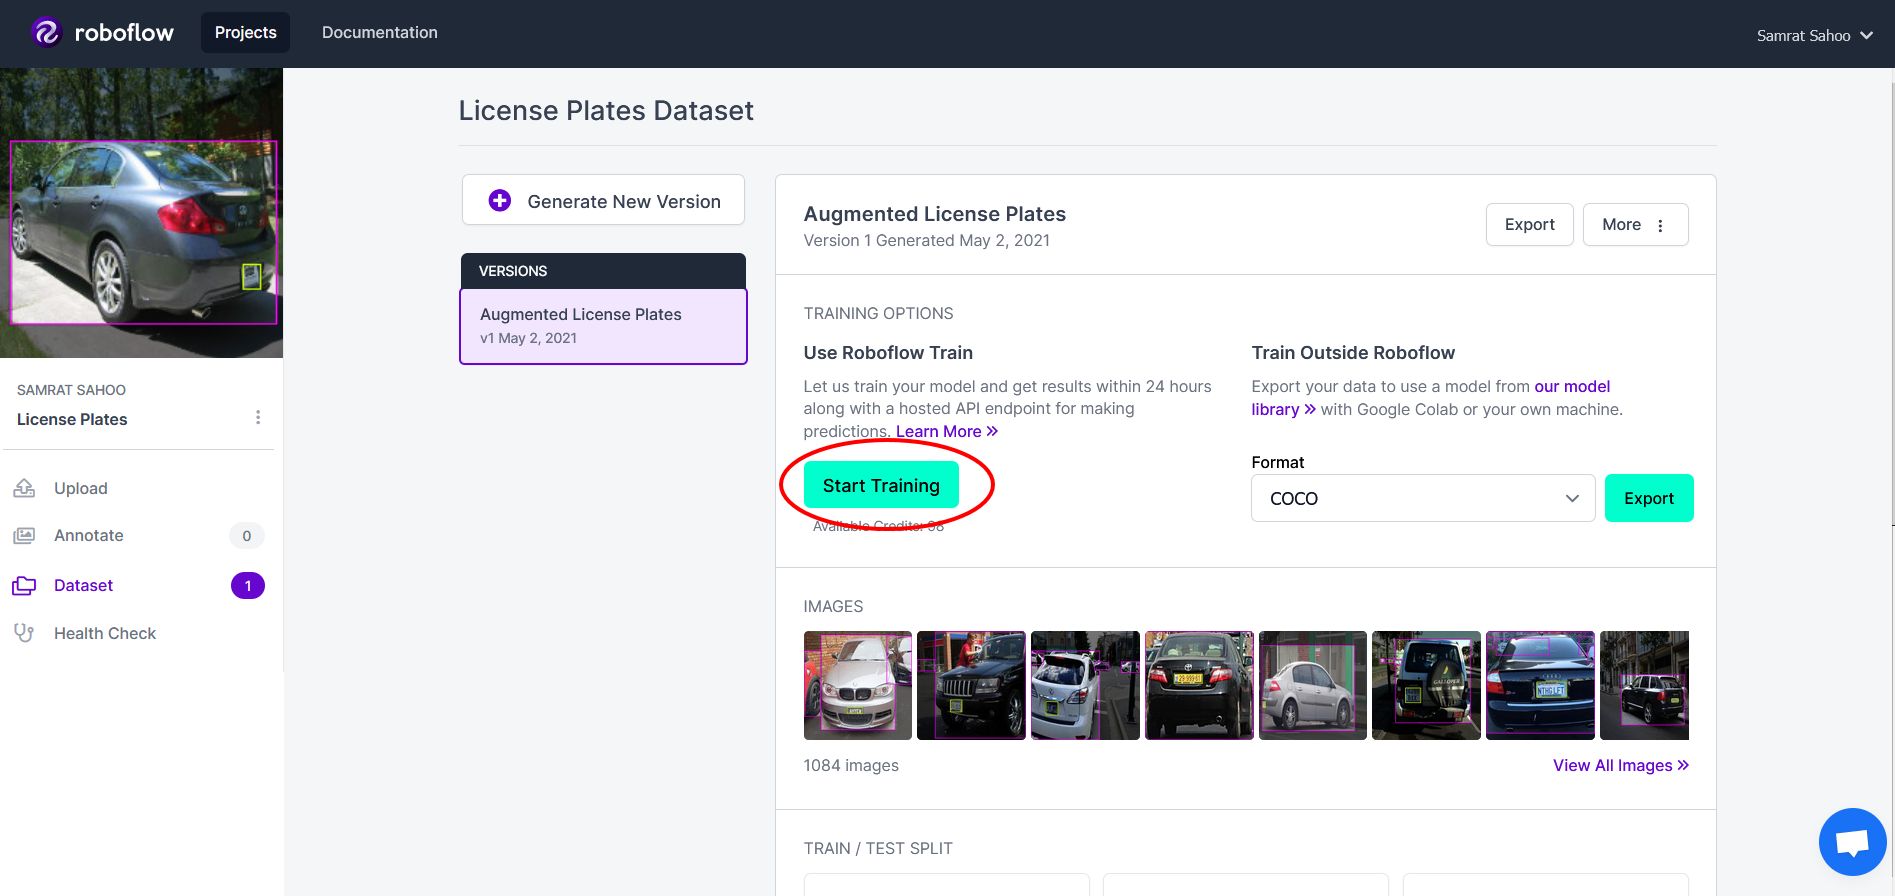
Upon click this, you will see 2 options come up. Click on the "Train from Scratch" option and then start the training process! If you have already trained a model with license plates in the past or use would like to use one of Roboflow's public models to boost performance via transfer learning, you can click on "Start from a Checkpoint" where you will be prompted to choose a model checkpoint.
Because the training process is a computationally-intensive and time-intensive process, it will take time to fully train the model. In the meantime, you can get some popcorn and watch an episode of Silicon Valley! Upon completion, you will receive an email from Roboflow letting you know the model has completed its training process along with some statistics such as training time, precision, recall, and mAP.
Conduct a Video Inference Programmatically
To use your newly trained model, you will see a couple of different options:
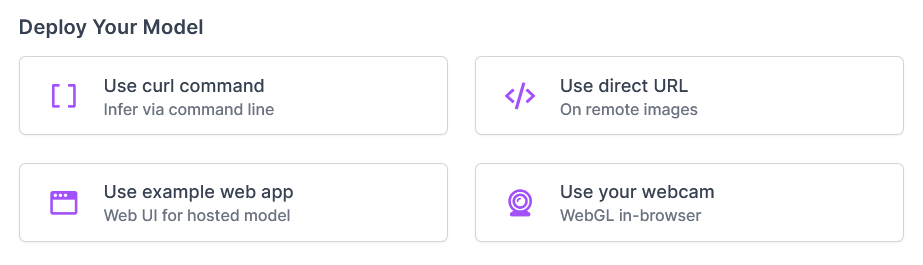
For this project, we will be using the Roboflow Hosted Inference API. To use this, you will want to get the model ID and your account access token--this can be found if you click on "Use curl command." You should have a link that looks something like https://infer.roboflow.com/xx-name--#?access_token=[ACCESS_TOKEN]
- xx-name--# is your model ID
- ACCESS_TOKEN is your access token
Next, you will want to clone the following repository:
git clone https://github.com/roboflow-ai/roboflow-jetson-license-plate.git
Then install all the required dependencies:
pip3 install -r requirements.txtOpen up the roboflow_config.json file and change the following values for the keys ROBOFLOW_API_KEY and ROBOFLOW_MODEL. For example if xx-name--# is your model ID and 9QoZKPC2l7A5 is your access token, then your JSON file would look like this:
{
  "__comment1": "Obtain these values via Roboflow",
  "ROBOFLOW_API_KEY": "9QoZKPC2l7A5",
  "ROBOFLOW_MODEL": "xx-name--#",
  "ROBOFLOW_SIZE": 416,
  "LOCAL_SERVER": false,

  "__comment2": "The following are only needed for infer-async.py",
  "FRAMERATE": 24,
  "BUFFER": 0.5
}
Finally to test how well your model works, run:
python3 main.py
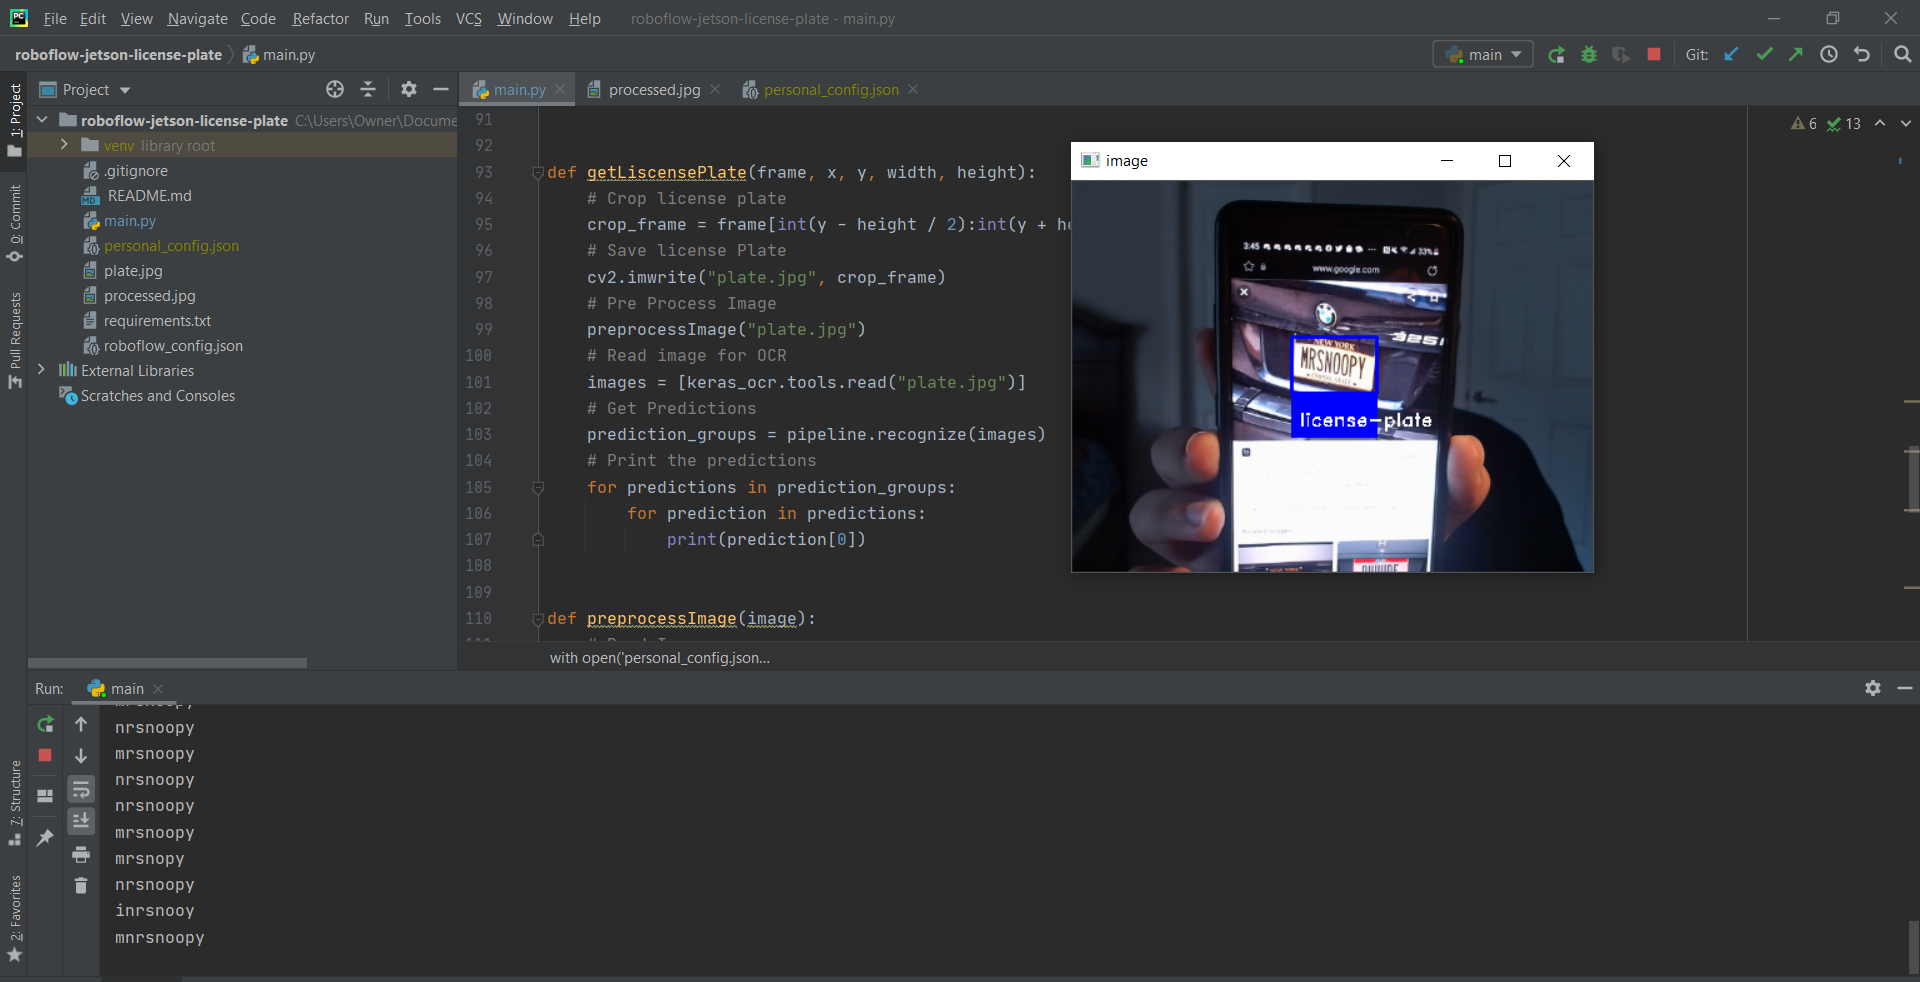
It seems to work pretty well! Now let's dive into how all of this actually works. Note: This was all written in Python!
How does the code work?
Let's talk through how our code works step-by-step.
Constructing the inference URL
Roboflow's inference endpoint for each model is constructed in a very specific way. It gathers the data from the roboflow_config.json file and then constructs the URL accordingly. Here we can see how the URL is constructed:
ROBOFLOW_API_KEY = config["ROBOFLOW_API_KEY"]
ROBOFLOW_MODEL = config["ROBOFLOW_MODEL"]
upload_url = "".join([
   "https://infer.roboflow.com/" + ROBOFLOW_MODEL,
   "?access_token=" + ROBOFLOW_API_KEY,
   "&name=YOUR_IMAGE.jpg"
])
Sending each frame to be analyzed by the model endpoint
To run an inference on a video, each frame is an image that is run through the model endpoint. However, before the frame can be sent to the endpoint, there are a couple of steps that must be fulfilled:
- Obtaining the frame itself: To obtain the frame, OpenCV provides a read method to be able to read the current frame in the video stream. This can be done simply through this:
# Get webcam interface via opencv-python
video = cv2.VideoCapture(0)
# Get the current image from the webcam
ret, img = video.read()
- Resizing the frame: This helps improve speed and save bandwidth while maintaining the aspect ratio
height, width, channels = img.shape
scale = ROBOFLOW_SIZE / max(height, width)
img = cv2.resize(img, (round(scale * width), round(scale * height)))
- Encoding the image to a base64 string: The Roboflow hosted API, requires you to post the image as a base64 string. Fortunately, this is very easy by simply doing:
retval, buffer = cv2.imencode('.jpg', img)
img_str = base64.b64encode(buffer)
- Sending an http post request: You can finally post the data to your model endpoint and obtain the different predictions that your model was able to find!
resp = requests.post(upload_url, data=img_str, headers={
    "Content-Type": "application/x-www-form-urlencoded"
}, stream=True).json()['predictions']
Processing the Responses
Now we have to process the responses from the inference API.
- JSON Response: Great! Now that you have the predictions, all that is required to do is to draw the predictions onto the video frame itself. To do this, we need to understand what the json response for a prediction may look like:
{
    "x": 504.5,
    "y": 363.0,
    "width": 215,
    "height": 172,
    "class": "license-plate",
    "confidence": 0.917
}
- Writing on the Video Stream: The response gives us the x, y coordinate of the center, the width and height, the class, and confidence level of the prediction. To process this onto a frame, we can write a method to draw the appropriate bounding boxes write the respective class name:
def writeOnStream(x, y, width, height, className, frame):
    # Draw a Rectangle around detected image
    cv2.rectangle(frame, (int(x - width / 2), int(y + height / 2)), (int(x + width / 2), int(y - height / 2)),
                  (255, 0, 0), 2)

    # Draw filled box for class name
    cv2.rectangle(frame, (int(x - width / 2), int(y + height / 2)), (int(x + width / 2), int(y + height / 2) + 35),
                  (255, 0, 0), cv2.FILLED)

    # Set label font + draw Text
    font = cv2.FONT_HERSHEY_DUPLEX

    cv2.putText(frame, className, (int(x - width / 2 + 6), int(y + height / 2 + 26)), font, 0.5, (255, 255, 255), 1)
- Iterating through predictions: Using this, we can iterate through all of the predictions and write draw the appropriate bounding boxes and write the respective class name for each prediction:
for prediction in resp:
    writeOnStream(prediction['x'], prediction['y'], prediction['width'], prediction['height'],prediction['class'],img)
Applying OCR to the license plate
To apply OCR on a license plate, we will be using a module called keras-ocr. To conduct this OCR, there are a couple of steps involved.
- Cropping the License Plate: Given that we know the license plate's JSON response from Roboflow API, we can crop the plate out of the frame by doing splicing the image array:
crop_frame = frame[int(y - height / 2):int(y + height / 2), int(x - width / 2):int(x + width / 2)]
- Saving and Preprocessing the Image: We can use OpenCV to then save and preprocess this image. For the sake of concision, our preprocessing method can be found here.
cv2.imwrite("plate.jpg", crop_frame)
# Pre Process Image
preprocessImage("plate.jpg")
- Creating an OCR Pipeline and Predicting: Finally we will need to create a pipeline for the OCR model to read the image and give its respective predictions; these predictions will then be printed in the console.
images = [keras_ocr.tools.read("plate.jpg")]
# Get Predictions
prediction_groups = pipeline.recognize(images)
# Print the predictions
for predictions in prediction_groups:
    for prediction in predictions:
        print(prediction[0])
Conclusion
And there you have it; a fully functional license detection model that can also conduct an OCR on the license plate! A large portion of this project was based on our Using Your Webcam with Roboflow Models blog where we explore the different steps to using the Roboflow Hosted API with a webcam. The full code for this project can be found on Github. Please don't hesitate to reach out to us if you have any questions!
As a next step, try this video tutorial:
Cite this Post
Use the following entry to cite this post in your research:
Samrat Sahoo. (May 14, 2021). License Plate Detection and OCR using Roboflow Inference API. Roboflow Blog: https://blog.roboflow.com/license-plate-detection-and-ocr/