
Mislabeled annotations quietly degrade model performance, and catching them manually across a large dataset is impractical. This tutorial shows how to use CLIP embeddings and the Roboflow CVevals open-source script (cutout.py) to automatically surface annotations that are likely incorrect, demonstrated on the TACO trash dataset. The output is a report identifying outlier labels so you can fix them in Roboflow Annotate before training the next model version.
Data quality is essential to building a good computer vision model: the more precise your annotations are, and the fewer annotations that are mislabeled, the better your model will perform. But how does one identify mislabelled images in a dataset? Good question!
In this guide, we’re going to show how to use CLIP and the Roboflow CVevals project to identify images that may have been assigned the wrong label during the annotation process. At the end of this guide, you’ll have a report showing any potentially mislabeled images in your computer vision dataset. Without further ado, let’s get started!
Step 1: Upload Images to Roboflow
If you already have images in Roboflow, you can skip this section.
In this guide, we’re going to load our images from Roboflow for use in identifying mislabelled images. Using a platform like Roboflow is helpful for improving data quality because Roboflow various automated checks are performed to assure your data quality (i.e. identify bounding boxes with 0x0 dimensions).
In addition, you can inspect each annotation in Roboflow and make changes to them. This is ideal if you find an image that has been mislabelled in your dataset.
First, sign up to the Roboflow platform. Then, click the “Create a Project” button:

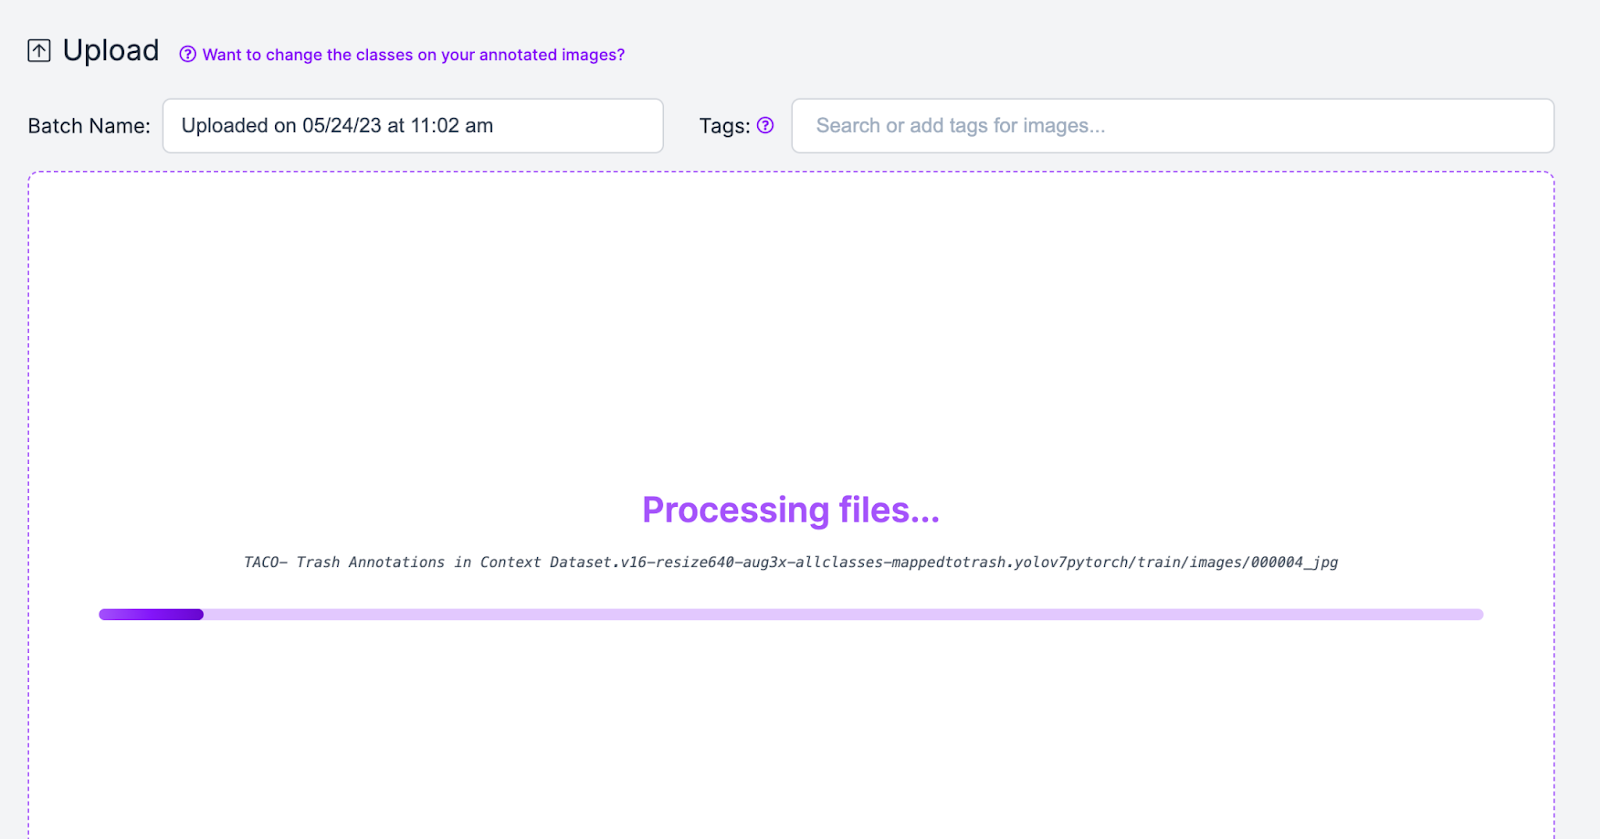
Next, upload all of your annotated images to the Roboflow platform. This will take a few moments depending on how many images are in your dataset. In this example, we’ll work with the TACO trash dataset, which contains photos of trash in context (i.e. litter on the ground). You can work with any images you have.
If you have not annotated your images, you can add annotations using the Roboflow Annotate tool. With your annotated images in the Roboflow platform, we’re ready to start identifying mislabelled images.
Step 2: Download Mislabeled Images Script
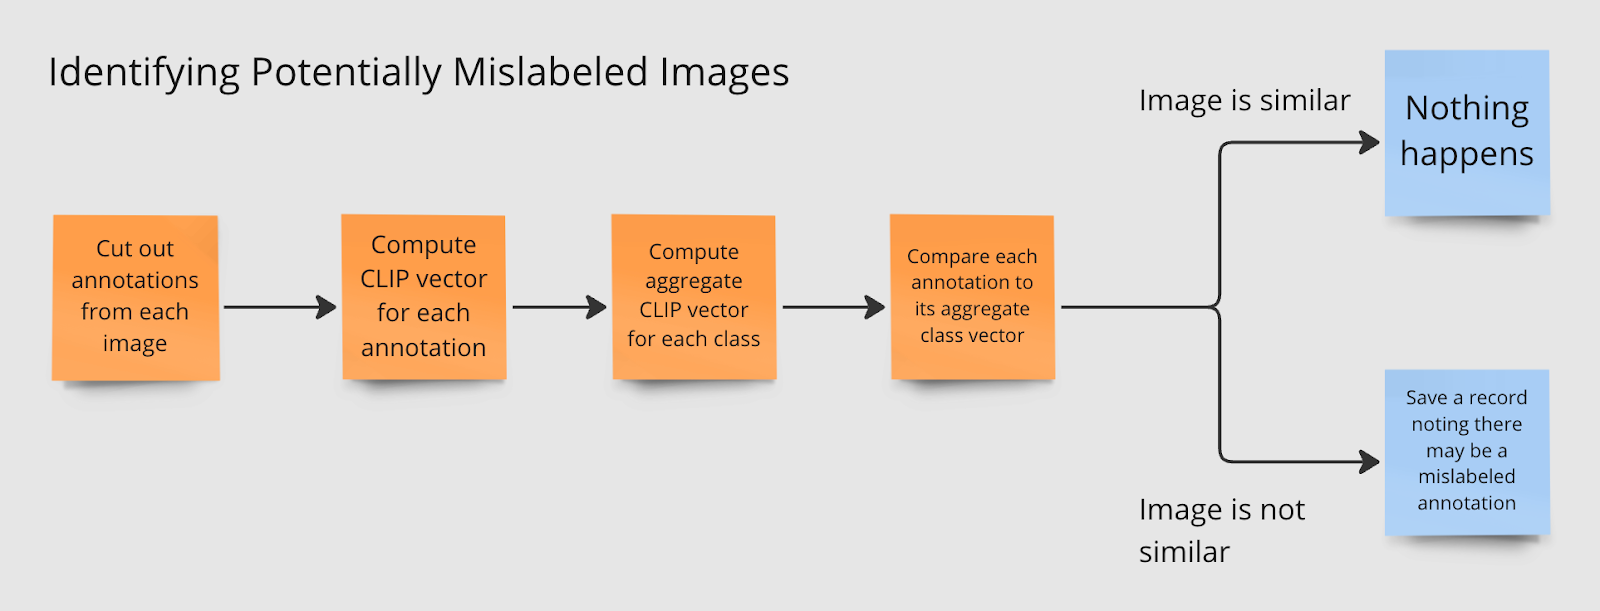
Roboflow maintains an open-source project called CVevals with various utilities for evaluating computer vision models and datasets. In this guide, we’re going to use the cutout.py script, which leverages CLIP, an image embedding model developed by OpenAI, to identify images that may not be labeled correctly.
The script cuts out annotations from each image, computes its CLIP vector, then aggregates CLIP vectors for each class. Then, each annotation is compared to the aggregate CLIP vector. The further apart an annotation is from the average class vector, the more likely it is that the annotation is incorrect.
To get started, first clone the CVevals repository, install the requisite dependencies, and copy the cutout.py script into the main project directory:
git clone https://github.com/roboflow/cvevals
cd cvevals
pip3 install -r requirements.txt
pip3 install -e .
cp scripts/cutout.py .
Now we’re ready to run the script to identify mislabelled images.
Step 3: Run Script on a Dataset
To identify mislabelled images using the CVevals label checking script, you will need your Roboflow API key, workspace ID, dataset version, and project ID. You can find out how to retrieve these pieces of information in our documentation.
With these pieces of information ready, we can run the evaluation script. Here are the required arguments you need to specify:
python3 cutout.py --eval_data_path=images --roboflow_workspace_url=<> --roboflow_project_url=<> --roboflow_model_version=<>The eval_data_path refers to the folder in which you want to save the dataset downloaded from the Roboflow API.
Optionally, you can specify the following arguments:
--generate_pdf=true: Generate a PDF report showing various dataset metrics, including the names of files that may have mislabelled images.--fp_threshold=0.7: The similarity threshold that must be met before an image is considered similar to the average CLIP vector for a class. By default, this value is 0.7. We recommend leaving this value as 0.7 unless you notice the script flags valid annotations as mislabeled.
We’ll specify the --generate-pdf=true report in this example to generate a PDF summary:
python3 cutout.py --eval_data_path=images --roboflow_workspace_url=workspace --roboflow_project_url=project --roboflow_model_version=1 –-generate_pdf=trueLet’s run the command on our TACO dataset. Our dataset contains over 3,000 images so it will take some time to run the analysis.
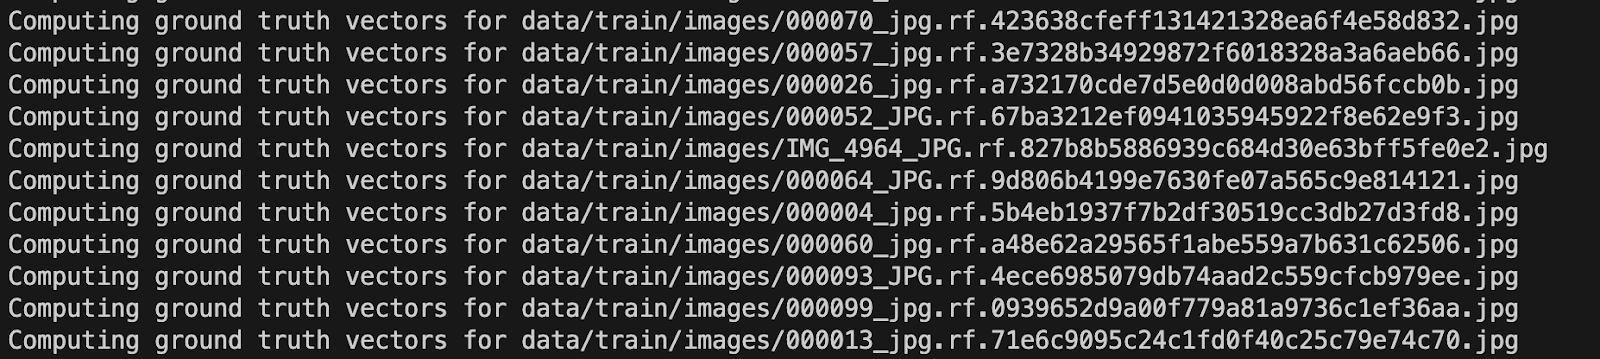
The command will show messages as vectors are computed for ground truth data:
After computing vectors, the command prints out the names of any images that may have been misidentified:
data/train/images/000068_jpg.rf.9b9cbf4a646084759cf497bda644590a.jpg has a false positive at (325, 273, 428, 346)
Evaluating data/train/images/000086_jpg.rf.28c7a99a2009feab19227107629024a9.jpg
Evaluating data/train/images/000085_jpg.rf.0c83a3b05ee4a9753194afb50f61f33f.jpg
Evaluating data/train/images/000003_jpg.rf.6c0f89788e0aa72792c150a98abd7378.jpg
Evaluating data/train/images/000053_jpg.rf.e40407e687da7a73c86c2714898372b4.jpg
Evaluating data/train/images/000041_jpg.rf.872d29dbeb93f1e38d8212e6d8eaacb9.jpg
Evaluating data/train/images/000003_jpg.rf.f9f5224a16e4175bb5302c96d0cd1d40.jpg
data/train/images/000003_jpg.rf.f9f5224a16e4175bb5302c96d0cd1d40.jpg has a false positive at (68, 267, 605, 514)
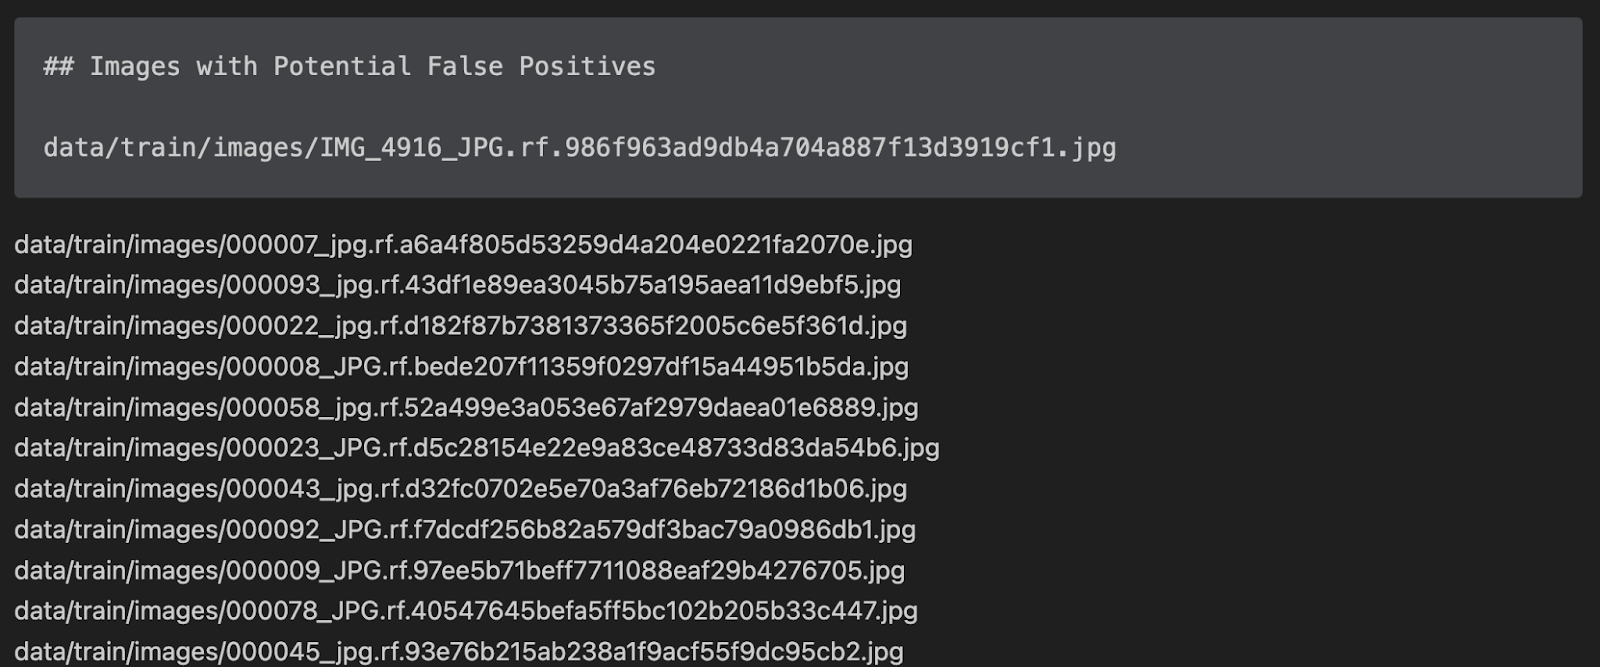
…The report is saved as a markdown file. Here’s a preview of the file showing some of the results from our analysis:
Let’s open up one of these files in Roboflow Annotate to see the annotations:
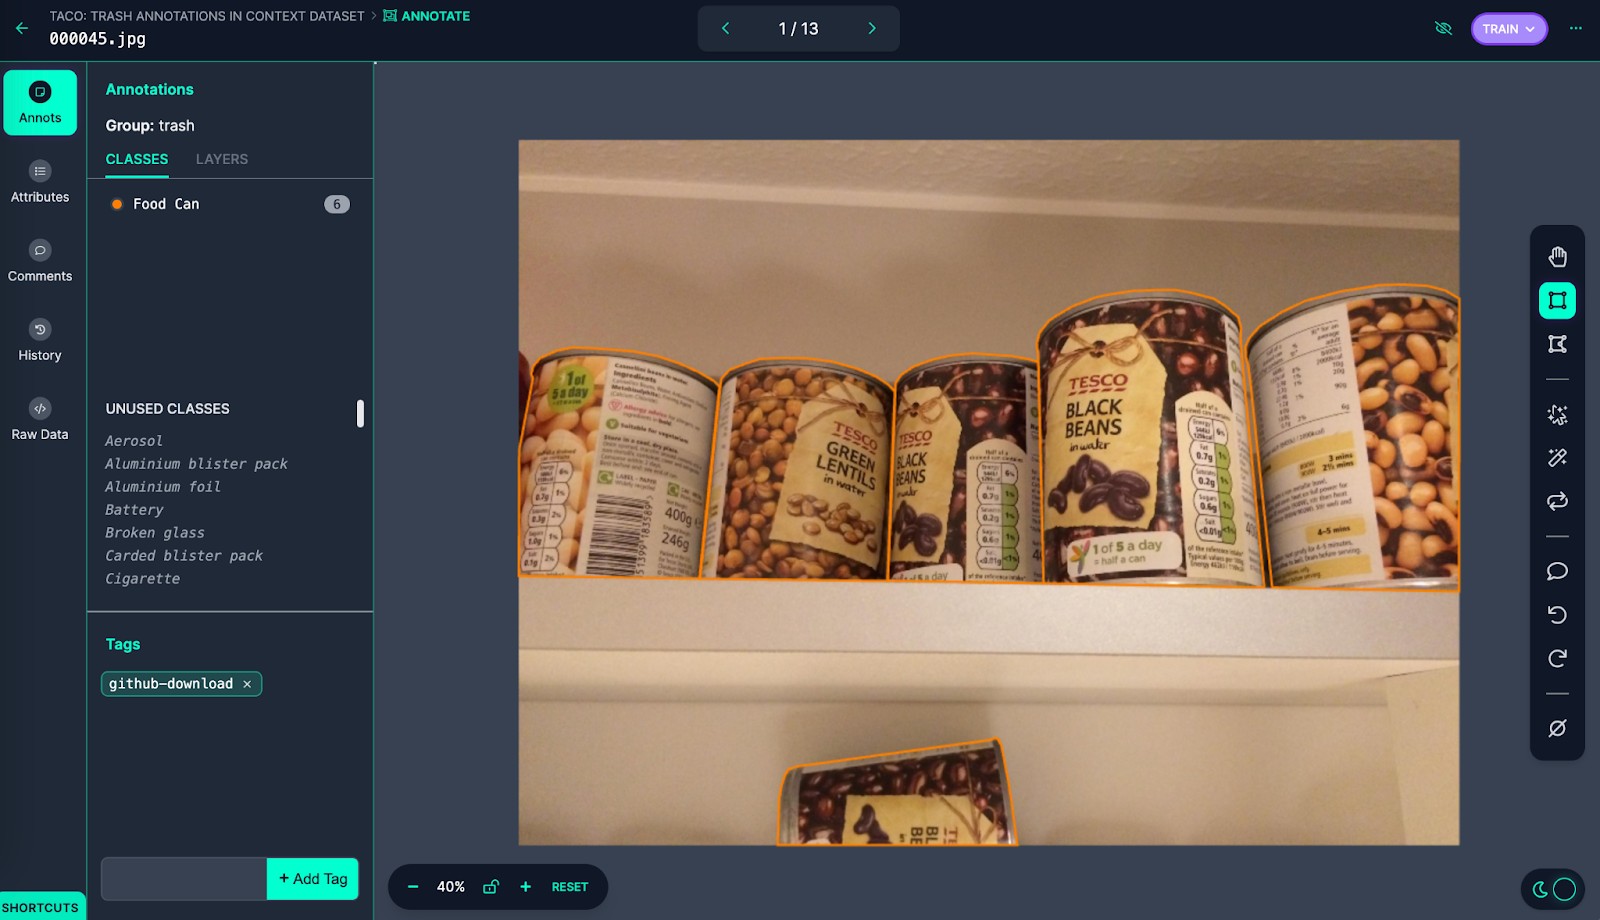
These images were labeled as “Food Can” in the annotation group “trash”. With that said, the images don’t look like trash; the cans are on a shelf in what appears to be a kitchen and there is no sign that any of the cans have been opened. While TACO is a dataset of trash annotations in context, the cans are out of place: they are in an environment where the objects are not trash.
In this case “null” may be a more appropriate annotation since there are no visual signs the items are trash.
With that said, this image would be a good candidate for synthetic data generation: the background could be changed to be more appropriate (i.e. cans on the ground, or cans on grass) to help the model better understand cans in context. We could then use the new synthetic data to train an updated version of our model.
Depending on your use case and the environment your model will operate in, the action you take when finding outlier data is up to your discretion. For instance, if this model will always be deployed in environments where litter is present, this particular example can be ignored. But, if you are going to be identifying trash in other contexts (i.e. a kitchen), this image should be marked as null.
Because we specified the `--generate_pdf` flag, we also have a PDF version of the analysis markdown file. This is saved in a file called `report.pdf`.
Conclusion
In this guide, we have used CLIP to identify annotations that may include incorrect labels in an image dataset.
Running this evaluation on a computer vision dataset will help assure the quality of your dataset, thereby assisting to maximize the performance of the models you train on your dataset.
We recommend running an evaluation before training new versions of a model where new images have been added to help ensure incorrect annotations do not impact the quality of subsequent trained models.
Now you have the tools you need to identify mislabelled images in your datasets.
Cite this Post
Use the following entry to cite this post in your research:
James Gallagher. (May 24, 2023). How to Identify Mislabeled Images in Computer Vision Datasets. Roboflow Blog: https://blog.roboflow.com/identify-mislabeled-images-computer-vision/