
When you are building an image classification model, it is essential that your model “generalizes”. This means that the model learns features of images without overfitting specifically to your training set.
One way to improve your classification model’s ability to generalize is to add image augmentations. Image augmentations are created by creating copies of images in your training set and manipulating them in different ways.

For example, you could apply a brightness augmentation to images, which will help your model identify objects in different lighting conditions.
Data Augmentation for Image Classification
In this guide, we are going to show you how to augment images for classification model building. We will walk through how to create a classification project in Roboflow, then generate a version of a dataset to which several augmentations are applied.
By generating augmentations with Roboflow, you can benefit from our dataset versioning features. These features allow you to apply augmentations to specific versions of a dataset, without changing your underlying dataset. This means you can have ten different datasets all using the same source images but with different augmentations applied.
You can train your model in Roboflow using your augmented images, or export your augmented images for use in your own training pipeline.
Roboflow’s augmentation features are available for classification, object detection, and segmentation.
Without further ado, let’s get started!
Step #1: Create a Roboflow Project
To get started, create a free Roboflow account. Once you have created an account, go to your Roboflow dashboard and click the “Create Project” button in the top right corner of the user interface. You will be taken to a page where you can configure your new project:
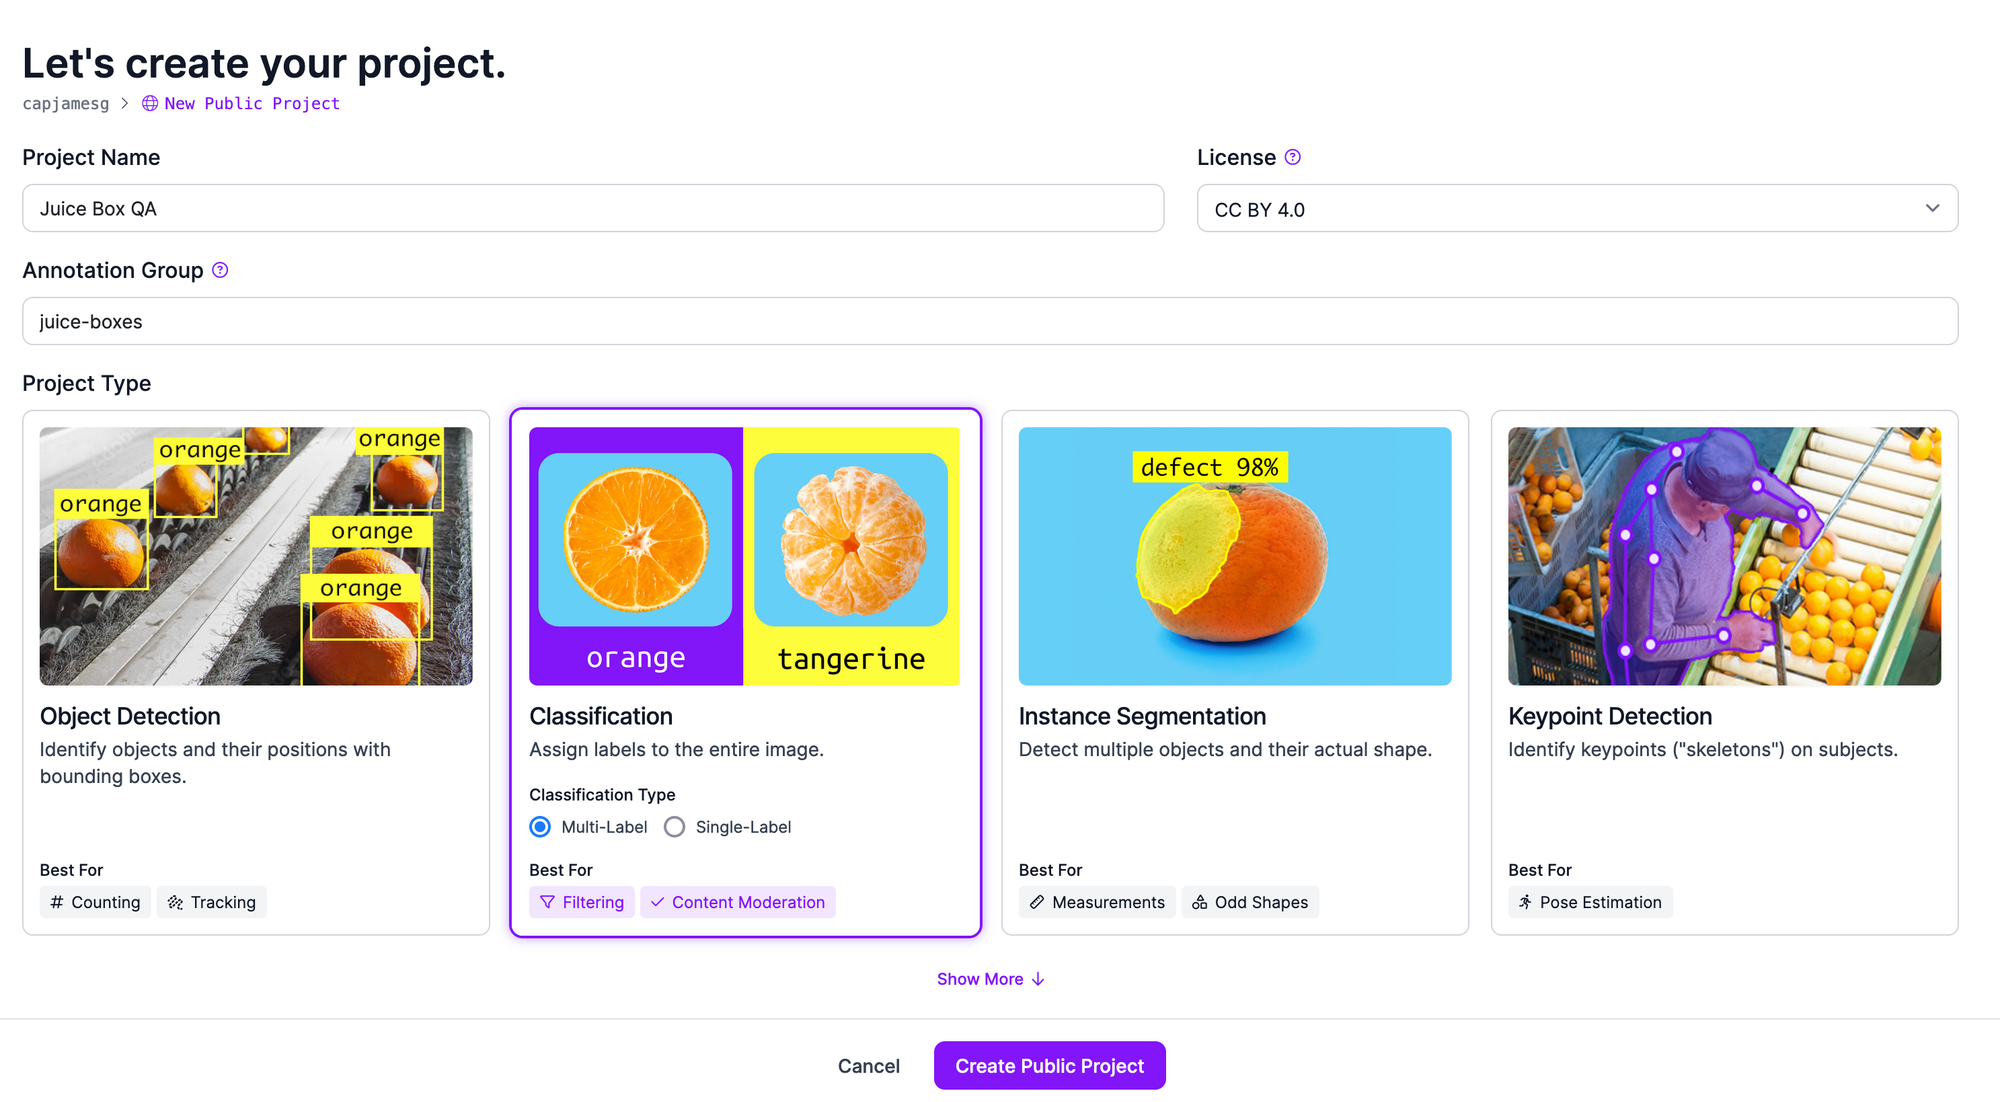
On this page, set a name for your project and choose “Classification” as the project type. Then, click “Create Project” to create your project.
Step #2: Upload Data
Once you have created a project, you can upload your project data to Roboflow. We accept annotations in several formats. For classification, we support single and multi-class folder annotation formats. See our documentation for more information on supported formats.
If your data is labeled in a supported upload format, you can drag and drop your data into Roboflow and the labels will be automatically recognised and saved in your project. If your data is unlabeled, you can drag and drop your images and label them in Roboflow.
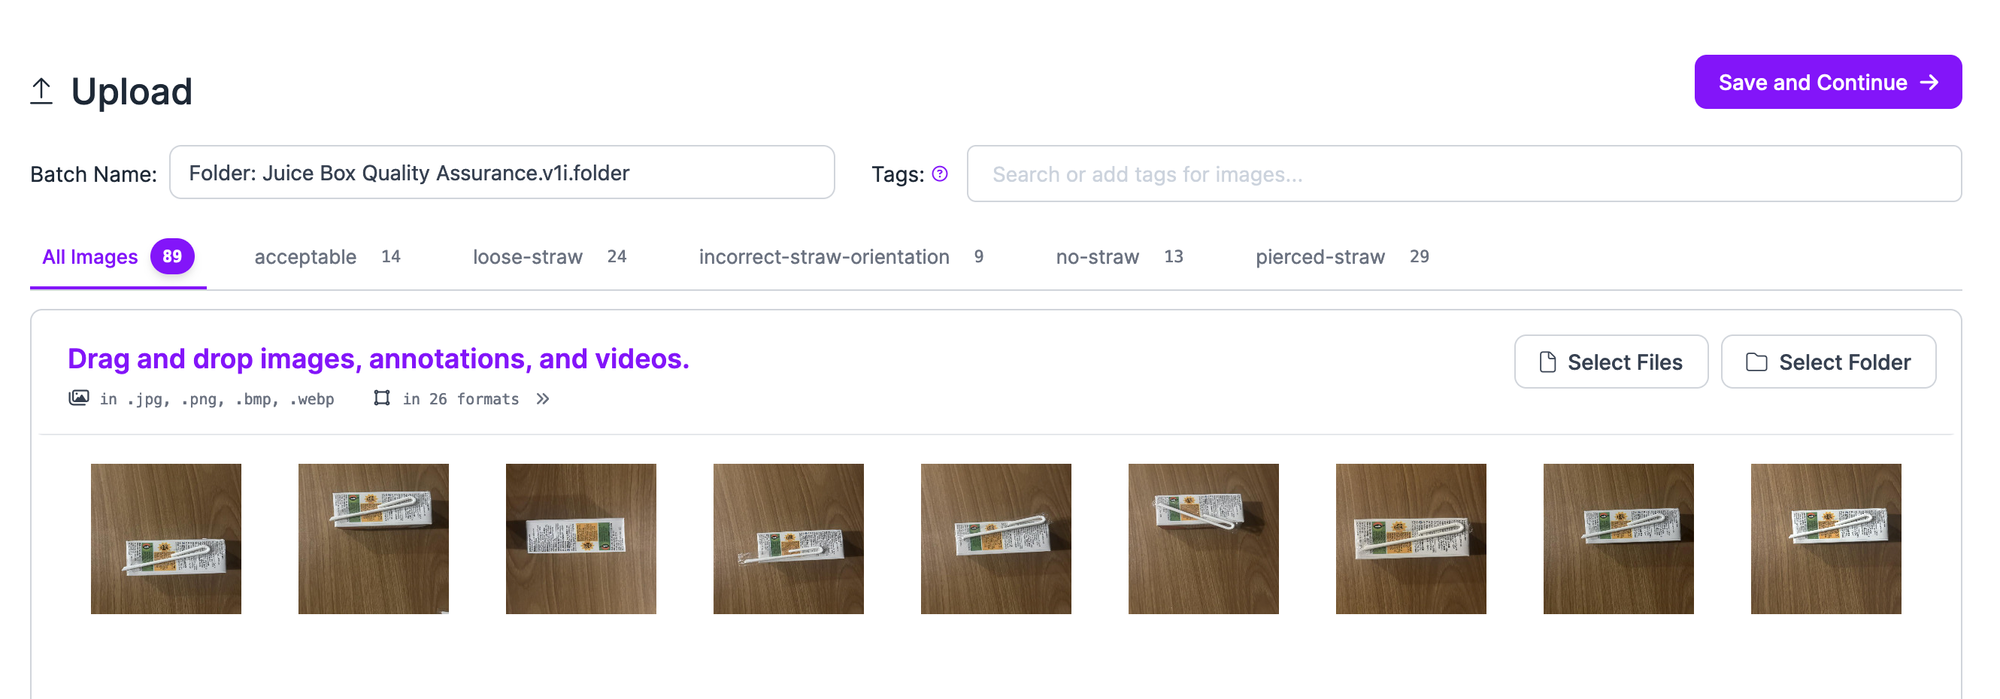
Once you have uploaded your images or annotations and images, click “Save and Continue” to add the data to your project.
If you need to label images, refer to the Roboflow Annotate documentation for information on the annotation tools available to you.
Step #3: Generate a Dataset Version
Once you have labeled all of your images, you can generate a dataset version. A dataset version is a snapshot of a dataset.
You can apply augmentations and preprocessing steps to specific dataset versions without changing your underlying dataset. This allows you to generate multiple versions of a dataset with different augmentations, ideal for experimentation to find the best combination for training a high performing model.
To generate a dataset version, click “Generate” in the left sidebar of the Roboflow dashboard. On this page, you will be presented with several configuration options.
For your first dataset version, we recommend leaving preprocessing steps as default. We will instead focus on adding augmentations.
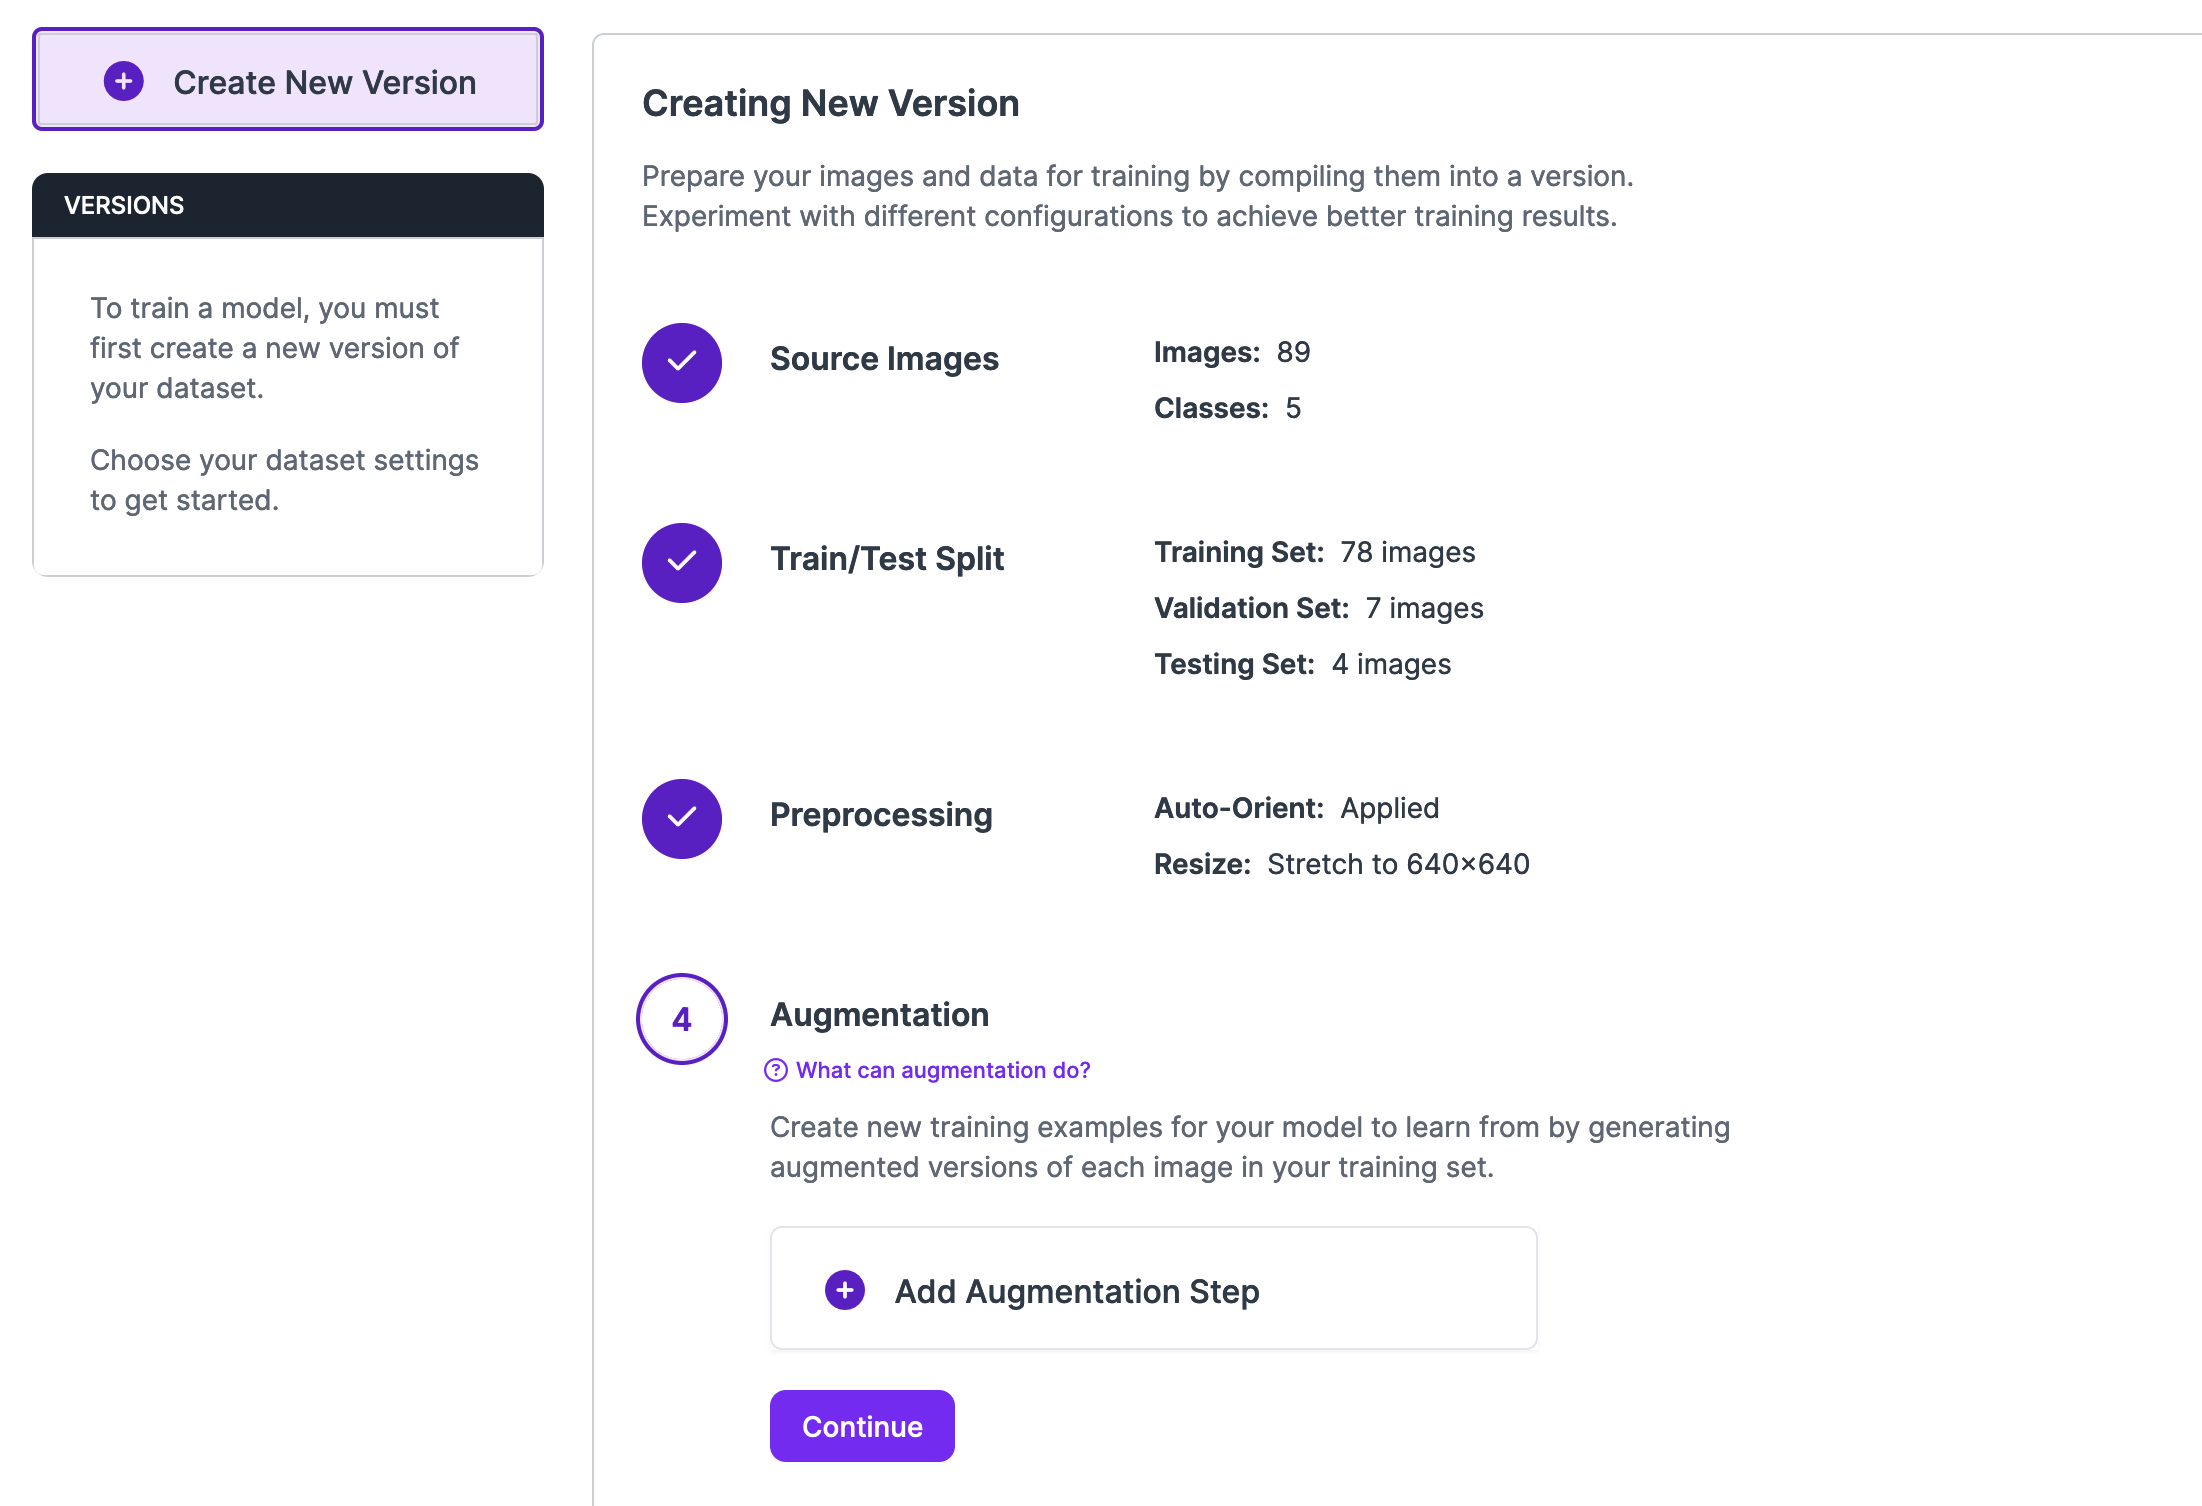
Scroll down to the Augmentations panel. On this panel, you will see several augmentations that you can apply, including:
- Flip
- 90 degree rotate
- Crop
- Rotation
- Shear
- Hue
- Saturation
- Brightness
- Exposure
- Blur
- Noise
- Cutout
When you are ready to apply augmentations, click “Add Augmentation Step”. You can select any available augmentation to apply.

When you click on an augmentation, you will be able to see a preview of what it will do to an example image in your dataset. You can also configure the augmentation parameters.
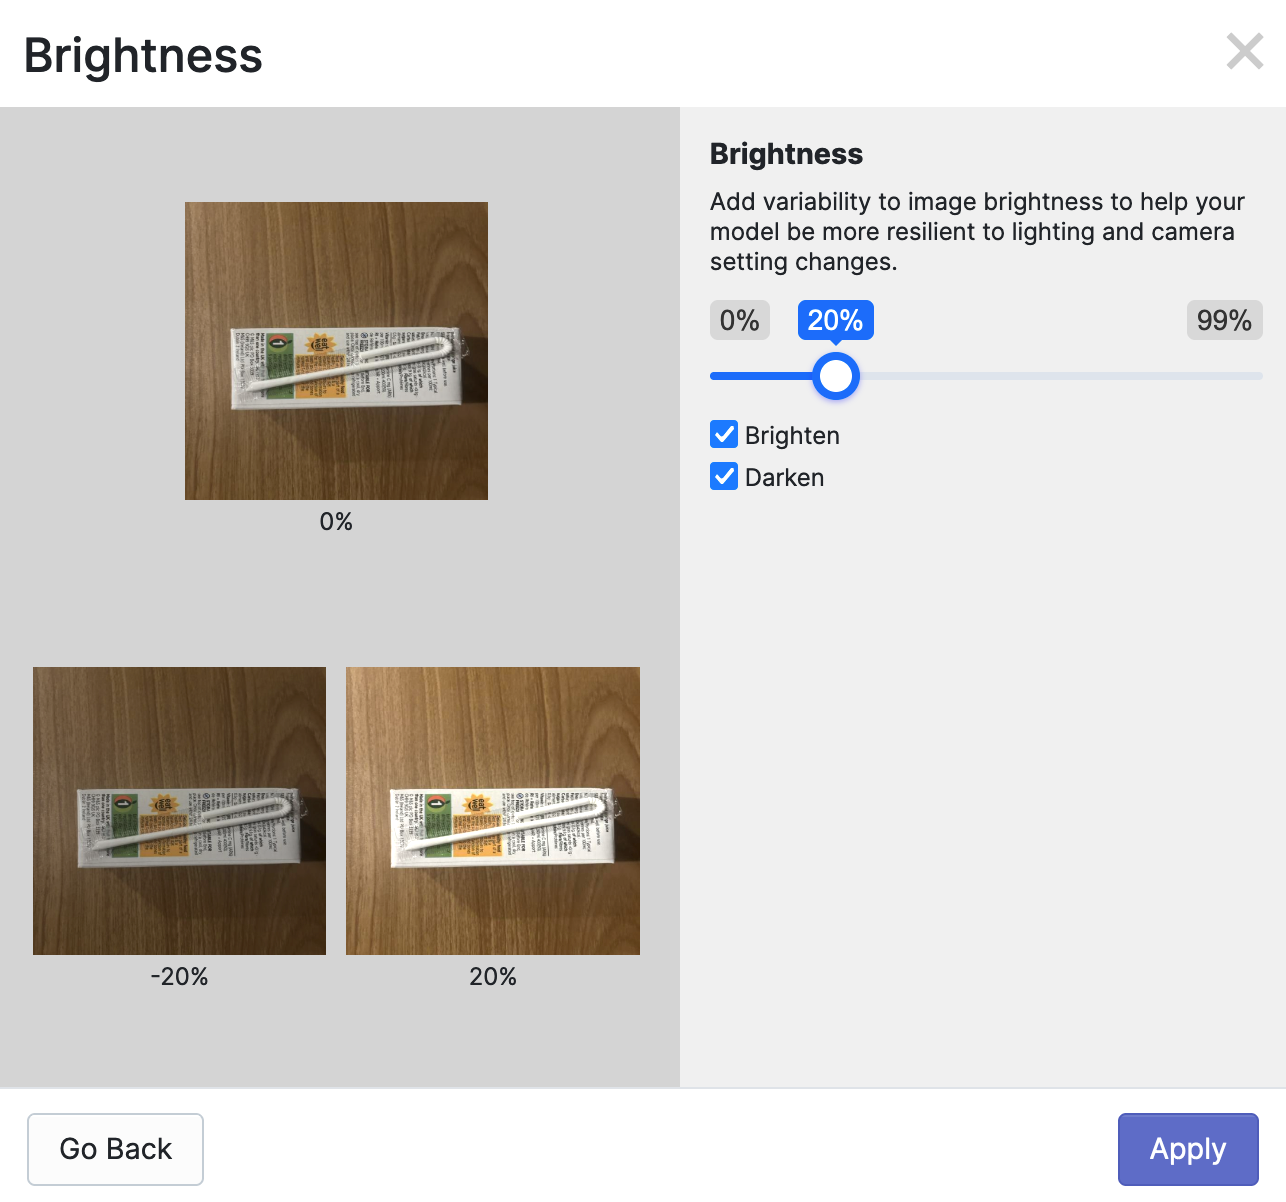
For example, if you apply a brightness augmentation, you can customize the range within which the brightness will be changed, and whether darker, lighter, or darker and lighter examples should be added. These parameters vary for each augmentation.
To learn more about what augmentations you should apply to your dataset, refer to our augmentation and preprocessing guide.
When you have applied the augmentations you need, click “Continue”, then click “Create” at the bottom of the page. On the Create tab, you will be able to choose a maximum version size. This refers to how many images will be in your final dataset. If you select 2x, for example, it means your training set will be 2x the size. The increased size is made up of your augmented images.
We recommend 2x-3x for most datasets.
Once you have selected a maximum version size, click “Create” at the bottom of the page to create your dataset. The dataset creation process may take a few minutes. You will see a loading screen while your dataset is generated with augmented images.
Step #4: Use Your Dataset
When your dataset is ready, you can use it to train a model on Roboflow. You can also export your data for use in training a model on your own hardware.
To train a model, click the “Train with Roboflow” button on the dataset version page. You will be walked through several model configuration steps, after which point you can start training your model. Models trained with Roboflow can be deployed on your own hardware with Roboflow Inference, an open source computer vision inference server, or in the cloud.
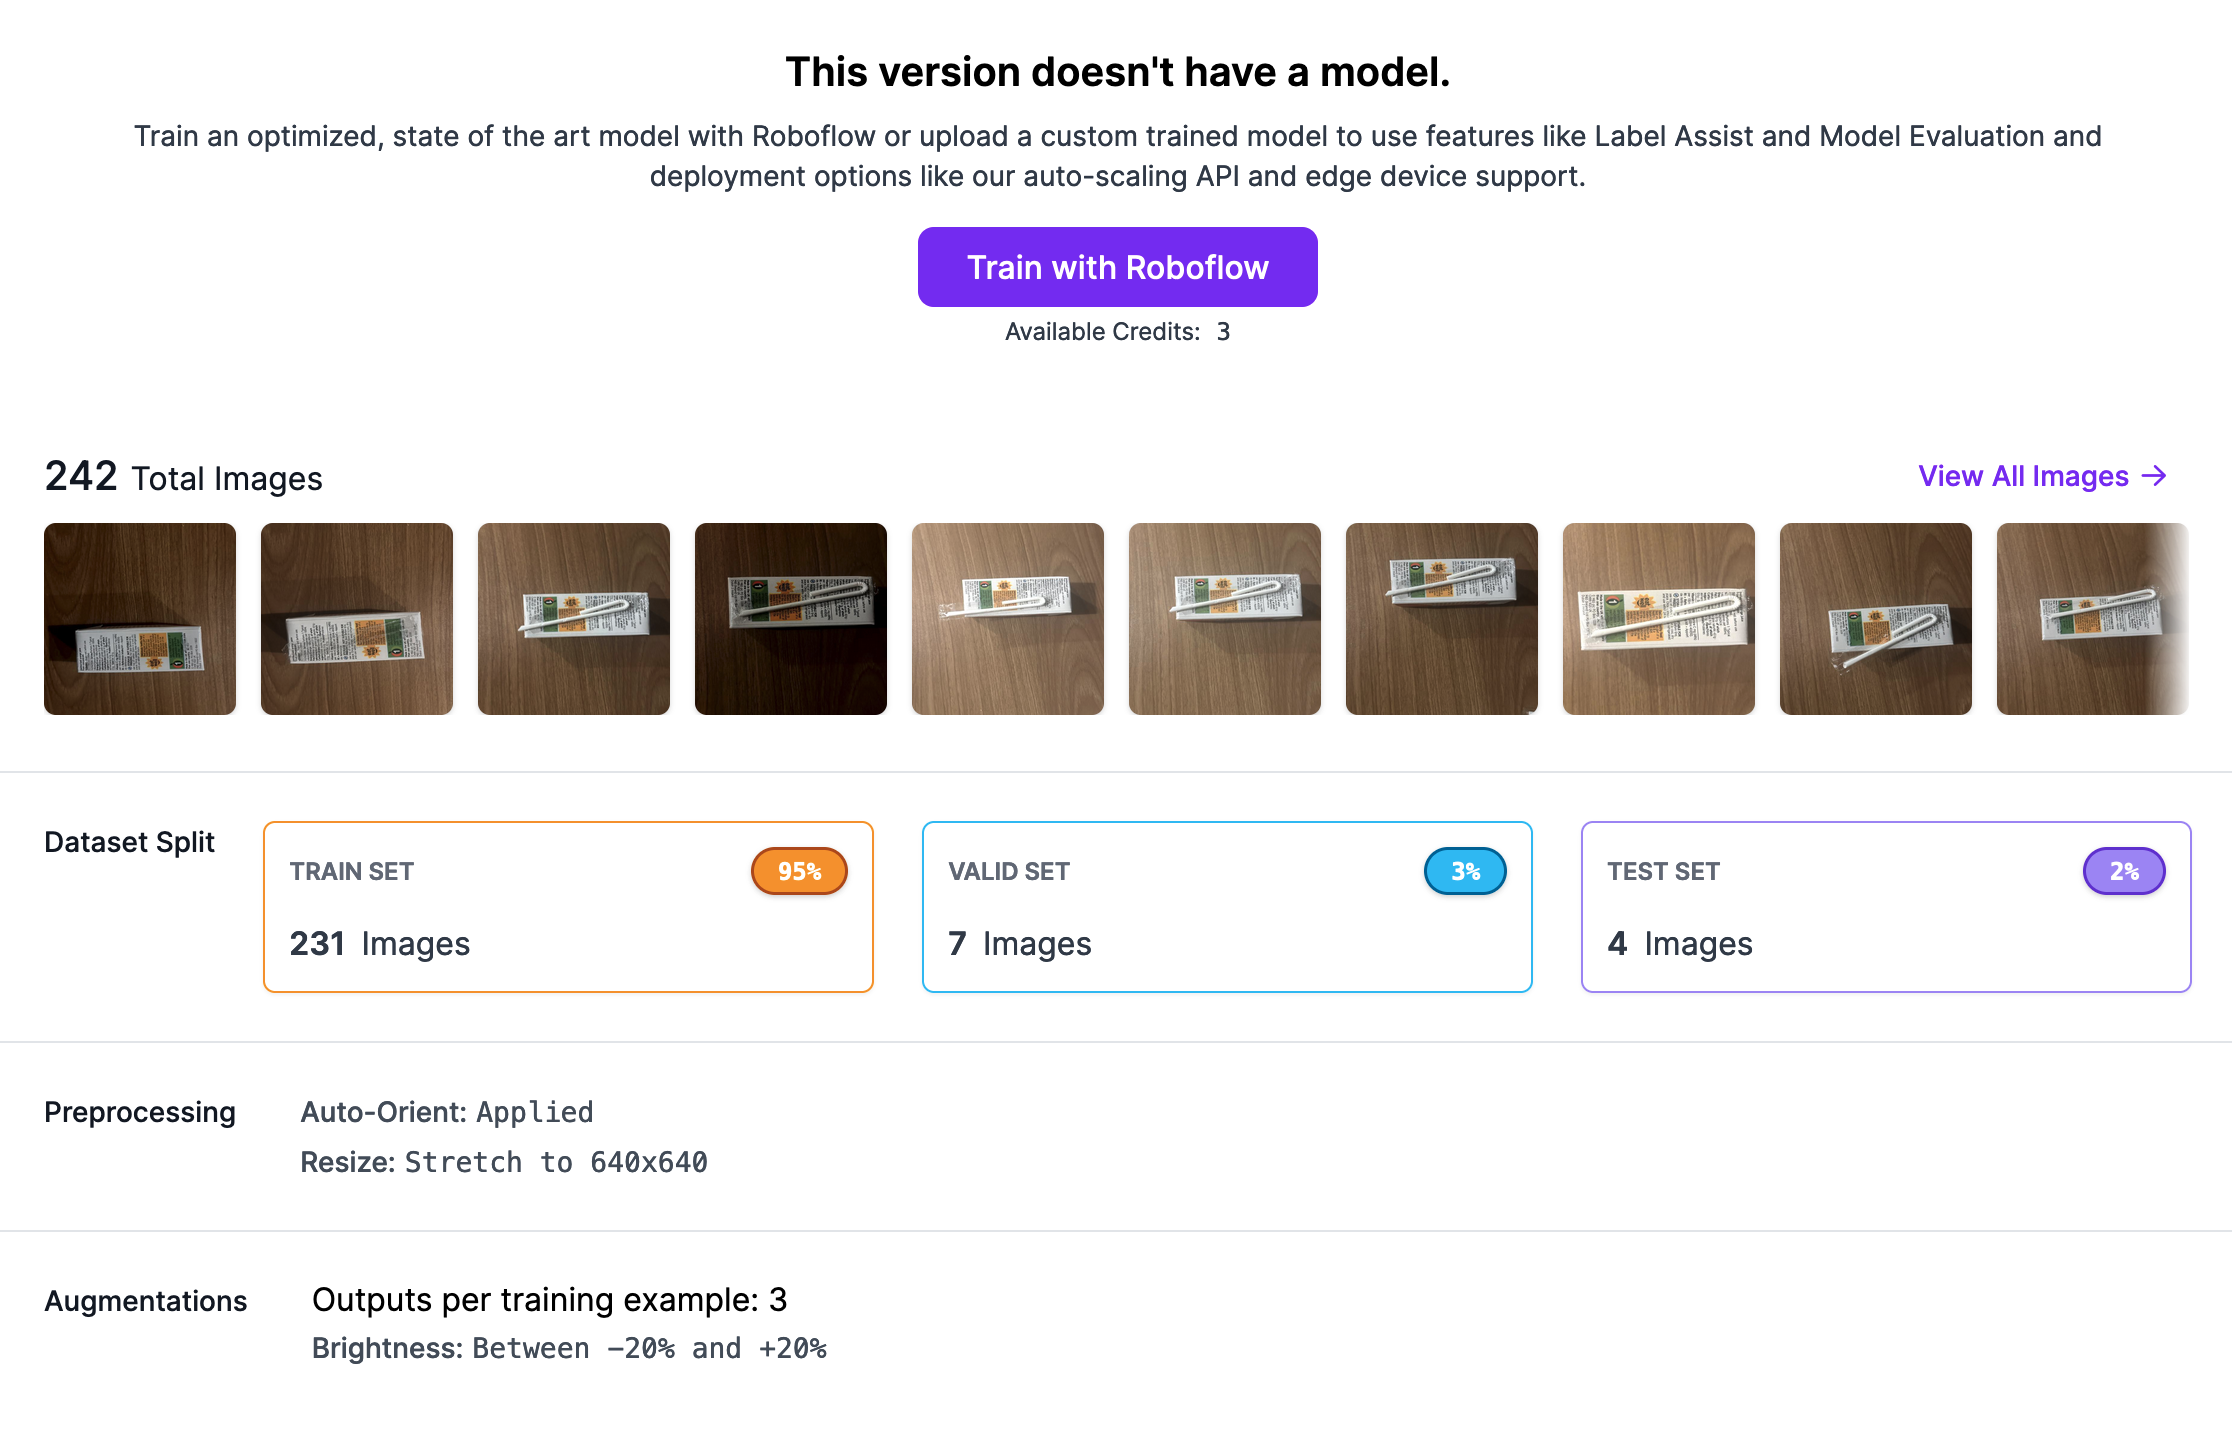
To export your dataset, click the “Export Dataset” button. You can choose one of the export formats we support for classification: folder structure or CLIP structure.
Conclusion
You can use the Roboflow platform to apply augmentations to images for use in creating computer vision datasets.
In this guide, we walked through how to create a Roboflow project, upload images, and generate a dataset version with augmentations such as greyscale and brightness. We then demonstrated how to use your dataset for model training in our application, as well as what you need to do if you want to export your dataset.
Cite this Post
Use the following entry to cite this post in your research:
James Gallagher. (Jul 16, 2024). How to Augment Images for Image Classification. Roboflow Blog: https://blog.roboflow.com/image-classification-augmentations/