
When you are preparing a dataset for use in training a segmentation model, you may want to add augmented images to your dataset.
Augmented images are copies of images from a training set that are transformed to create a new image. The augmented images may help a model better “generalize”, which means the model can identify features without being overfit to the specifics of the training set.
With Roboflow, you can generate augmented images for use in training image segmentation models. The Roboflow image augmentation workflow is a dataset generation feature, which can be used to create several different versions of a dataset, each with its own augmentations.
In this guide, we are going to walk through how to generate augmented images for inclusion in an image segmentation model with Roboflow.
We will:
- Create a project
- Upload data
- Generate a version and apply image augmentations to data
- Discuss how to train a model or export your data
Without further ado, let’s get started!
Step #1: Create a Project
First, create a free Roboflow account. Then, go to your Roboflow dashboard and click the “Create Project” button. You will be taken to a page where you can create a project, within which you can store your segmentation dataset.
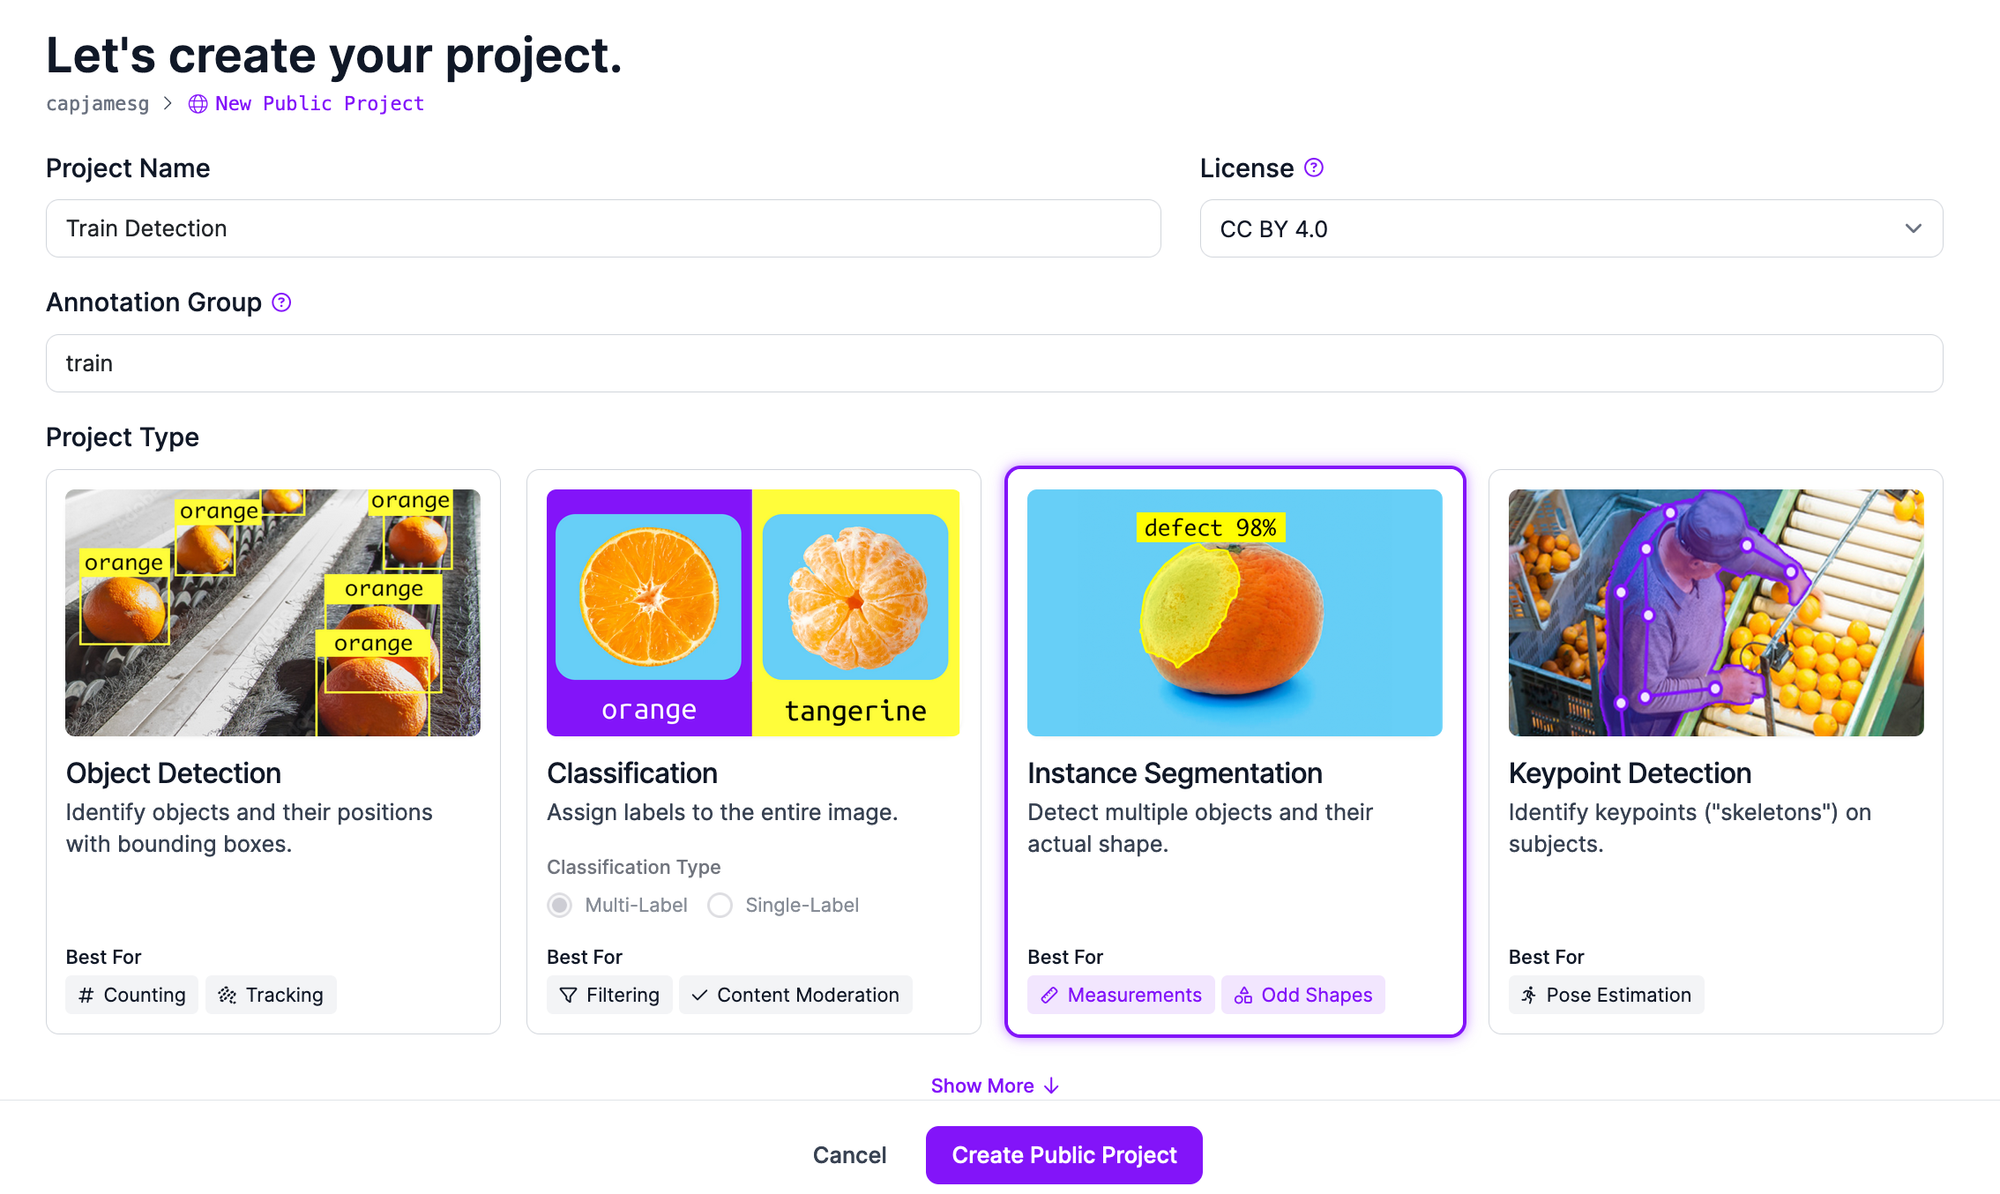
Set a name for your project, then choose the “Image Segmentation” project type. Click “Create Project” at the bottom of the page to create your project.
Step #2: Upload Data
After you have created your project, you will be taken to the dataset upload page. On this page, you can upload either:
- Raw images, or;
- Raw images with supported annotations.
If you upload raw images, you can label them within the Roboflow Annotate annotation suite.
To learn about the supported annotation formats you can upload to Roboflow, refer to the Roboflow Formats index.
To upload raw or annotated images, drag and drop your data into the Roboflow web interface:
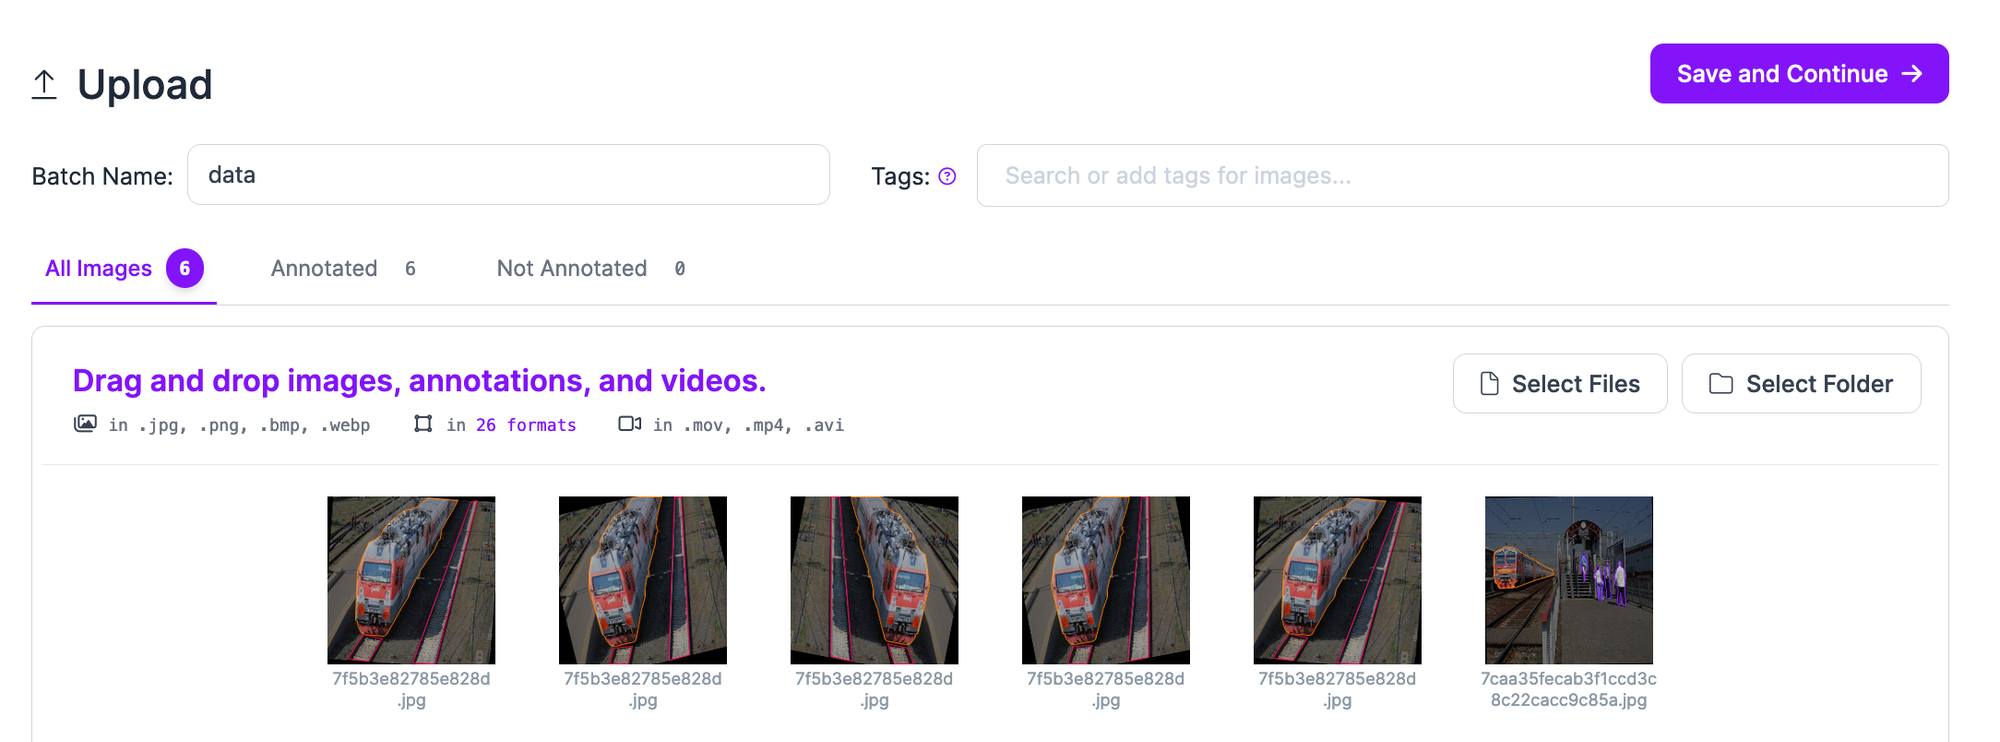
Your images will first be processed in the browser. Then, a “Save and Continue” button will appear which will allow you to upload your data to Roboflow.
The amount of time it takes for your data to be uploaded will depend on the number of images you are uploading and the speed of your internet connection.
With your images uploaded, you can label your data in Roboflow, or proceed to generate a dataset version with augmentations.
Step #3: Augment Image Segmentation Data
When you are ready to apply image augmentations to your dataset, click “Generate” in the left sidebar. This will open up the dataset generation page. On this page, you can create a snapshot of your dataset and apply preprocessing and augmentation steps to the snapshot.
With Roboflow dataset versions, you can generate several versions of a dataset with their own augmentations without manipulating the underlying dataset. This makes it easy to experiment with different augmentations without changing your raw images.
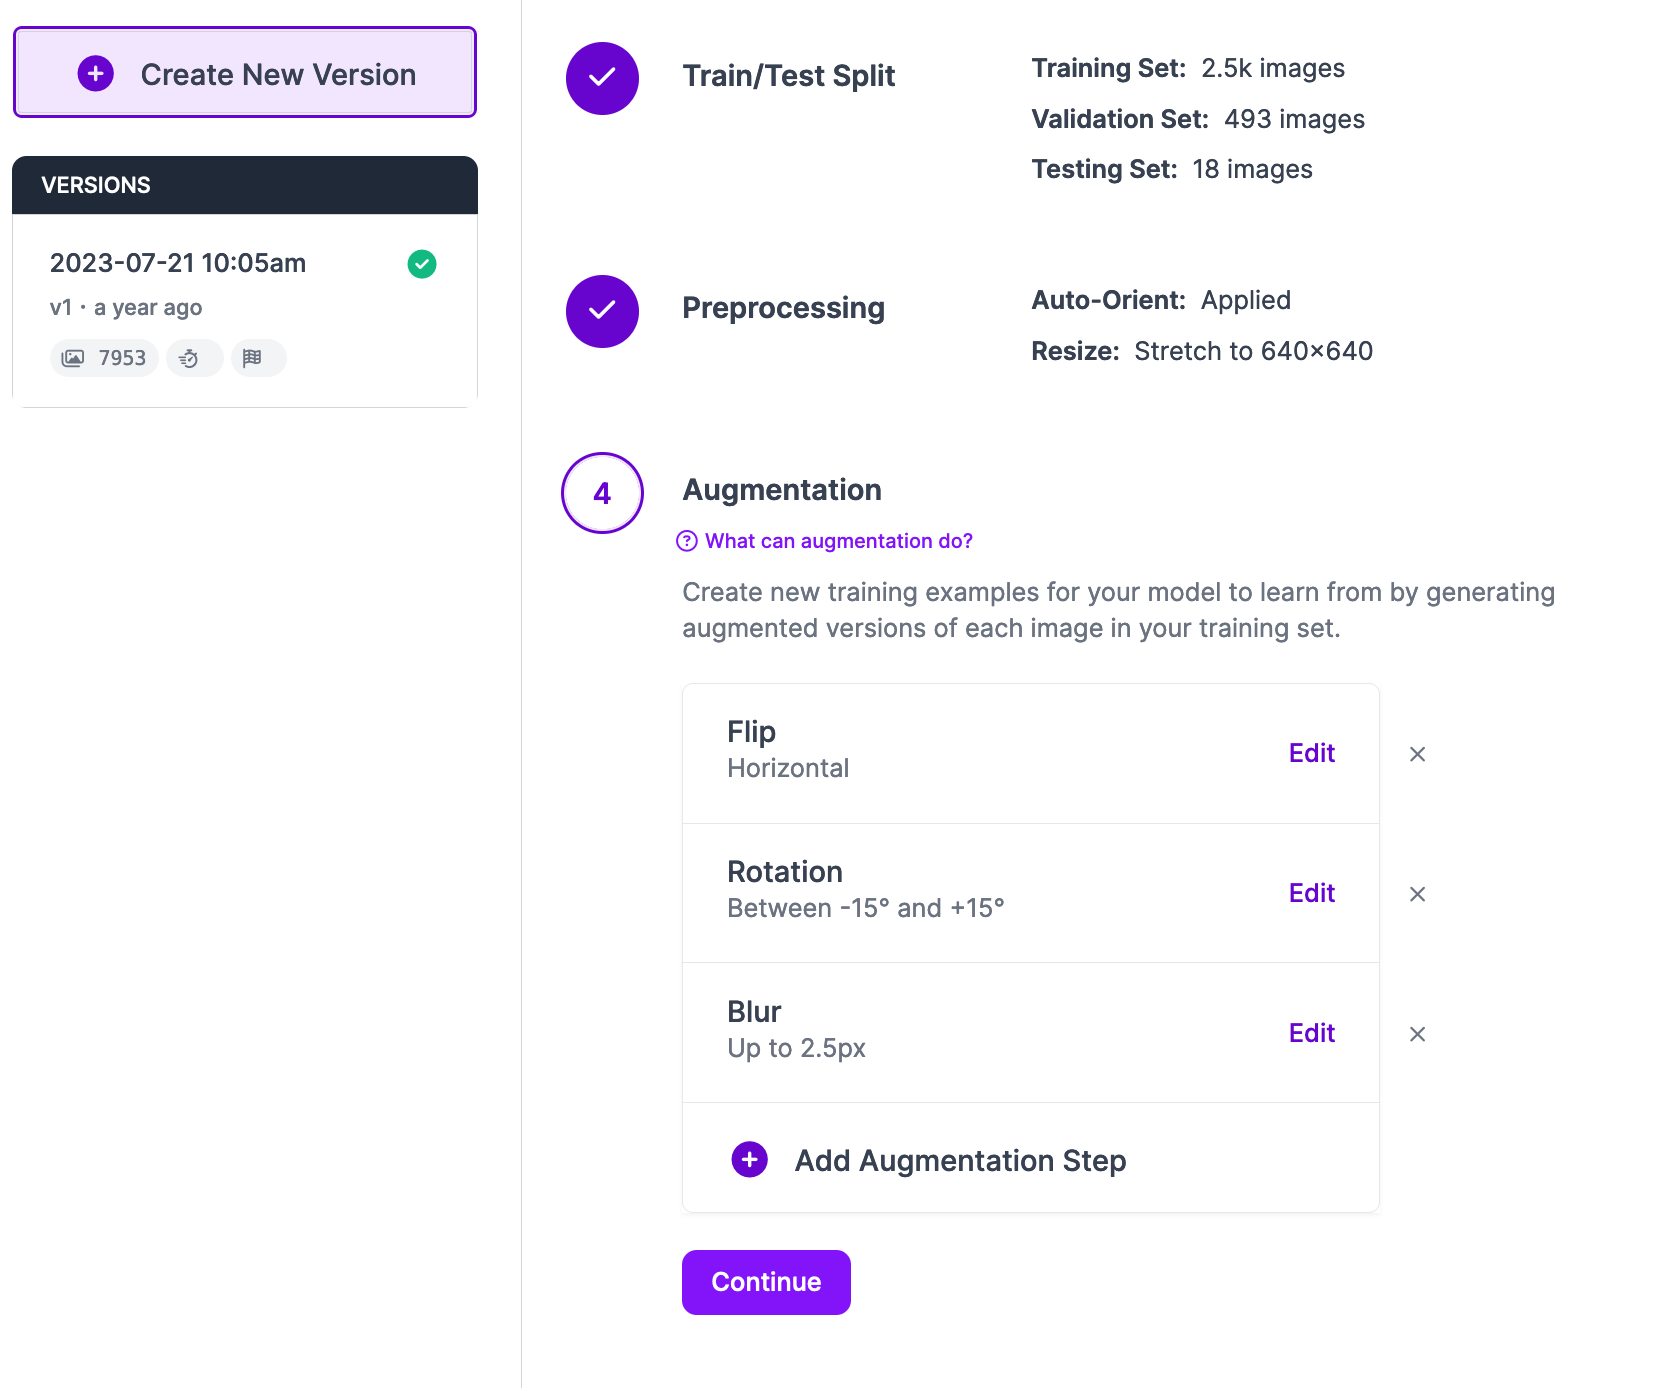
To apply image augmentations, scroll down to the “Augmentations” section on the page. Then, click “Add New Augmentation”.
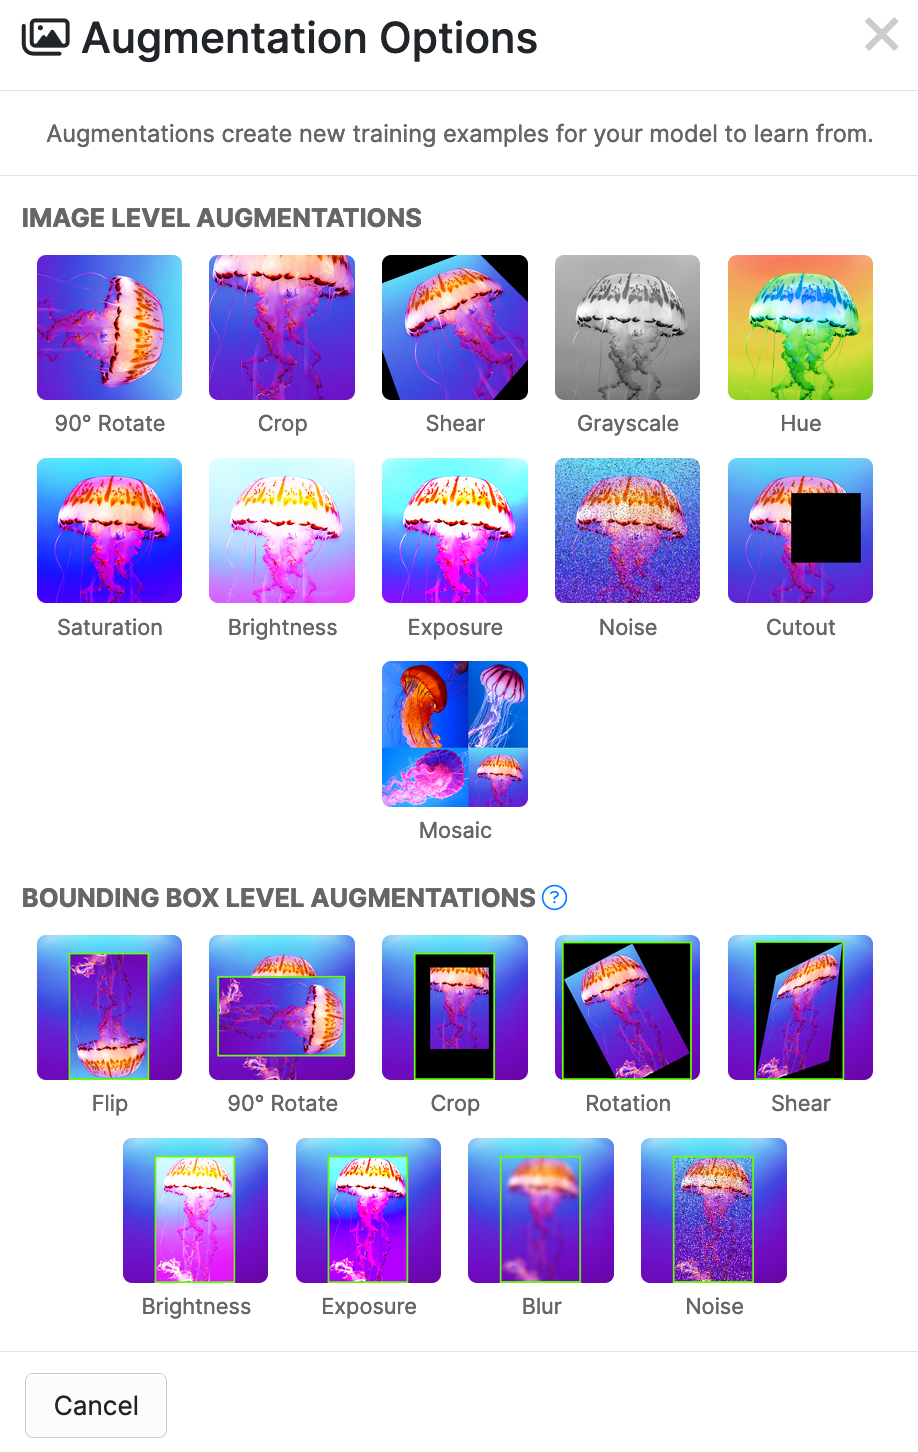
There are two types of augmentations supported:
- Image-level, which are augmentations applied to a full image, or;
- Bounding-box level, which are augmentations applied to a bounding box that is the closest fit around each segmentation mask annotation.
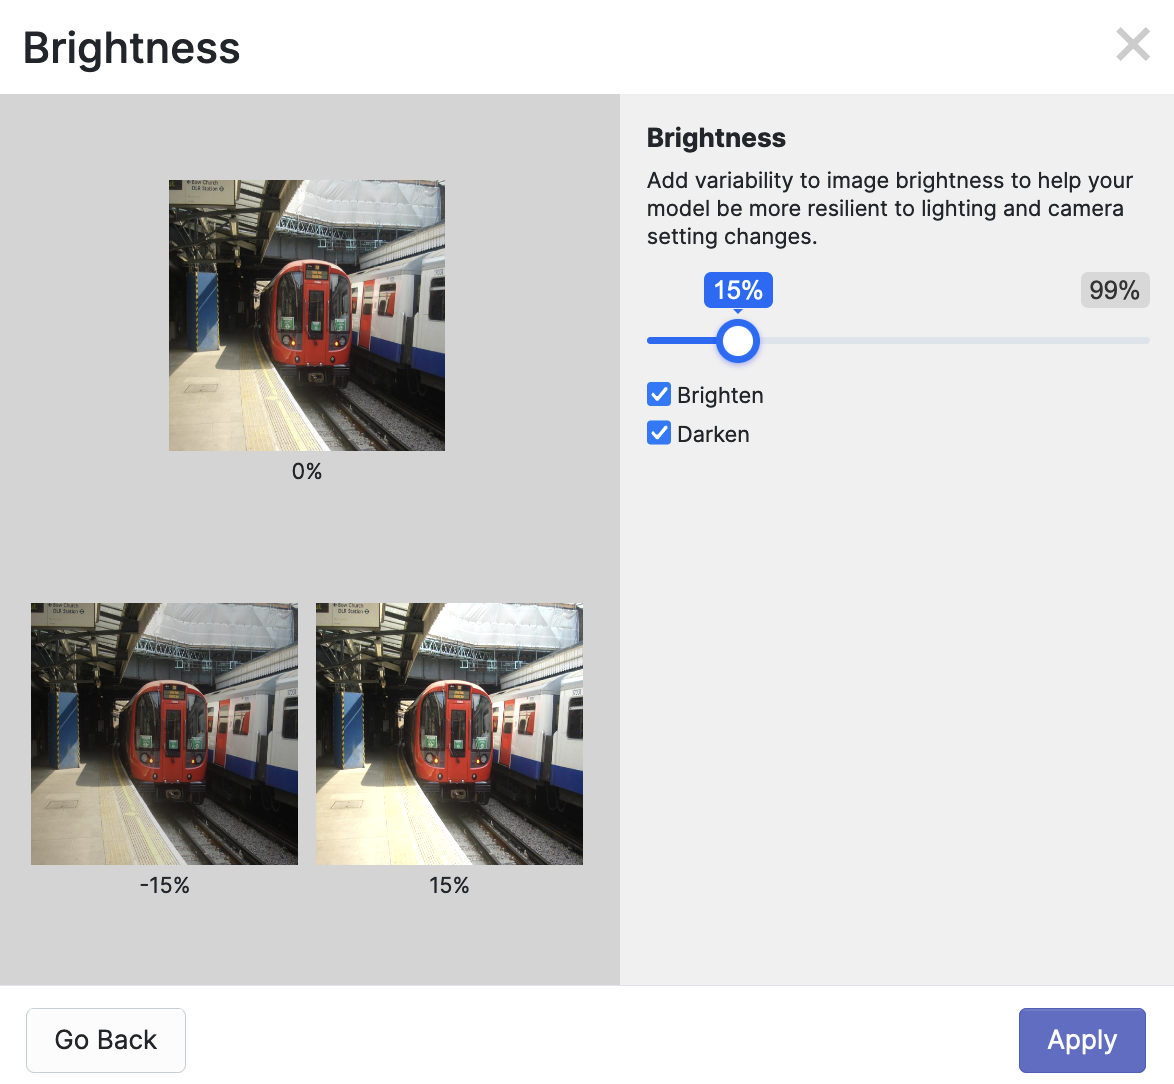
To add an augmentation, click on the augmentation you want to apply. A window will appear in which you can configure the augmentation. The configuration options available will vary depending on the augmentation type you have chosen.

For example, if you choose the brightness augmentation, you can choose the extent to which augmented images will be brightened or darkened.
To learn more about which augmentations may be right for your project, refer to our guide on image preprocessing and augmentations.
All augmentations are applied to copies of random images in your training dataset. They do not transform an existing image in place. This means that, after augmentation, there will be more images in your dataset.
Once you have applied all of the augmentations you need, click “Create” at the bottom of the page. We recommend keeping the “Maximum Dataset Size” value at 2x. You may increase it to 3x if you need more augmented images. Then, click the “Create” button.
Your dataset version will be generated. The amount of time this process takes depends on how many images are in your dataset and the augmentations you have applied.
Step #4: Train an Image Segmentation Model
Once you have generated your dataset version, you can train a model.
You can train your model on Roboflow using your dataset, or you can export your dataset for use in training a model on your own infrastructure.
If you train a model on Roboflow, a cloud API will be available that you can use to query your model. You can also deploy your model on your own hardware using Roboflow Inference, an open source computer vision inference server.
To train a model on Roboflow, click the “Train with Roboflow” button on your dataset version page.

To export your data, click the “Export Dataset” button and choose the format in which you need your dataset. Roboflow supports COCO Segmentation exports. You can also export your dataset as object detection datasets, where segmentation masks in your dataset are transformed into polygons for object detection.
You can optionally upload models you have trained elsewhere back to Roboflow for deployment, provided the model type is supported. See a list of supported models you can upload to Roboflow.
Conclusion
Image augmentations can help improve model performance, when you choose augmentations appropriate for your use case. With Roboflow, you can generate augmented images for use in training image segmentation models.
In this guide, we walked through how to generate augmented images with Roboflow. We created a project, uploaded a dataset, then generated a version to which augmented images were applied. We then discussed how to train a model using your dataset in Roboflow, and how to export your dataset for use in training a model on your own hardware.
To learn more about deploying models on Roboflow, refer to the Roboflow Inference deployment documentation.
Cite this Post
Use the following entry to cite this post in your research:
James Gallagher. (Jul 17, 2024). How to Augment Images for Image Segmentation. Roboflow Blog: https://blog.roboflow.com/image-segmentation-augment/