
Roboflow simplifies the process of managing, training, and deploying computer vision models with hosted APIs, private clouds, and to edge devices. When using Voxel51 for dataset curation and visualization, you can efficiently export annotated datasets from Voxel51, and upload them into Roboflow to train and deploy high-performance models.
In this tutorial, you’ll learn how to export a dataset from Voxel51, upload it to Roboflow, train an RF-DETR model, and deploy it for real-world use.
What You’ll Learn
- Export annotated data from Voxel51 in YOLOv5 format.
- Import and preprocess the dataset in Roboflow.
- Train an RF-DETR model for object detection.
- Create a workflow to visualize and evaluate model performance.
- Deploy the model for real-world applications.
- Continuously improve the model with production data.
Import Voxel51 Datasets to Roboflow
Let’s dive into the step-by-step process!
Step 1: Export the Voxel51 Dataset
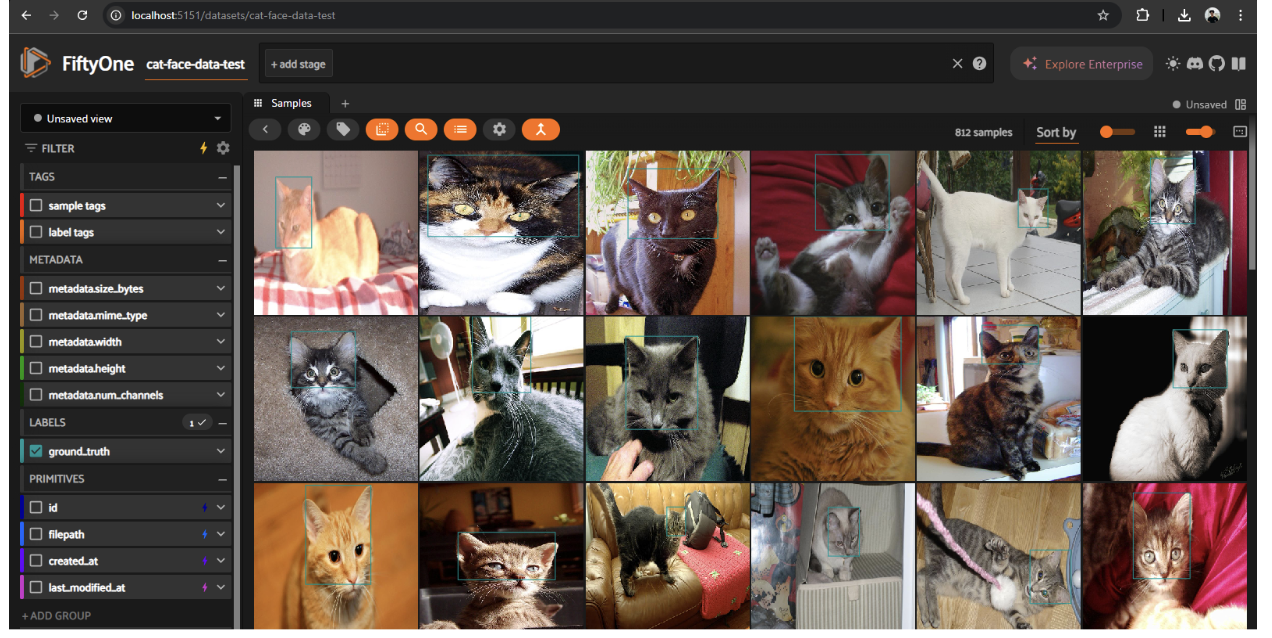
For this tutorial, it is assumed that you have the Voxel51 interface set up with an annotated and ready-to-export dataset.
To use this dataset in Roboflow, we’ll export it in YOLOv5 format, which is compatible with Roboflow (Roboflow supports over 40 annotation formats) and includes image files (e.g., .jpg or .png) and annotation files (.txt) defining bounding boxes and class labels.
Steps to Export:
Set up Voxel51. Ensure you have Voxel51 installed (pip install fiftyone) and access to your dataset.
Run the export script. Use the following Python code to export the dataset in YOLOv5 format.
import fiftyone as fo


dataset_name = "cat-face-data-test"


# Load the dataset by name
dataset_or_view = fo.load_dataset(dataset_name)


# The directory to which to write the exported dataset
export_dir = "yolo_export"


# Automatically detect the label field
sample = dataset_or_view.first()
label_field = None
for field in sample.field_names:
    try:
        if sample[field].__class__.__name__ in ["Detections", "Detection"]:
            label_field = field
            break
    except Exception:
        continue
if label_field is None:
    label_field = "ground_truth"  # Fallback, update if needed


# The type of dataset to export
dataset_type = fo.types.YOLOv5Dataset


# Get class list from the dataset if possible
classes = None
try:
    classes = dataset_or_view.default_classes
except AttributeError:
    pass


# Export the dataset
dataset_or_view.export(
    export_dir=export_dir,
    dataset_type=dataset_type,
    label_field=label_field,
    classes=classes,
)
print(f"Dataset exported to {export_dir} in YOLO format.")


# Optionally launch the FiftyOne app
session = fo.launch_app(dataset_or_view)
session.wait()
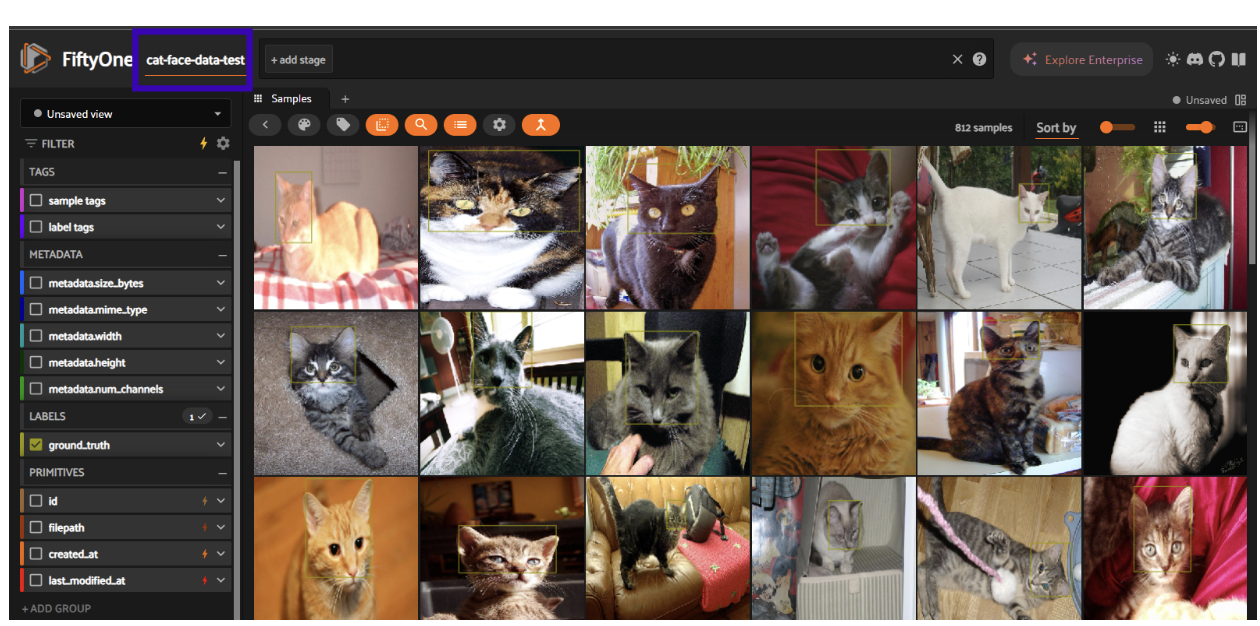
Change the Dataset name and export Directory according to your preferences. The dataset name can be found on the top right of the Voxel51 UI.
Verify the export. The dataset will be saved as a .zip file in the yolo_export directory, containing images and YOLOv5-compatible .txt annotation files.

Why YOLOv5 Format?
YOLOv5 is a widely supported format in Roboflow, encoding bounding boxes and class labels in a compact, text-based format. This ensures that annotations from Voxel51 (e.g., cat face bounding boxes) are preserved for training in Roboflow.
Step 2: Set Up Your Roboflow Account and Project
The following video shows a full tutorial on Steps 2, 3, and 4.
Roboflow’s user-friendly platform streamlines dataset management, model training, and deployment. Creating a project in Roboflow allows you to organize your dataset, apply preprocessing, and train a model tailored to your use case. For the dataset, we’ll set up an object detection project.
- Create a Roboflow Account: Visit Roboflow and sign up for a free account or log in.
- Create a New Project: On the Roboflow dashboard, click “Create Project” in the top-right corner. Name the project (e.g., “Cat Face Detection”) and select Object Detection as the project type.
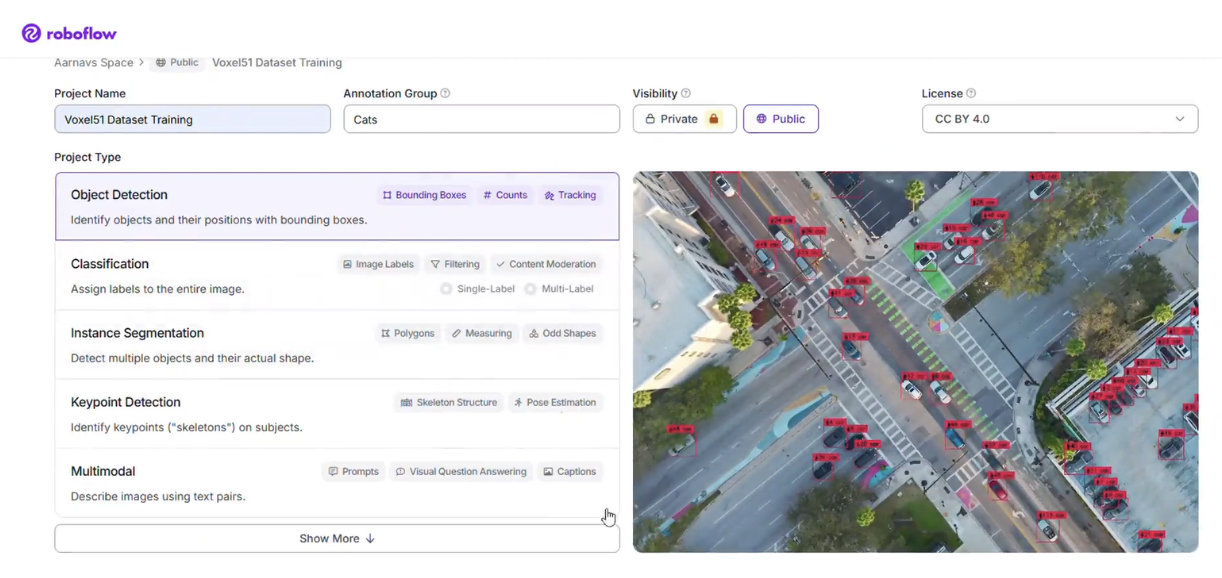
- Understand the Project Setup: The object detection project type is designed to handle datasets like “cat-face-data-test,” where each cat face in an image is annotated with a bounding box.
Step 3: Import the Voxel51 Dataset into Roboflow
With the dataset exported in YOLOv5 format, it’s time to upload it to Roboflow. This step leverages Roboflow’s tools for preprocessing, augmentation, and dataset management to ensure high-quality training data.
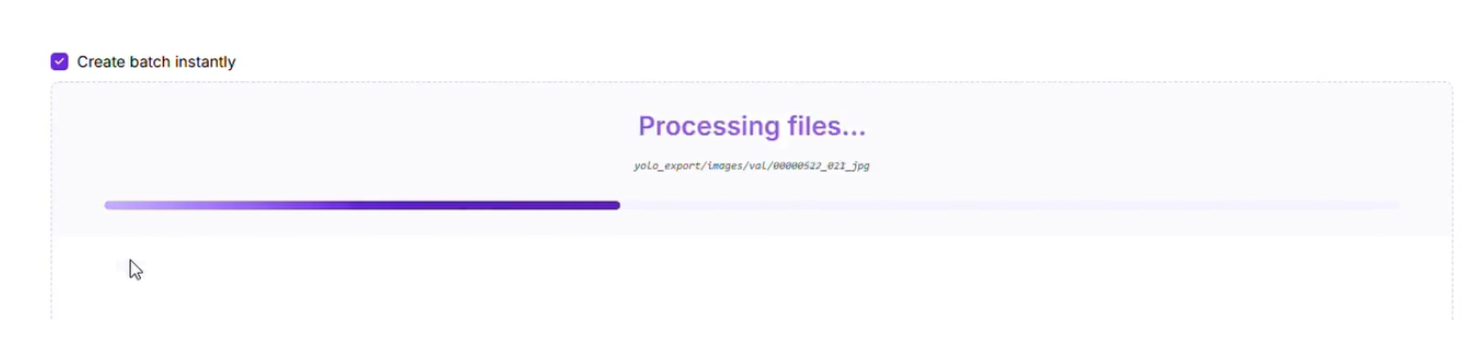
- Navigate to the Upload Section: In your Roboflow project, click the “Upload” button on the dataset page. Drag and drop the .zip file from the chosen directory or browse to select it.
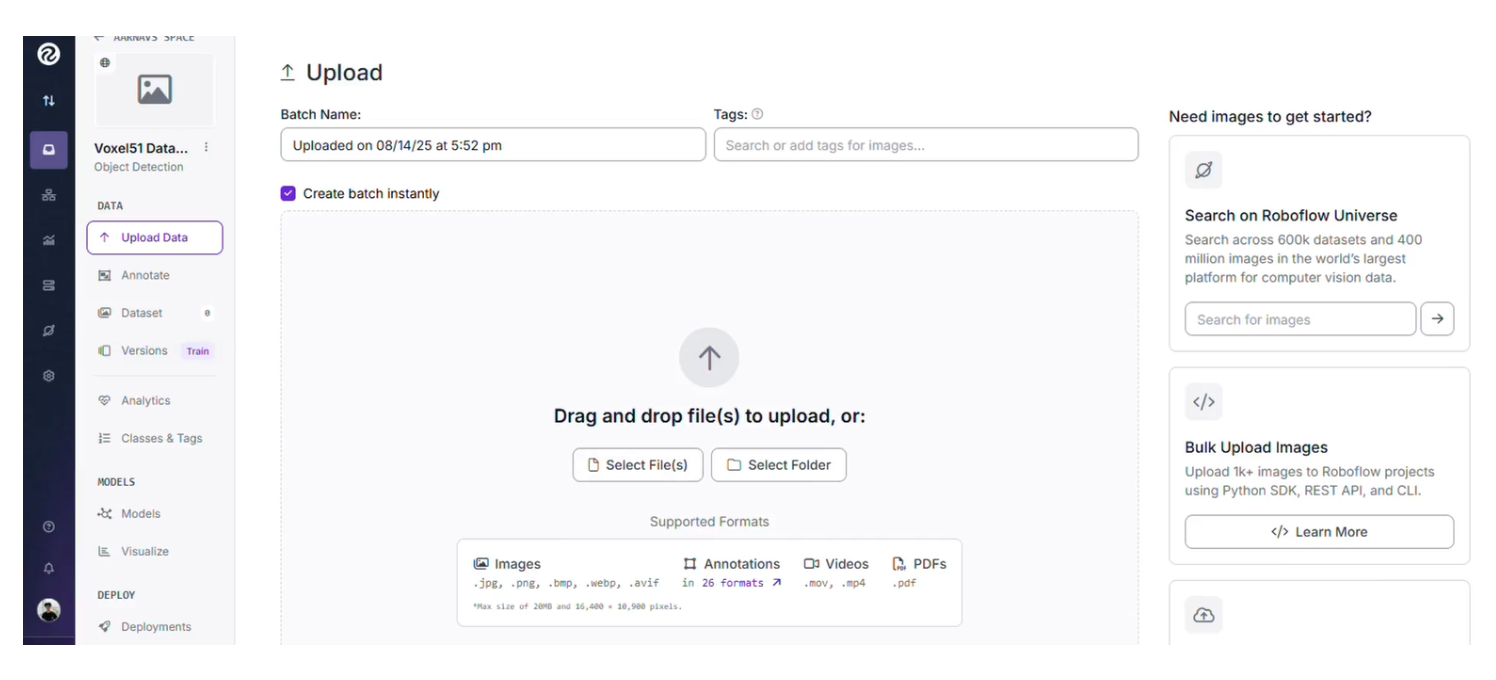
- Confirm Upload: Roboflow will process the .zip file, extracting images and annotations. Verify that the dataset is correctly imported by checking the dataset page for image counts and annotation details.
Step 4: Train an RF-DETR Model in Roboflow
Training a model is the core of the pipeline. We’ll use Roboflow to train an RF-DETR model, a state-of-the-art architecture for object detection tasks. By configuring preprocessing and training parameters, we’ll ensure the model accurately detects cat faces.
- Navigate to the Train Section:
- In your Roboflow project, click the “Train” button in the dataset section.
- Select “Custom Train” to use Roboflow’s cloud-based training infrastructure.
- Configure Preprocessing:
- Dataset Split:
- Train Set: 70%
- Validation Set: 20%
- Test Set: 10%
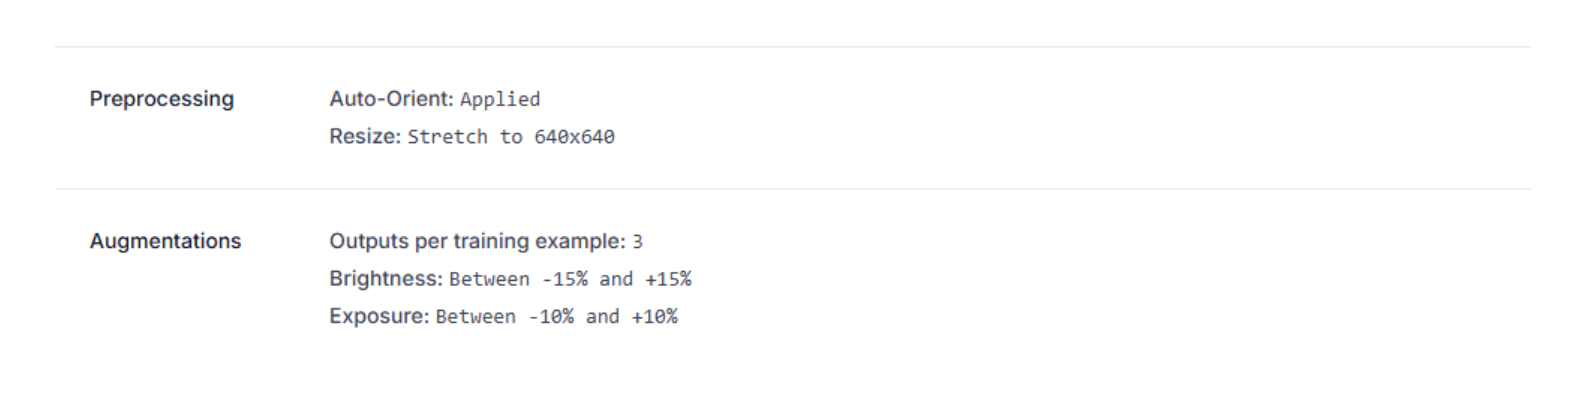
- Auto-Orient: Enable to correct image orientations for consistency.
- Resize: Stretch images to 640x640 pixels to standardize input size.
- Augmentations:
- Outputs per training example: 3
- Brightness: Between -15% and +15%
- Exposure: Between -10% and +10%
- Dataset Split:
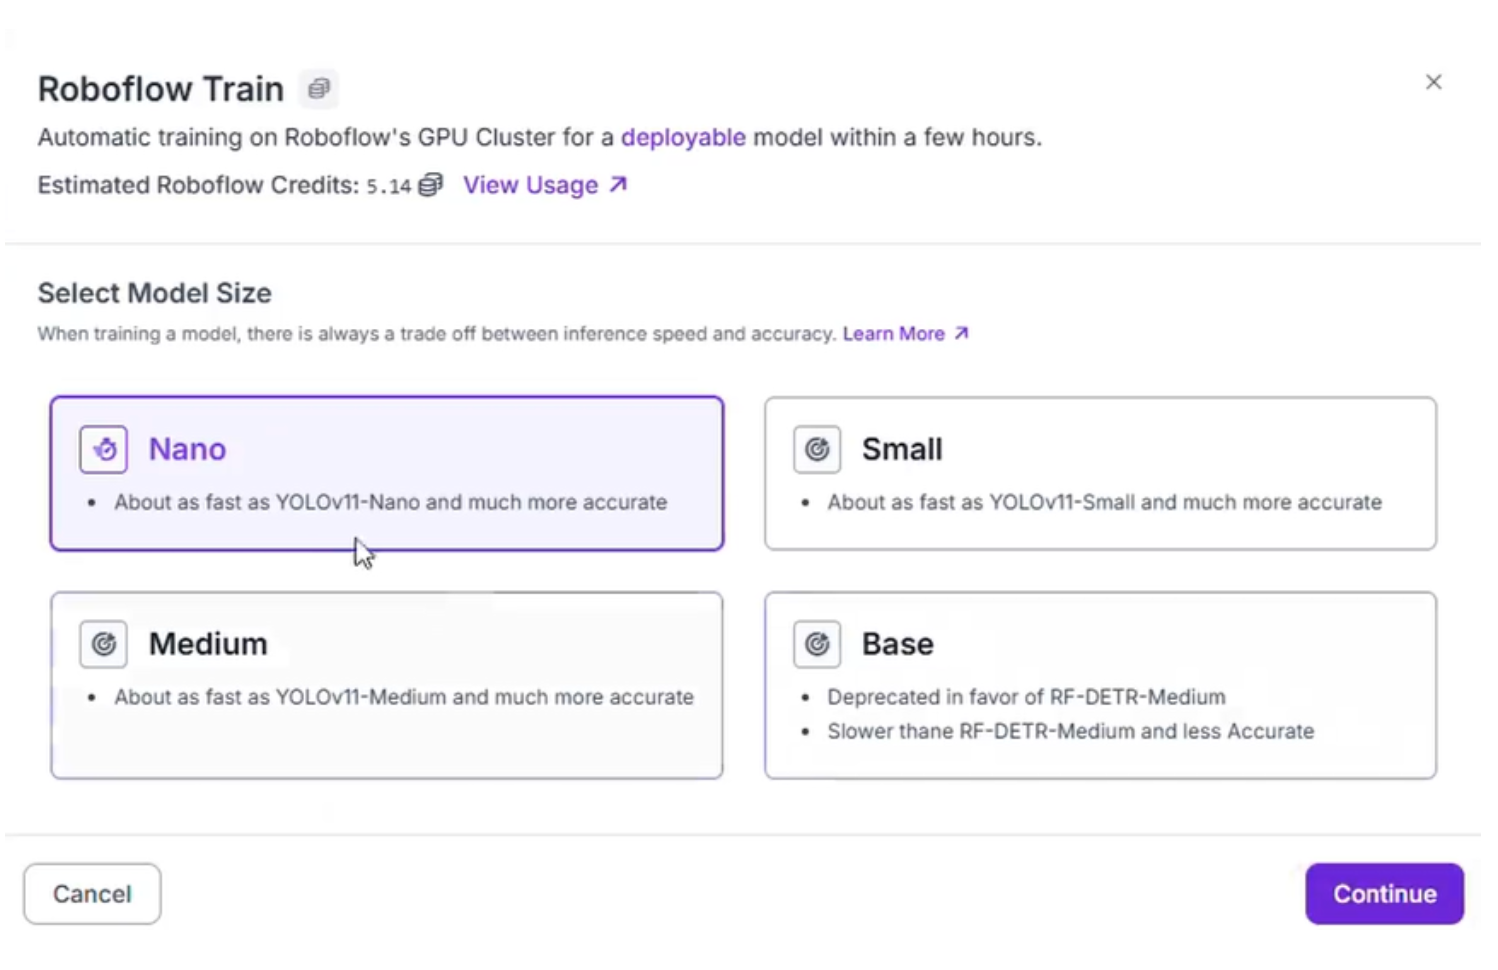
3. Select the Model: Choose RF-DETR (nano) as the model architecture. RF-DETR is optimized for object detection, offering high precision for tasks like cat face detection.
- Start Training: Launch the training process. The model will be ready in a few hours, depending on the dataset size and Roboflow’s infrastructure.
Step 5: Build and Test a Workflow in Roboflow
Once the model is trained, we’ll evaluate its performance using Roboflow’s workflows feature. This allows you to create a pipeline to process images, apply the trained model, and visualize results, ensuring accurate cat face detection.
- Create a Workflow: Navigate to the “Workflows” tab in your Roboflow project and click “Create Workflow”. Name it (e.g., “Cat Face Detection Workflow”).
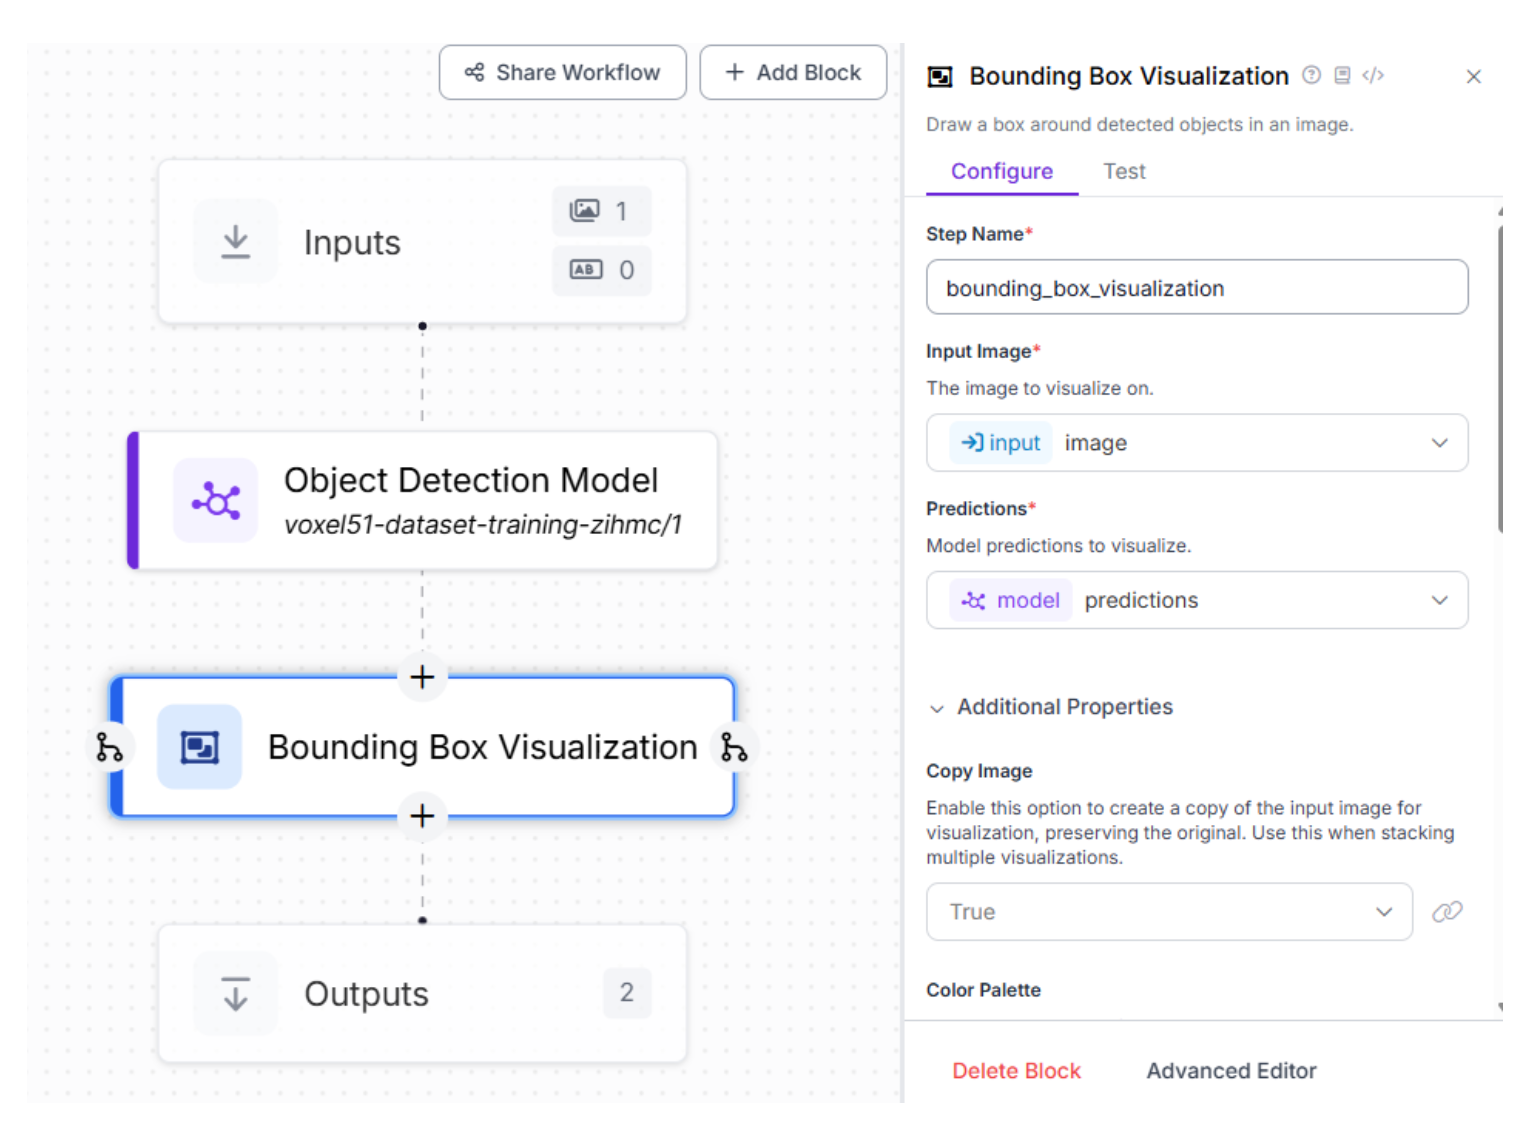
- Add a Model Block: Drag and drop a “Model” block into the workflow canvas and select your trained RF-DETR model.
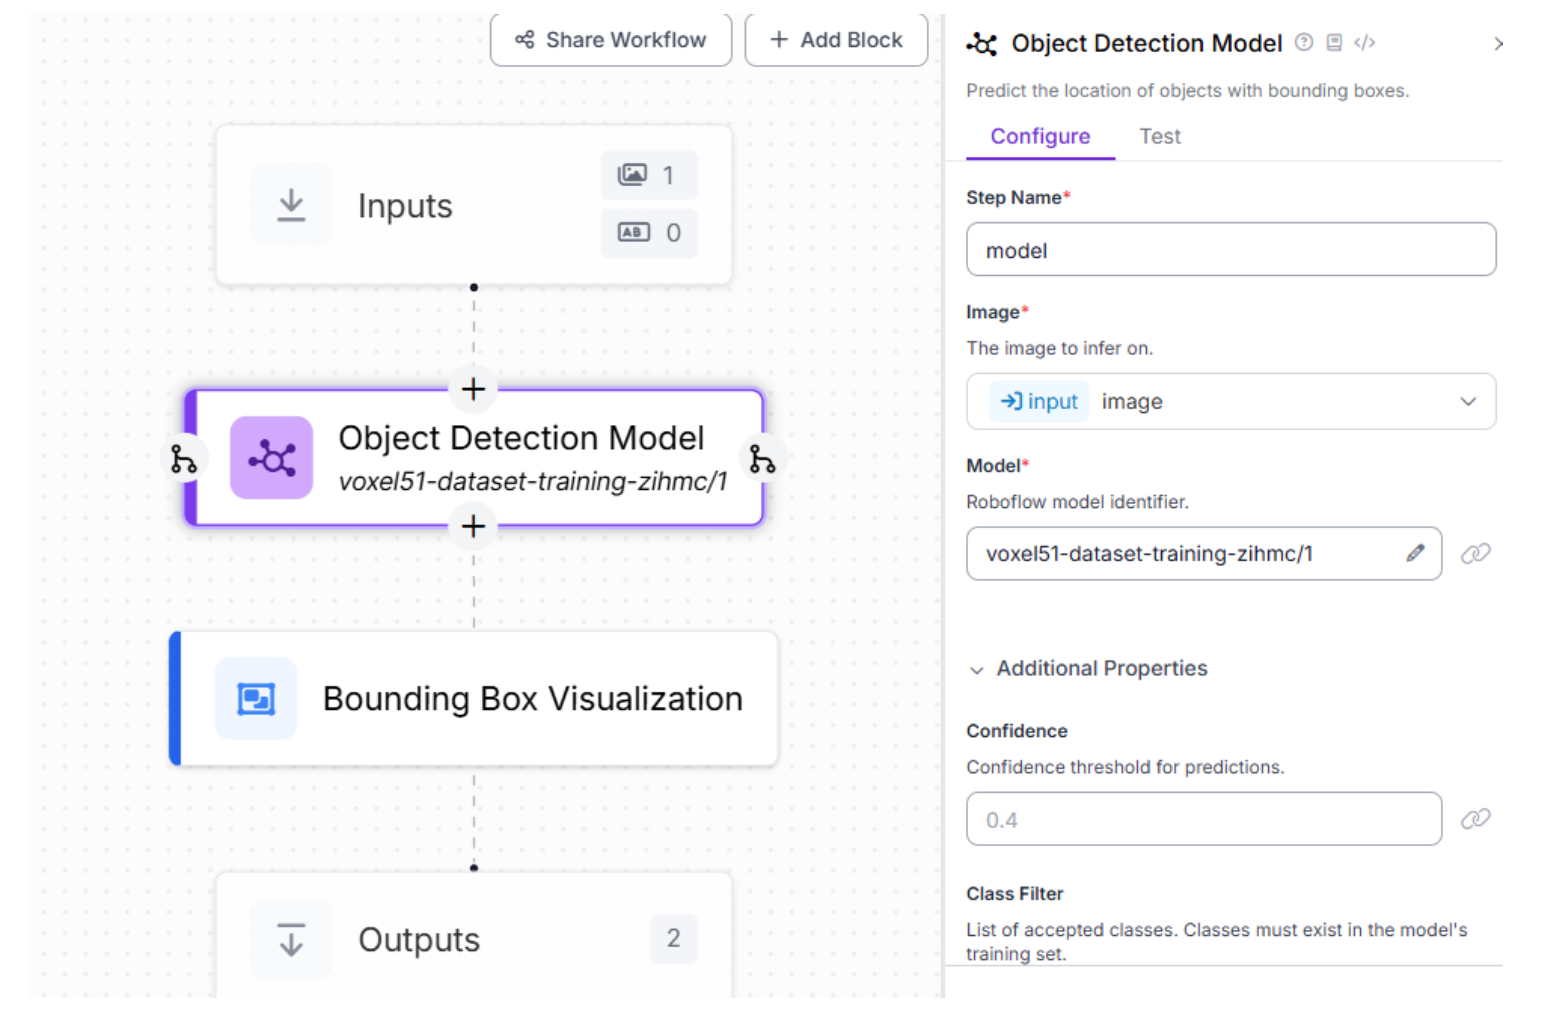
3. Add a Visualization Block: Add a “Visualization” block, connect it to the model block, and configure it to display bounding boxes and confidence scores for detected cat faces.
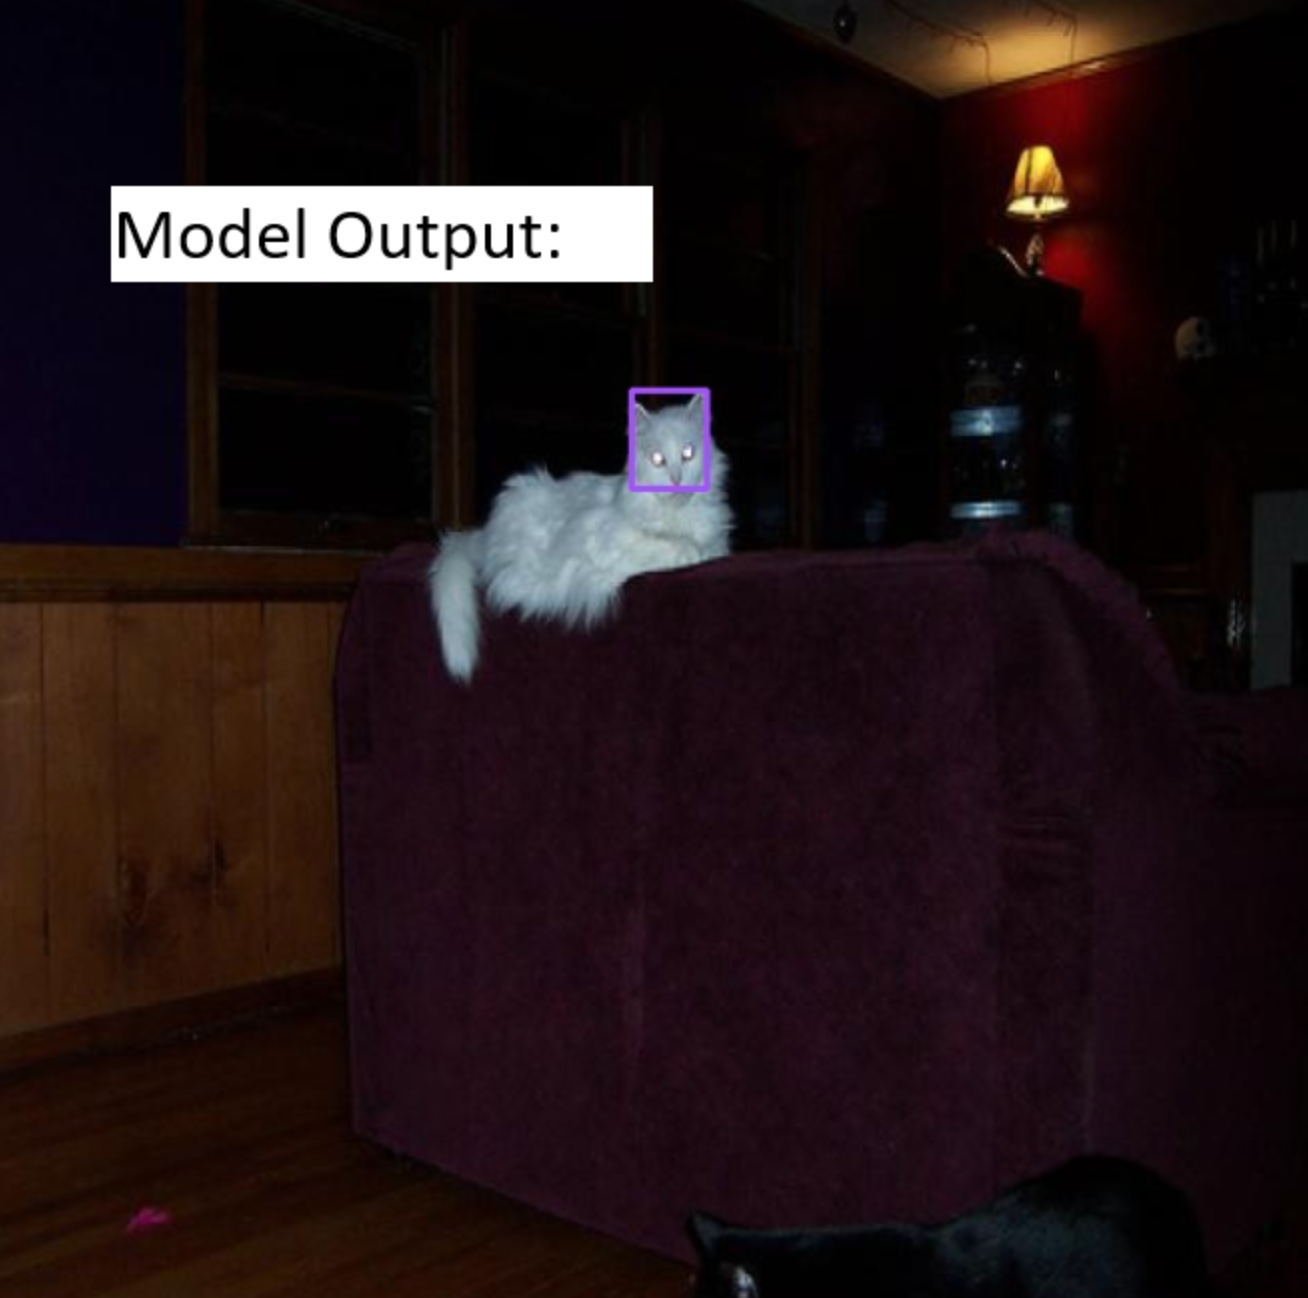
- Test the Workflow: Upload a test image from the dataset or a new image. Run the workflow and review the output, which overlays bounding boxes on detected cat faces.
- Evaluate Performance: Check for accuracy: Are cat faces correctly detected, even in challenging images? Look for false positives/negatives: Are there missed detections or incorrect classifications?
The workflow feature makes it easy to validate your model’s performance and share results with stakeholders. Visualizing detections builds confidence in the model and highlights areas for improvement.
Step 6: Incorporate Production Data for Continuous Improvement
Real-world data often differs from the initial dataset, which can impact model performance. Roboflow simplifies the process of integrating and labelling production data, allowing you to retrain your model to improve accuracy over time. This iterative process ensures your cat face detection application remains robust in diverse scenarios.
- Upload Production Data: Import new images into Roboflow and use its labelling tools to annotate them.
- Retrain the Model: Add the labelled production data to your dataset and retrain the RF-DETR model to improve performance.
- Monitor Improvements: Use Roboflow’s analytics to track model performance over time.
Continuous improvement keeps your model relevant and accurate, making Roboflow an ideal platform for evolving computer vision applications.
Step 7: Deploy the Model
A trained and tested model is ready for real-world use! Roboflow’s flexible deployment options make it easy to integrate your RF-DETR model into applications, whether for web, mobile, or edge devices.
- Choose a Deployment Option:
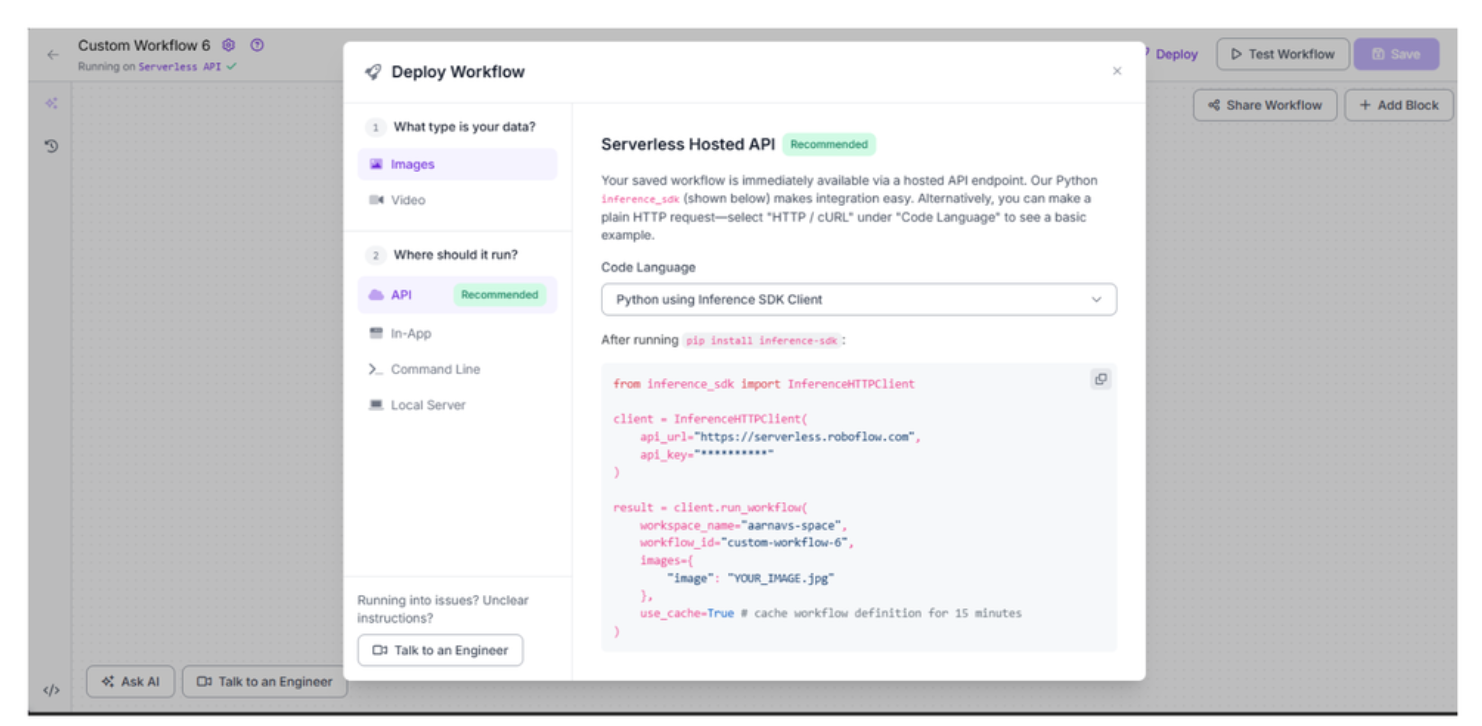
- In the Roboflow project, go to the “Deploy Workflow” tab.
- Options include:
- Serverless Hosted API: Host the model on Roboflow’s servers for quick integration.
- In-App: Deploy within Roboflow for testing or internal use.
- Command Line: Run locally using Roboflow’s CLI tools.
- Local Server: Set up on your server for private deployment.
- Configure the Deployment: For the Serverless Hosted API, install the inference-sdk (pip install inference-sdk) and use the following Python code:
from inference_sdk import InferenceHTTPClient
client = InferenceHTTPClient(
    api_url="https://serverless.roboflow.com",
    api_key="YOUR_API_KEY"
)
result = client.run_workflow(
    workflow_id="custom-workflow-8",
    images=[
        {"image": "YOUR_IMAGE.jpg"}
    ],
    use_cache=True  # Cache workflow definition for 15 minutes
)
- Replace YOUR_API_KEY with your Roboflow API key and custom-workflow-3 with your workflow ID from the Roboflow dashboard.
- For other deployment options, follow Roboflow’s documentation for CLI or local server setup.
- Integrate and Test:
- Use the API or SDK to send images to the model and receive detection results.
- Test with sample images to ensure the model performs well in production.
- Monitor and Scale:
- Use Roboflow’s analytics tools to monitor performance.
- Scale the deployment for high-throughput applications or adjust local resources as needed.
Deployment brings your model to life, whether for a pet monitoring app or an automated cat face recognition system. Roboflow’s deployment options make this process seamless.
Conclusion: Integrating Voxel51 with Roboflow
Congratulations! You’ve built a computer vision pipeline for exporting a dataset from Voxel51, uploading it to Roboflow, training an RF-DETR model, and deploying it for real-world use.
Whether you’re a beginner or an experienced developer, this integration streamlines your workflow. Now, explore new datasets, experiment with augmentations, or deploy your model to solve real-world problems; the possibilities are endless! Get started free.
Written by Aarnav Shah
Cite this Post
Use the following entry to cite this post in your research:
Contributing Writer. (Aug 15, 2025). How to Import Voxel51 Datasets into Roboflow. Roboflow Blog: https://blog.roboflow.com/import-voxel51-datasets/