
This guide will walk you through the process of integrating Roboflow with Ignition using the OPC UA Writer Sink block. This block allows you to send data from computer vision models and Workflows in Roboflow to Ignition.
Below, we will set up a workflow in Roboflow that processes model predictions and sends the results to an OPC UA server, which Ignition will use to visualize data.
Setting Up a Roboflow Workflow
Step 1: Create a Workflow in Roboflow
- Log into Roboflow and navigate to the Workflows page.
- Click Create New Workflow.
- Build the basic workflow, including your model and Workflows logic to process its predictions (Please see our Getting Started guide for more information on how to get started with Roboflow!)
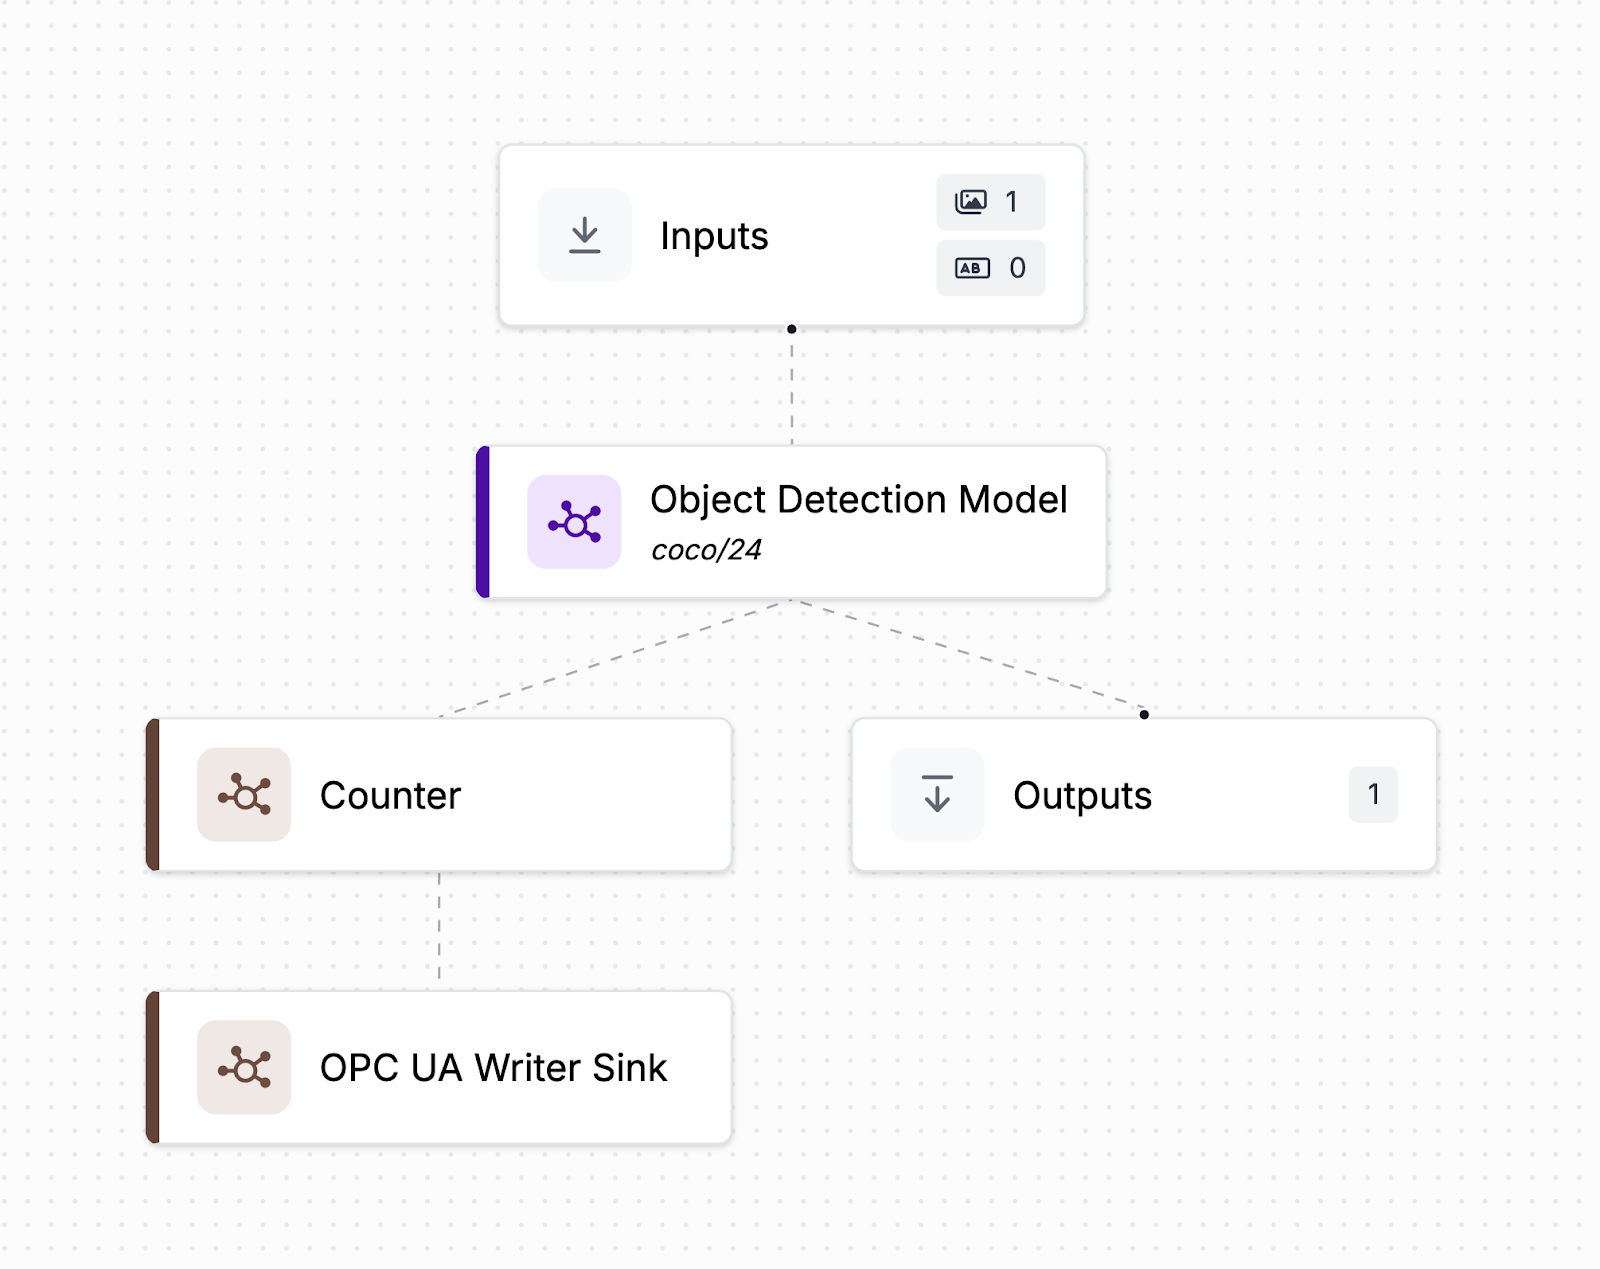
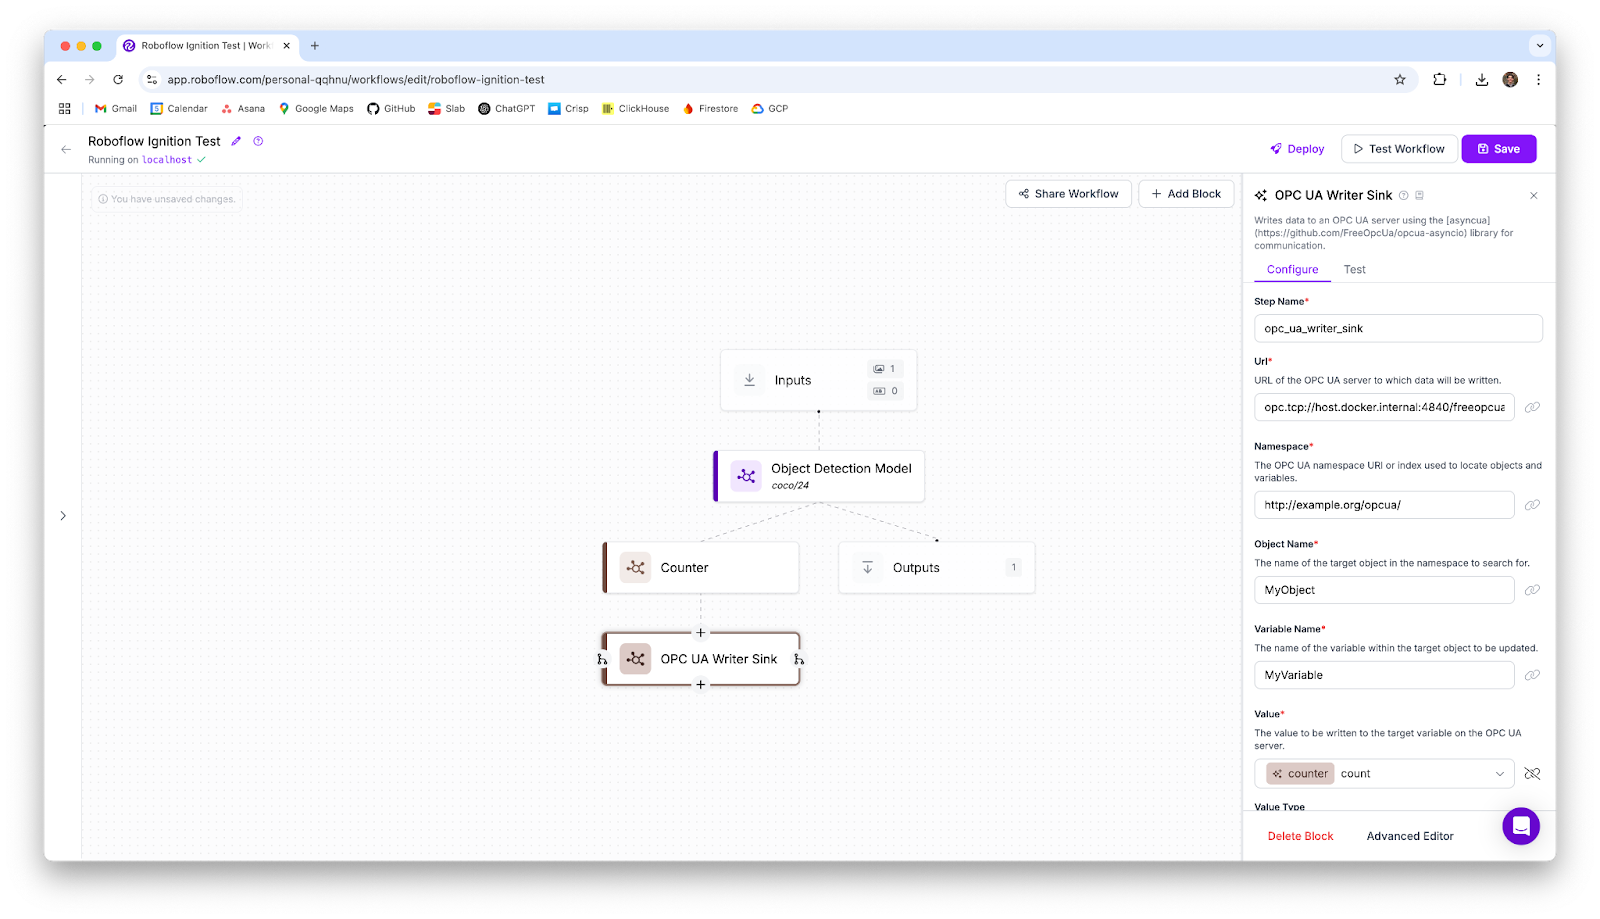
Step 2: Add an OPC UA Writer Sink Block
- Click “Add Block” and select “OPC UA Writer Sink” (This block is not available on the Hosted API. You will need to connect a local Inference server. In addition, the OPC UA Writer Sink is only available to Enterprise plan users).
- Configure the block. Please refer to the example values below for configuring the block:
- URL: opc.tcp://host.docker.internal:4840/freeopcua/server/ (Depends on where the OPC UA server is located in relation to the Inference server)
- Namespace: http://example.org/opcua/
- Object Name: YourObject
- Variable Name: YourVariable
- Value: (This value will likely come from another block, such as a Custom Python block that counts/aggregates the number of detections for a particular class).
- Value Type: Integer (Can also be Boolean, Float, or a String).
Setting Up an OPC UA Server
You can use `freeopcua` to set up a local OPC UA server.
First, install the required Python library:
pip install opcuaNext, you will need a OPC UA server. You can create one with this code:
from opcua import Server
from datetime import datetime
server = Server()
server.set_endpoint("opc.tcp://localhost:4840/freeopcua/server/")

obj = server.nodes.objects.add_object("ns=2;s=ProductionLine", "ProductionLine")
tag = obj.add_variable("ns=2;s=DefectStatus", "DefectStatus", False)
tag.set_writable()

server.start()
print("OPC UA Server is running...")
try:
    while True:
        tag.set_value(False)  # Example: No defect detected
except KeyboardInterrupt:
    server.stop()
This server will host a variable DefectStatus that Roboflow can write to for real-time defect monitoring.
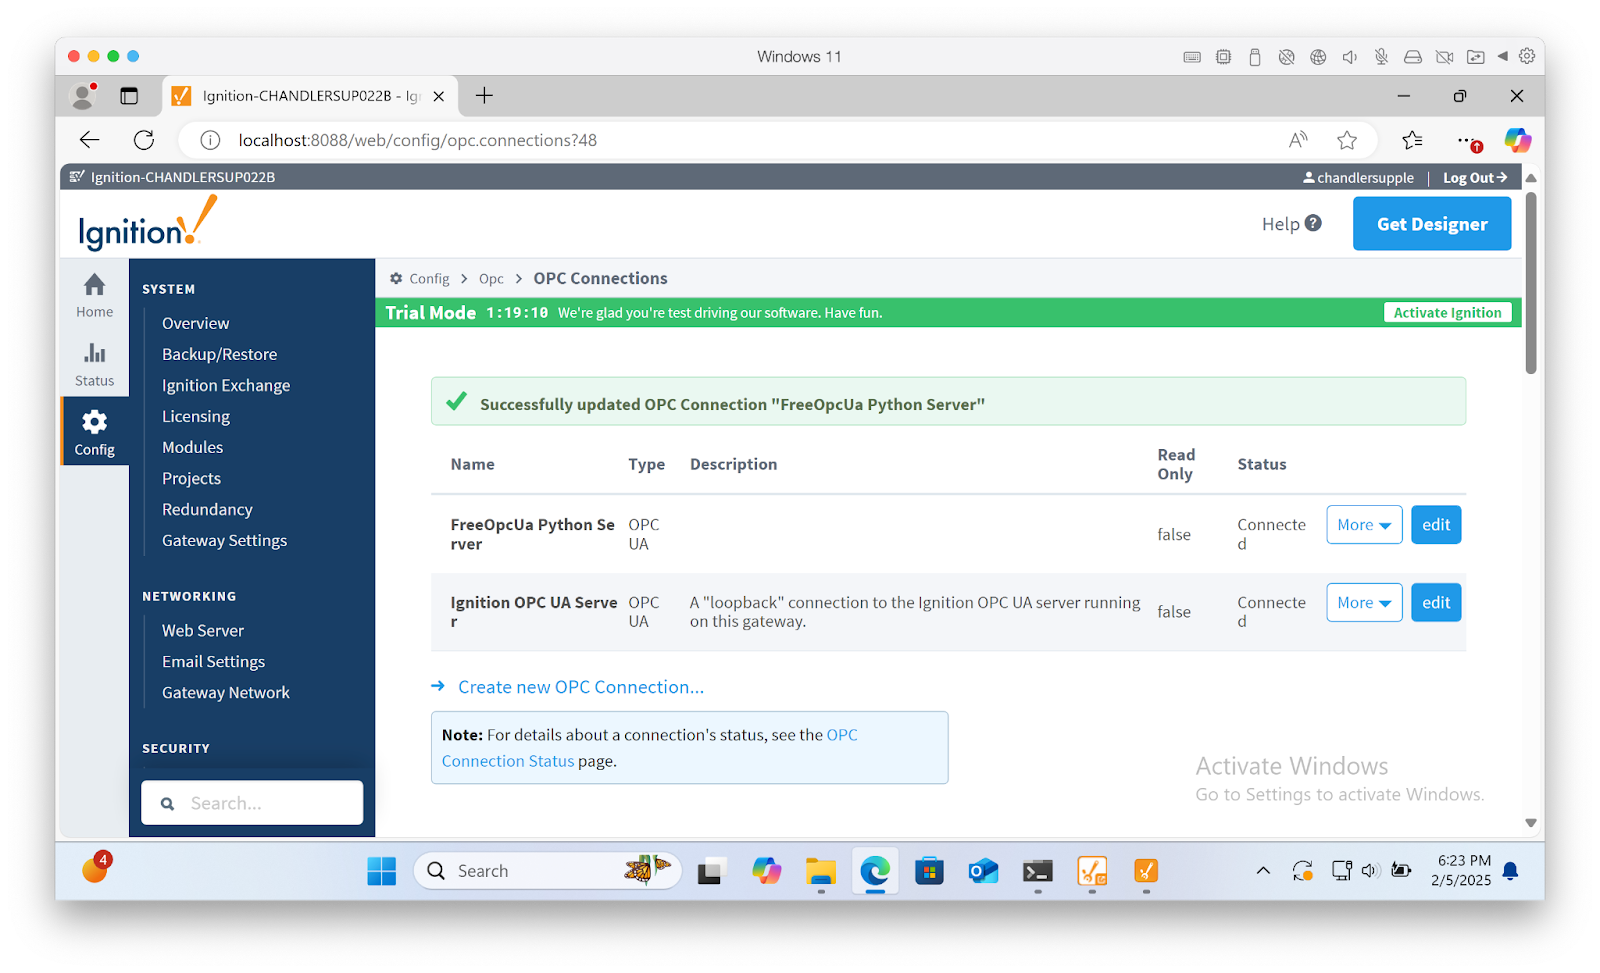
Configuring Ignition
Next, we need to configure Ignition to receive our OPC UA data.
Step 1: Add an OPC UA Connection
- Open Ignition Gateway.
- Navigate to Config > OPC UA > Servers.
- Click “Create New OPC UA Server Connection”.
- Enter the endpoint URL (opc.tcp://localhost:4840/freeopcua/server/).
- Save the connection.
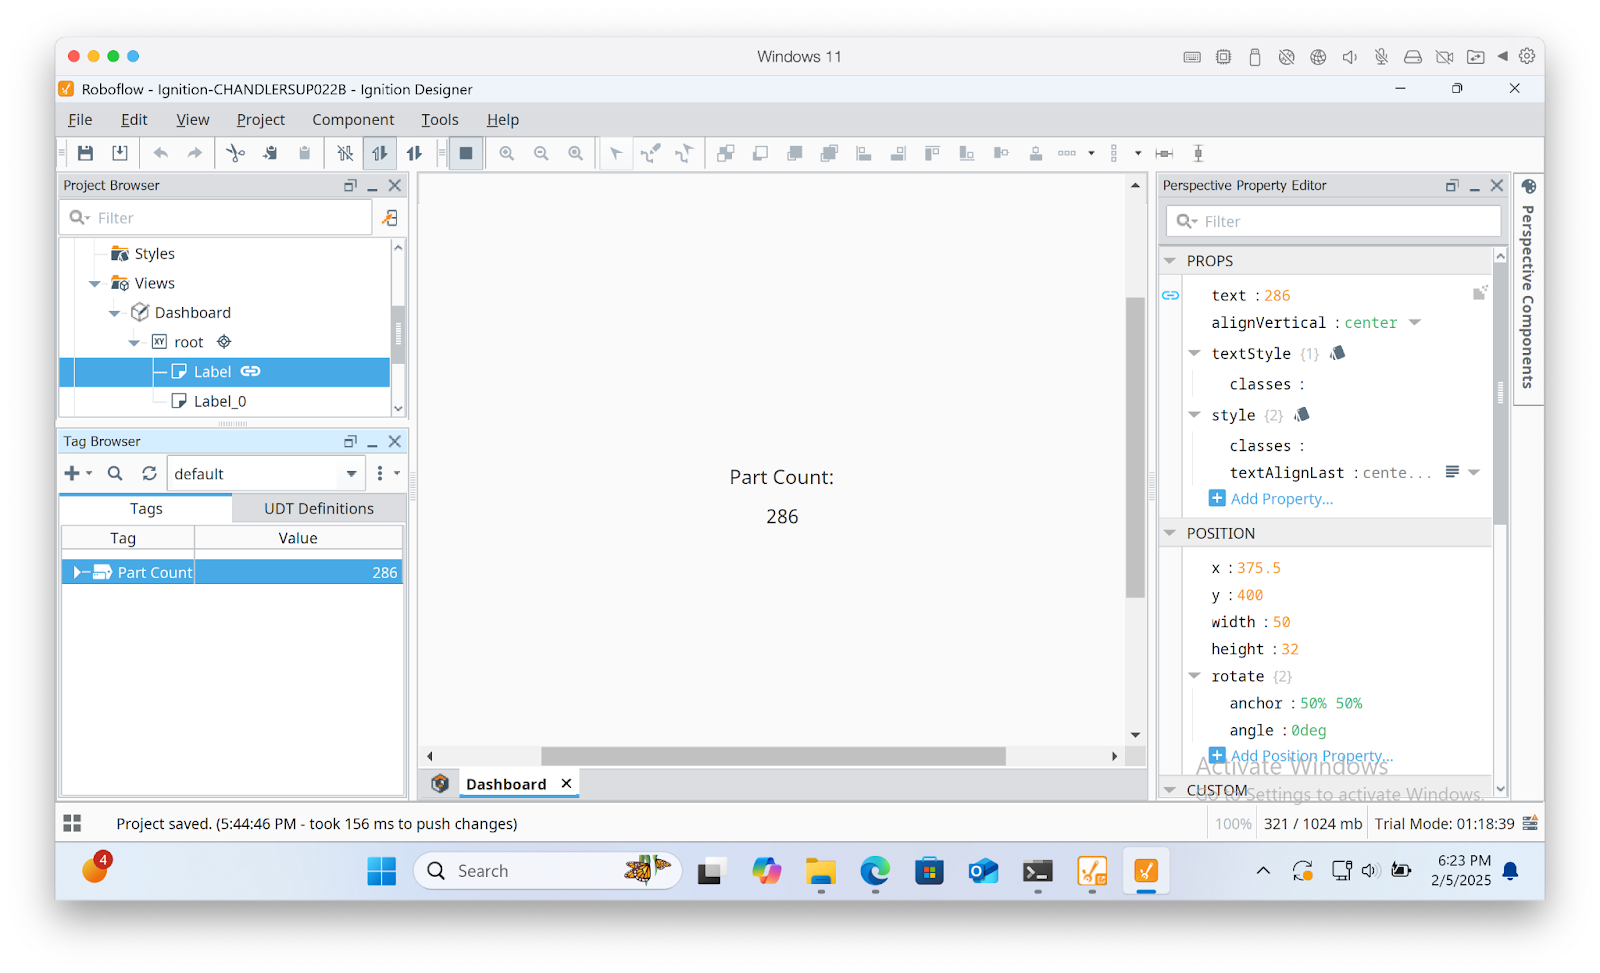
Step 2: Add Tags in Ignition Designer
- Open Ignition Designer.
- In the OPC Browser, navigate to ProductionLine > DefectStatus.
- Right-click and select Add Tag.
- Set the tag data type (e.g., Boolean for defect detection).
- Drag the tag into a component to visualize the data (e.g., Alarm Indicator, Status Display).
What Kind of Data Can Be Sent Over OPC UA?
OPC UA allows for transmitting various data types, including:
- Booleans: Machine status indicators (e.g., conveyor running, defect detected).
- Integers: Count of defective parts per shift.
- Floats: Confidence scores from quality inspection models.
- Strings: Classification results (e.g., "Pass", "Fail", "Needs Review").
Examples:
- Sending True when a defective part is detected and needs removal from the production line.
- Updating a numerical value representing a weld integrity score.
- Transmitting a classification label (e.g., "Good Part", "Misaligned Component").
Connecting Workflows with OPC UA enables real-time communication between computer vision models and industrial automation systems, improving quality control, reducing defects, and enhancing production efficiency.
Cite this Post
Use the following entry to cite this post in your research:
Chandler Supple. (Feb 13, 2025). How to Integrate Roboflow with Ignition with OPC UA. Roboflow Blog: https://blog.roboflow.com/integrate-roboflow-with-ignition/