
With Batch Processing, you can upload a folder of images or videos and then allow our infrastructure to handle inference.
Batch Processing is ideal for asynchronous applications that can leverage computer vision such as running analysis on sports broadcasts, analyzing drone footage, building an image or video search index, and more.
In this guide, we are going to talk about how to use Batch Processing. We will walk through an example that shows how to use the feature to run an object detection model on all frames in a video. We will then have a batch of predictions we can process how we want.
Since launching, Roboflow customers have used Batch Processing to process millions of video frames and images. Whether you have a single video or terabytes of data, Batch Processing can handle your vision AI workloads.
Here is the video we will work with:
Without further ado, let’s get started!
What is Batch Processing?
Batch Processing lets you upload batches of images and videos and run AI Workflows on the input data. To use Batch Processing, first create a Workflow in Roboflow, then create a batch job with the input data on which you want to run your Workflow.
Over 100 blocks are supported in Workflows which can be combined together to create complex, multi-step applications and agents. For example, you could build a Workflow that:
- Runs a detection model on players from sports footage for use in analytics applications;
- Processes video footage from drones for use in aerial imagery projects;
- Calculates CLIP vectors for use in building an image or video search engine.
Batch Processing automatically provisions the infrastructure needed to process your input data. Whether you have one thousand or one hundred thousand images, Batch Processing will scale automatically, run your Workflow, and return results in the output format specified.
Batch Processing is available for all Roboflow users. Pricing information is available in the pricing table in the Batch Processing documentation.
How to Use Batch Processing
Batch jobs can be created and monitored both from the Roboflow web interface or the command line interface.
Below, we will show how to use the web interface to create a batch job. We will walk through an example of running a Workflow to process football footage. The results could then be post-processed for applications like ball possession analysis, creating projection maps of where players were on the field, and more.
See the technical documentation for more information on the command line interface.
We also have guides on how to process data that is stored on AWS, GCP, and Azure:
- Process image and video data stored in GCP using Batch Processing
- Process image and video data stored in Azure Blob Storage using Batch Processing
- Process image and video data stored in AWS S3 using Batch Processing
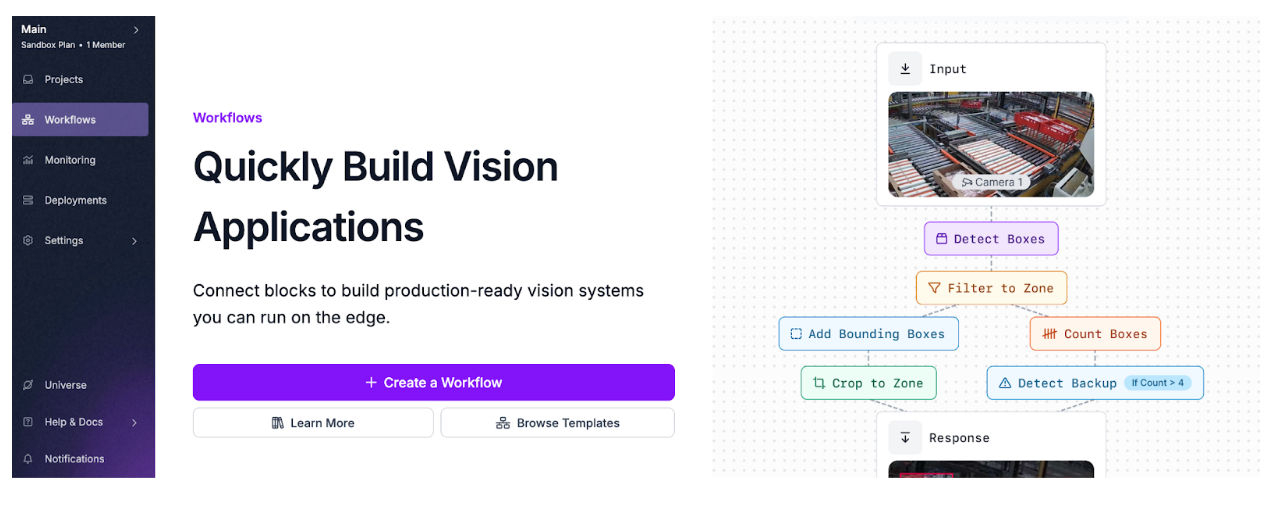
Step #1: Create a Workflow
First, create a free Roboflow account. Click “Workflows” in the sidebar of the web application. Then, create a Workflow. You will be taken into the Workflows editor.
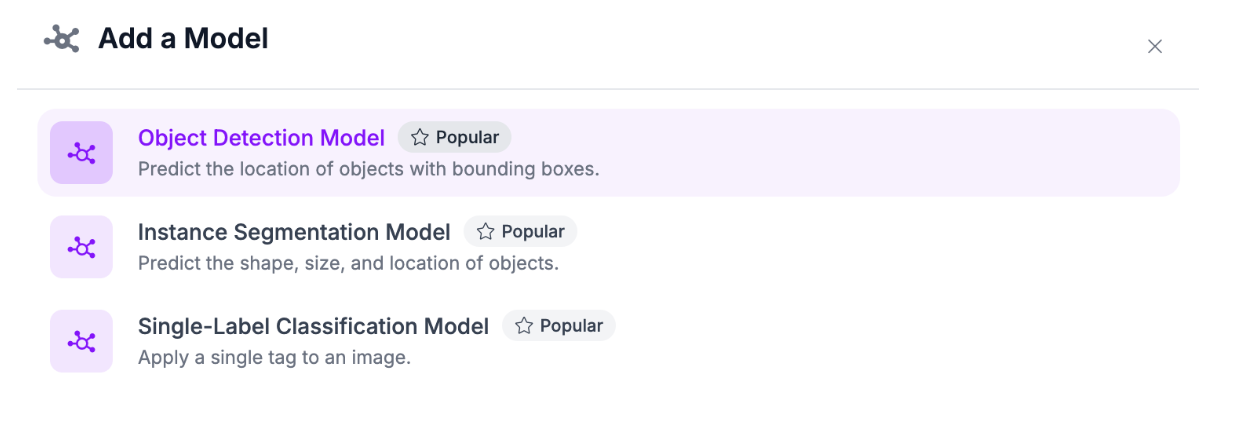
Click the “Add Model” button:

Then select “Object Detection Model”.
Select the Model ID input to choose the model you want to use.
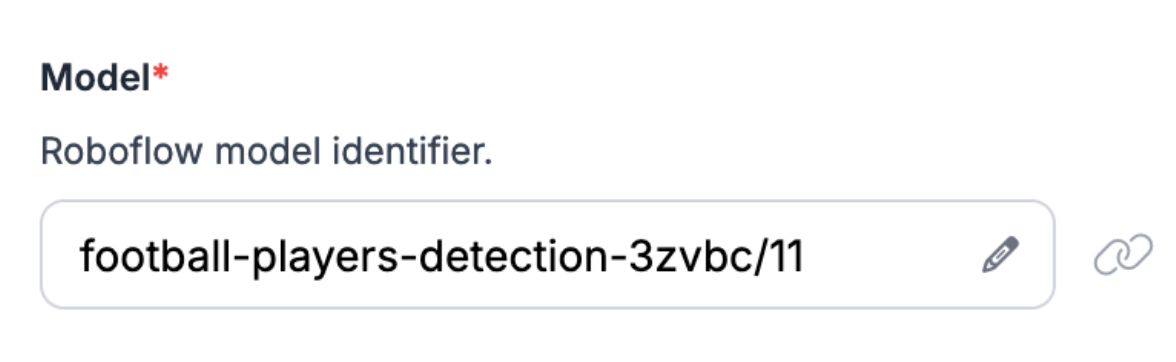
If you already have a detection model trained on or uploaded to Roboflow, specify it here. For this guide, we will use the open football-players-detection-3zvbc/11 model available on Roboflow Universe. This model has been trained to identify players on a football field.
After setting up your model, you can build additional logic using the blocks available in Workflows.
For this guide, let’s add one more step: an object tracker. We can use this tracker to keep track of players between frames. This is useful for any application that involves understanding how players move through the playing field.
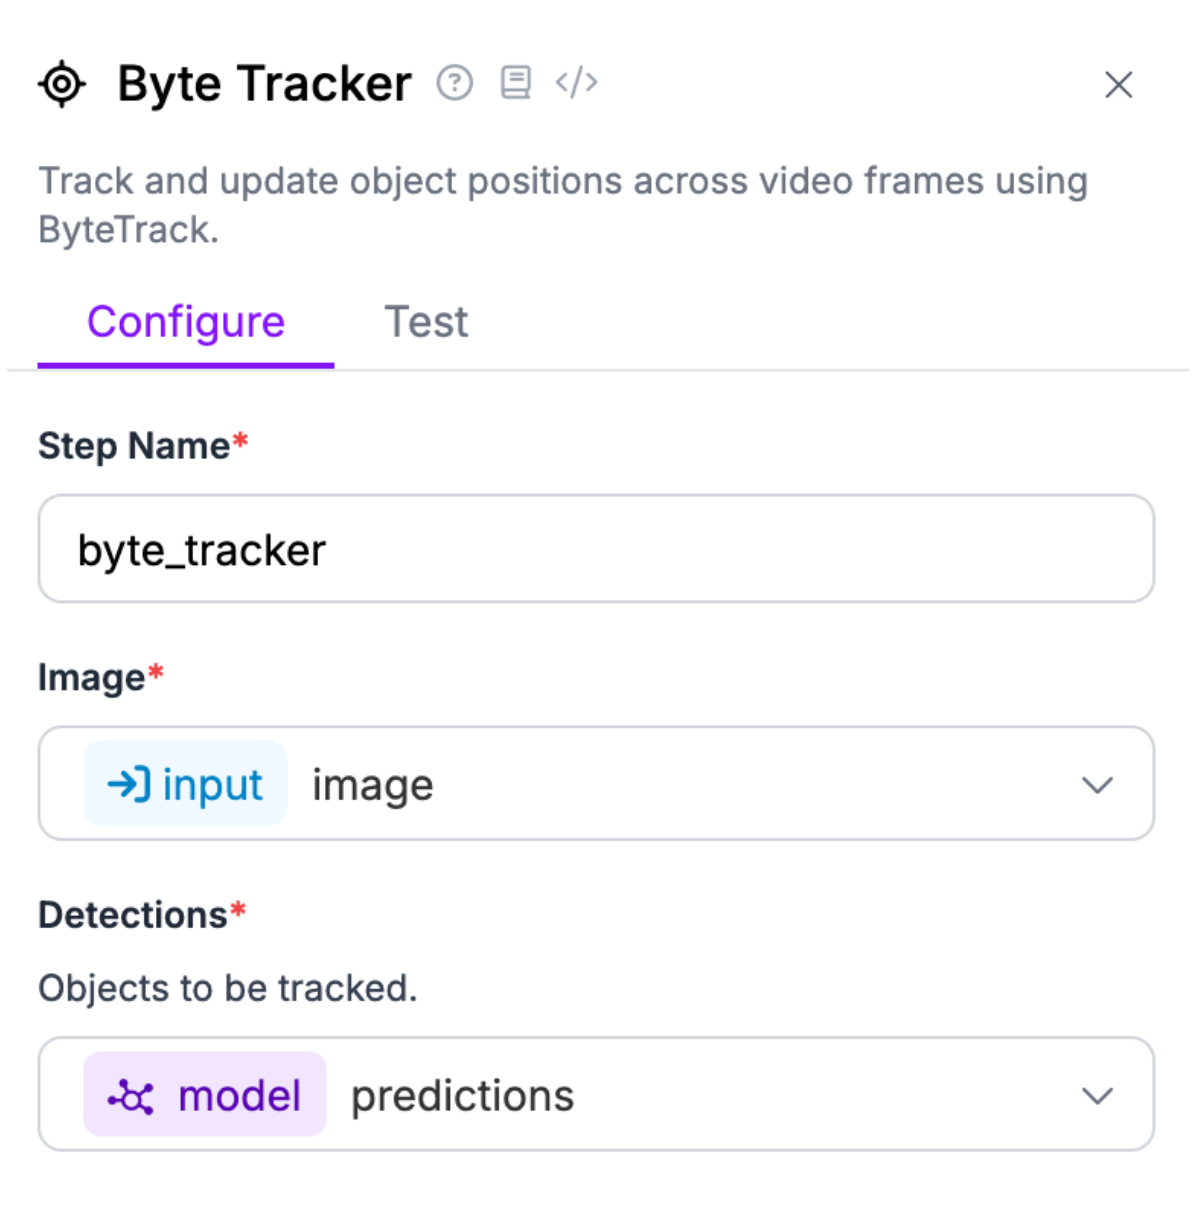
Workflows has a pre-built object tracker we can use: Byte Tracker.
Click “Add Block” then add Byte Tracker to your Workflow:

The block will be automatically configured to process predictions from your model:
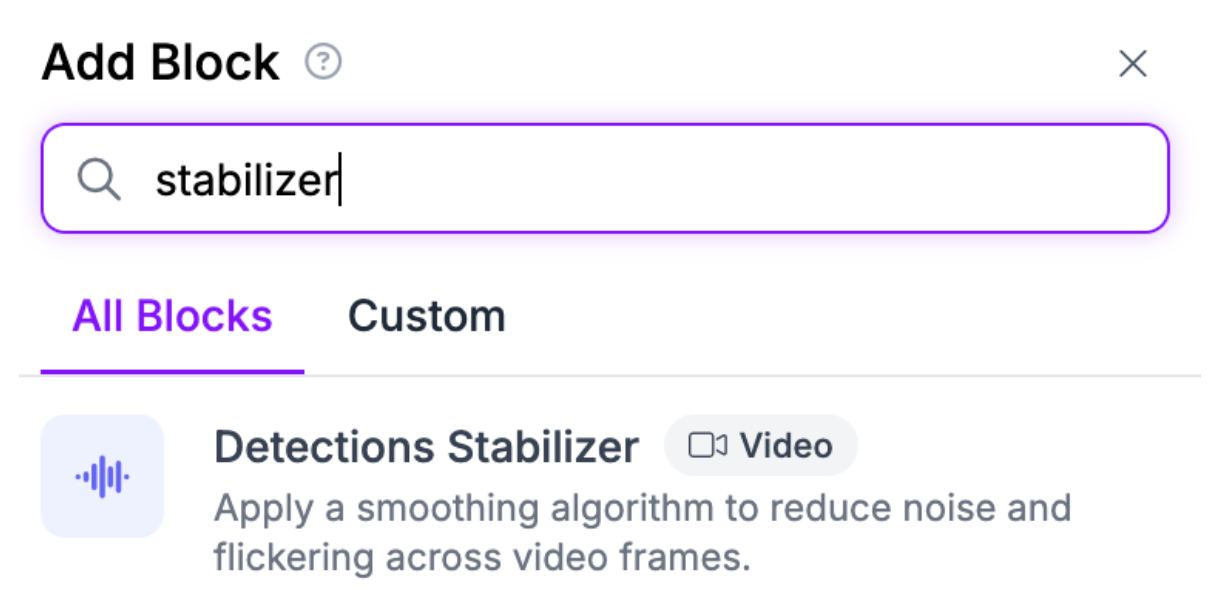
Finally, let’s add a Detections Stabilizer block to help reduce the impact of bounding box jitters in our output data. Bounding box jitters can affect the quality of object tracking, but the stablizer block will help mitigate this issue.
Your final Workflow should look like this:

Step #2: Prepare a Batch Job
With a Workflow ready, we can create a Batch job to process images or videos.
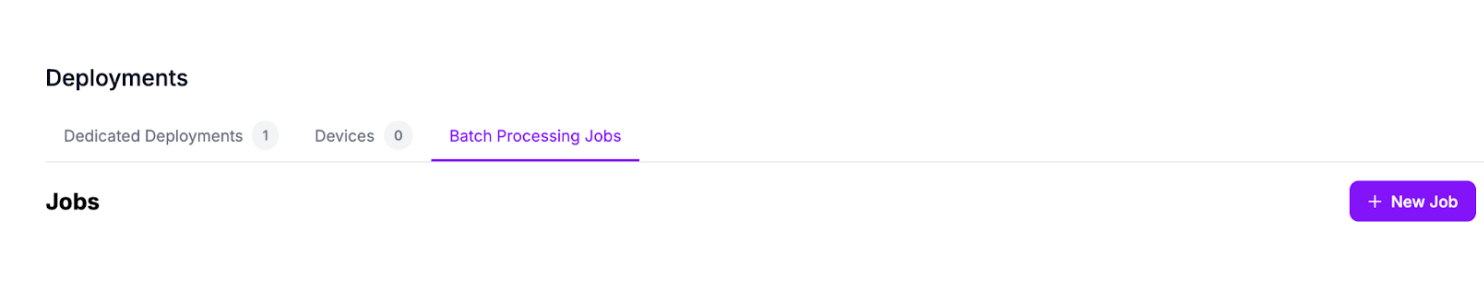
Go back to your Roboflow dashboard, then click “Deployments”. Click “Batch Processing Jobs”:
Click “New Job” to create a new batch to be processed by your Workflow.
A window will appear in which you can configure your Batch job. First, set a name for your batch. Then, choose whether you want to work with images or videos. For this guide, we’ll work with a 24 FPS video. You can upload multiple videos, too.
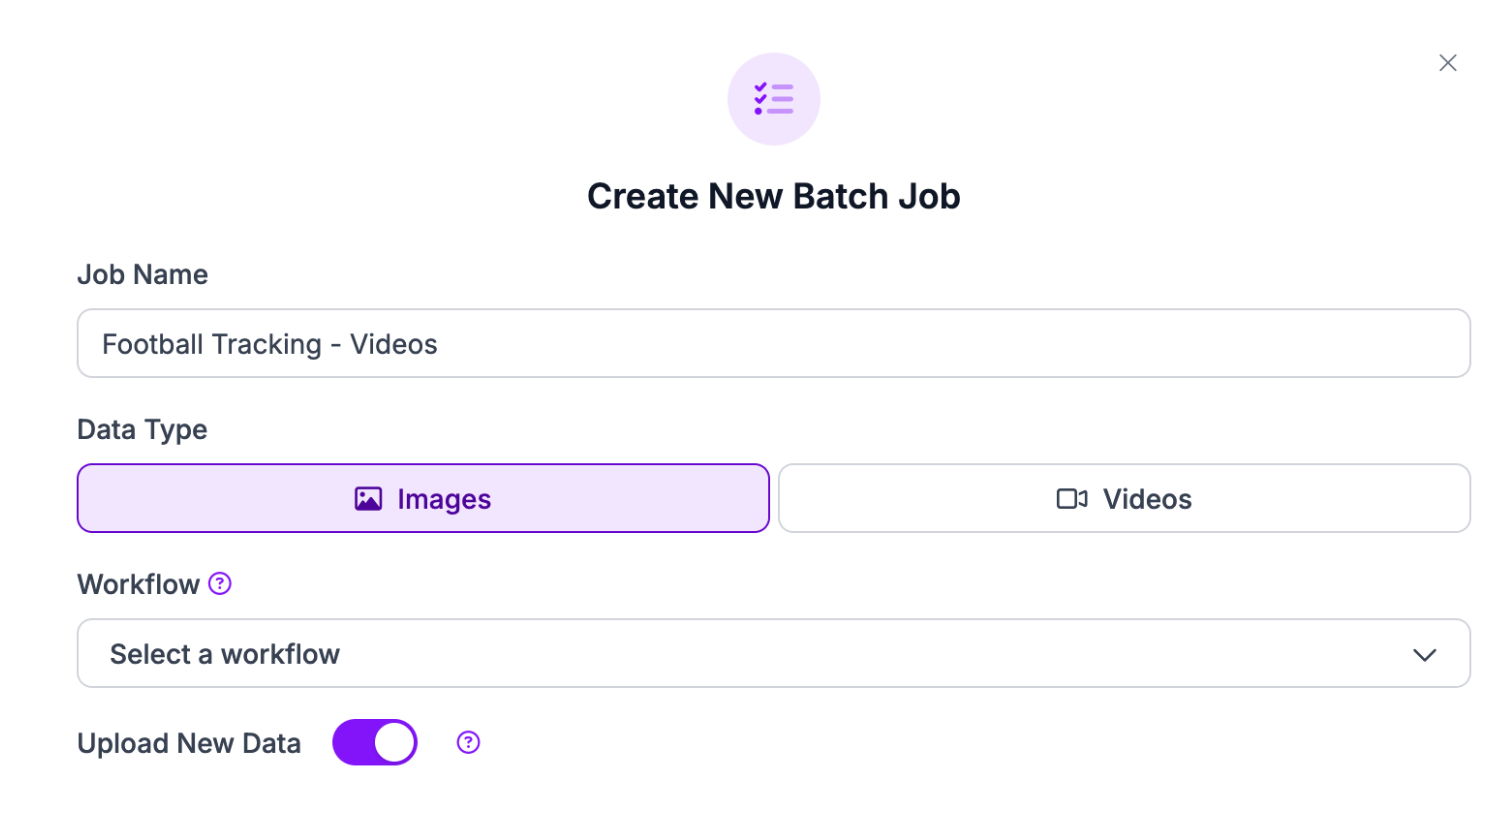
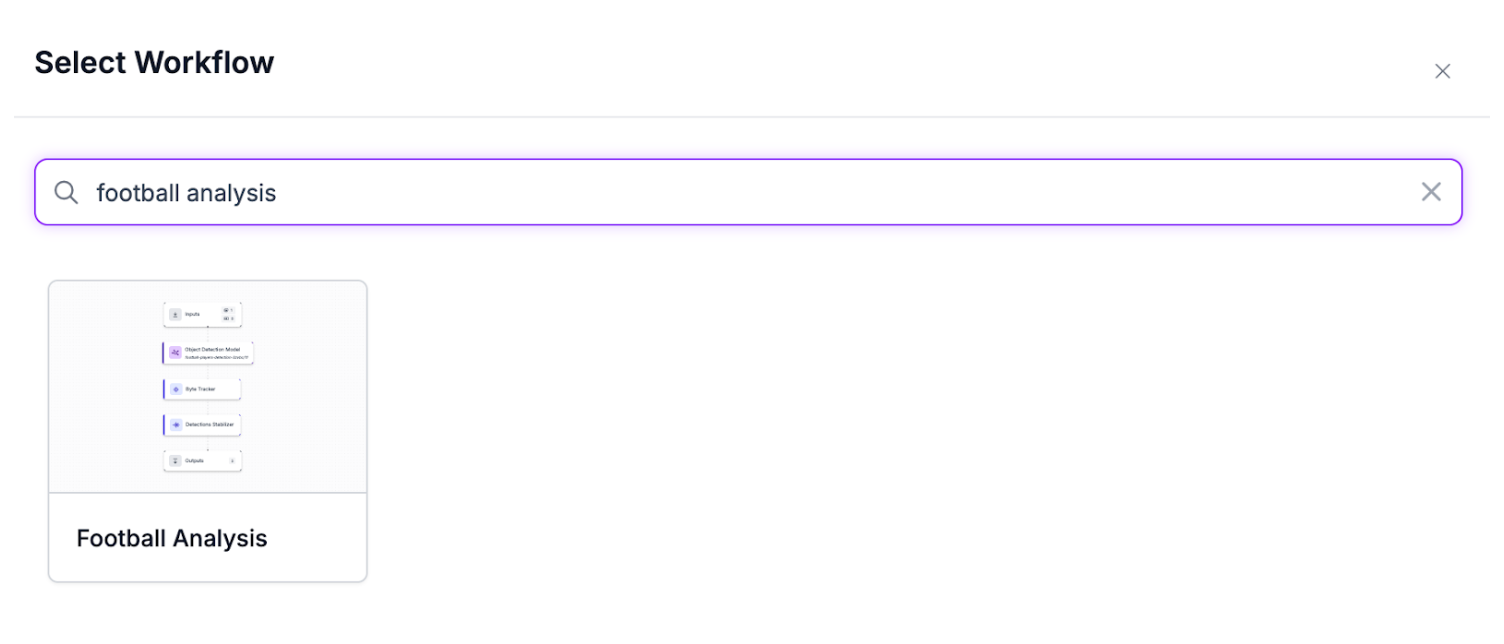
Then, click on the Workflow field and select the Workflow you created earlier:
You will then be asked to upload data. Drag and drop the data you want to process into the “Upload files” section of the window:
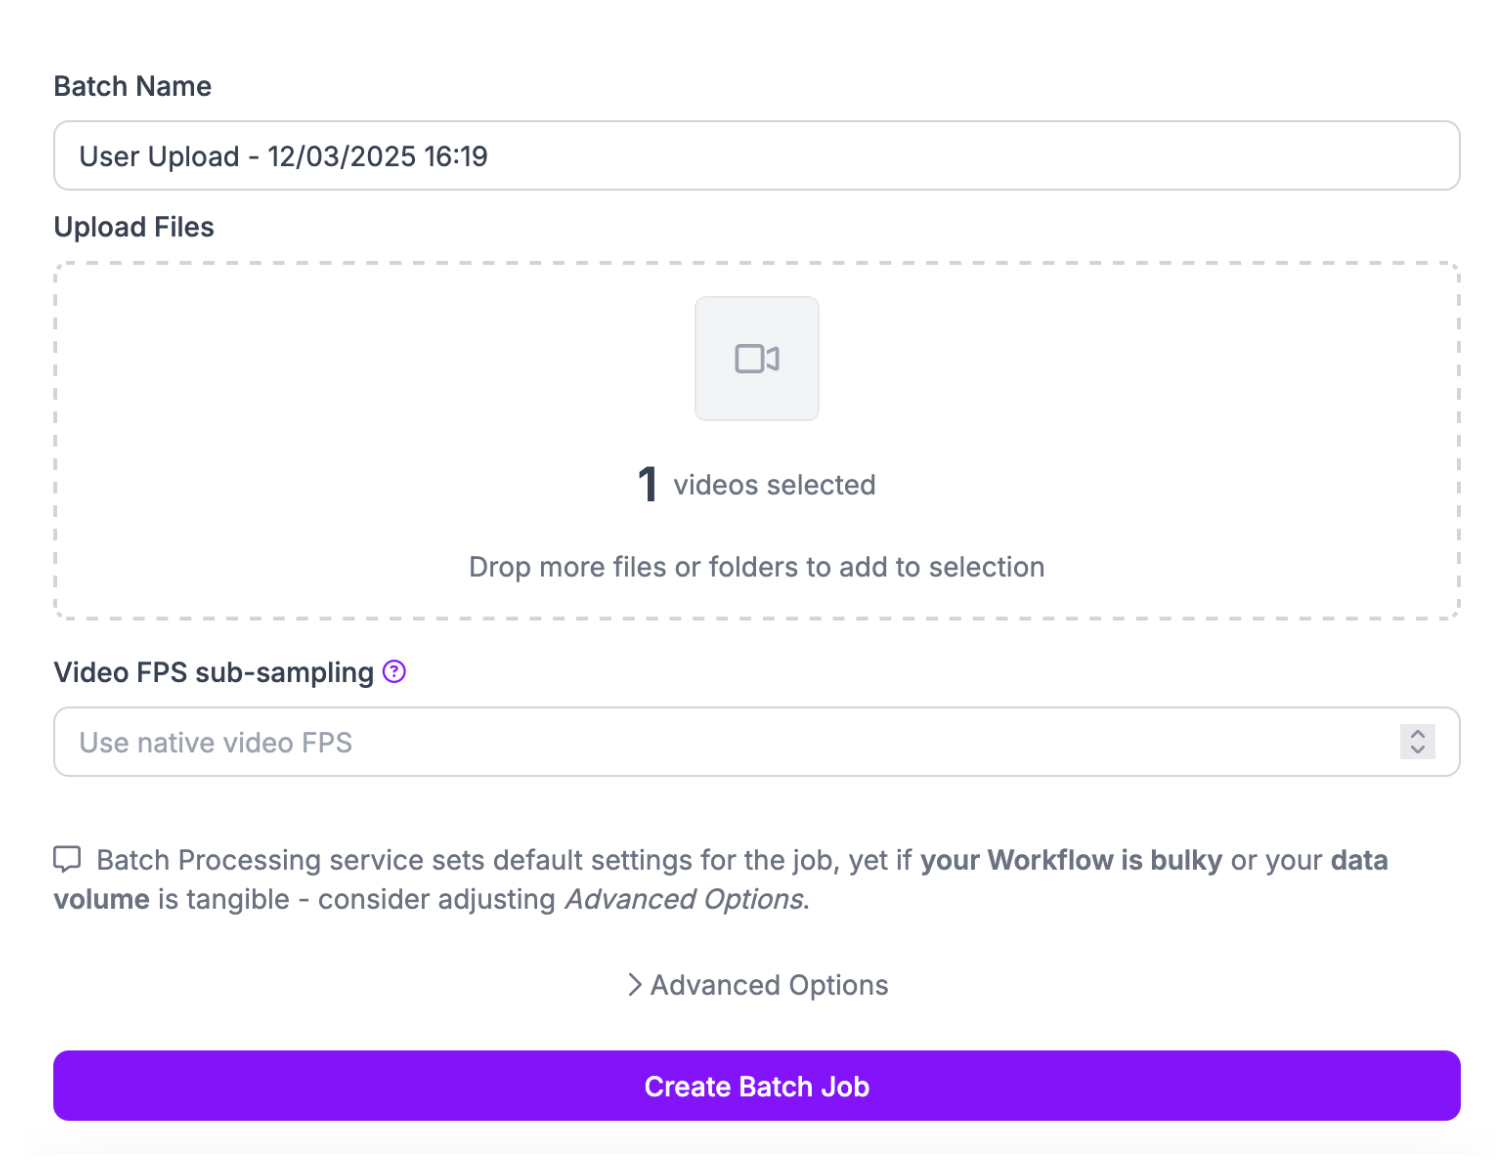
By default, Batch Processing will process videos at their native frame rate.
With that said, you can sample frames from videos if you would prefer. This is more cost effective for use cases like video CLIP vector calculation for use in image indexing. In such a use case, you don’t need vectors for every frame; every fifth frame would be sufficient. Sampling would be useful in that case.
For this guide, we will process our video at the native frame rate, the default option.
Step #3: Start the Job
With your job ready, click “Create Batch Job”.
When you create a job, your input data – images or videos – will be uploaded to Roboflow. Then, infrastructure will be provisioned to handle your job. It may take a few minutes for your job to begin, depending on the availability of infrastructure and the number of images or videos you uploaded.
You can see live status updates from your job. First, your job will be scheduled:

Then, the job will start running. When the job is complete, the status of the job will update to Completed.
Step #4: Analyze the Predictions
Once your job has finished, you can export the results for use in your application. To do so, click the download icon on the right side of the row that corresponds to the job that has finished:

A window will appear that describes the output from your batch job:
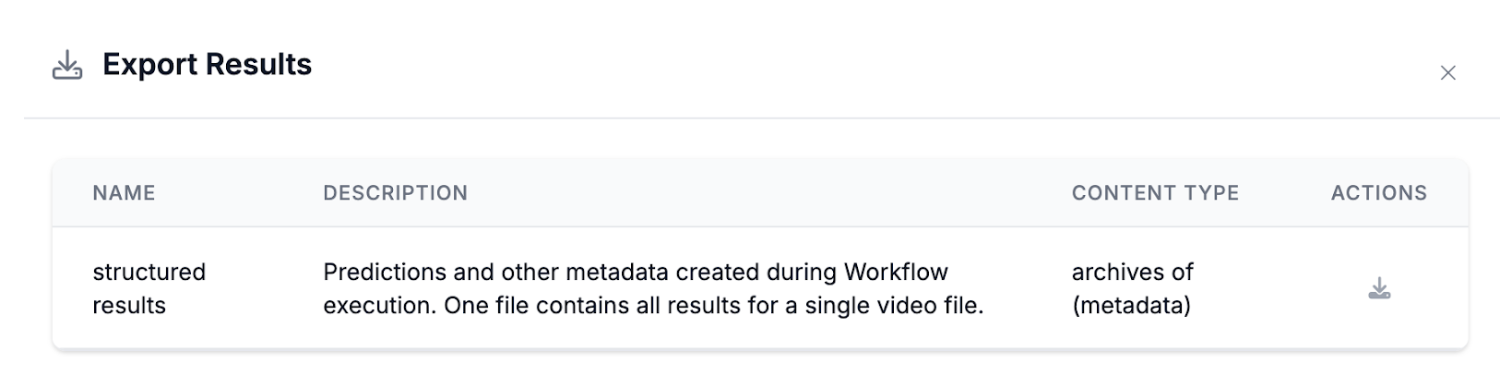
Click the download icon to download your data.
Here is a sample of the data from our Workflow:
"{""image"": {""width"": 1920, ""height"": 1080}, ""predictions"": [{""width"": 23.0, ""height"": 38.0, ""x"": 1704.5, ""y"": 466.0, ""confidence"": 0.9257460236549377, ""class_id"": 1, ""tracker_id"": 1, ""class"": ""goalkeeper"", ""detection_id"": ""4f0a9bac-bbc3-431a-a7db-722b0271db79"", ""parent_id"": ""image.[0]""}, {""width"": 29.0, ""height"": 48.0, ""x"": 1276.5, ""y"": 565.0, ""confidence"": 0.9199044704437256, ""class_id"": 2, ""tracker_id"": 2, ""class"": ""player"", ""detection_id"": ""620fb46c-fbf2-40fc-904e-ab0afa98d5bb"", ""parent_id"": ""image.[0]""}, ... {""class_id"": 2, ""tracker_id"": 24, ""class"": ""player"", ""detection_id"": ""72e23a5e-7f4b-4b43-9369-03df76a0bb95"", ""parent_id"": ""image.[0]""}]}"
This data contains:
- The predictions from our detection model;
- Confidences for each detection;
- Tracker IDs that we can use to track objects across frames.
- And more metadata.
What you do from here depends on your application.
For sports broadcasting, for example, we could write a Python script that calculates possession of the ball based on proximity between players and bounding boxes. We could identify where players are on the field.
We have a full guide that shows the various ways in which computer vision can be applied to sports:
If you are building an image indexing tool with CLIP vectors calculated from a Roboflow Workflow, your next step may be to take the CLIP vectors you exported from Batch Processing and index them in a vector database.
If you are building a tool to analyze drone footage, the next step may be to consolidate the results with other geospatial data your drone collected.
Whatever you do next, Batch Processing will be ready to handle new input data whenever you have new information to process.
Conclusion
Roboflow Batch Processing lets you process stored images or videos in batches. You can run any Workflow built in Roboflow Workflows on batches of data uploaded to Roboflow. Batch Processing will provision the infrastructure needed to analyze your images or videos, then return the results for you to use in whatever way you need.
Batch Processing is available for all Roboflow users. Pricing information is available in the pricing table in the Batch Processing documentation.
Curious to learn about how Batch Processing compares to our Serverless API and other cloud offerings? Check out our Managed Compute comparison. Curious to learn more about what you can build with Workflows that can then be run with Batch Processing? Check out our Workflows getting started guide.
Cite this Post
Use the following entry to cite this post in your research:
James Gallagher. (Mar 13, 2025). Launch: Roboflow Batch Processing. Roboflow Blog: https://blog.roboflow.com/roboflow-batch-processing/