The Roboflow CLI will improve workflows and the ability to use Roboflow when building computer vision applications.
You can use the new Roboflow CLI to access information about your workspaces and projects, upload images and annotations, and perform inference directly from your command line.
Install the Roboflow CLI
To get started, install the tool globally on your system using npm:
npm i -g roboflow-cli
After that you should have the Roboflow command available to you in your terminal of choice.
Authorizing the Roboflow CLI
Once you have the Roboflow CLI installed on your system, you will want to authorize it to access your workspaces. There is an auth flow built into Roboflow to do this, type:
roboflow auth
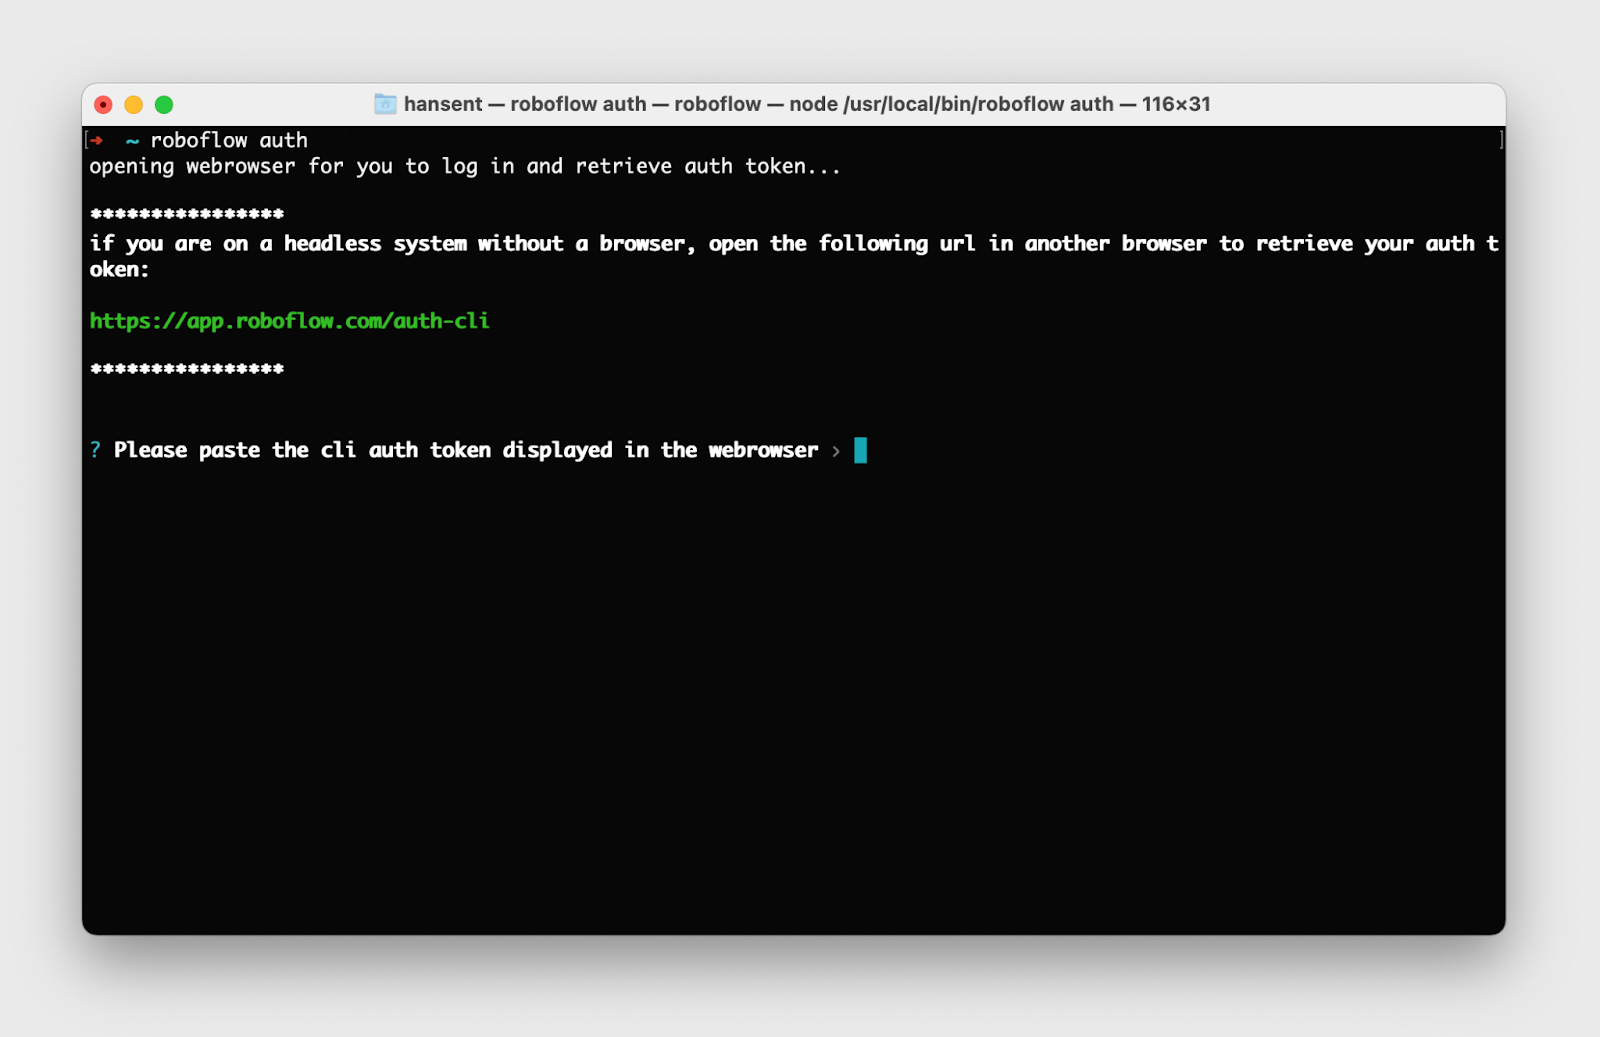
This will open a browser window (or you can copy the url it prints into a browser if your terminal doesn’t support opening a browser).
You’ll sign in to Roboflow, if you are not already, and then a one-time auth token will be generated that you can paste into the CLI. If you have multiple workspaces, you can select exactly which ones you want to allow the CLI to access.
When you paste the auth token into the CLI, you will get your API keys and some basic workspace information. The CLI will store this info in a local config file at "~/.config/roboflow/config.json"
You can see where the config is stored and the configuration data by running roboflow config.
If you want to reset your CLI, or to delete the API keys from your local system, you can type roboflow config reset.
It can be tricky to work on projects on your local machine, manage them with API keys, and navigate multiple workspaces. Storing the API keys locally makes it easier to manage and you can let the tool worry about using the right API key based on the workspaces or projects you're accessing.
Remember that the API keys are stored in your local home directly and you may not want to authorize the CLI tool on a shared account or computer that you don’t control fully.
Using the Roboflow CLI
Now that you have the CLI installed and have authorized it using your Roboflow account, let’s explore what you can do with it.
If you type roboflow open, it will open a browser for your default workspace. This is a way to get to the app while you're working on a dataset locally for tasks like checking Roboflow for information, annotating, or kicking off a training job.
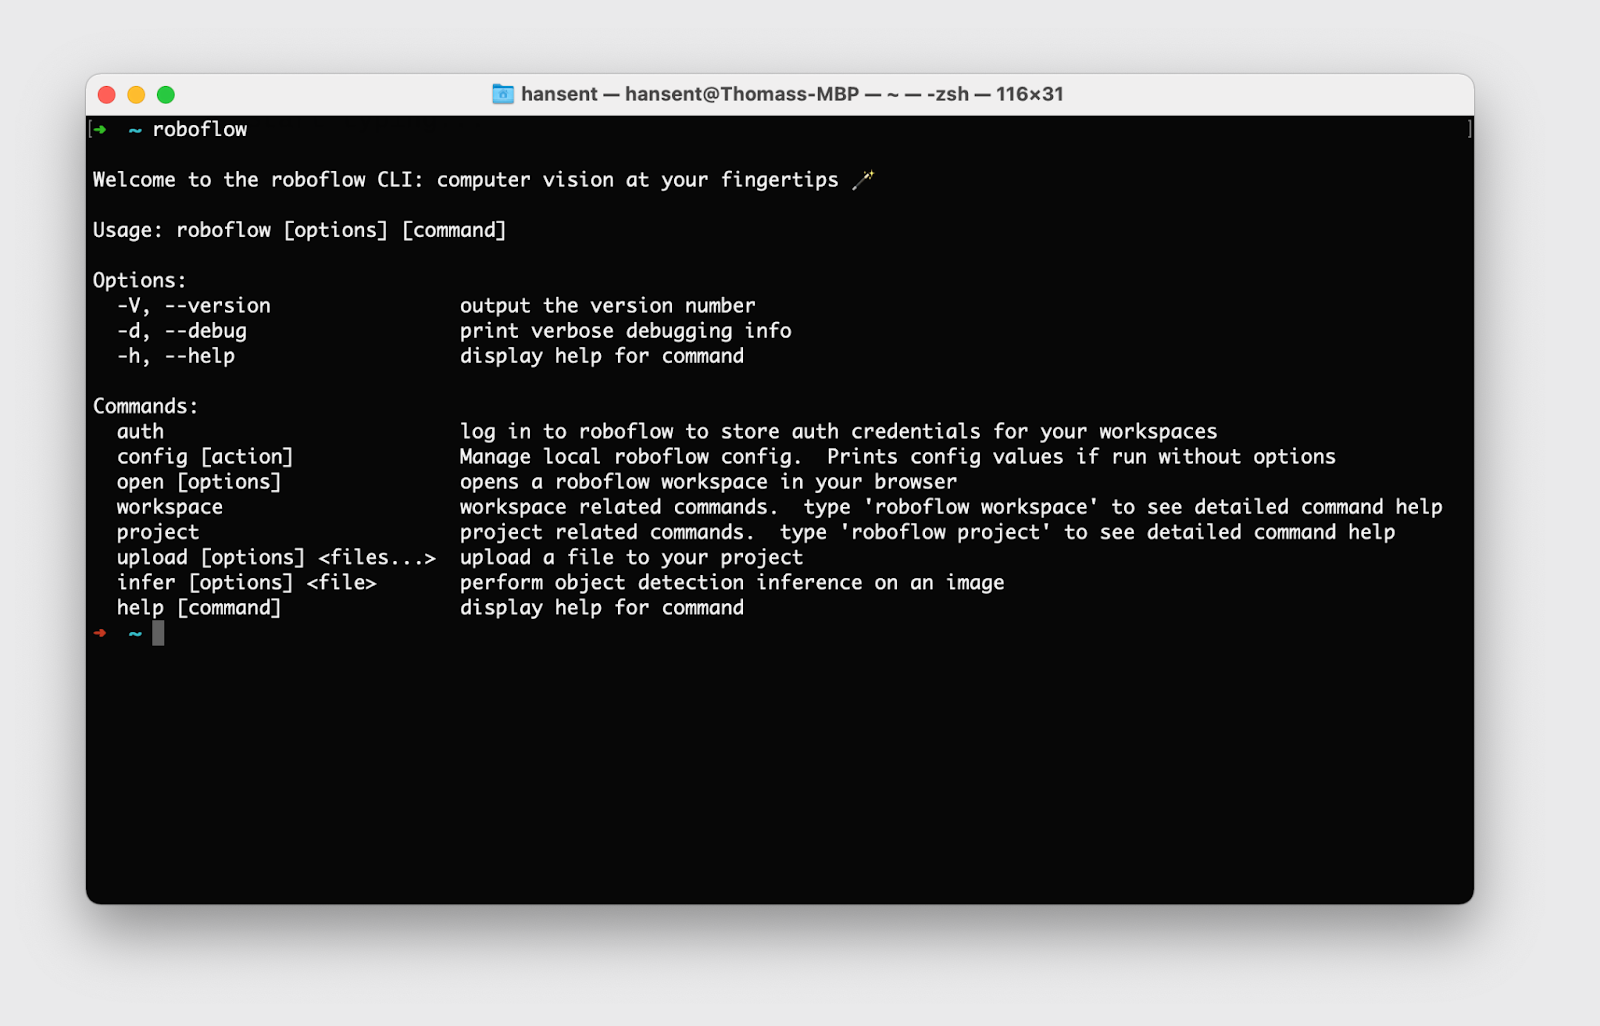
You can access the help to see specific command line options and arguments using roboflow help. We’ll go over the four main subcommands currently supported by the CLI:
workspaceprojectuploadimportinfer
Workspace and Project Subcommands
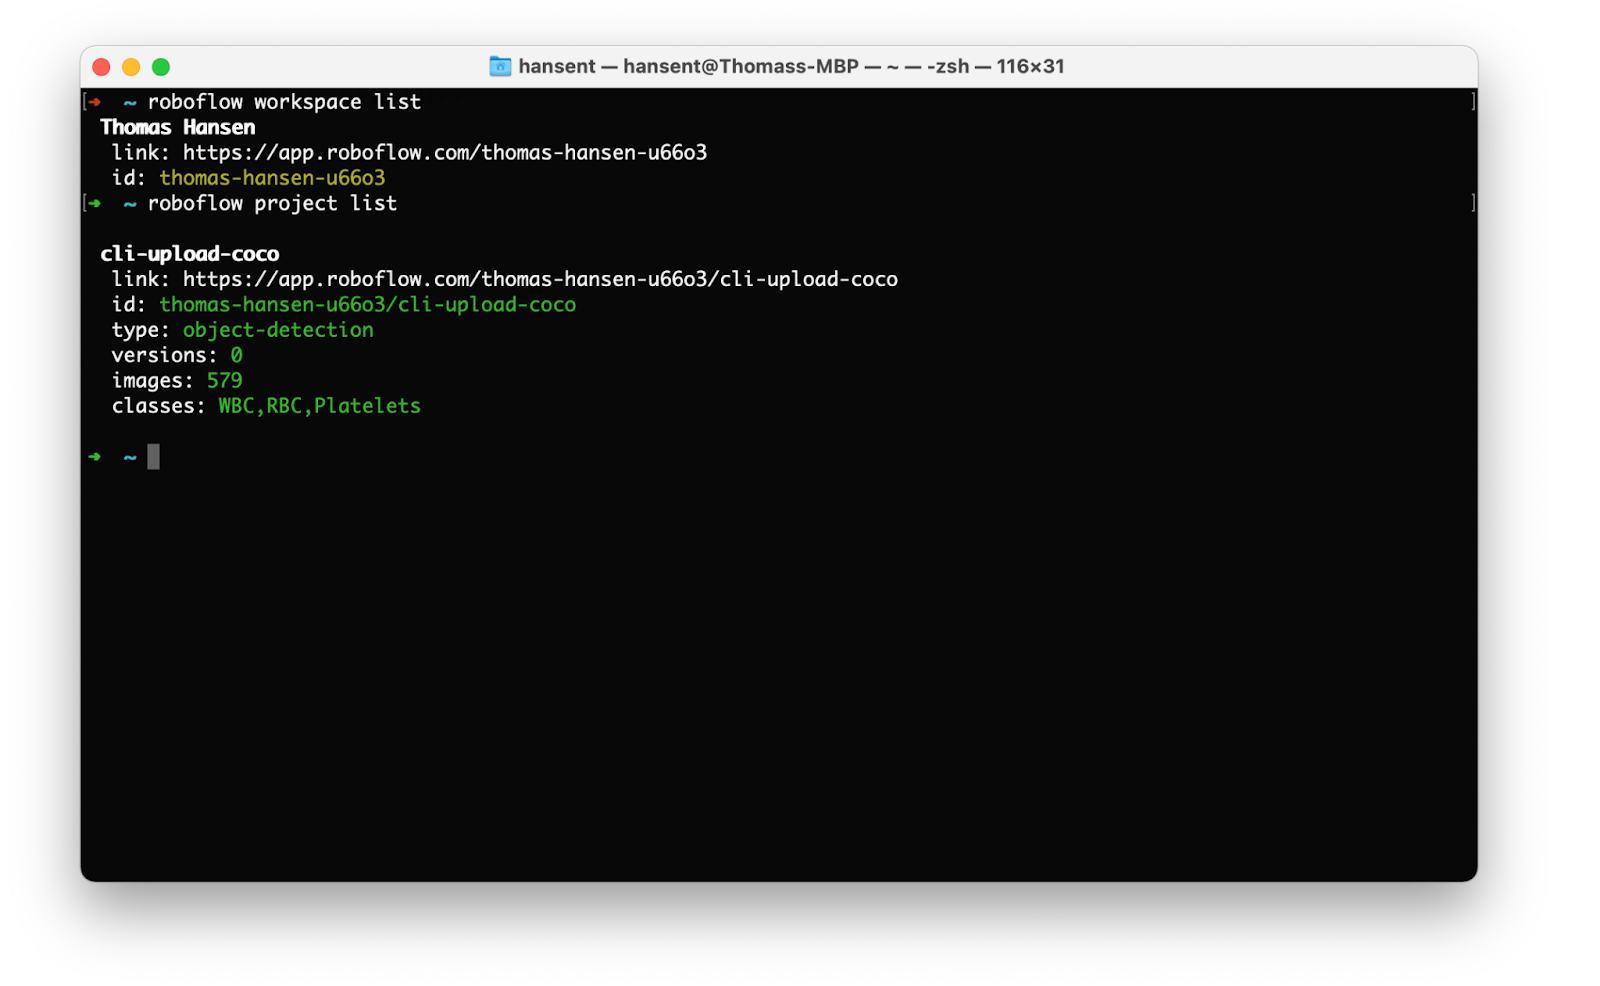
The workspace and project subcommands work similarly. You can use them to list your workspaces or projects using roboflow workspace list or roboflow project list.
Note that most of the commands will use the default workspace for listing projects or making API calls. You can also pass a -w <YOUR_WORKSPACE_ID> option to most of the commands to use a specific workspace; or you can change which workspace is the default workspace by running roboflow select. This is only applicable if you have multiple workspaces authorized. If there is only one workspace, it will always be the default.
You can get the full info for a workspace or project using roboflow workspace get or roboflow project get <PROJECT ID>. You can get project info for any public project, like from Roboflow Universe, or private projects in workspaces you have authorized.
The commands mostly print JSON to the command line which is in the same format as that from our REST API; this makes it easy to use for automation tasks or CI/CD integration needs you may have and also is pretty easy to read for us humans.
Let’s say you want to get the details for this mask wearing dataset on universe; you can just type:
roboflow project get mask-wearing
Upload Images Using the Roboflow CLI
This is where we think this tool will especially make workflows easier for you. You’ll want to use this if you find yourself with images or datasets on your local system that you want to upload to Roboflow or you have written custom upload scripts to use our API.
Let’s assume you have a file, image.jpg, in you current directory: You can type:
roboflow upload image1.jpg
This will ask you which of your projects to upload into, but you can also skip that by specifying it explicitly using the -p option to the command.
If you have annotations for your image such as a file called image.xml:
roboflow upload image1.jpg -a image1.xml
If you have many images:
roboflow upload *.jpg
If you have many images with annotations:
You can pass a special “[filename]” value to the -a option that will match the annotation file name based on the name of the image. This would upload image1.jpg with annotations from image1.xml, and image2.jpg with annotations from image2.xml, etc
roboflow upload *.jpg -a “[filename].xml”
This only works if you have one annotation file for each image. If you have an entire dataset in a common format, like one downloaded from Roboflow Universe, you can also use the import command.
Import a Dataset using the Roboflow CLI
You can import an entire dataset from your local file system using the import subcommand. This is a way to import your pre-existing datasets or any dataset from Roboflow Universe into your Roboflow Projects.
To try this out on an example dataset from Roboflow Universe, you can download the Aerial Maritime Dataset.
Let’s say you download the dataset in the COCO format. Just unzip the dataset you downloaded from Roboflow Universe, and then import the project into one of your own projects by pointing the roboflow import command at the folder:
roboflow import ./Aerial\ Maritime.v24i.coco/
This will understand most common computer vision dataset formats and assign train/valid/test splits and annotation metadata to the images being uploaded.
Infer Using the Roboflow CLI
You can also run inference on images from the command line:
roboflow infer -m mask-wearing/18 image.jpg
Here the -m option specifies which version to pull the model from. This specific example will run object detection against the latest model of this public universe face mask detection project.
If you have trained your own custom model you can substitute the model/version for one of your own. This will work for object-detection, classification, instance-segmentation, or semantic-segmentation models.
Questions, Feature Requests, Issues, or Contributions
This is the first version of the Roboflow CLI and we plan to continue iterating on this tool to help you build computer vision applications faster. If you have ideas or feedback that would help make this more useful, the CLI is open source and on Github for you to contribute. We'd welcome your involvement.