Karel CornelisSoluco
As part of a groupwork for a postgraduate applied AI at Erasmus Brussels we made an object detection model to identify ingredients in a fridge.
The project idea was to identify ingredients in a fridge and lookup a recipe that had one/more of those ingredients as its main ingredient. In the last step we generated a sommelier speech text for a wine paired to our recipe.
Does this sound cool ? Read on, I’ll introduce you to the ingredient detection part.
Let’s get some data ?
Well … that turned out to be quite difficult and since the current public datasets didn’t fit our needs we crafted our own dataset!
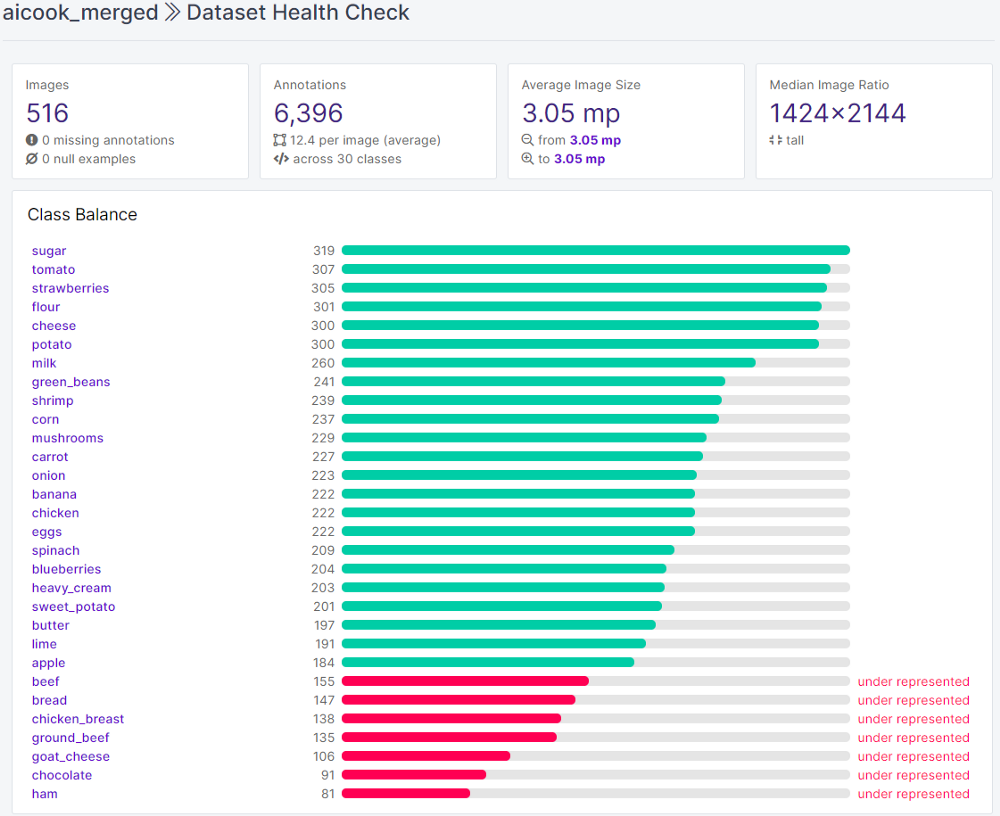
From the recipe dataset we used (which is a subset of the recipe1M dataset) we distilled the top50 ingredients and used 30 of those to randomly fill our fridge.
We used 1 fridge with a fixed camera position to make all the pictures (1424–2144px — iso 400–300dpi -sRGB)

We did this in 2 separate shoots totaling 516 images. This gets boring real fast, but luckily the kids helped out :).
Labeling time!
There are various tools available but we choose Roboflow for the following reasons:
- online tool — no installation required, easy to use
- data is private (even Roboflow staff first needs your permission to see it) or can be public if you choose so
- multi-user/team support
- various helpful tools, dataset versions and various output formats
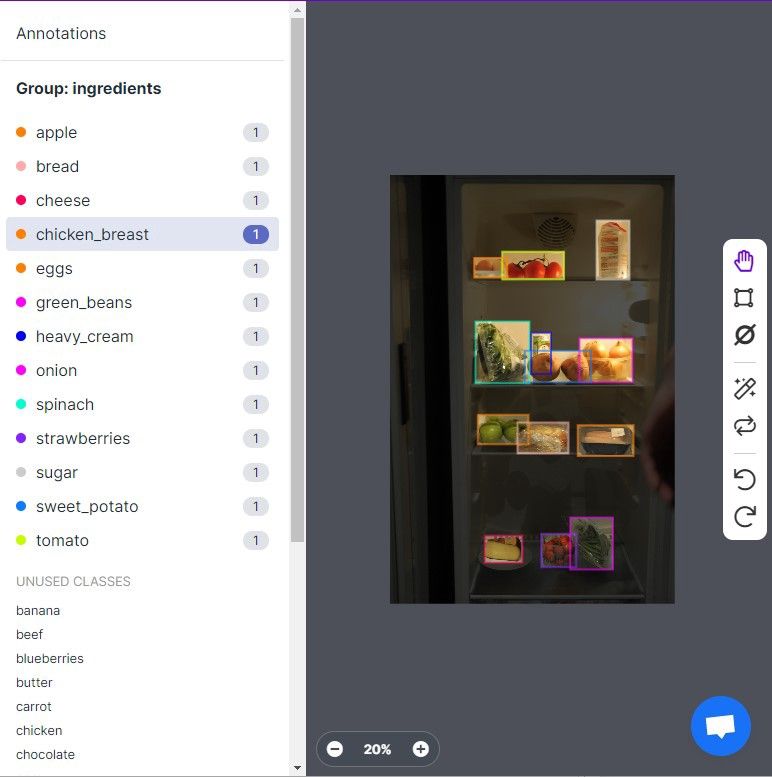
Which Roboflow features proved worthwhile ?
We discovered that labeling is a cumbersome task, but the boys & girls at Roboflow already knew this and provided 2 helpful features that dramatically speed up things:
- copy/paste the labels of the previous image
- Label-Assist
To use this, we labeled half our images and generated a “helper” AI model with those labeled images. That model is then put to work and assisted us in labeling the second half.
We evaluated our work by using the health-check function. We inspected the class balance, object count per image and annotation heatmaps by a simple mouse click.
As you know AI models need lots and lots of data, preferably with enough variation so that the model can generalize well and is able to cope with real-life situations. Most models pose some constraints towards the input size. We used YOLOv5, which needs square images (in multiples of 32px).
Image preprocessing and augmentations are key here. The Roboflow platform provides both of them in a very declarative way. You can pick the needed augmentations and choose how many versions of your base image you would like.
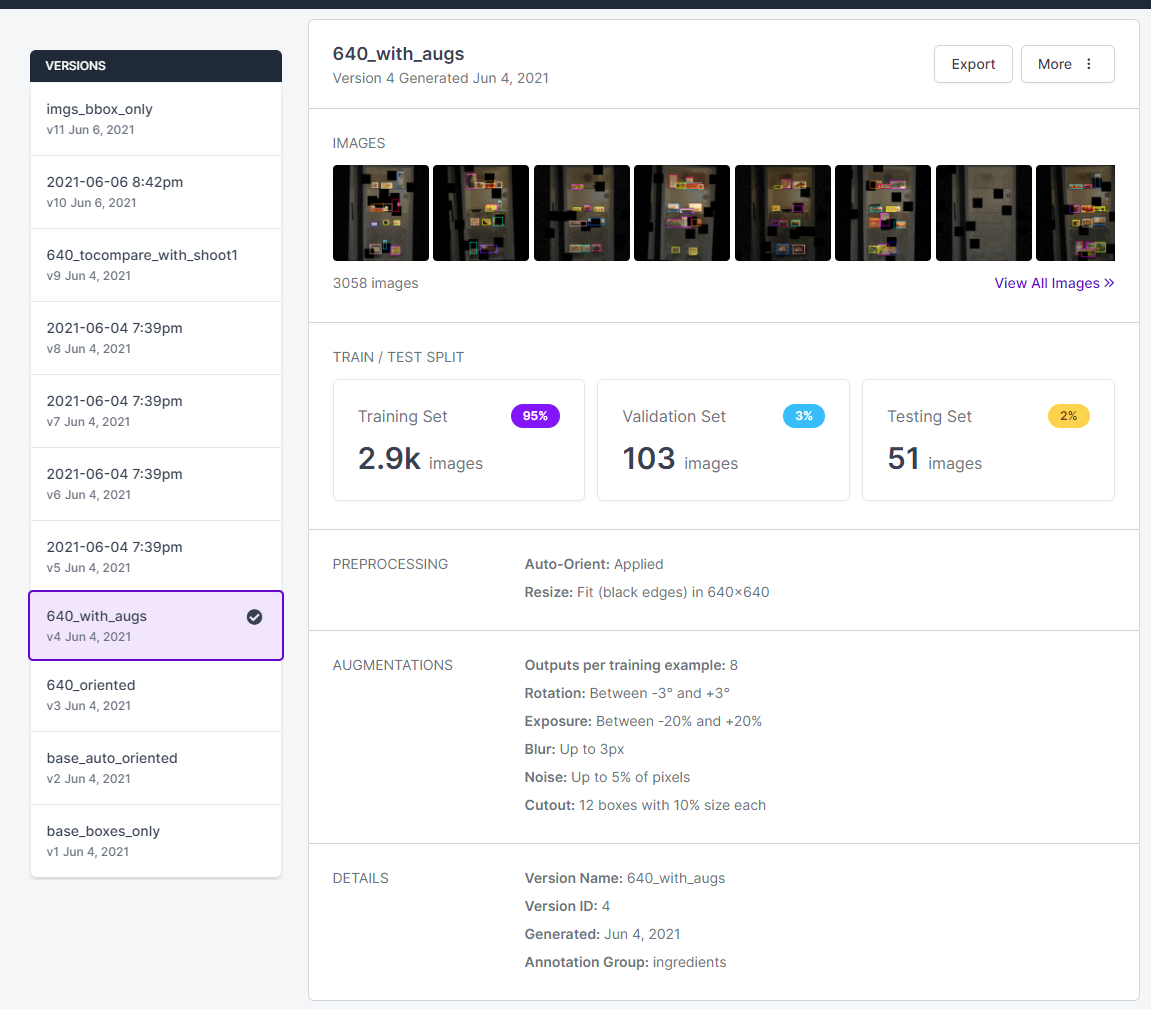
We tried and explored several different augmentations and finally went for the above setup.
All the dataset versions are kept and are exposed on a URL, which can be easily used in your own notebook or application. When exporting your dataset several annotation formats are available. Very handy when you want to switch or compare models without any additional work. Just point to the right URL!
We didn’t use that feature (except for label-assist), but we did use the YOLOv5 notebook provided in the model zoo. All the notebooks there give you a clear introduction to various AI vision models. A recommended starting place, even if you don’t need to craft your own dataset.
Train, validate, test time
As soon you have setup your dataset that has the correct labels and added the needed augmentations, you can go ahead and train a vision model on your data. Note that your dataset can be split in the 3 needed parts (train, validate, test). Typically in slices of 70,20,10 percent, but you can pick your own set size.
Roboflow can also provide models generated on your dataset and conveniently exposes these as web-service endpoints. Some other out-of-box deployment options are available as well.
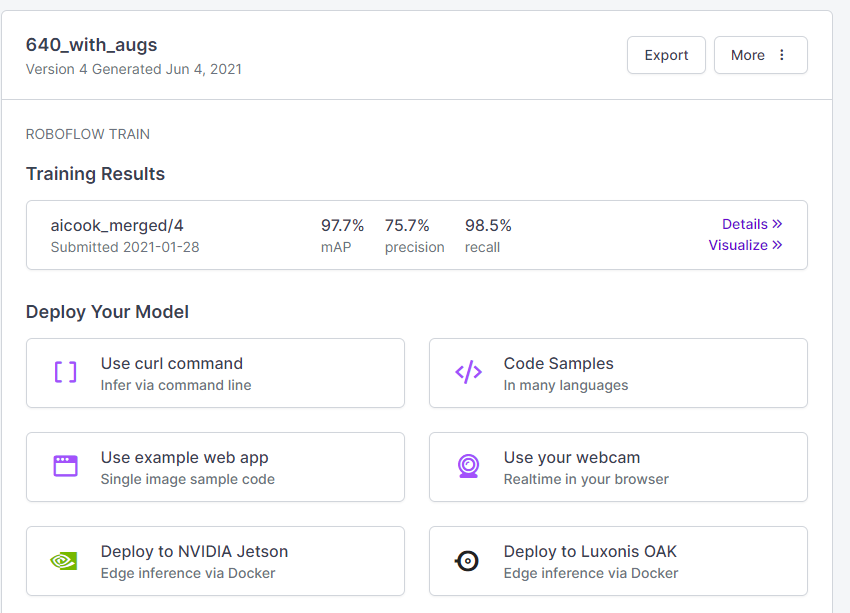
We didn’t use those deploy features since we wanted to build our own application. However we did use the YOLOv5 notebook provided in the model zoo to perform model explorations, setup training, etc …
All the notebooks there give you a clear introduction to various AI vision models. A recommended starting place, even if you don’t need to craft your own dataset.
Check out the final dataset
The aicook dataset can be found among some other public datasets on the Roboflow site. The base version (516 images + labels) and an augmented version (3,050 images).
You can use this project to build your own smart fridge or as a base to jump-start your own project by adding more images and training your own model!
Feel free to contact me for more information or to discuss this in more detail!
Cite this Post
Use the following entry to cite this post in your research:
Mohamed Traore. (Sep 20, 2021). How I Used Computer Vision to Make Sense of My Fridge. Roboflow Blog: https://blog.roboflow.com/smart-fridge/
