
Splitting annotation work across a team in Roboflow involves creating one dataset per annotator, sharing each dataset with the full team so everyone can see examples from colleagues, and then merging the individually labeled datasets into a single combined dataset once all images are labeled. This workflow keeps annotation progress visible and consistent across team members without requiring any external coordination tools. The post covers each step, from inviting teammates at app.roboflow.com/invite through the final merge.
Dataset annotation is better with teams: you can move more quickly, keep everyone on the same page, track annotation progress, and easier provide examples of what the ultimate dataset should look like.
In this post, we'll walkthrough an example workflow of annotating data with your team using Roboflow Pro.
The recommended workflow is: (1) inviting our team members (2) uploading datasets components for the team members (3) sharing the datasets with your team (4) annotating images (5) merging the individually labeled datasets into a final dataset.
Inviting Your Team Members
First, we need to invite our team members to join our team on Roboflow.

Visit https://app.roboflow.com/invite to add your colleagues.
Uploading Images for Annotation
As a next step, we'll create datasets (yes, plural!) for annotation. Specifically, we'll create one dataset per person on our team that is going to be labeling images. Each dataset will be each individual team member's responsibility to annotate. (Once we've labeled all the data in all datasets, we'll merge them.) Refer to our documentation on creating a dataset.
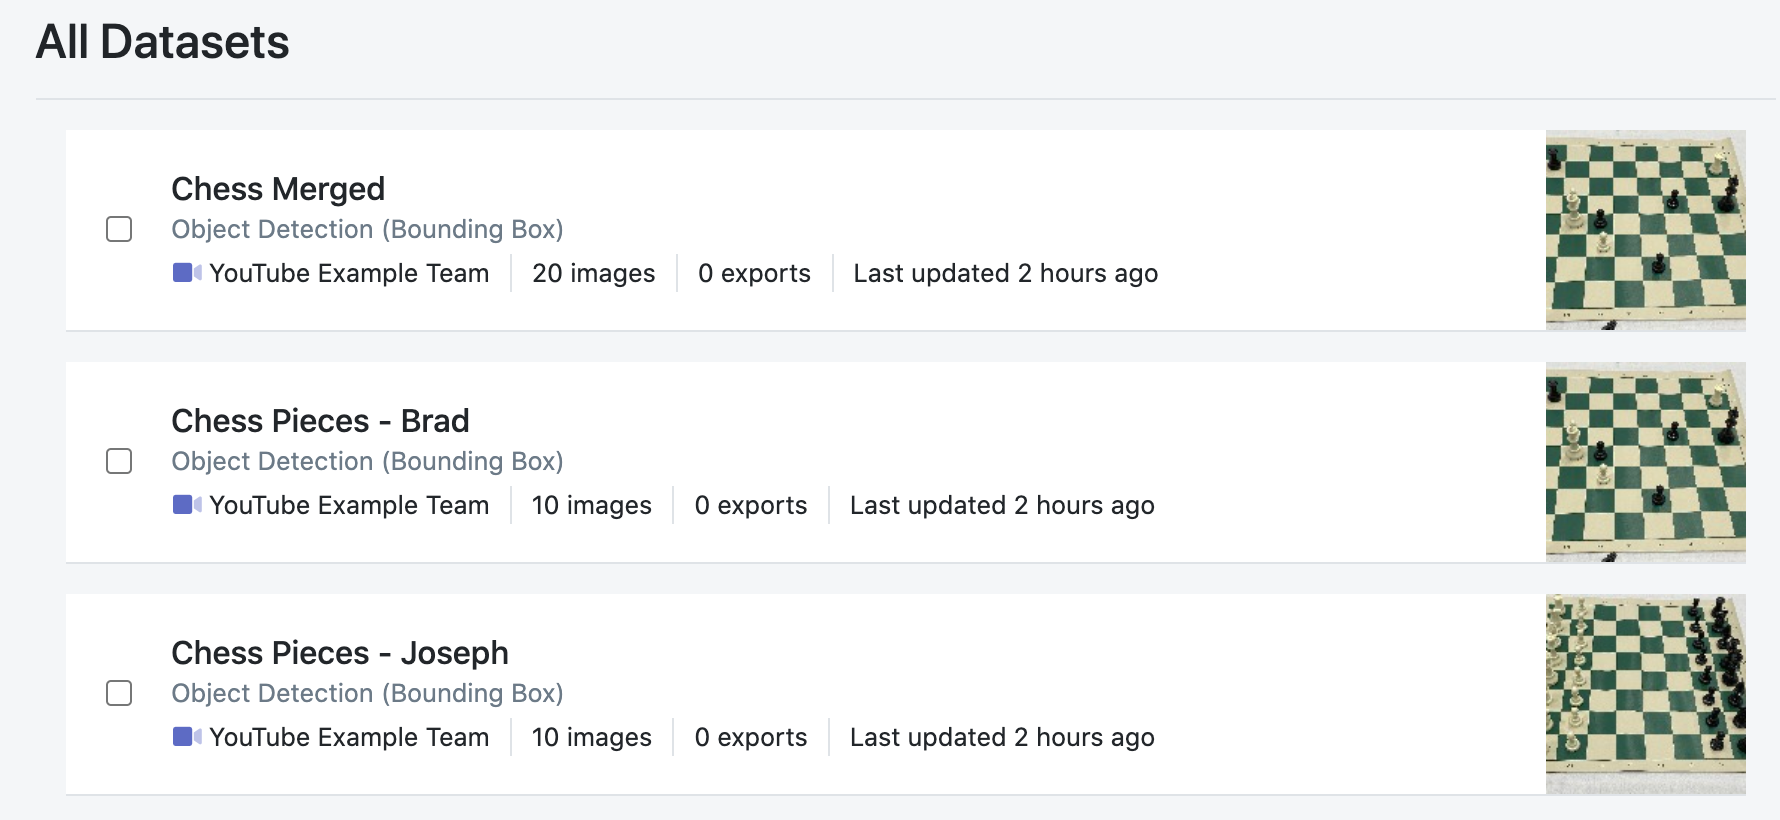
When creating a dataset, we recommend naming each dataset with the person responsible for labeling that portion. For example, if I (Joseph) were labeling chess images with a team member (Brad), I would name the datasets "Chess Pieces - Joseph" and "Chess Pieces - Brad."
Sharing Datasets with Your Team
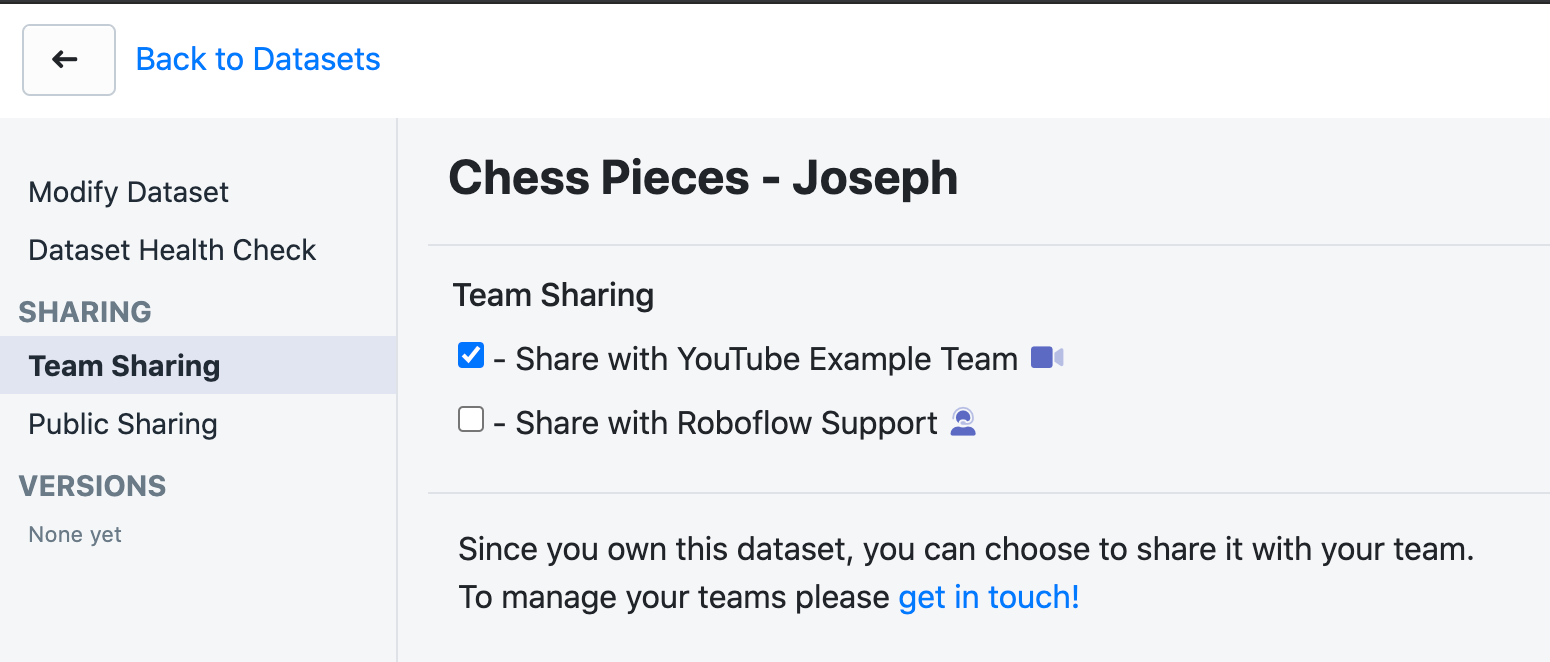
Once the datasets are uploaded, they need to be shared with your team. Open a dataset, click "Team Sharing" on the left-hand side, and check the box for the team with which you want to share the dataset. We recommend sharing all of the individual datasets with your team members so everyone can see examples from their colleagues.
Annotating Images
Once images are uploaded and the datasets are shared, it's time to annotate images. Be sure to refer to our guide on best practices for labeling data:

And the video version:
Merging Labeled Datasets
Once each team member has fully labeled their respective dataset, we want to merge these datasets into one dataset that contains all labeled images. To do so, simply check the boxes for the datasets we seek to merge and click "Merge Datasets" in the upper right hand corner.
The resulting dataset will contain all de-duplicated images and their labels. Note that the individual dataset components also remain.
And that's it! We can continue to follow this workflow as we add more images by adding images to only that individual labeler's dataset or creating a new dataset altogether. Happy annotating!
Cite this Post
Use the following entry to cite this post in your research:
Joseph Nelson. (Dec 25, 2020). How To Annotate Images with Your Team Using Roboflow. Roboflow Blog: https://blog.roboflow.com/team-image-annotation-workflow/