
Released by Hugging Face in February 2025, SmolVLM2 is a multimodal image and video model. You can ask SmolVLM2 questions about the contents of an image with arbitrary text prompts. For example, you could ask SmolVLM2 about the contents of a receipt or a shipping manifest, or about whether a box is on a forklift pallet.
You can now fine-tune SmolVLM2 and SmolVLM 256M models with Roboflow. In this guide, we are going to show how to prepare a dataset for, fine-tune, and deploy a SmolVLM2 model with Roboflow. We will walk through an example of a dataset that turns a shipping manifest into a JSON representation of the information on the manifest.
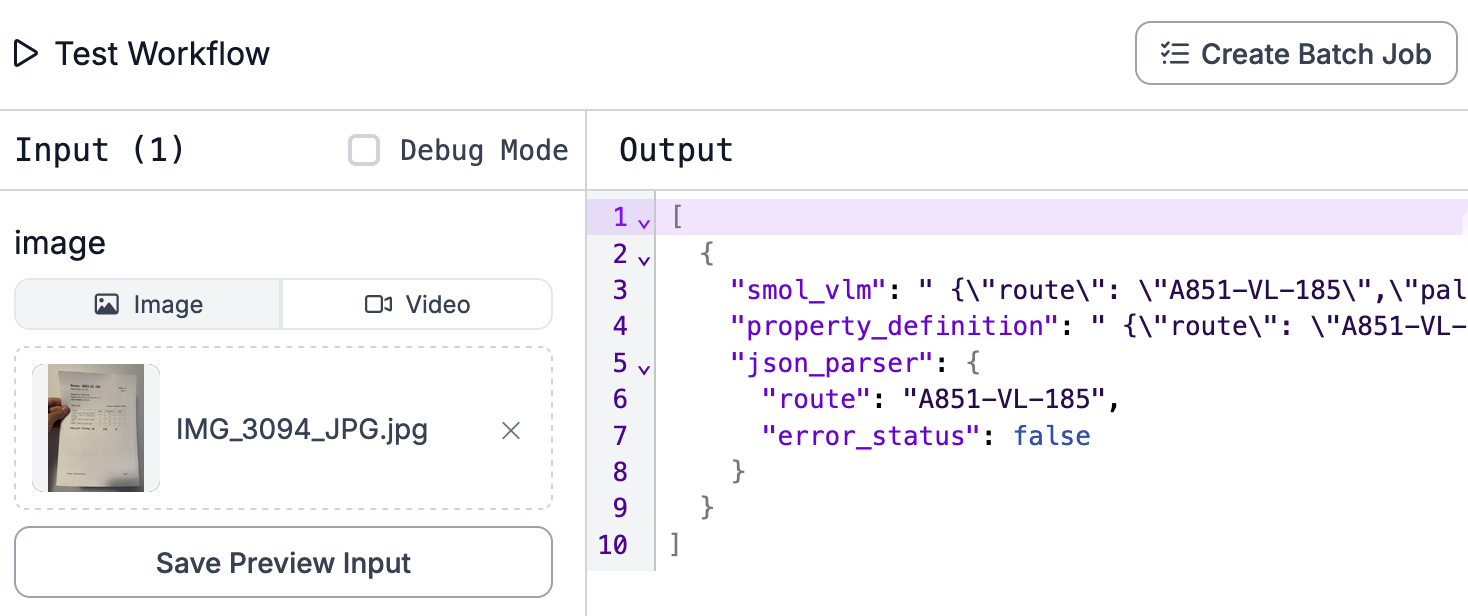
Here is an example output from the model trained on Roboflow and run in a Workflow:
Without further ado, let’s get started!
Step #1: Prepare Dataset
For this guide, we are going to use a pre-labeled shipping manifest dataset on Roboflow. This dataset contains image-text pairs of JSON data corresponding to the contents of an image, and the image to which the data corresponds.
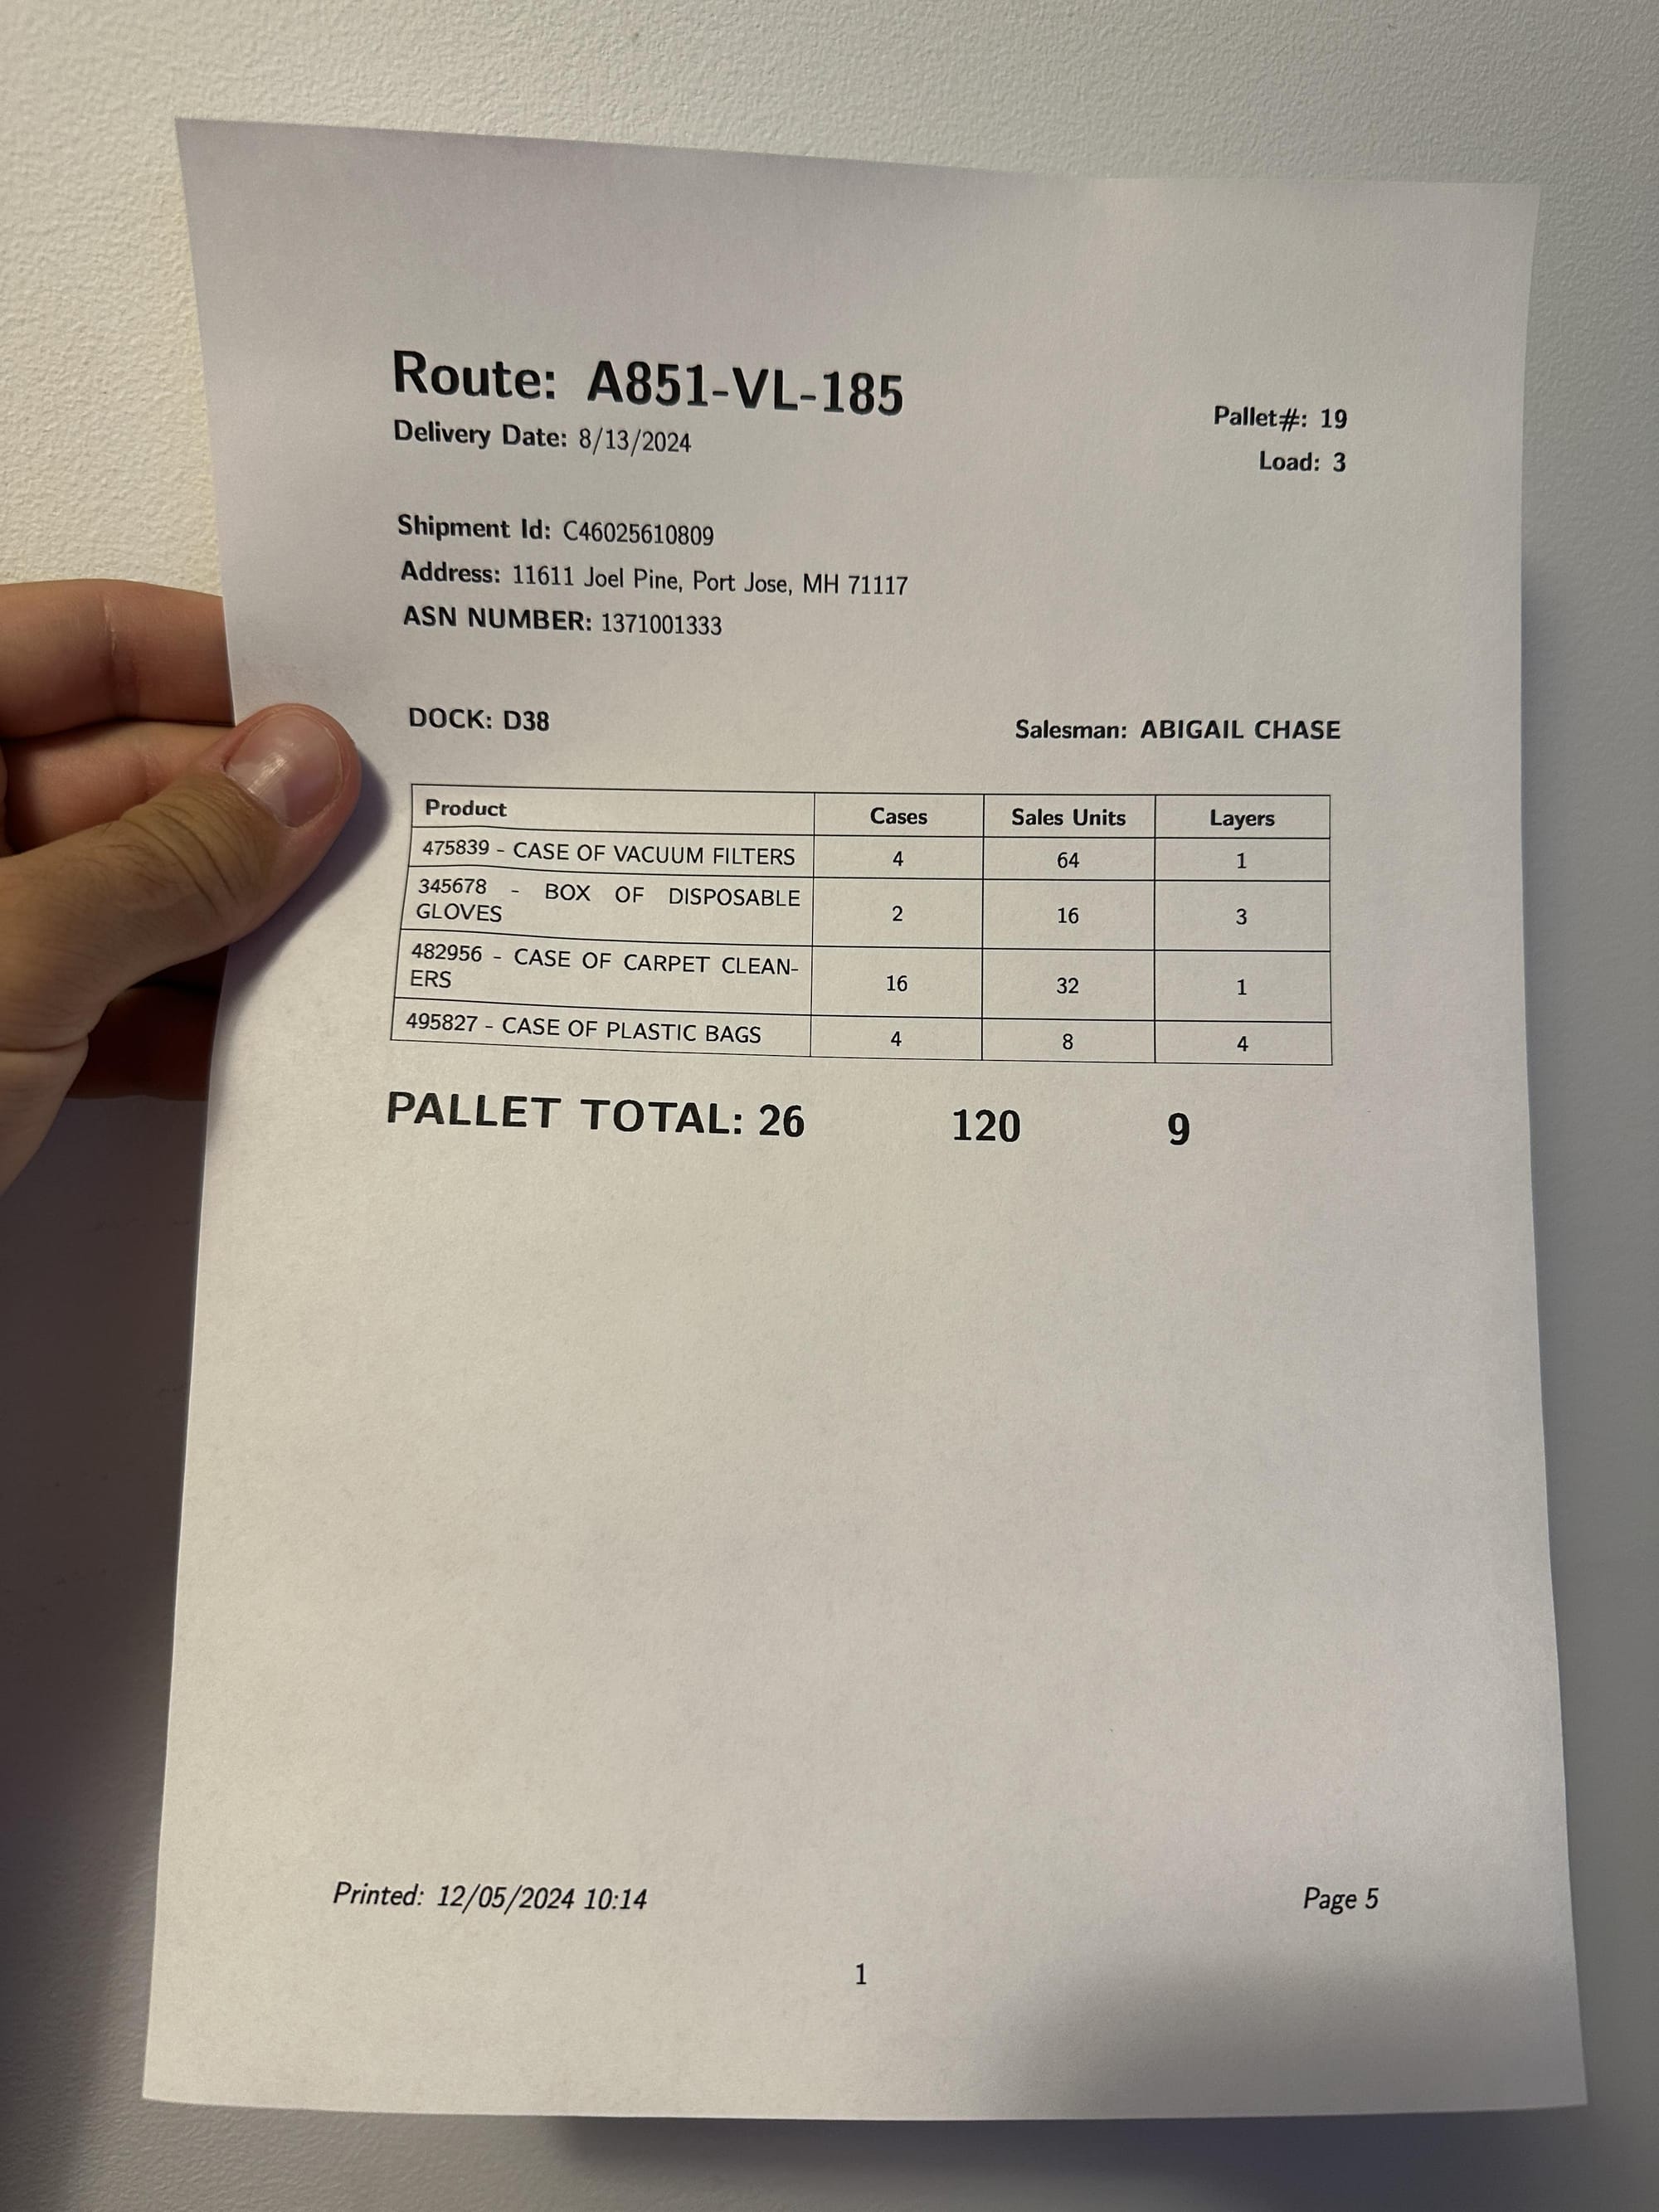
Here is an example of an image in our dataset:
Here is an example of the JSON representation of the data:
{
  "route": "A851-VL-185",
  "pallet_number": "19",
  "delivery_date": "6/13/2024",
  "load": "3",
  "shipment_id": "C46025610809",
  "dock": "D38",
  "destination": "11611 Joel Pine, Port Jose, MH 71117",
  "asn_number": "1371001333",
  "salesman": "ABIGAIL CHASE",
  "products": [
    {
      "description": "475839 - CASE OF VACUUM FILTERS",
      "cases": "4",
      "sales_units": "64",
      "layers": "1"
    },
    ...
  ],
  "total_cases": "26",
  "total_units": "120",
  "total_layers": "9",
  "printed_date": "12/05/2024 10:14",
  "page_number": "5"
}
Here, we can see information like the route ID, the pallet number, and the delivery date associated with the manifest.
Forking a Dataset from Universe
To use the shipping manifest dataset, navigate to the dataset in Universe, then click “Fork Project”.
The data will be added to a new project which will open in your Roboflow dashboard.
If you forked a dataset from Roboflow, you can skip to Step #2. Otherwise, follow the instructions below to learn how to create a project from scratch and upload your own data.
Uploading Data from Scratch
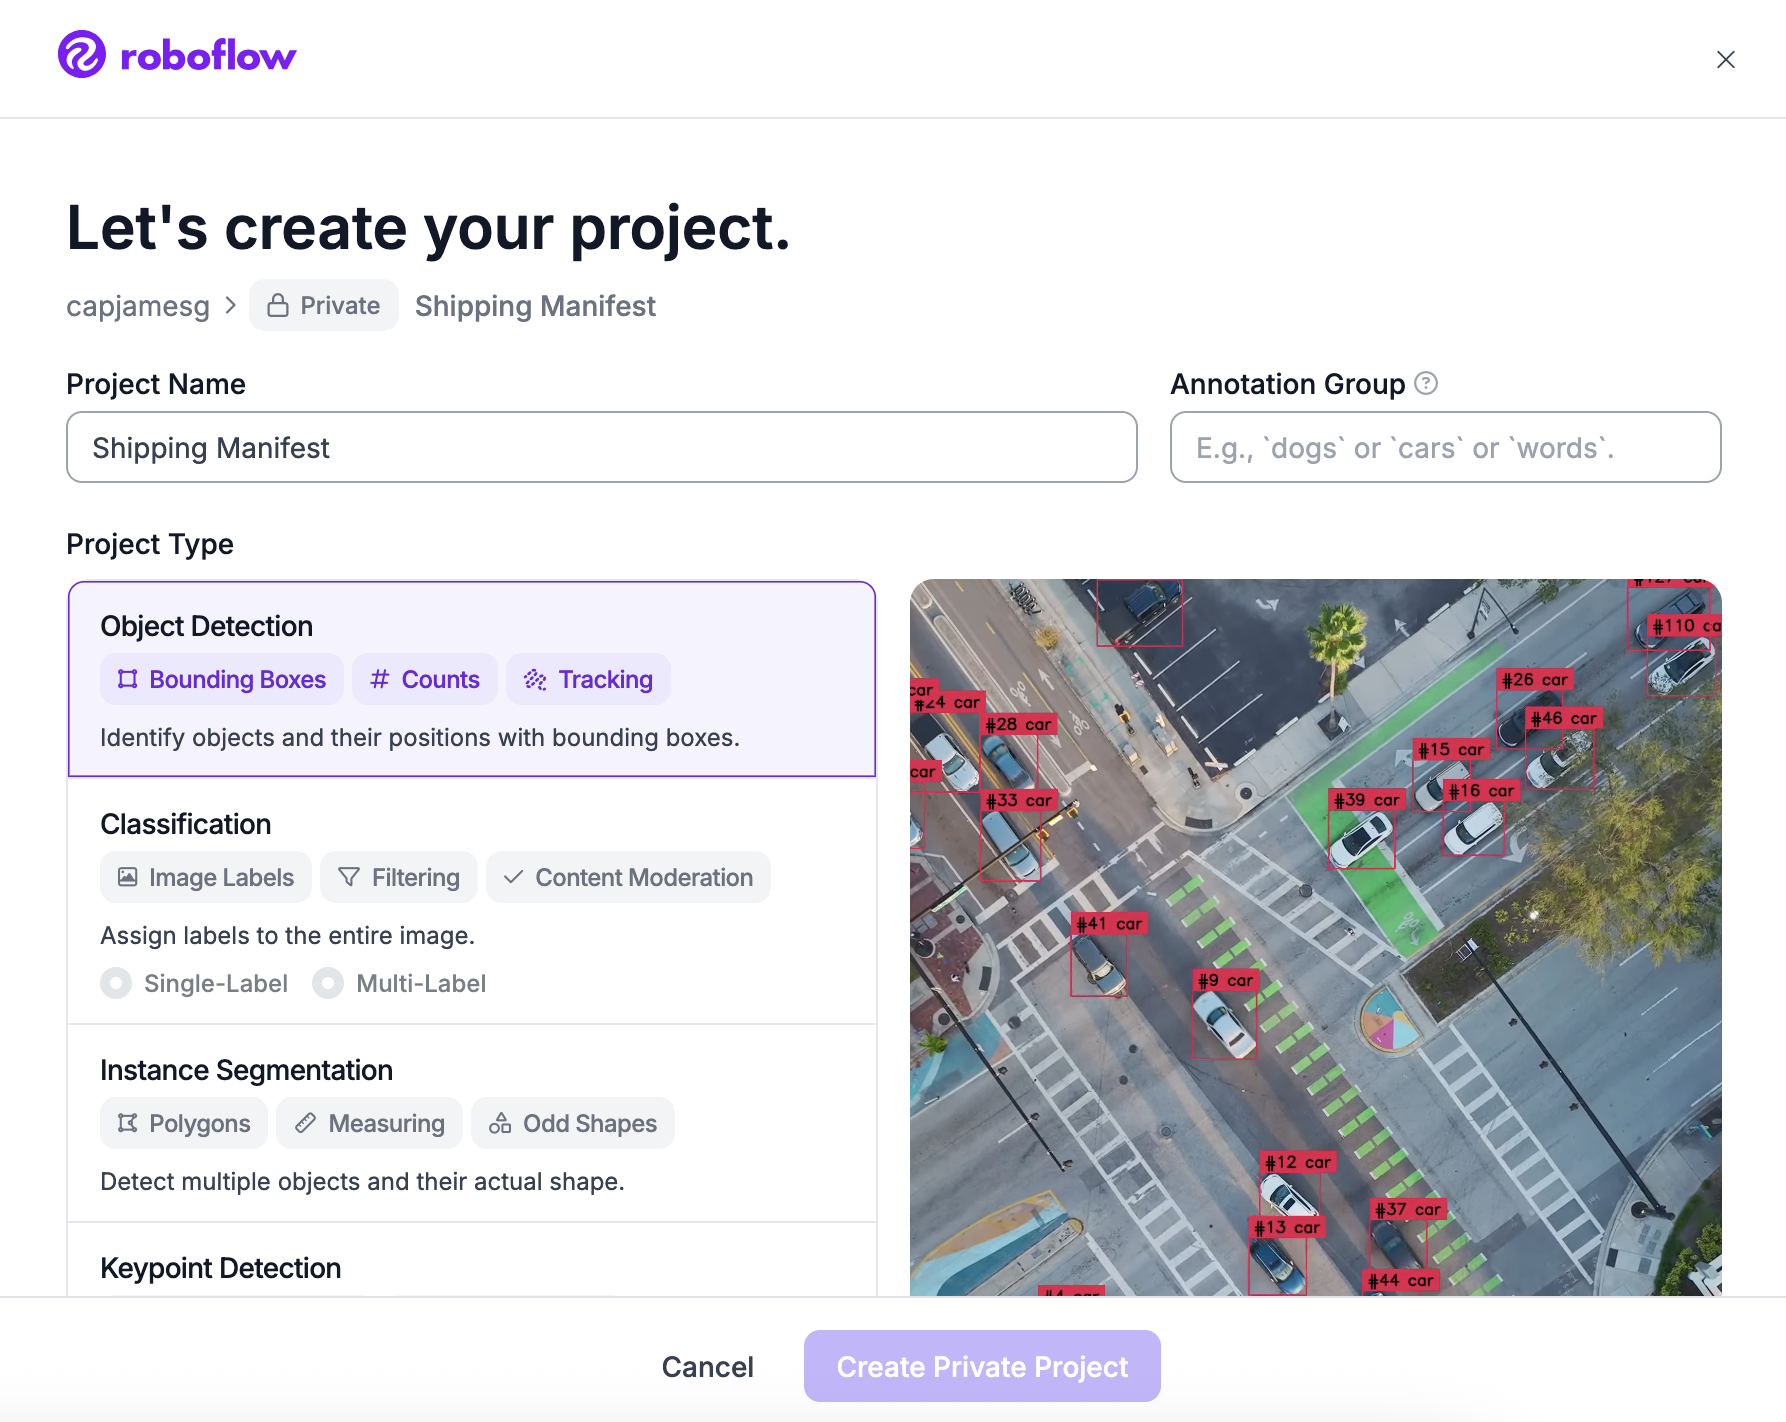
If you are uploading your own data, you will need to create a Roboflow project:
Then upload your data:
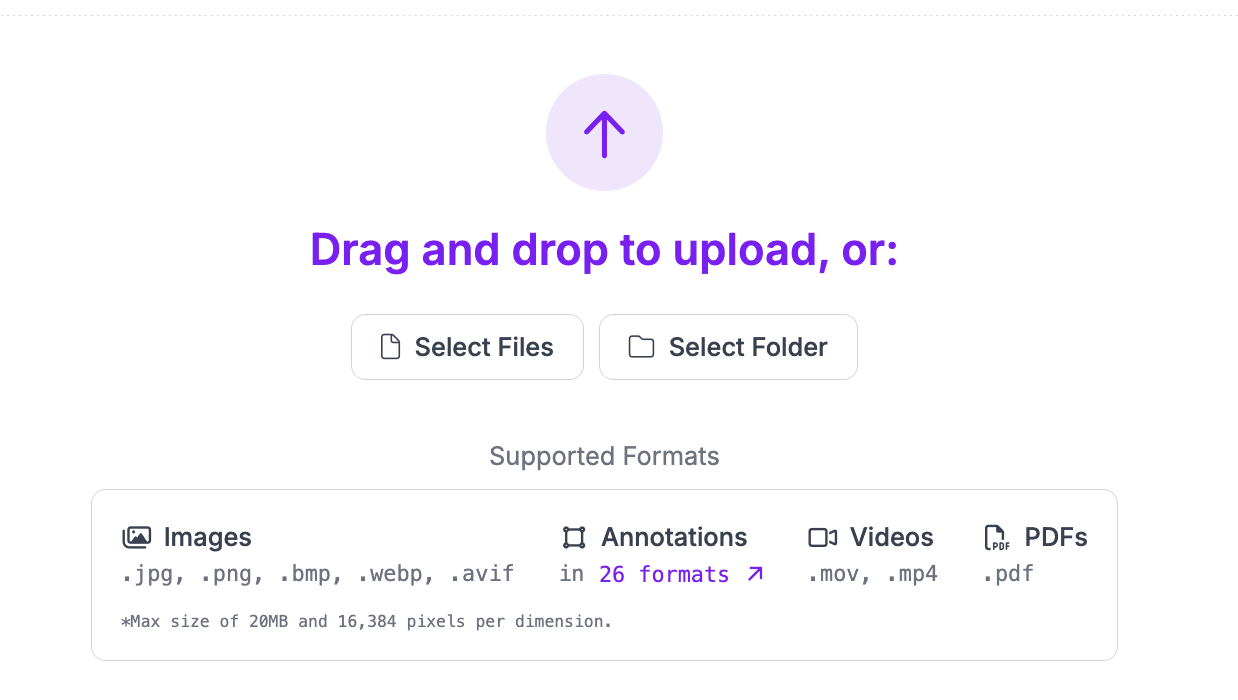
Click “Save and Continue” to complete the upload process.
Your dataset will then be available for labeling.
Step #2: Annotate Data
If your data is unannotated, you can annotate it in Roboflow.
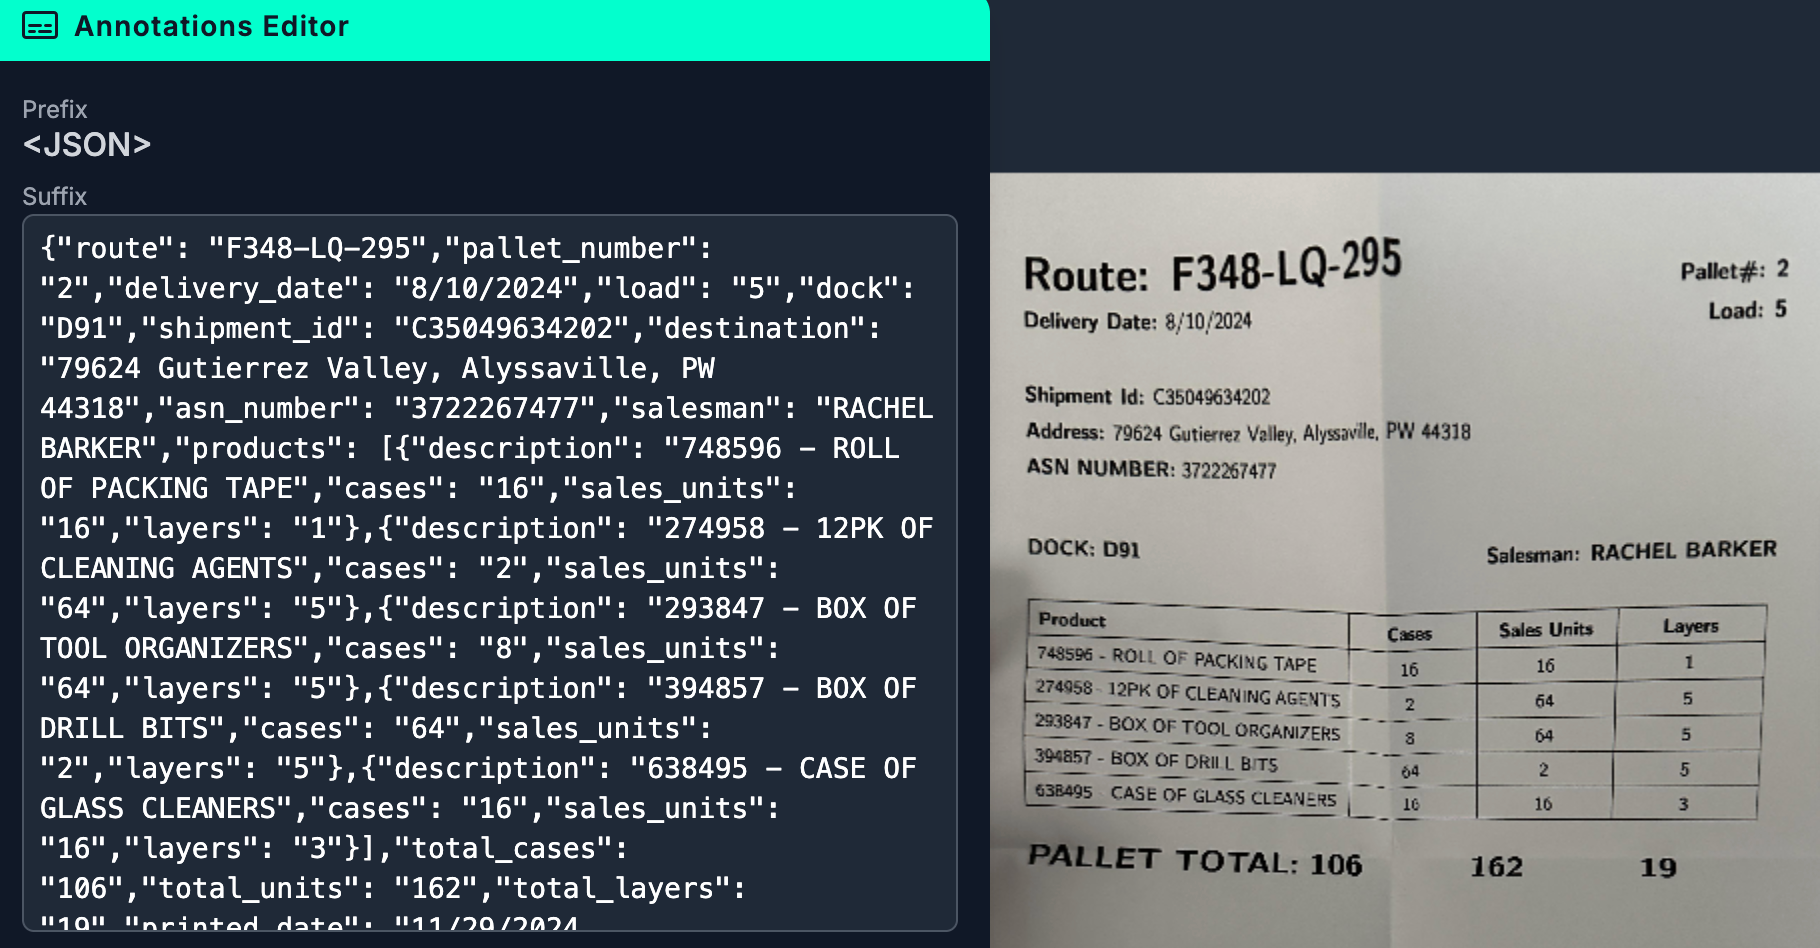
Before you annotate, you will need to set a prefix. This is the prefix used to prompt your SmolVLM2 model. You can set a Prefix from the “Classes & Tags” page:

For this guide, we will set a prefix that says <JSON>. This prefix will contain the JSON representation of our data. The prefix can be any value you want. You can set multiple prefixes.
To start annotating, click on the Annotate tab in the sidebar, choose the batch of images you uploaded, and select an image. You will be taken to the Roboflow Annotate interface from which you can label your images:
Once you have labelled your images, you are ready to generate a dataset version.
Step #3: Generate Version
A dataset version is a snapshot of your dataset frozen in time. You can use dataset versions to train models.
Click “Generate” in the left sidebar of your project. You will be taken to the dataset generation page.
On this page, you can set augmentations and preprocessing steps for your dataset. We recommend leaving the preprocessing and augmentation steps as the defaults for your first model. As you train future versions, you can experiment with different augmentations and preprocessing steps.
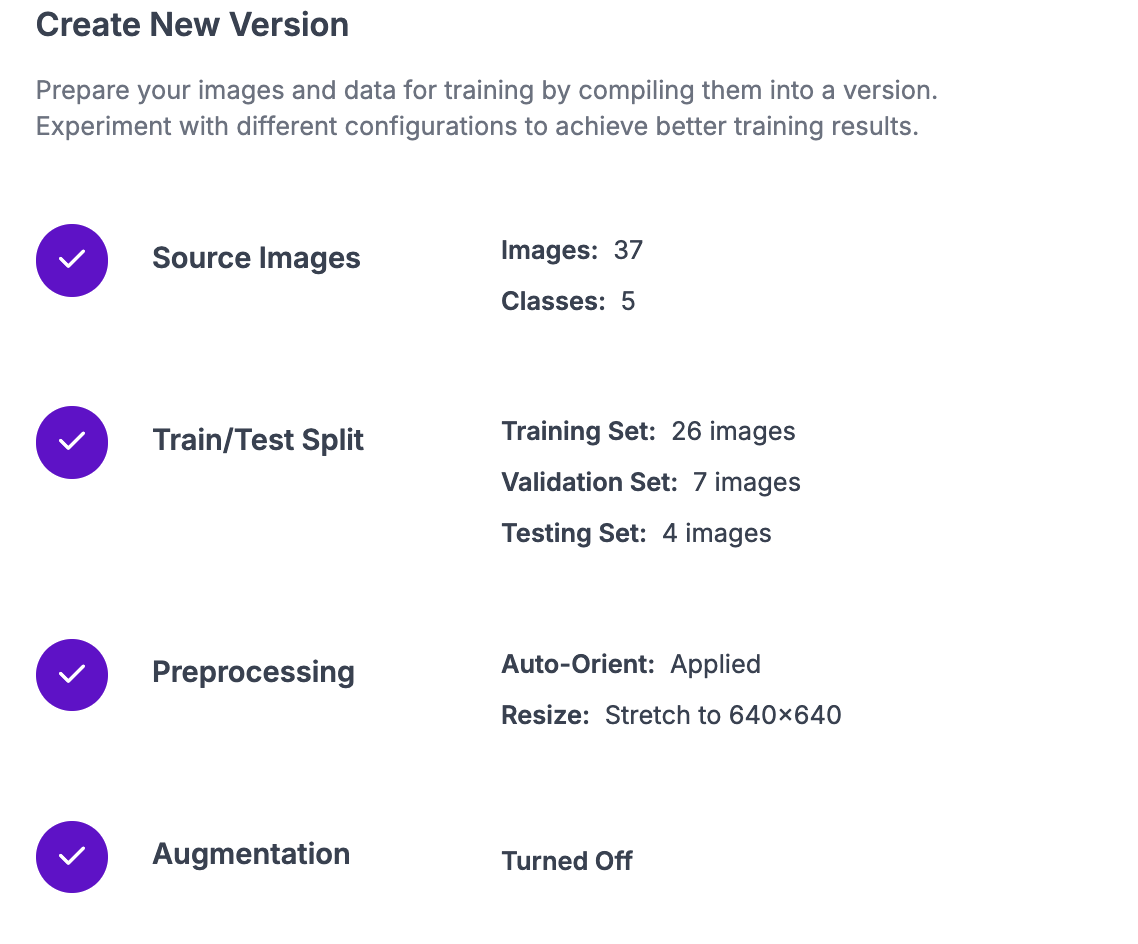
Click “Create” at the bottom of the page to generate your dataset version:
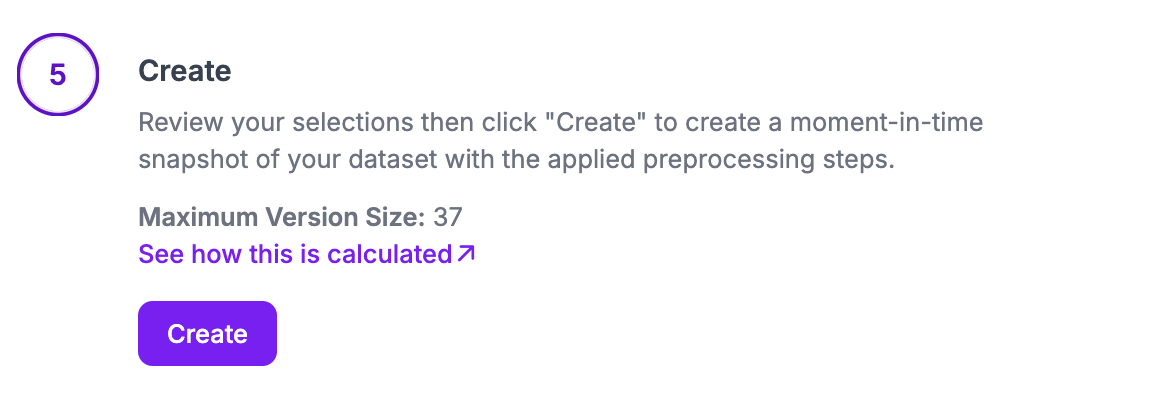
It may take a few moments for your dataset to be generated.
When your dataset is ready, you will be taken to a page from which you can train a model.

Step #4: Train a SmolVLM2 Model
With a generated version ready, we can start training a SmolVLM2 model.
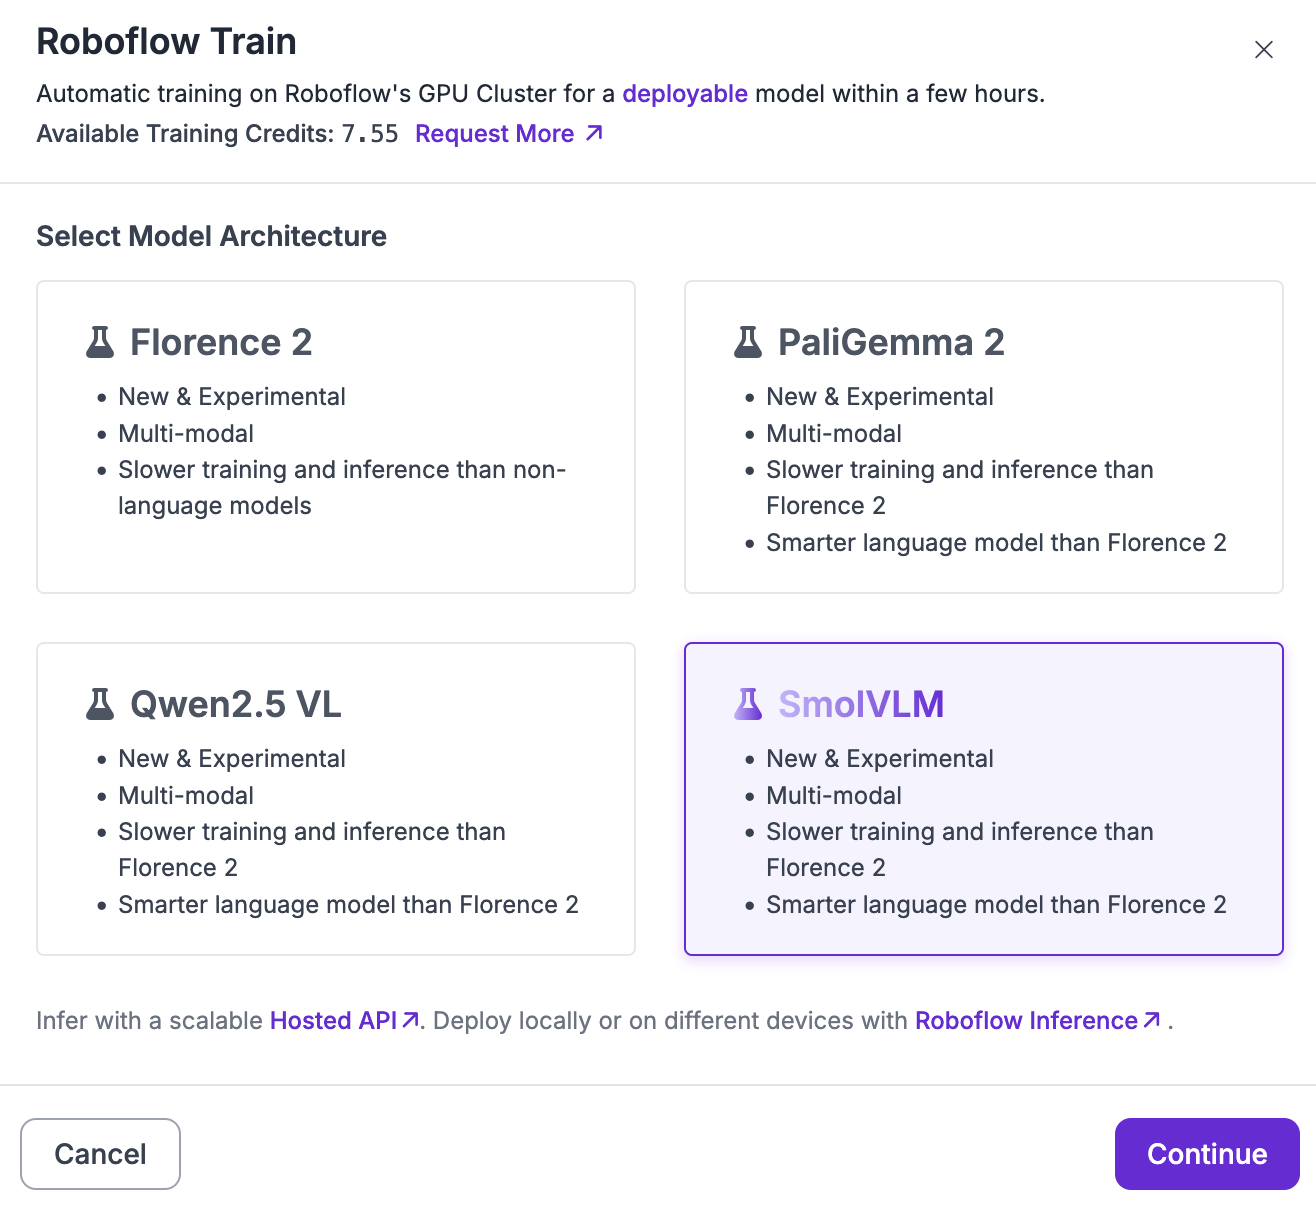
Click the “Custom Train” button on the page. A window will appear from which you can choose the model architecture you want to use. Select the SmolVLM training option:
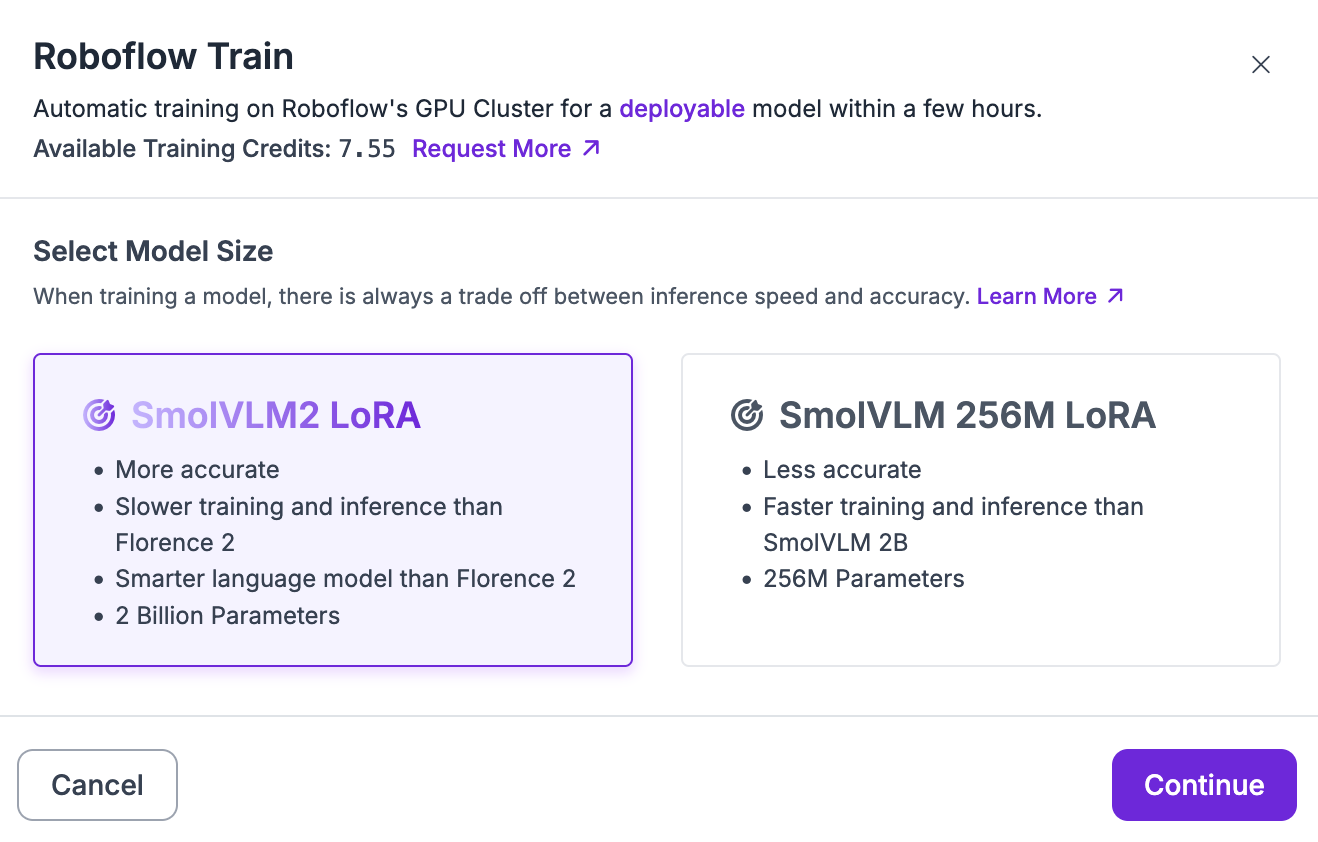
You will then be asked what version of SmolVLM you want to fine-tune. For this guide, we are going to fine-tune a SmolVLM2 model, the latest SmolVLM model developed by Hugging Face.
For your first model version, choose "Train from Pretrained Weights":

Click “Start Training” to start your training job.
The amount of time your training job will take will depend on the number of images in your dataset and the architecture you have chosen.
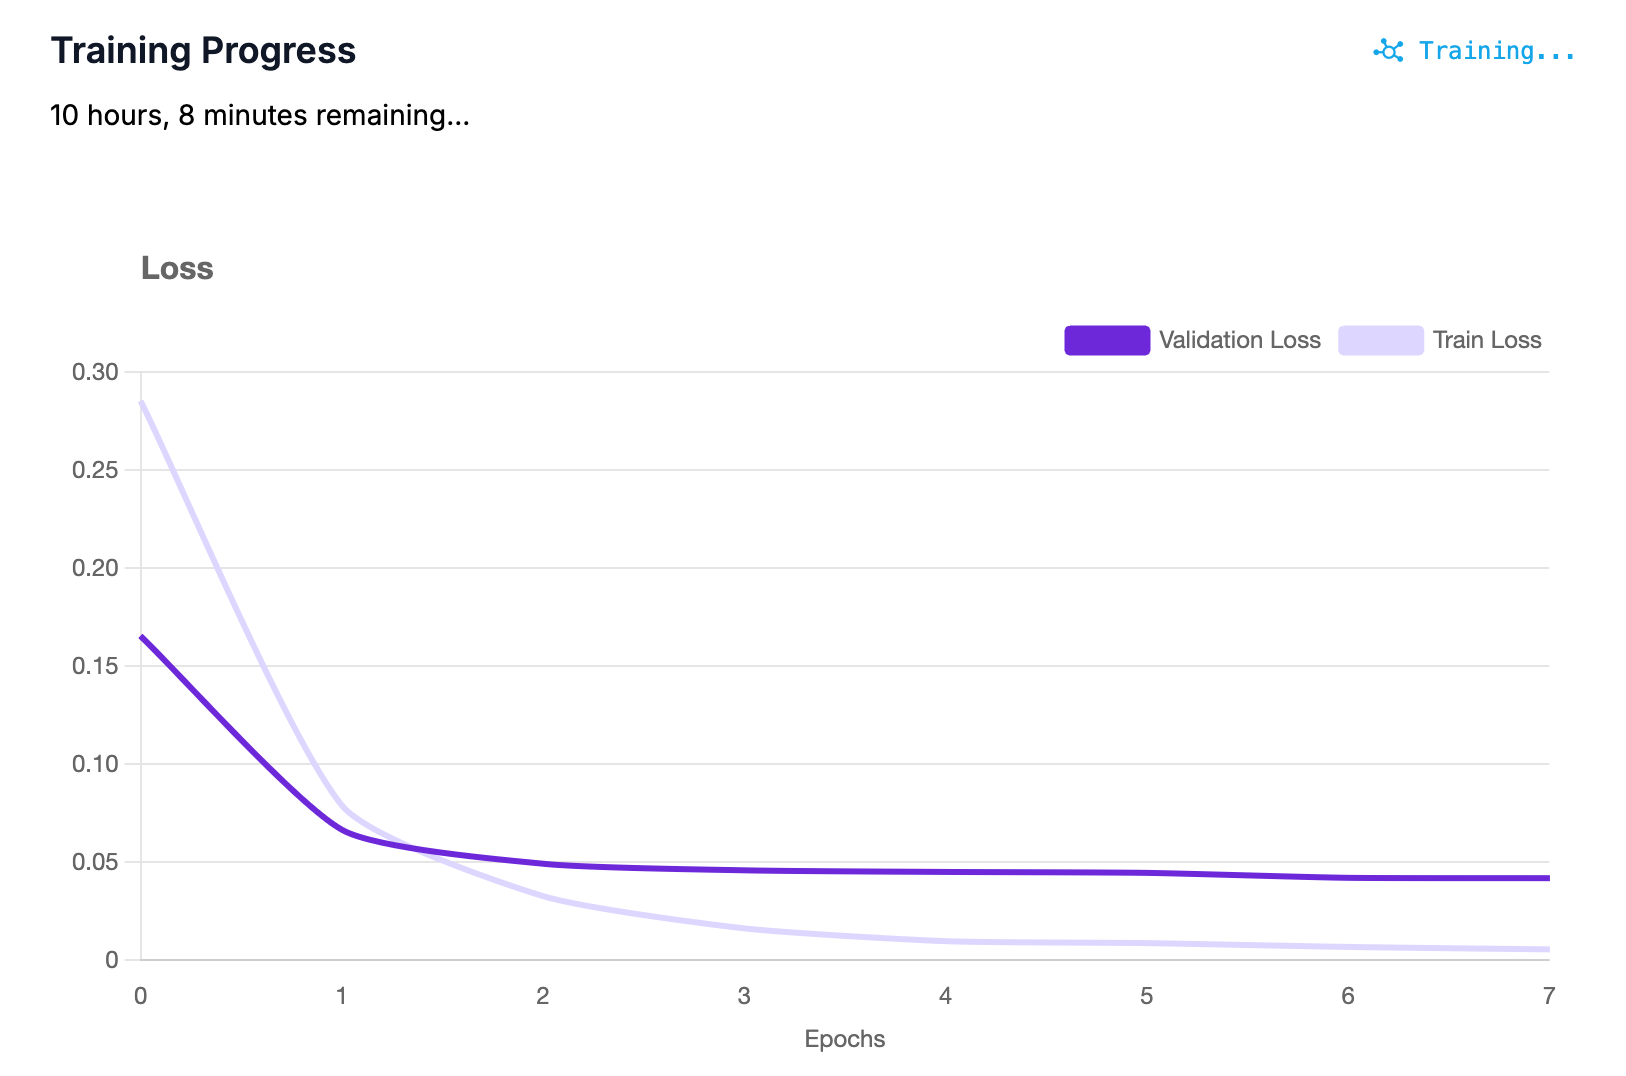
As your model trains, you can see training graphs showing the performance of your model:
Once your model has trained, you can deploy it in the cloud or using your own hardware.
Deploy a SmolVLM2 Model
To deploy SmolVLM2, we are going to use Roboflow Workflows, a web-based application builder for computer vision projects. To get started, click on the “Workflows” tab in the left sidebar of your Roboflow dashboard. Then, click “Create Workflow”.
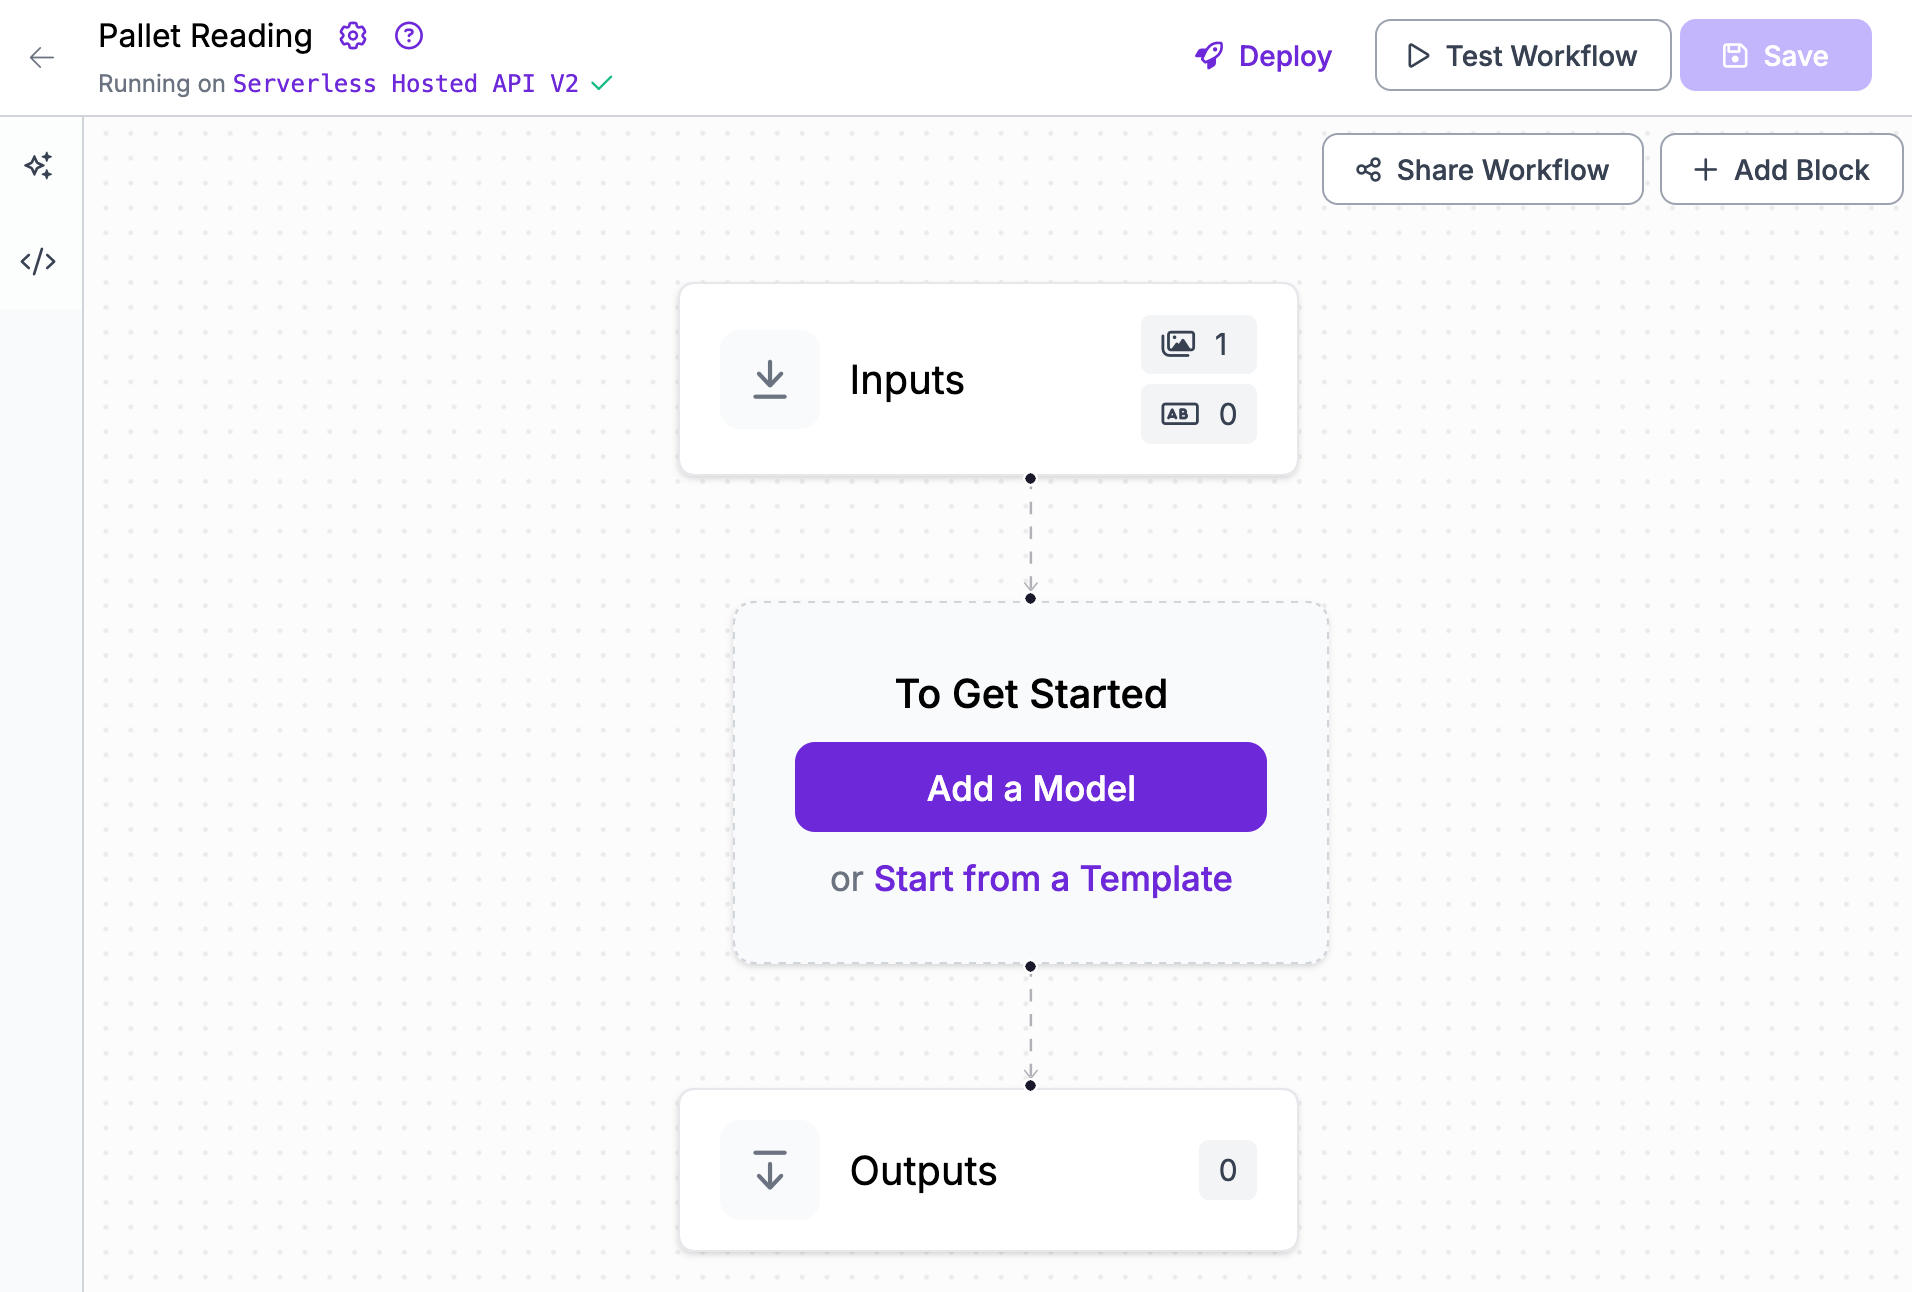
You will be taken to a blank Workflow:
Click “Add Model”, then search for SmolVLM. Click SmolVLM and add the block to your Workflow.
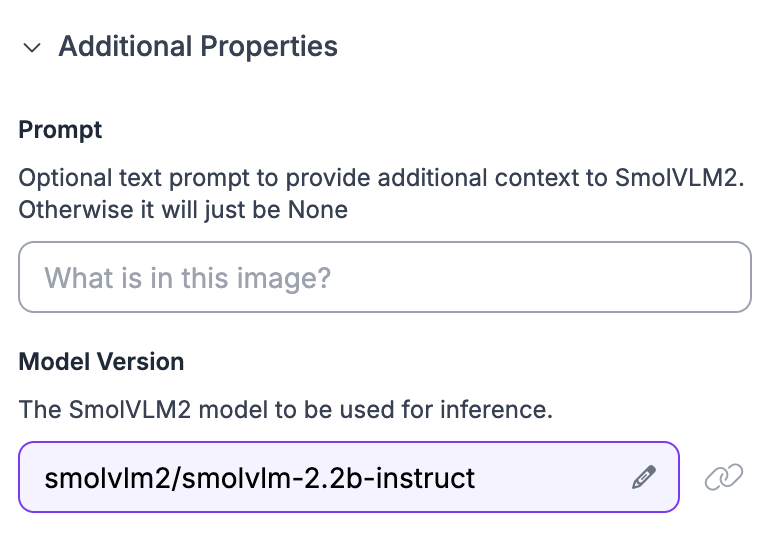
A configuration panel will open in which you can choose the SmolVLM model you want to run. You can choose from any of the models you have trained, as well as the base SmolVLM model weights.
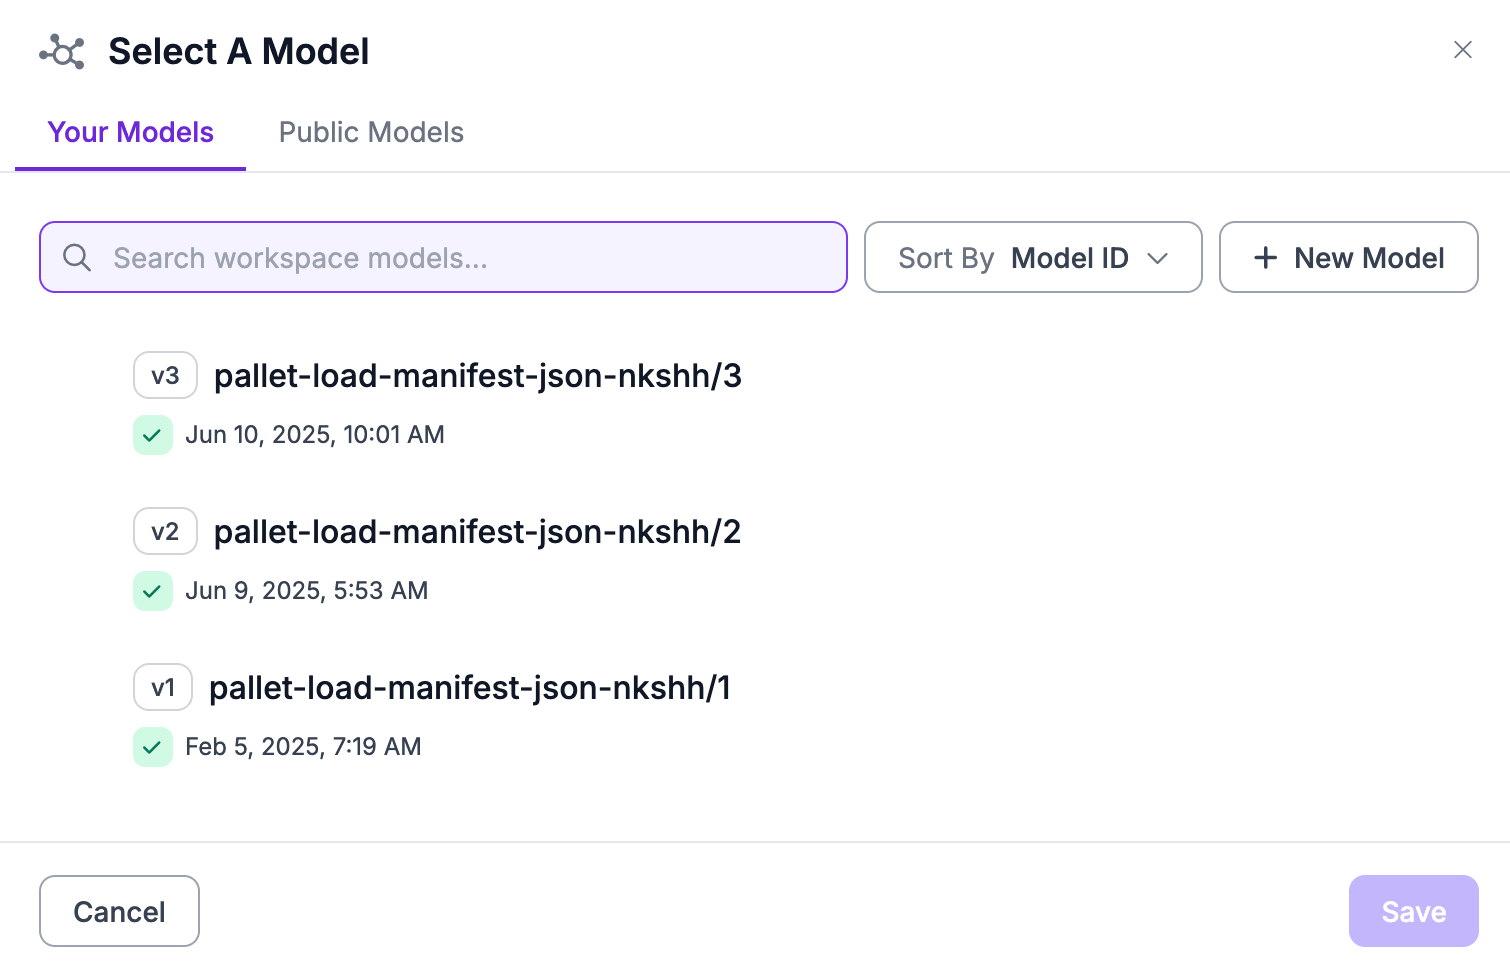
Click on the “Model Version” field:
Then, choose the model you trained earlier.
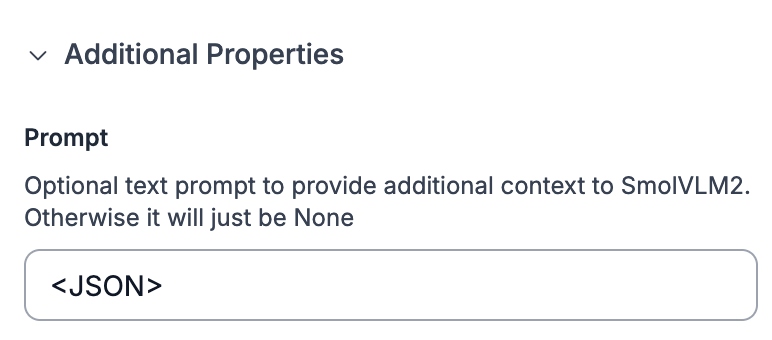
Then, set your "Prompt" to the prefix you used to annotate your data. In this guide, we used the <JSON> prefix:
To run our model, we need to either use a local version of Roboflow Inference, our computer vision inference server, or a Dedicated Deployment. A Dedicated Deployment is a cloud GPU provisioned exclusively for your use on which you can run Workflows.
For this guide, let’s use a Dedicated Deployment. Click the “Running on” option in the top right corner, then select “Dedicated Deployment”. Provision a GPU deployment. For more information on Dedicated Deployment and its pricing, refer to the Dedicated Deployment instructions.

We are now ready to test and deploy the model.
To test the model, click “Test Workflow” in the top right corner of the Workflows editor. Then, upload an image you want to use to test your model. You should use an image from your dataset test set.
Let’s use the following example image:

Our model returns the following JSON:
{
  "route": "A851-VL-185",
  "pallet_number": "19",
  "delivery_date": "6/13/2024",
  "load": "3",
  "shipment_id": "C46025610809",
  "dock": "D38",
  "destination": "11611 Joel Pine, Port Jose, MH 71117",
  "asn_number": "1371001333",
  "salesman": "ABIGAIL CHASE",
  "products": [
    {
      "description": "475839 - CASE OF VACUUM FILTERS",
      "cases": "4",
      "sales_units": "64",
      "layers": "1"
    },
    {
      "description": "345678 - BOX OF DISPOSABLE GLOVES",
      "cases": "2",
      "sales_units": "16",
      "layers": "3"
    },
    {
      "description": "482956 - CASE OF CARPET CLEAN-ERS",
      "cases": "16",
      "sales_units": "32",
      "layers": "1"
    },
    {
      "description": "495827 - CASE OF PLASTIC BAGS",
      "cases": "4",
      "sales_units": "8",
      "layers": "4"
    }
  ],
  "total_cases": "26",
  "total_units": "120",
  "total_layers": "9",
  "printed_date": "12/05/2024 10:14",
  "page_number": "5"
}
SmolVLM2 was able to successfully understand a receipt and return its contents as a JSON object. The JSON includes data like the products on the pallet, the dock ID, and other fields that our model was trained to identify.
To deploy your model, click “Deploy”. You will then see a code snippet that you can use to deploy your model. The code snippet looks like this:
from inference_sdk import InferenceHTTPClient
client = InferenceHTTPClient(
    api_url="https://serverless.roboflow.com",
    api_key="API_KEY"
)
result = client.run_workflow(
    workspace_name="WORKSPACE",
    workflow_id="WORKFLOW_ID",
    images={
        "image": "YOUR_IMAGE.jpg"
    },
    use_cache=True # cache workflow definition for 15 minutes
)
Replace the API URL with the URL associated with your Dedicated Deployment. When you run the code, your Workflow will run with your input image on your Dedicated Deployment.
You can also deploy the model on your own hardware with Inference. Click the “Run Locally” tab to see the code snippet you need to run your model on your hardware.
Conclusion
SmolVLM2 is a multimodal model developed by Hugging Face. You can fine-tune SmolVLM2 for visual question answering, structured information retrieval, and more.
In this guide, we fine-tuned SmolVLM2 to read shipping manifests. We prepared a dataset, then trained a model in the cloud. We then deployed the model in a Roboflow Workflow using a GPU Dedicated Deployment.
Cite this Post
Use the following entry to cite this post in your research:
James Gallagher. (Jun 23, 2025). How to Fine-Tune a SmolVLM2 Model on a Custom Dataset. Roboflow Blog: https://blog.roboflow.com/train-smolvlm2/