
One of the first steps in training accurate and reliable computer vision models on custom data is having access to high quality production image data. In many cases, this image data already exists in an internal system or database, just waiting to unlock computer vision use cases.
Today we’ll walk through uploading image data from a Databricks SQL warehouse into a Roboflow project to enable training custom computer vision models.
Prerequisites
Before we begin, we’ll be working with a few assumptions. First, we’ll assume that you already have a Databricks Workspace configured and image data stored as binary in a table. We’ll also assume that you have the access to a personal access token in Databricks with the correct read permissions. Lastly, we’ll assume you also already have a Roboflow account, a project created, and access to your Roboflow API key. With these assumptions in mind, let’s dive in.
Install Dependencies
In this blog we’ll be connecting to Databricks with the Databricks SQL Connector for Python. We’ll also use the Roboflow Python Package for uploading images and tags to our Roboflow projects. Lastly, we’ll install tqdm to display loading bars for our upload process. You can install these dependencies with pip by running the following.
pip install -q roboflow databricks-sql-connector tqdmDatabricks Environment Variables
In order to connect to our Databricks SQL warehouse with the sql connector, we’ll need three pieces of data. First, we’ll need some connection details for our Databricks compute resource; specifically the server hostname and the http path. This information can be found by following this Databricks documentation. We’ll also need a personal access token to authenticate to our resources which we can create by following these steps. Once we have these credentials let’s connect to Databricks.
Connecting to Databricks
We’ve got all the data we need to start querying our database. Let’s query our table with DESCRIBE to get a little more information about the contents of our table. This should return information including the column names and data types.
from databricks import sql

sql_statement = """
DESCRIBE nicks_test_workspace.default.images;
"""

with sql.connect(server_hostname=server_hostname, http_path=http_path, access_token=access_token) as connection:
   with connection.cursor() as cursor:
       cursor.execute(sql_statement)
       results = cursor.fetchall()
       print(results)
Notice that we’re using a sql connection and our environment variables to connect to our table. We can see that this table has four columns:
- “ID” of type int
- “bytes” of type binary
- “raccoon_name” of type varchar(255)
- “weight” of type float
Now that we’ve connected to our database and we have the ability to run sql queries, let’s make sure we have all the necessary environment variables needed to upload image data to our Roboflow project.
Roboflow Environment Variables
In order to upload image data to Roboflow we’ll need our workspace id, project id, and an api key. First, let’s grab our Roboflow Private API key by following these instructions. We’ll also need our “workspace id” and our “project id” which can be found here.
This information can also be found on the project page in the URL as seen below.
https://app.roboflow.com/{workspace_id}/{project_id}/annotate
Upload Images to Roboflow from Databricks
Now that we’ve collected our Roboflow information, let’s upload images to our project. First, we’ll change our sql statement to pull in the “raccoon_name” and “weight” from our table and use a function to parse the response into useful tags for our images. We’ll also save our bytes to a python tempfile so it can be uploaded utilizing the Roboflow python package. Notice how we’re also grabbing the total length of images returned to help gain feedback for our progress bar.
from databricks import sql
from roboflow import Roboflow
from tqdm import tqdm
import tempfile
from pathlib import Path
def parse_tags(data_dict):
# Remove 'bytes' key from the dictionary
if 'bytes' in data_dict:
del data_dict['bytes']
# Create a list with concatenated key-value pairs
tags = [f'{key}: {value}' for key, value in data_dict.items()]
return tags
# Initialize roboflow python client
rf = Roboflow(api_key=api_key)
project = rf.workspace(workspace).project(project)
sql_statement = """
SELECT
img.bytes,
img.weight,
img.raccoon_name
FROM
nicks_test_workspace.default.images as img
LIMIT
2
"""
with sql.connect(server_hostname=server_hostname, http_path=http_path, access_token=access_token) as connection:
with connection.cursor() as cursor:
cursor.execute(sql_statement)
results = cursor.fetchall()
total_length = len(results)
for row in tqdm(results, total=total_length):
tags = parse_tags(row.asDict())
with tempfile.NamedTemporaryFile(suffix=".jpeg") as tmp_file:
tmp_file.write(row.bytes)
path = Path(tmp_file.name)
project.upload(
str(path),
tag_names=tags,
batch_name="data-bricks-upload",
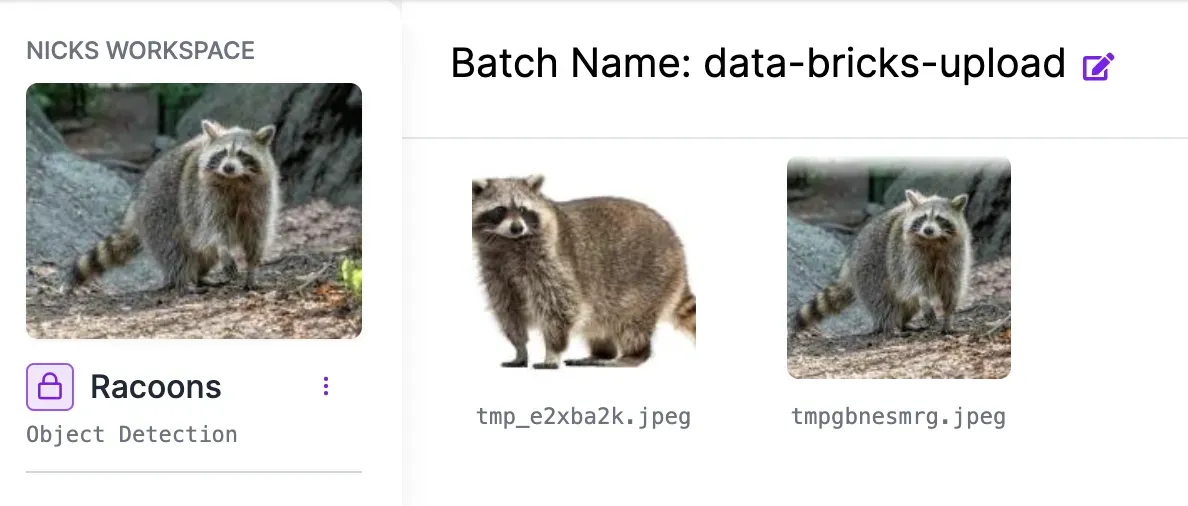
)After running the code, we can see that we’ve successfully uploaded two images of racoons from Databricks into our Roboflow project.
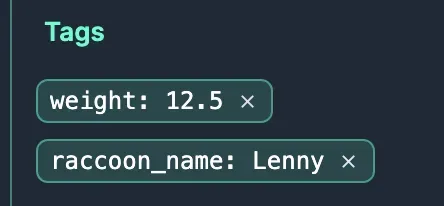
On closer inspection, we can also see that we successfully tagged our images with metadata that was alongside our image bytes stored in the database.
From here, you can build computer vision models on our custom data. We’re looking forward to seeing what you build.
Checkout the latest custom model training guides to try training state-of-the-art models with your data: