
Effective hand cleaning is essential to healthcare, restaurants, and most businesses. However, how can we guarantee that the hand washing process is done properly, without fail? With this computer vision project, I have integrated real-time feedback and computer vision to develop a hand-washing steps-tracking system using a Python application and a Roboflow-trained model. Here is how it all works together:
Build a Real-Time Process Tracking Application with Computer Vision Step-By-Step
Let's jump into it!
Part 1: Create the Handwashing Step Recognition Model
For my project I wanted to recognize eight distinct handwashing steps from a live video feed. Each step (e.g., “Palms Together,” “Fingers Interlaced”) must be detected reliably, so I can track how long each is performed.
1. Collect images
For this, I simply gathered video footage of myself performing each handwashing step. You can use my model. However, I highly suggest you do it yourself to obtain the best results in your own environment.
Use a smartphone, webcam (preferably connected to your laptop), or camera in a well-lit environment. Record multiple times, with different backgrounds and lighting conditions, to make the model robust.
2. Annotate images
After this, we want to upload our video as images to Roboflow, so we will create a new classification project.
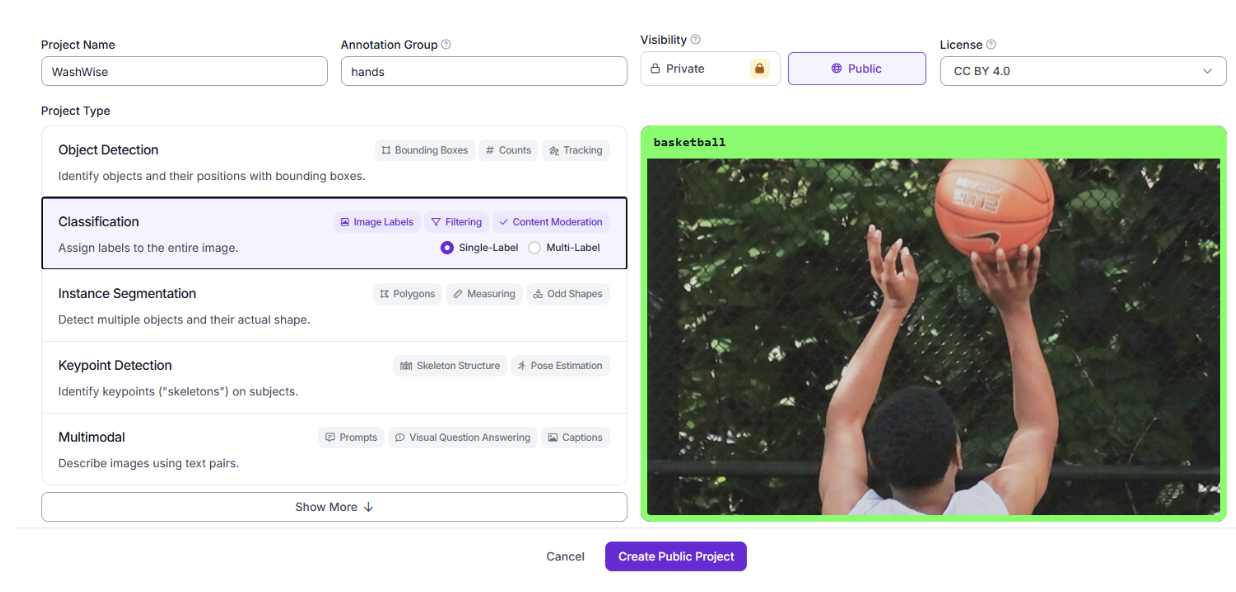
We will then upload the video, and split it up into 20-30 frames per second using Roboflow’s importing capabilities.
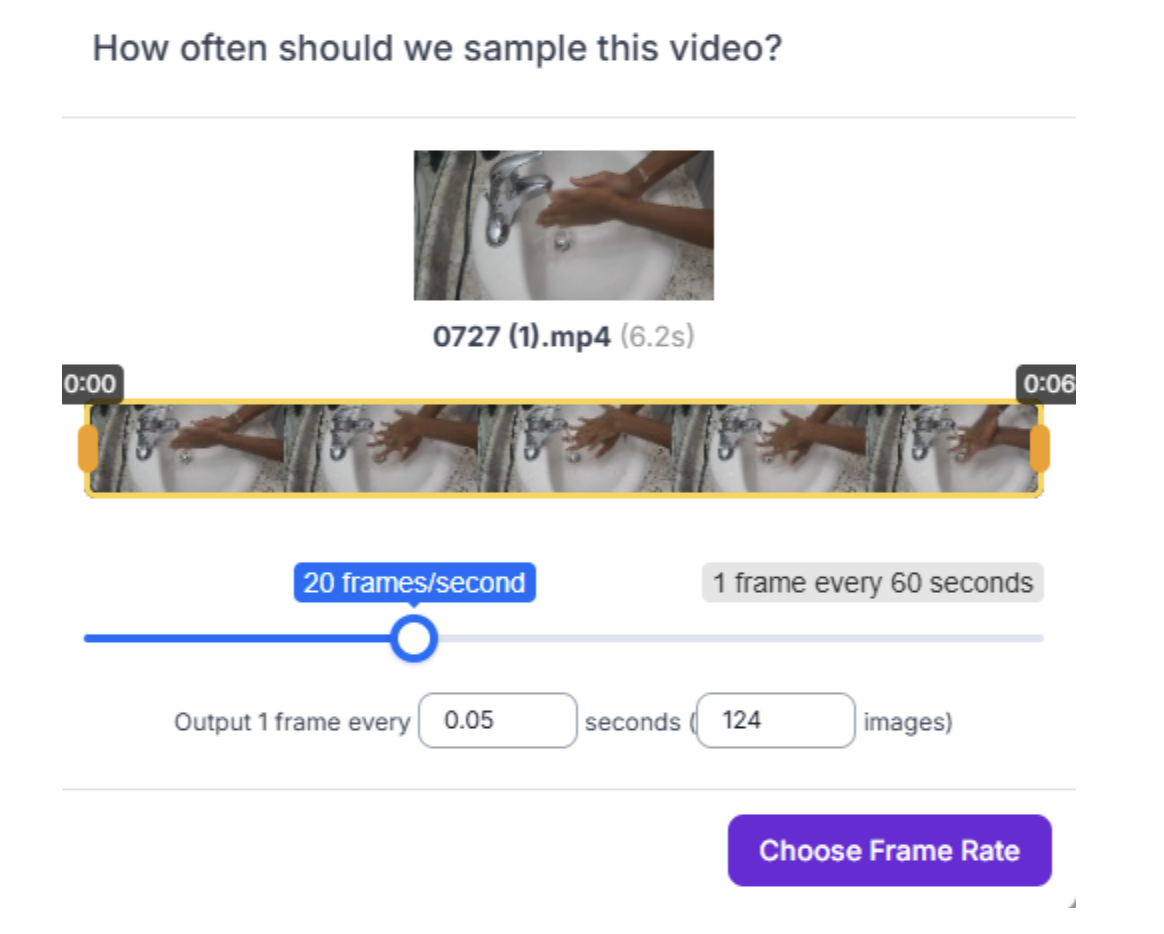
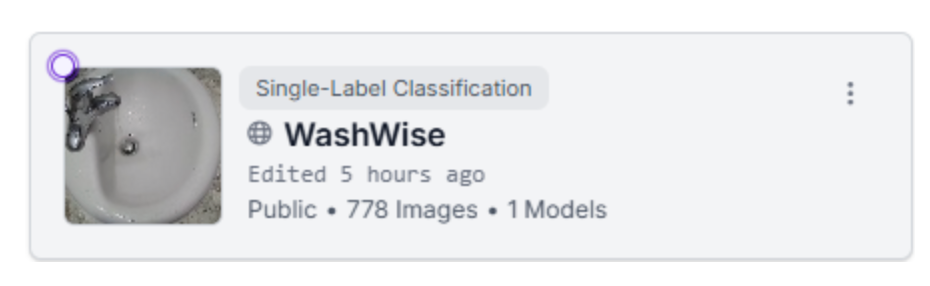
It's important to have enough images for the model to be accurate. My project had around 780 images that were annotated.
Now it's time to begin annotating. For each image, we will assign the correct class label (e.g., “palms together,” “right palm on left dorsum”). Consistency is key; we will make sure labels match your intended step names.
After all of the images have been annotated, we will add them to the dataset. I like keeping the recommended values by Roboflow for Training, Validation, and Testing, but this can be changed according to your preference. Then we start training the model. We can add the greyscale pre-processing step to prevent color-bias in the model and stretch the images to 640 by 640 pixels based on Roboflow’s preference.
3. Train a model
Finally, we can custom-train our model on the ViT model.
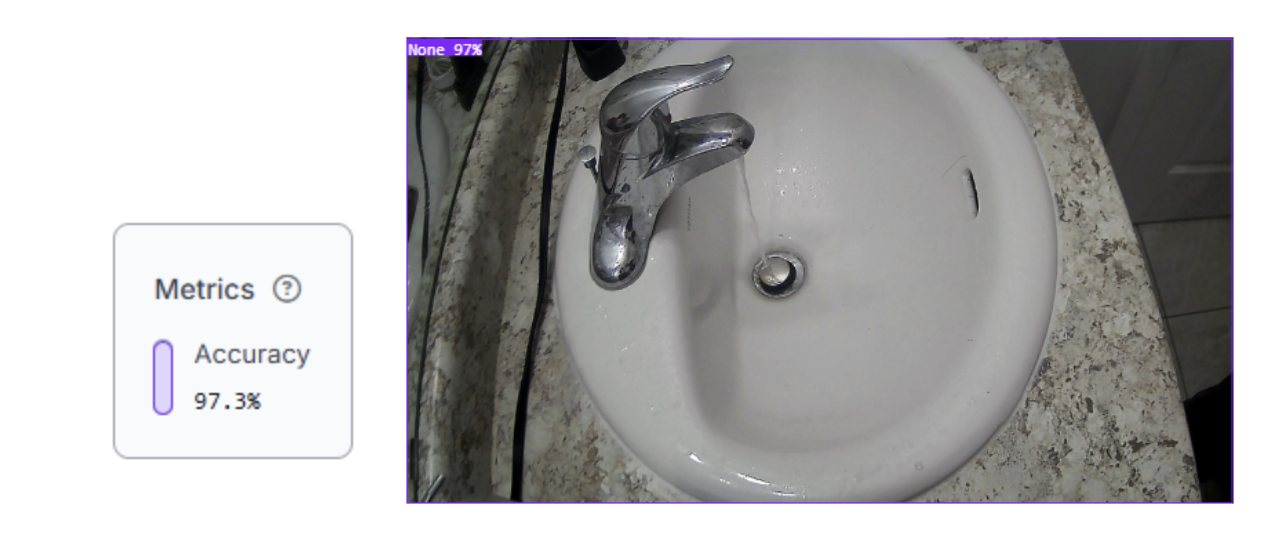
After the model is completed, we should monitor accuracy. If accuracy is low, we can collect more data or refine our labels. In my case, we did not need to, as accuracy was already quite high. The next step is to test the model using images to see if it is viable.
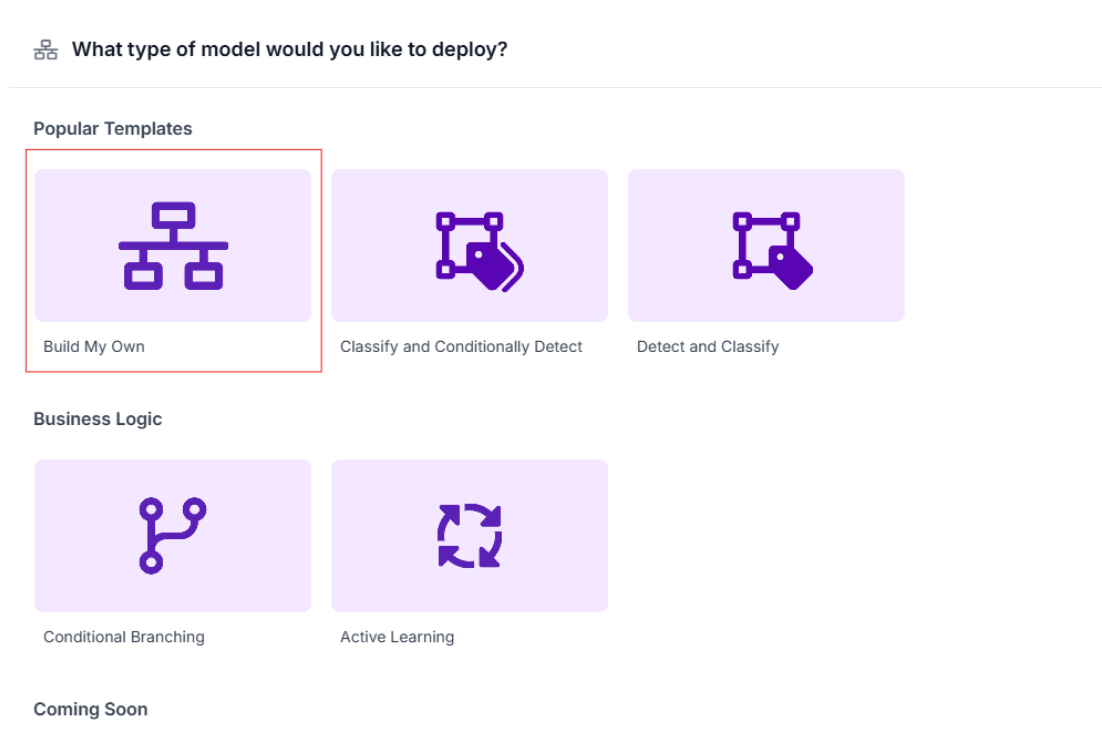
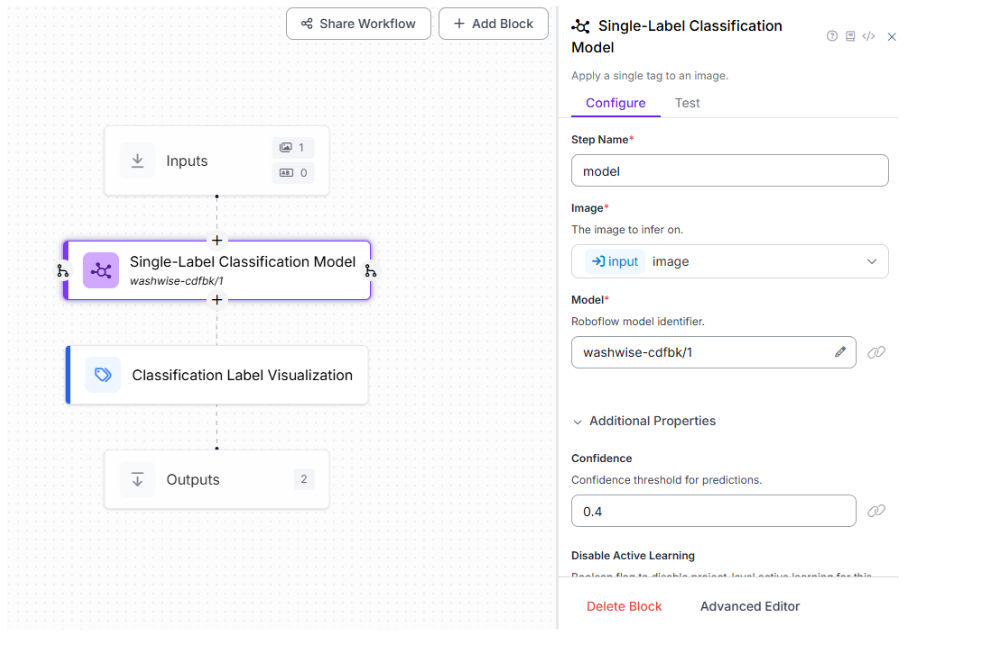
4. Create a workflow
After this, we will create a Roboflow Workflow. I chose to create my own rather than use the pre-existing templates that Roboflow offers. This makes it accessible via API for real-time inference.
I left the confidence threshold at 0.4.
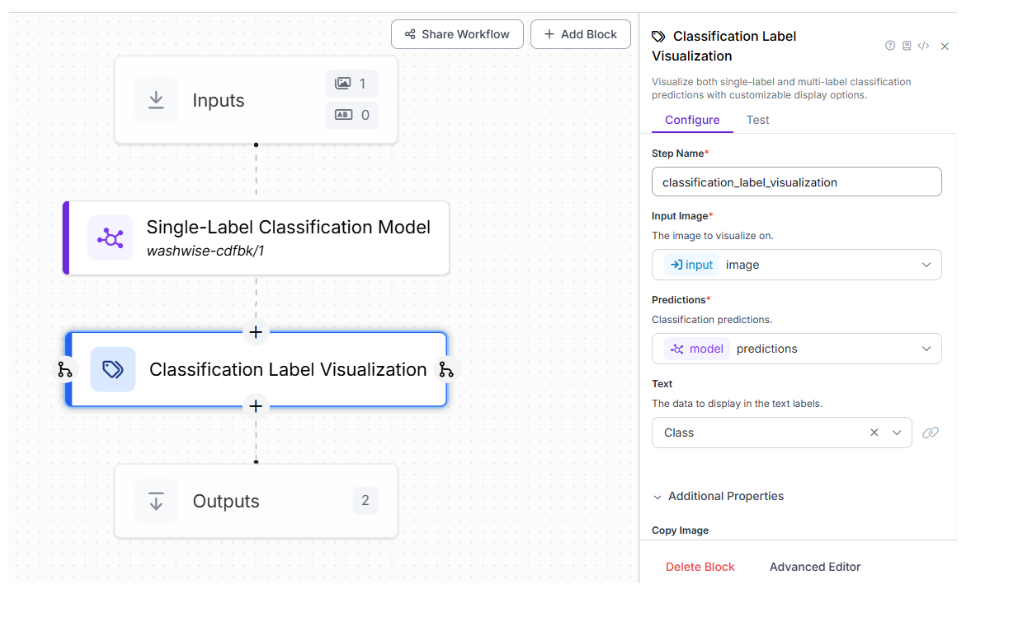
We can also add a classification Label Visualization block to put the predictions on the screen.
5. Deploy the model
After this, we’re ready to deploy. We will use Roboflow’s provided code, and add a GUI using OpenCV in Python to make the user experience easy and efficient.
Part 2: Building the Real-Time Python Application
We will first create a virtual environment and install required packages (roboflow-inference, opencv-python, python-dotenv, etc.), which are all provided in the requirements.txt file on GitHub. Then we will store the Roboflow API key and workflow details in a .env file for security. For assistance with .env files, please check this article.
To have this working, we will need to write some more code.
The section below sets up the real-time connection between our webcam and the deployed Roboflow model. By using the InferencePipeline, every frame from our camera is sent to the model for classification. The my_sink function acts as a callback, processing each prediction and frame.
If our workflow returns a visualization (like a labeled image), it’s displayed; otherwise, the raw frame is shown. Printing the prediction results to the console is useful for debugging and understanding what the model sees, as shown in the code below.
This architecture allows for instant feedback, making the system interactive and user-friendly. The modular callback design means we can easily add more logic (like tracking or logging) as needed, which is why we use this code:
# Import the InferencePipeline object
from inference import InferencePipeline
import cv2
import os
from dotenv import load_dotenv


# Load environment variables from .env file
load_dotenv()


API_KEY = os.getenv("API_KEY")
WORKSPACE_NAME = os.getenv("WORKSPACE_NAME")
WORKFLOW_ID = os.getenv("WORKFLOW_ID")


def my_sink(result, video_frame):
    # Check if the result contains the key for the visualization output from the workflow
    # Note: The key name 'classification_label_visualization' must match the output name in your Roboflow workflow.
    if "classification_label_visualization" in result and result["classification_label_visualization"] is not None:
        # Display the image received from the workflow
        cv2.imshow("Workflow Image", result["classification_label_visualization"].numpy_image)
        cv2.waitKey(1)
    else:
        # If no visualization, just show the raw frame
        cv2.imshow("Live Feed", video_frame.numpy_image)
        cv2.waitKey(1)

    # Print the full prediction results to the console
    print(result)


# initialize a pipeline object
print("Initializing pipeline...")
pipeline = InferencePipeline.init_with_workflow(
    api_key=API_KEY,
    workspace_name=WORKSPACE_NAME,
    workflow_id=WORKFLOW_ID,
    video_reference=0, # Path to video, device id (int, usually 0 for built in webcams), or RTSP stream url
    max_fps=30,
    on_prediction=my_sink
)


print("Starting pipeline...")
pipeline.start() #start the pipeline
pipeline.join() #wait for the pipeline thread to finish
print("Pipeline finished.")
cv2.destroyAllWindows()
The StepTracker class is the core of our compliance logic. It ensures that each handwashing step is performed for a minimum amount of time (e.g., 10 seconds). When a step is detected, the tracker starts a timer; when the step changes or ends, it adds the elapsed time to the total for that step.
This prevents us from simply rushing through the motions and encourages proper technique. The tracker also normalizes step names to avoid mismatches due to formatting differences. By calling get_status, we can retrieve the current progress for each step, and all_steps_complete lets us know when the user has fulfilled all requirements, as shown below:
import time
class StepTracker:
"""
A class to track the progress of a multi-step process, like handwashing.
It measures the cumulative duration each step is performed and checks against a target time.
"""
def __init__(self, target_duration_seconds=10):
"""
Initializes the StepTracker.
"""
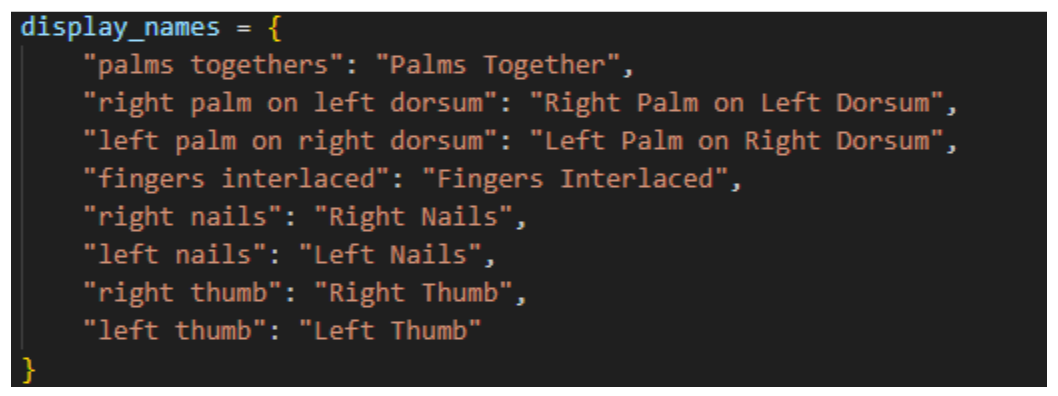
self.steps = {
"palms togethers",
"right palm on left dorsum",
"left palm on right dorsum",
"fingers interlaced",
"right nails",
"left nails",
"right thumb",
"left thumb"
}
self.target_duration = target_duration_seconds
self.durations = {step: 0 for step in self.steps}
self.current_step = None
self.current_step_start_time = None
def update(self, detected_step):
"""
Updates the duration for a detected step.
"""
# Roboflow might return class names with underscores or be 'None'
normalized_step = "none"
if detected_step:
normalized_step = detected_step.replace("_", " ").lower()
# If the detected step is not one we are tracking, or it's "None", it marks the end of a pose.
if normalized_step not in self.steps:
if self.current_step is not None:
# Add the duration of the last pose to its total
duration = time.time() - self.current_step_start_time
self.durations[self.current_step] += duration
print(f"Stopped tracking '{self.current_step}'. Total duration: {self.durations[self.current_step]:.2f}s")
# Reset current step since no valid pose is detected
self.current_step = None
self.current_step_start_time = None
return
# If this is a new, valid step being detected
if normalized_step != self.current_step:
# First, log the time for the previous step if there was one
if self.current_step is not None:
duration = time.time() - self.current_step_start_time
self.durations[self.current_step] += duration
print(f"Stopped tracking '{self.current_step}'. Total duration: {self.durations[self.current_step]:.2f}s")
# Then, start the timer for the new step
self.current_step = normalized_step
self.current_step_start_time = time.time()
print(f"Started tracking: '{self.current_step}'")
def get_status(self):
"""
Returns the current durations and target for display purposes.
Includes the actively accumulating time for the current step.
"""
display_durations = self.durations.copy()
if self.current_step is not None:
elapsed = time.time() - self.current_step_start_time
display_durations[self.current_step] += elapsed
return display_durations, self.target_duration
def all_steps_complete(self):
"""
Checks if all steps have reached their target duration.
"""
for step in self.steps:
if self.durations[step] < self.target_duration:
return False
return True
We will then create a GUI window using OpenCV that shows progress bars for each step. When all steps reach the target duration (e.g., 10 seconds), display a completion message.
The create_status_image function builds a custom GUI window using OpenCV, showing progress bars for each handwashing step. As we complete each step, the progress bar fills up and changes color.
When all steps reach the target duration, a clear completion message is displayed, letting us know we are “good to go.” This real-time visualization motivates users to complete every step properly and provides a sense of accomplishment. The GUI is fully customizable; colors, fonts, and layout can be adjusted to fit your needs or branding.
import cv2
import numpy as np


def create_status_image(durations, target_duration, all_complete):
    """
    Creates an image to display the status of the handwashing steps.
    """
    # Image dimensions and colors
    width, height = 800, 600
    background_color = (20, 20, 20)  # Dark grey
    text_color = (230, 230, 230)     # Light grey
    bar_background = (50, 50, 50)
    bar_color_incomplete = (220, 180, 0) # Yellow
    bar_color_complete = (0, 200, 80)     # Green
    font = cv2.FONT_HERSHEY_SIMPLEX


    # Create a black image
    status_img = np.full((height, width, 3), background_color, dtype=np.uint8)


    # --- Title ---
    cv2.putText(status_img, "Handwashing Progress", (50, 60), font, 1.5, text_color, 3, cv2.LINE_AA)


    if all_complete:
        # --- Completion Message ---
        cv2.putText(status_img, "All Steps Complete!", (150, 250), font, 2, bar_color_complete, 4, cv2.LINE_AA)
        cv2.putText(status_img, "You are good to go!", (200, 350), font, 1.5, text_color, 3, cv2.LINE_AA)
    else:
        # --- Progress Bars ---
        y_pos = 120
        for step, duration in durations.items():
            # Draw the background of the progress bar
            cv2.rectangle(status_img, (50, y_pos), (width - 50, y_pos + 40), bar_background, -1)


            # Calculate progress
            progress = min(duration / target_duration, 1.0) # Cap at 100%
            bar_width = int(progress * (width - 100))

            # Determine bar color
            bar_color = bar_color_complete if progress >= 1.0 else bar_color_incomplete


            # Draw the progress bar
            if bar_width > 0:
                cv2.rectangle(status_img, (50, y_pos), (50 + bar_width, y_pos + 40), bar_color, -1)


            # Draw the text label for the step
            label = f"{step.replace('_', ' ').title()}: {duration:.1f}s / {target_duration}s"
            cv2.putText(status_img, label, (60, y_pos + 28), font, 0.7, text_color, 2, cv2.LINE_AA)

            y_pos += 60


    return status_img
Why Is This Useful?
For hospitals, it ensures that staff follow every step of hand hygiene protocols, reducing infection risk. For food service, it assists staff with proper hygiene to avoid contamination and food poisoning. Lastly, for many businesses in general, it encourages public health and safety rule compliance.
Building a Real-Time Process Tracker with Computer Vision
Ready to build your own? Start by recording your data, train your model on Roboflow, and use the provided Python code to bring your handwashing tracker to life! This is the GitHub with all the provided code.
Have fun staying safe.
Written by Aarnav Shah
Cite this Post
Use the following entry to cite this post in your research:
Contributing Writer. (Jul 29, 2025). Real-Time Process Tracking with Computer Vision. Roboflow Blog: https://blog.roboflow.com/build-handwashing-tracker/