
About a month ago, I quit drinking coffee cold-turkey. Up until that point, I regularly consumed coffee, and I had been experimenting with having more coffee in my day because I both enjoyed the taste and the ritual of making coffee. This gradual increase, although initially tasty, was not a wise idea: my body didn’t enjoy the amount of caffeine I had consumed.
Recently, I thought: what if I had a system to remind me when I was about to hit the point at which coffee goes from being a productivity-booster to inducing negative side-effects? I also wondered whether that same system could apply to tea, which I had started drinking more regularly? I didn’t need to wonder, however: I could build a system to solve this problem.
In this article, I’m going to talk through my experience building a tool that lets me track how many cups of caffeinated beverages I have in a day. I’m also going to walk through how you can make a model just like the one I made yourself. Without further ado, let’s begin.
Defining the Problem
To set myself up for success, I started where all computer vision projects should. I asked myself what problem I wanted to solve. I could then use this information to inform a potential solution. I noted that the problem I wanted to solve was having a clear insight into how many cups of tea or coffee I had consumed in a day.
This project should be beverage-agnostic. I am more interested in how many cups of caffeinated beverages I consume, which is easy to automate, than I am the proportion of cups of tea versus coffee. I usually drink only tea or coffee at home. By keeping the scope small, I could focus more on solving the problem that mattered to me.
With a clear problem statement in mind – build a way to track how many cups of tea or coffee I had consumed in a day – I got to work and started planning out my solution.
Planning the Solution
To solve my problem, I decided to use computer vision. I could point a camera at an area on my desk and use the presence or absence of a cup as an indicator as to whether or not I was going to make a cup of tea or coffee.
Of course, I noted that my cup being gone for a short while is not indicative of going to make a caffeinated beverage. I could instead be taking a sip from my mug. With that in mind, I decided that my model should only record that I have gone to make a cup of tea or coffee if my mug is away from my coaster for more than two minutes.
Then, I needed to decide how I should record my data. I settled on saving the time at which I make a cup of tea to a JSON file for later processing. I also decided that when I go to make tea I want my Slack status to update. This element made the project more social: my teammates can see when I’m away to make a cup of tea.
Now I had a solution in mind, I proceeded to bring this solution to fruition.
Monitoring Cups with Computer Vision
Let’s discuss how I monitor cups with computer vision. By the end of this section, you’ll have what you need to build a model that detects cups in an image.
Step 1: Collect and Annotate Images
To build a model, we need data. Luckily for me, I have a surplus of mugs at home, even though I only use a select few of them. All of the mugs came in handy for this project. I used my iPhone to take photos of mugs across my house on different surfaces and with different backgrounds.
I paid special attention to the area in which my model would be deployed – my desk – to help ensure my model would perform well in that environment. Indeed, when you are training a computer vision model, you need to consider the environment in which it will be deployed. I only want to use my model on my desk, so I took a lot of photos of cups on surfaces including my desk. (I took a few with me holding a cup, too, in case I wanted to showcase the model with my webcam to show how it can track a mug!)
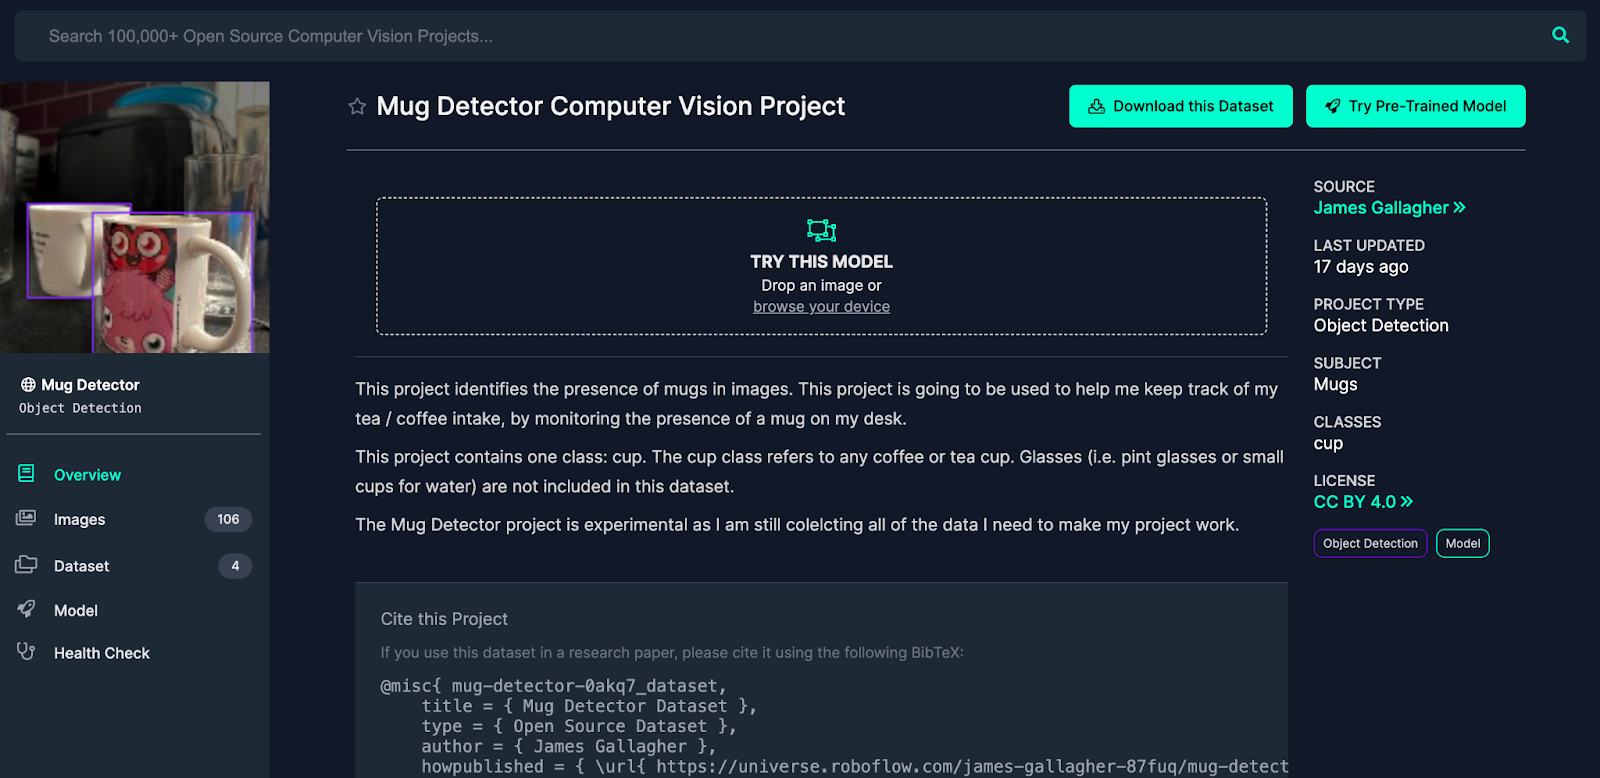
If you want to build a model like mine, you can download my “Mug Detector” dataset from Roboflow Universe. Click on “Dataset” then “Download”. Select a format compatible with RF-DETR, such as COCO JSON. Then, copy the command you are given and run it in your terminal. This command will save the annotated data to your computer. You can also clone the dataset into your Roboflow account, which bypasses the need to download then re-upload the images so long as you have already created a project. See the next step for guidance on how to do create a project.
Alternatively, you can create your own dataset of images.
Step 2: Upload your images
With a dataset of images ready, we can now proceed to create a project in Roboflow and upload our images. Roboflow lets me worry less about the computer vision back-end and more so about solving my problem.
First, let’s create a project in Roboflow. If you don’t already, you will need to create an account on the platform. Here is the modal you’ll see when you create a new project from the Roboflow dashboard:
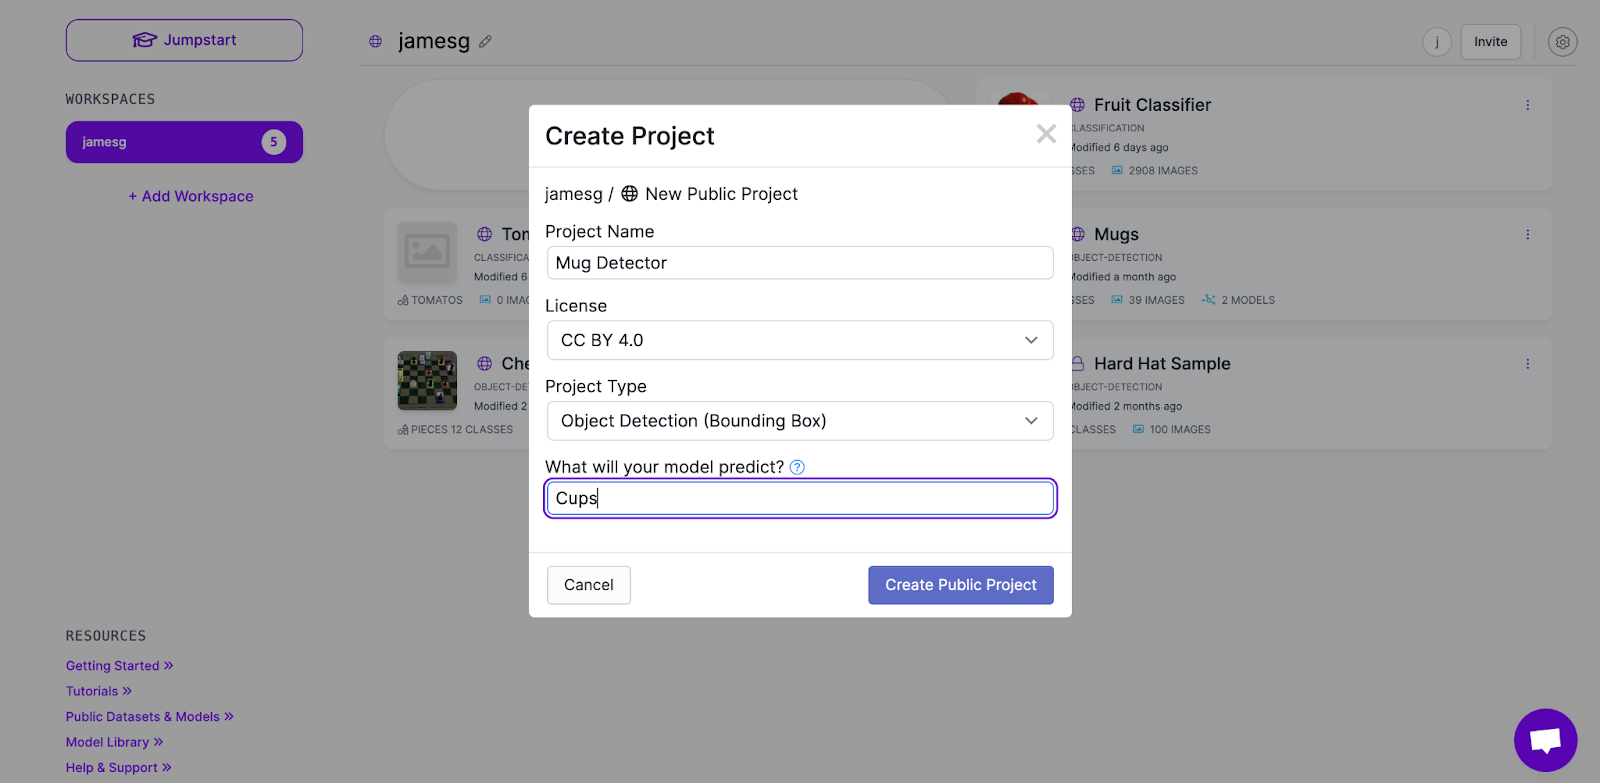
Select the “Object detection (bounding box)” project type. This is because our project needs to be able to detect the presence of mugs in an image.
Next, upload all of your images of mugs, or the data from the Mug Detector Roboflow Universe dataset. I’m going to use the Universe dataset since it includes all of the images I took.
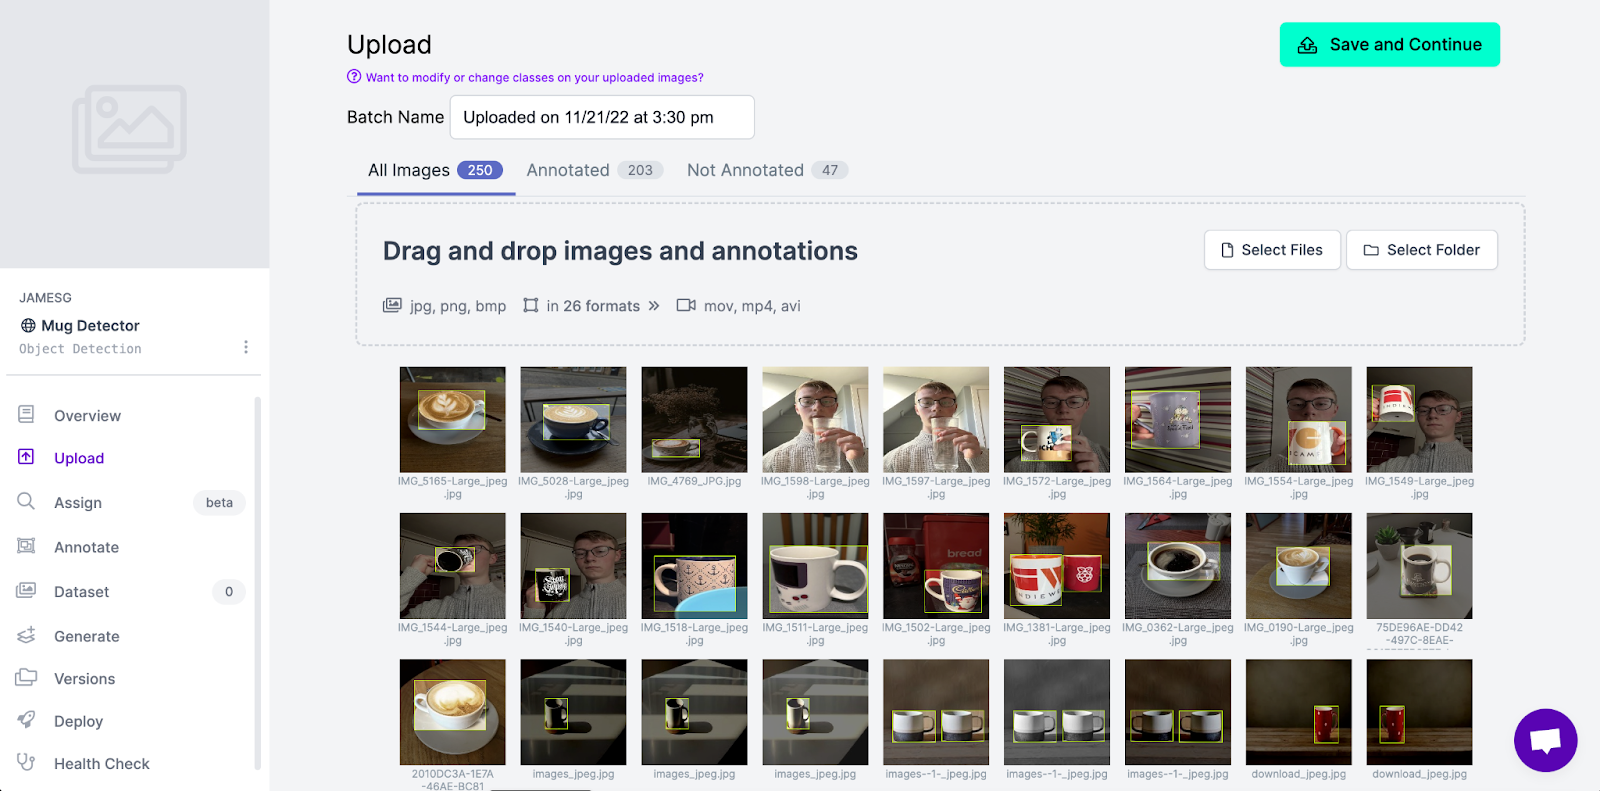
Step 3: Annotate your images
Next, you’ll need to annotate the images in your dataset. In the Roboflow dashboard, click “Annotate” in the sidebar. Then, click on the first image in the list of unannotated images. From there, you’ll be able to start annotating.
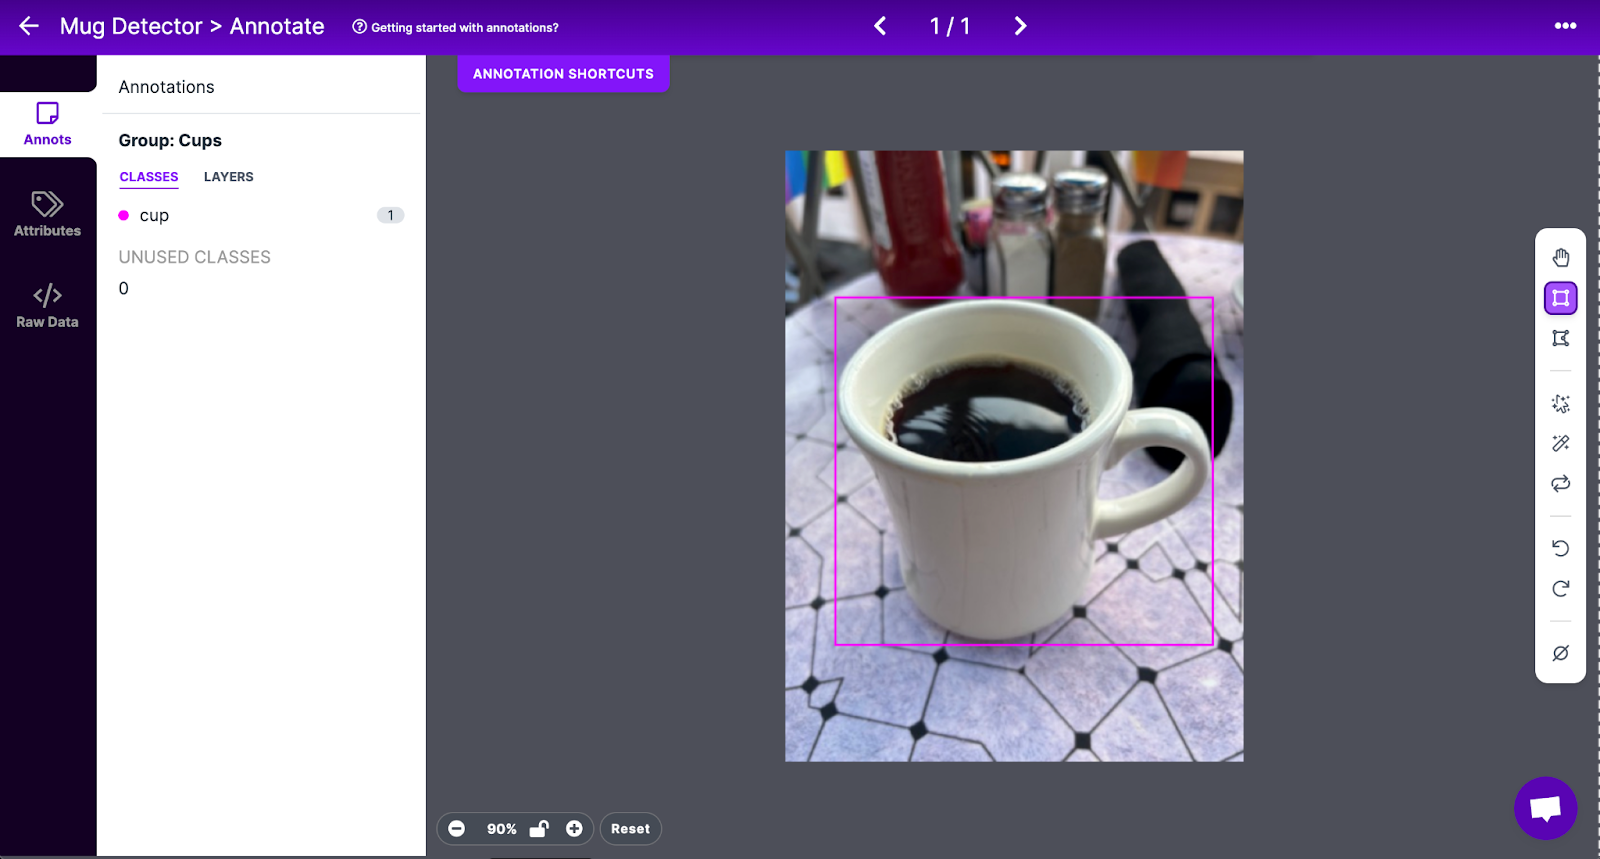
In our case, we need to use the “bounding box” tool in the sidebar. This tool will let us draw a box around all of the mugs in our dataset. This is the point at which we prepare all the data our model will need to learn how to identify a mug. Add the word “cup” as your class.
To speed up the time it takes to annotate images, consider clicking “Label assist” in the right sidebar. This is denoted by a magic wand icon. Then, select the “Public models” dataset and “COCO”. This will load the MS COCO dataset that will help you annotate images. Deselect all classes and then select the “cup” class, which contains lots of photos of cups and mugs.
If you are annotating something else in your images, you could load classes other than “cup” to have the model pre-trained on COCO assist you in your annotations. This technique – where you have a pre-trained model assist with annotations – is called model-assisted labeling.
Draw a box as close to the edges of a mug as you can for each image in your dataset. If more than one mug appears, annotate each instance in the image. If a mug is blocked by something – for example, a finger if someone is holding the mug – proceed to annotate the whole mug including the part that is obscured. This will help your model recognise mugs even if they are blocked a little bit. You can learn more about how to label images effectively in our image labeling best practices guide.
For each image in your dataset, add the appropriate annotations.
I would recommend adding a few images to your dataset that show the environment in which your model will be deployed – a desk, a table, etc. – that do not include a mug. You can mark these images as “null” in the Roboflow annotation tool. A “null” annotation tells a model that this image doesn’t contain any instances of a mug. This is a useful addition to a dataset especially if you start to notice false positives in your trained model.

For example, if a glass – which, like mugs, are cylindrical and have a rim – gets identified as a mug in your trained model, you might want to add a few images of glasses in your dataset and mark them as “null”. This way, the model can learn that glasses are not mugs. I did this for my dataset. I didn’t want my water glass that I sometimes put next to my tea cup to be identified as a mug. My logs of cups of tea I have consumed would be all over the place!
Once you have annotated all of your images, click “Annotate” in the sidebar, then click on the batch of images you have annotated. Next, click “Approve all” and “Submit for review”. This will move your data into the Review stage, a step before the data is added to your final dataset. The Review stage gives you a final opportunity to check your data is ready for being used in your model.
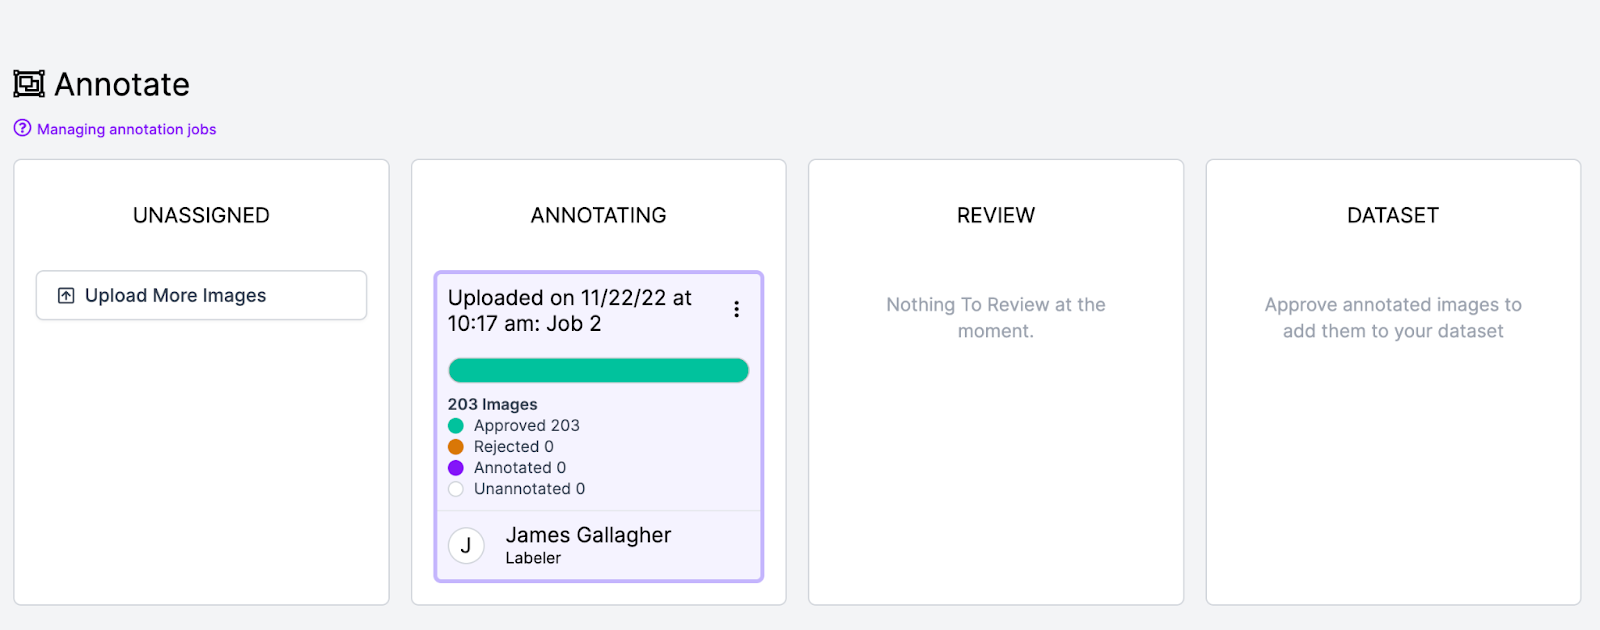
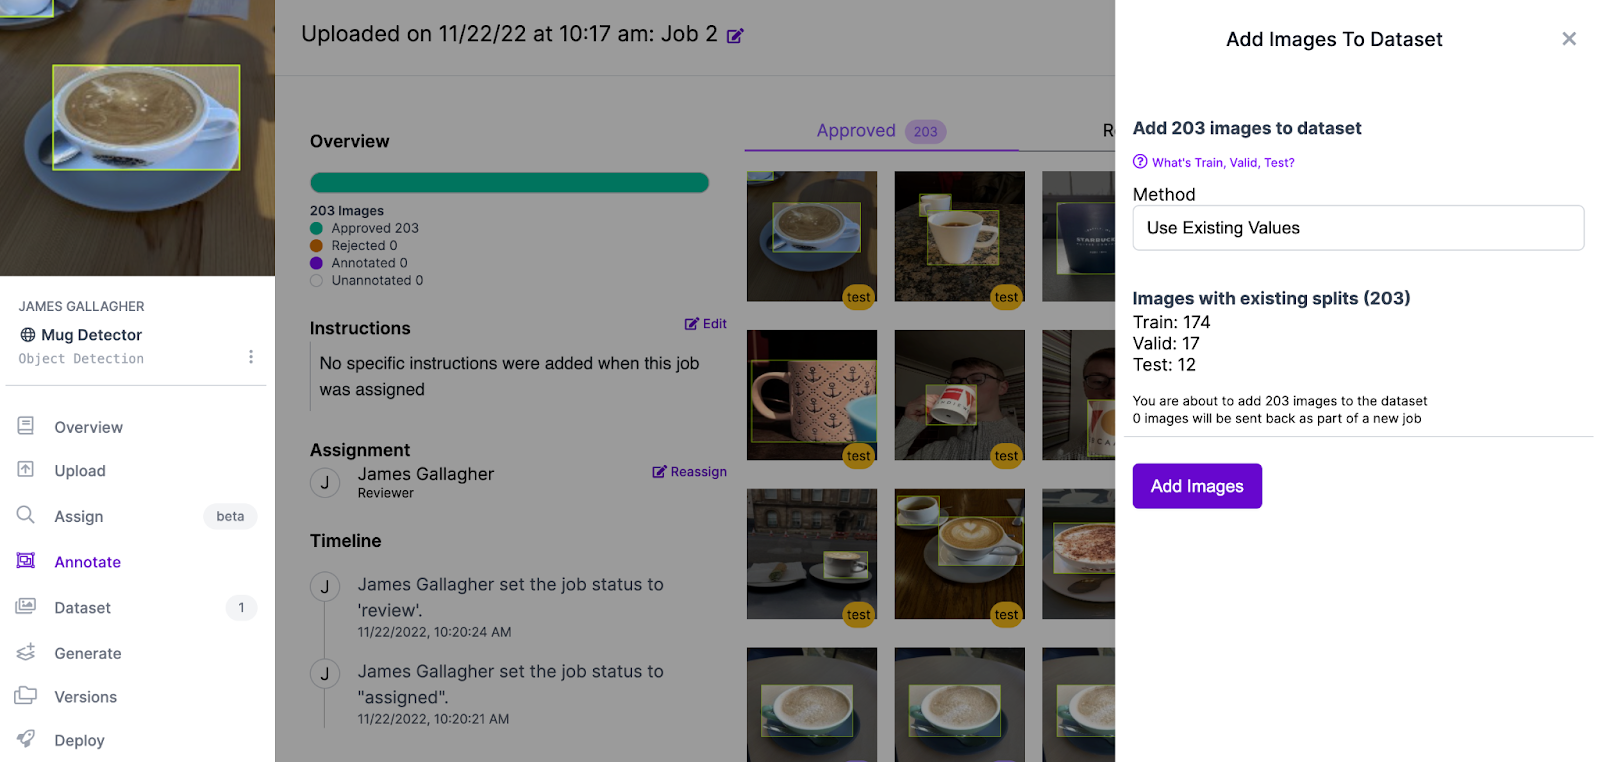
When you are confident your annotations are complete, click on the batch of images you have just annotated. On that page, click “Add approved to dataset”. This will add all of your images to your final dataset that will be used for training.

If you used the Mug Detector Universe dataset I made, please make sure you select the “Use Existing Values” method when prompted to add images to your dataset. If you don’t do this, previously augmented images might get mixed in with your train and test sets. This will impact the reliability of the performance metrics your model shows.
Step 4: Train the model
Now we have all of our annotated images in Roboflow, we can proceed to train our model. We can do this by clicking “Generate” in the sidebar.
At this point, we want to apply a few augmentations to our data. Augmentations are new images added to a dataset based on existing images in the training set. These augmentations are used to help a model learn more about the object(s) it is aiming to detect. We should add:
- Grayscale: This will allow our model to learn more about mugs without fitting too much to the color of mugs in your dataset.
- Flip: Because mugs can appear at different orientations, a flip rotation is appropriate.
- Brightness: Brightness helps the model perform better at different light levels.
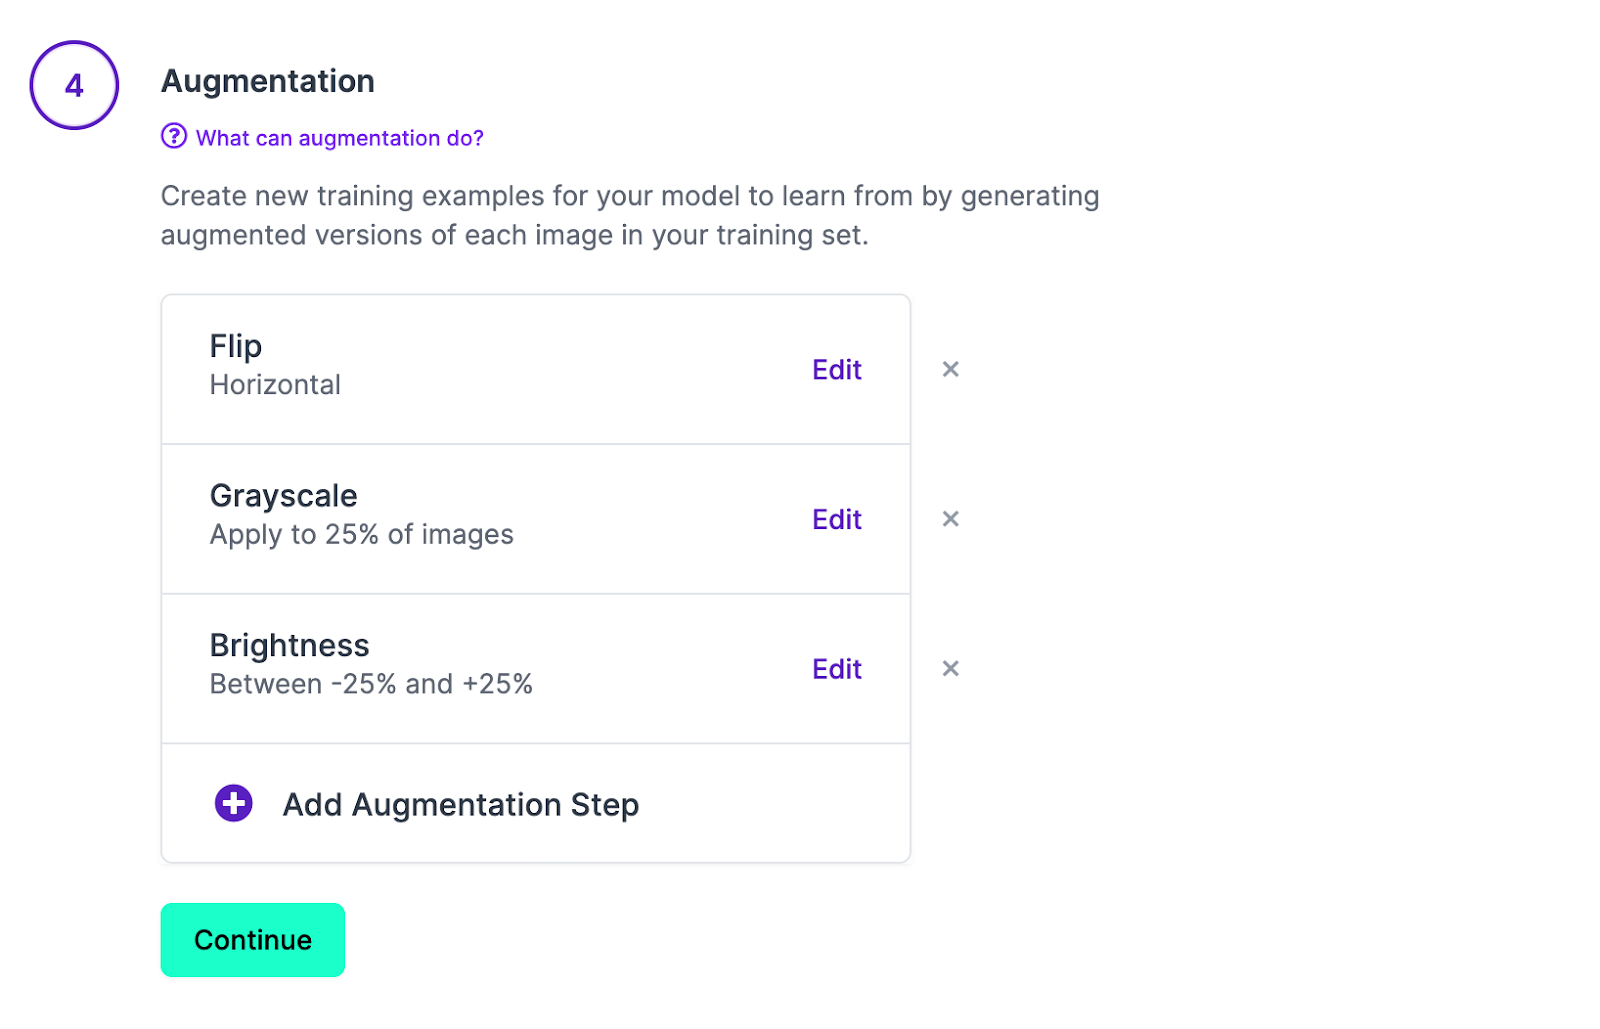
Click “Continue” and then “Generate”. Our model will start training. Now you have time to make a cup of tea or coffee and wait for your model to train. (You’ll have to write down that you drank it though because your model isn’t here to help yet!)
Step 5: Use the model
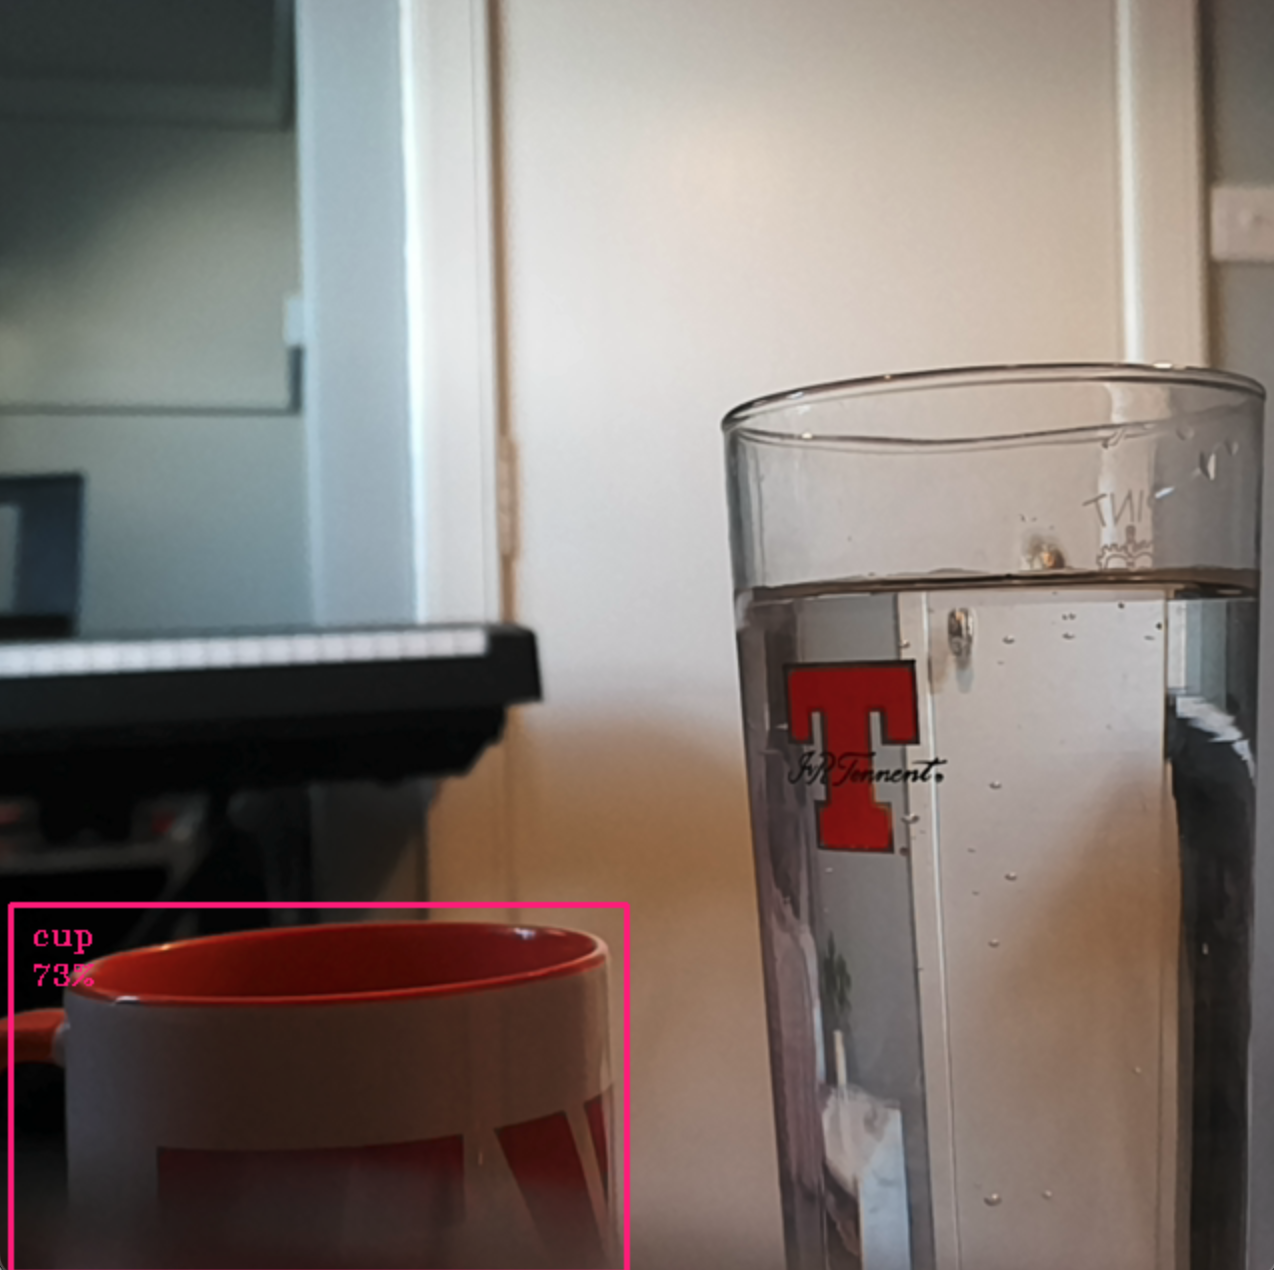
After some time has passed, your model will be ready for use in the real world. Click on the “Deploy” tab in the sidebar of the Roboflow dashboard. You’ll then be greeted with a box that invites you to try the model on images or video. You can also use a webcam, too. Let’s see what happens when I upload a photo of a mug on my desk to the model:

Our model works! There is a box drawn around my mug with the class name “cup”. This shows the model has been able to successfully identify the mug in the image.
If your model hasn’t worked as you expected, there are a few things you can do to improve model performance. You can:
- Add more images of mugs (if your dataset is small).
- Ensure the mugs in your dataset are representative of the ones you want to identify (i.e. if none of your mugs have handles but all of the ones in your dataset do, that might be a problem).
- Add null annotations to images that do not contain a mug.
- Experiment with different augmentations to see what can help. Check out our article on image augmentations for more guidance.
In my experience, my model was good at detecting mugs on my desk and when I was holding them. Thus, my goal – to detect mugs – was achieved. But, there is definitely room for improvement. Sometimes a mug is not detected until I change the angle slightly, for example. An important part of building a model is applying this sort of thinking while you test.
Step 6: Use the model on my desk
I said that I wanted this model to be deployed on my desk. How can I accomplish that? For my project, I decided to use the Luxonis OAK camera. This camera is purpose-built for computer vision and has a great SDK for retrieving data. Not only that, the camera has a Roboflow SDK, so I can use it with my Roboflow model in a few lines of code.
If you don’t have an OAK camera, you can run inference on other cameras too. You could deploy your model on a Raspberry Pi with a camera that is pointed at your desk, for example.
I discuss how to deploy the model using an OAK camera in the rest of this section. But, if you don’t have an OAK camera, keep reading anyway because we discuss some logic that might inform your next steps.
To use the OAK camera, I first installed the required dependencies:
pip3 install roboflowoakThen, I copied the out-of-the-box Roboflow OAK Python library snippet to make sure my model was working. Upon running the code, here is what I saw:
My camera successfully identifies the mug in my video feed. When I move the mug away, no annotations show up on the screen. When I put a glass in view of the camera, it is not annotated as a mug. Great!
Then, I added some logic that works with the `result` object.
My logic:
- Makes predictions on the video feed.
- Saves a record to a JSON file if a mug has been away for more than two minutes.
- Updates my Slack status when a mug has been away for more than two minutes.
- Amends the JSON file to note when my mug returns to my coaster.
- Removes my Slack status when my mug returns to my coaster.
This works by having a variable that tracks when my mug was most recently found. If my mug has been gone for more than two minutes, a function is called that saves the record to a JSON file and another function is called that updates my Slack status.
To make this work, there are a few lines of code that run every time inference is performed on a frame, even if no predictions are found. These lines of code check whether the last inference of a mug was more than two minutes ago. There is a global counter that stores a value corresponding to the last time a mug was seen.
Here is how the code works:
if (
2	    len(predictions) == 0
3	    and most_recent_time_found
4	    and most_recent_time_found
5	    < datetime.datetime.now() - datetime.timedelta(seconds=DELAY)
6	    and tea_break_ongoing is False
7	):
In this code, we check:
- If there are no predictions, which indicates a mug cannot be found.
- If a “most recent time” has been set (which indicates a mug has been seen before).
- If the last time a mug was found was more than DELAY seconds, where DELAY corresponds to a period of 120 for 2 minutes. This is a global value that you can change to manipulate for how long a mug needs to be away for a break to be tracked.
- If a break is ongoing.
The timing component is essential. Without this component, breaks would be recorded with every sip I took from my cup, because sipping necessitates moving the mug away from the camera. The two minute period ensures that breaks are only logged when my mug is away for long enough that I am likely to be going to prepare a cup of tea or coffee.
The aforementioned JSON record contains information on:
- When the break started.
- Whether the break is ongoing.
- When the break ended.
- The duration of the break in seconds.
Using this data, I could create visualizations that show when I make caffeinated drinks in a day if that was something that interested me further down the line.
If I stop the script with Command-C on macOS (Control-C on Windows), a function is called which notes the last tea break is over and removes my Slack status. This ensures that my turning the camera off at the end of the day will not result in a long tea break being tracked.
If you want to run this logic for yourself, you can clone the project GitHub repo and install the required dependencies:
git clone https://github.com/capjamesg/roboflow-tea-detector
8	cd roboflow-tea-detector
9	pip3 install -r requirements.txt
You’ll then need to export your Roboflow API key and project in your environment so that the program can access your project:
export ROBOFLOW_KEY=""
10	export ROBOFLOW_PROJECT=""
If you want to update your Slack status with this project, you’ll need to create a Slack App as instructed in the project README and export a bot token, like this:
export SLACK_TOKEN=""Now we’re ready to run our code. We can run our project using the following command:
python3 app.pyWhen you run the code, you should see a camera window pop up. Here’s what happens when I run my code:
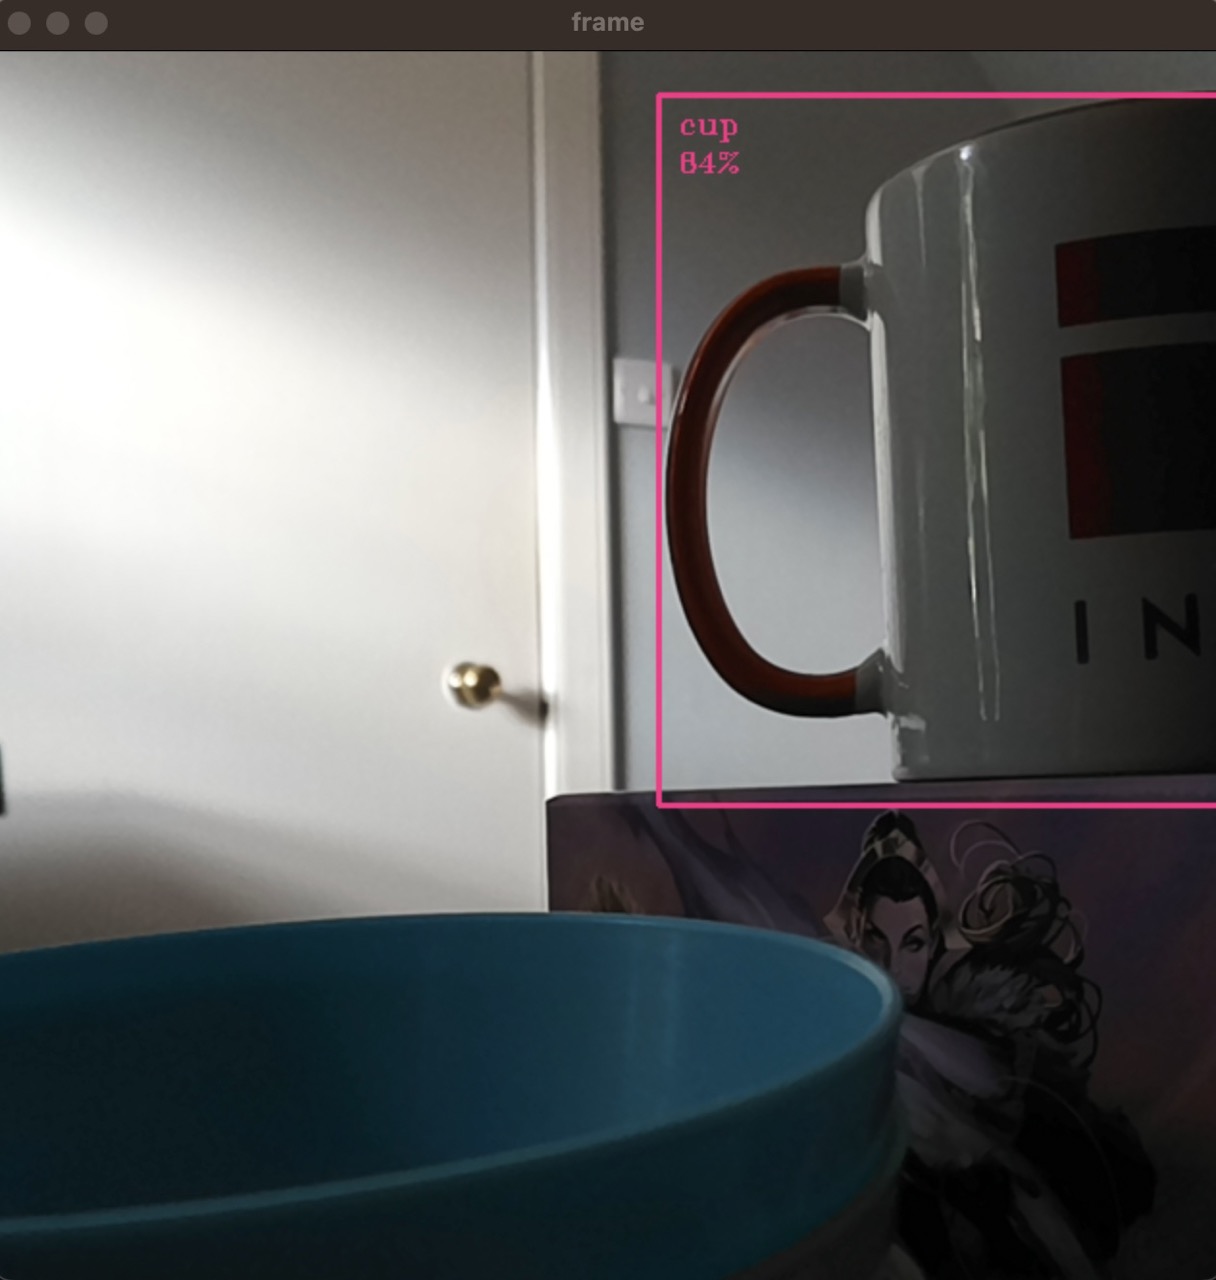
As I move the mug on my desk, the model picks up the mug. When I move the mug, the model removes the bounding box indicating the presence of a mug in the image.
When I move my mug away from my desk after two minutes, my Slack status updates:

When I move my mug back, my Slack status is removed.
A file called tea_breaks.json is also updated to track when I make cups of tea. Here’s an example record in the file:
{"start": "2022-11-18 18:03:36.060046", "is_ongoing": false, "end": "2022-11-18 18:03:50.451313", "duration": 14.391267}This was just a test, hence the break shows a duration of 14 seconds.
This record structure mimics all of the data points we discussed earlier. As aforementioned, we could make a lot of visualizations with this data. This is a testament to all of the possibilities with computer vision. Building the model is only one step: the next step is to connect some logic to your model. Let me set a challenge: what cool things could you do with this model?
I encourage you to read over the app.py code to see how it works. Feel free to make a few tweaks! Two easy tweaks to make are:
- Change “delay” to 4 so that your model records a tea break after a mug being away for four seconds. This is useful for testing.
- Change the “status_emoji” value in the ACTIVE_RECORD constant to another emoji. Change the “status_text”, too.
You could even take the project to a new level and create charts to:
- Visualize how many cups of tea or coffee you drink in a day.
- Visualize at what times you drink the most tea or coffee.
- Visualize when you usually have your last cup of tea or coffee.
With this code, we now have:
- A model that can detect a mug.
- A tracker that logs when we make cups of tea.
- A system to update our Slack bio when we make a cup of tea.
You may be wondering: how can I check how many cups of tea I have had in a given day? That’s where the “update.py” script comes in. This script interprets our JSON file of data and prints to the console how many cups of tea I have had. I can then run this at the end of a day – particularly if I am feeling a bit jittery – to get the results of my data.
Conclusion
With help from Roboflow and the Luxonis OAK camera, I was able to successfully build a model that monitors the number of cups of tea and coffee I have in a day. My project contains some logic to both track the number of cups of tea or coffee I have and update my Slack status so that my coworkers know when I have gone to make a cup of tea.
The “Slack status” trigger could be anything, though. You could get a text when you drink more than three cups of coffee in a day by using Twilio to send an SMS message. You could email yourself a weekly roundup that shows how many coffees you had on each work day and an average number.
Now you have the knowledge you need to train a computer vision model and a script to accompany you as you deploy a model on the Luxonis OAK.
The script includes generic logic for tracking the presence and absence of an object that could be applied to a myriad of other problems, from monitoring how long forklifts are away from their parking spot in a day to tracking how many times a lathe is used in a factory.
Happy building!
Cite this Post
Use the following entry to cite this post in your research:
James Gallagher. (Nov 23, 2022). Monitoring My Caffeine Intake with Computer Vision. Roboflow Blog: https://blog.roboflow.com/caffeine-monitoring-computer-vision/