
Roboflow Workflows is a low-code computer vision application builder. With Workflows, you can build multi-step computer vision workflows in a browser editor. You can then deploy your Workflows using the Roboflow API, a Dedicated Deployment, or on your own hardware.
In this guide, we’ll explore how to use traditional computer vision techniques to automatically blur your screen during sensitive moments, such as when switching between tabs or browsers. This could be used by live streamers to blur a screen while switching tabs, reducing the chance a tab is accidentally opened with sensitive information visible.
Here is a demo of the system in use:
Here are the steps we will follow in this guide:
- Create a workflow that calculates the dominant colour in a region
- Set up OBS
- Install and import libraries
- Define needed variables
- Create blur function that runs when the dominant colour changes, indicative of a tab change.
- Run the Workflow with OBS on your computer
Let’s start building!
Create a Workflow
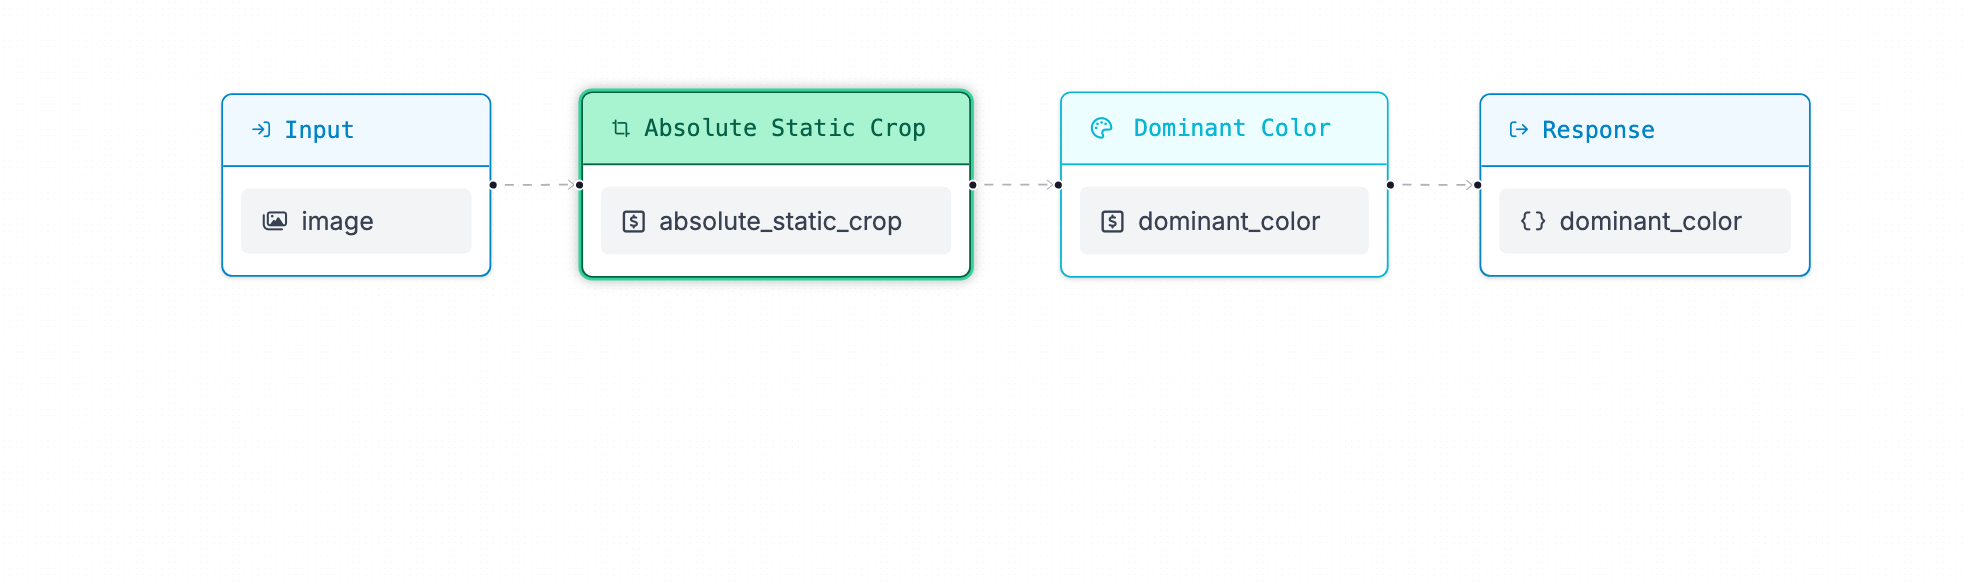
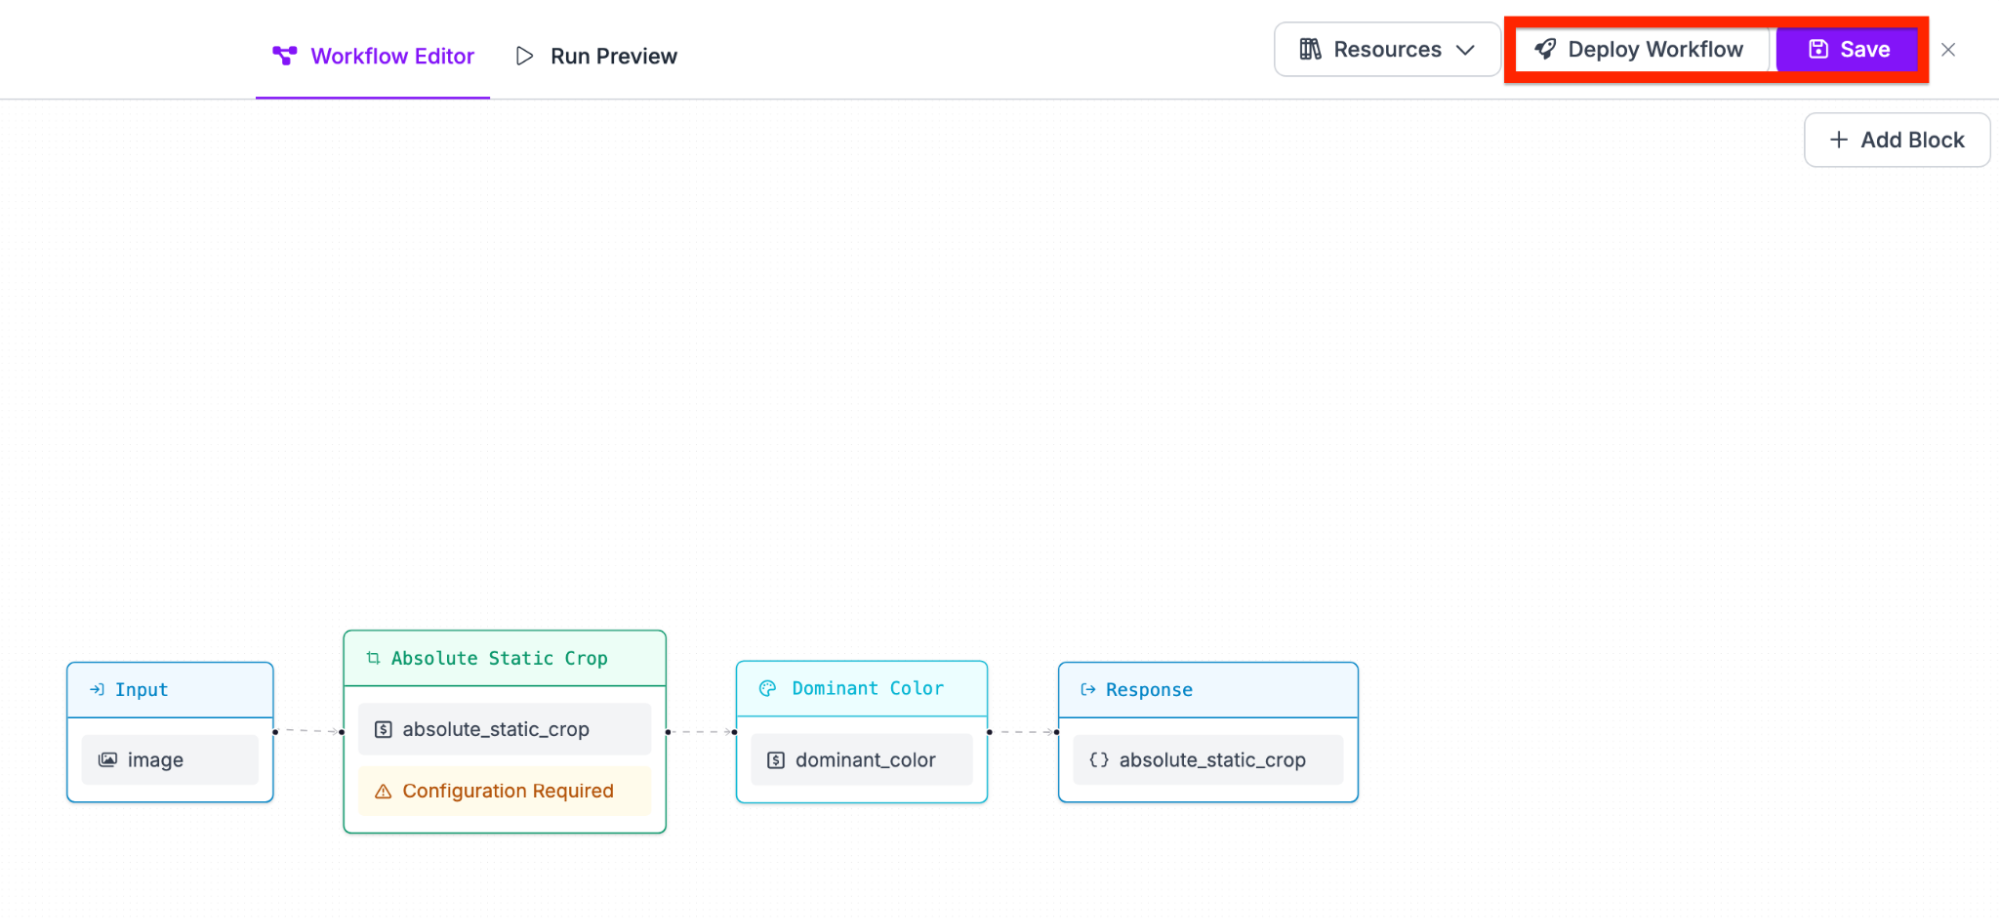
Our end workflow will look similar to this:
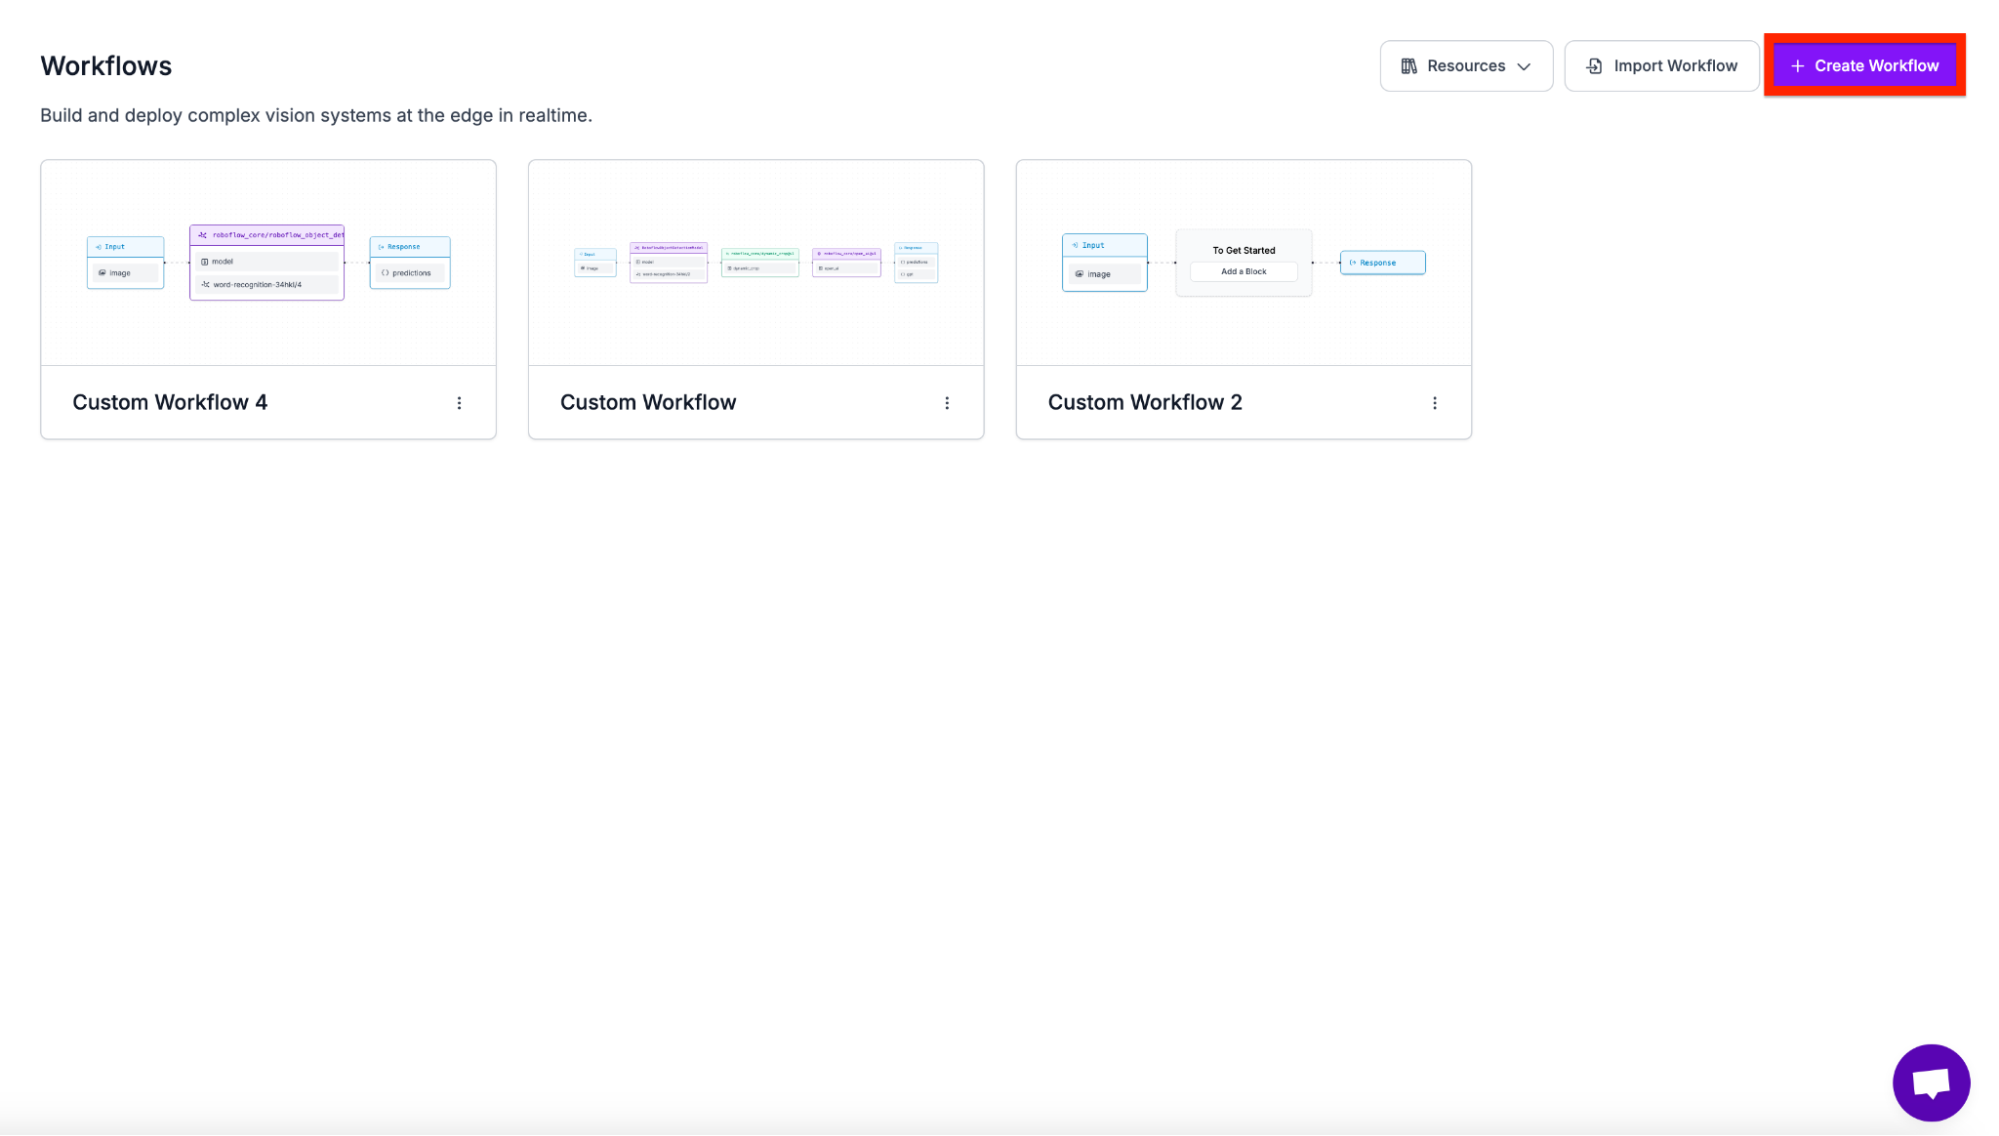
First, create a new Workflow in your Roboflow account:
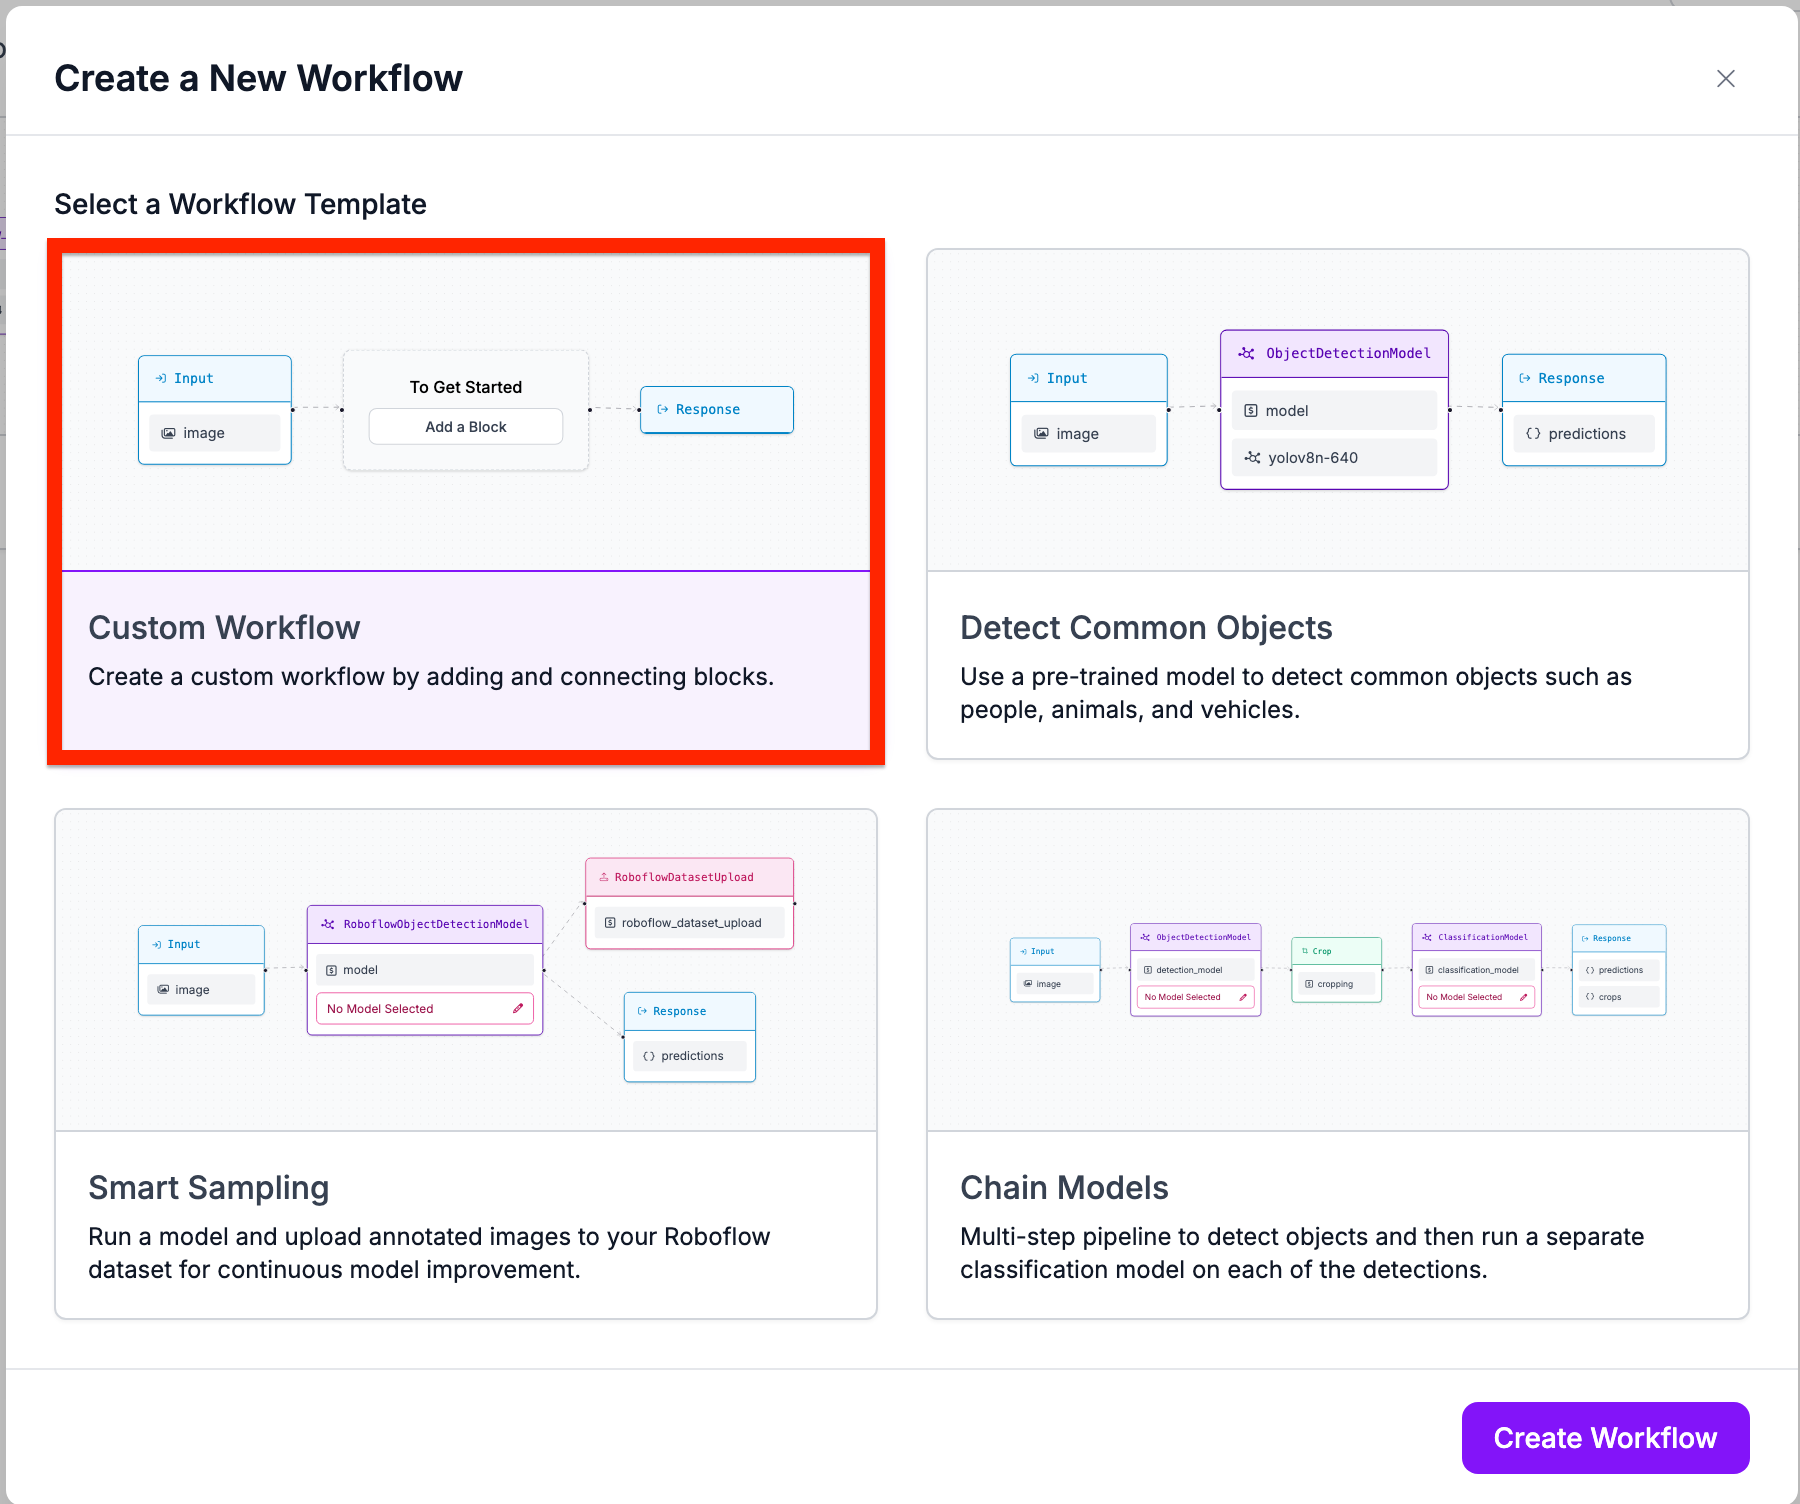
Next, select the custom Workflow option.
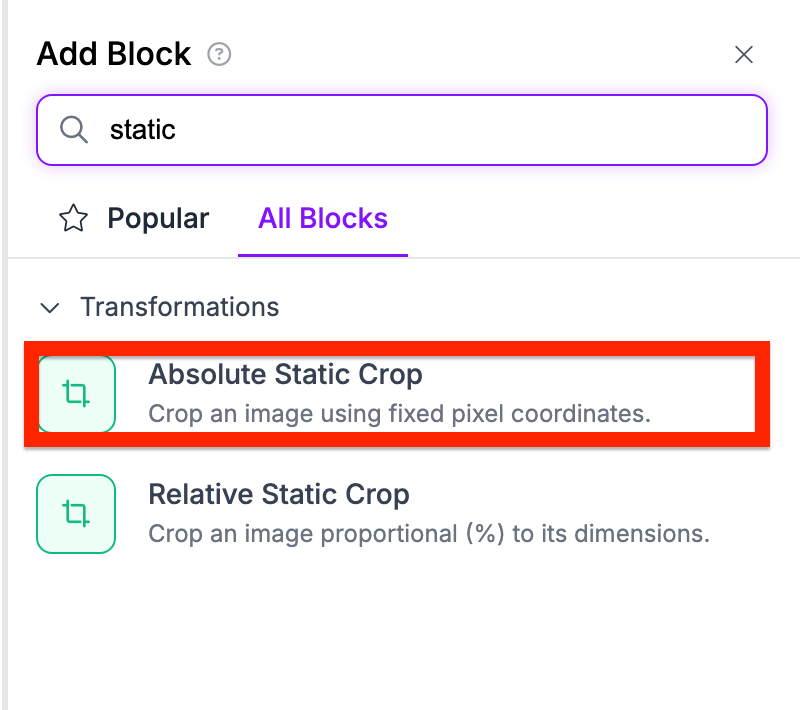
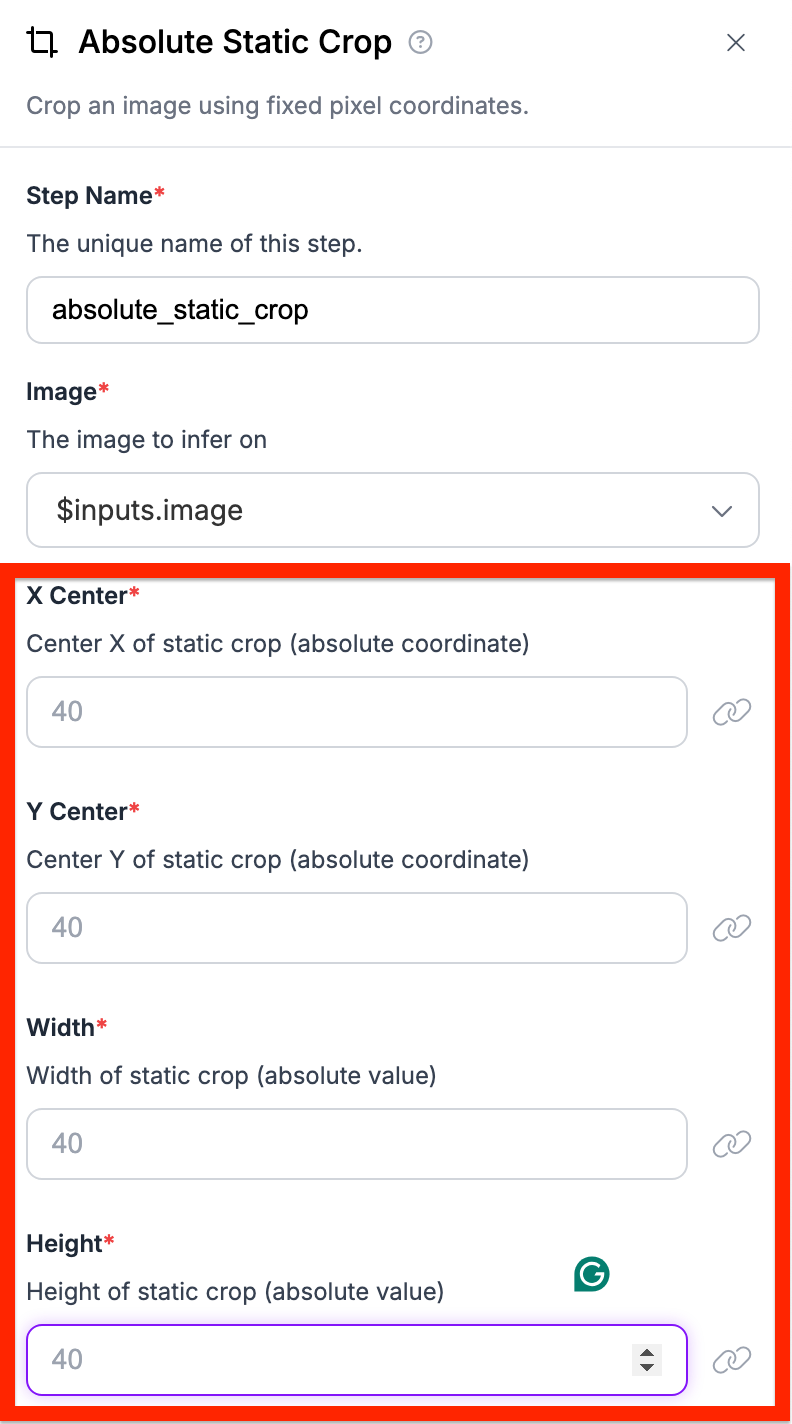
Next, select Absolute Static Crop. This block allow us to focus our Workflow on a particular part of an image.
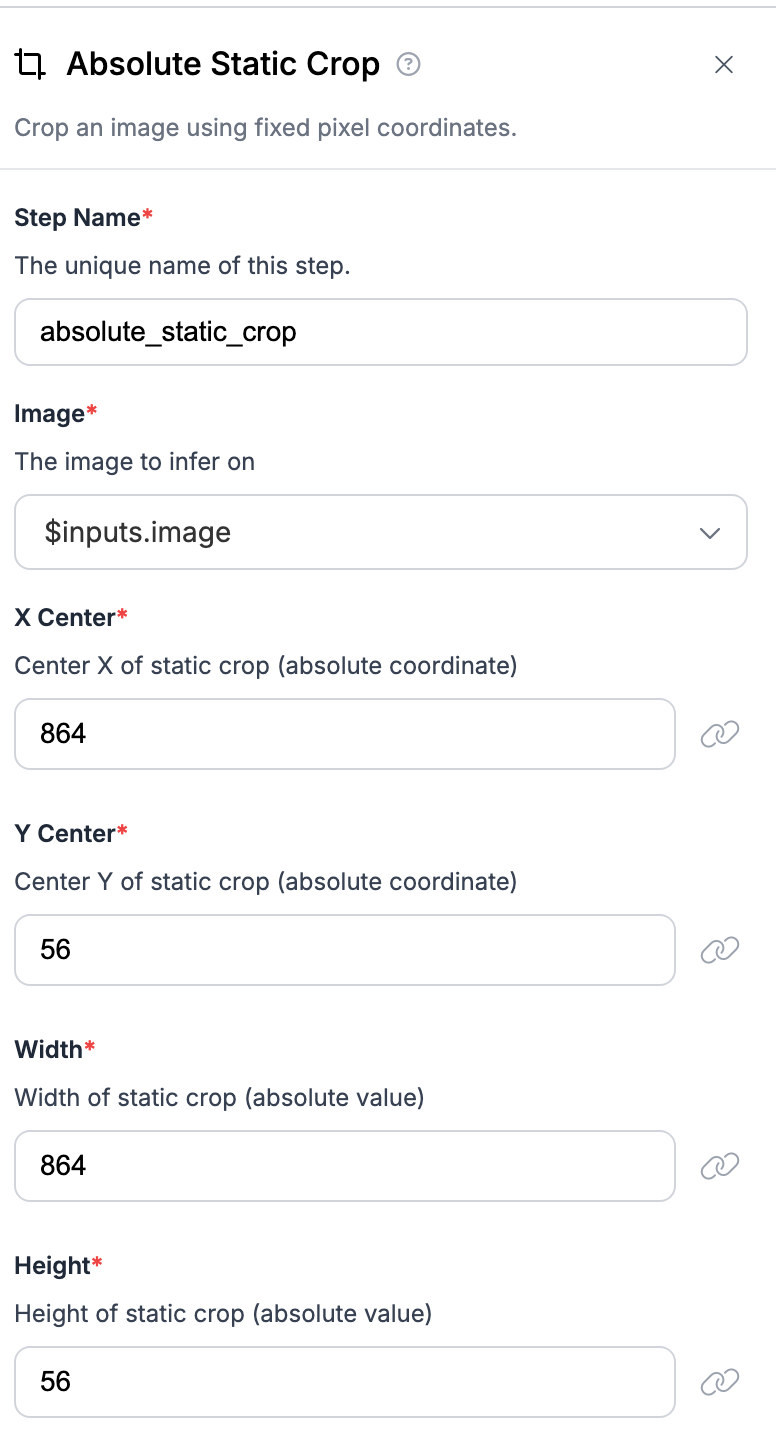
Next, insert the x y and width and height of the areas you are detecting. This should be the region of the screen that you want to blur.
For my case, I used these values:
To retrieve these values, we recommend using a screenshot tool on your computer to identify the x, y, width, and height positions of the region you want to apply this tool to.
Next, add a dominant color block. You can find it by searching it up in the workflow search bar.
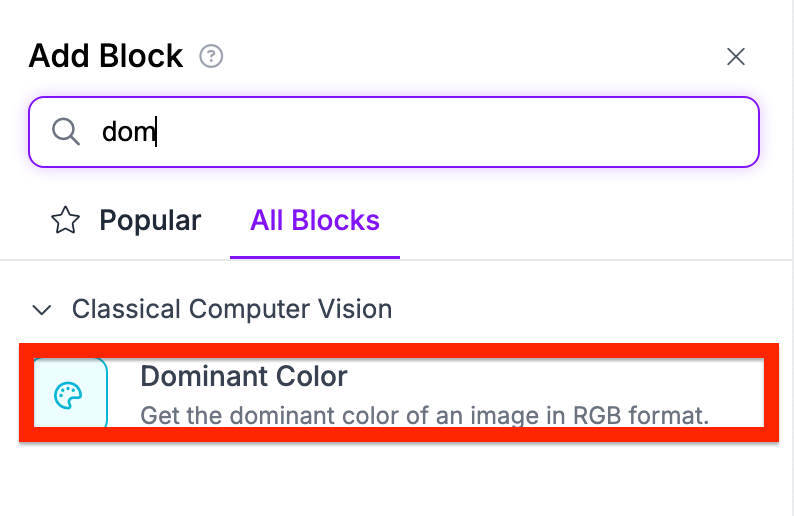
Make sure that the dominant color block accepts the static crop block as an input. Lastly, save the code block and save the deploy code.
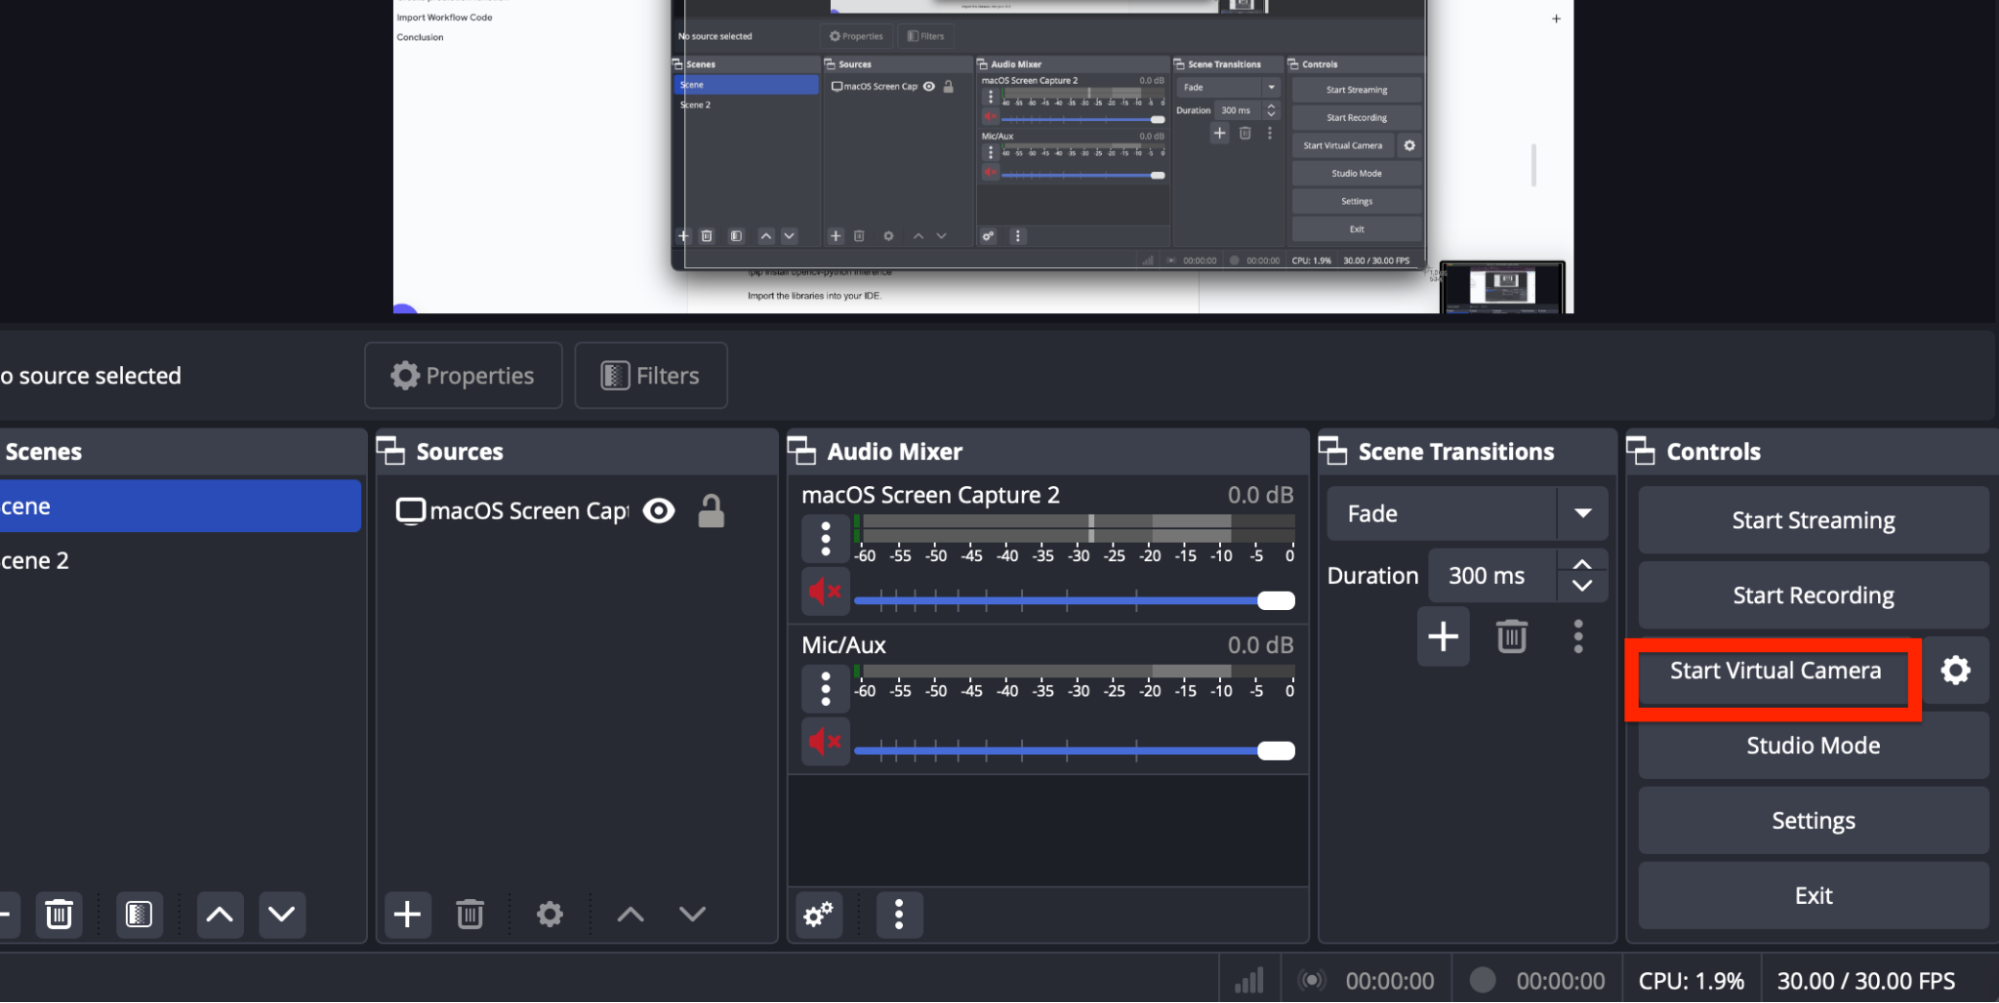
Set Up OBS
In order to record our screen, we will need a virtual camera provider. In my case, I used OBS in order to capture my screen. We can set up the virtual camera on OBS by selecting the start virtual camera category in OBS.
Now that we have our virtual camera set up, we can finally start to code.
Install and import libraries
Before we begin to code, let's install the needed libraries.
!pip install opencv-python inference
Import the libraries into a new Python script:
import cv2
from inference import InferencePipeline
from inference.core.interfaces.camera.entities import VideoFrame
Define needed variables
Now we need to define the necessary variables. We will be using prev color in order to understand what the previous color is. We use blur_frame_count in order to count how many frames need to be blurred during the process.
prev_color = (255, 255, 255)
blur_frame_count = 0
Create blur function
Next, in order to blur the screen, we will be using the GaussianBlur function from the cv2 library. The region of interest (roi variable) will be the full image. During the function, for every frame blurred, we subtract the blurred frame count by 1.
def blur_screen():
    roi = img
    blurred_roi = cv2.GaussianBlur(roi, (15, 15), 0)
    img = blurred_roi
    print("Blurring applied to the frame.")
    blur_frame_count -= 1
Create prediction function
In this step, we will create a function that will look through each frame shown and depending on the current color and previous color, it will blur the next few frames. This function will utilize the outputs of our model in order to determine the color of each tab.
The full code snippet looks similar to this:
def on_prediction(res: dict, frame: VideoFrame) -> None:
    global prev_color, blur_frame_count
    img = frame.image
    color = res["dominant_color"]

    if color[0] > (prev_color[0] + 10):
        blur_frame_count = 3
        print("Tabs changed, starting blur...")

    if blur_frame_count > 0:
        blur_screen()

    prev_color = res["dominant_color"]

    cv2.imshow("Screen Blur", img)

    if cv2.waitKey(1) & 0xFF == ord("q"):
        return
First, we set the prev_coor and blur_frame_count variables as global variables in order to access them in the function.
Then, we set the image.
Next, using our Workflow, we can get the dominant color of the tab. If the color difference is over 10, then we know that the tab has been switched. If this happens, we set the blur_frame_count to 3 and call the function blur_screen 3 times.
Lastly, we define the previous color of the screen and show the image, whether it is blurred or unblurred.
Import Workflow Code
Finally, we can add the Workflow code in order to connect the Workflow with the Prediction function.
pipeline = InferencePipeline.init_with_workflow(
    video_reference=1,
    workspace_name="nathan-yan",
    workflow_id="WORKFLOW-ID”,
    max_fps=60,
    api_key="API_KEY",
    on_prediction=on_prediction,
)
Make sure to start the pipeline by running the following code.
pipeline.start()Here is a demo showing our application in use:
Conclusion
In this guide, We learned how to blur tab changes in order to protect user privacy and information leakage. We also learned how to create a workflow in order to utilize traditional computer vision techniques. For more tutorials and guides utilizing workflows, check out some blogs.
Cite this Post
Use the following entry to cite this post in your research:
Nathan Y.. (Aug 30, 2024). How to Use Computer Vision to Blur Your Screen. Roboflow Blog: https://blog.roboflow.com/computer-vision-blur-screen/