
Roboflow's custom weights upload feature lets you train a model in your own environment using your own pipeline and then deploy it through Roboflow's scalable hosted API and edge SDKs without managing your own inference infrastructure. Supported architectures at launch include YOLOv5 and YOLOv8 object detection, YOLOv8 segmentation and classification, YOLOv7 instance segmentation, and YOLOv5 instance segmentation. Once uploaded, the weights also power Label Assist in Roboflow Annotate, so the same model can accelerate future annotation rounds on the same dataset.
At Roboflow, we understand the difficulties associated with deploying computer vision models. How do you get a proof-of-concept ready on an edge deployment device? How do you scale up effectively when you roll out your model further? How do you ensure the reliability of inference APIs?
These are problems we solve with Roboflow Deploy where we deploy a secure, infinitely-scalable API for use in your workflow, accompanied by SDKs for use in working with common deployment devices. Once you've trained a model, you can get predictions wherever you need them without touching your model architecture. Your model runs everywhere you need it, automatically.
With our newest release, you can train a model using your own custom workflow and then upload the resulting model weights to be deployed to our infrastructure. Additionally, for object detection and instance segmentation models, you can use your model to power Label Assist for automated annotations in Roboflow Annotate.
With this capability, you get the best of both worlds: flexibility and added control over your training process, while benefiting from a robust suite of field-tested deployment options and SDKs.
From today, you can deploy the following model architectures with Roboflow:
- YOLOv5 Object Detection
- YOLOv5 Instance Segmentation
- YOLOv8 Object Detection
- YOLOv8 Image Segmentation
- YOLOv8 Classification
- YOLOv7 Instance Segmentation
In this guide, we’re going to show how to upload your own model weights from these models to the Roboflow platform. Let’s get started!
Benefits of Deploying Custom Weights on Roboflow
Uploading custom weights on Roboflow affords the ability to take full control over your training process while using our infrastructure and SDKs to reduce the coding, configuration, infrastructure, and developer operations work associated with deploying your model.
By deploying on Roboflow, you can benefit from:
- Field-tested SDKs for multiple edge devices, providing a more intuitive way to deploy your model to the edge and integrate it with back-end logic.
- A robust, scalable API. With Roboflow’s serverless architecture, your API will expand as you grow, enabling you to deploy to production faster than ever with reliable infrastructure.
- Your model integrated with the rest of your computer vision workflow. Use your model in Roboflow’s Label Assist feature which uses an existing version of your model to make predictions and recommend annotations.
Upload Custom Weights to Roboflow
To upload custom weights to Roboflow for deployment, you need to have a dataset in the Roboflow platform with an associated version. A “version” is a snapshot of your data, frozen in time, that you can reference at any point. Your weights will be connected to that dataset version, with APIs available for all versions of your dataset that you generate.
Let’s talk through the steps you need to follow to upload your custom model weights onto the Roboflow platform.
Step 1: Create or Upload Your Dataset
In this guide, we will be working with a construction site safety dataset available on Roboflow Universe, a repository of over 200,000 open-source computer vision datasets.
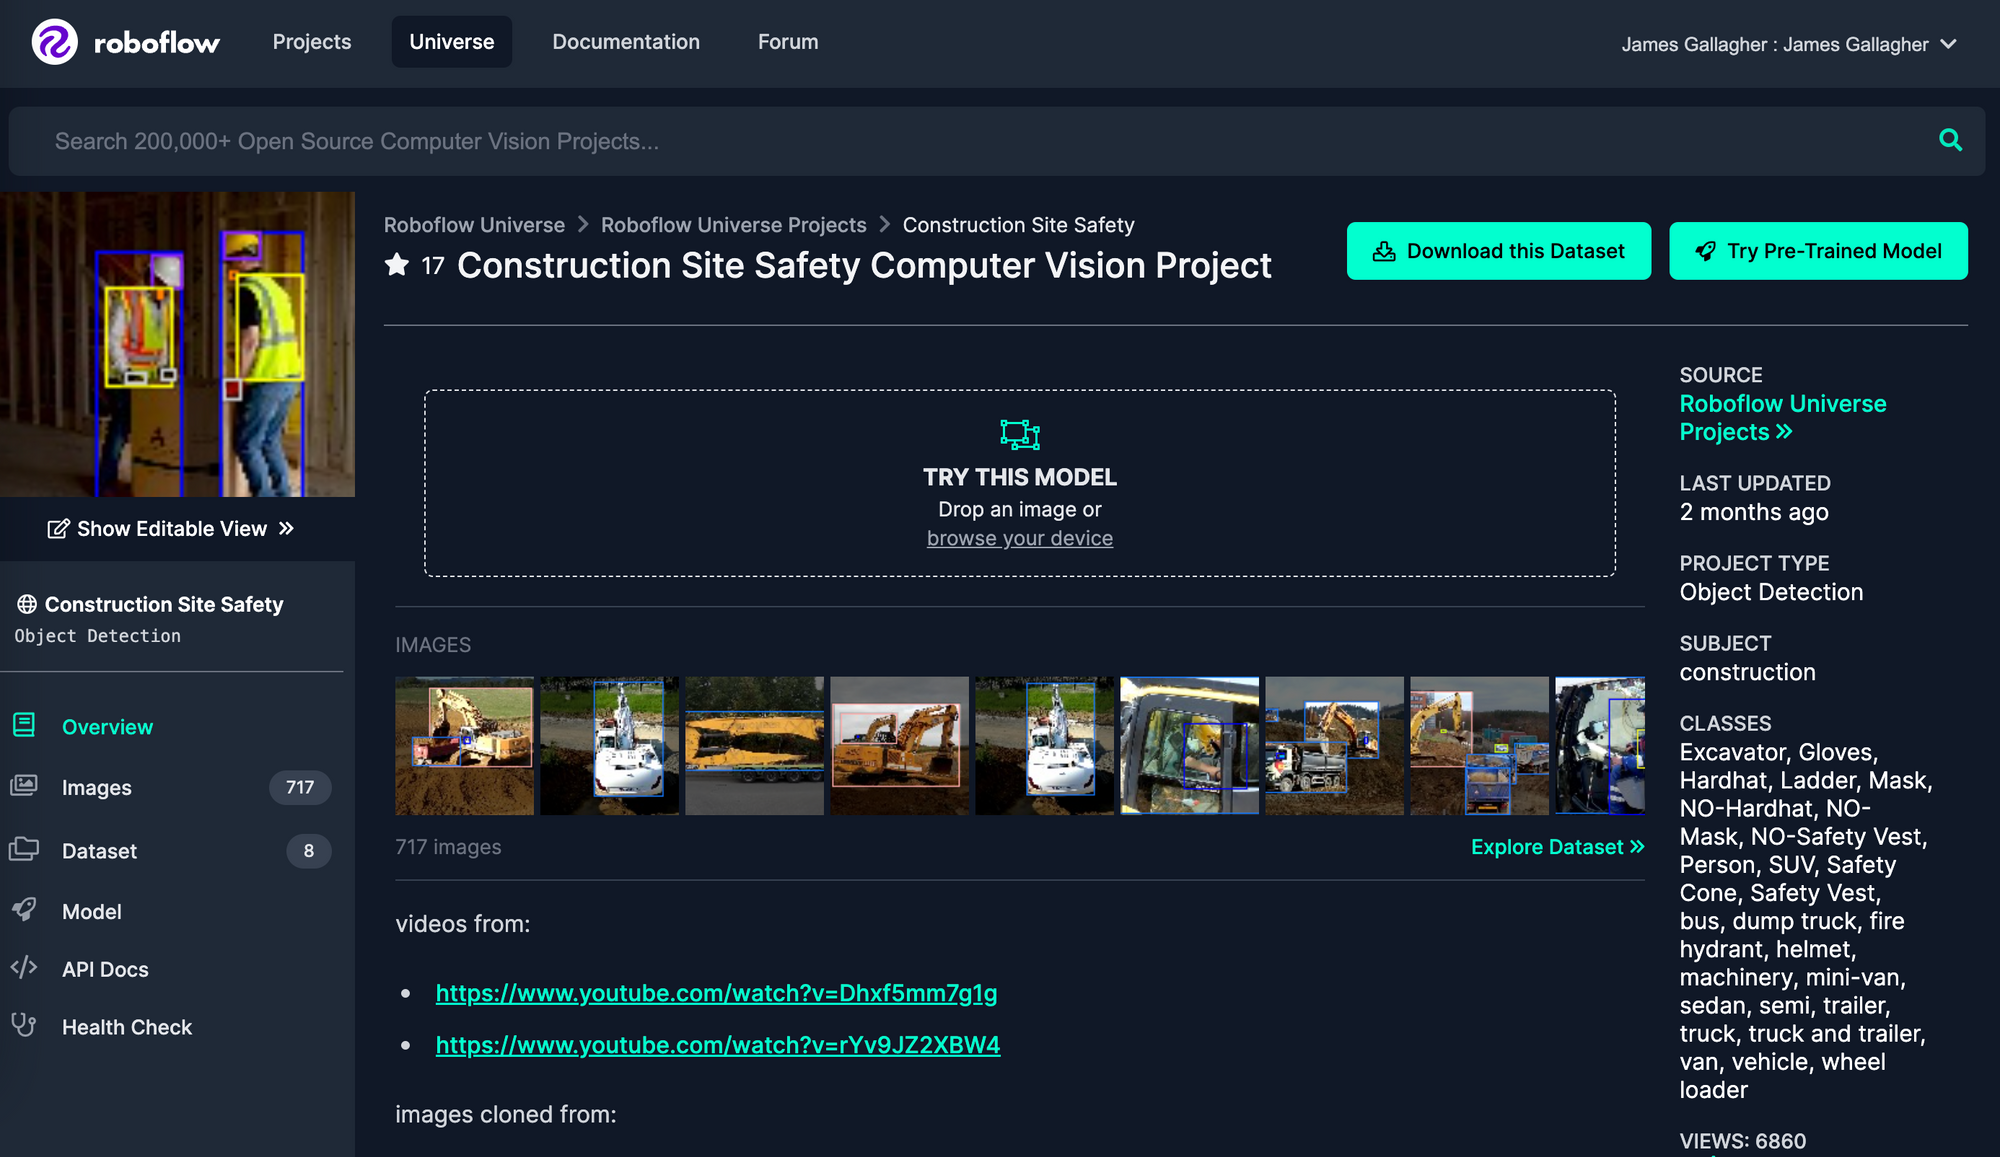
You can download the dataset from Roboflow Universe with a free Roboflow account if you don’t already have a dataset on which to train a model. We encourage you to explore Universe for data that meets your needs using the dataset search functionality. Universe Search uses your query to find semantically similar datasets.
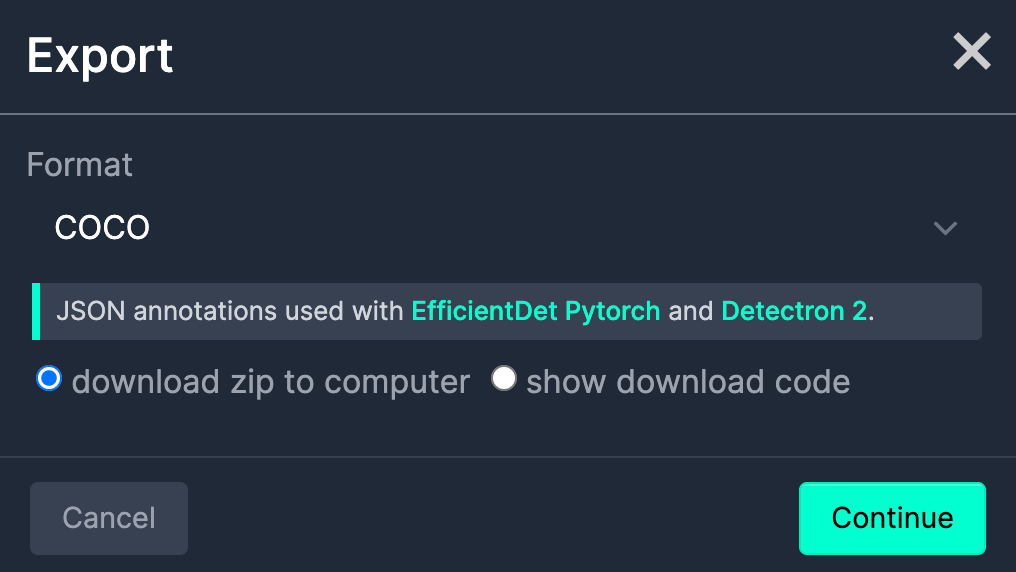
When you have found a dataset, click “Download This Dataset” and follow the instructions in the application to download a ZIP version of your dataset. Unzip the file.
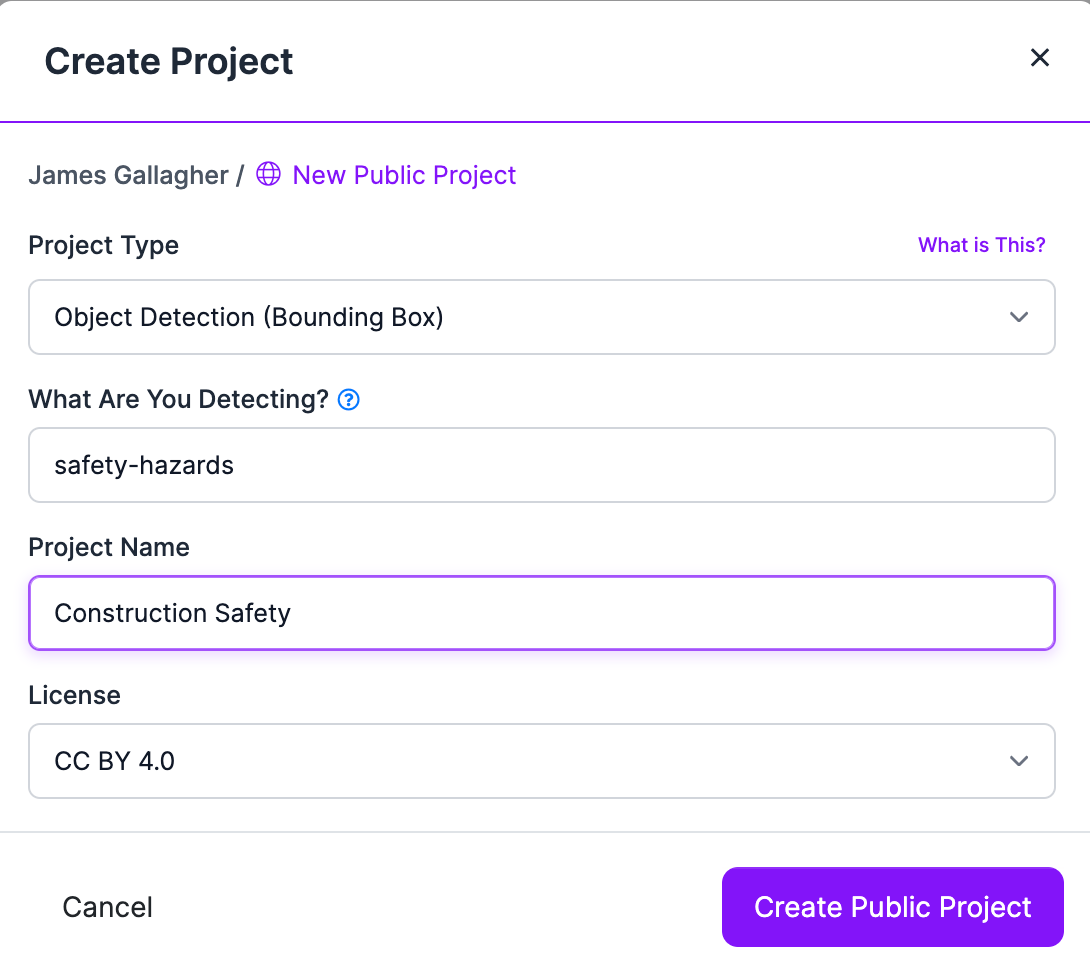
Next, head to the Roboflow dashboard and create a new project:
Then, upload the images associated with your project:
0:00/1×
If your dataset contains unannotated images, you can annotate them in Roboflow. Read our guide on image annotation best practices for advice on how to prepare a high-quality dataset for use in training your model. The more accurate your annotations are, the better your model will perform in production.
Step 2: Create a Dataset Version
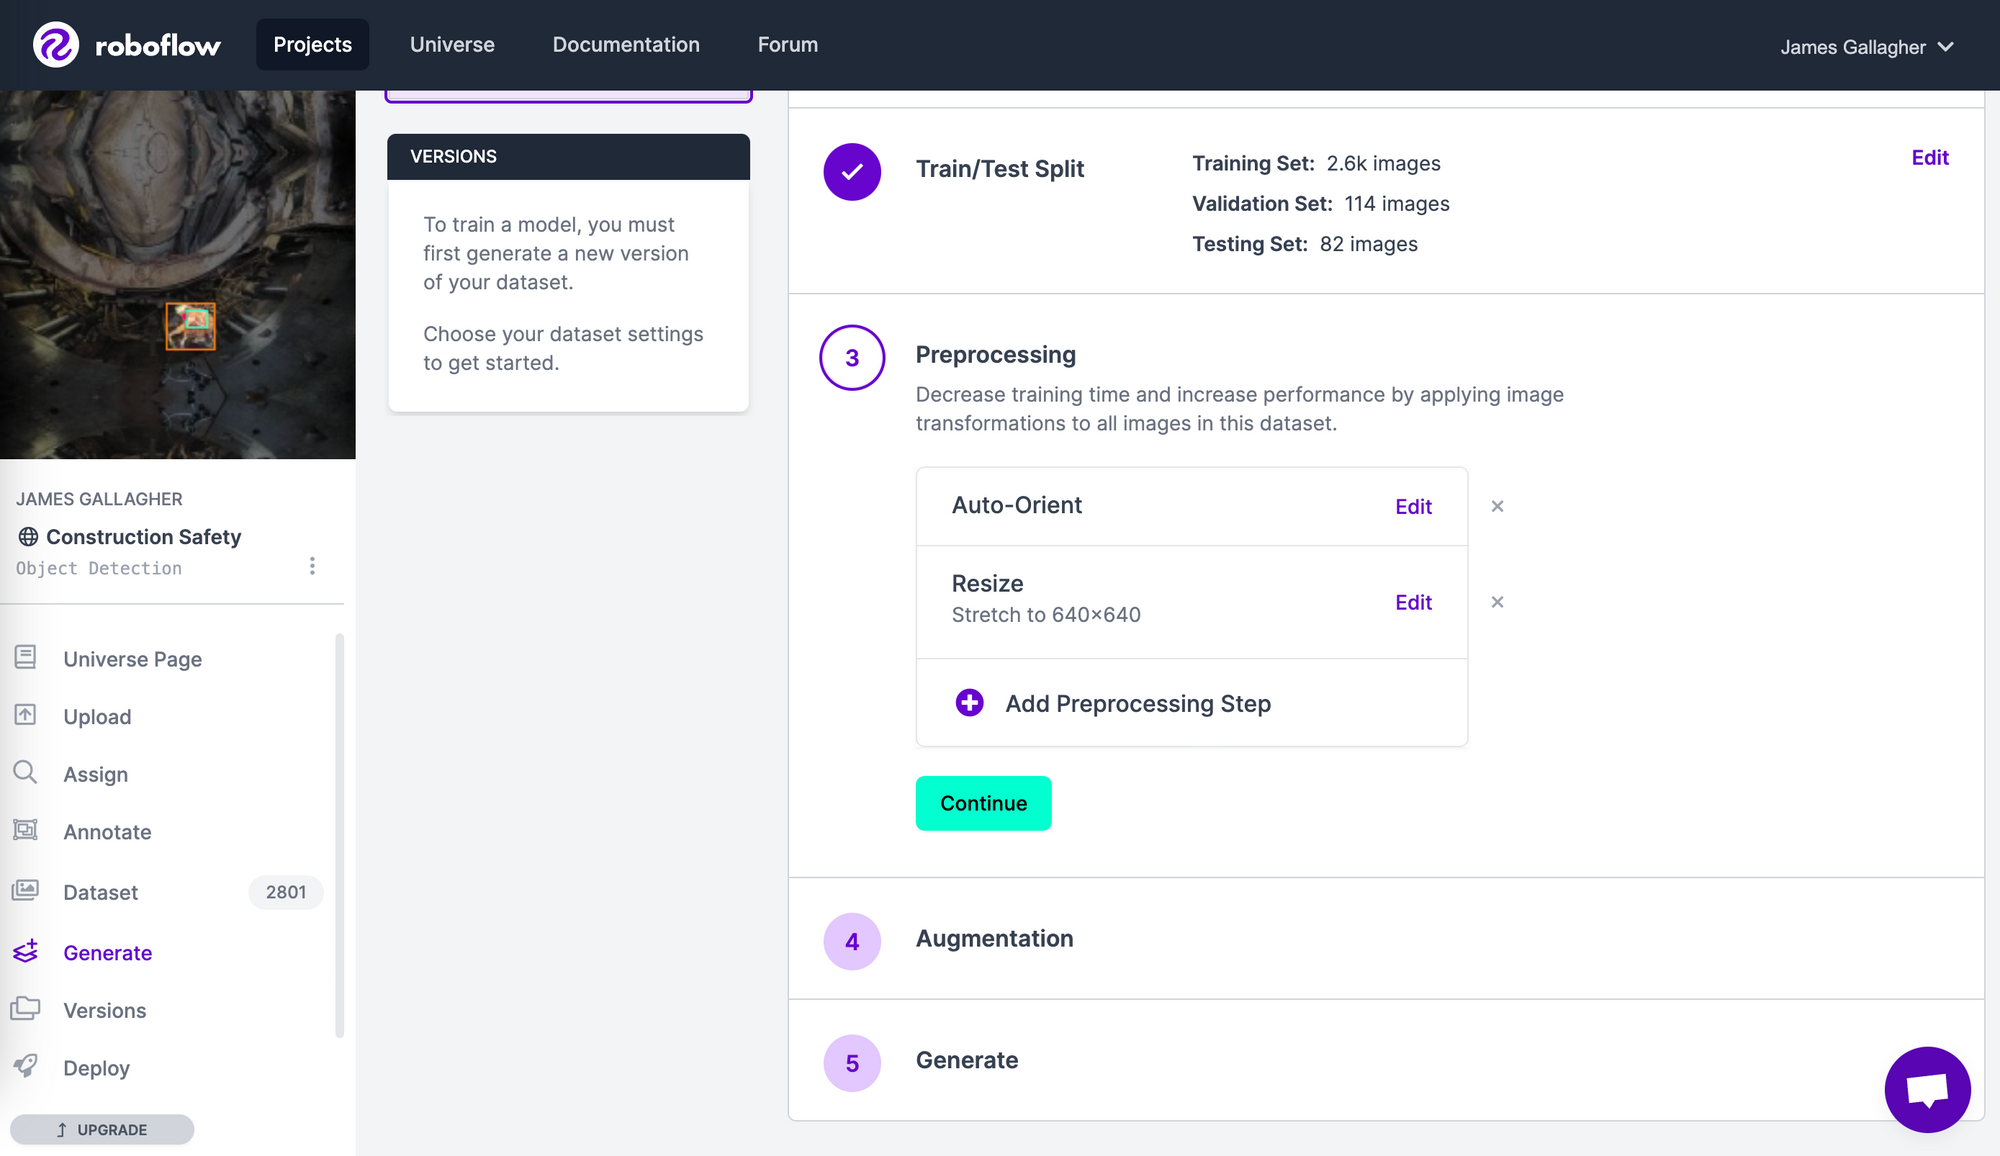
Once you have uploaded and annotated all of your images, click the “Versions” tab in the sidebar of the Roboflow dashboard. This will take you to a page where you can see all of your active dataset versions and create new ones. Click “Create new version”.
On this page, you will be asked whether you want to add any preprocessing steps to images in your dataset or generate augmented images. By default, a few preprocessing steps will appear on the page. We recommend leaving these steps as they are unless you need to apply other preprocessing steps. The two defaults -- auto-orient and resizing images -- boost model performance.
Our image augmentation feature lets you generate new images using existing images in your dataset. Each augmented image will have at least one of the specified augmentations you choose in the dashboard. These augmentations range from flipping the image to applying a blur.
By adding augmented images, you can help your model more effectively learn features in your dataset, thereby boosting performance. Check out our documentation on image augmentation for guidance on generating augmentations. (Note: Adding more augmentations is not always preferable. You should add augmentations that are appropriate for your data.)
When you are ready, click “Generate”. This will create a new snapshot of your dataset. This may take a few moments depending on how large your dataset is.
After your new dataset is ready, export your data from Roboflow. In the “Custom Train & Deploy” section of the dataset version page, select the model you are going to use in training. You will only see the models that fit your project type.
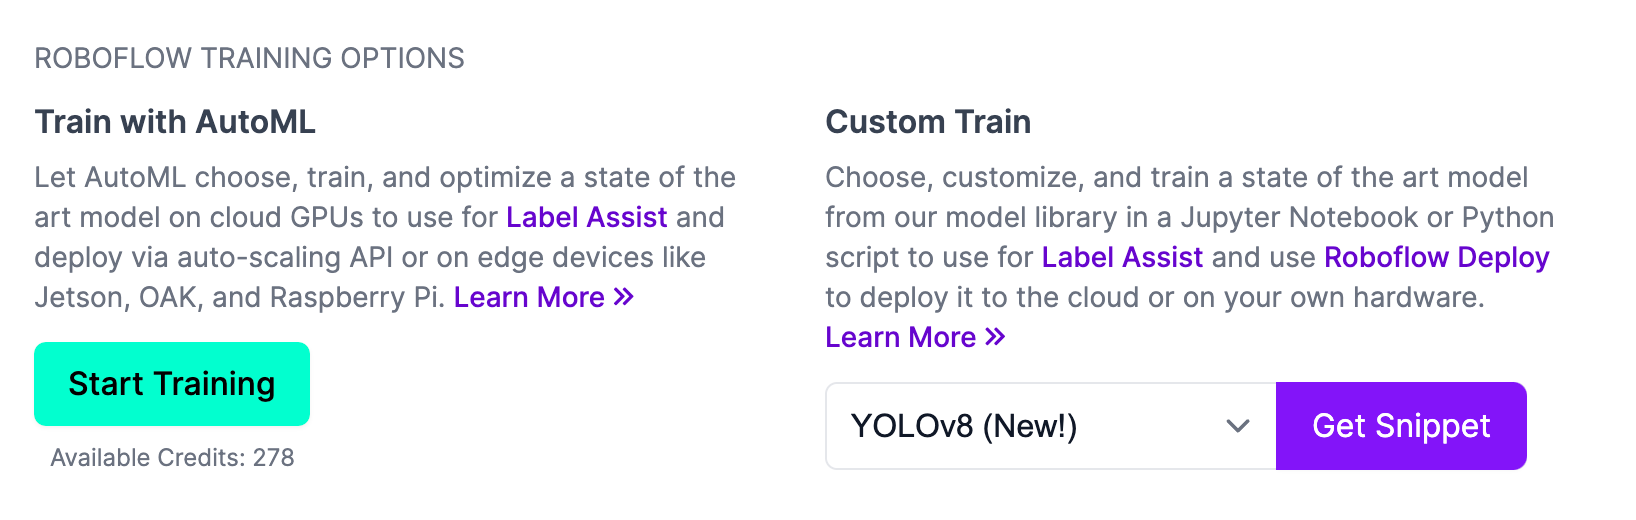
Copy the code snippet provided and use it to download your data for use in your training scripts. We have a repository of over 20 notebooks on GitHub that walk through training computer vision models using common architectures. Check out the guide associated with the model architecture you are using for reference material on how to work with the Roboflow API in your training process.
Step 3: Upload Model Weights
Once you have a trained model, you can upload it using the following code:
project.version(DATASET_VERSION).deploy(model_type=MODEL_TYPE, model_path=f”{HOME}/runs/detect/train/”)Substitute the following values:
- DATASET_VERSION: The version number associated with your dataset (accessible on the version page in the Roboflow dashboard.
- MODEL_TYPE: The ID associated with the model that you have trained. Valid IDs are available in the validFormats object on our documentation page for platform actions.
- HOME: The directory where your project files are.
If you are not using a Roboflow Notebook, use this long-form snippet:
from roboflow import Roboflow

rf = Roboflow(api_key="API_KEY")
project = rf.workspace().project("PROJECT_ID")
project.version(DATASET_VERSION).deploy(model_type=”yolov8”, model_path=f”{HOME}/runs/detect/train/”)
After you run this code, your weights will be uploaded to Roboflow. It may take a few moments before your weights are uploaded, processed, and ready for use. The Roboflow dashboard will say that there is a trained model available when your weights have been processed. A “model type” label will appear showing the type of model weights you uploaded:
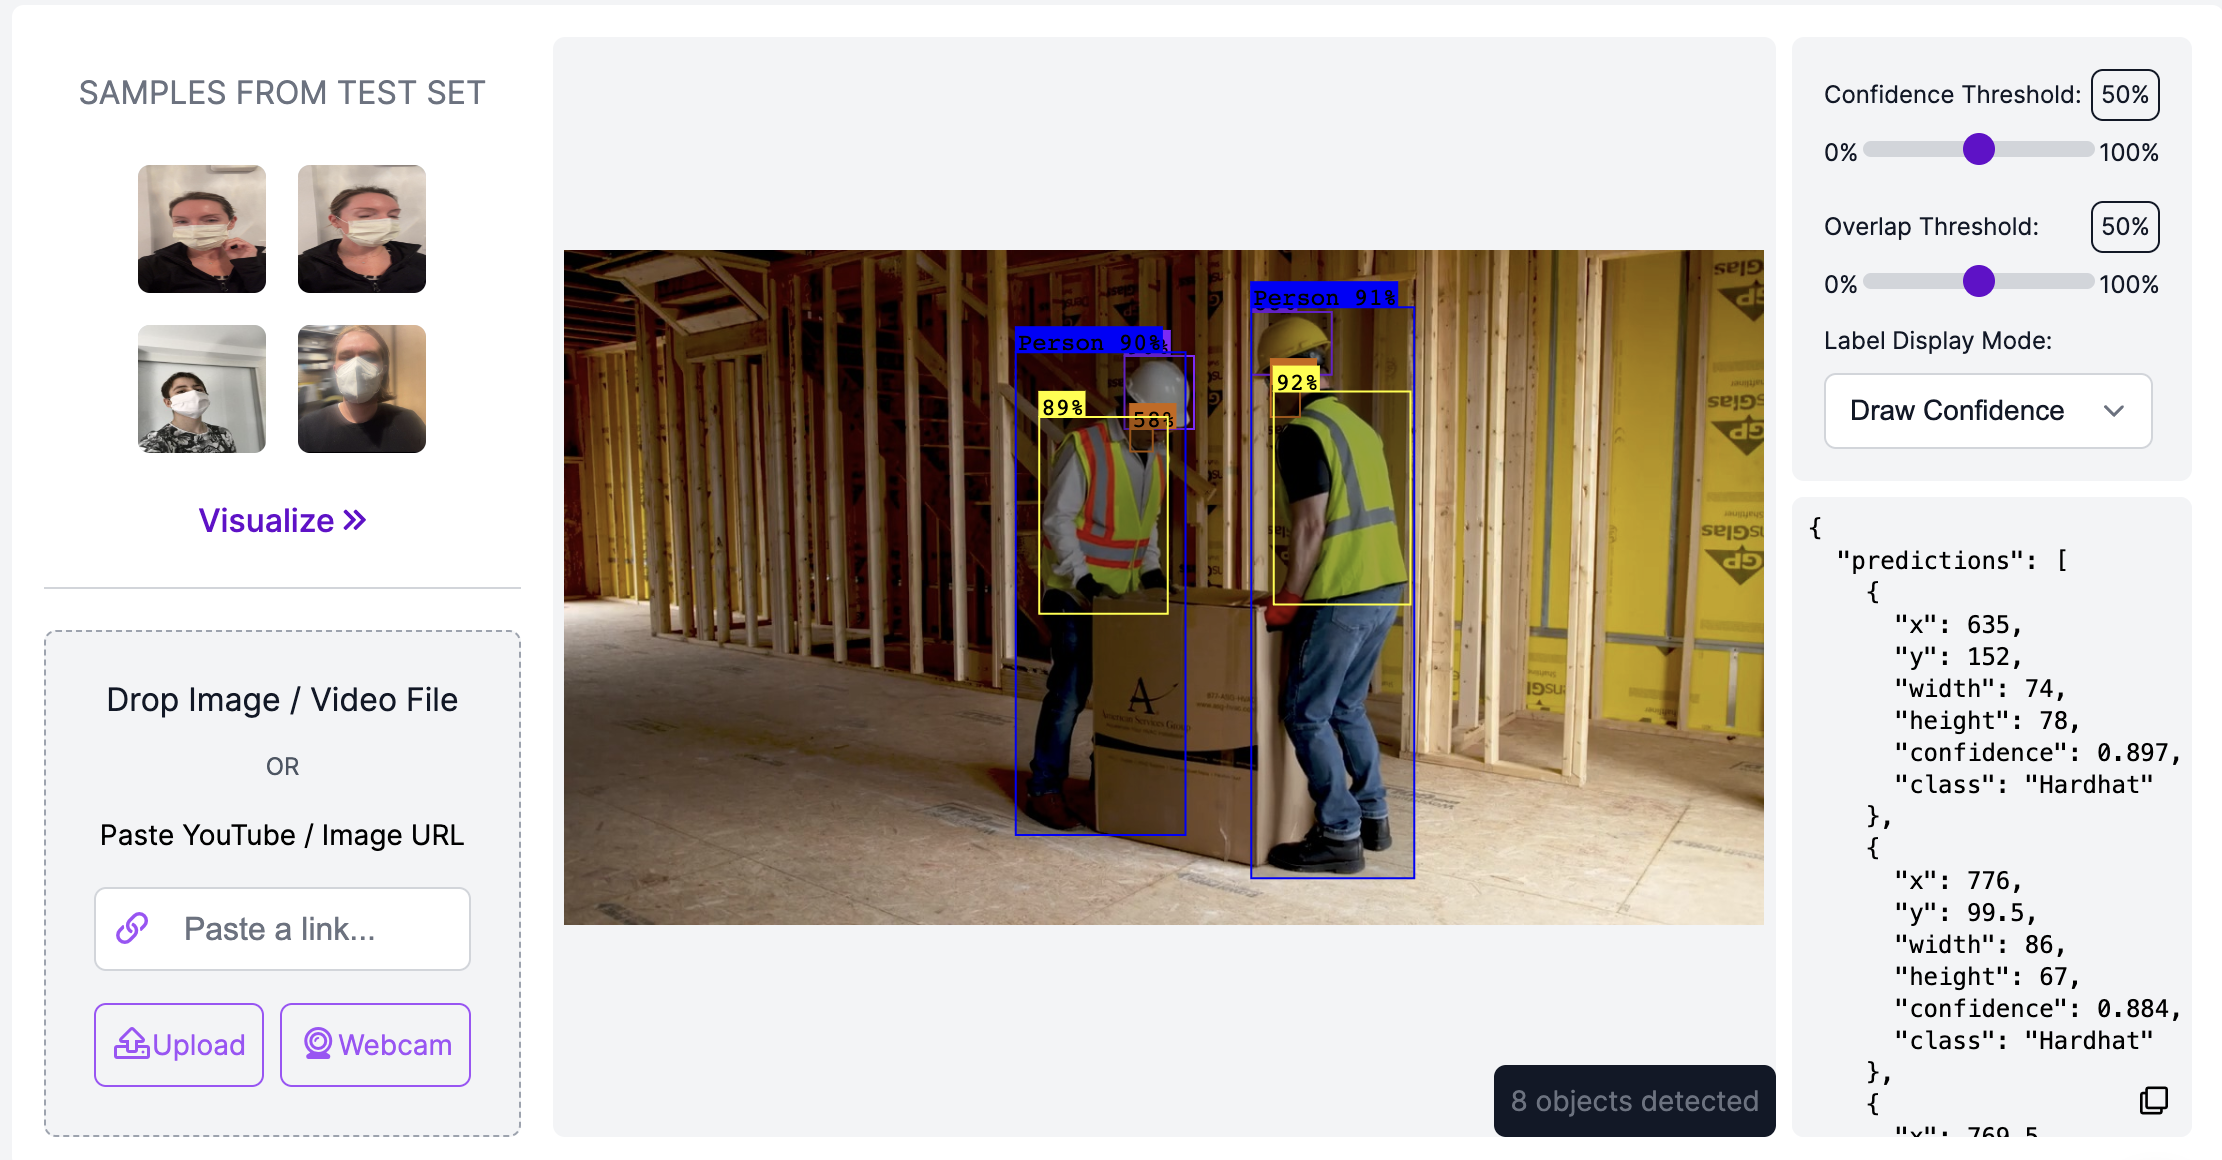
Test Your Model
You can test your model in your browser. Navigate to the “Deploy” tab in the Roboflow dashboard. In this tab, you can test your model by uploading images and videos, using images from your test set, pasting in URLs to images and YouTube videos, or by using your webcam:
When you are ready to deploy your model, check out our model deployment documentation. Here is our documentation for object detection deployment:
- NVIDIA Jetson Deployment
- iOS Deployment
- Luxonis OAK Deployment
- Web Browser Deployment
- Raspberry Pi Deployment
- Python SDK Deployment
- Web API Deployment
Note: We only support using our Hosted API for classification and segmentation models.
We have a vast repository of detailed tutorials on deployment on this blog, too.
Conclusion
In this guide, we have walked through how to upload your own model weights to the Roboflow platform. Using this feature, you can train custom models on your own infrastructure with a custom setup and upload them to Roboflow when you are ready to deploy your model.
Deploying on Roboflow means you can worry less about managing infrastructure and focus more on connecting your model to business logic. Roboflow provides an infinitely-scalable API for use in running inference and a range of SDKs and tutorials that guide you through using your hosted model in production.
Cite this Post
Use the following entry to cite this post in your research:
James Gallagher. (Mar 30, 2023). Launch: Deploy Custom Model Weights with Roboflow. Roboflow Blog: https://blog.roboflow.com/deploy-custom-model-weights-roboflow/