
Florence-2 is a multimodal vision model developed by Microsoft Research and available under an MIT license. Florence-2 is capable of a range of tasks, from dense caption description to optical character recognition to object detection.
We are excited to announce that you can deploy Florence-2 object detection models fine-tuned on your own data with Roboflow. Your models can then be deployed on your own hardware either as a microservice with Docker or through a Python SDK. Deployment is powered by Roboflow Inference, our open source computer vision inference server.
In this guide, we will walk through how to deploy your own, fine-tuned Florence-2 object detectino models.
Without further ado, let’s get started!
Deploy Fine-Tuned Florence-2 Weights
The general weights are good at identifying a large number of objects but they may struggle with your domain data. With that said, Florence-2 can be fine-tuned for specific use cases. This allows you to improve the performance of Florence-2 for your domain.
To deploy fine-tuned Florence-2 weights, you need to:
- Create a new project in Roboflow;
- Upload training data to Roboflow;
- Create a dataset version and download the data;
- Train a fine-tuned model;
- Upload fine-tunedmodel weights, and;
- Deploy the model with Inference.
Let’s walk through each of these steps.
Step #1: Create a Roboflow Project
To get started, create a free Roboflow account. This account will let you create a project where you can host your dataset and Florence-2 fine-tuned weights.
Once you have an account, go to your project dashboard and click “Create Project”. You will be taken to a page where you can configure a new project.
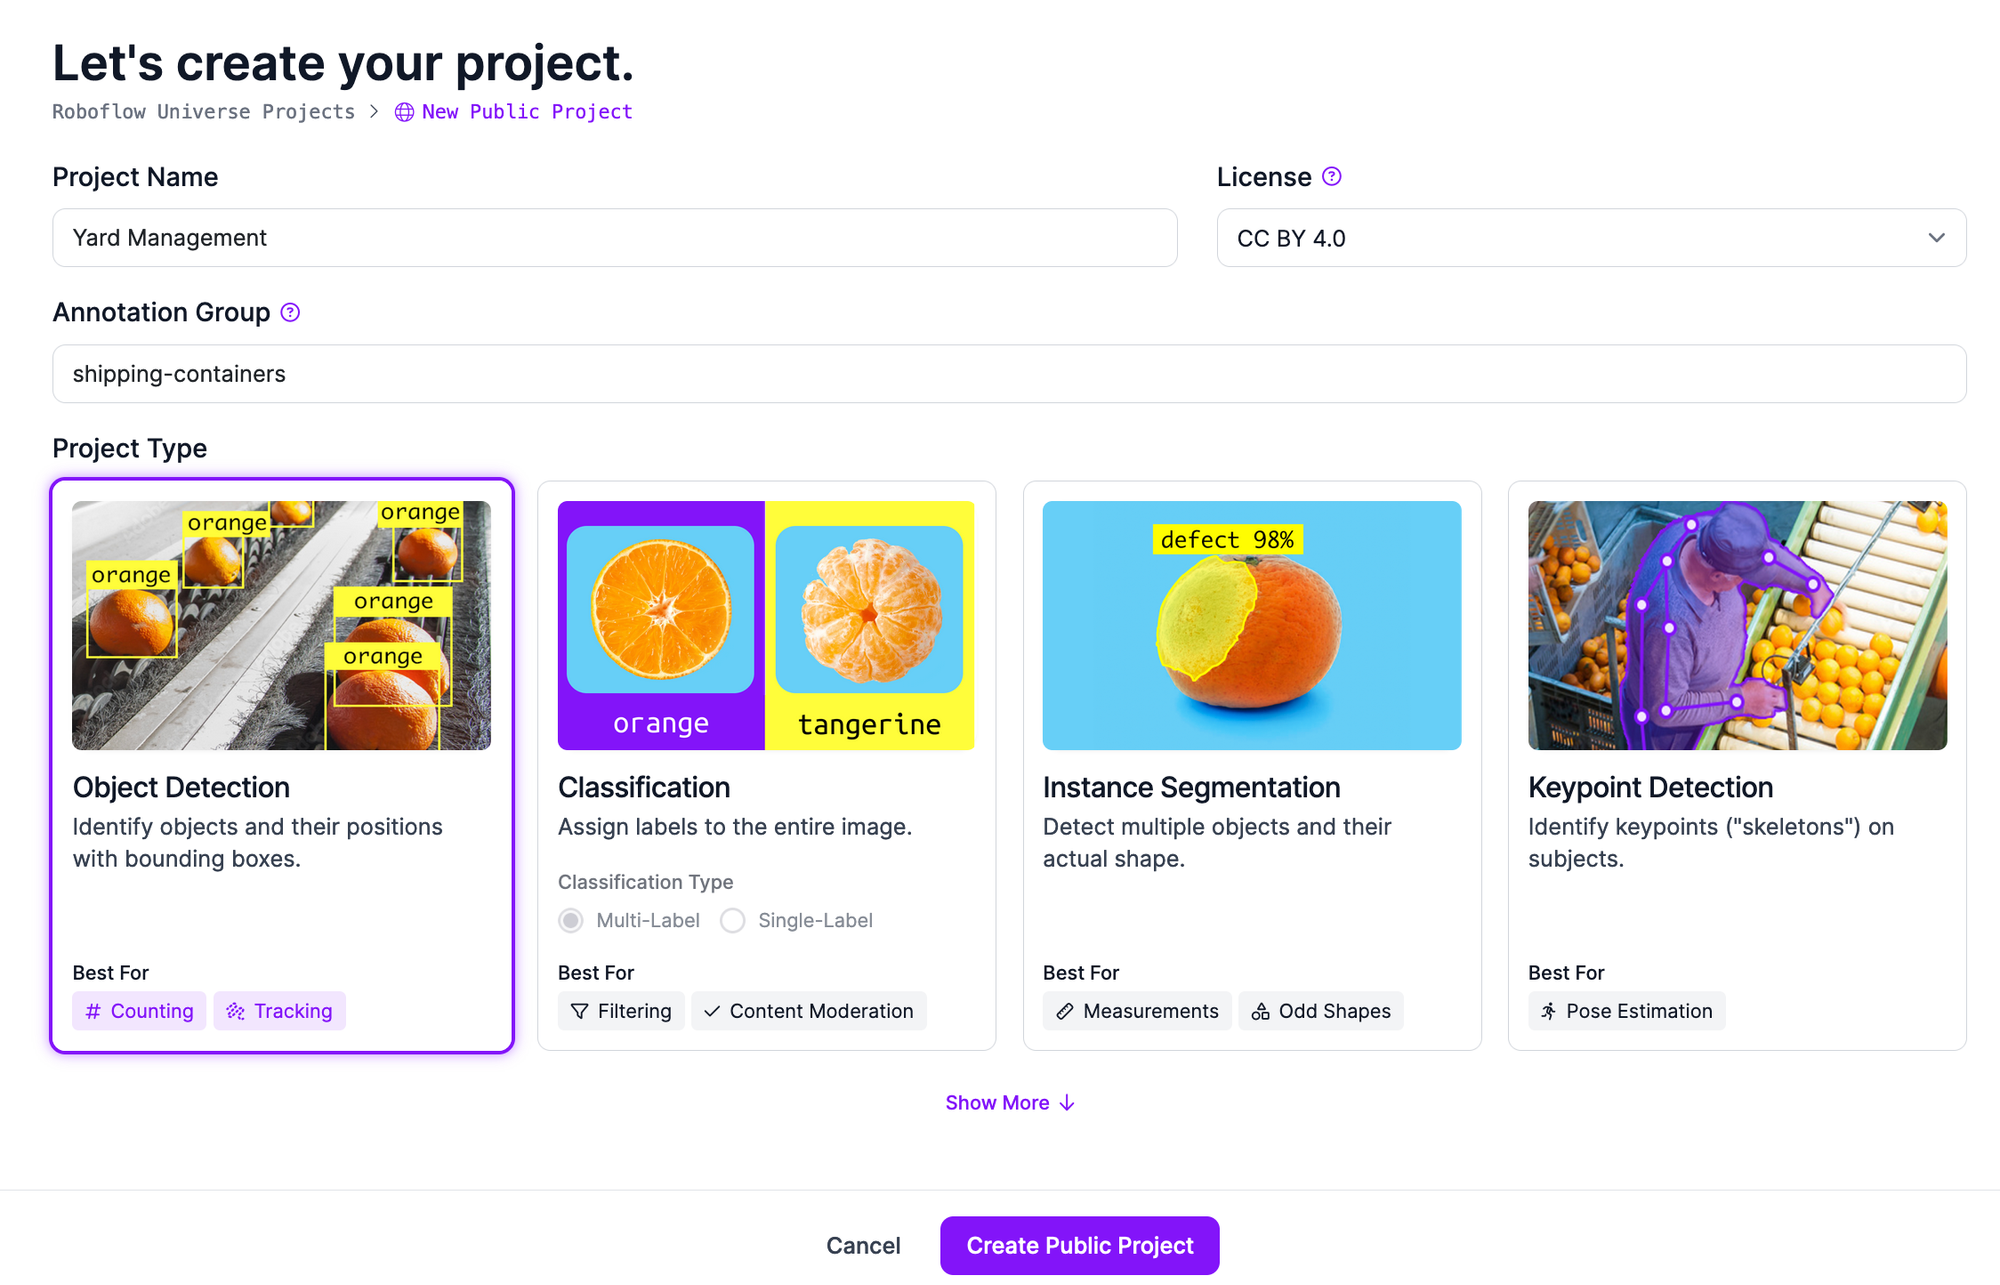
Set a name for your project, and choose “Object Detection” as the task type.
Step #2: Upload Project Data
Once you have created a project, you will be taken to a page where you can upload image data and annotations for use in training your model. You can either upload raw images, or images with annotations in any of the formats Roboflow supports.
To upload image data, drag and drop your files into the Roboflow dashboard:
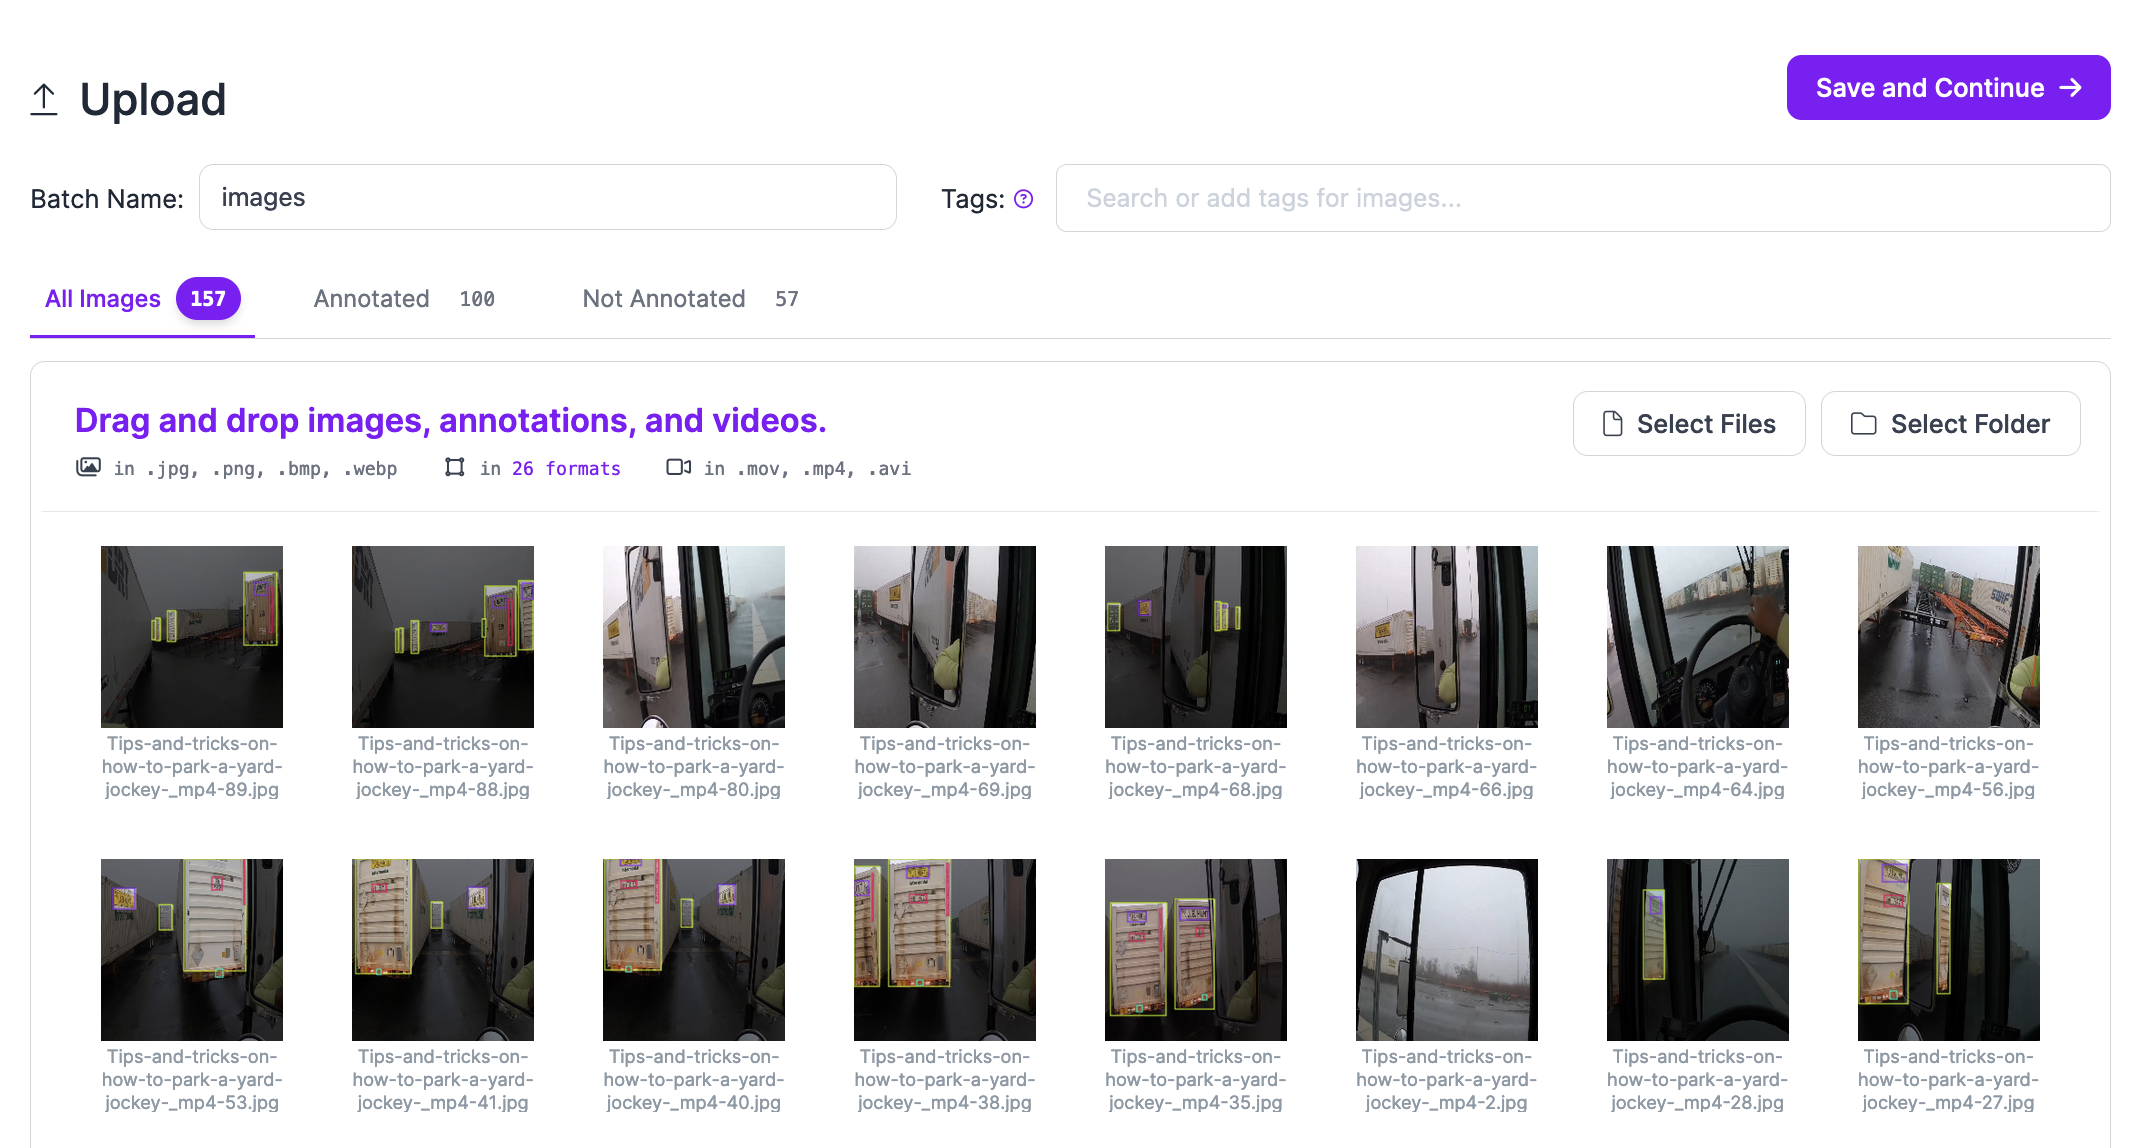
Your data will be processed in the browser. Then, a “Save and Continue” button will appear. When you click this button, your images (and annotations, if you uploaded any) will be uploaded to Roboflow and added to your project.
The amount of time it will take for your image data to be processed depends on how many images you have uploaded and the strength of your internet connection.
If you have any unannotated images, you can annotate them with Roboflow Annotate, a web-based annotation tool. Annotate has a wide range of tools that can help you efficiently label data. For example, you can use the SAM-powered label assistant tool to let you annotate objects in an image with a single click.
Step #3: Create Dataset Version and Download Dataset
Once you have labeled your data, you can create a dataset version. A dataset version is a snapshot of your dataset that is frozen in time.
You can apply preprocessing steps and augmentations to specific versions. This allows you to use these steps without modifying your raw images.
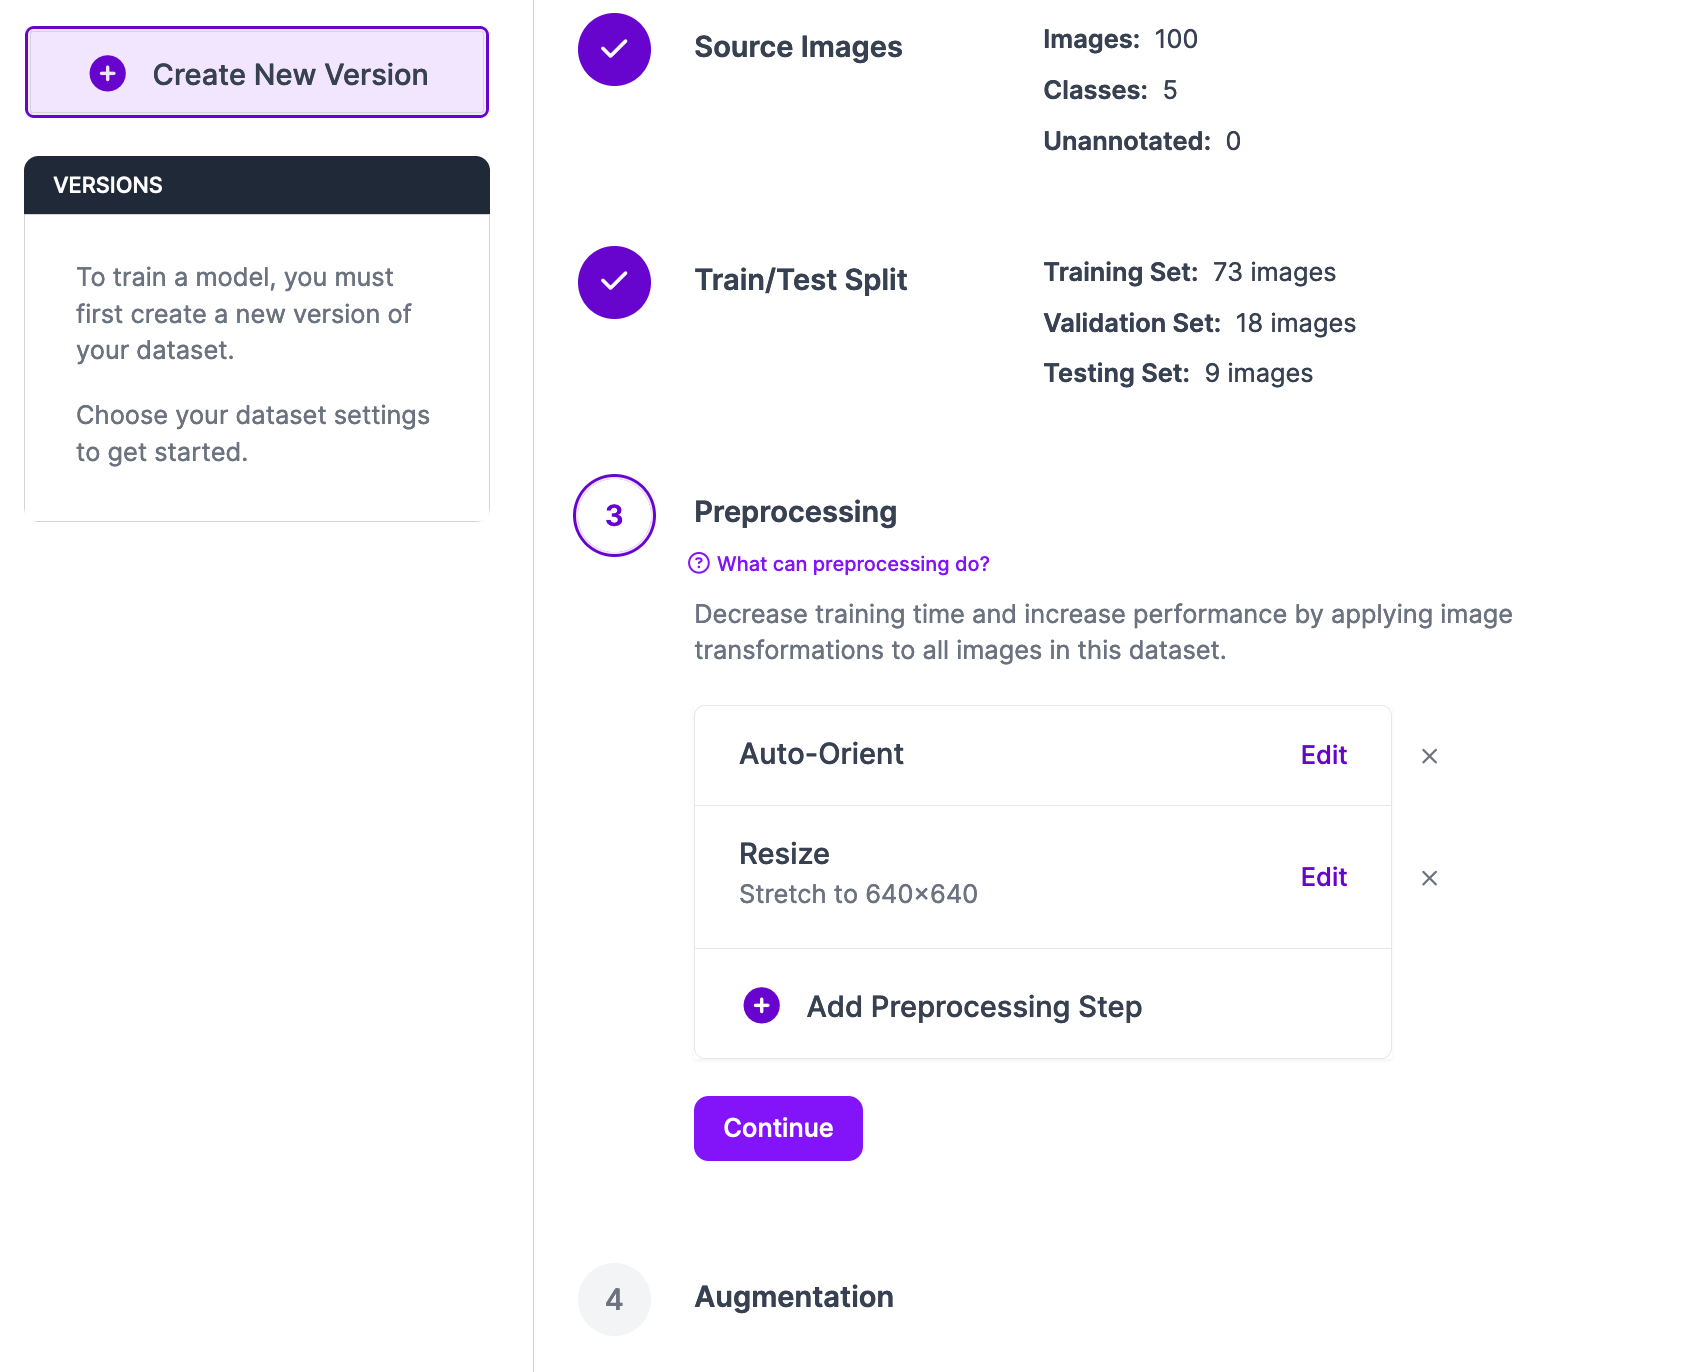
To generate a dataset version, click “Generate” in the left sidebar. You will be taken to the dataset generation page. On this page, you can set any preprocessing and augmentation steps that you want. Refer to our preprocessing and augmentation best practices for information on how to decide what, if any, steps you need to apply.
Once you have configured your dataset generation job, click “Create” at the bottom of the page to create your dataset.
It can take anywhere from a few seconds to a few hours for datasets to generate, depending on how many images are in your dataset and how many augmentations you have applied.
Once this process is complete, you will be taken to your dataset version page where you can export your data for use in training a model.
Step #4: Fine-tune Florence-2 on Custom Data
If you have already trained a model, you can skip this step.
The Roboflow team has written a notebook that walks through how to fine-tune a Florence-2 model in Google Colab.
As you follow the training notebook, you can replace the default dataset information with your dataset. In the Roboflow dashboard, click “Export Dataset” and choose the option to export to a notebook. You will then be given a code snippet that looks like this:
import roboflow

rf = Roboflow(api_key=KEY)

project = rf.workspace("roboflow-jvuqo").project("poker-cards-fmjio")
version = project.version(4)
dataset = version.download("florence2-od")
You can use that snippet to download your dataset into Colab for use in training your model.
The florence2-od identifier says that you want to export your data in the Florence-2 object detection format. Roboflow supports this format out of the box, allowing you to export your dataset in the format you need to train your model.
Once you have trained a model, you can upload it to Roboflow then deploy it with Inference.
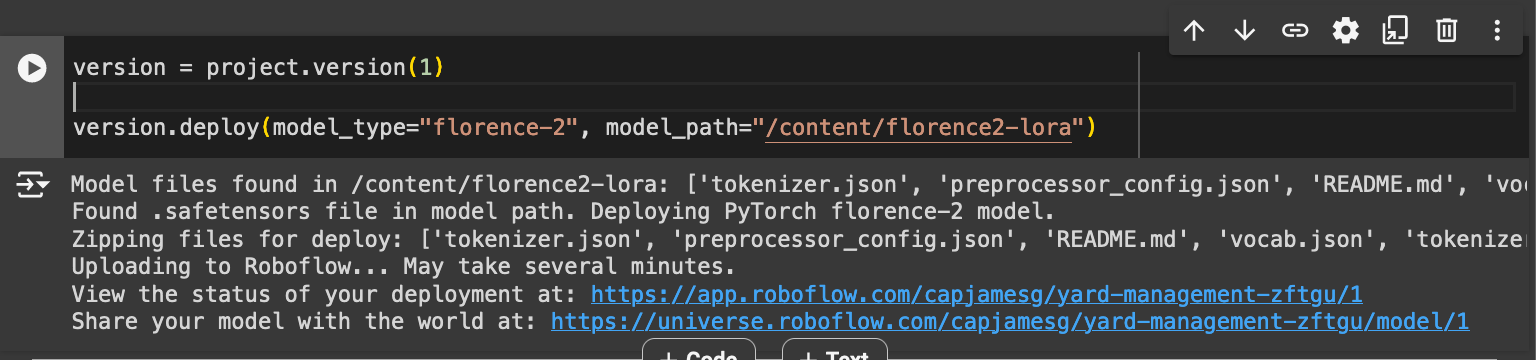
Step #5: Upload Fine-tuned Florence-2 Model Weights
Once you have trained your model, you can upload it to Roboflow using the following code:
import roboflow
rf = Roboflow(api_key="API_KEY")
project = rf.workspace("workspace-id").project("project-id")
version = project.version(VERSION)

version.deploy(model_type="florence-2", model_path="/content/florence2-lora")
Above, replace:
API_KEYwith your Roboflow API key.workspace-idandproject-idwith your workspace and project IDs.VERSIONwith your project version.
If you are not using our notebook, replace /content/florence2-lora with the directory where you saved your model weights.
When you run the code above, the model will be uploaded to Roboflow. It will take a few minutes for the model to be processed before it is ready for use.
Step #6: Deploy a Fine-tuned Florence-2 Model
Once your model has been processed, you can download it to any device on which you want to deploy your model. Deployment is supported through Roboflow Inference, our open source computer vision inference server.
Inference can be run as a microservice with Docker, ideal for large deployments where you may need a centralized server on which to run inference, or when you want to run Inference in an isolated container. You can also directly integrate Inference into your project through the Inference Python SDK.
For this guide, we will show how to deploy the model with the Python SDK.
First, install inference:
pip install inference
Then, create a new Python file and add the following code:
import os
from inference import get_model
from PIL import Image
import json
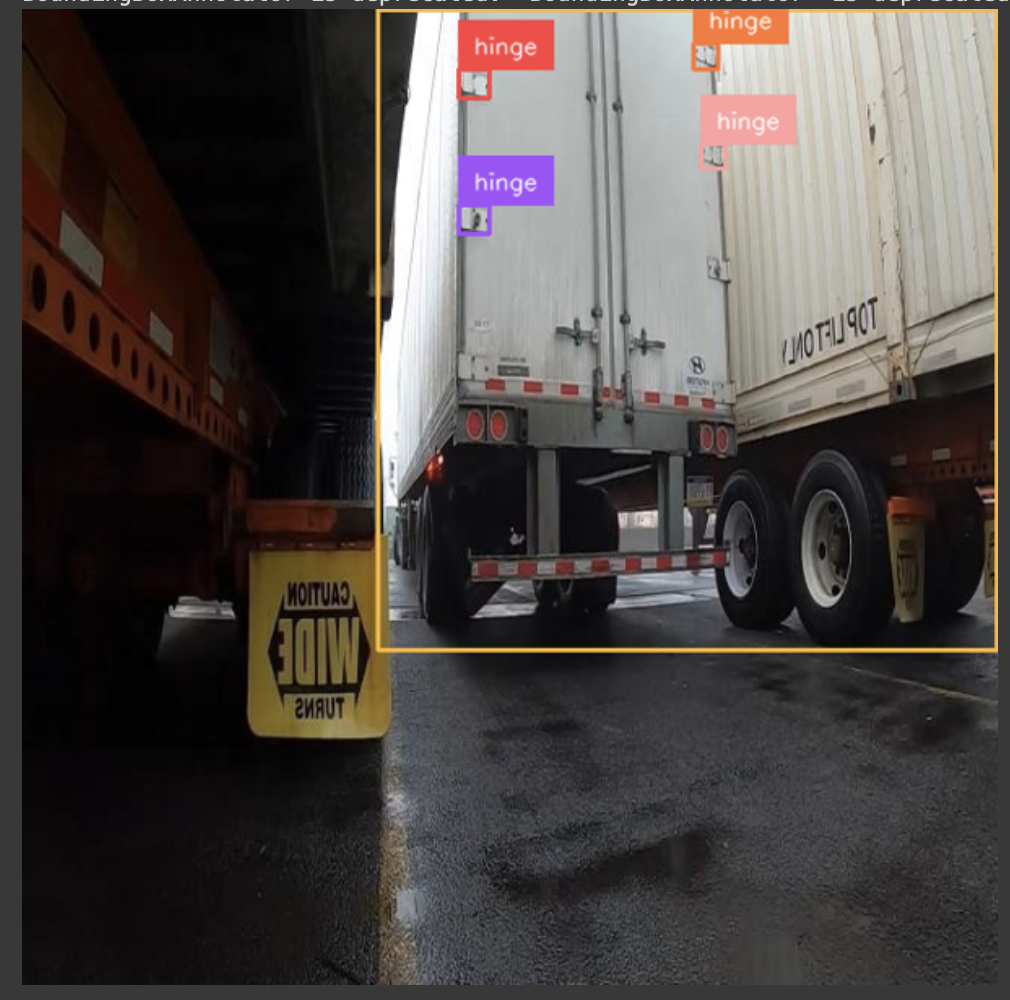
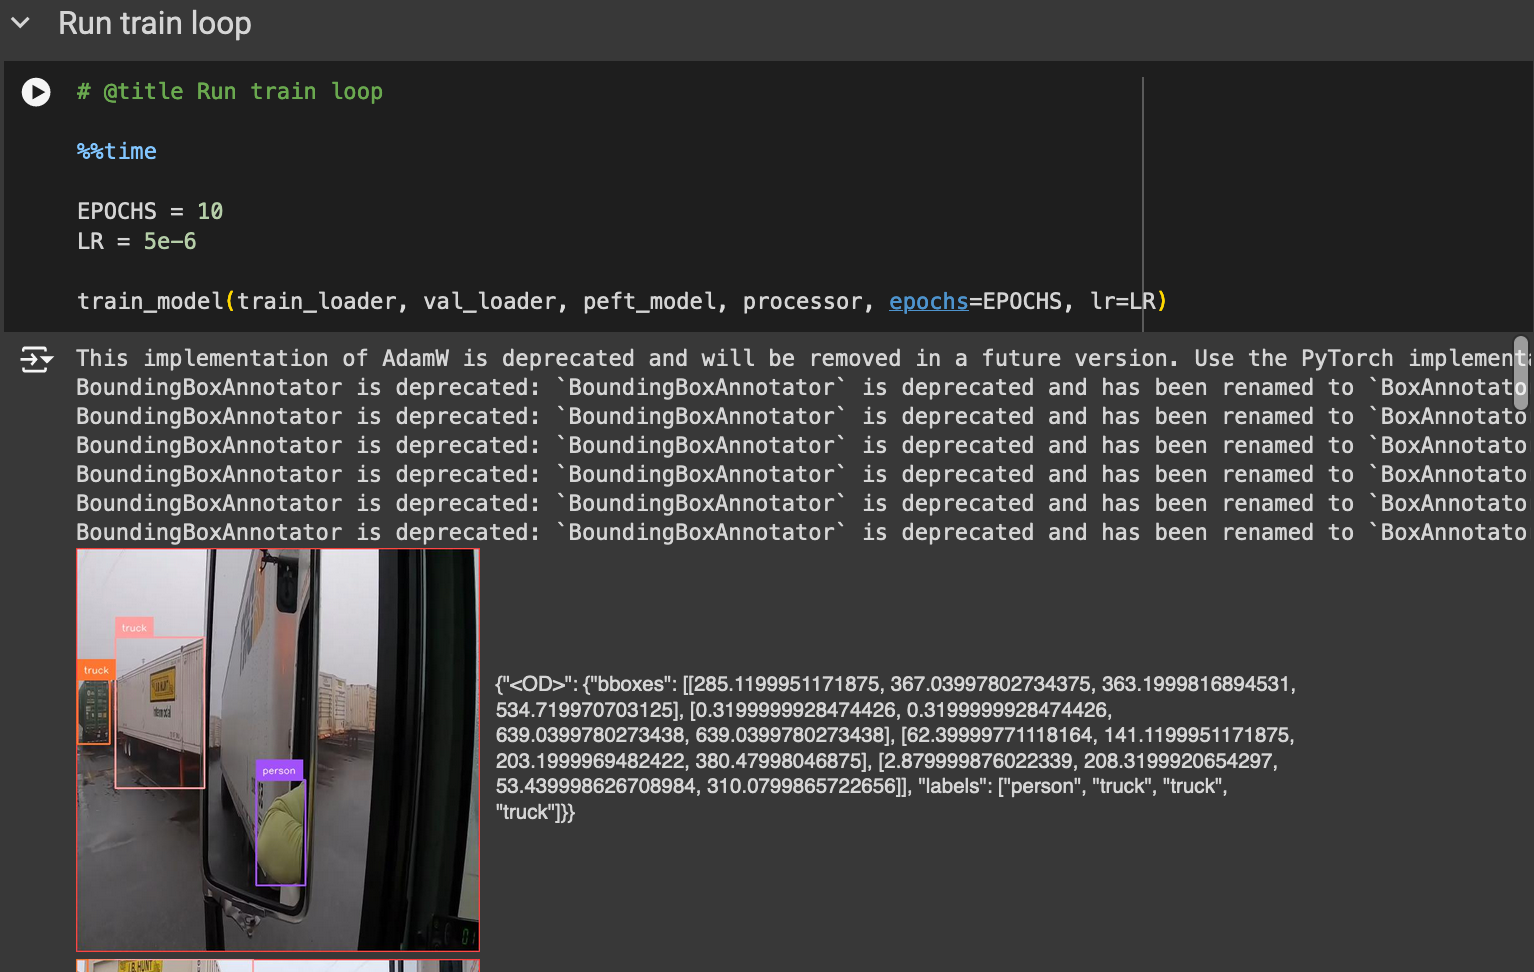
lora_model = get_model("model-id/version-id", api_key="KEY")
image = Image.open("containers.png")
response = lora_model.infer(image)
print(response)
Above, replace:
model-idwith your Roboflow model ID;version-idwith your project version, and;KEYwith your Roboflow API key.
In the code, we load our model, run it on an image, then plot the predictions with the supervision Python package.
When you first run the code, your model weights will be downloaded and cached to your device for subsequent runs. This process may take a few minutes depending on the strength of your internet connection.
Conclusion
Florence-2 is a multimodal model created by Microsoft Research. You can use Florence-2 for a wide range of tasks, from object detection to image captioning.
In this guide, we walked through how to deploy Florence-2 with Inference. We demonstrated how to use the pre-trained model weights for object detection. We then discussed how to fine-tune a Florence-2 model on a custom dataset. Finally, we walked through the process of uploading a fine-tuned model to Roboflow and deploying it with Inference.
To learn more about deploying models with Inference, refer to the Roboflow Inference documentation.
Cite this Post
Use the following entry to cite this post in your research:
James Gallagher. (Jul 17, 2024). Launch: Deploy Florence-2 with Roboflow. Roboflow Blog: https://blog.roboflow.com/deploy-florence-2-with-roboflow/